contact Me

Use the form on the right to contact Me.


123 Street Avenue, City Town, 99999

(123) 555-6789

email@address.com


You can set your address, phone number, email and site description in the settings tab.
Link to read me page with more information.

Blog

Snaps - Snap To It Key Fob Pattern

Michelle Burke

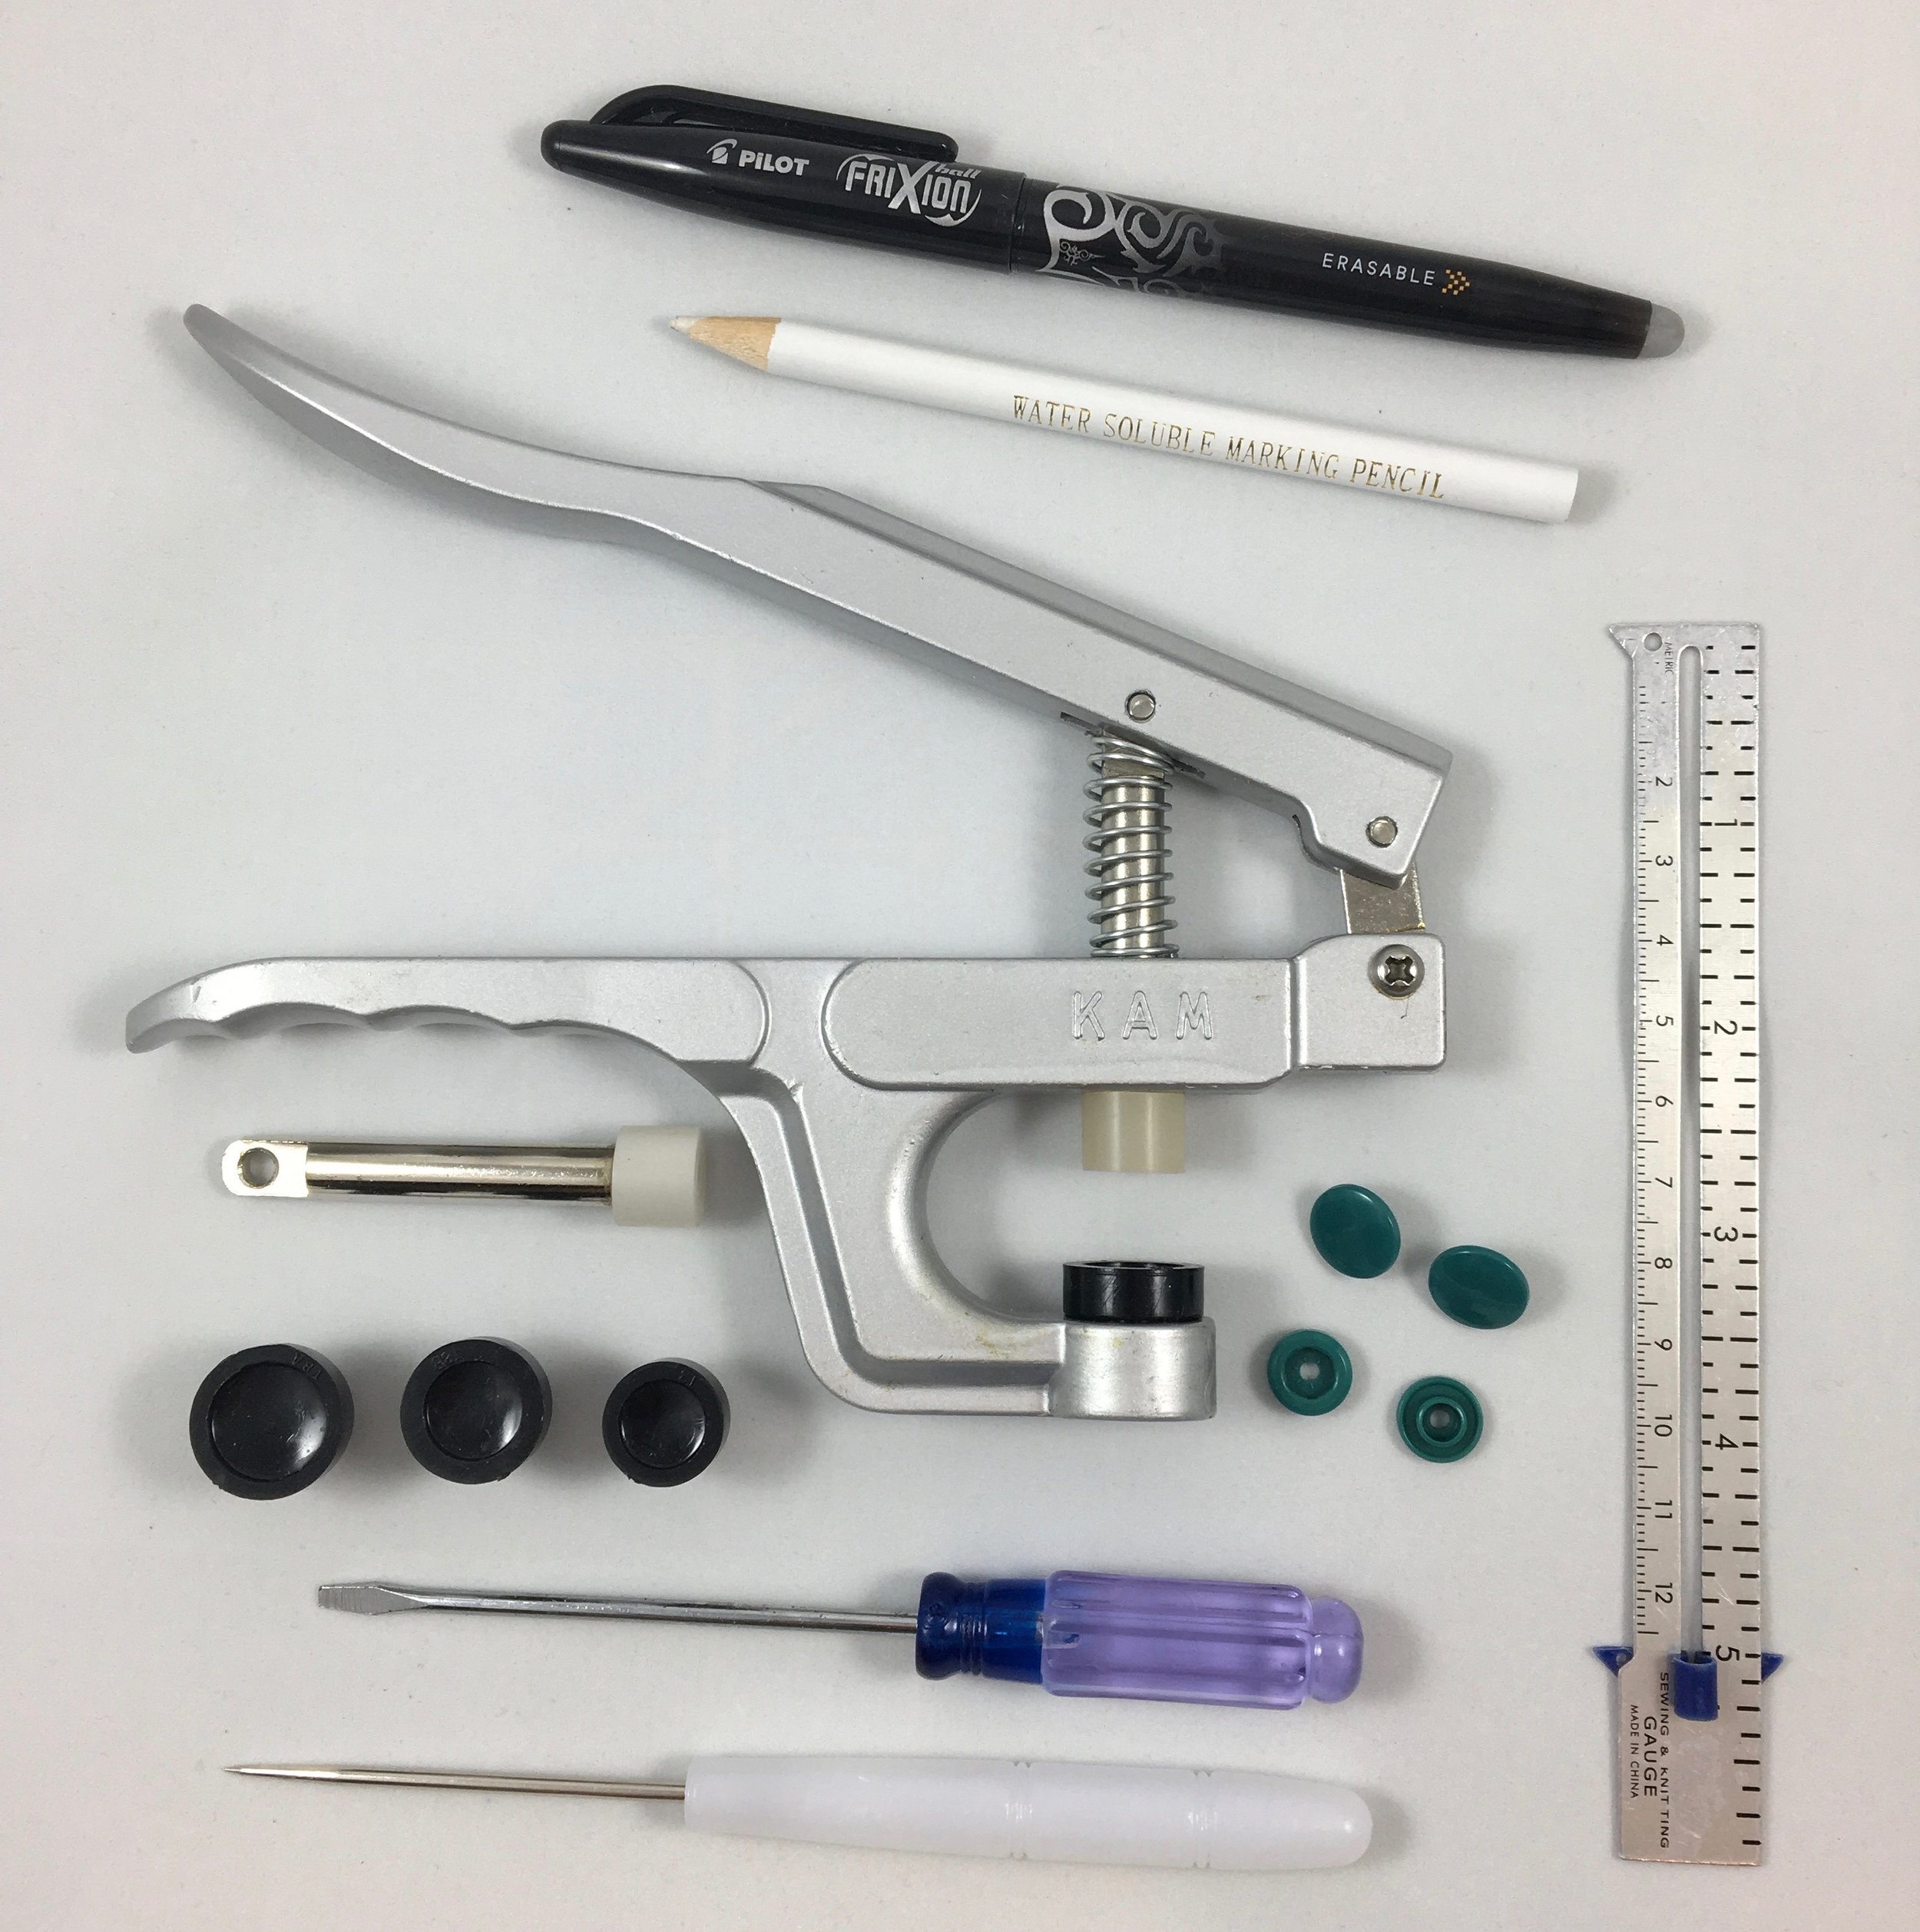
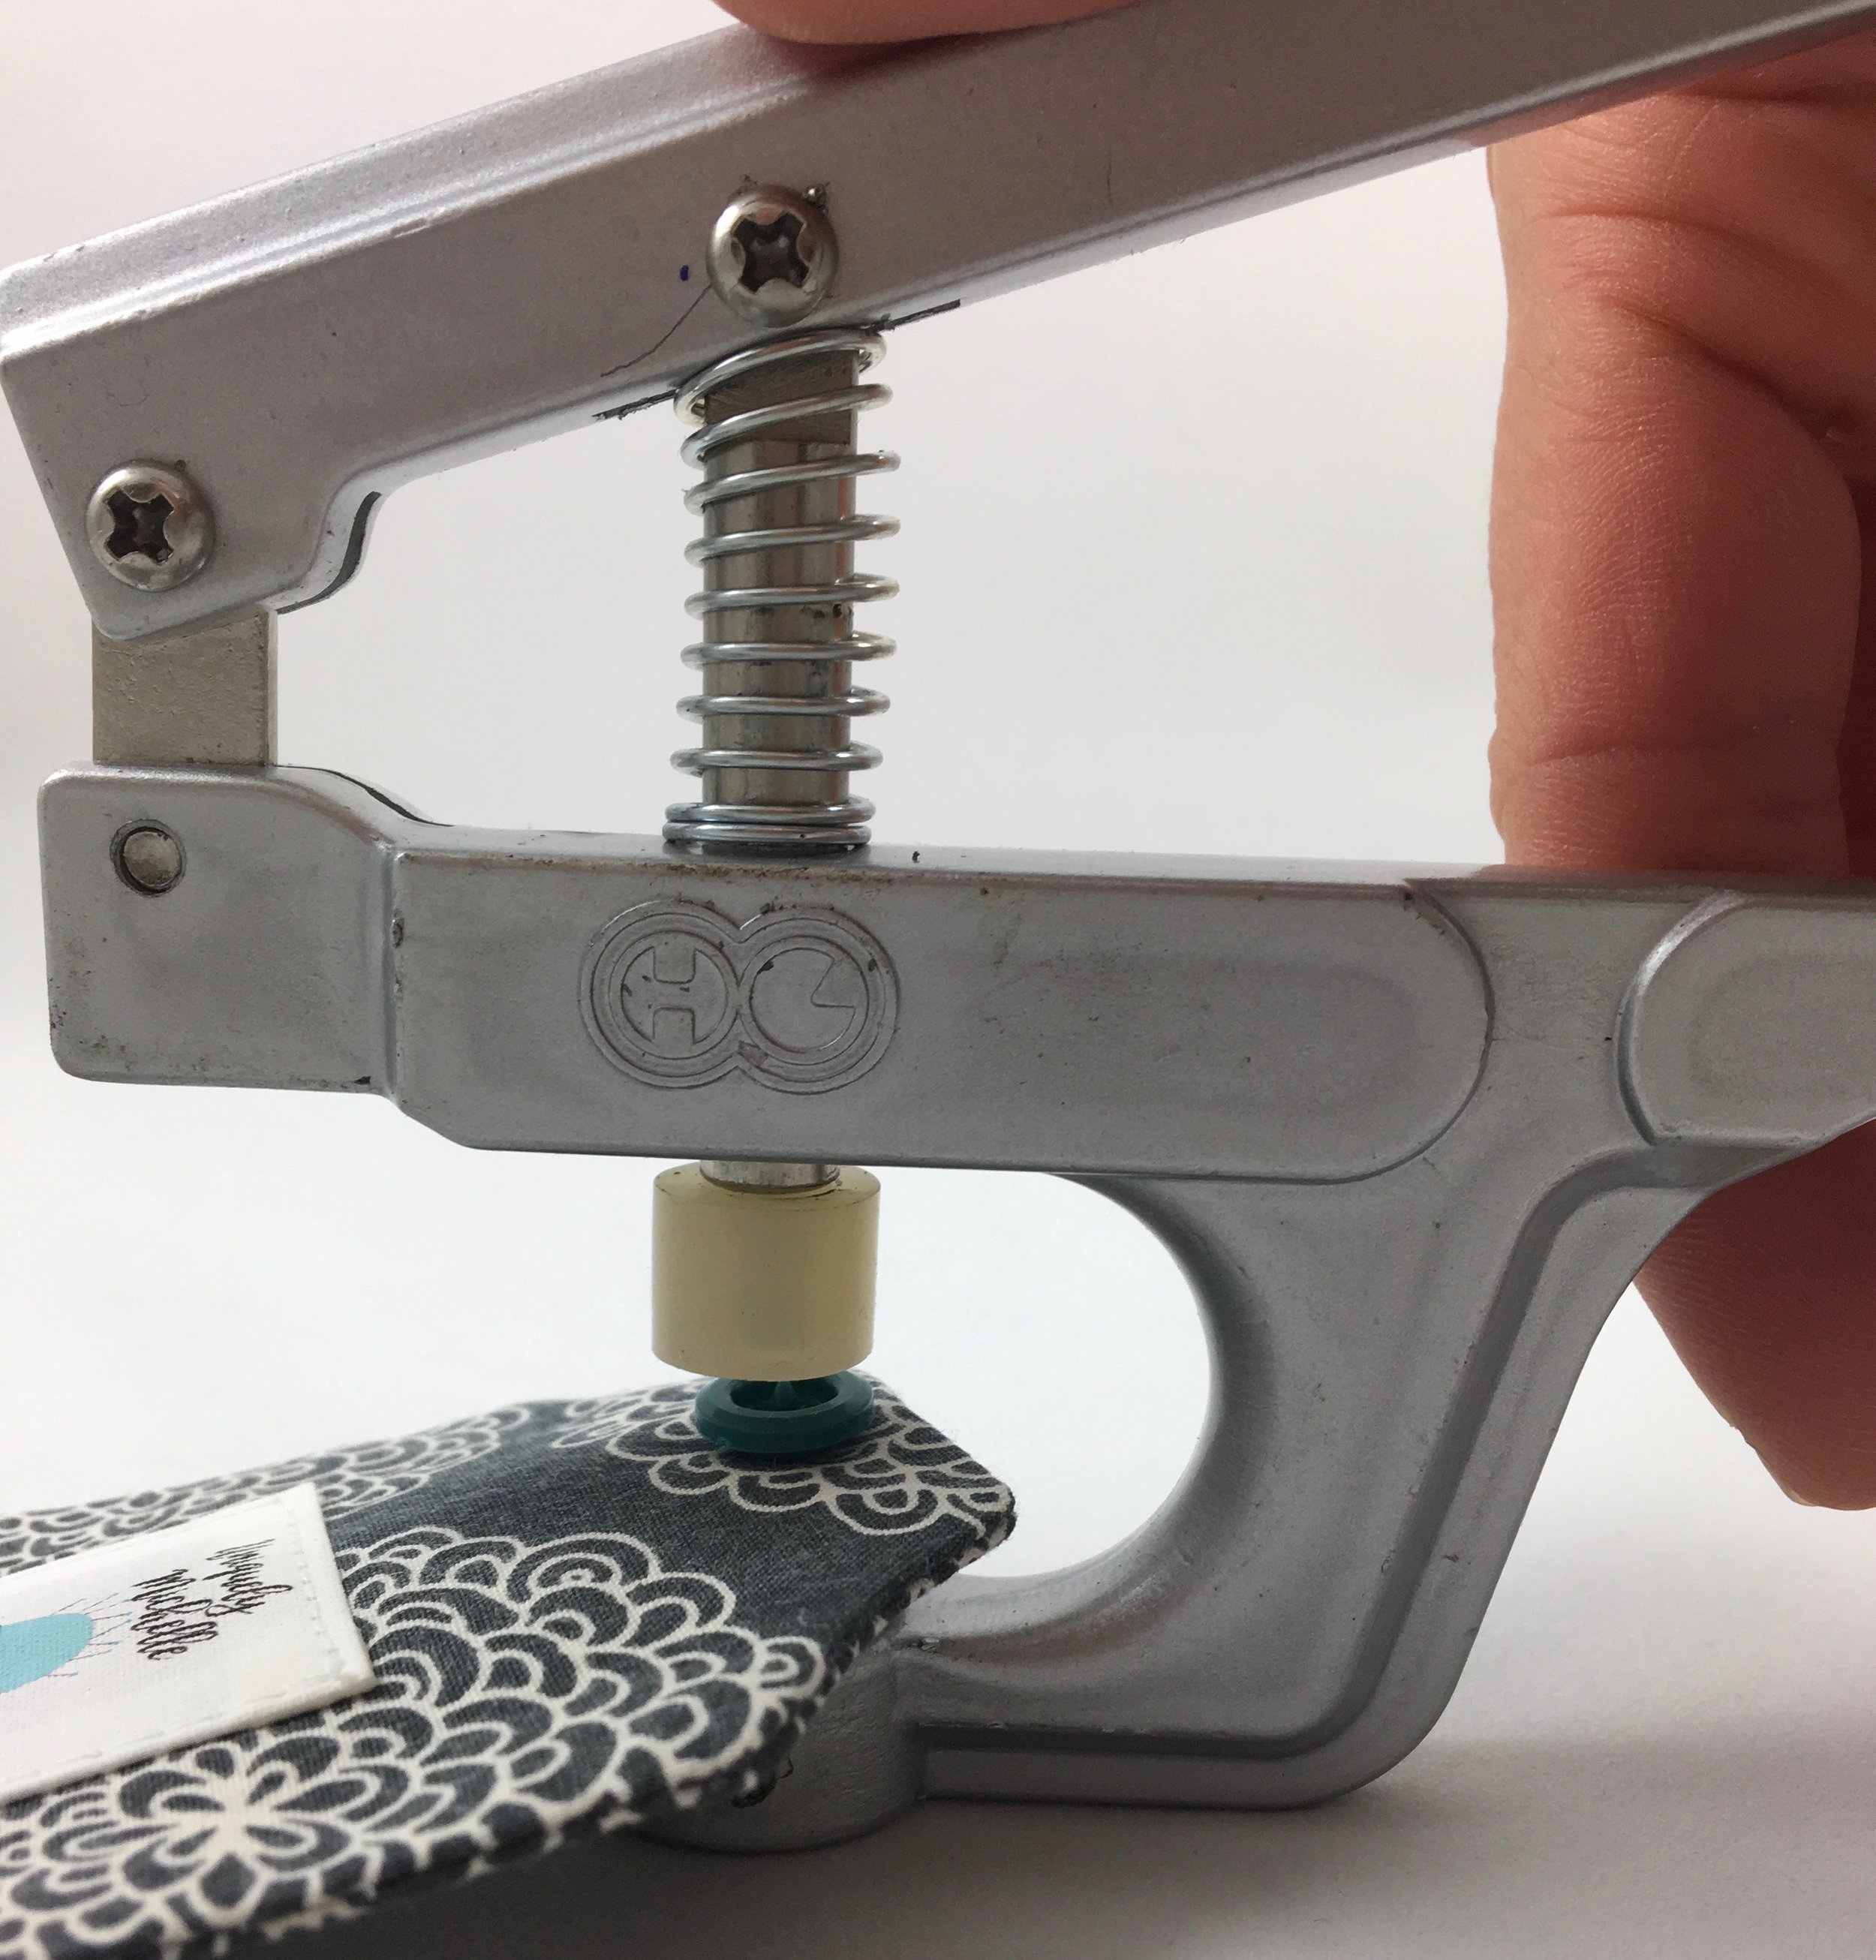
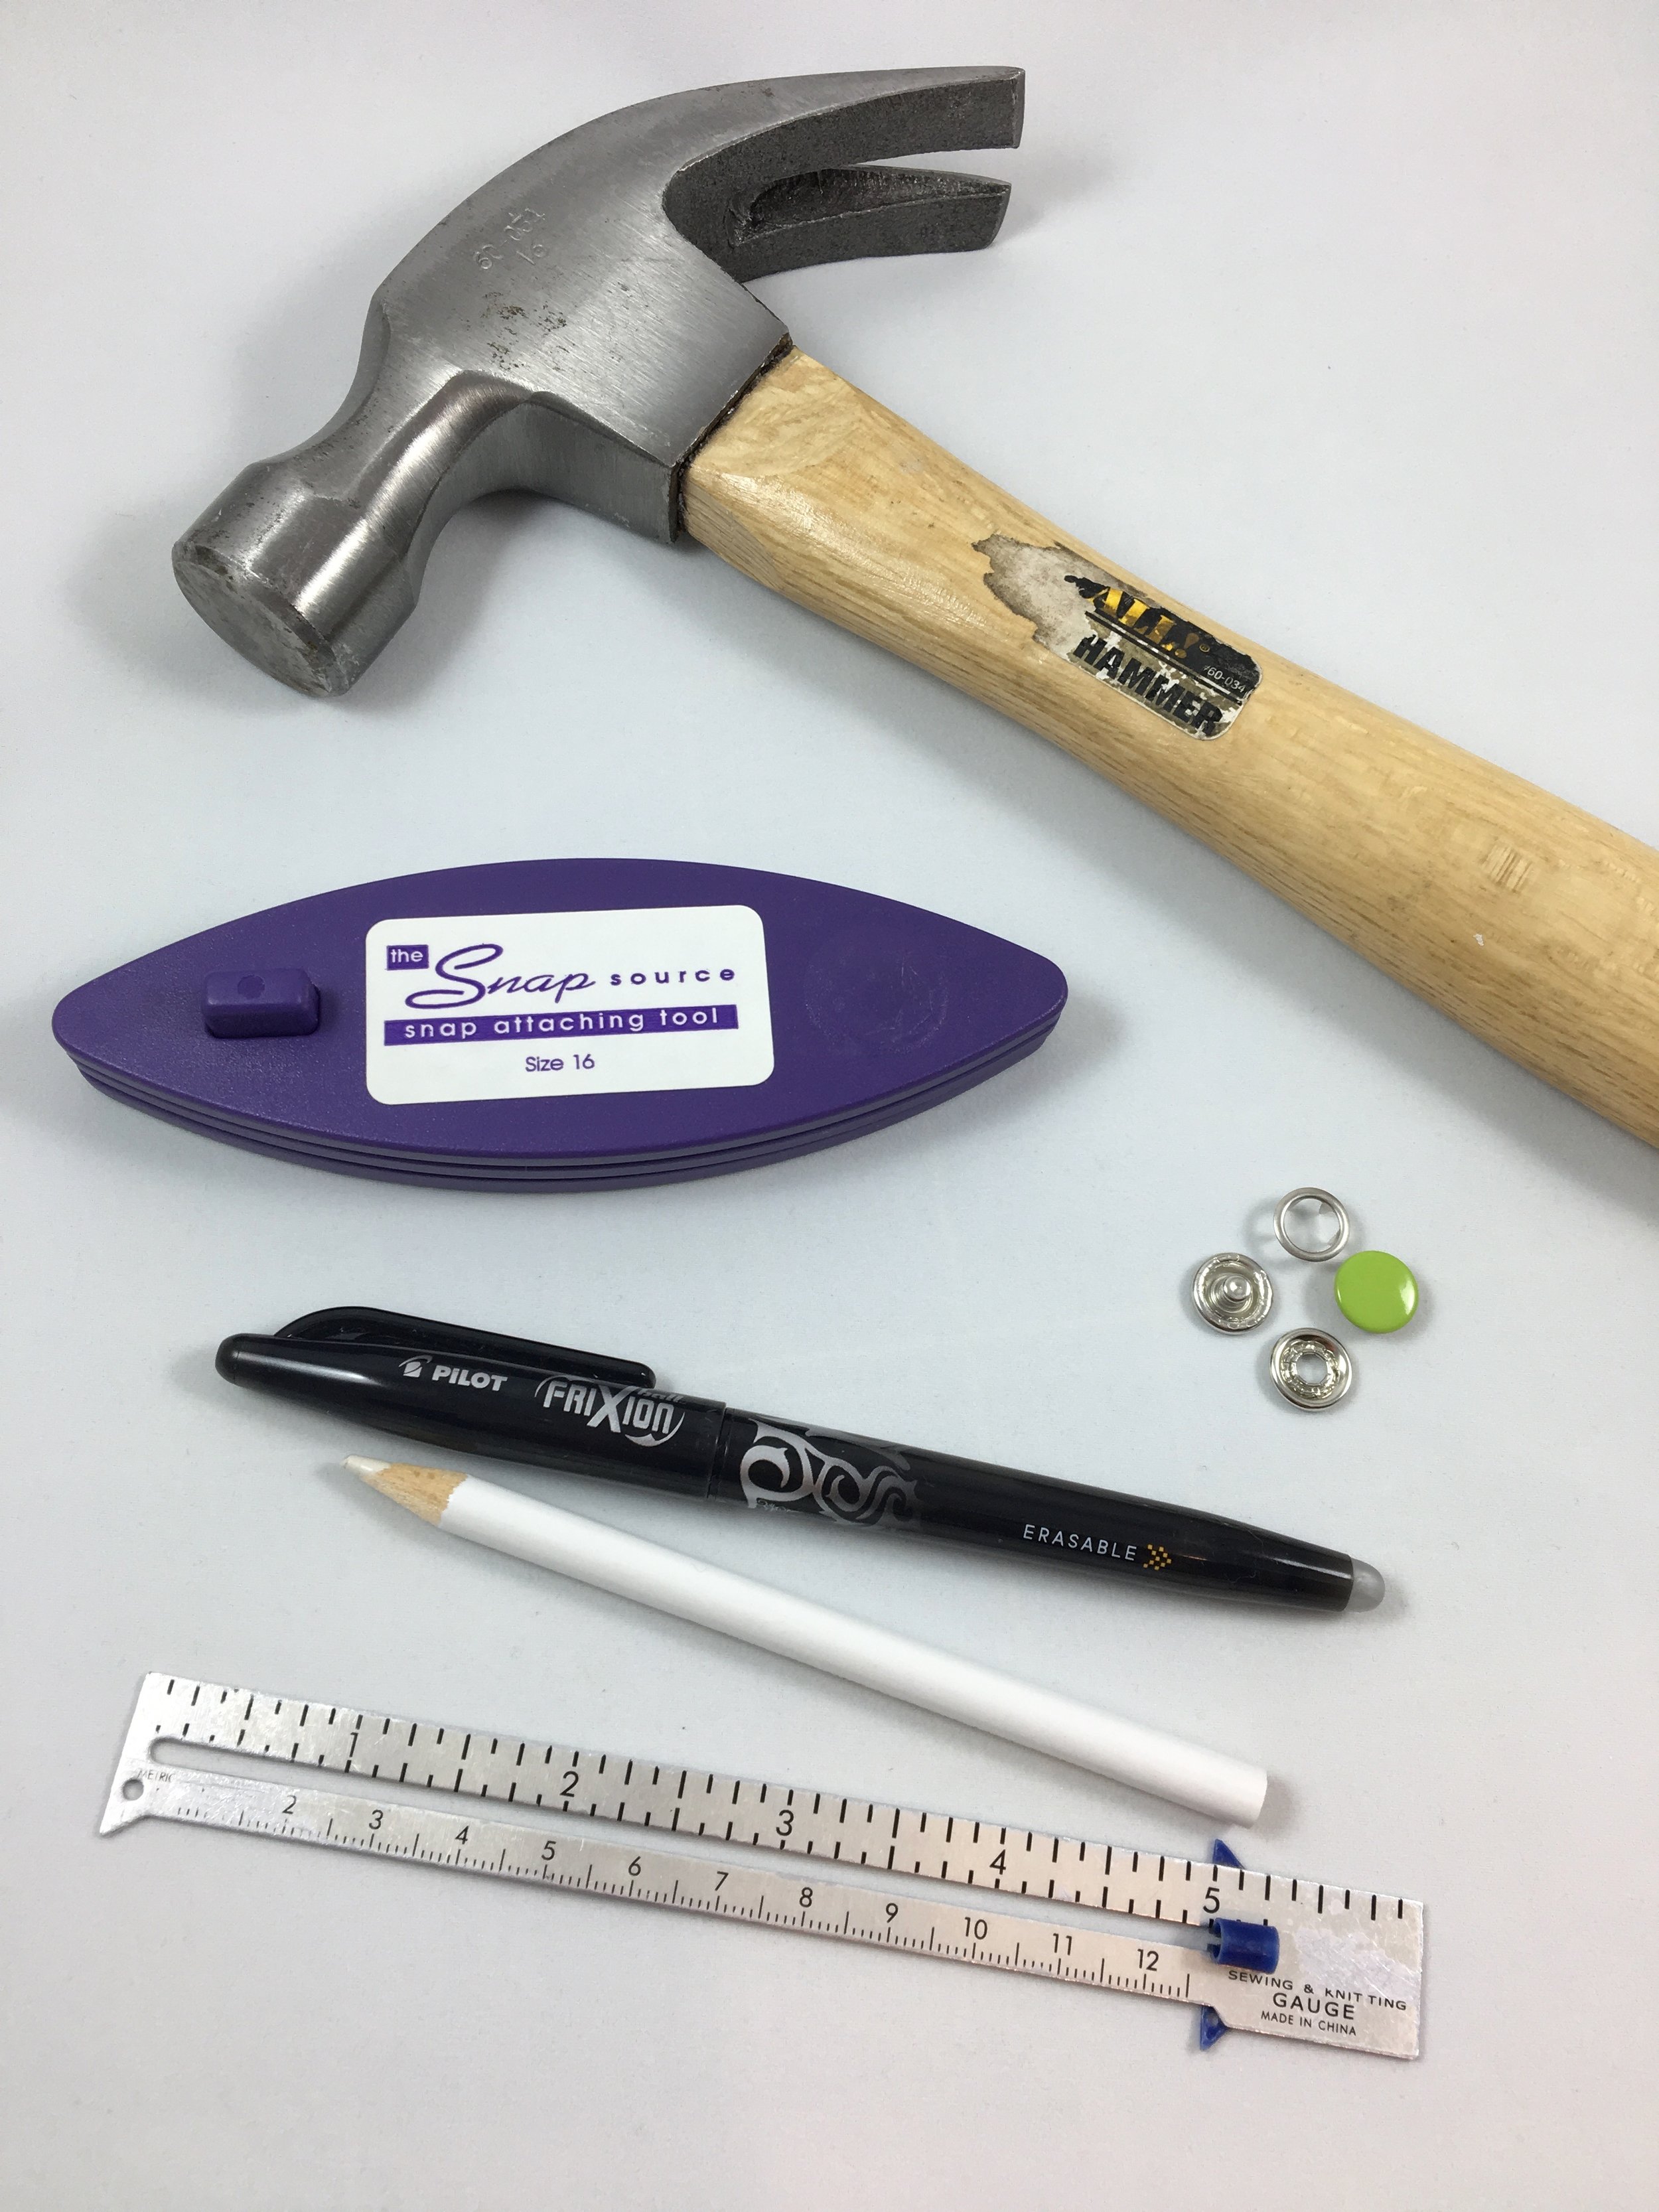
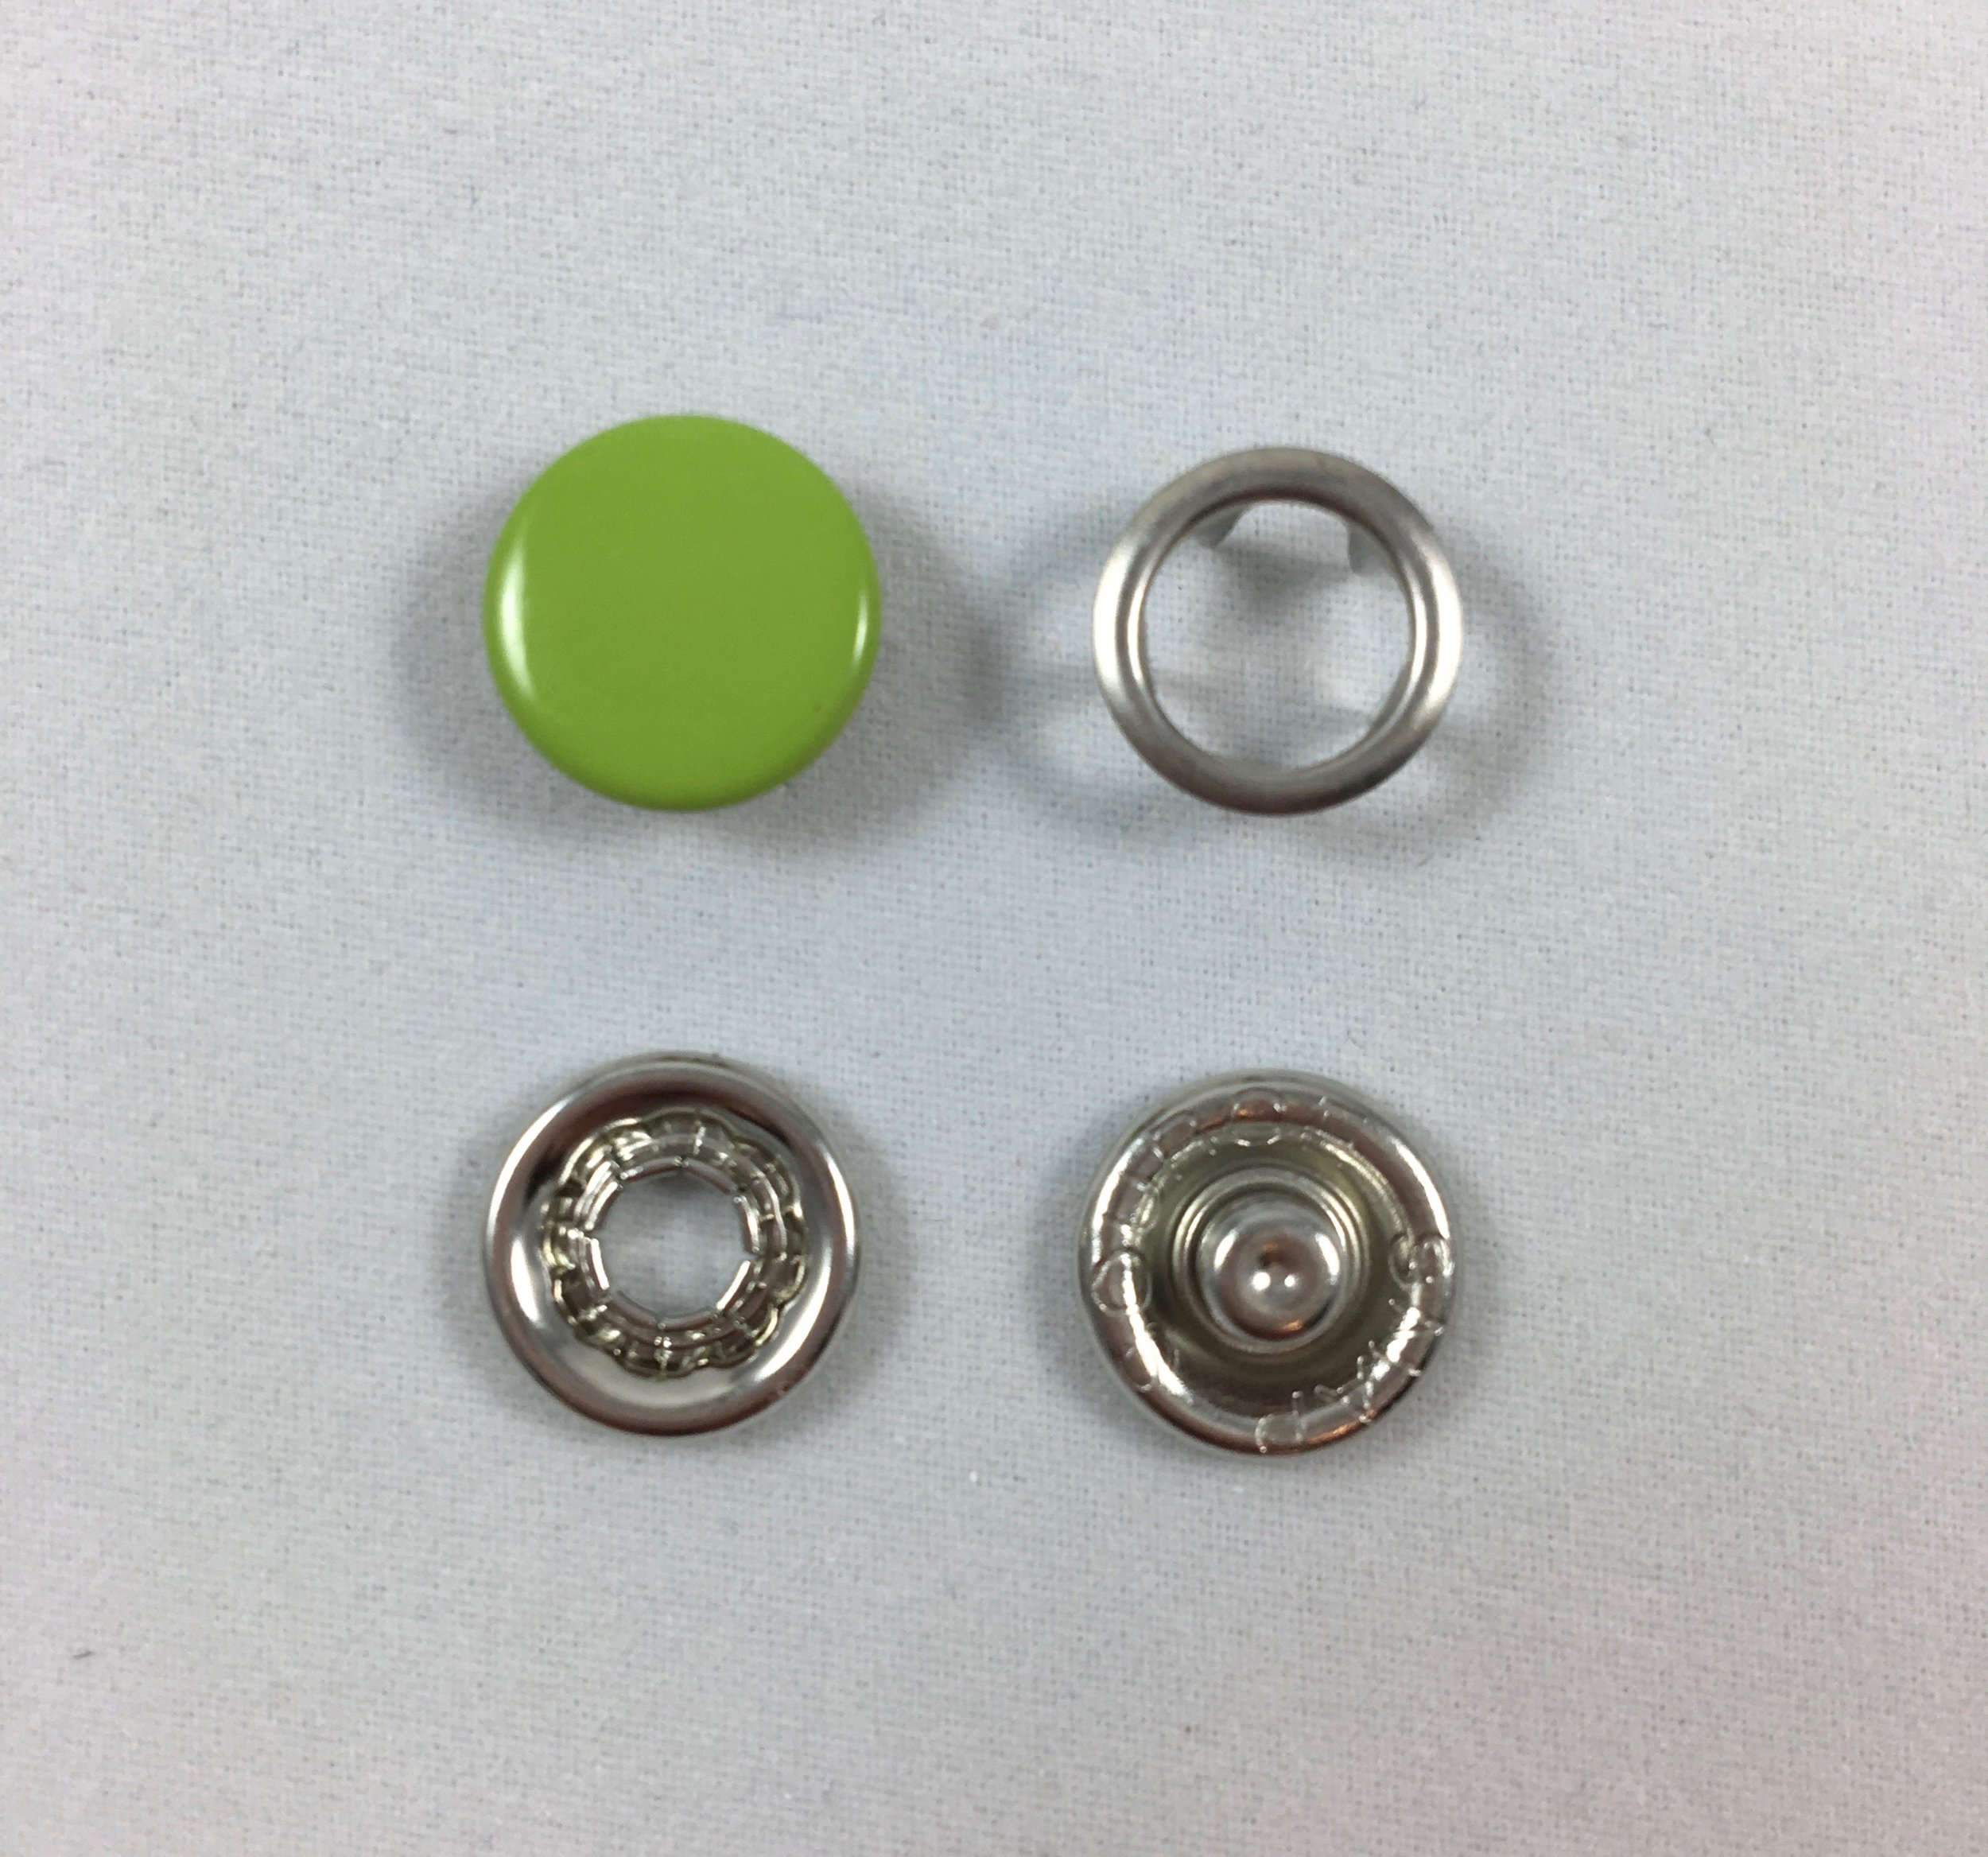
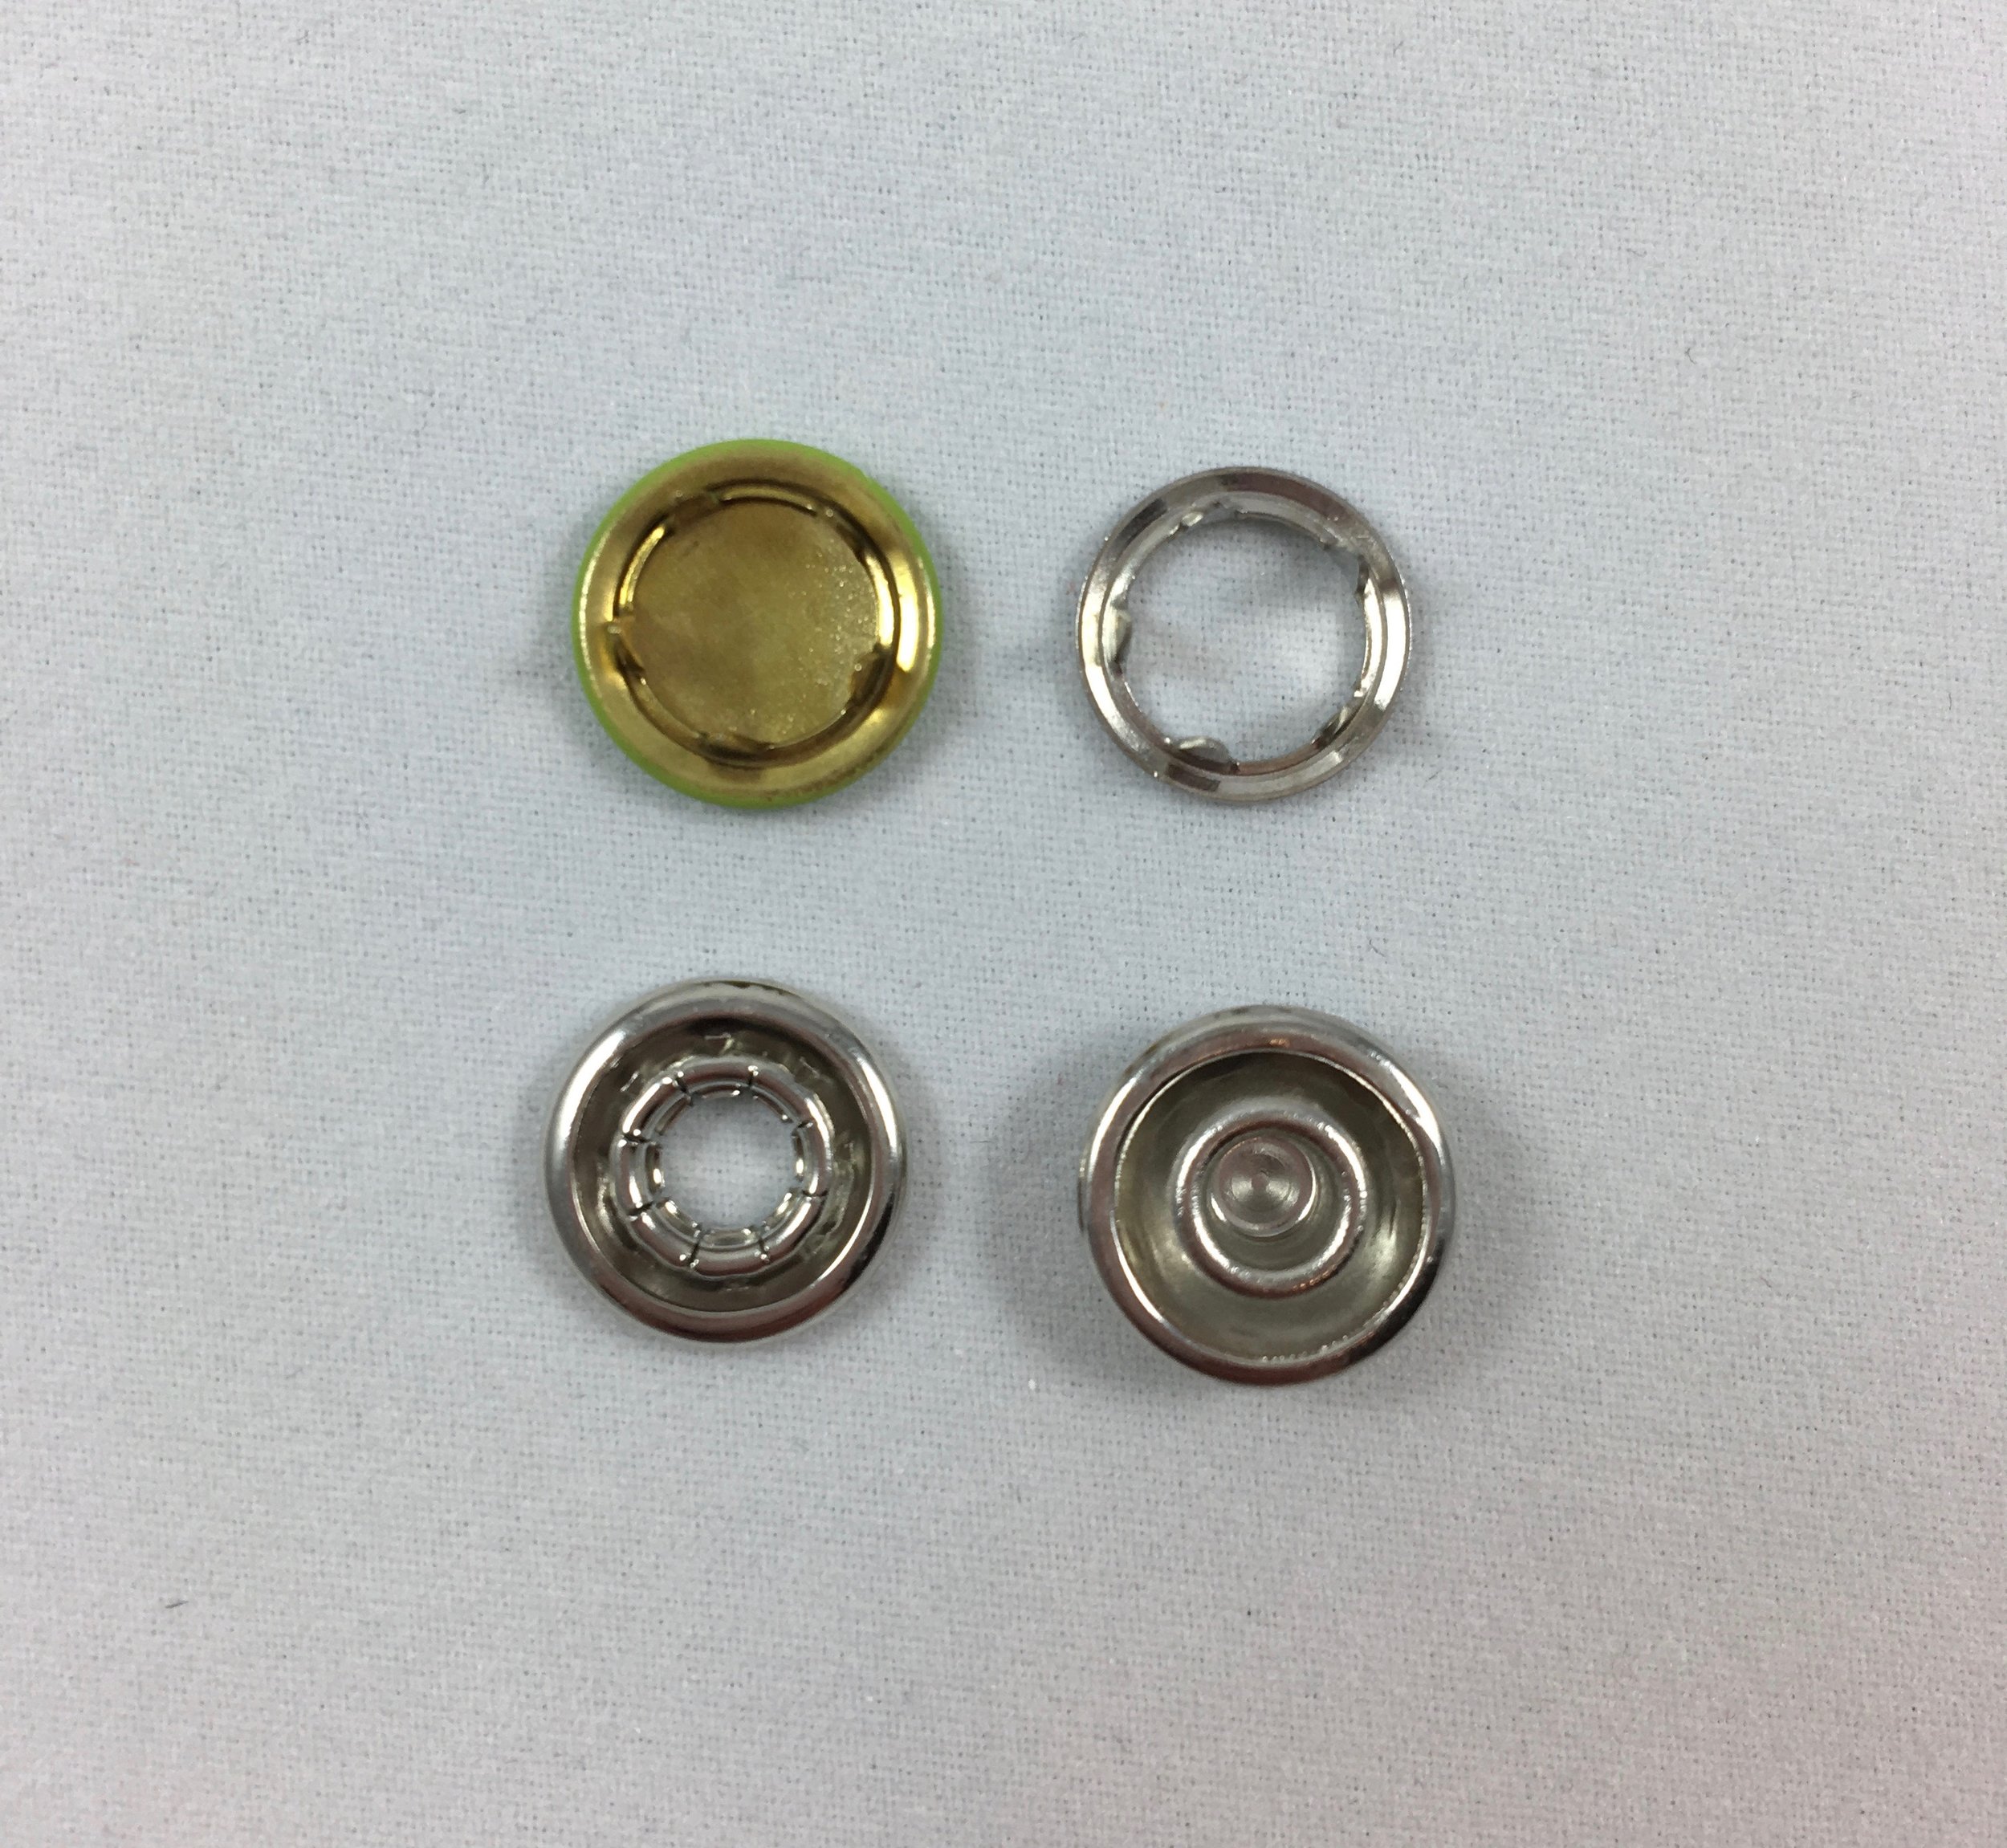
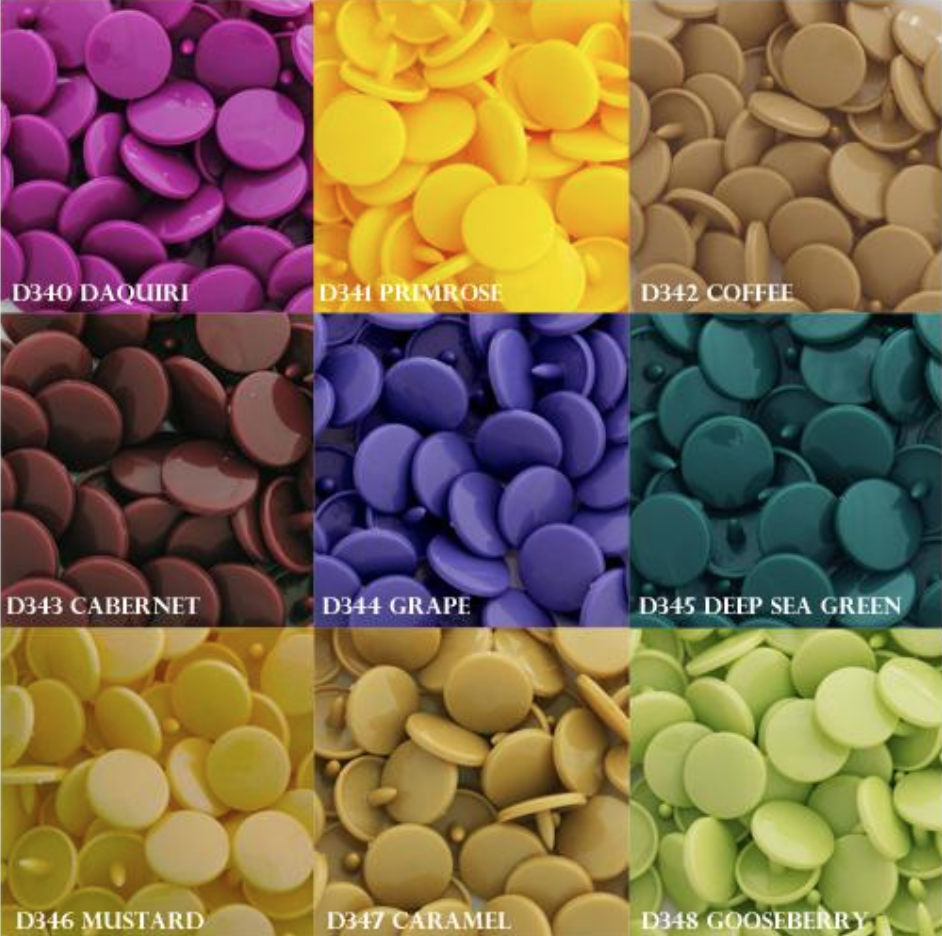
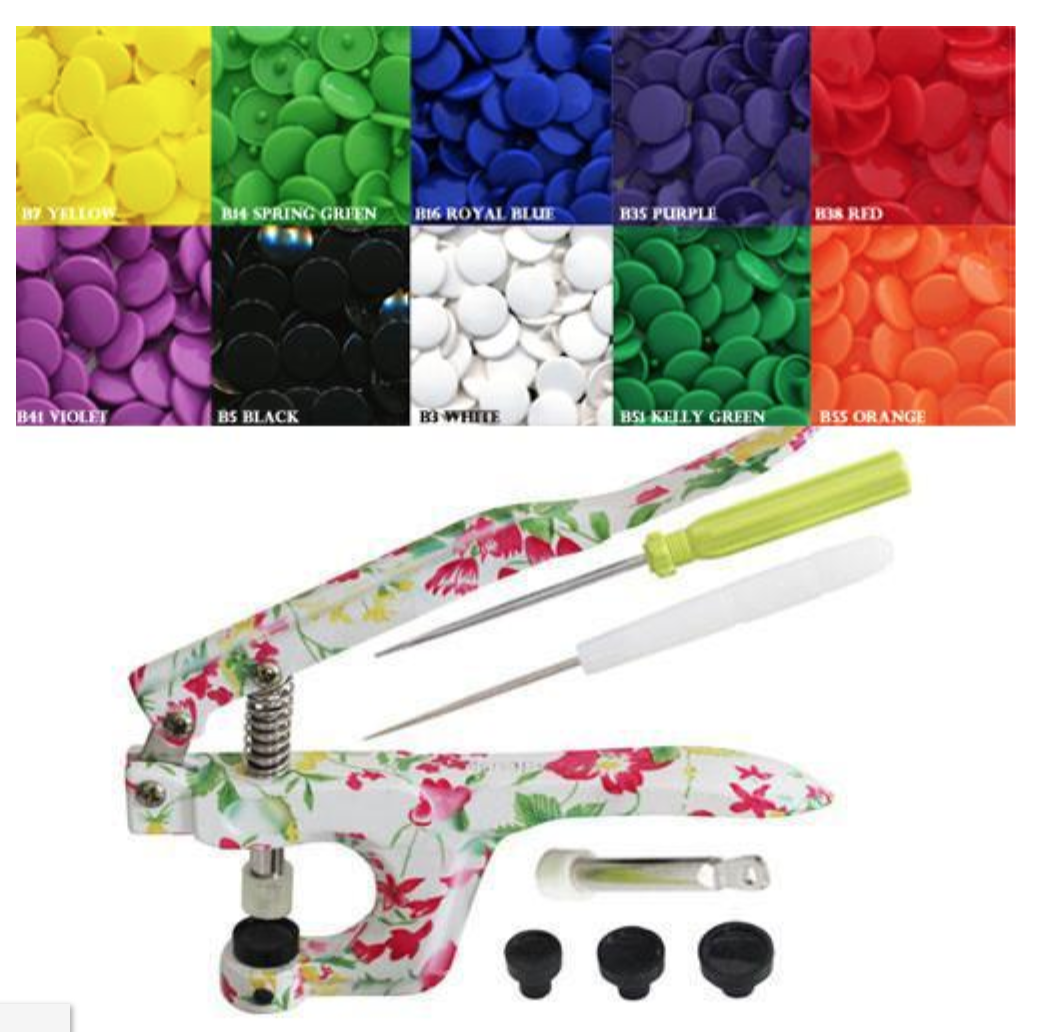
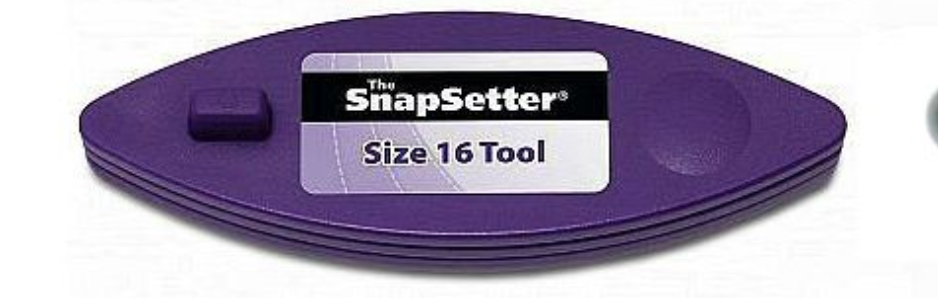
Are you ready to try out either some SnapSource metal snaps or plastic KAM snaps? I hope after Monday and Tuesday’s posts that were all about metal and plastic snaps, the tools needed to install each of them and information on where to get each of them, you may be considering adding some snaps to a project or two. I REALLY hope after Wednesday and Thursday’s posts showing you how easy both the SnapSource metal snaps and the KAM plastic snaps are to install, you are ready to add snaps to everything!

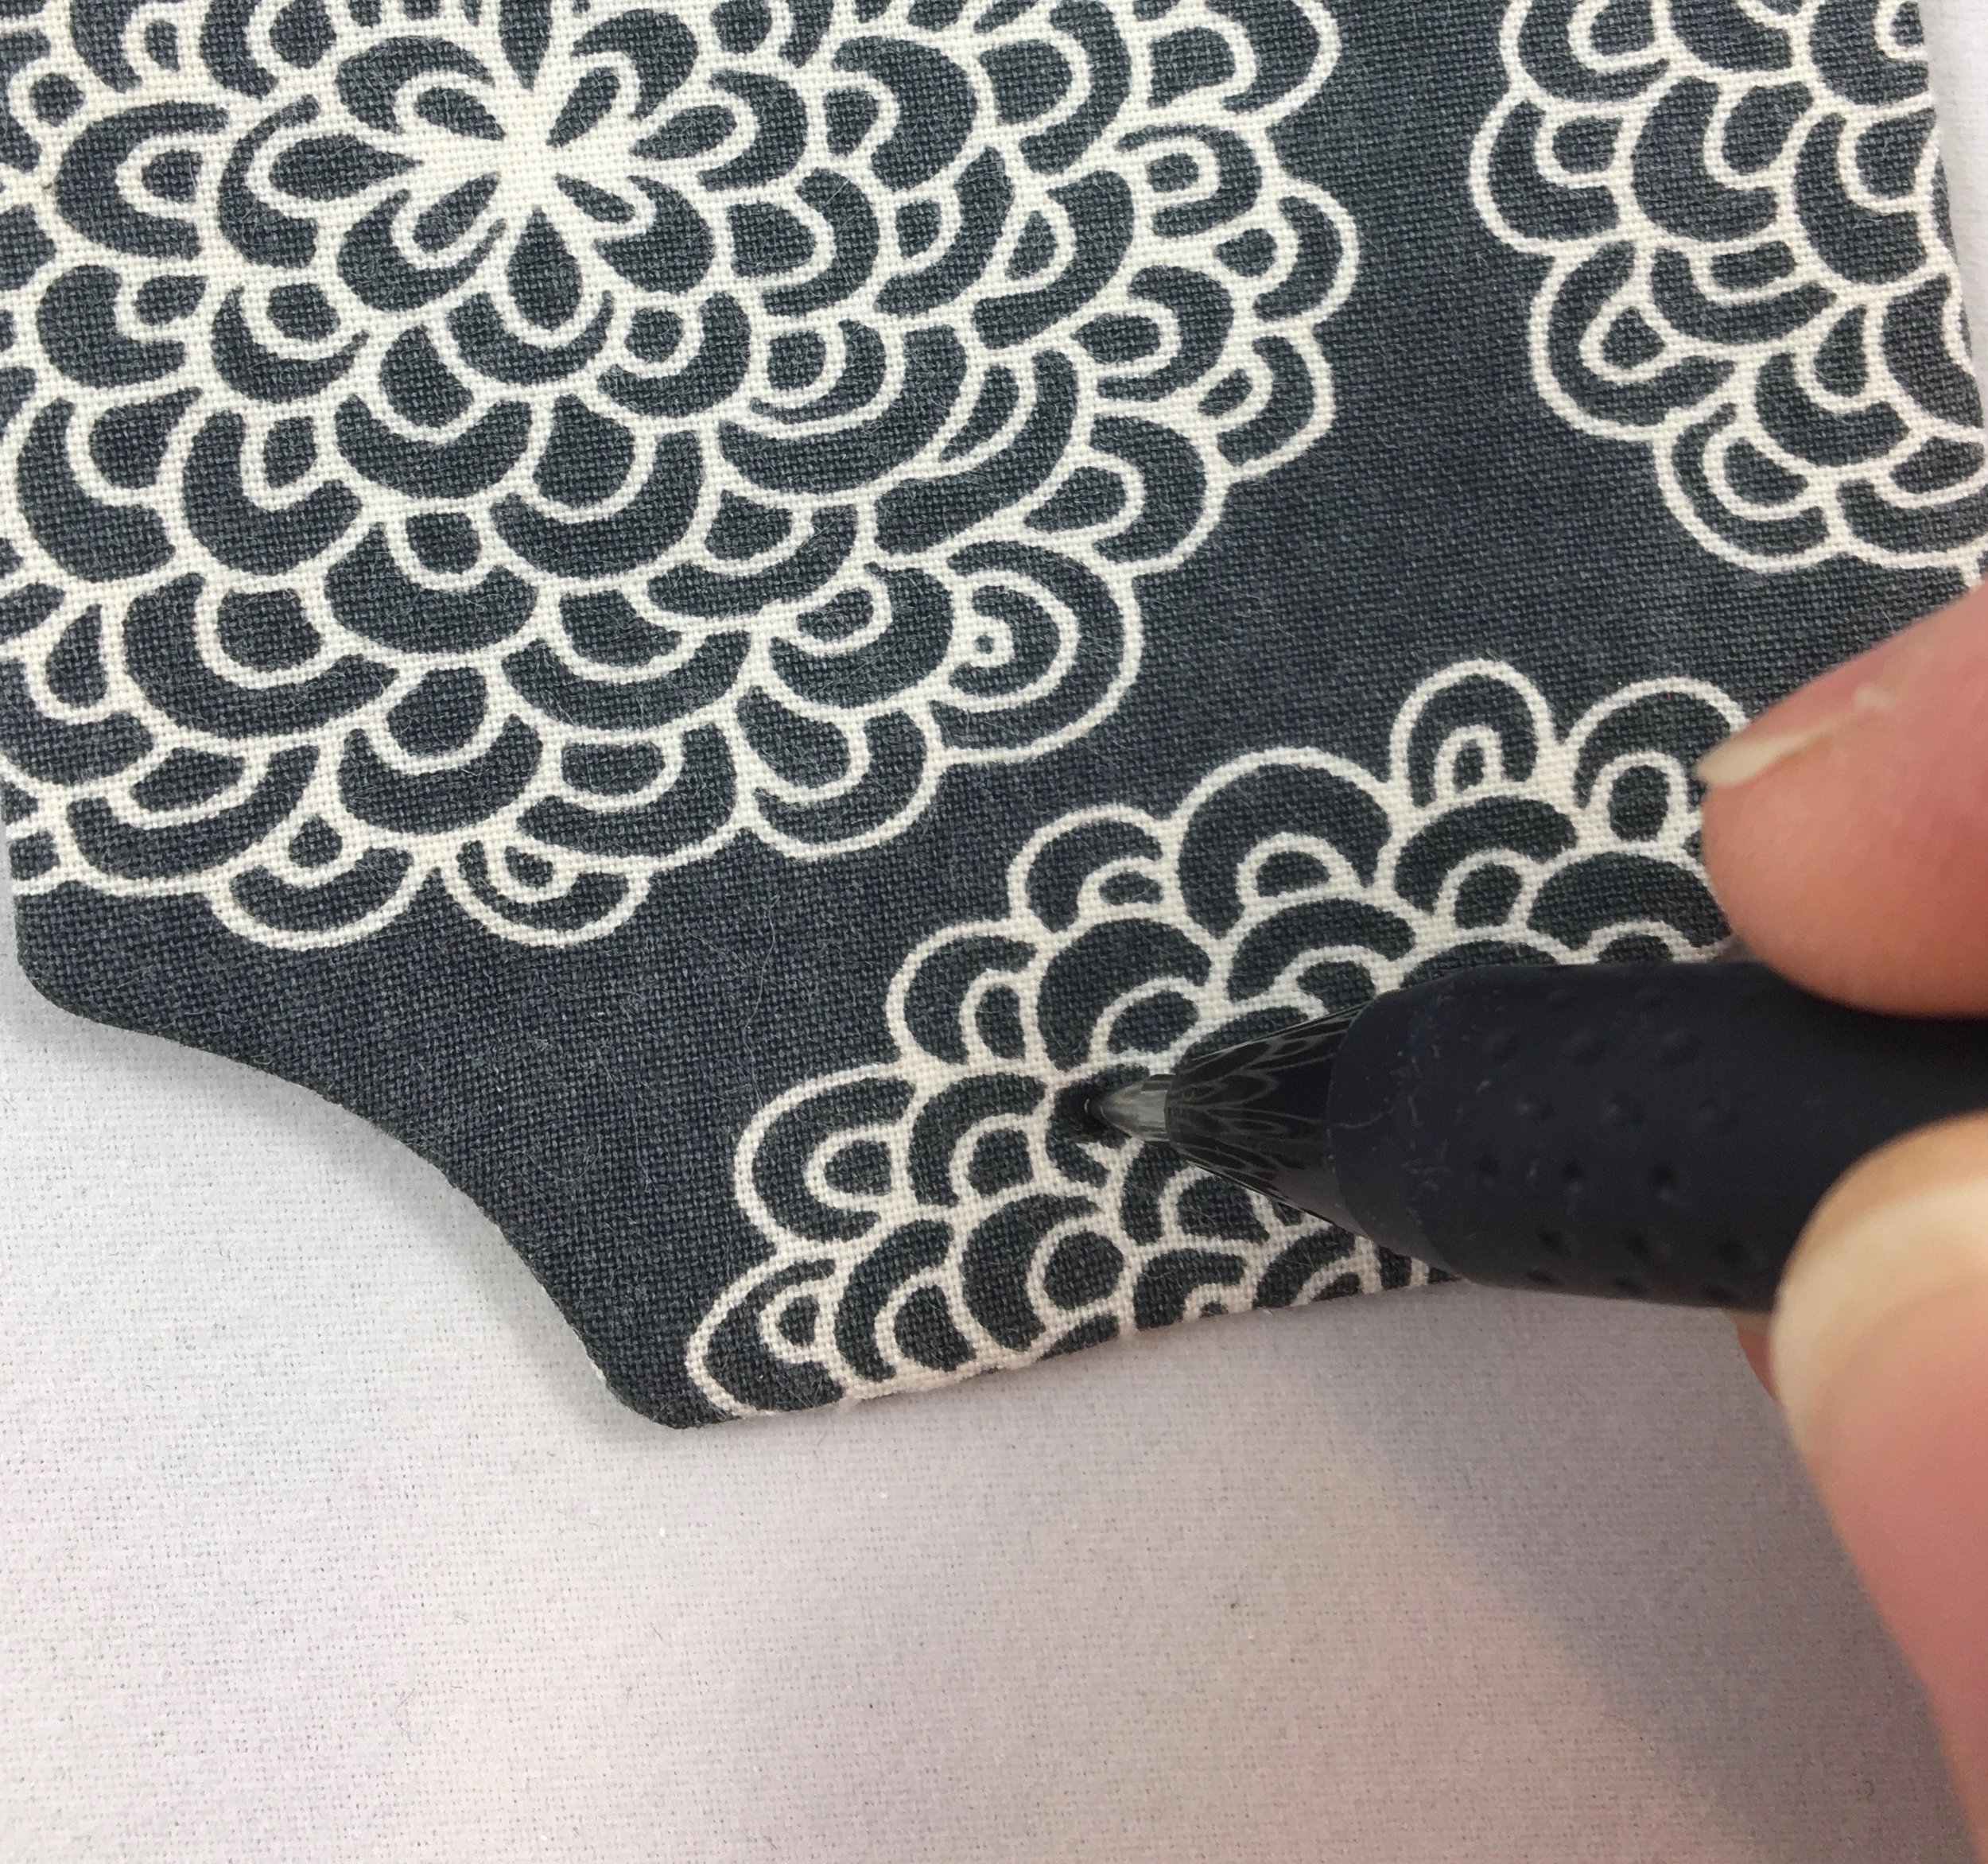
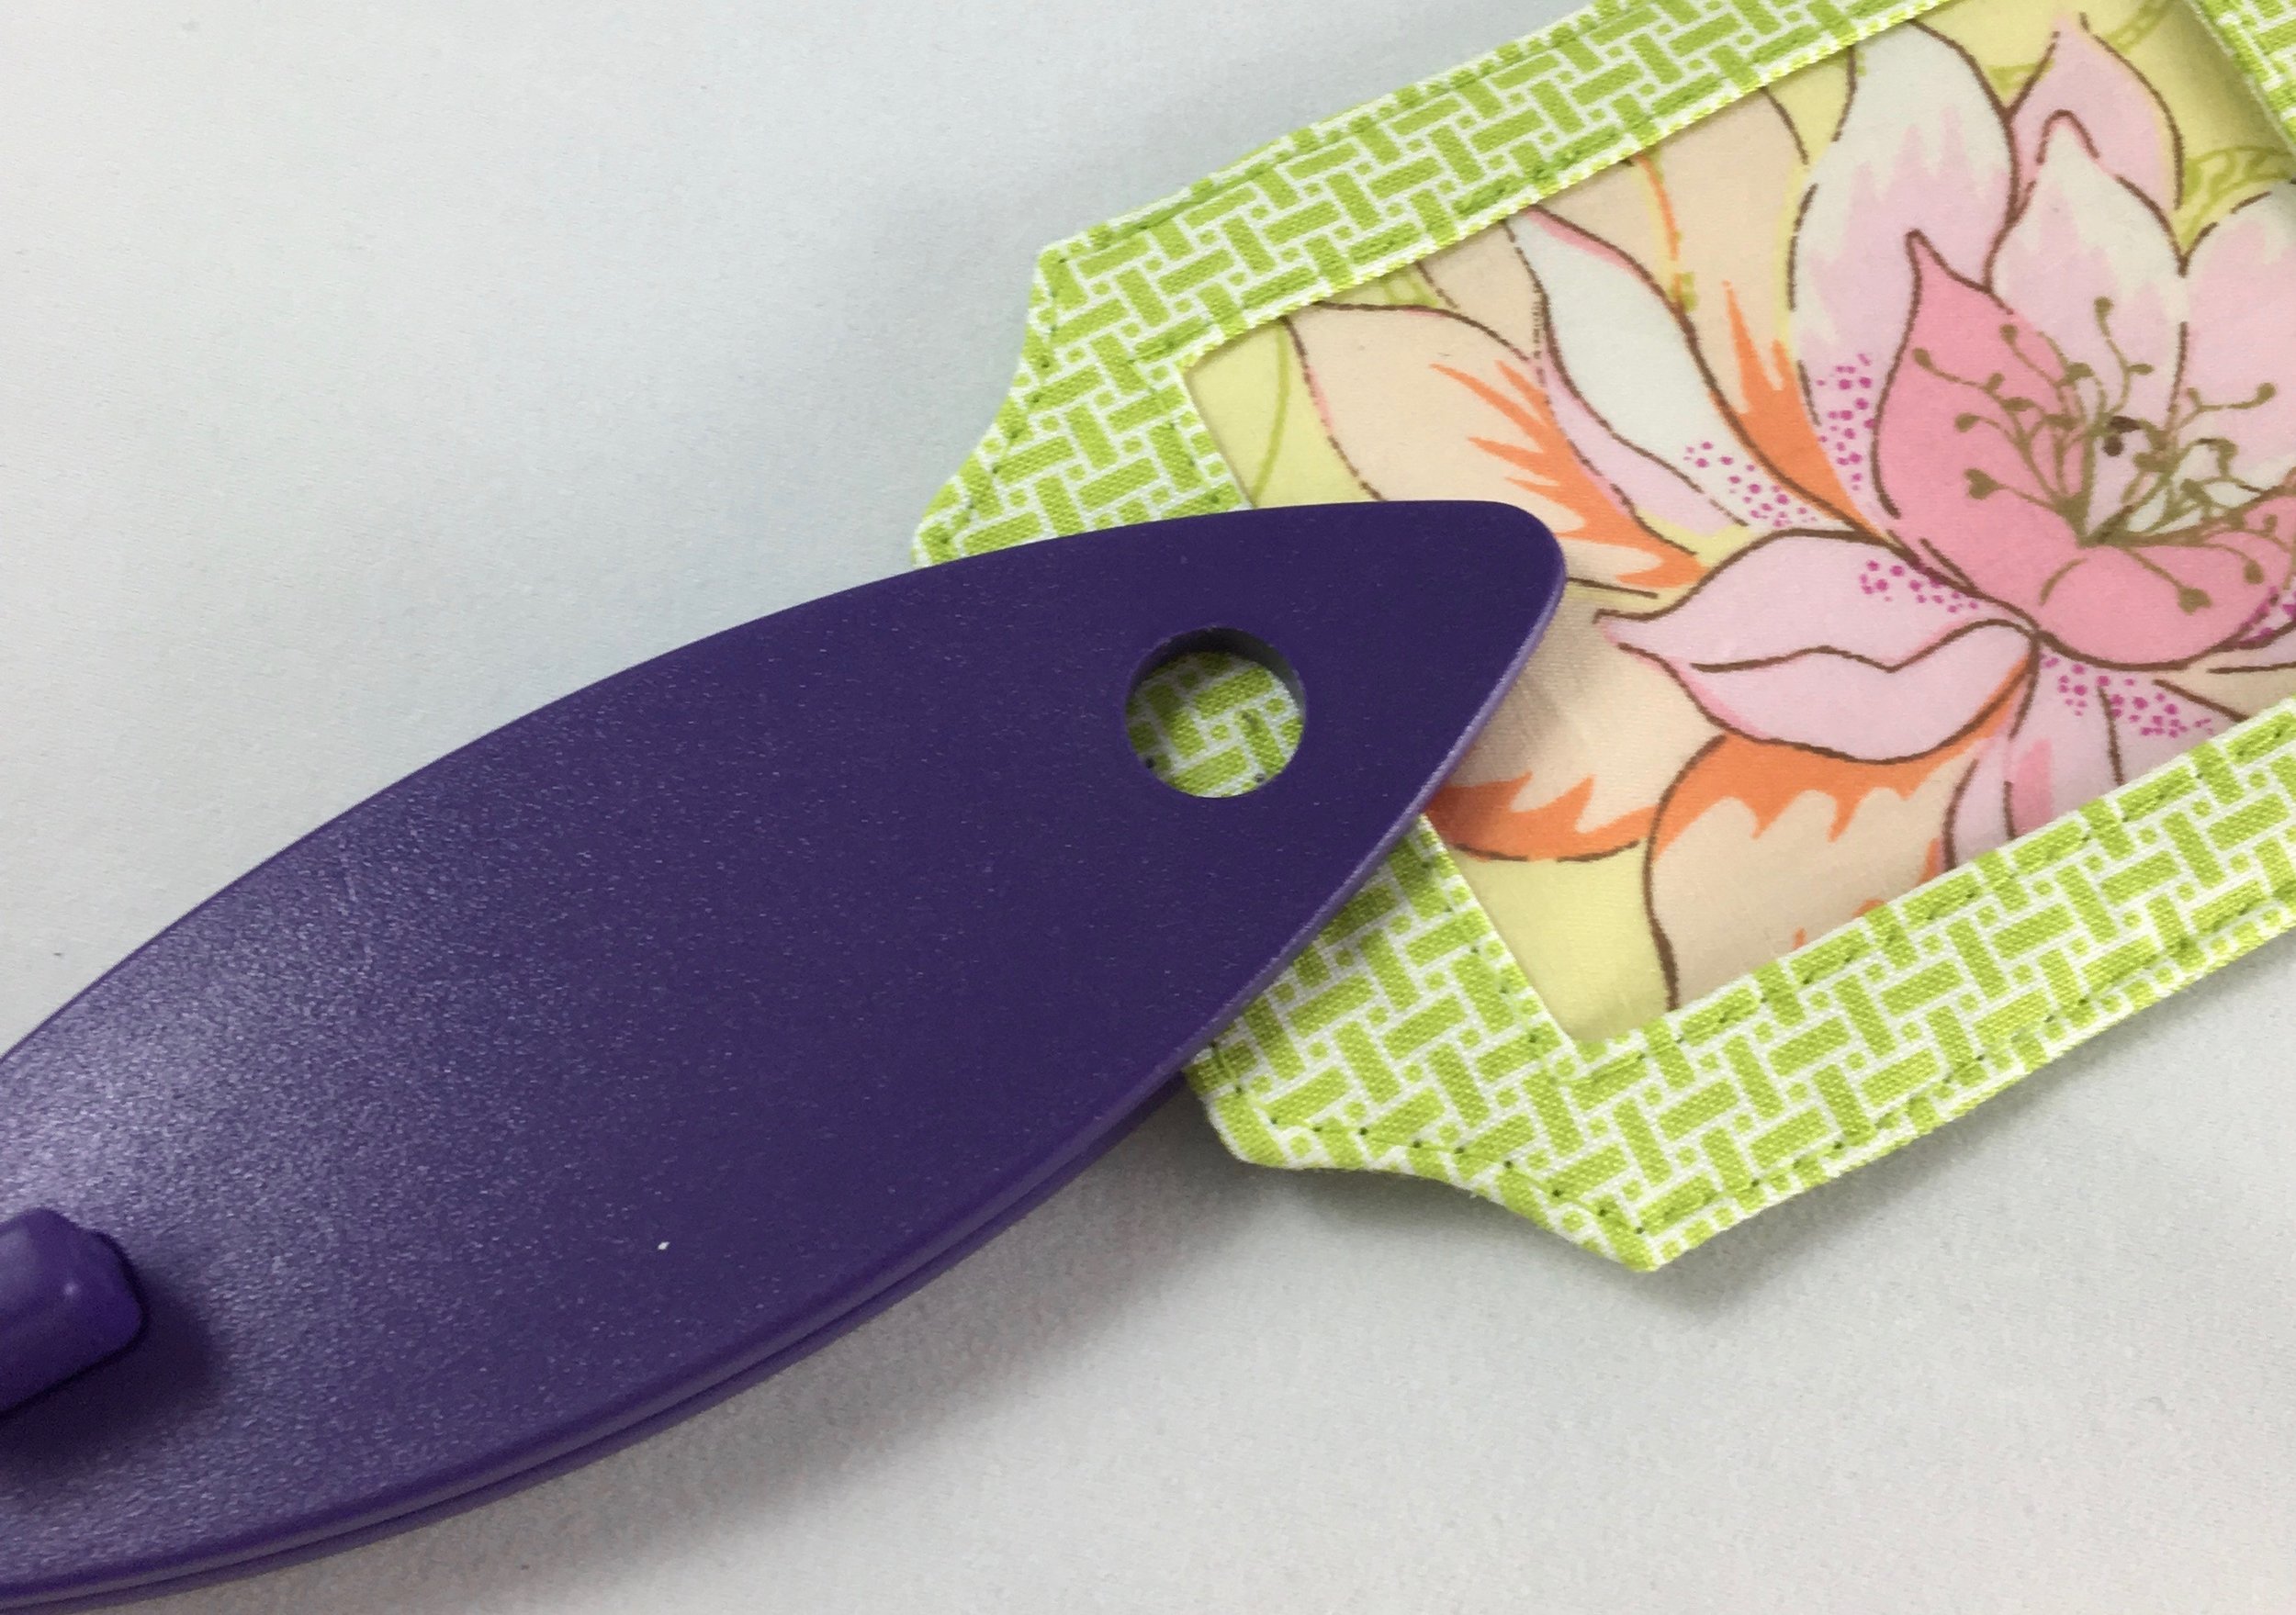
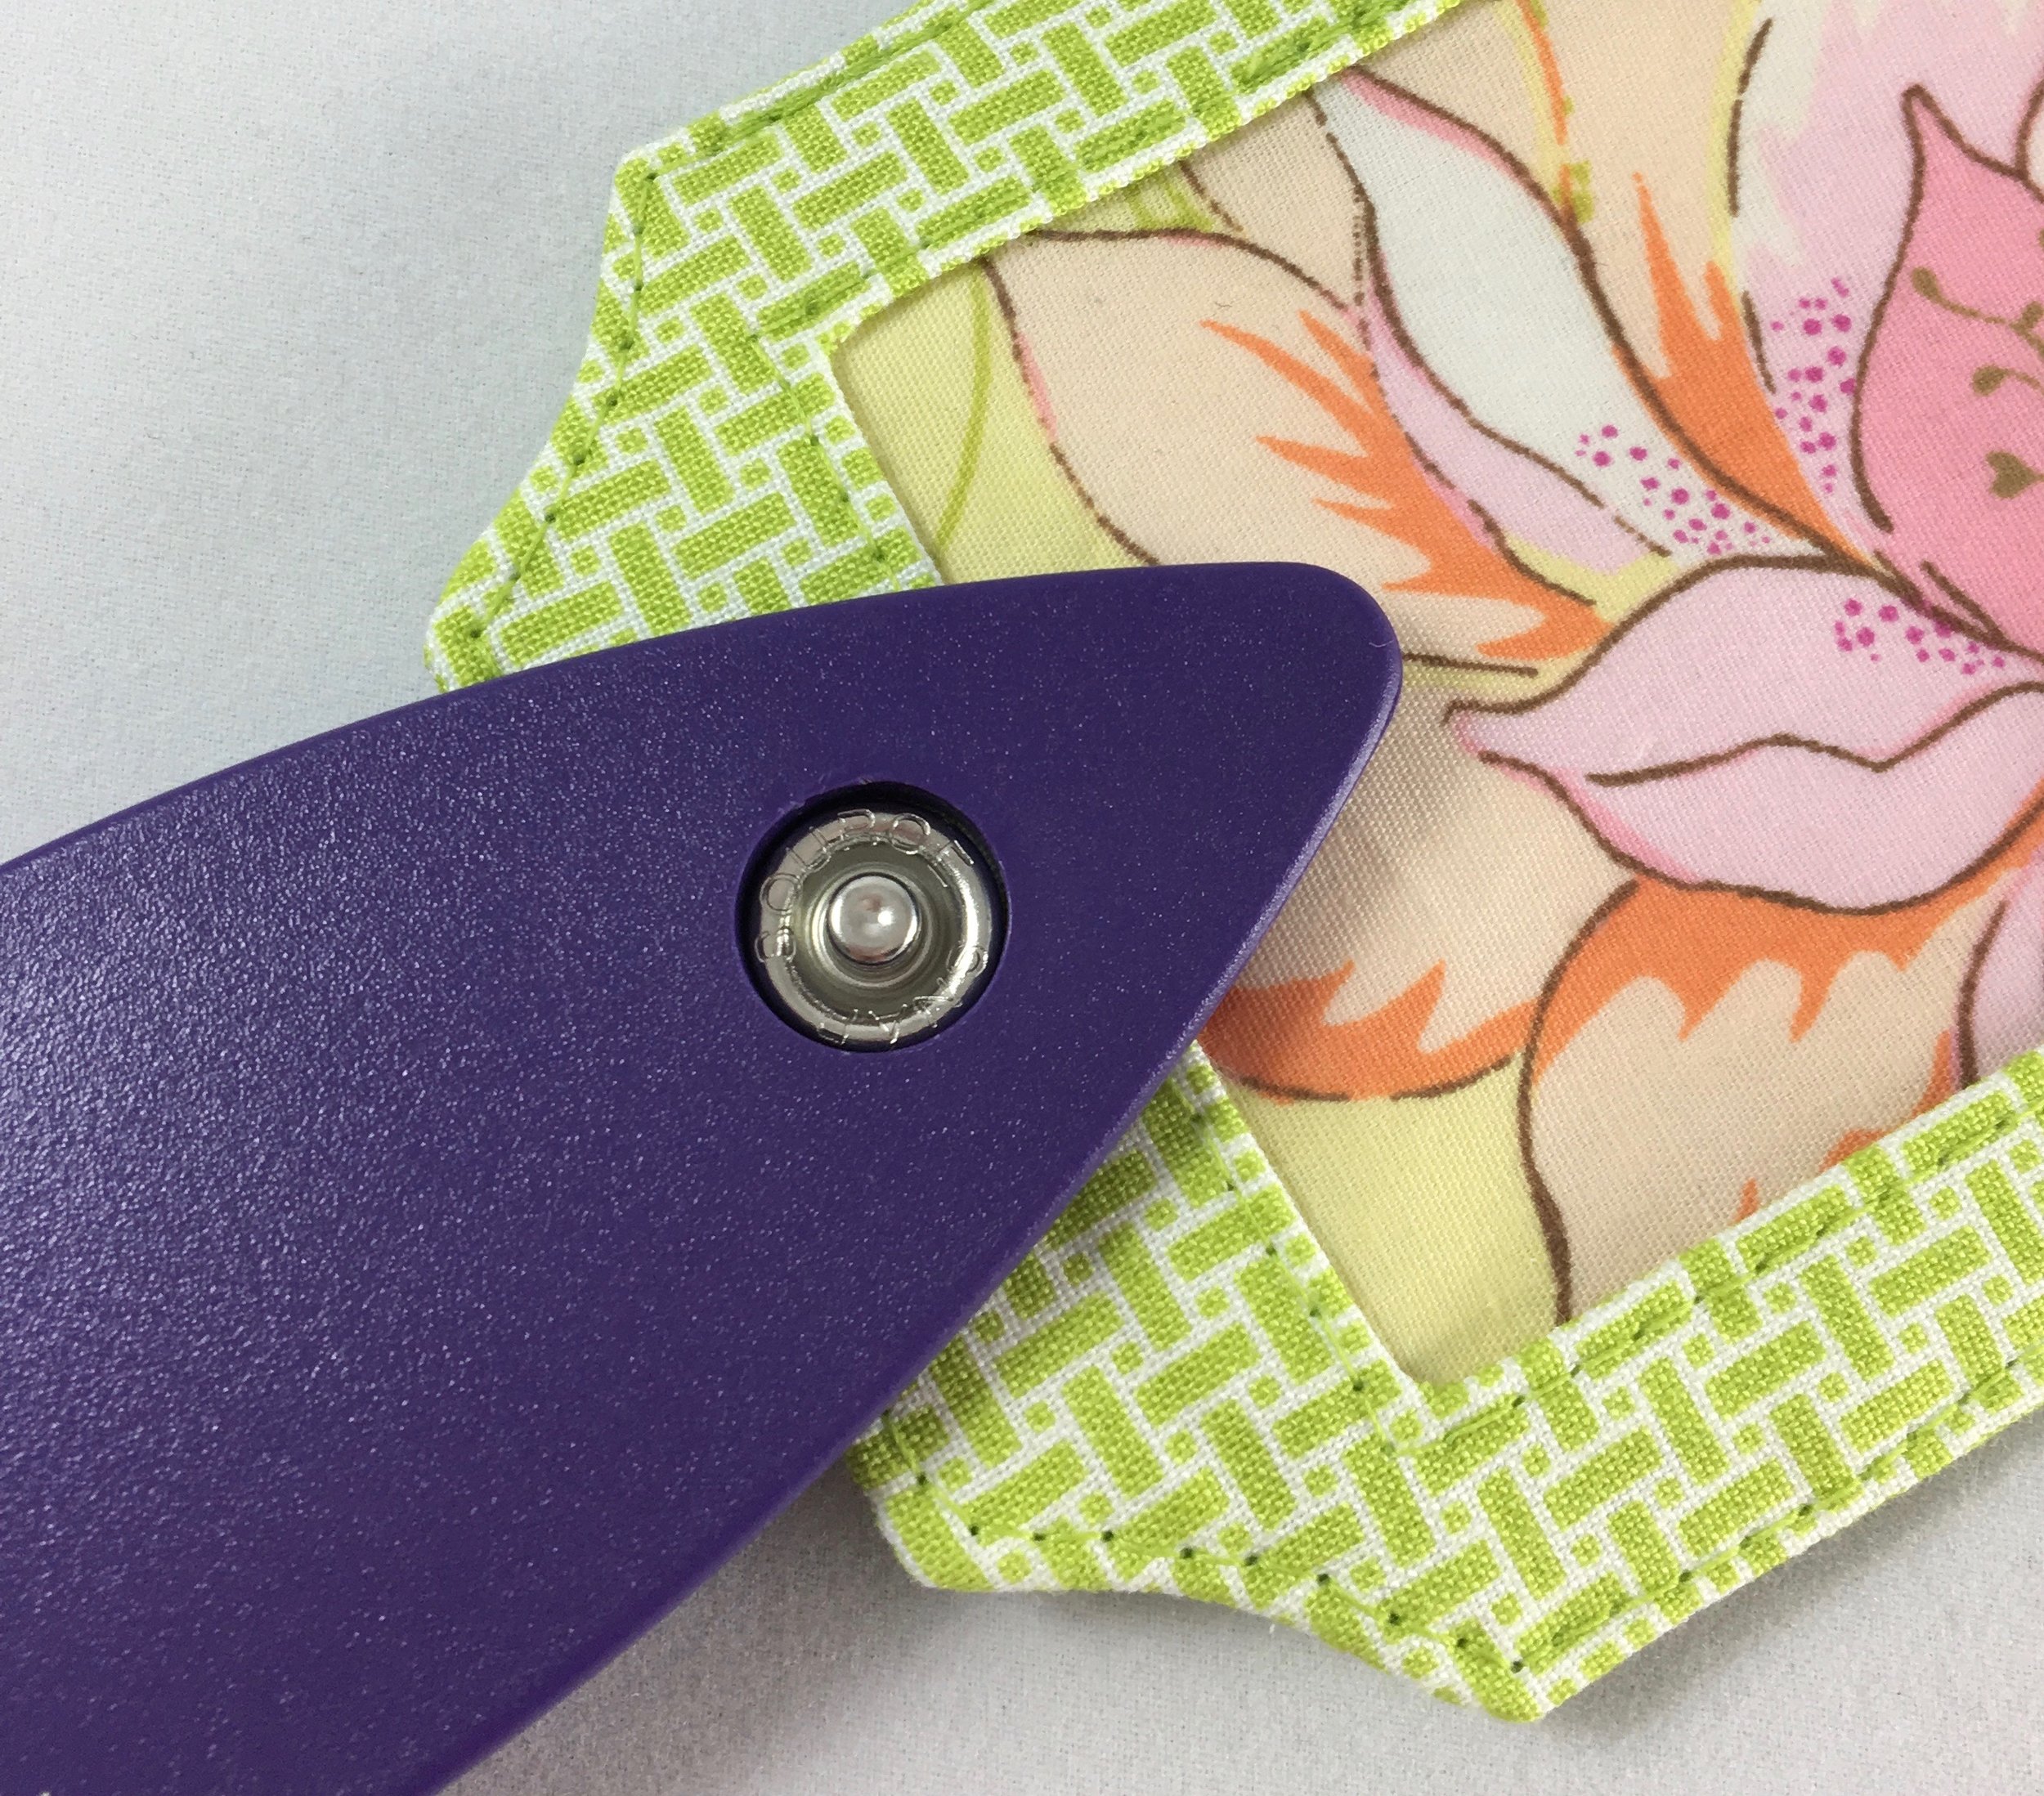
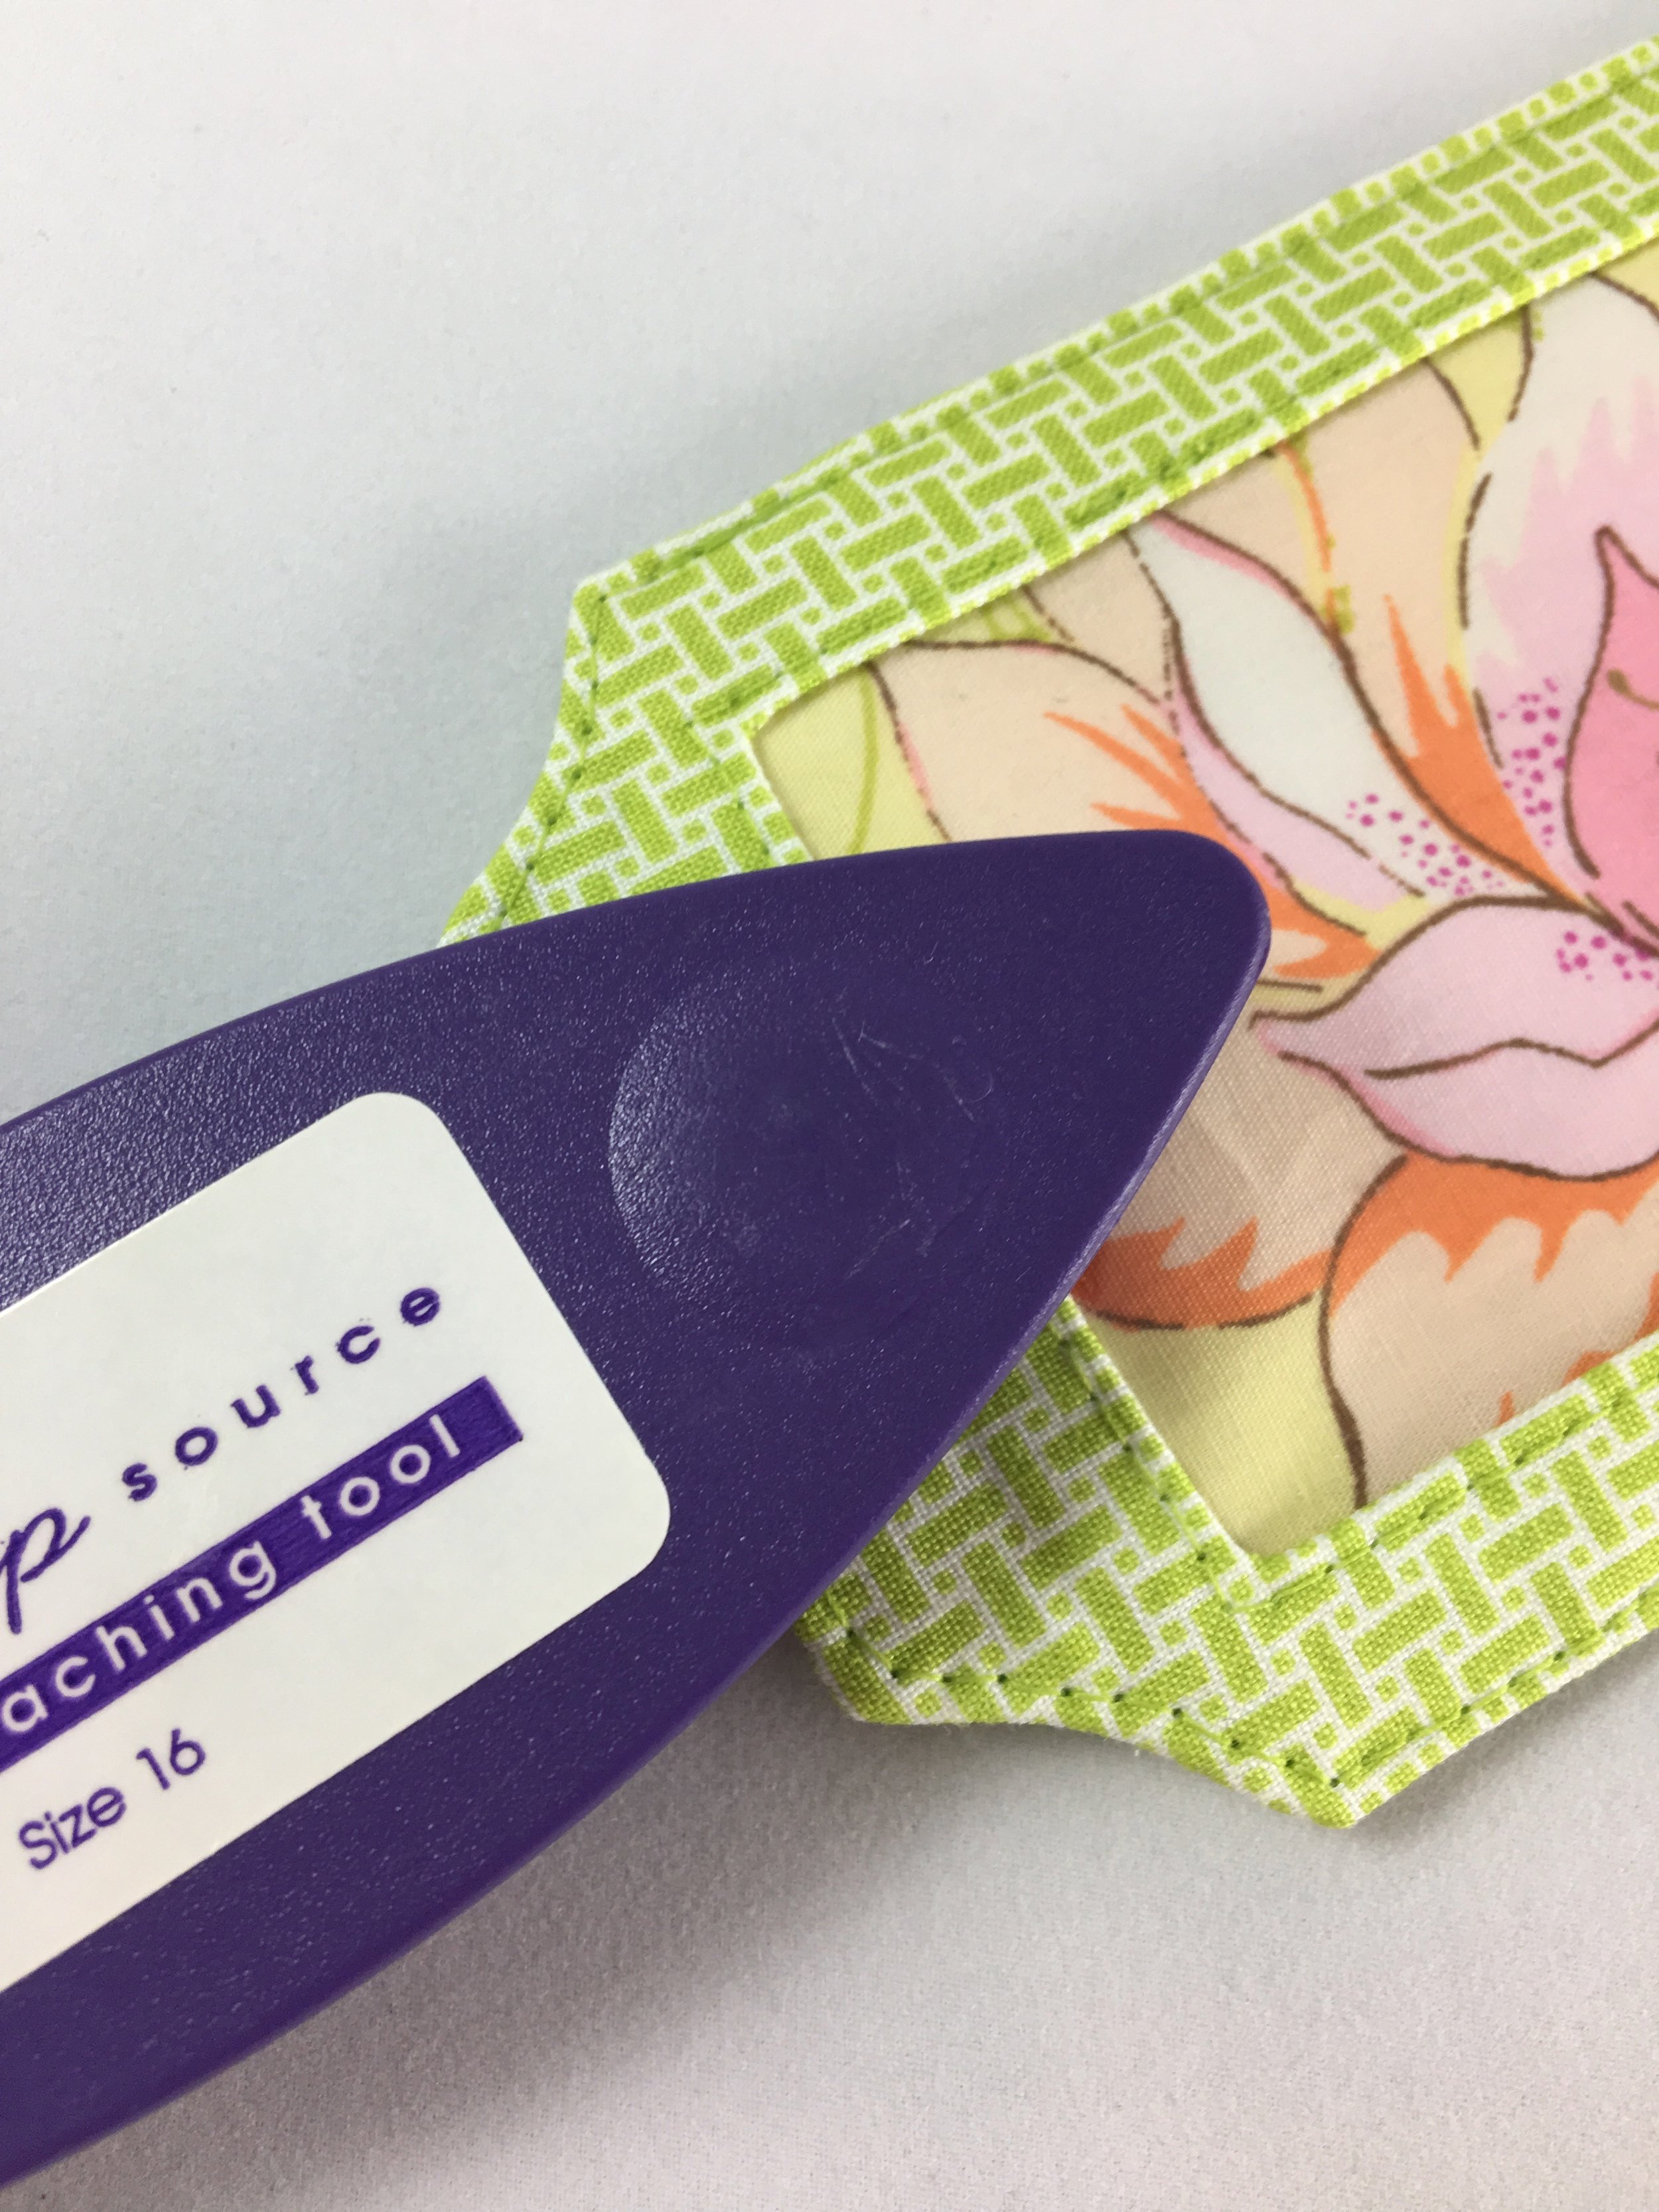
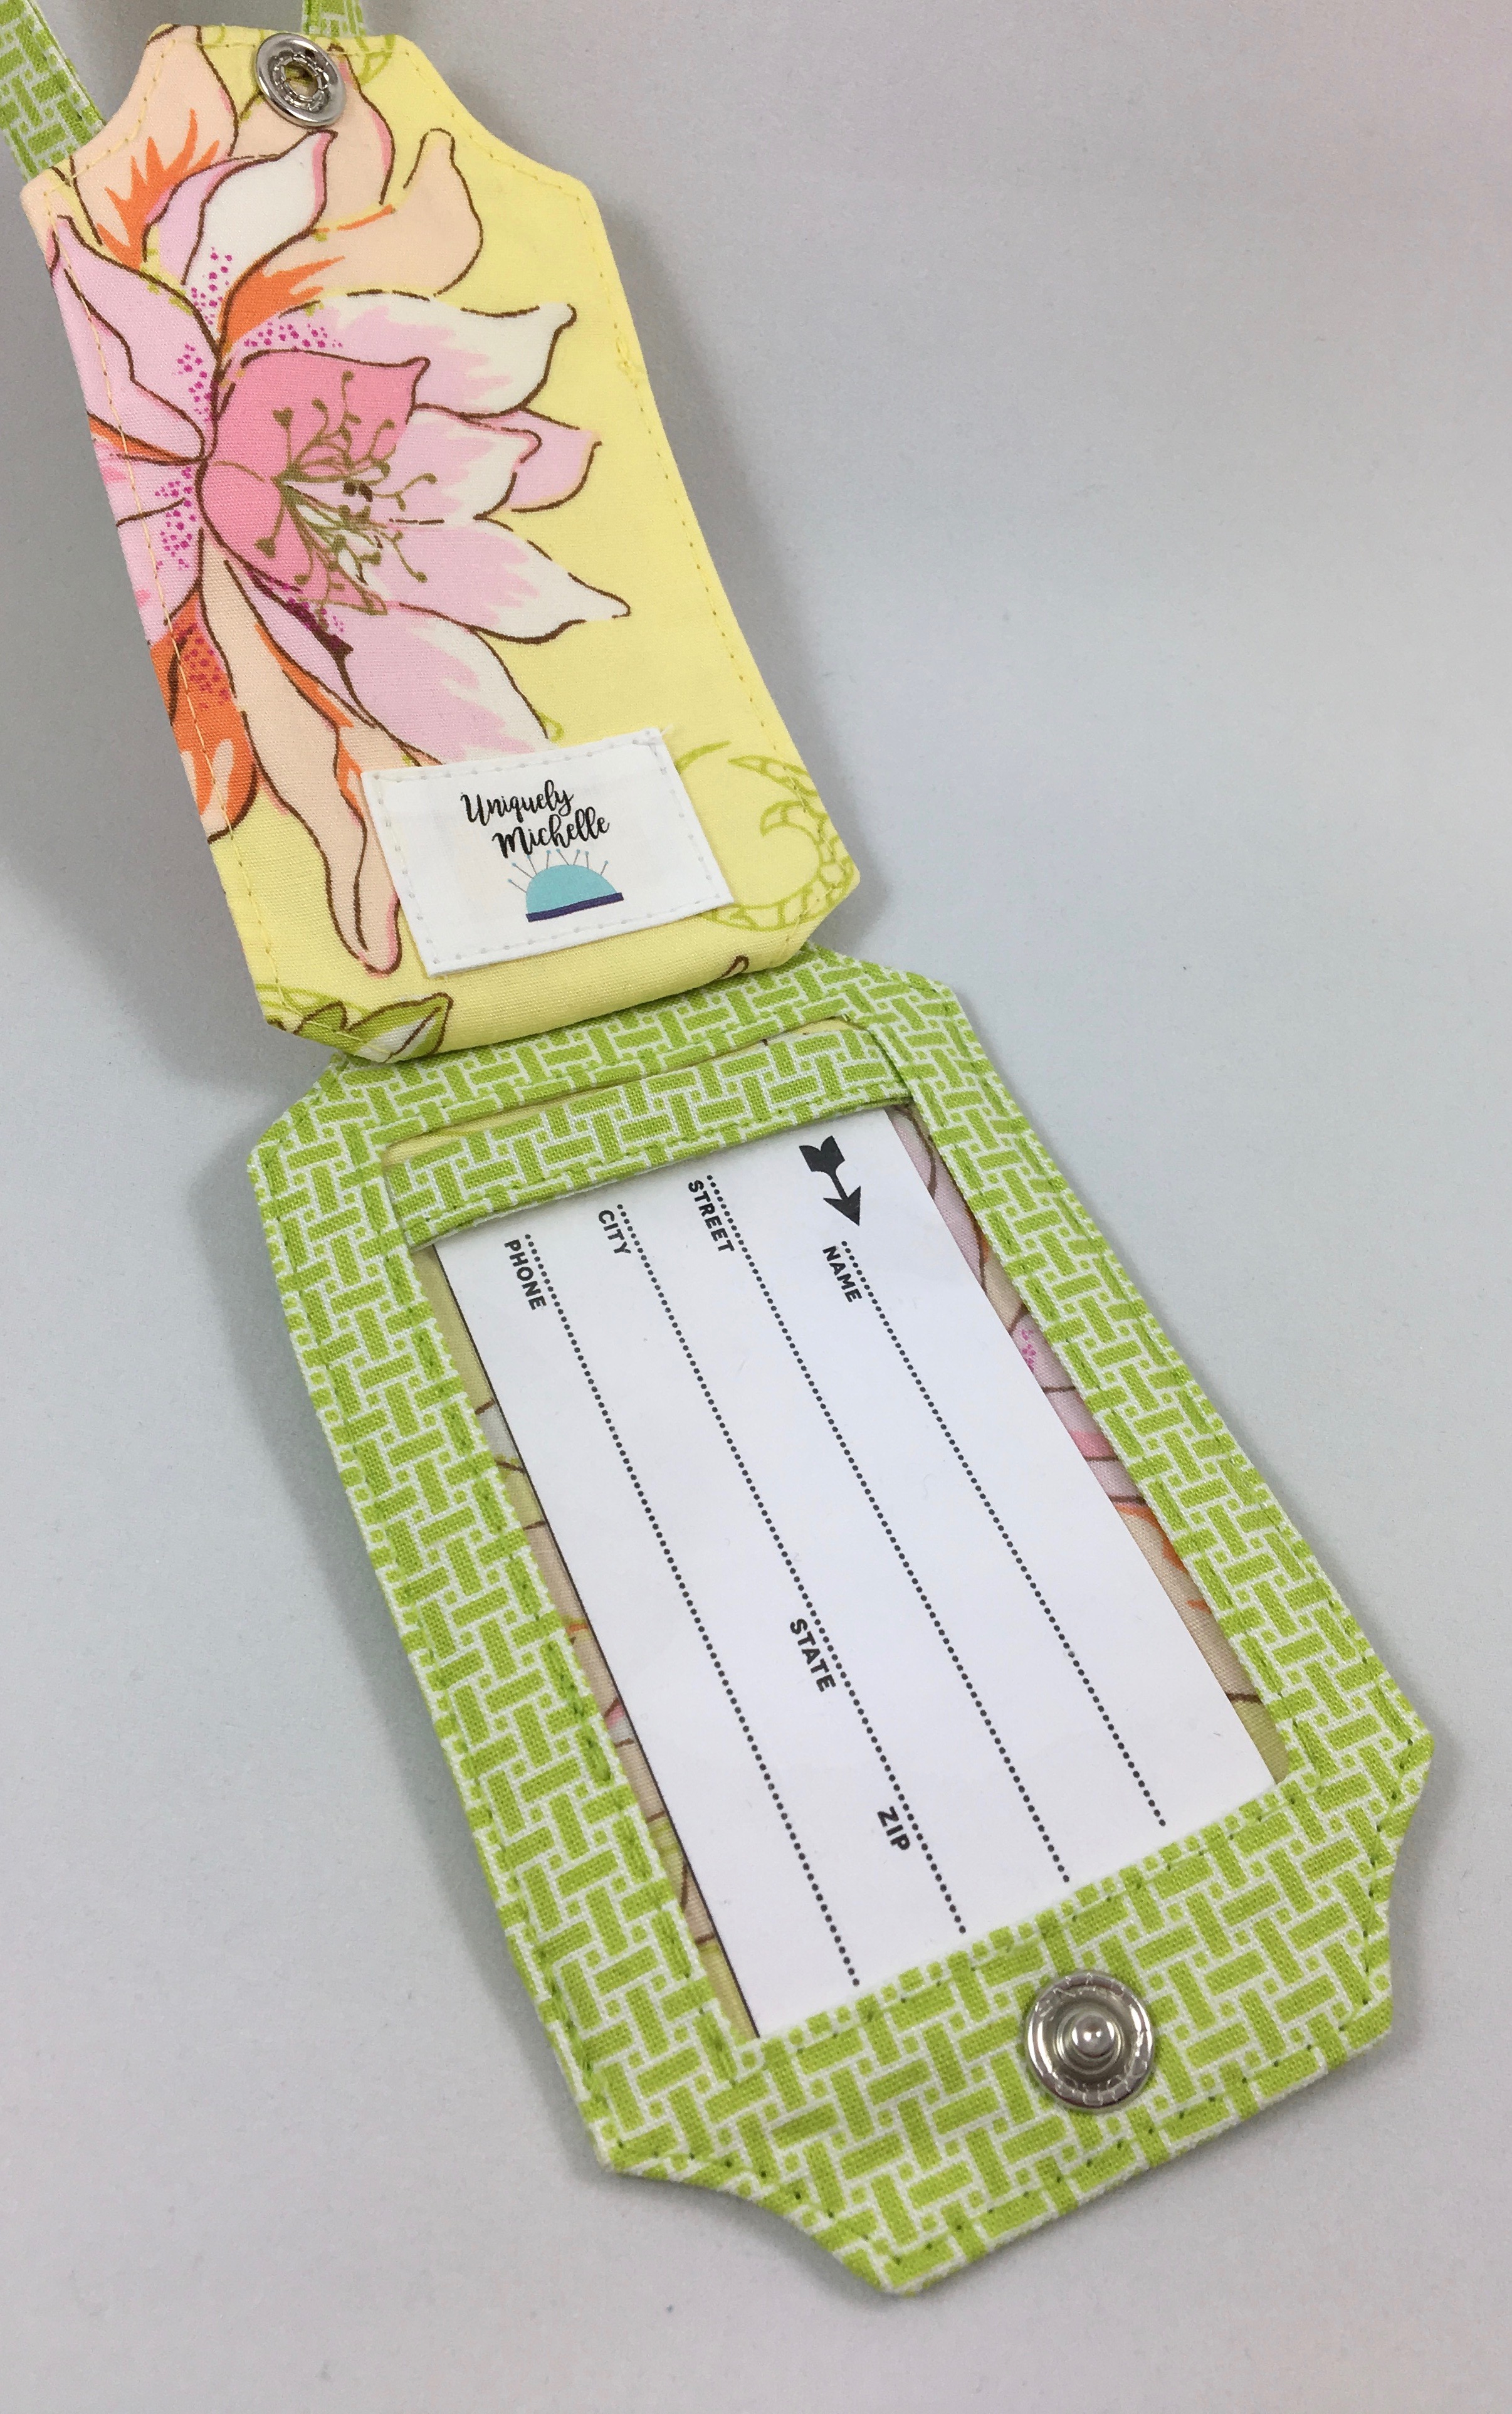
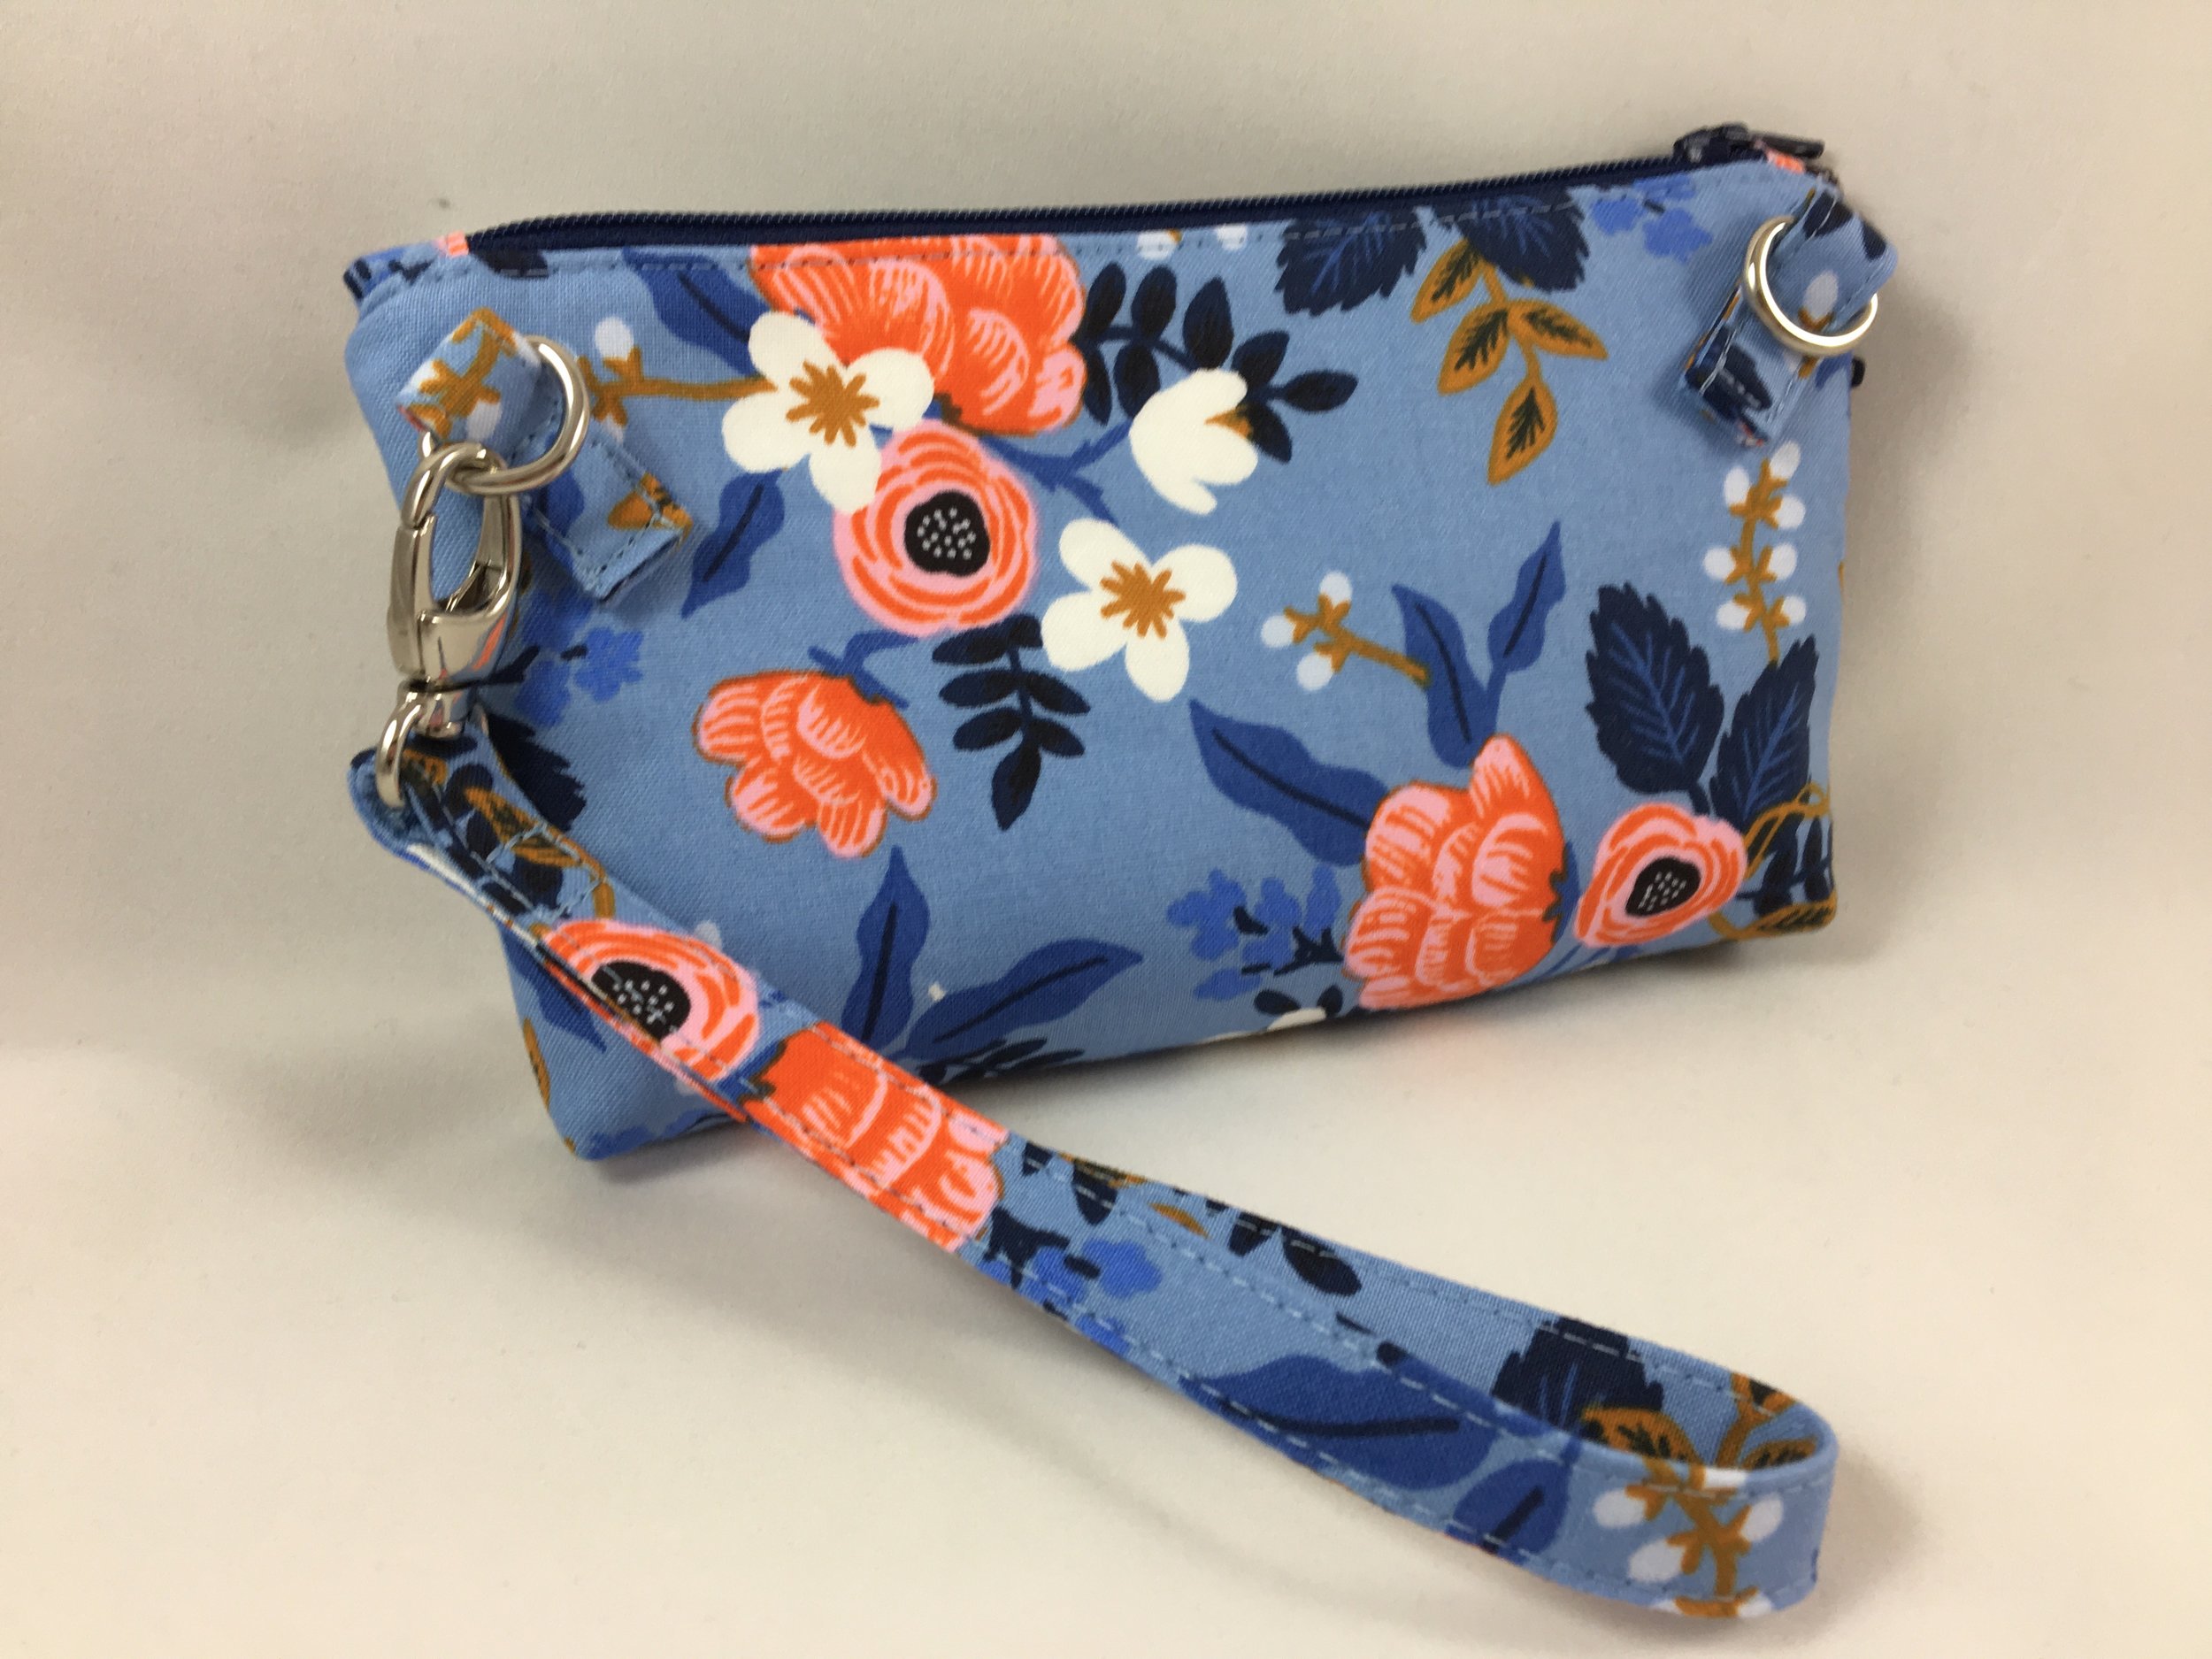
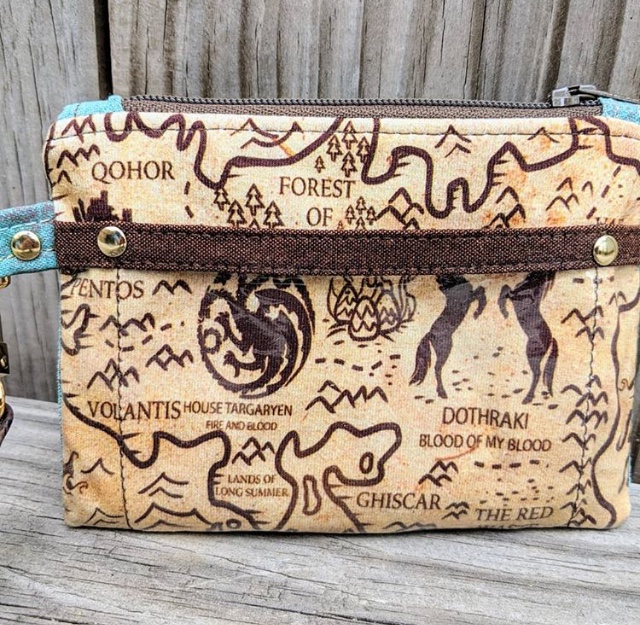
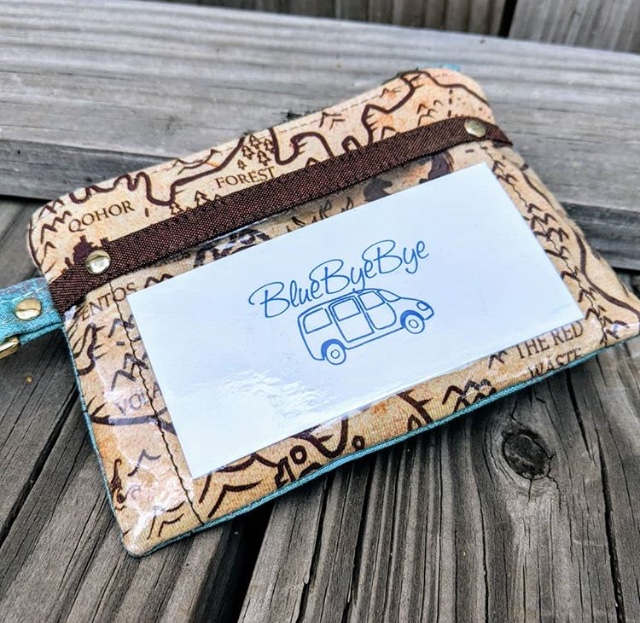
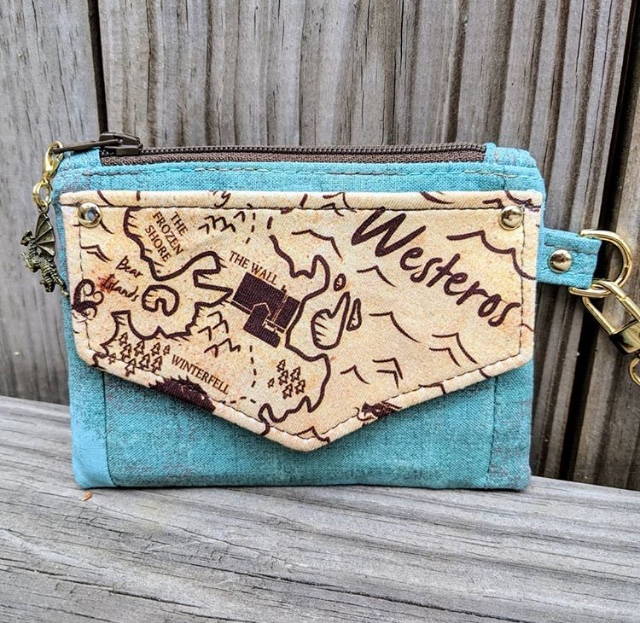
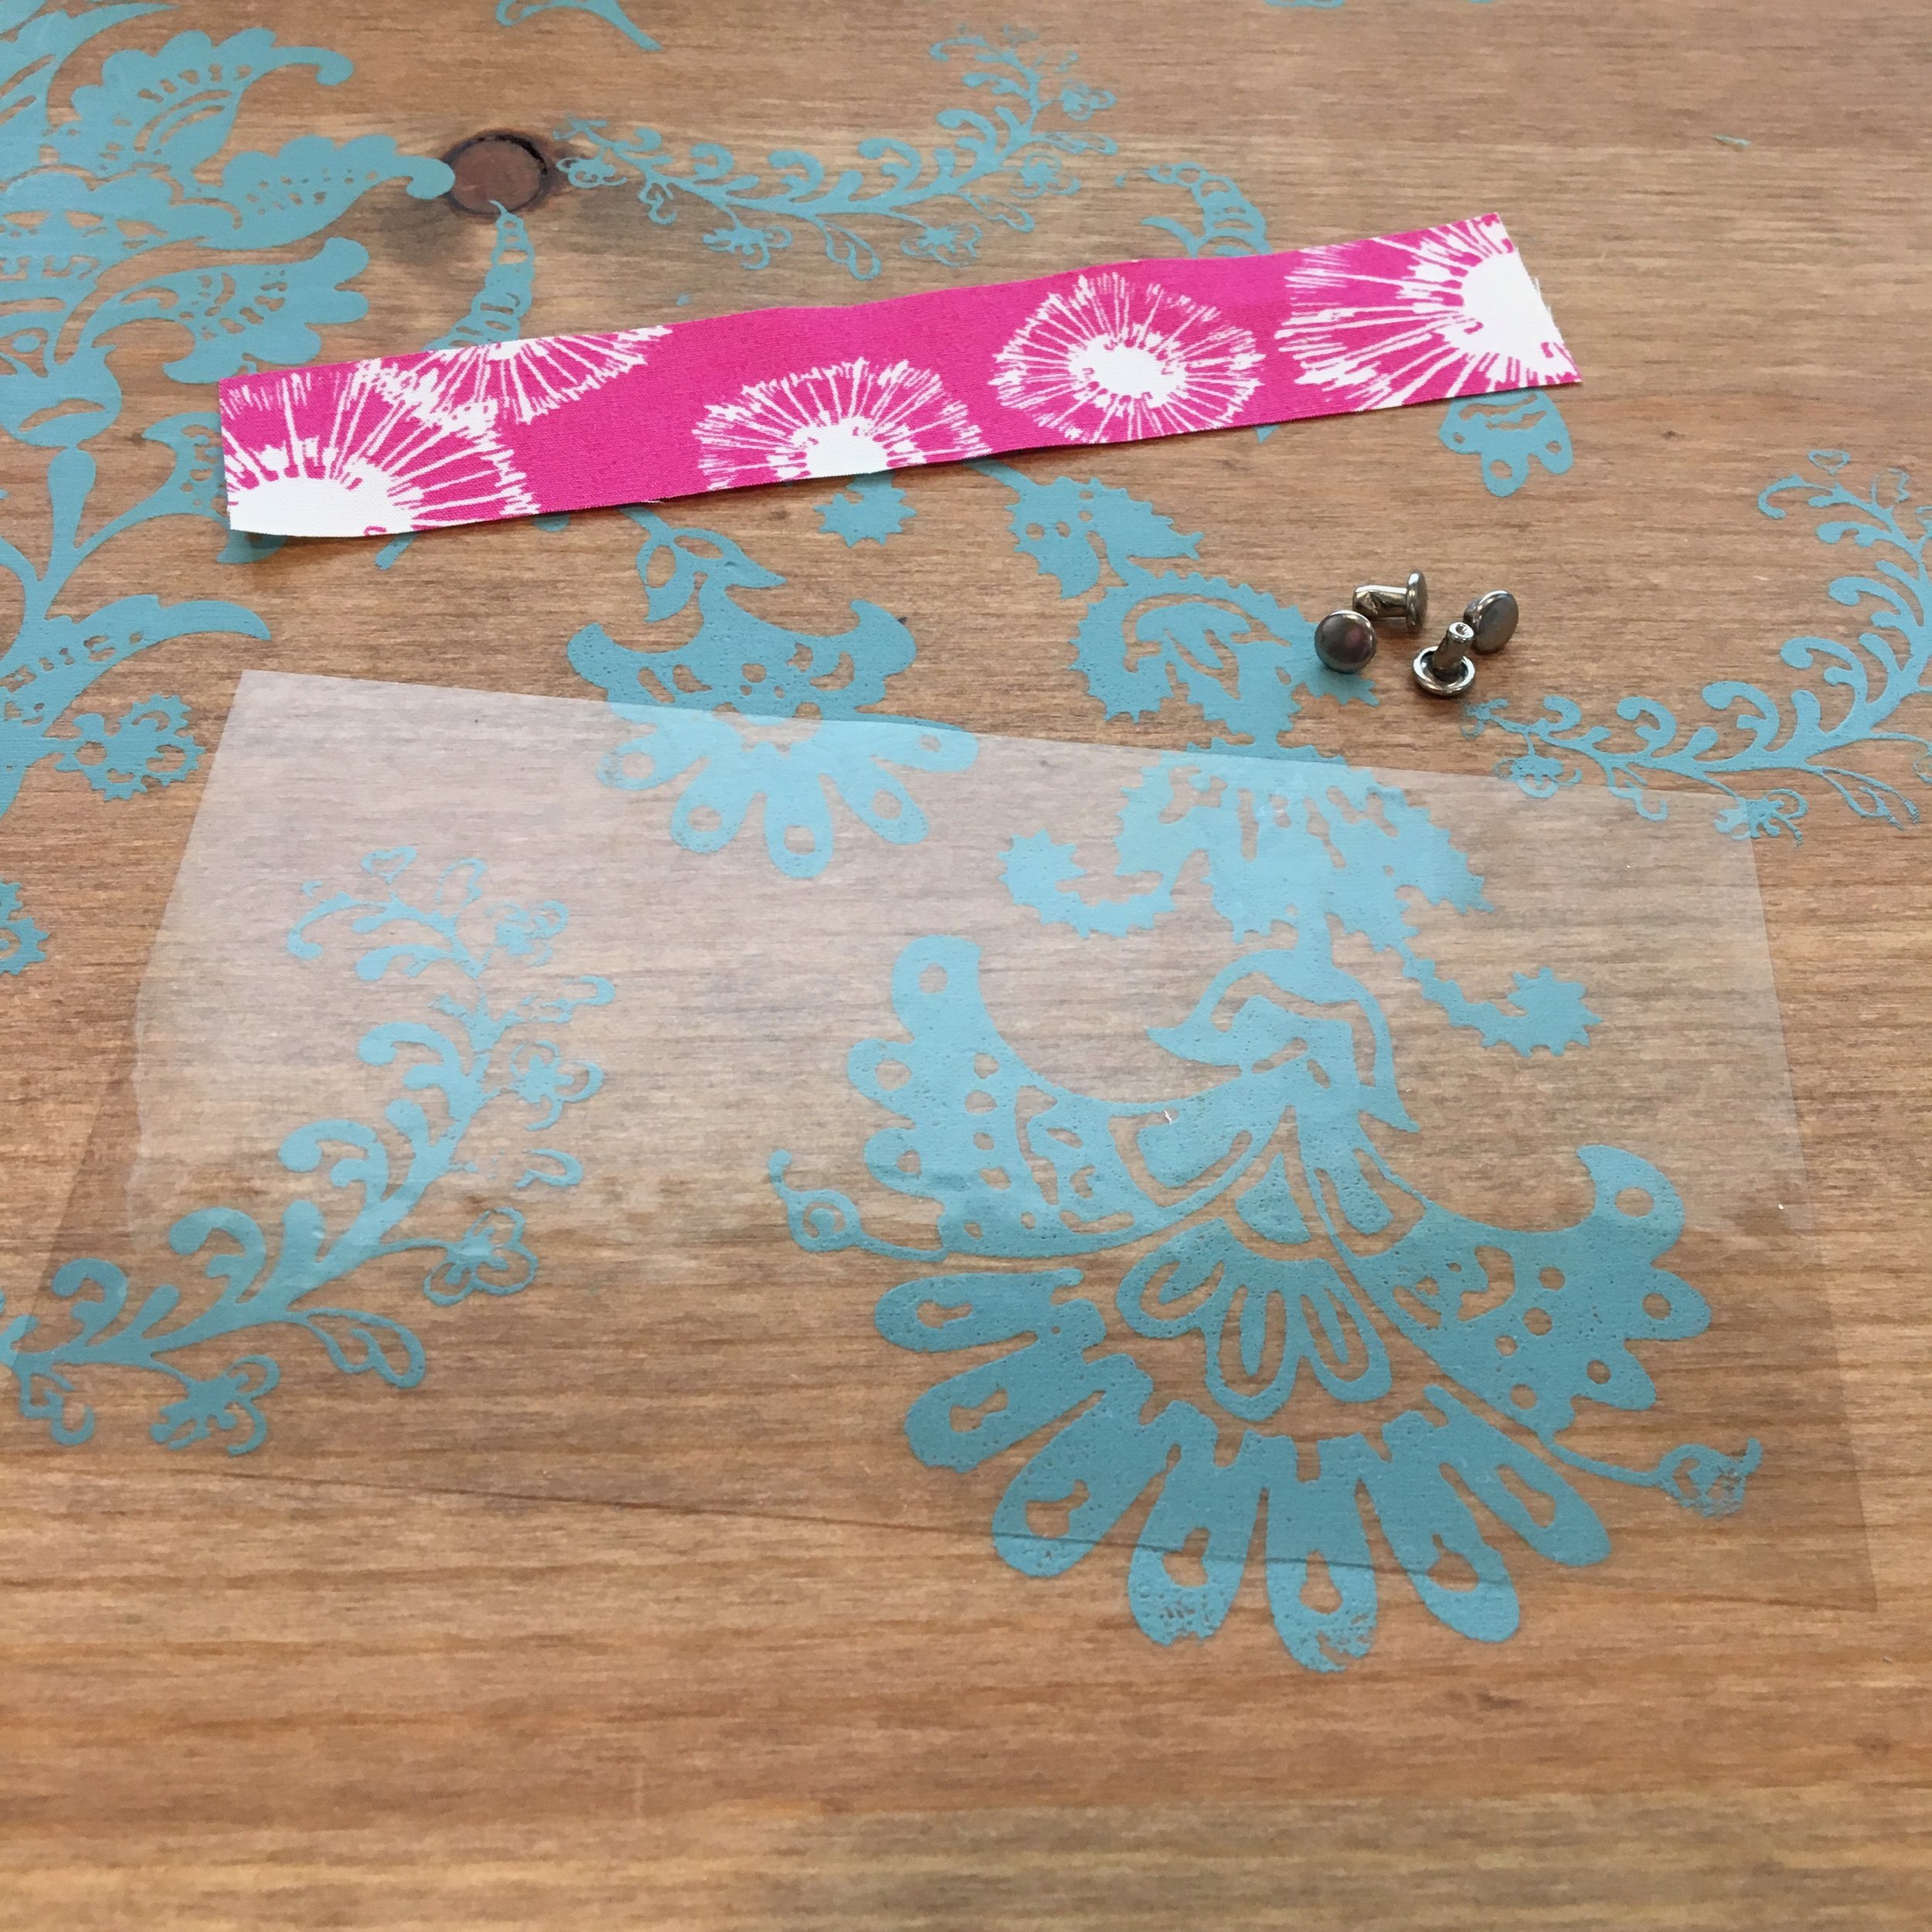
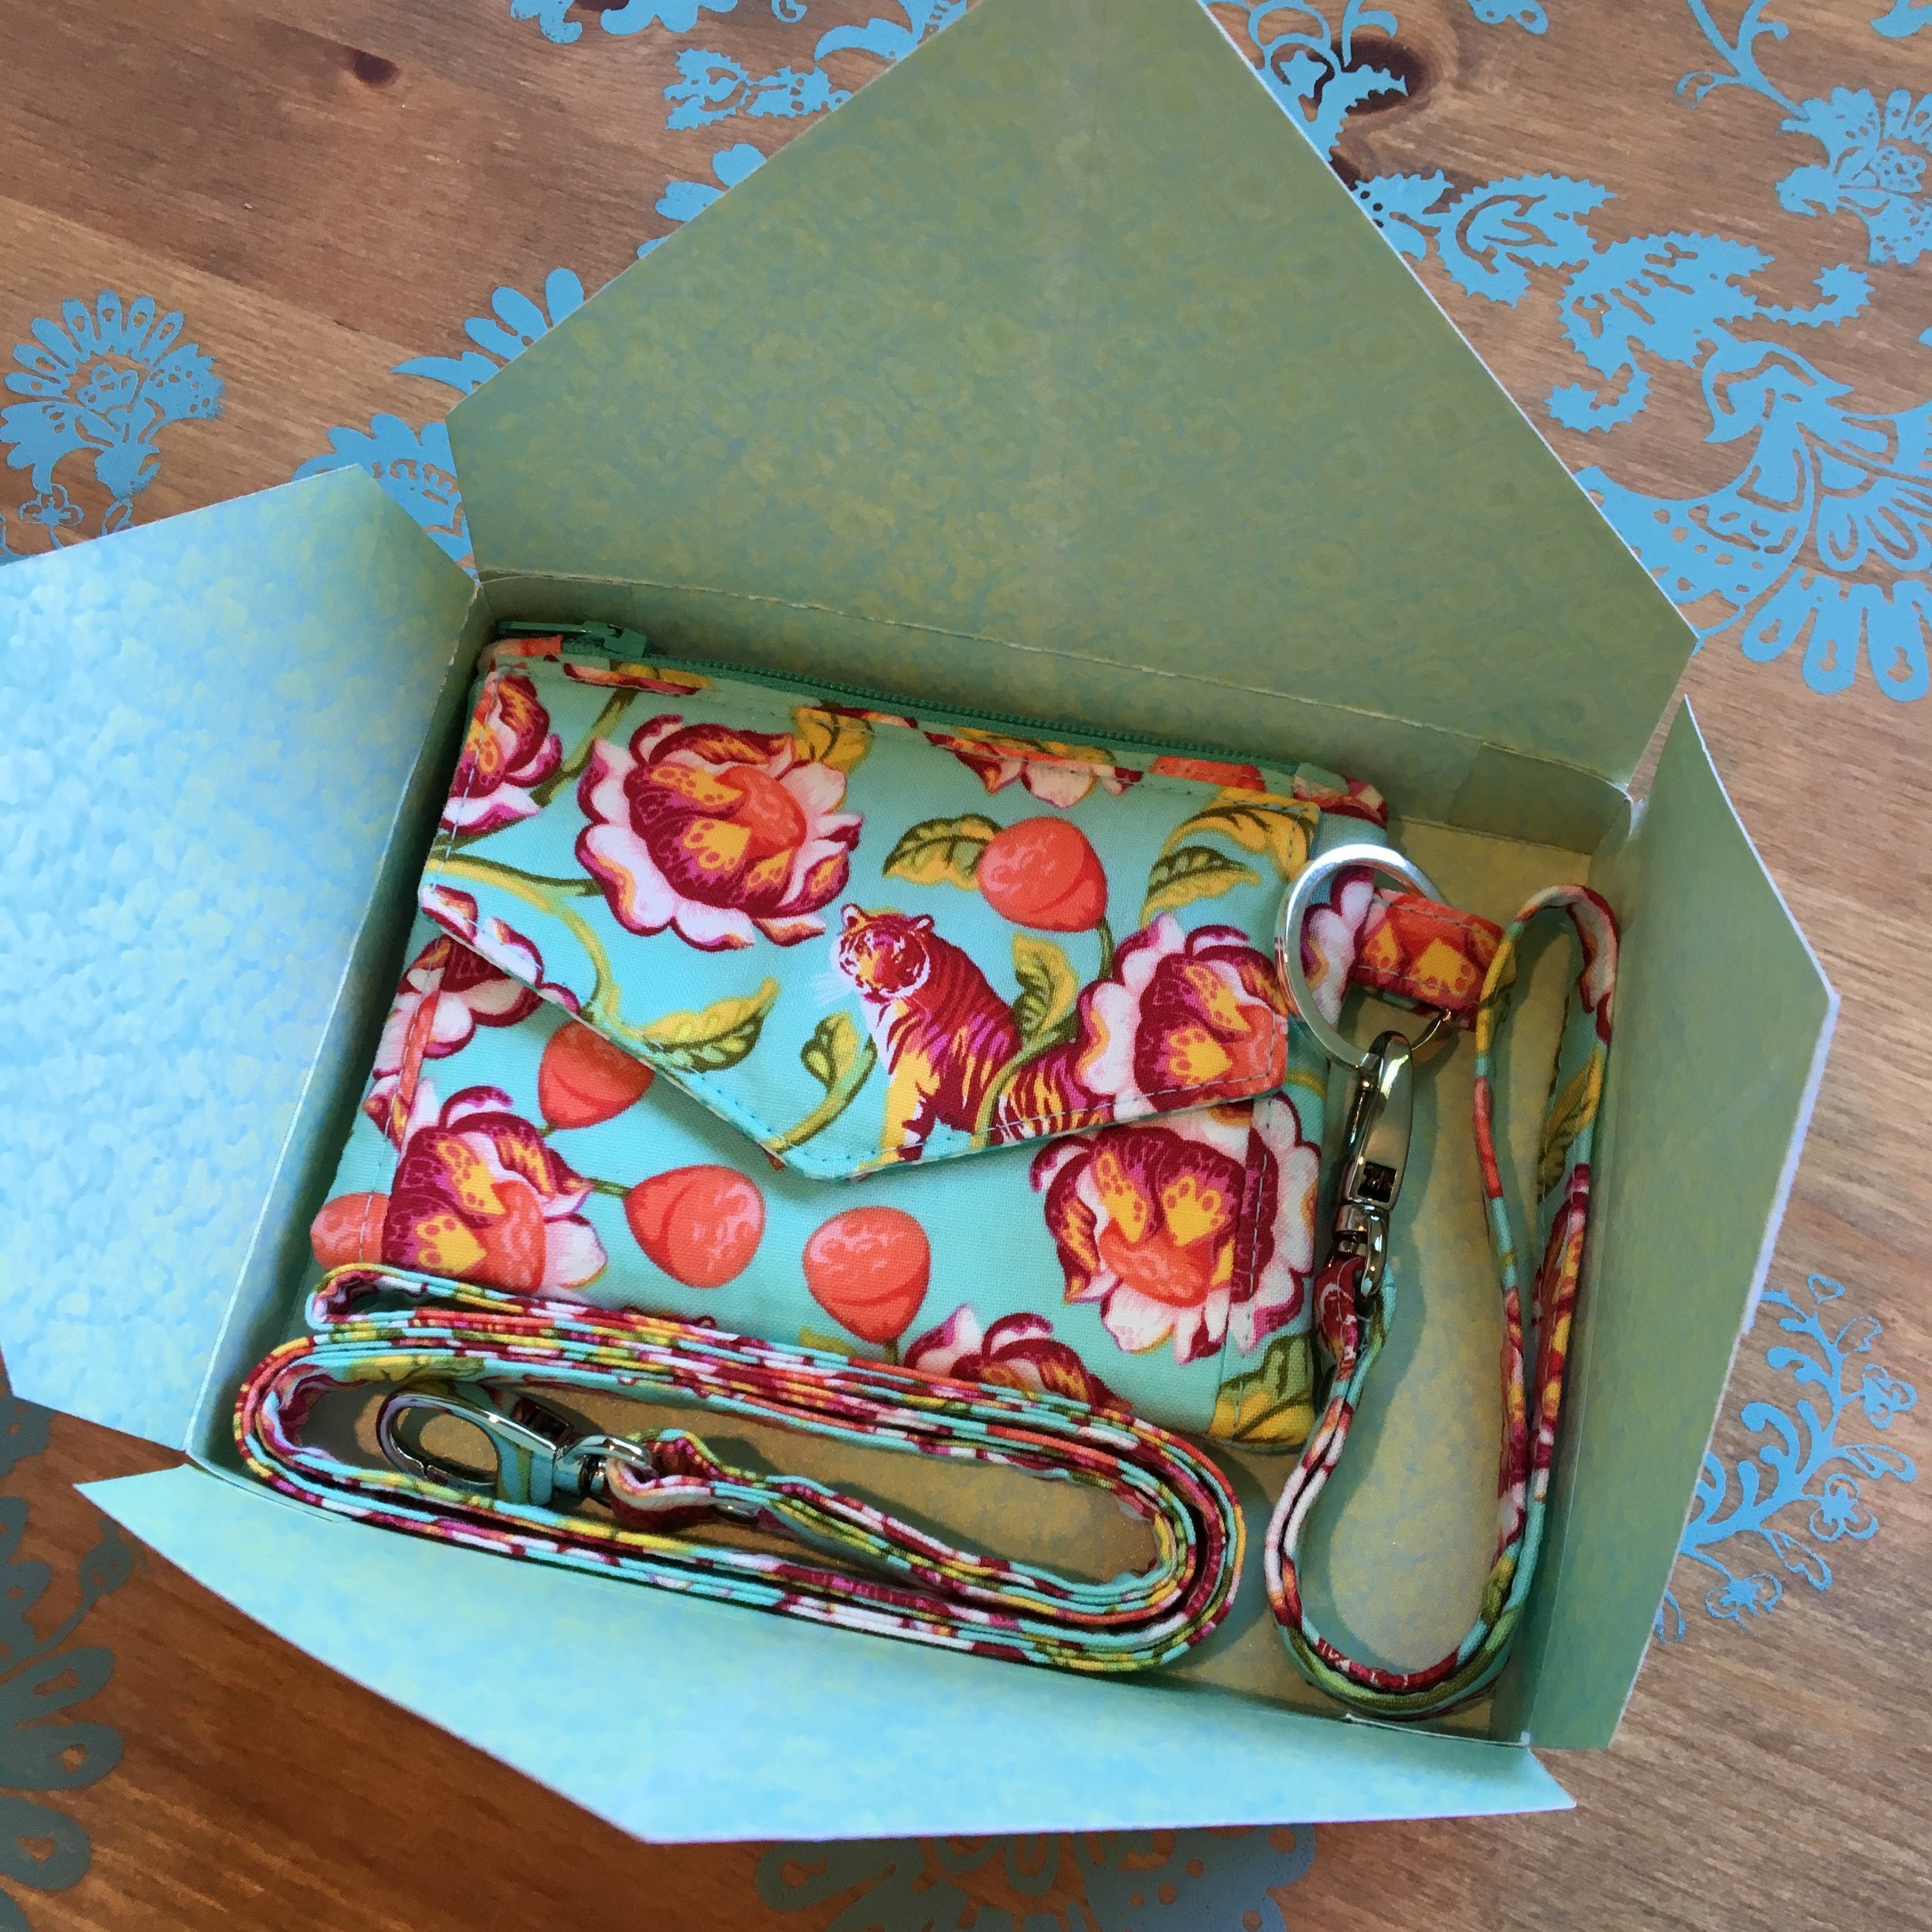
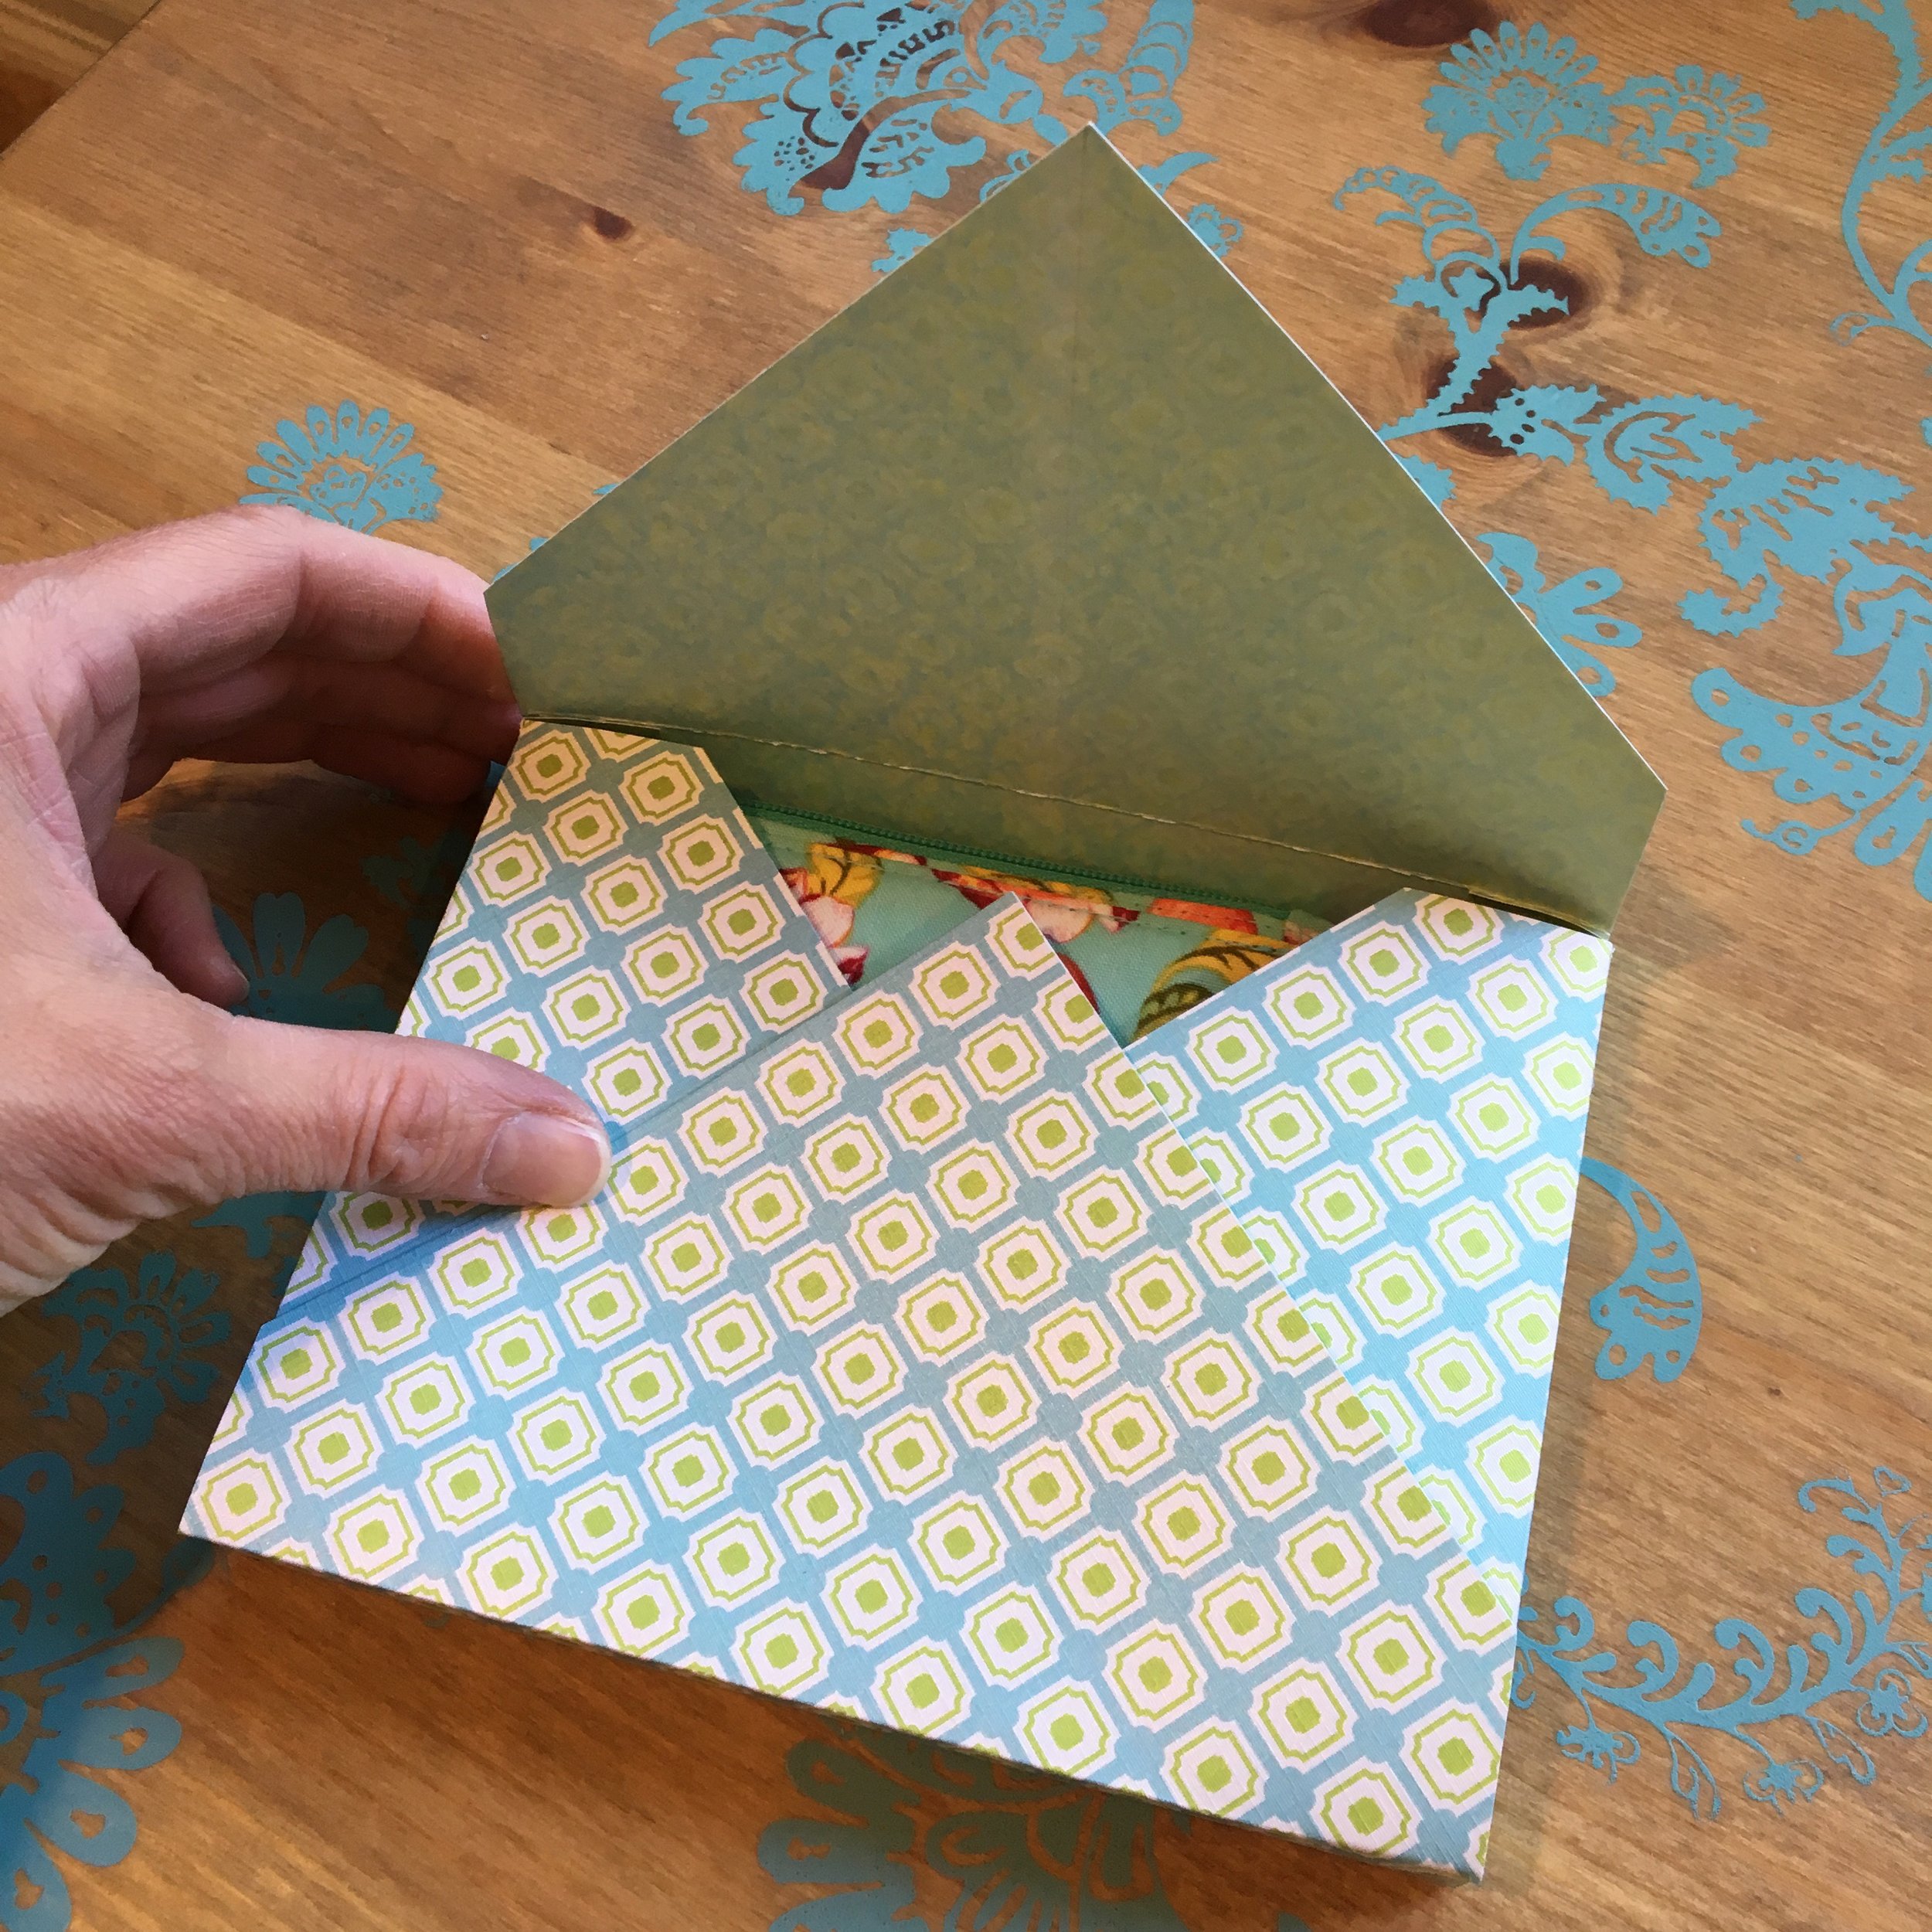
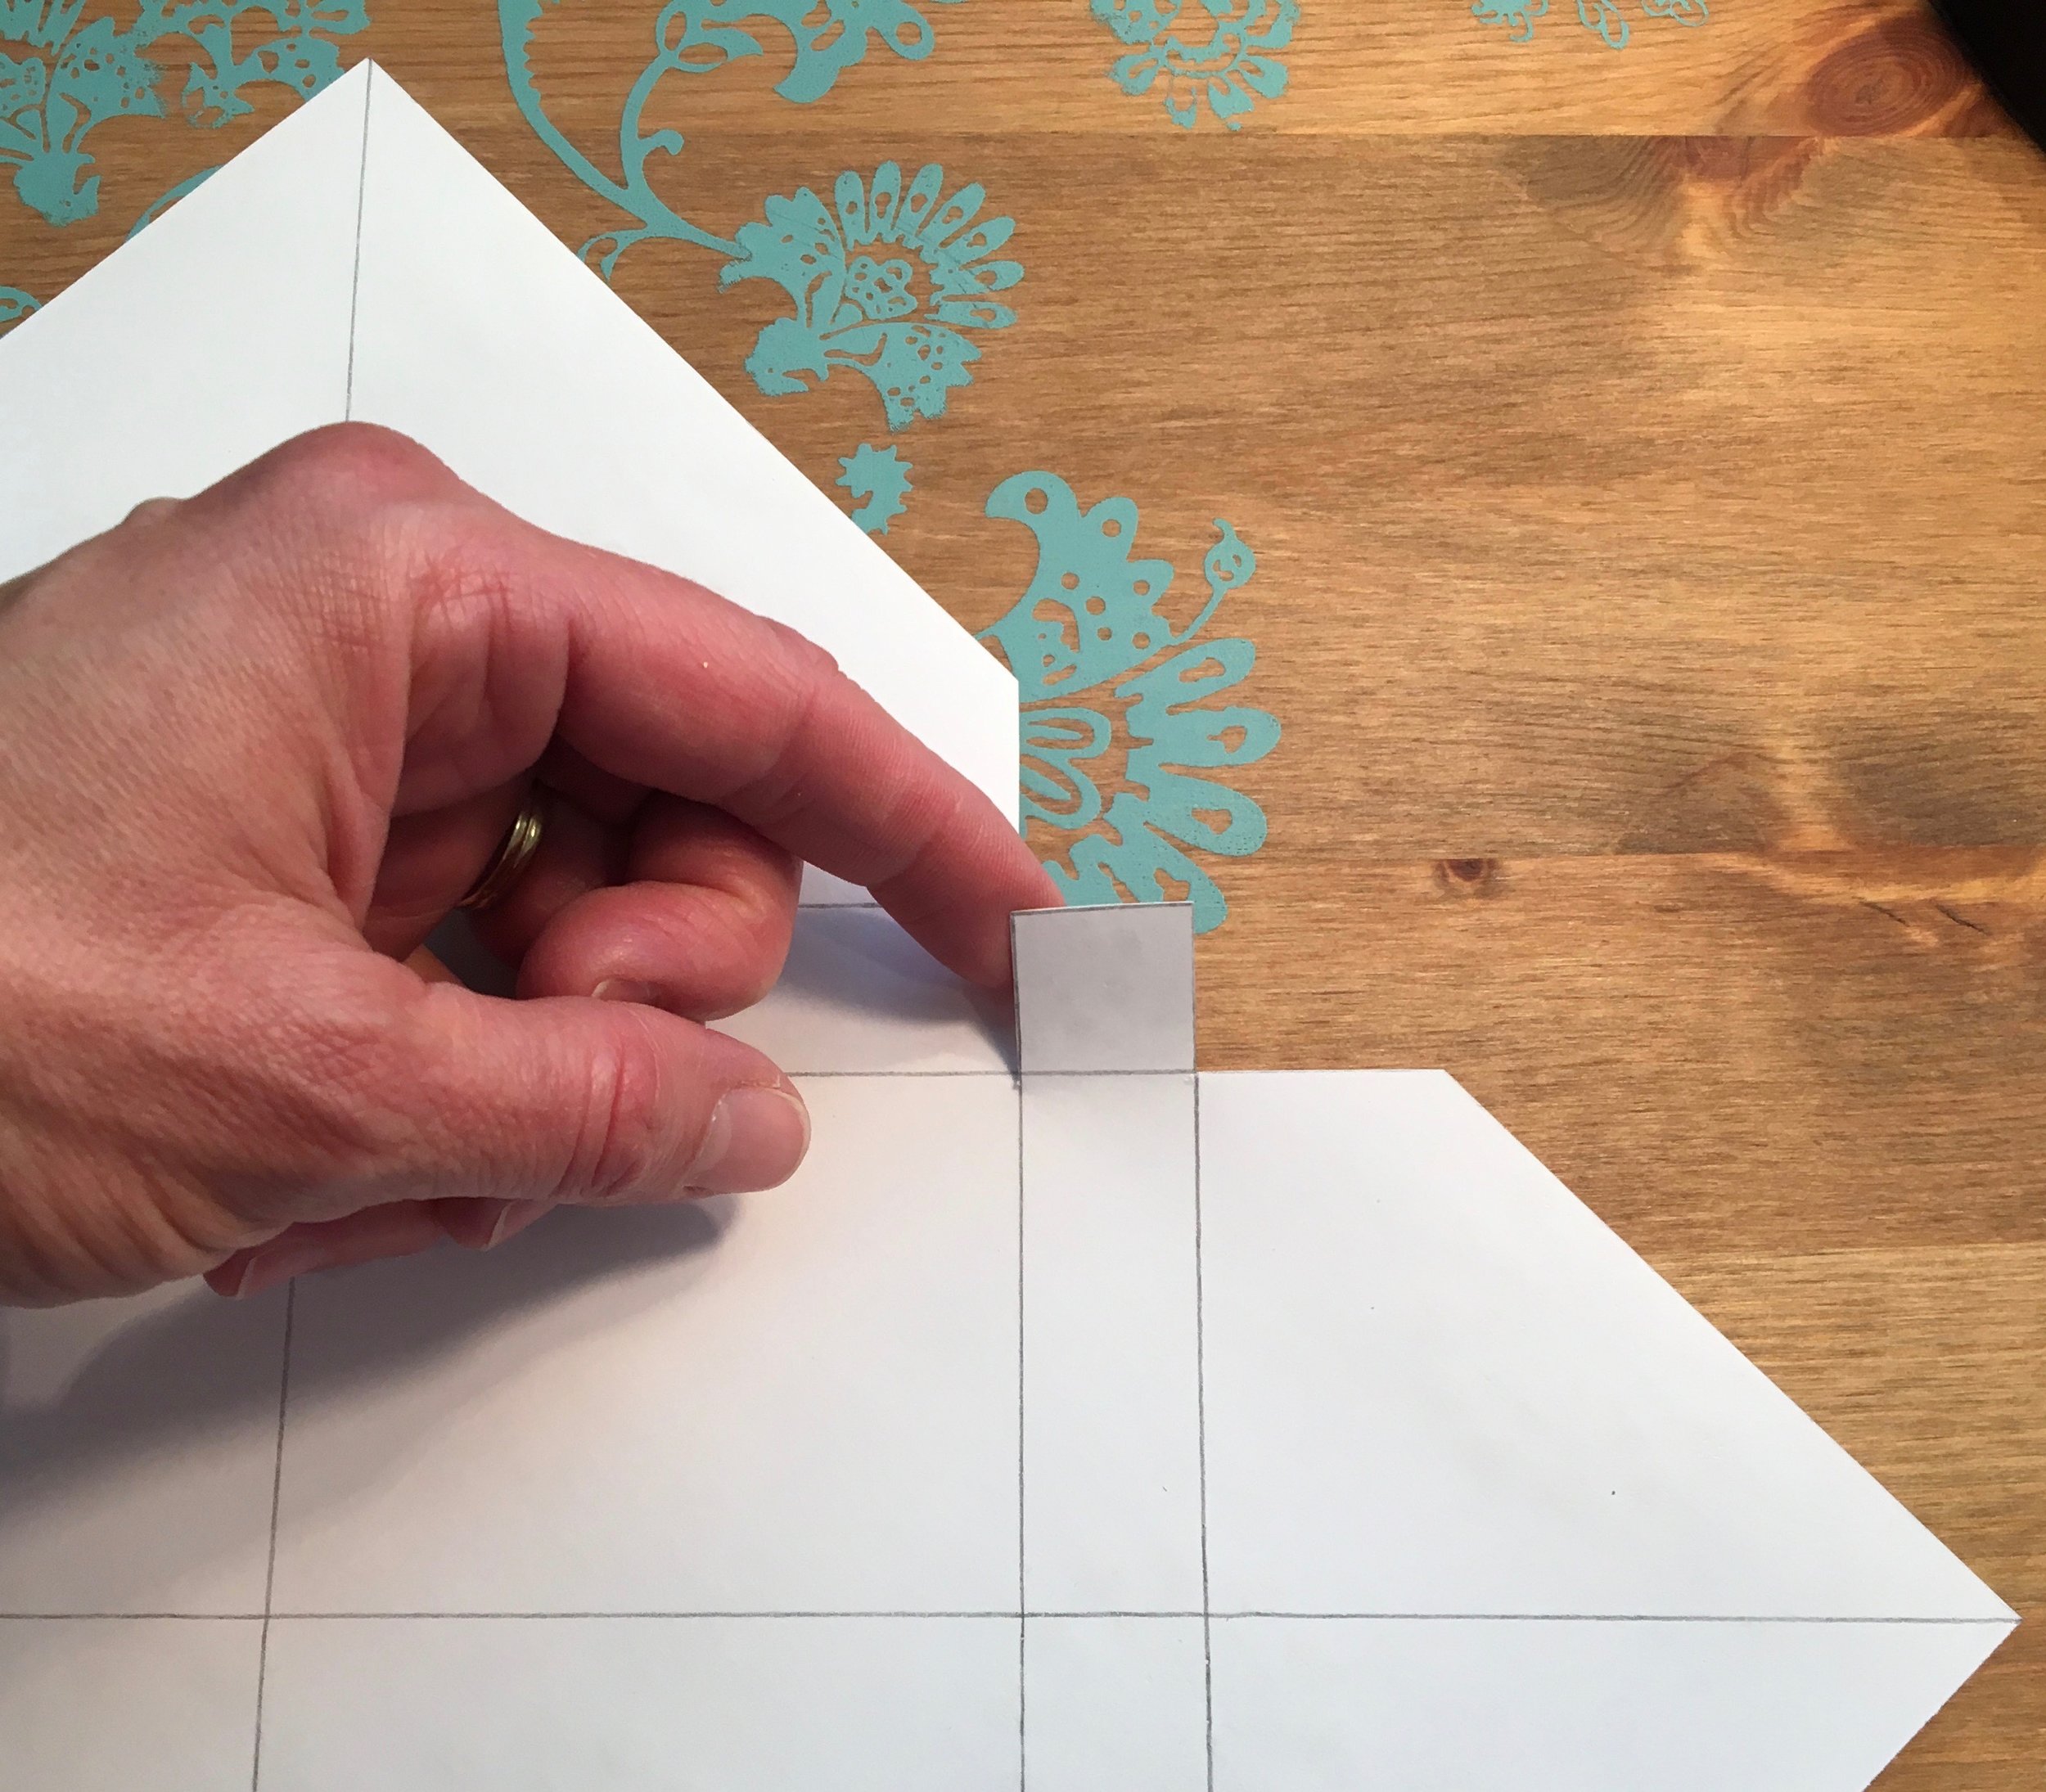
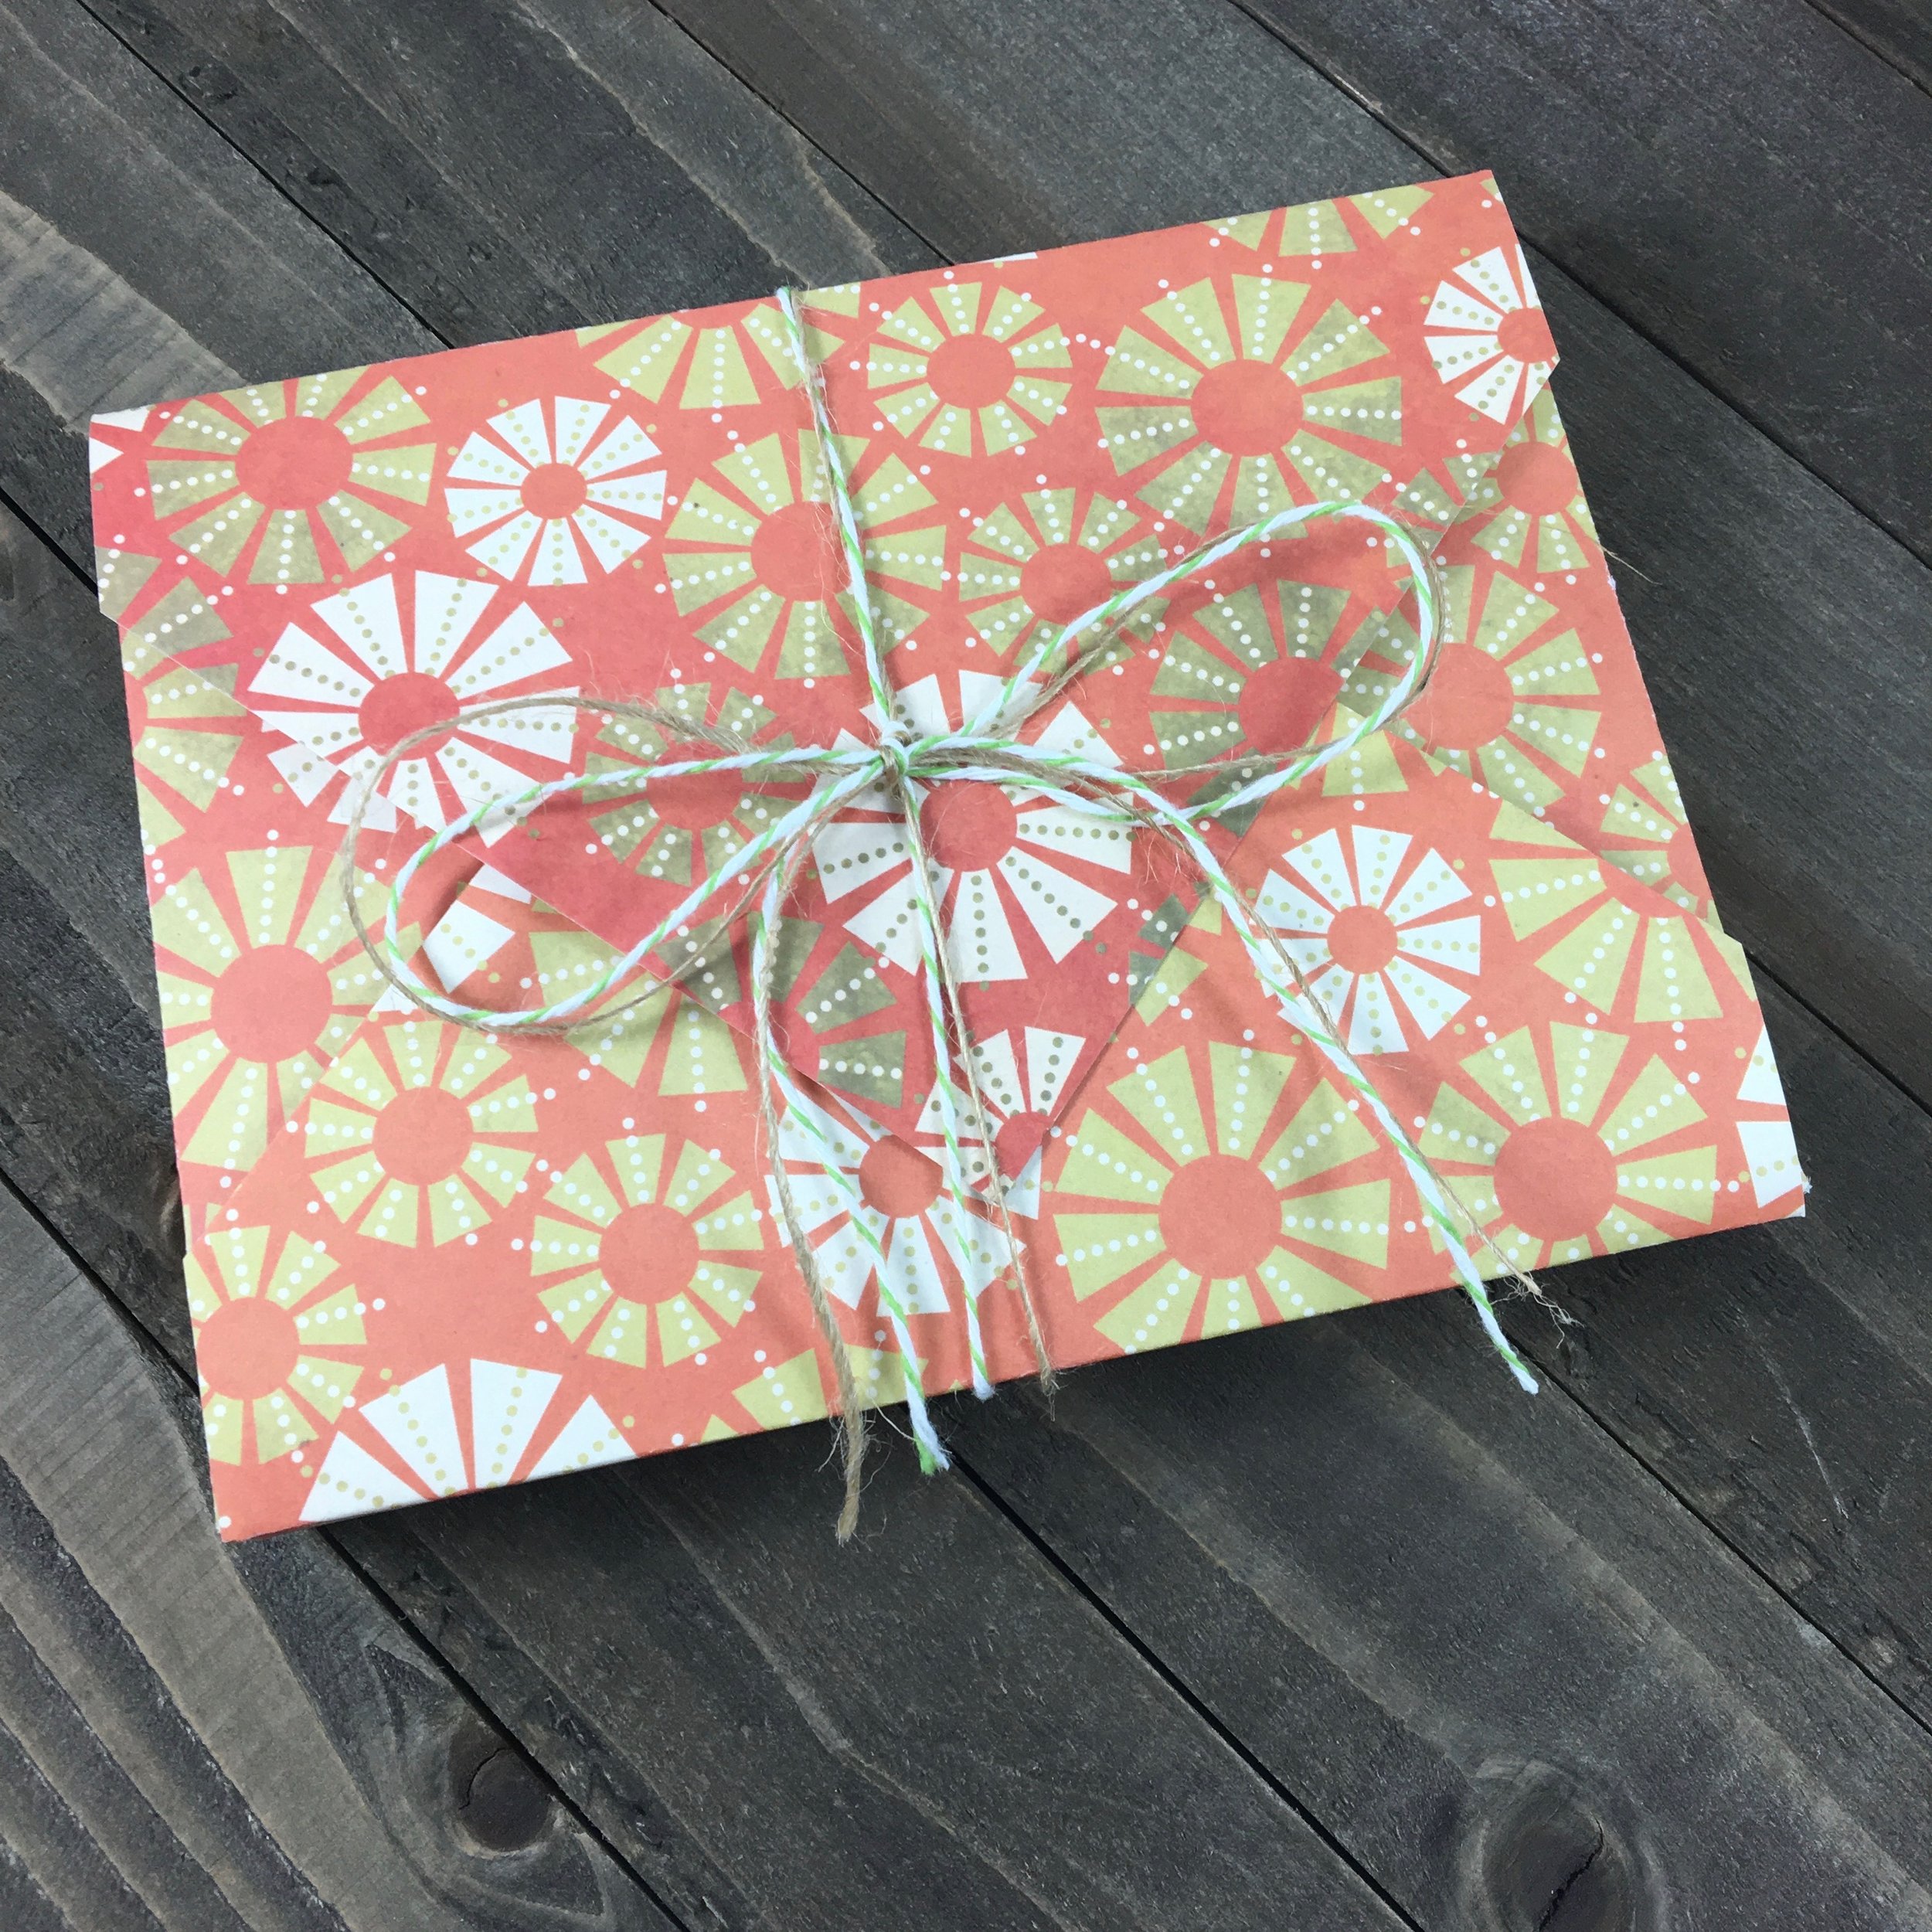
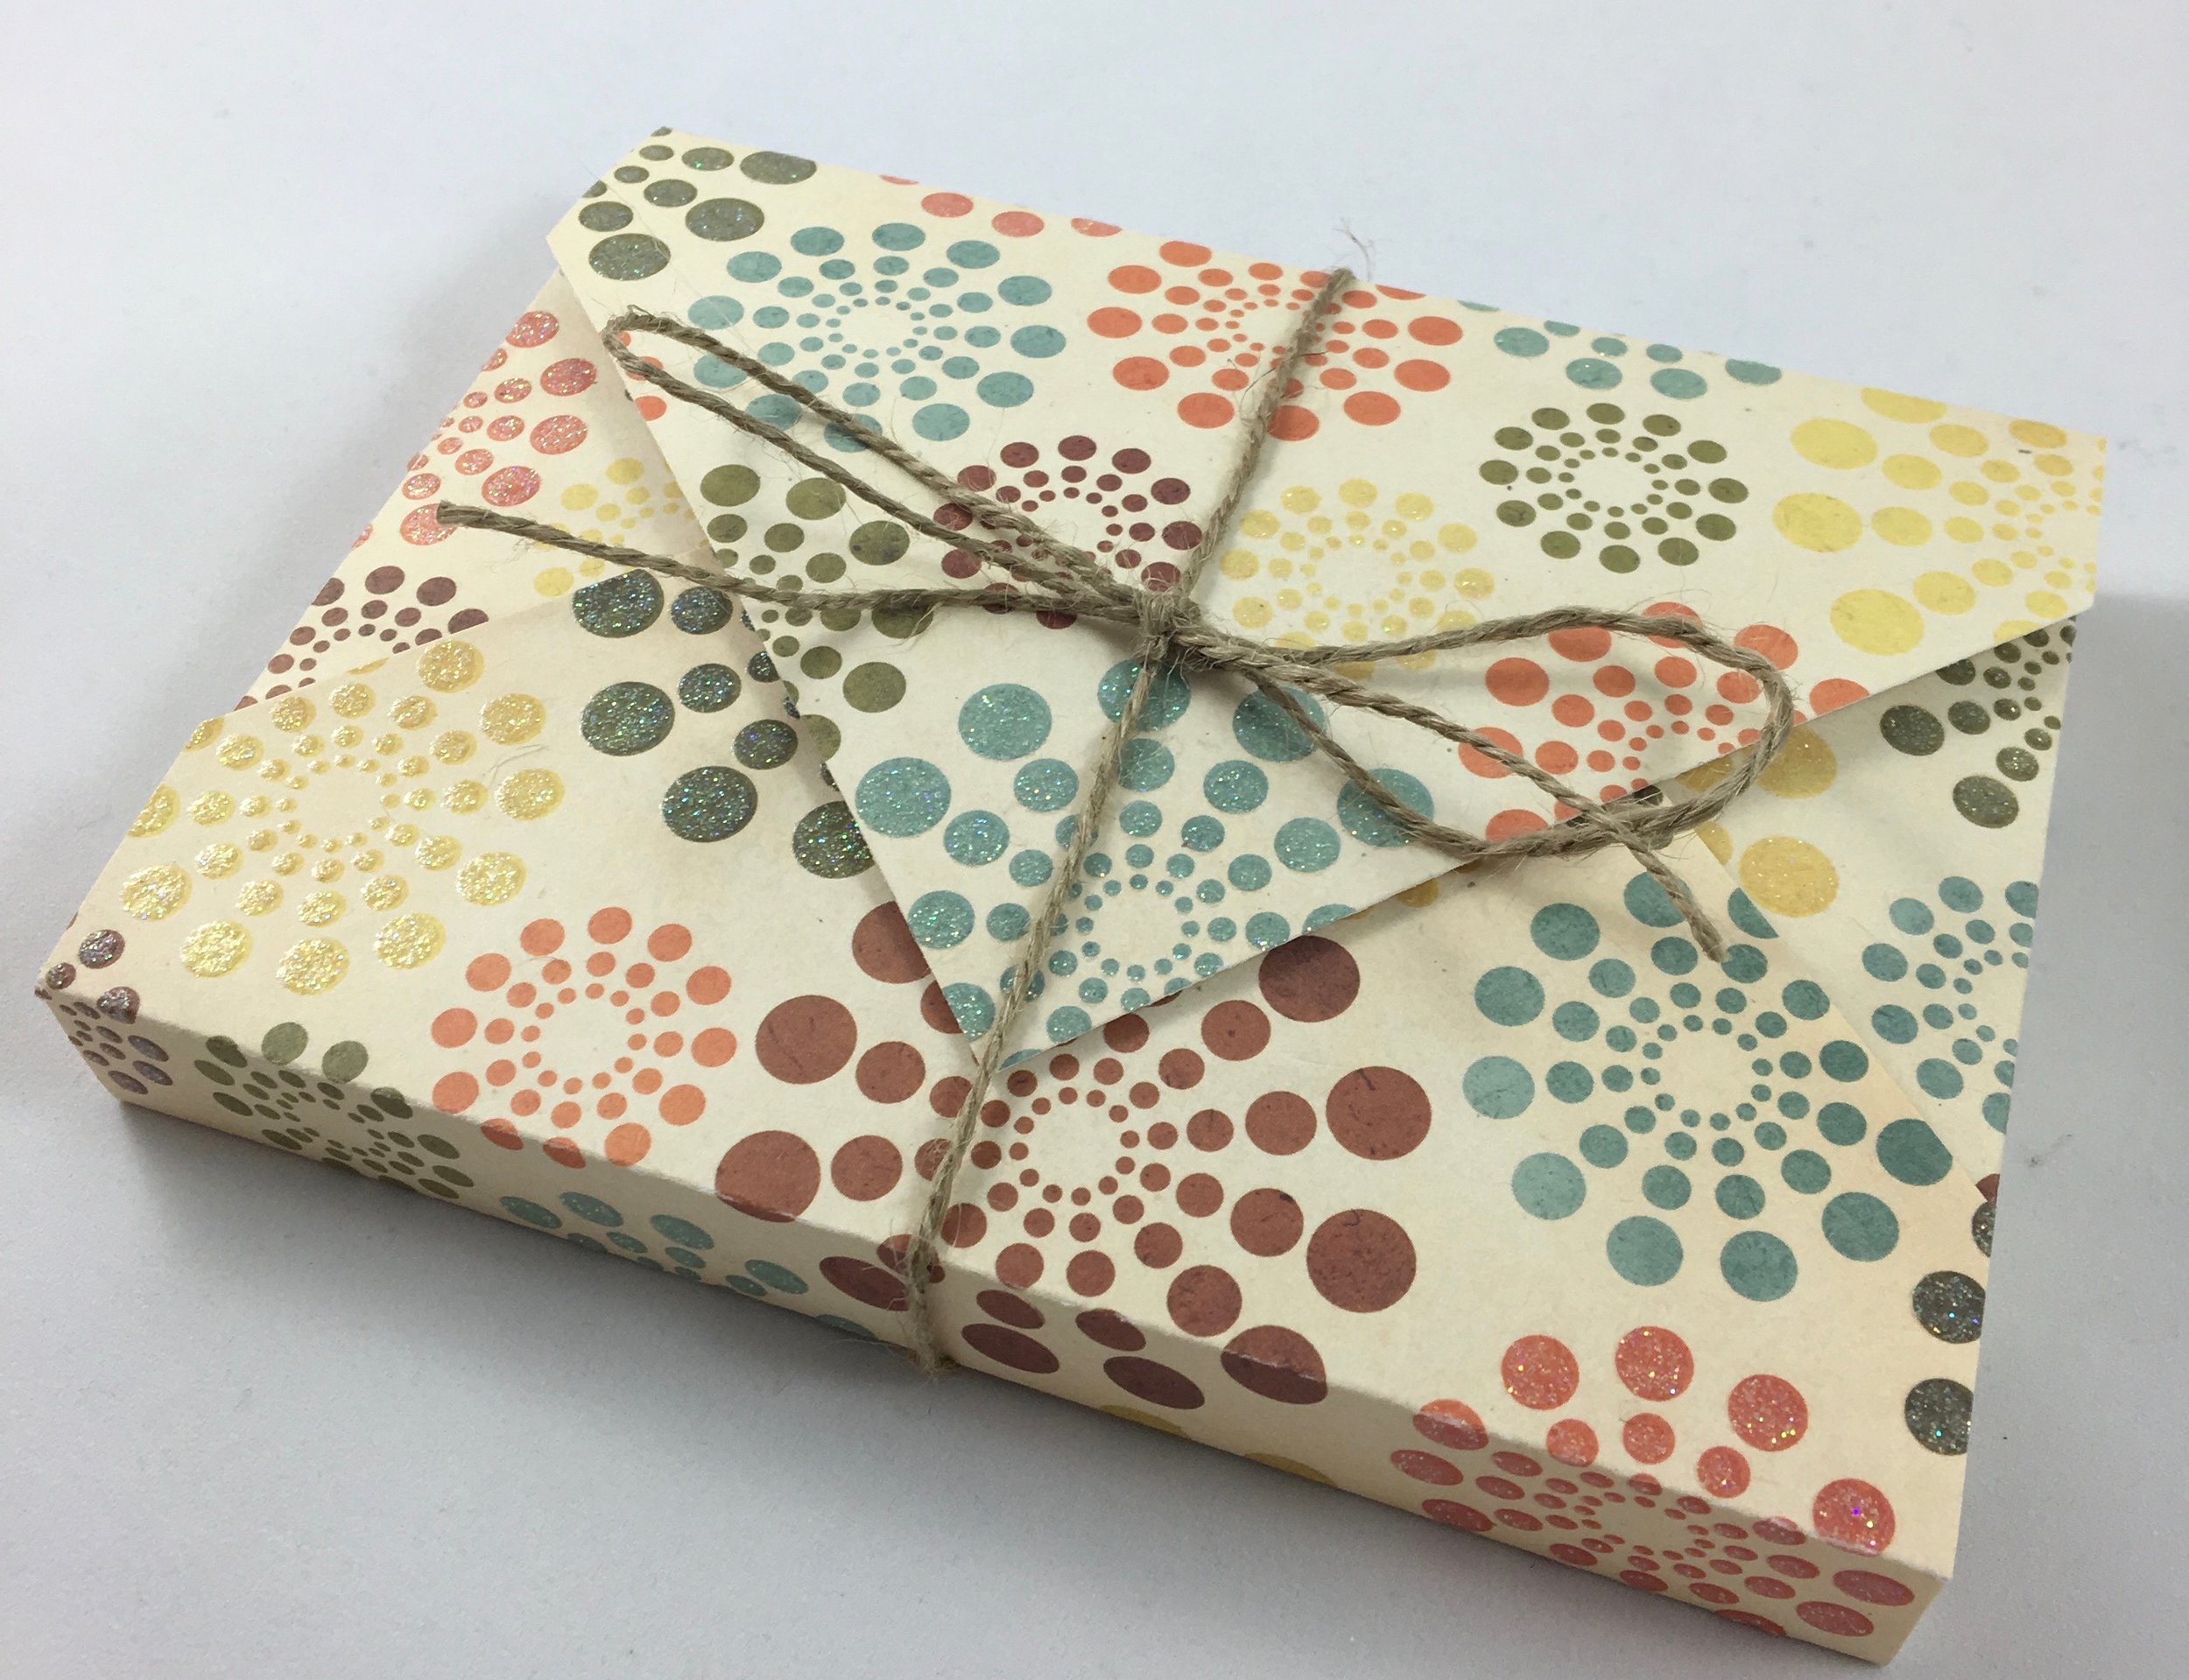
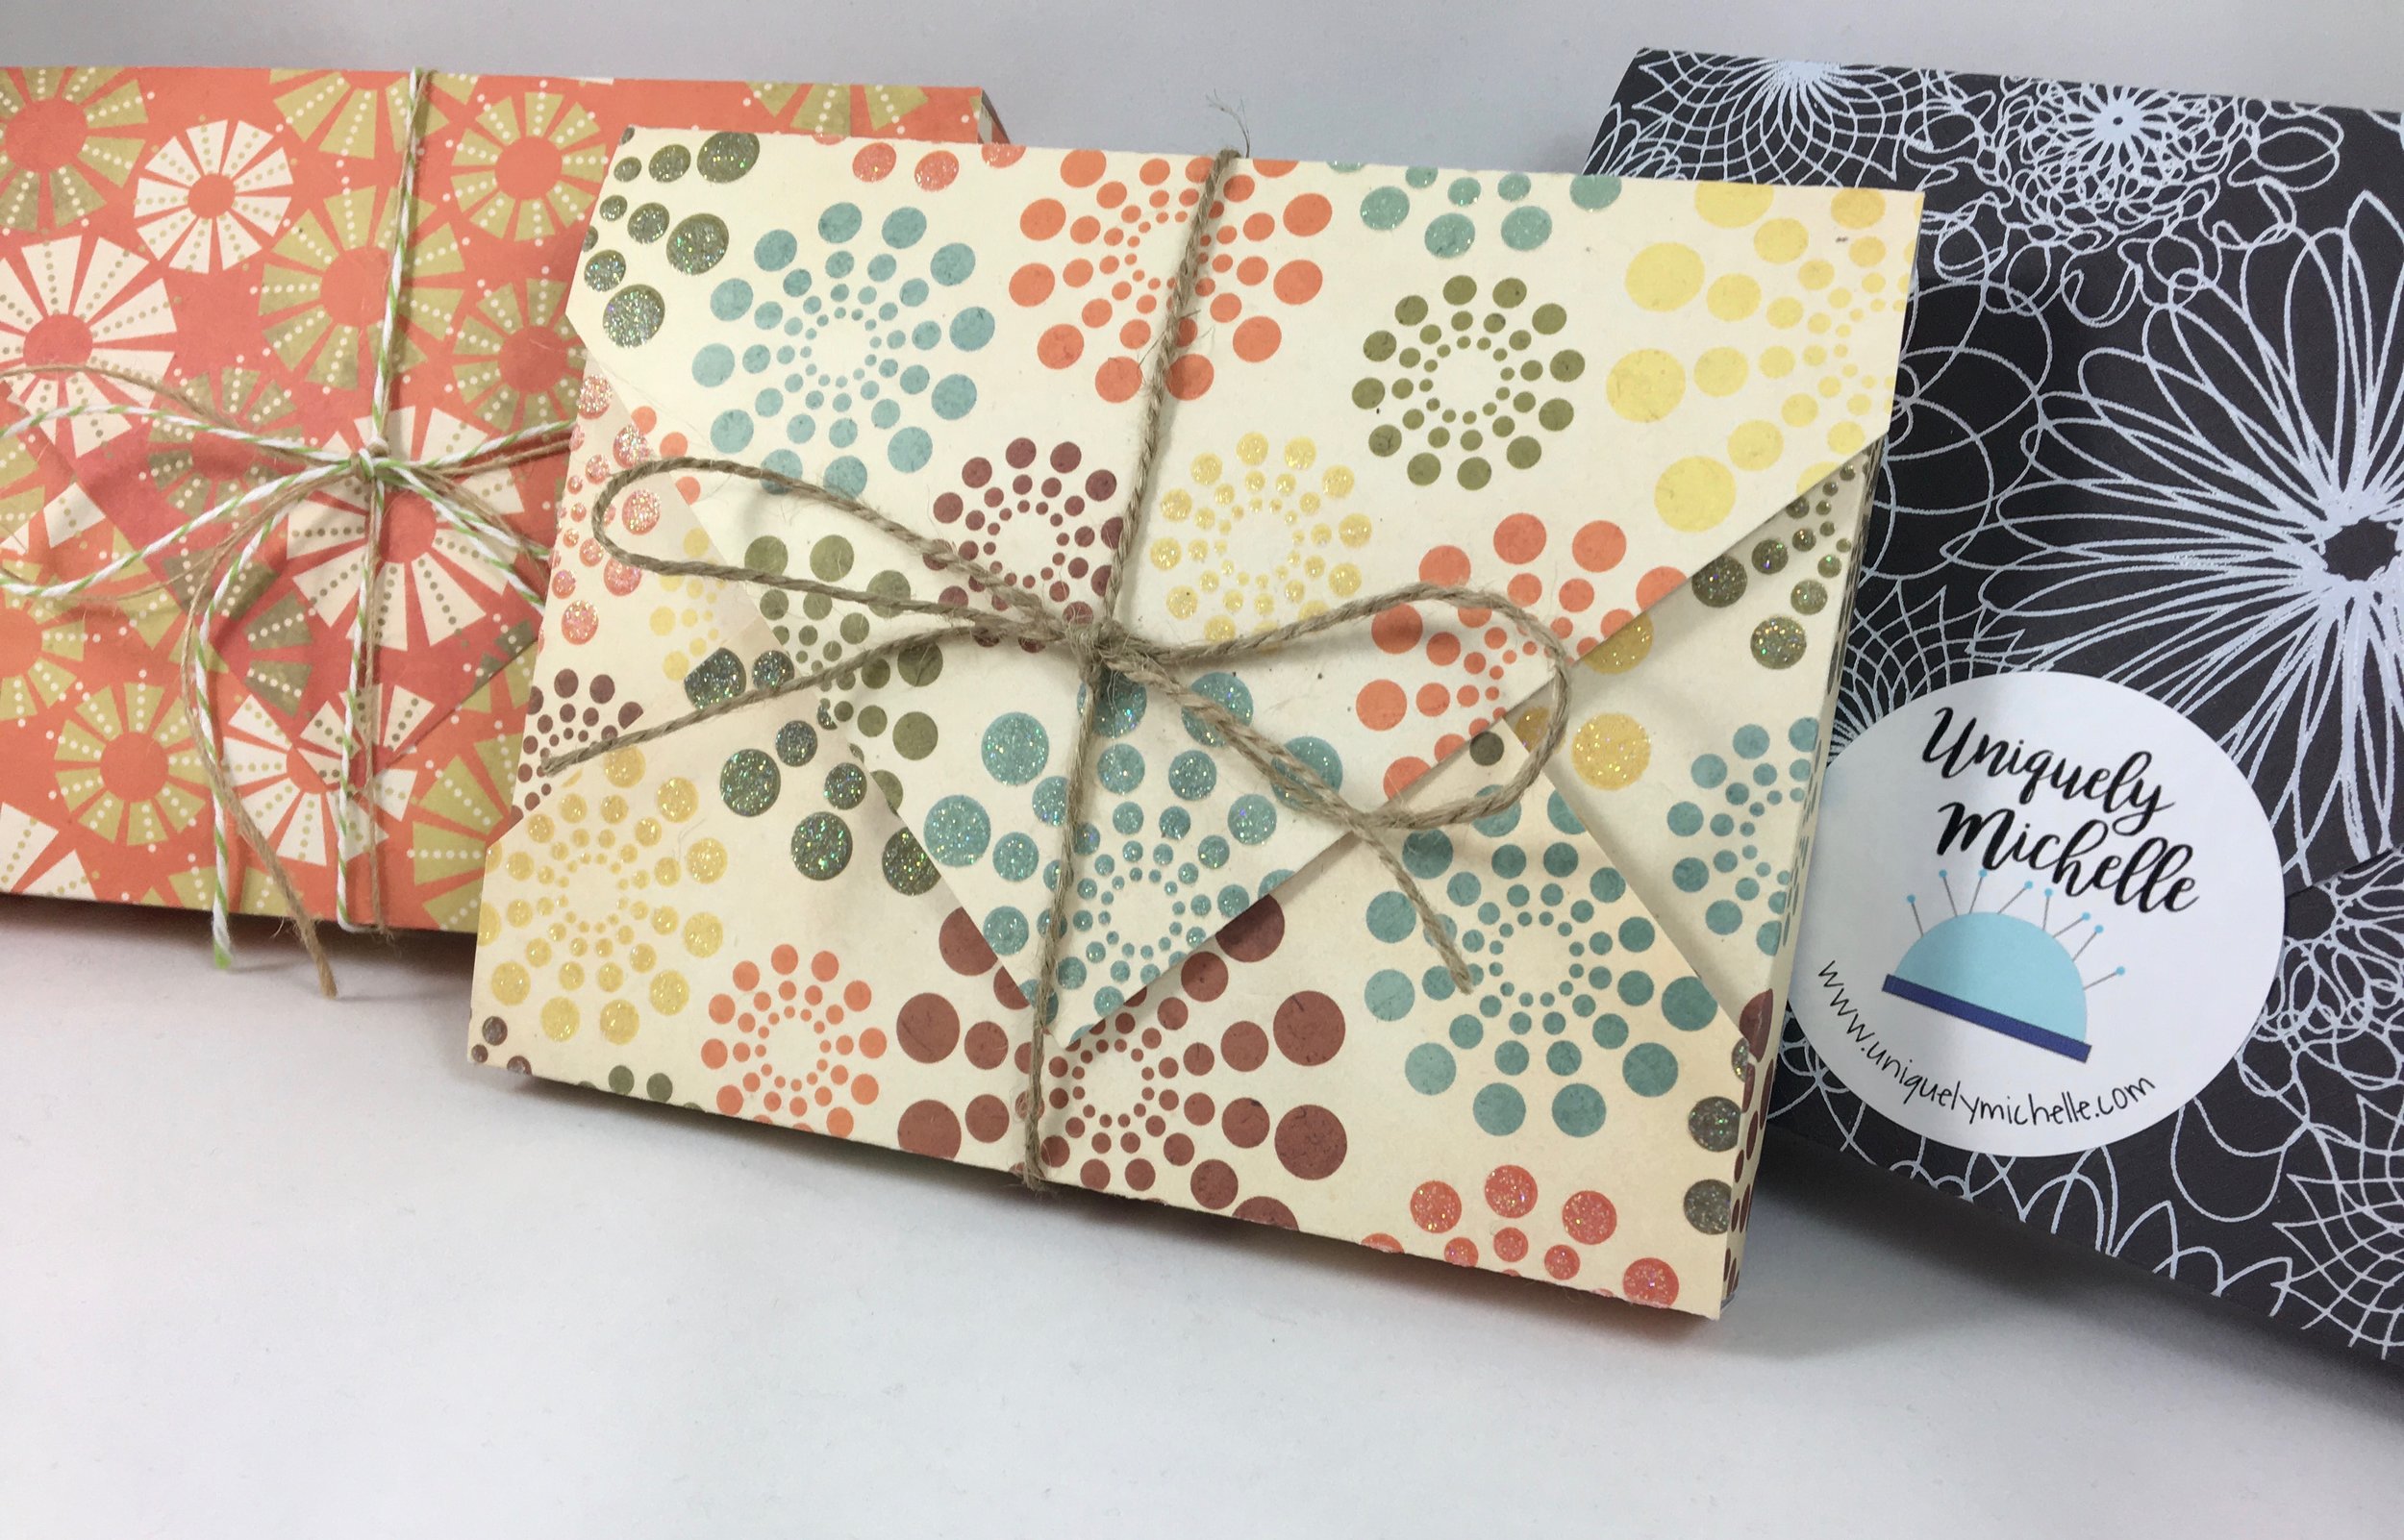
Today, I am sharing a FREE pattern that has a snap! This pattern will be perfect to try out some snaps. Snaps always add a professional touch. As you already know from the previous posts this week, having the correct tools to install high-quality snaps can make the process easy and fun and . . . it doesn’t have to be expensive to get those high-quality tools and snaps!

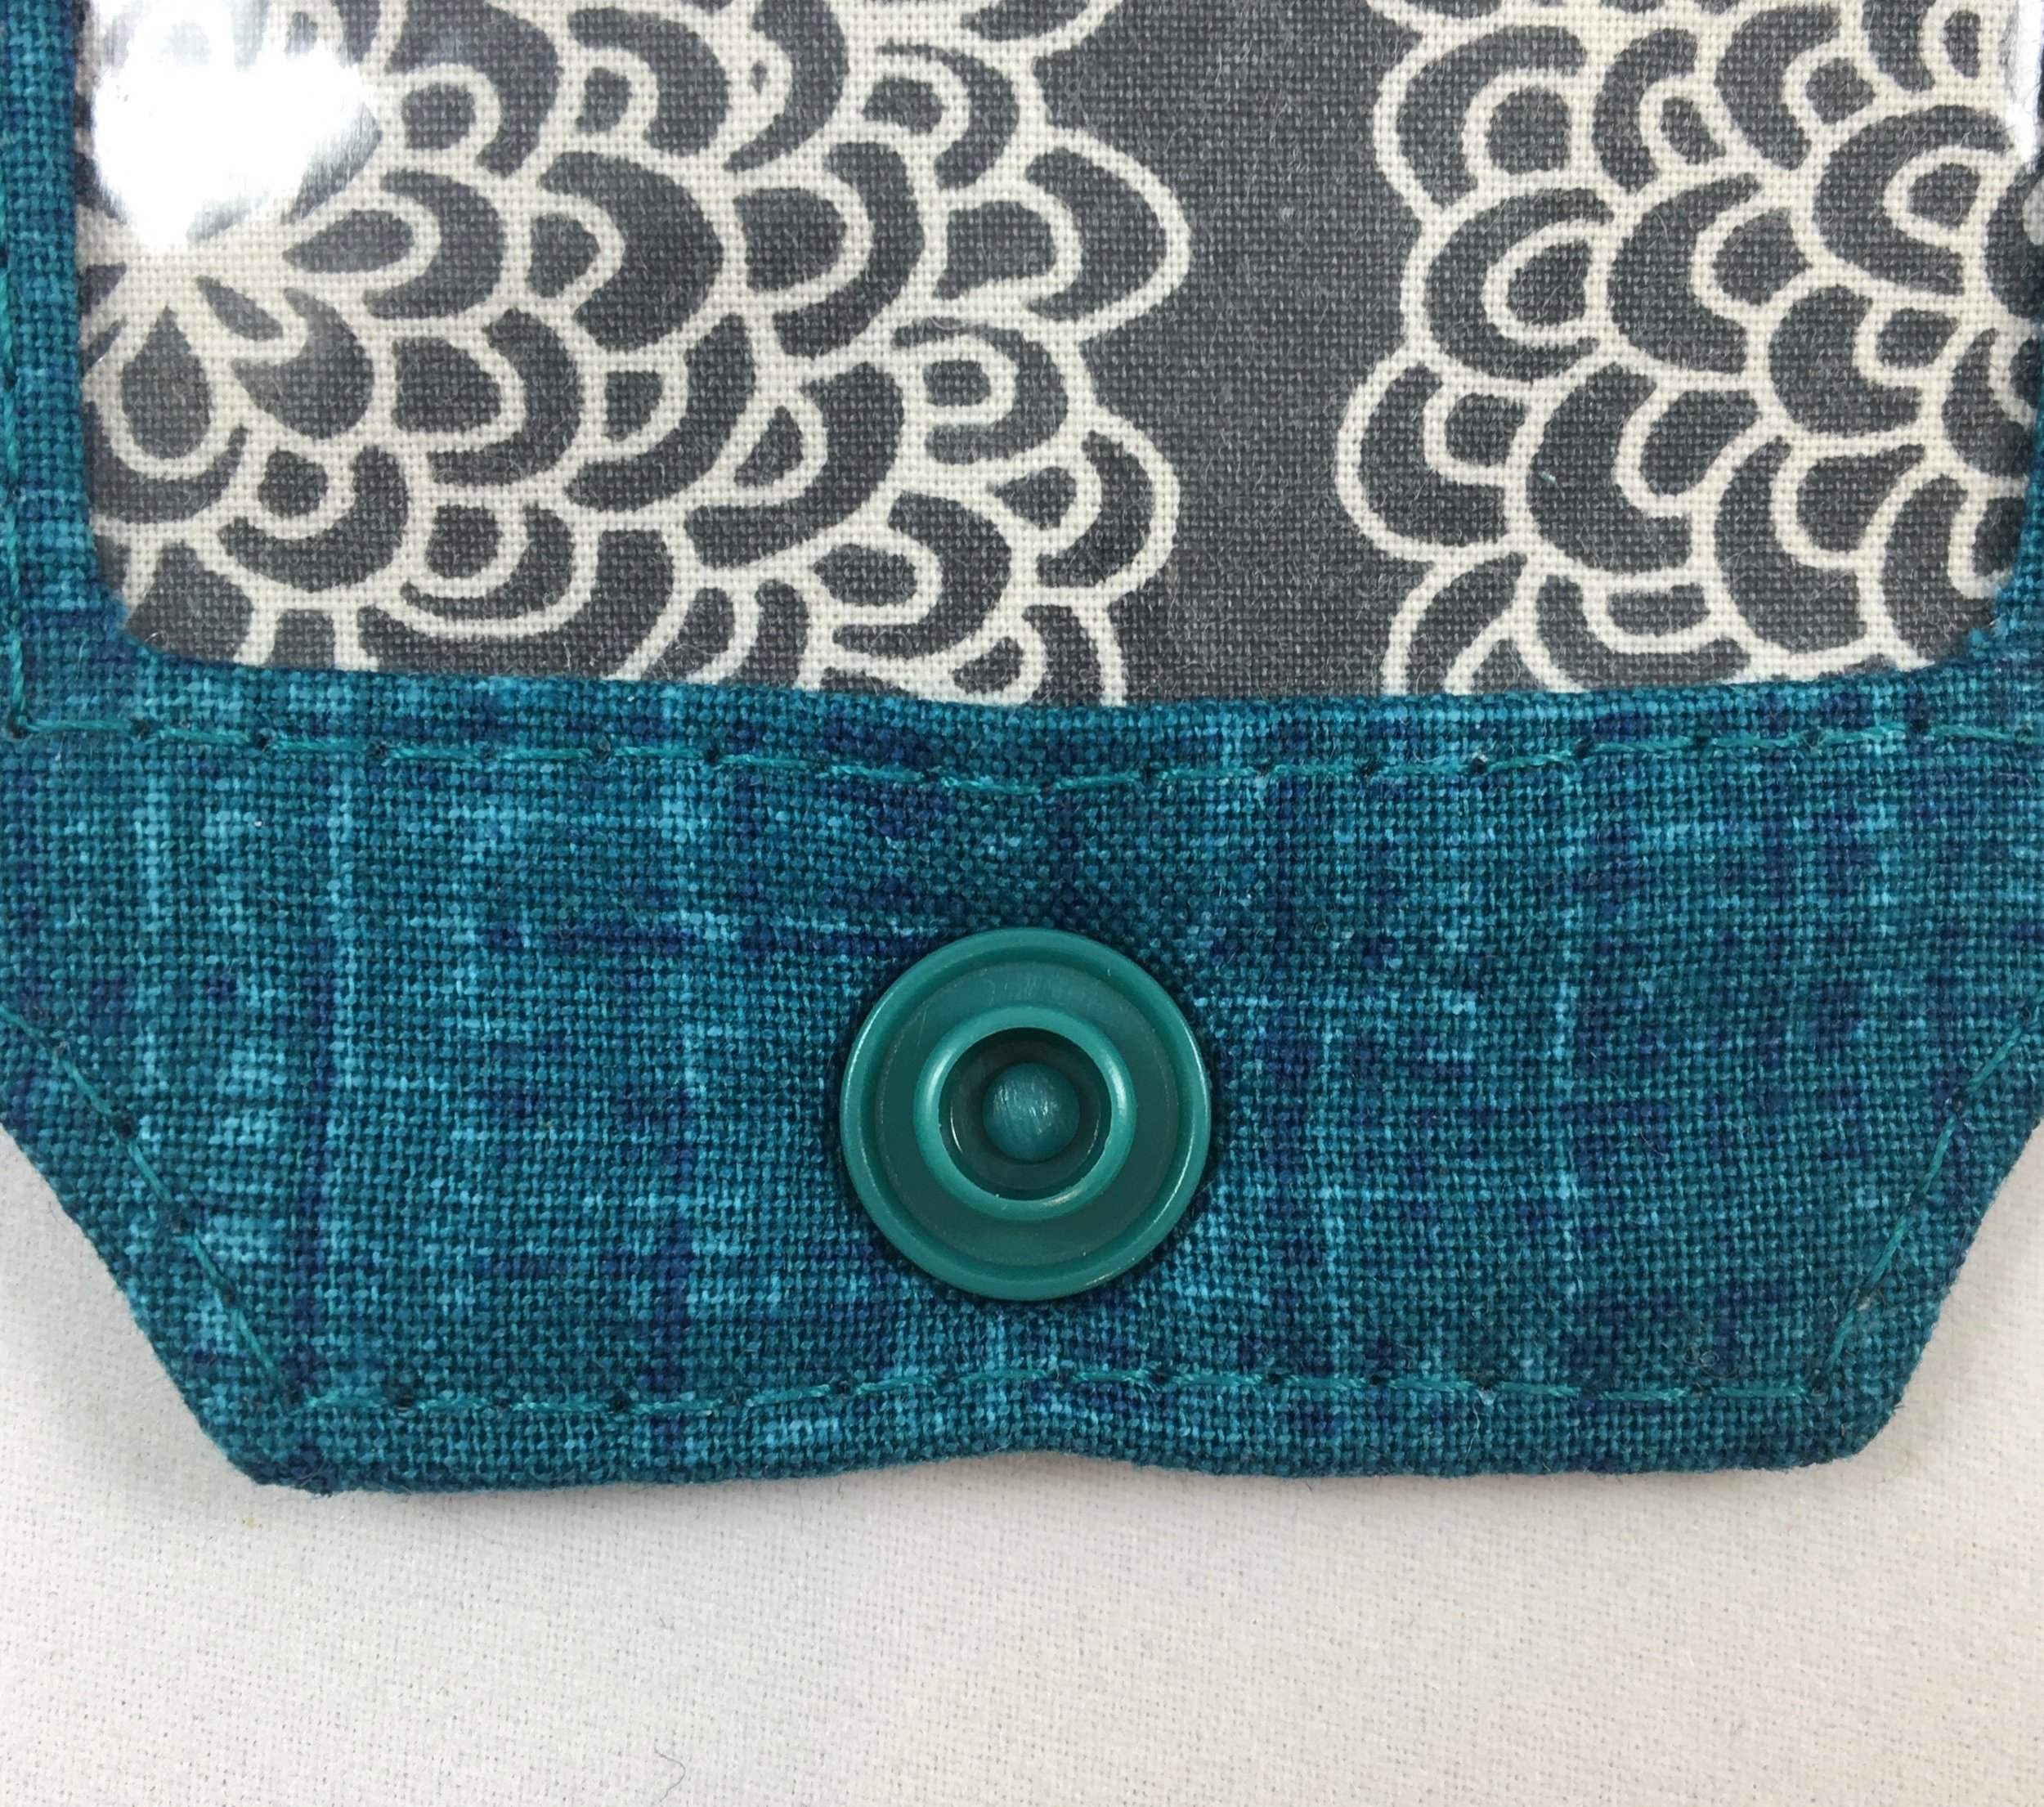
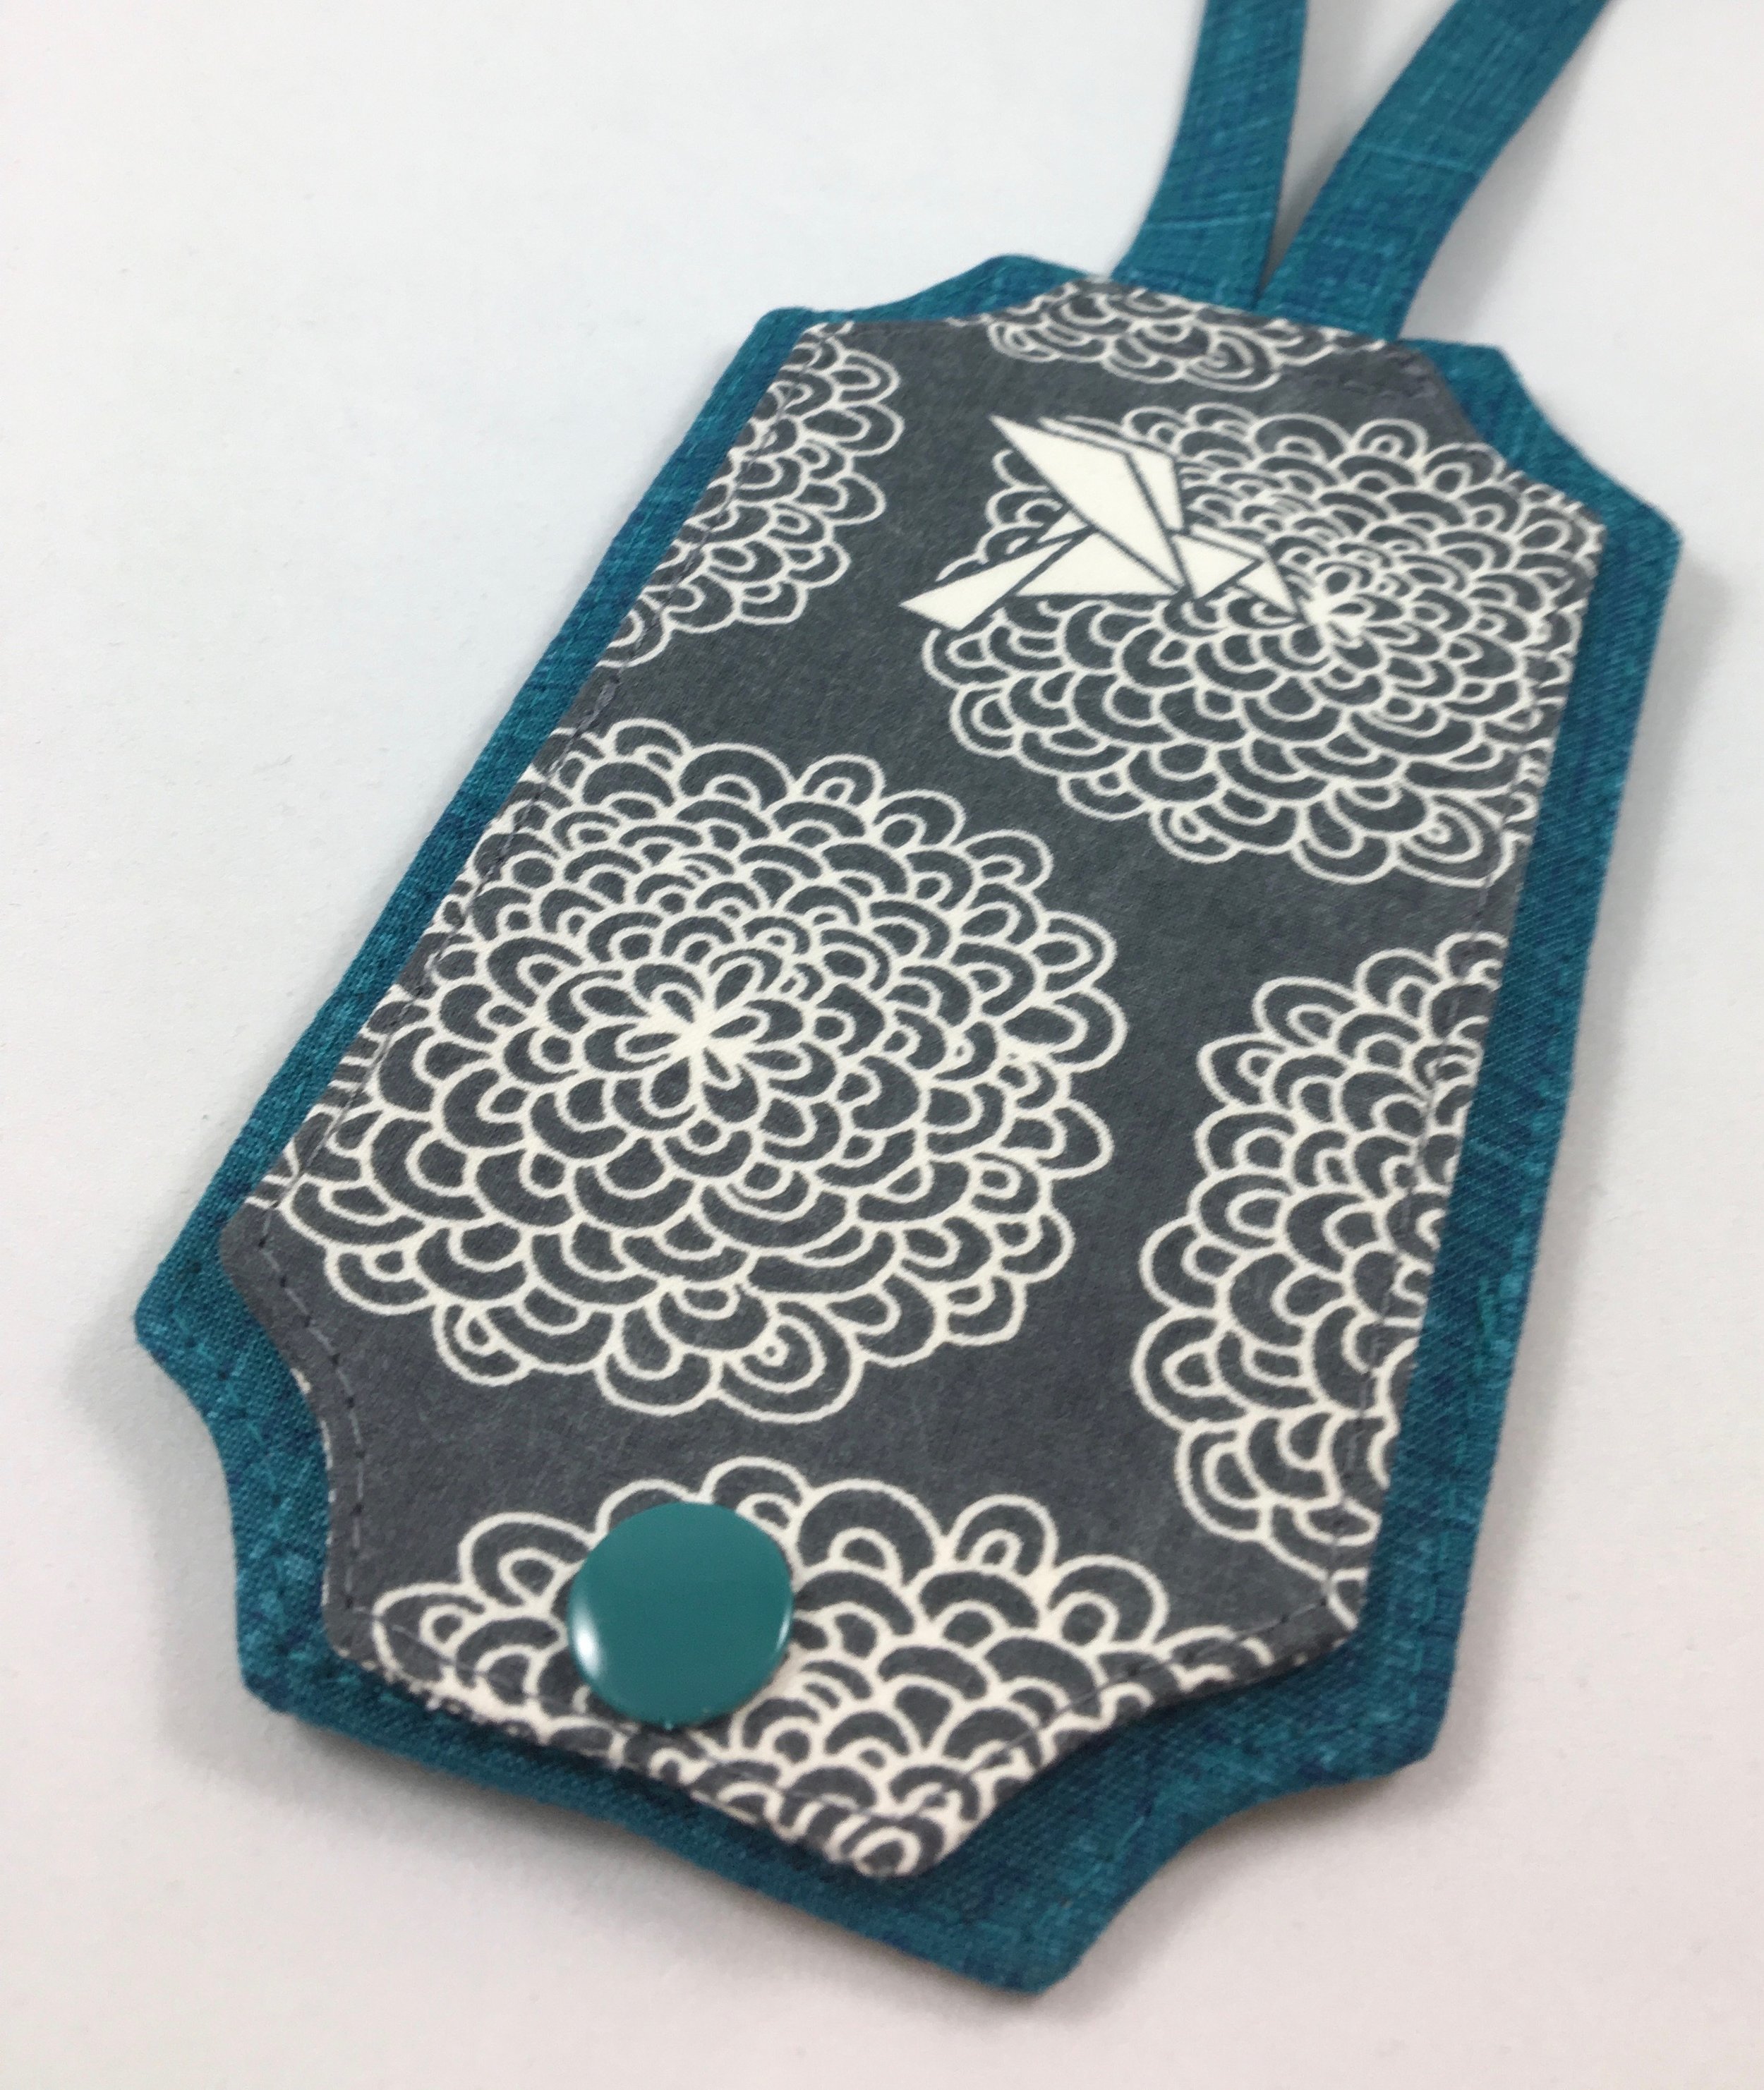
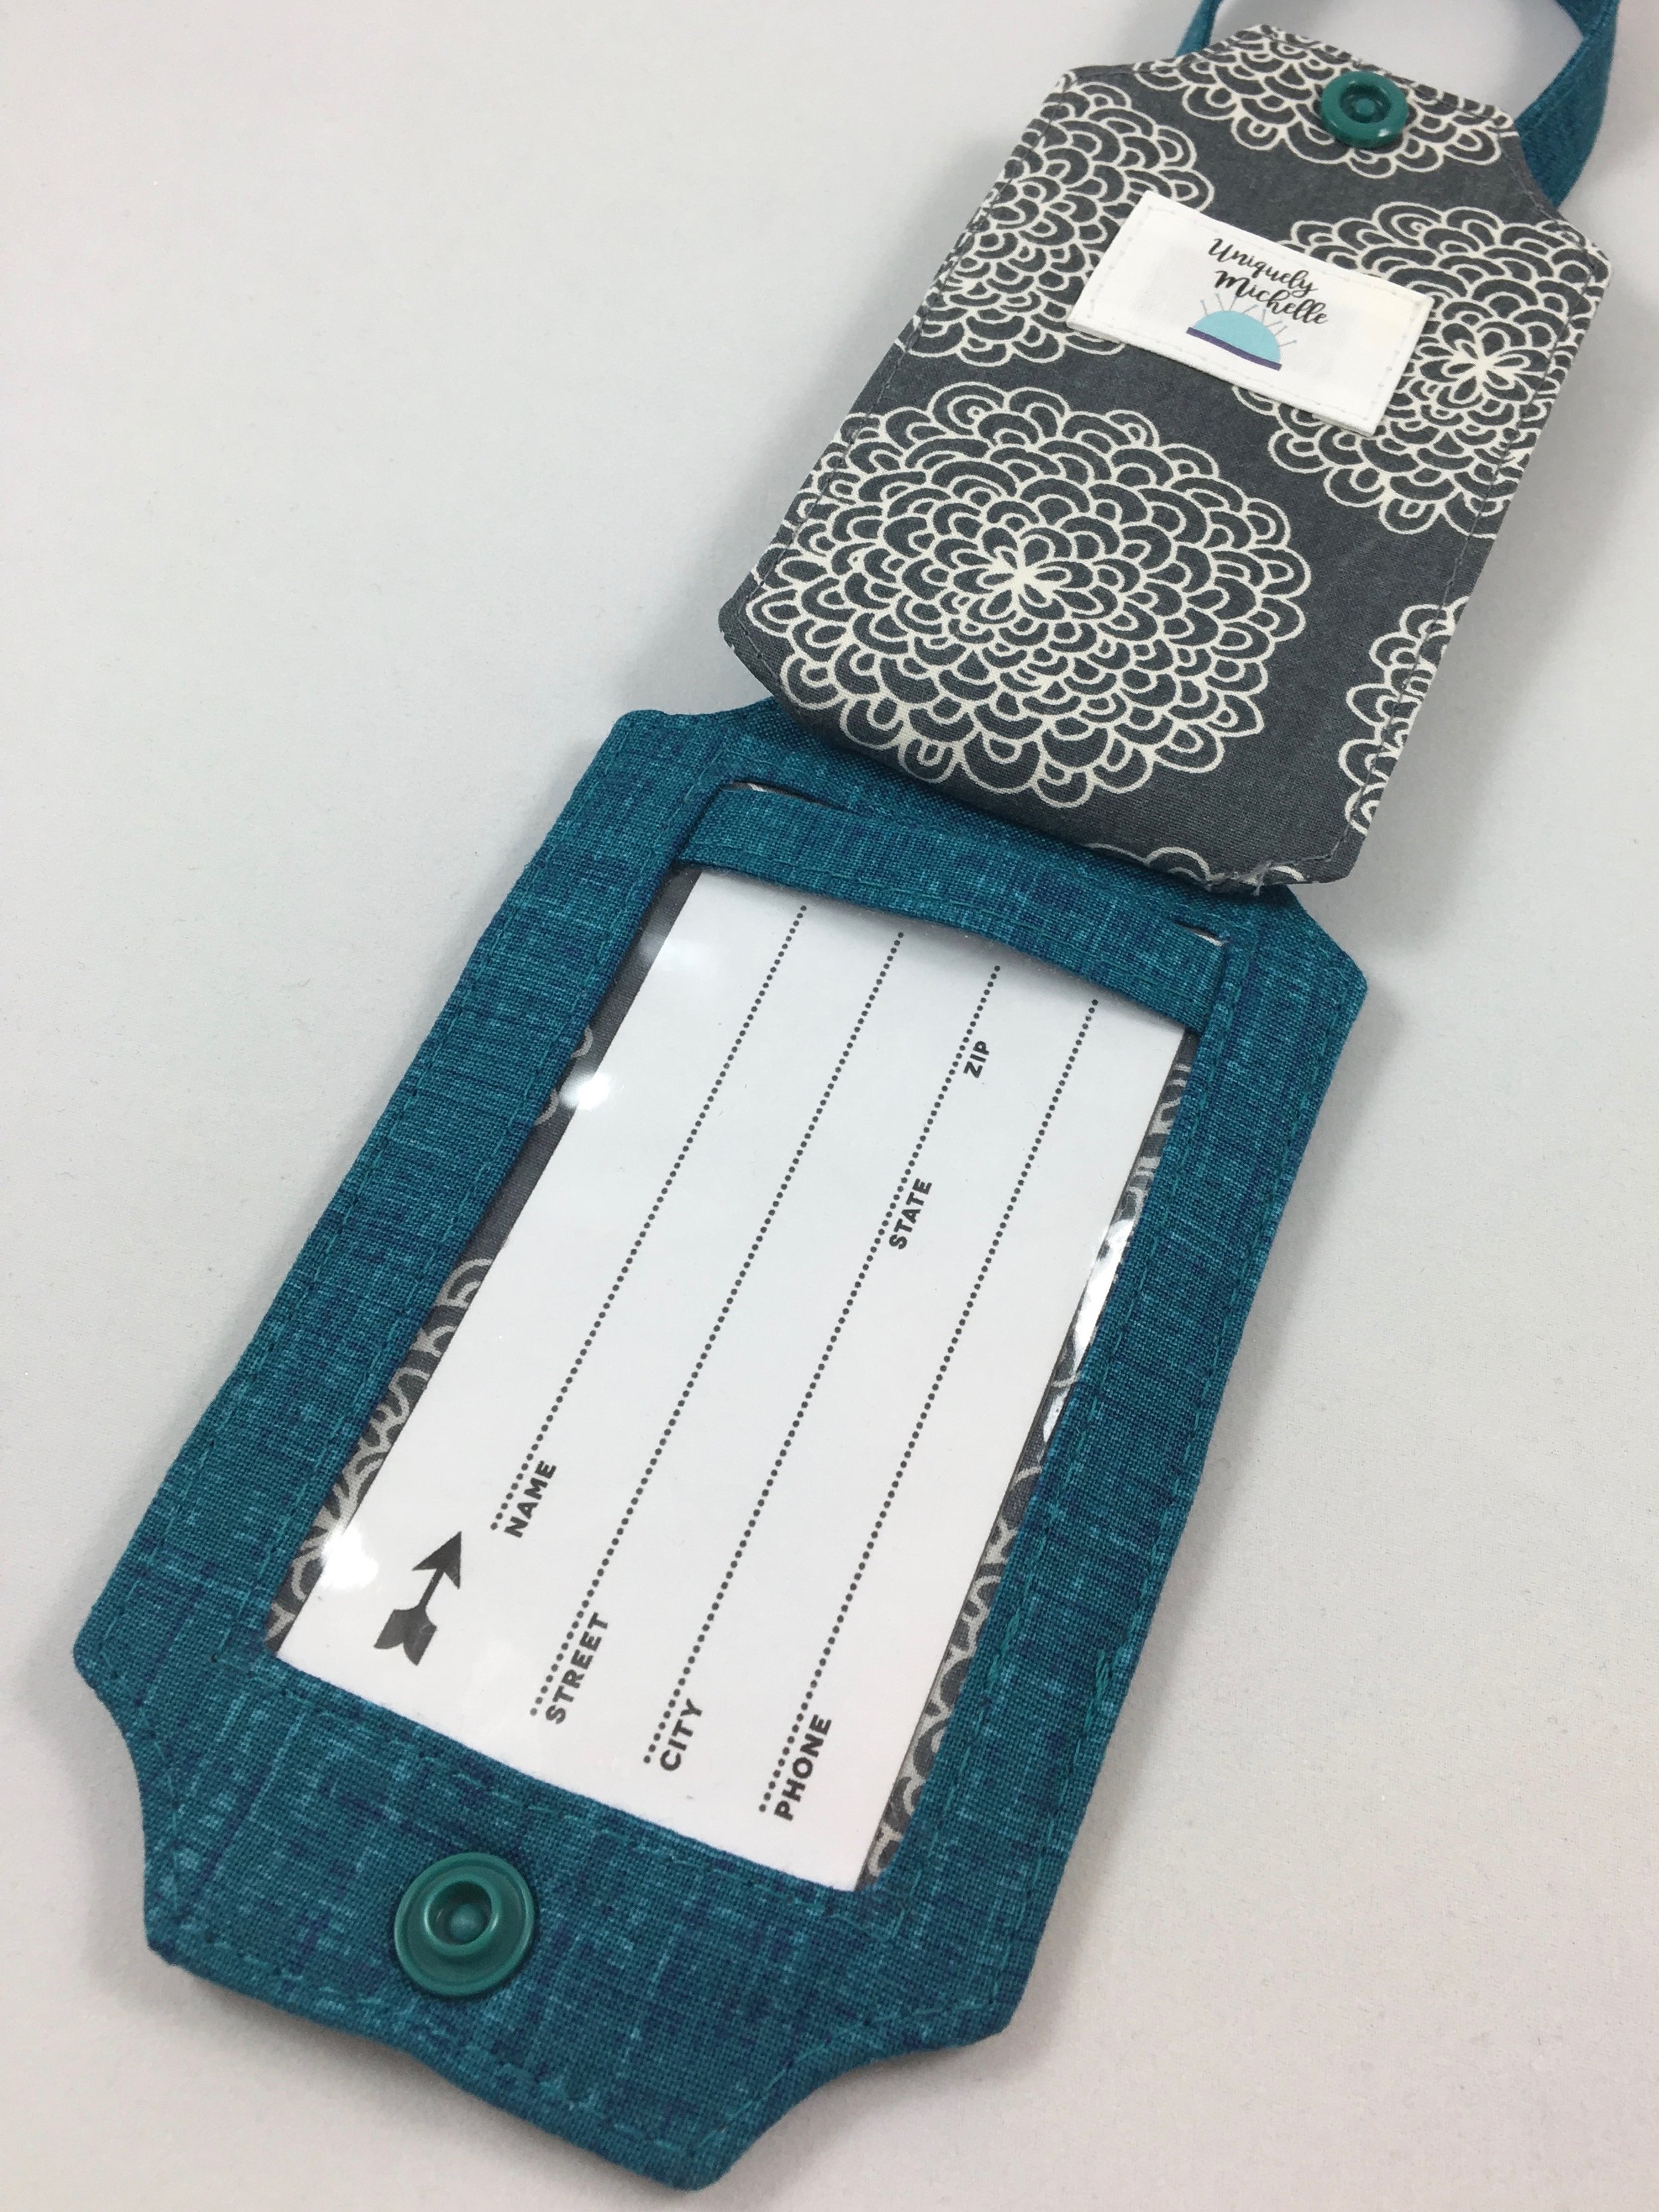
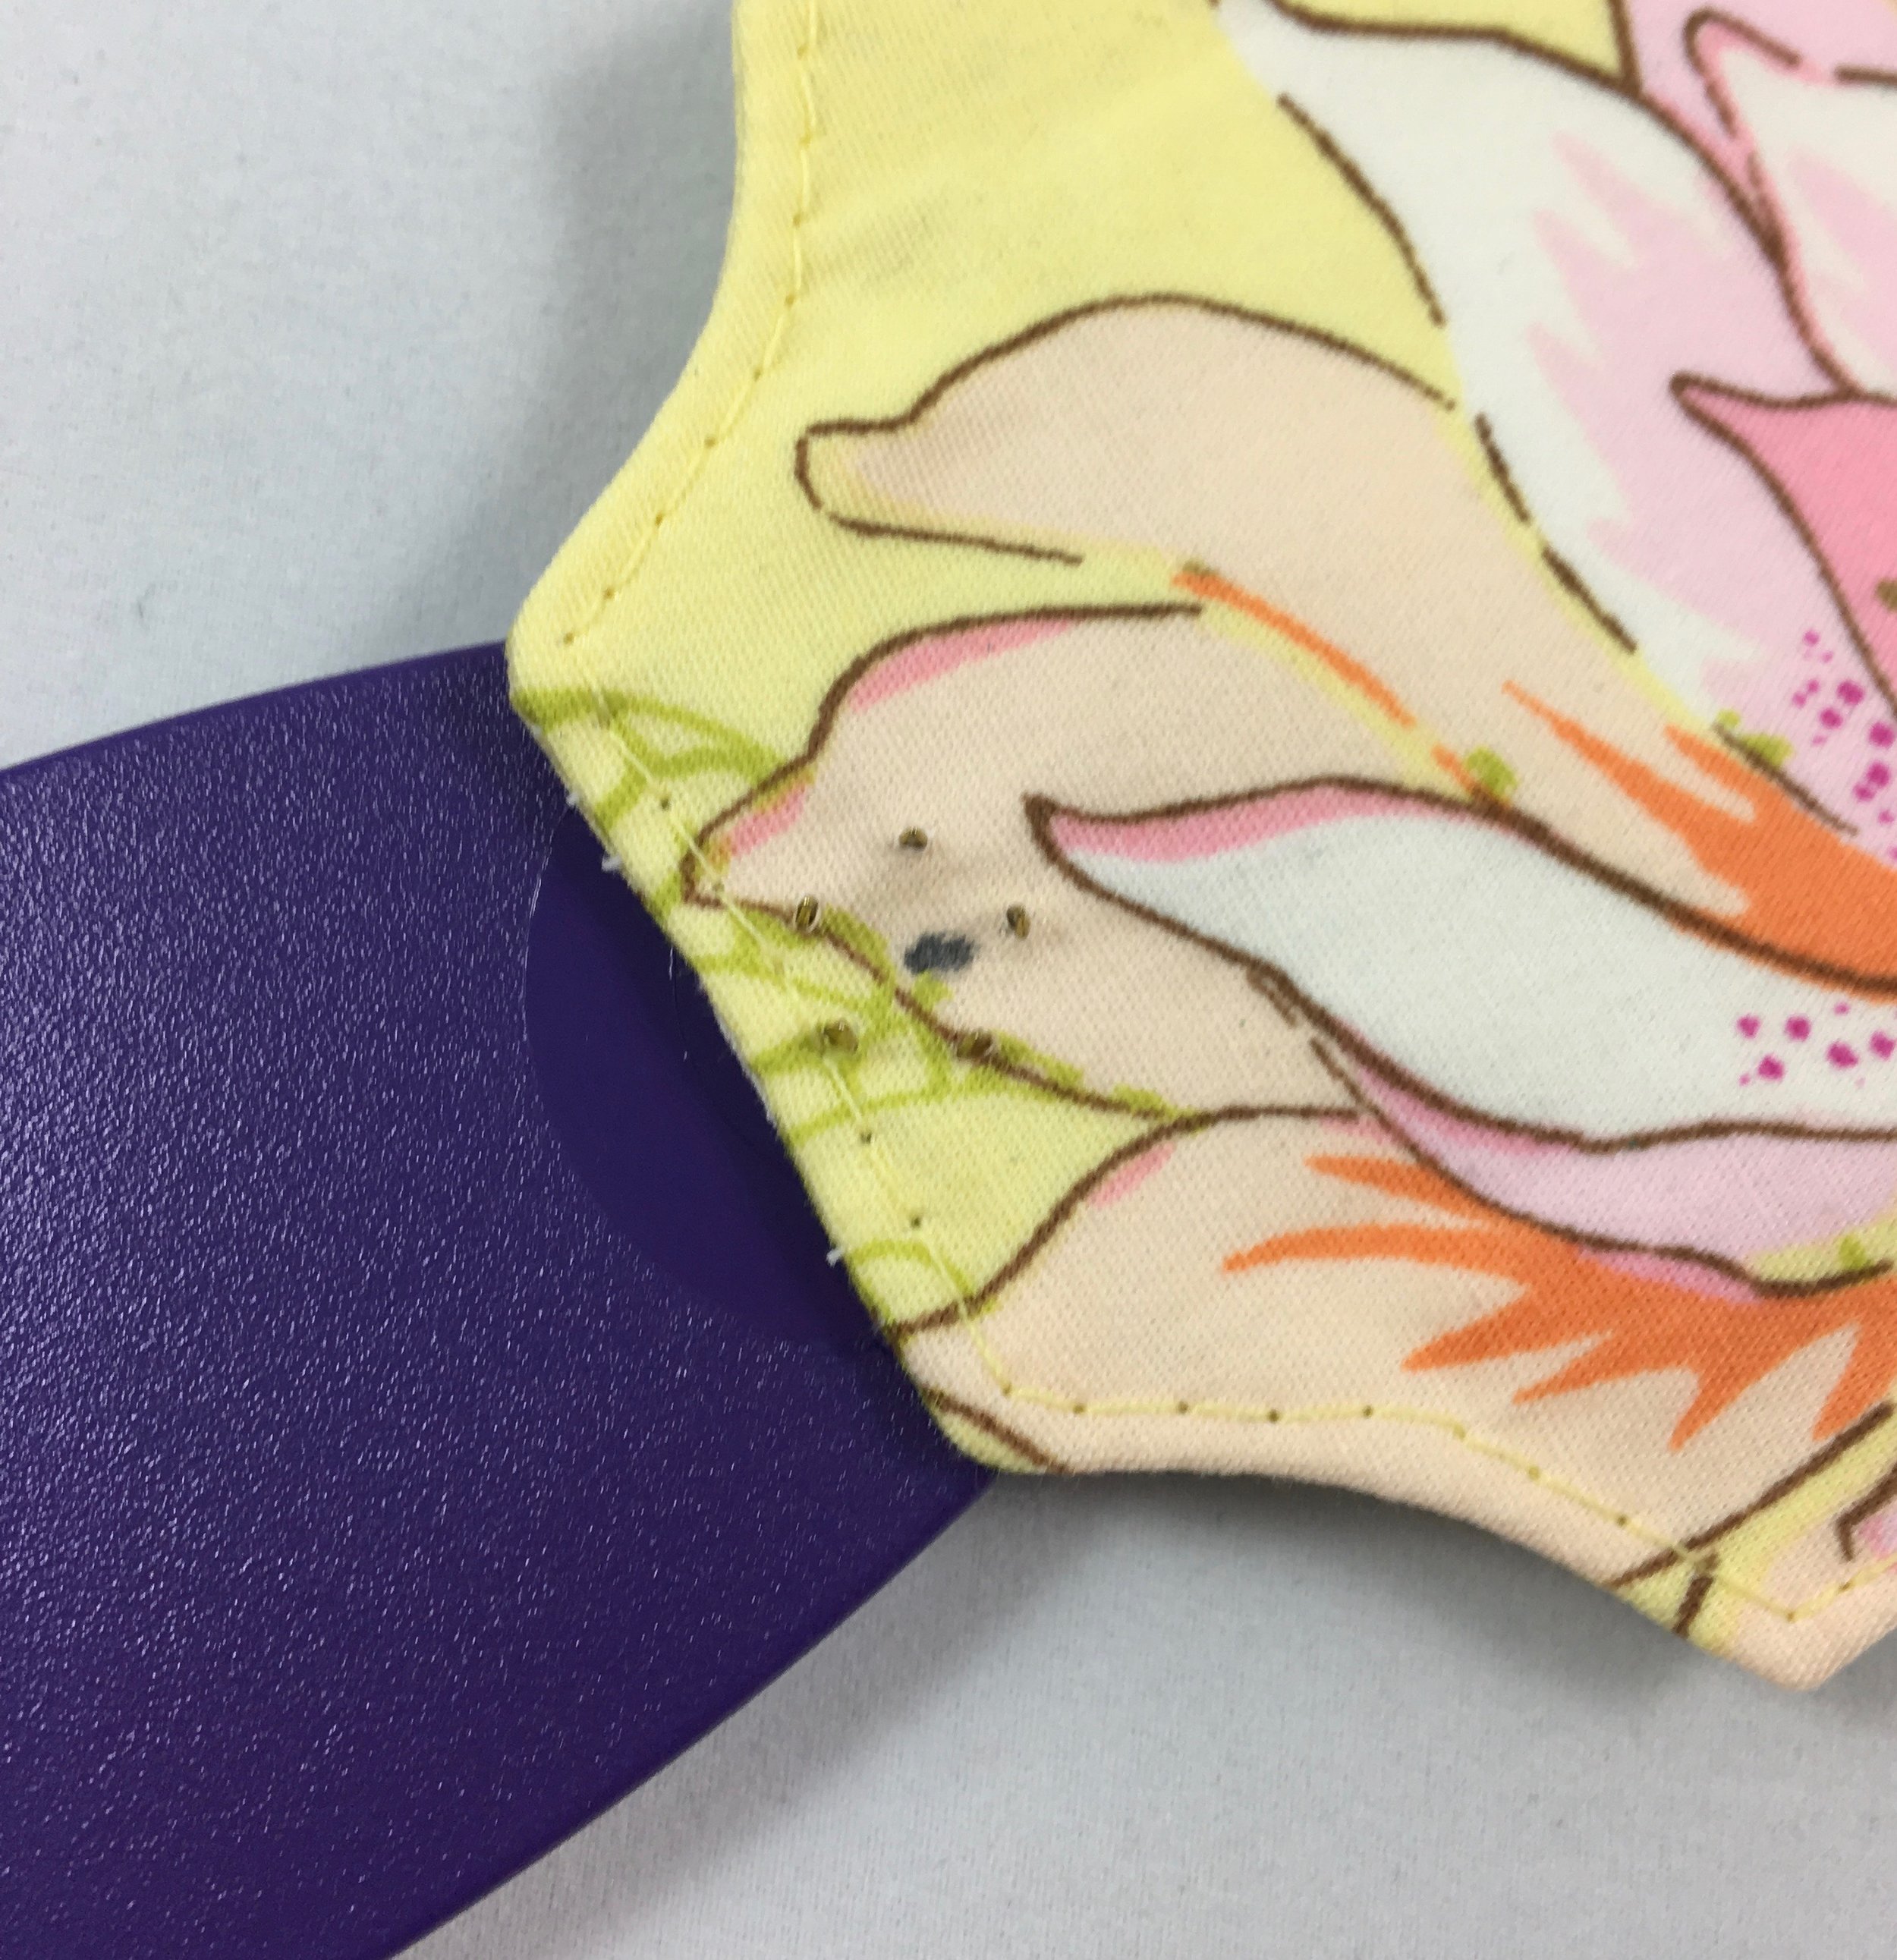
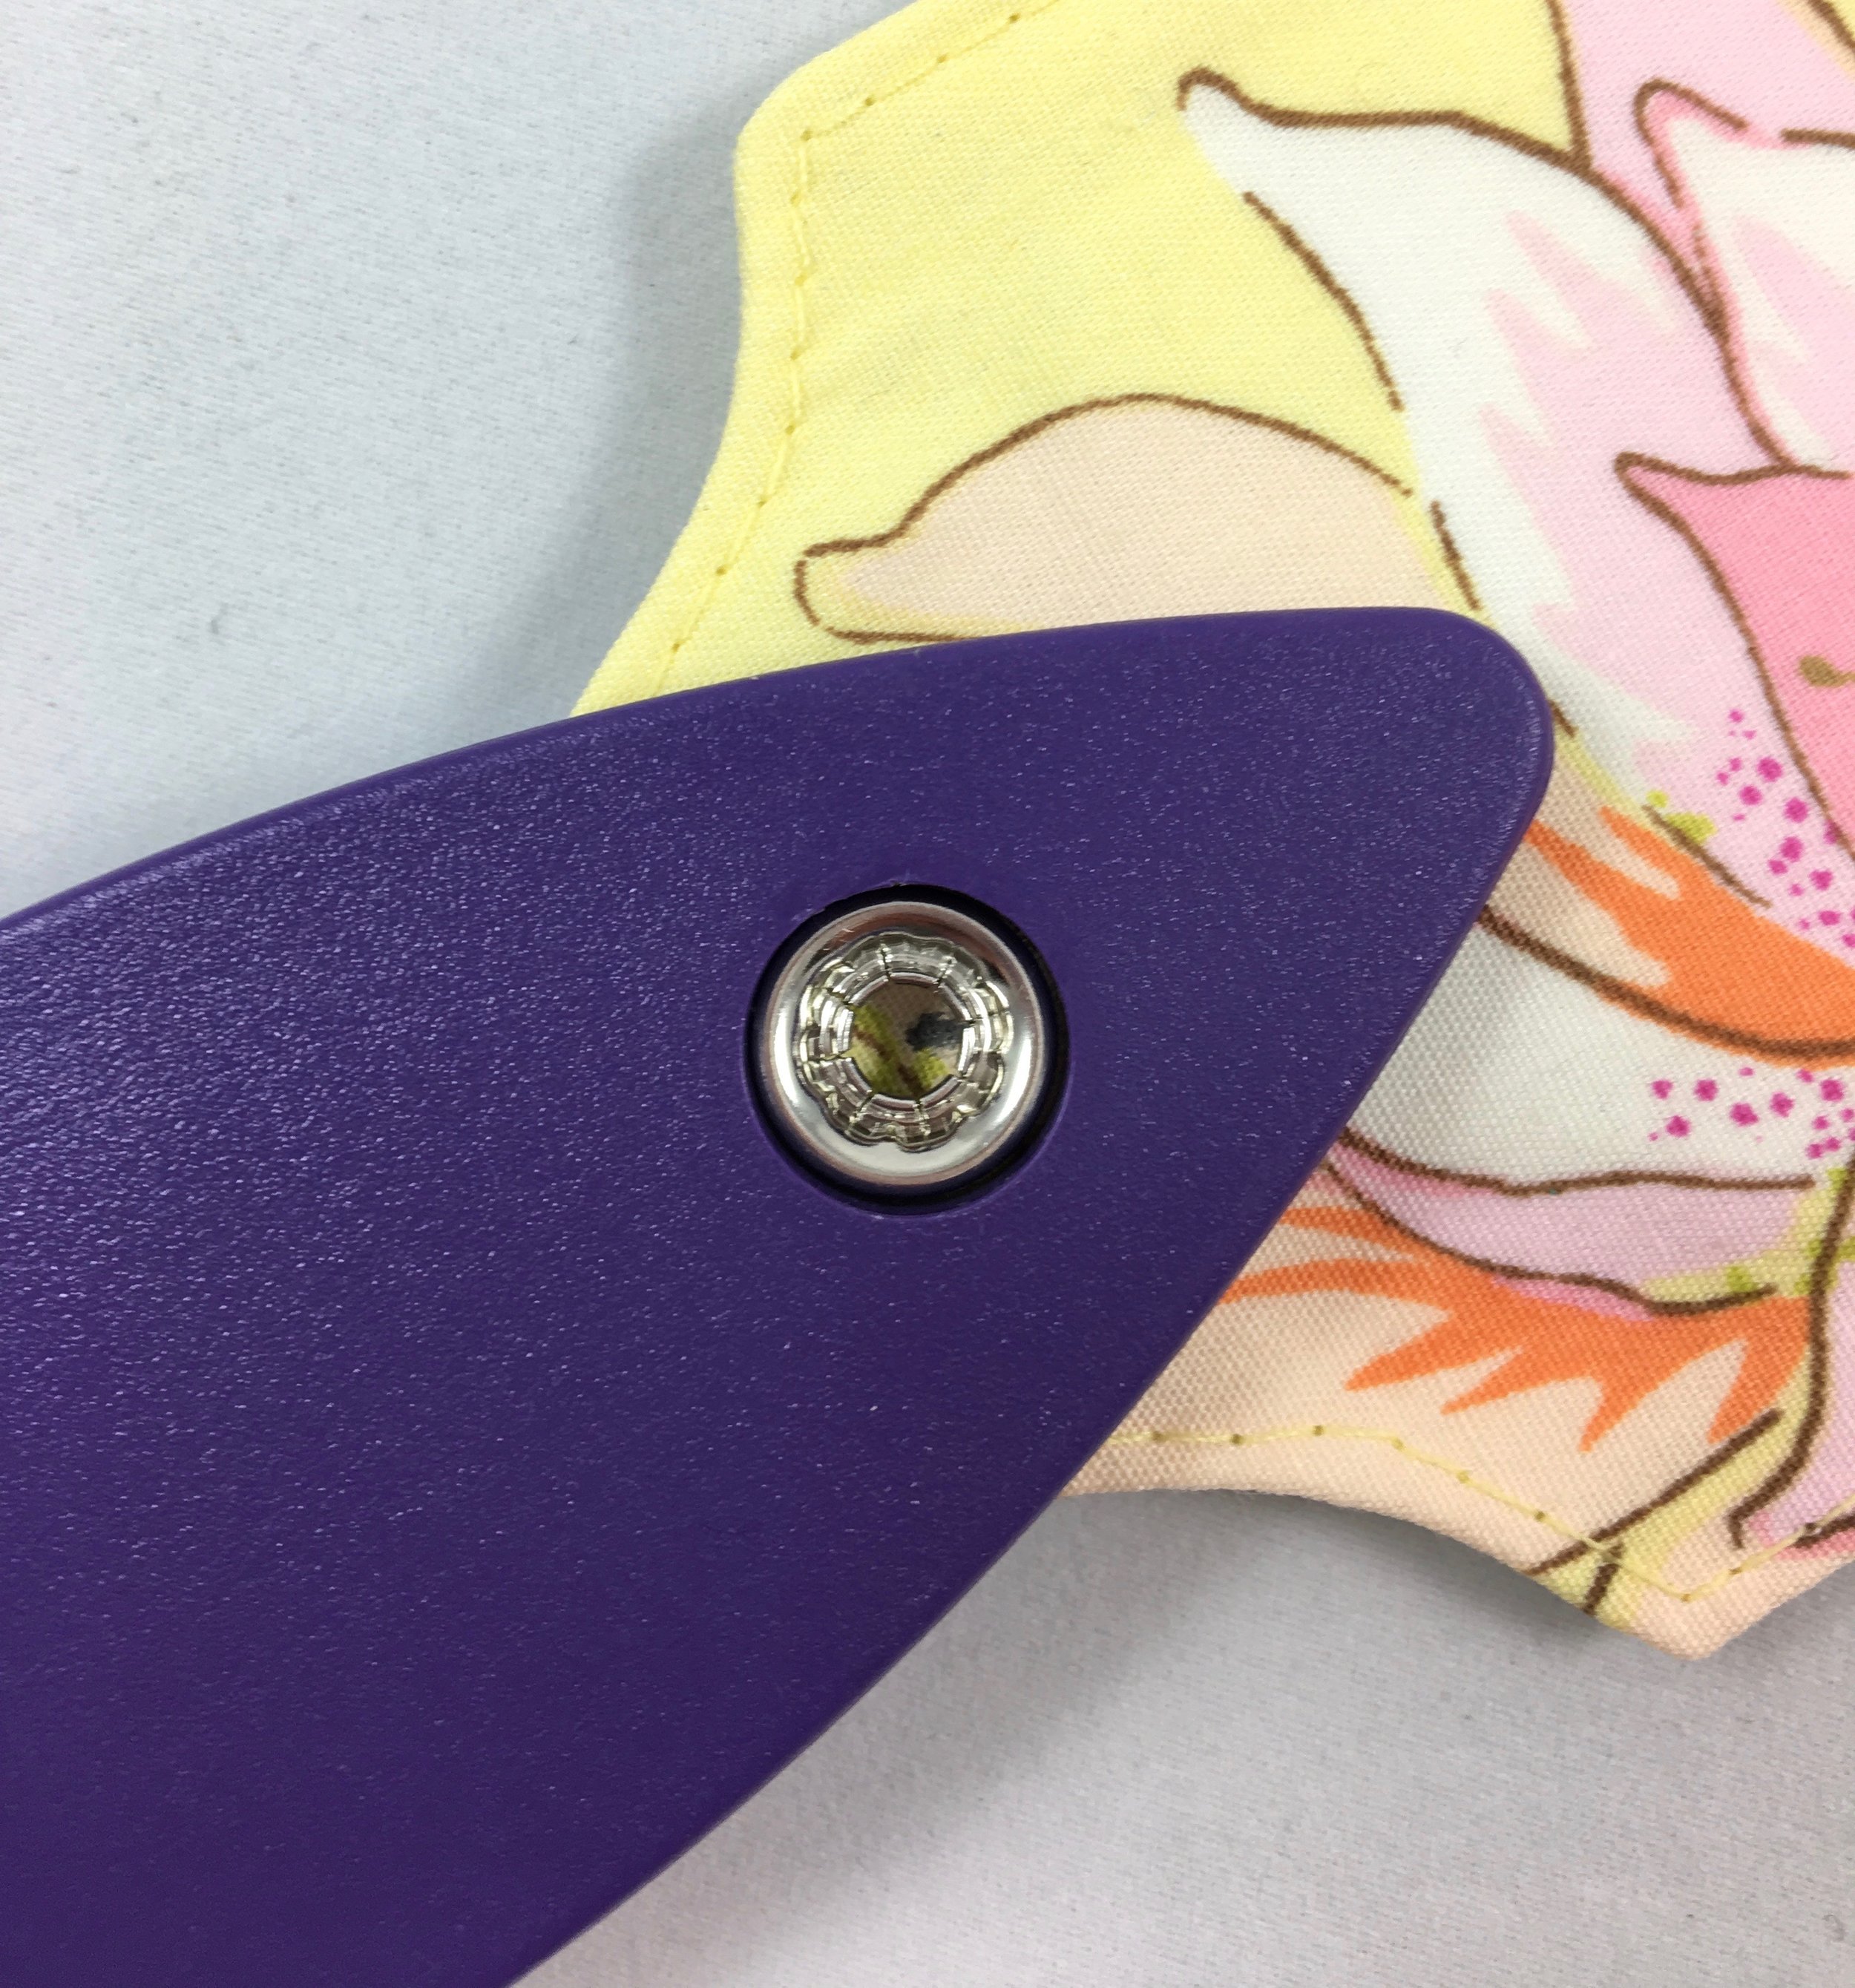
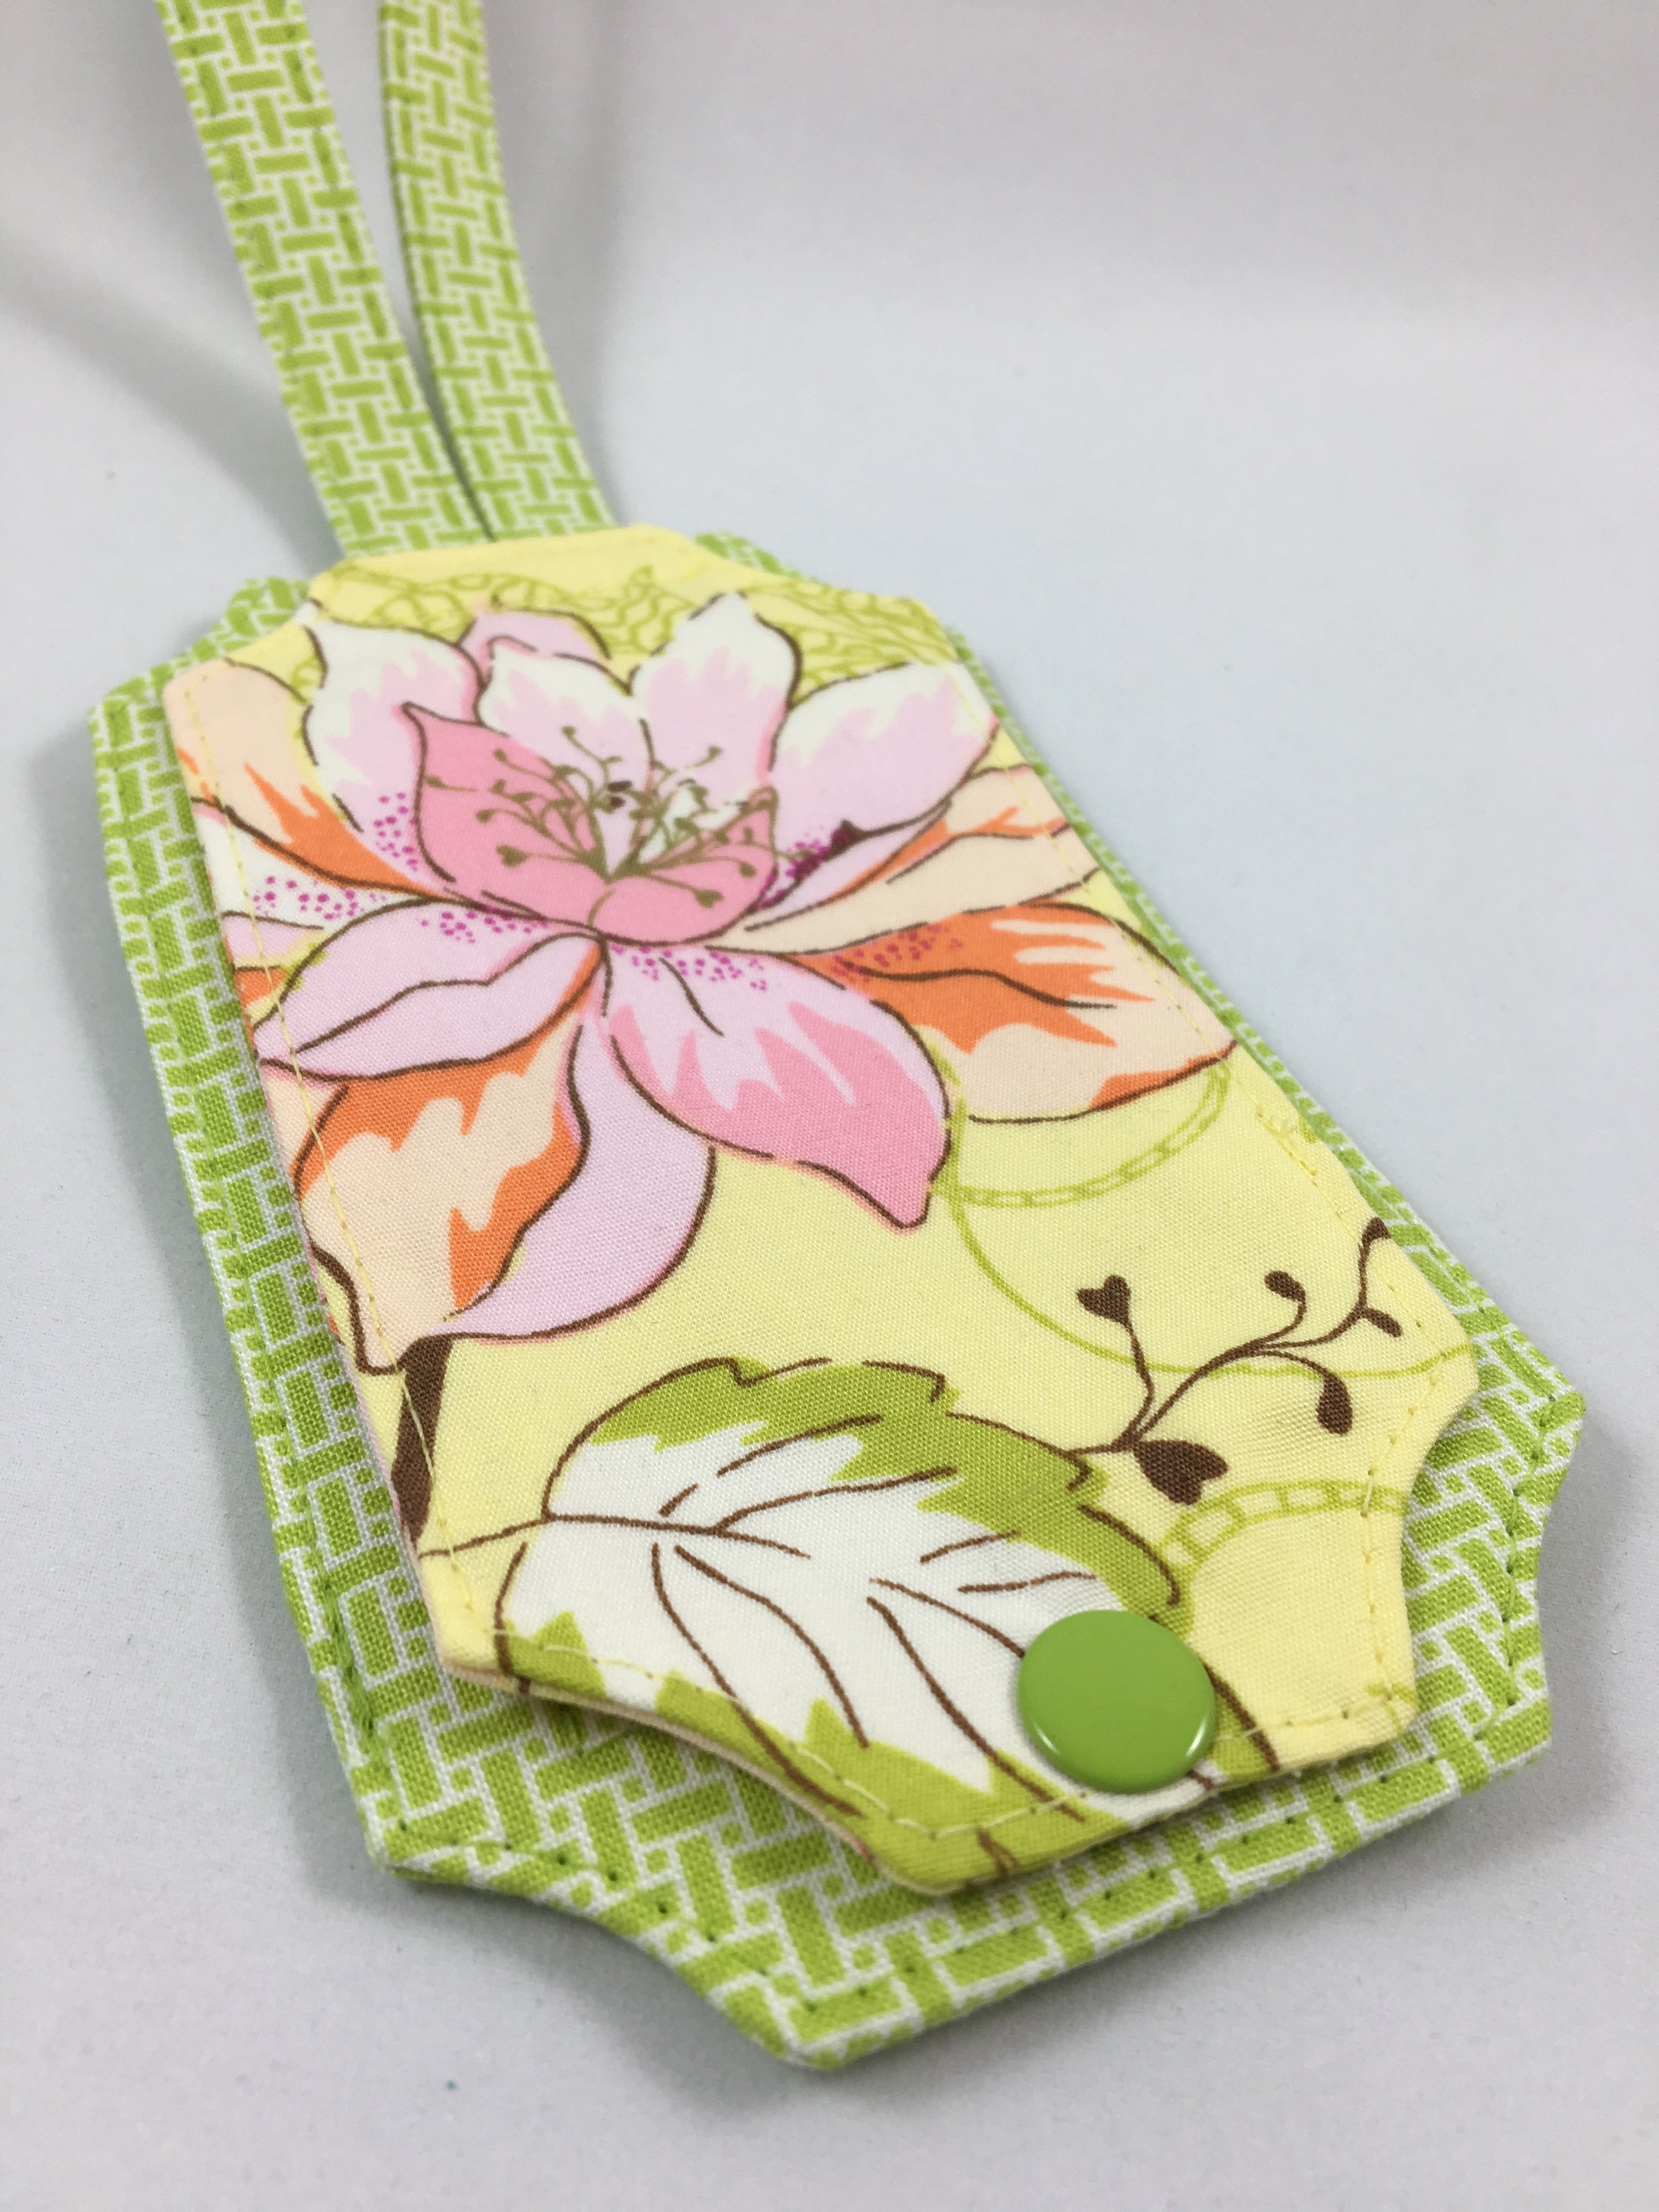
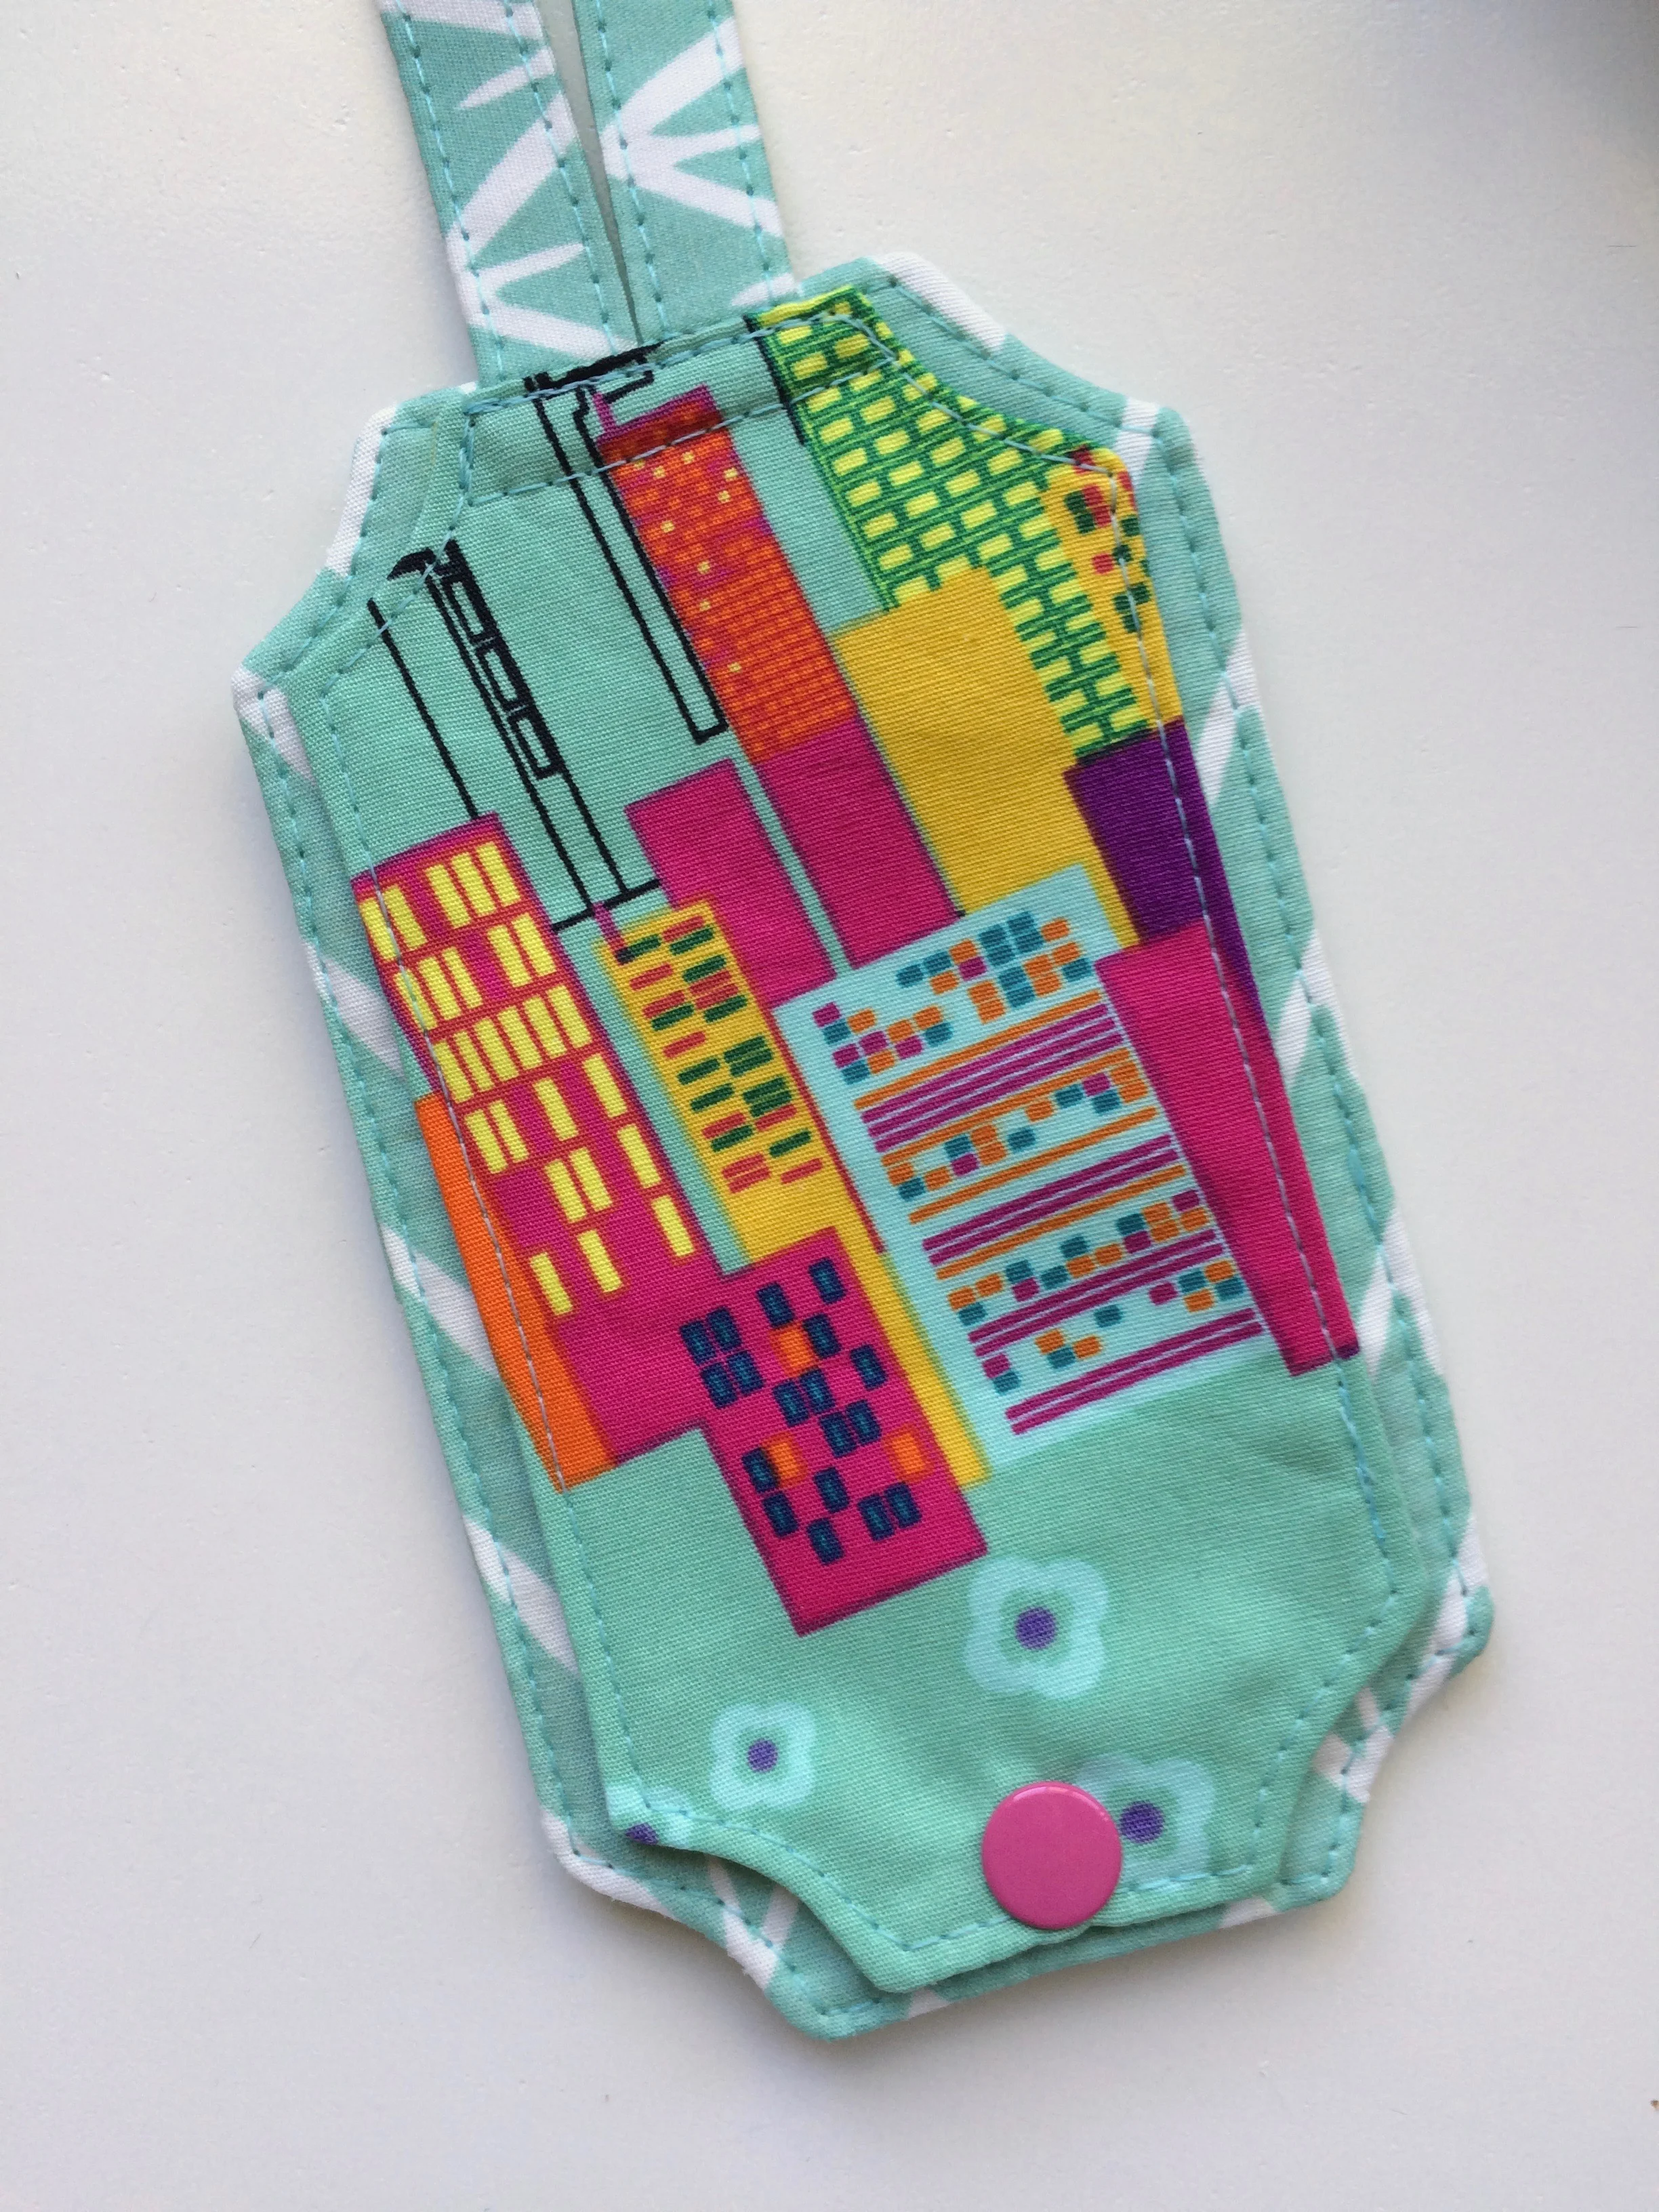
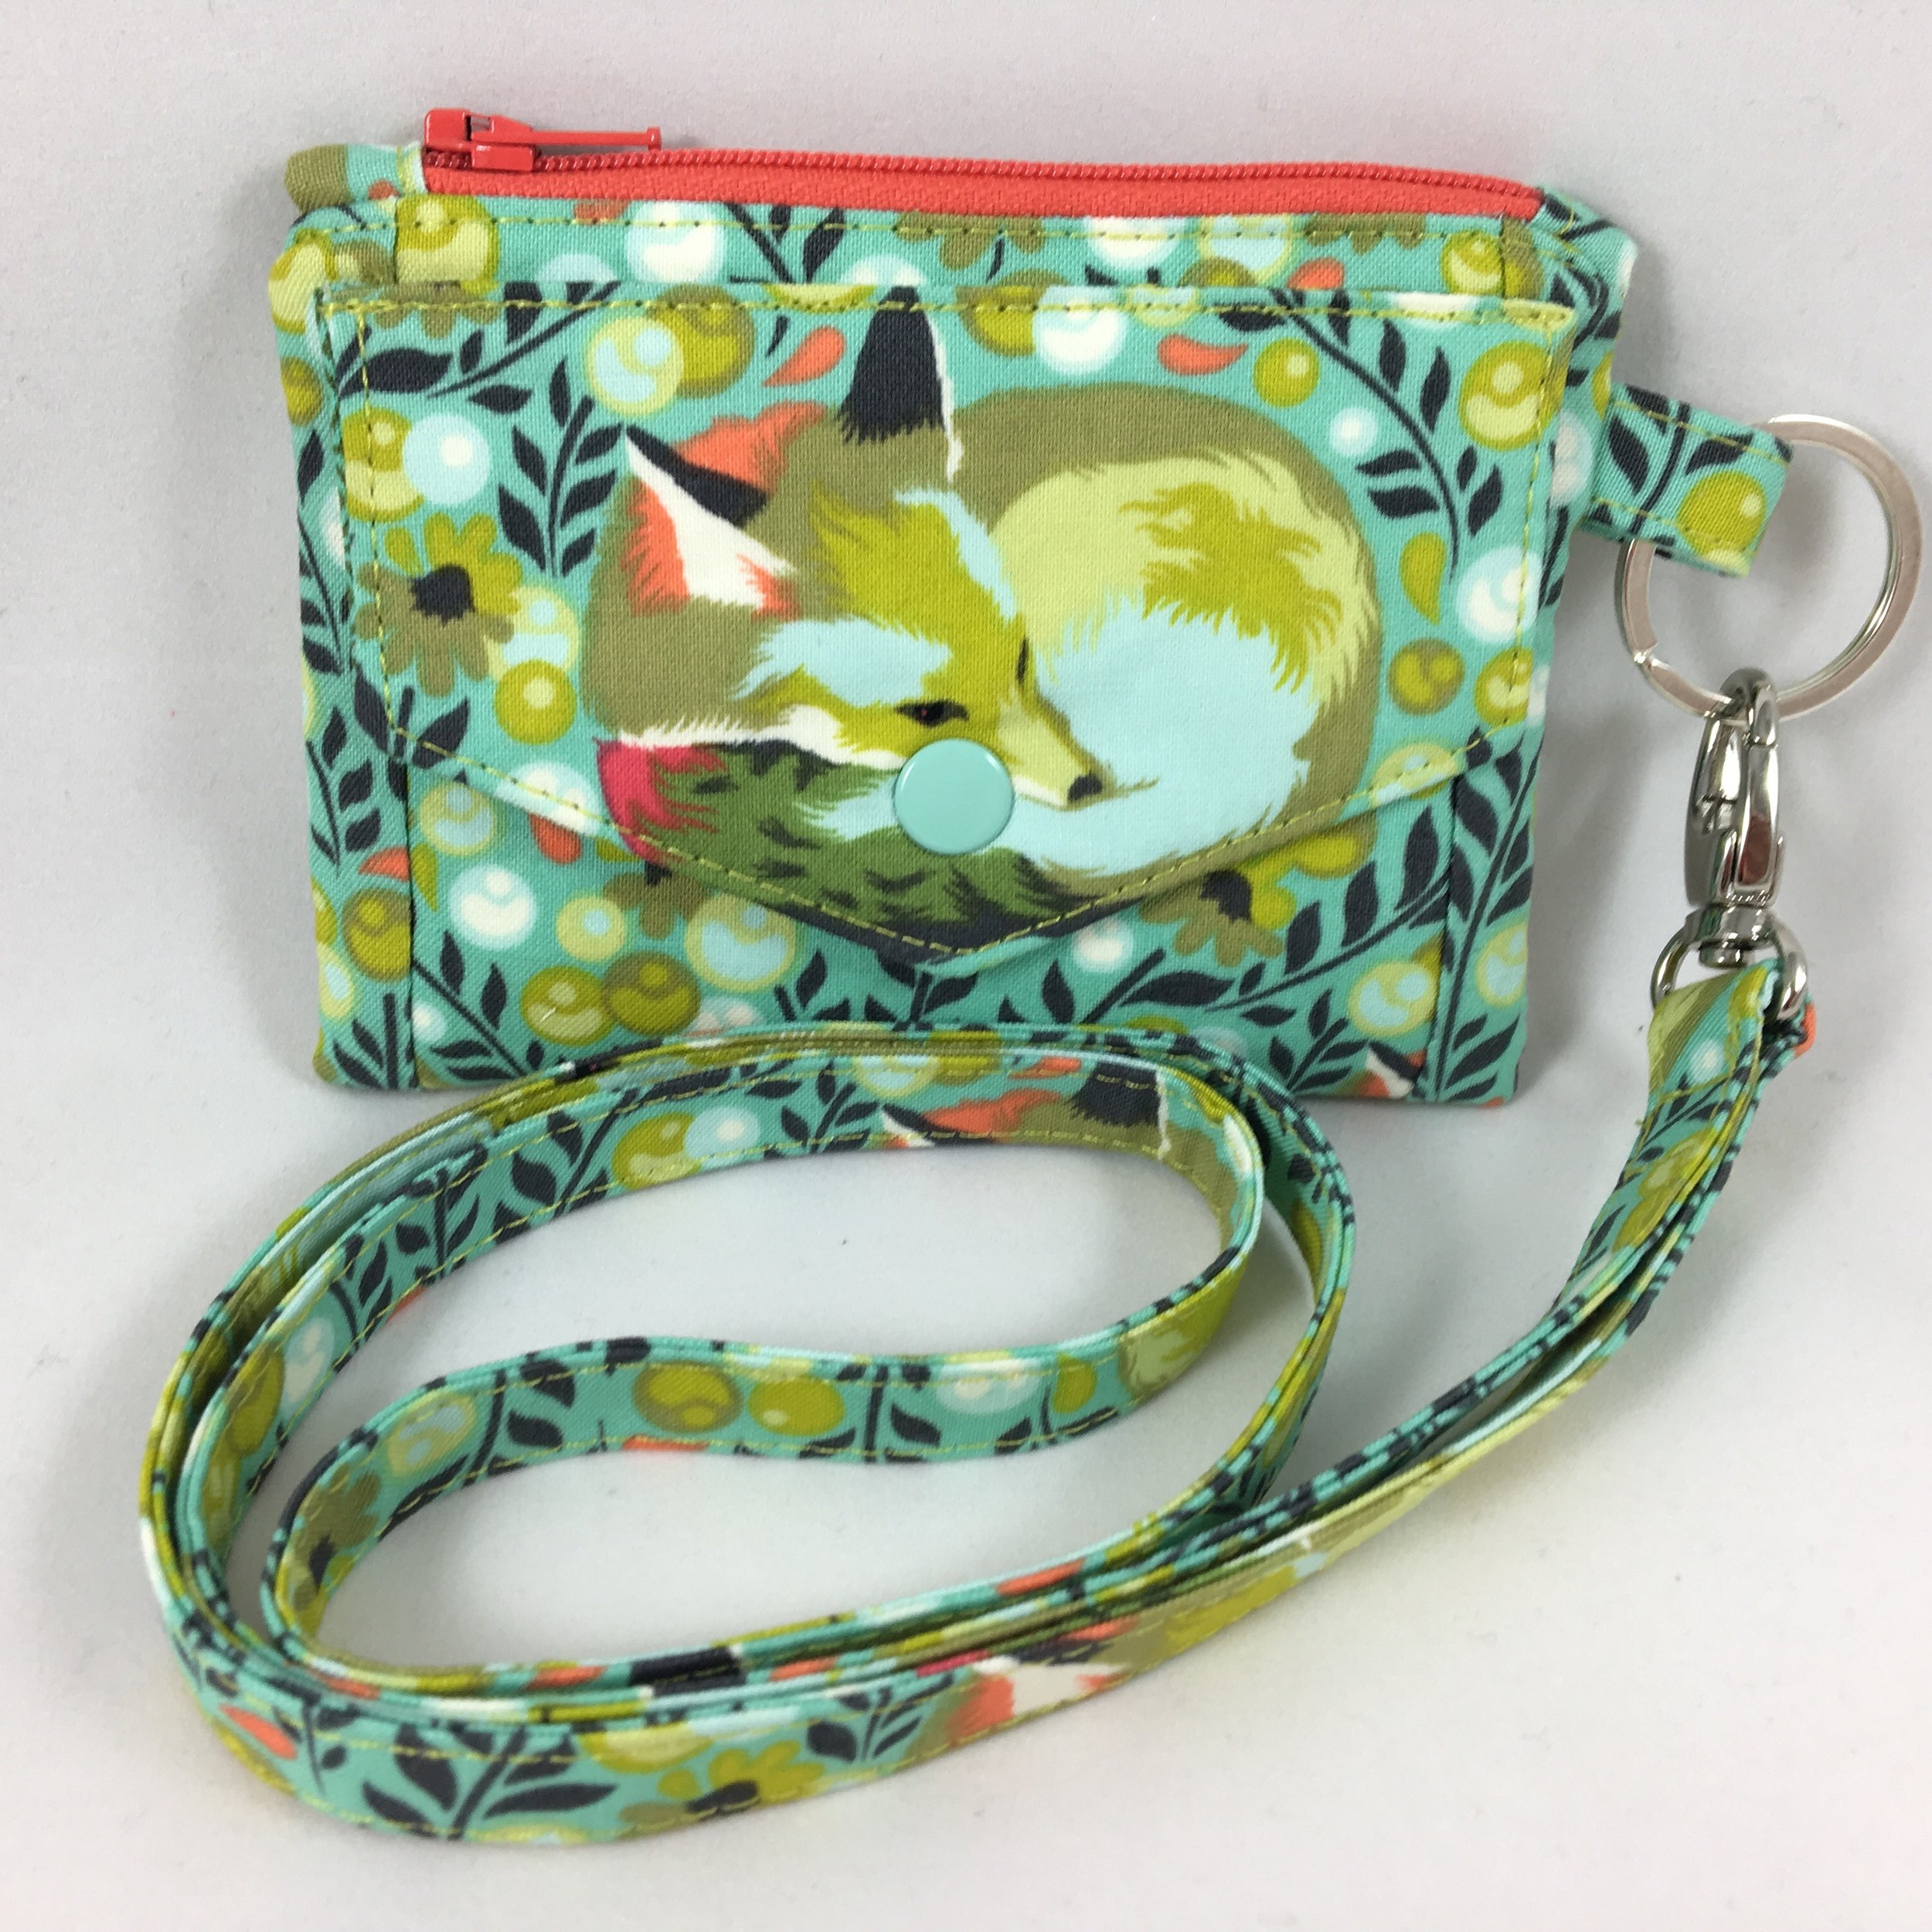
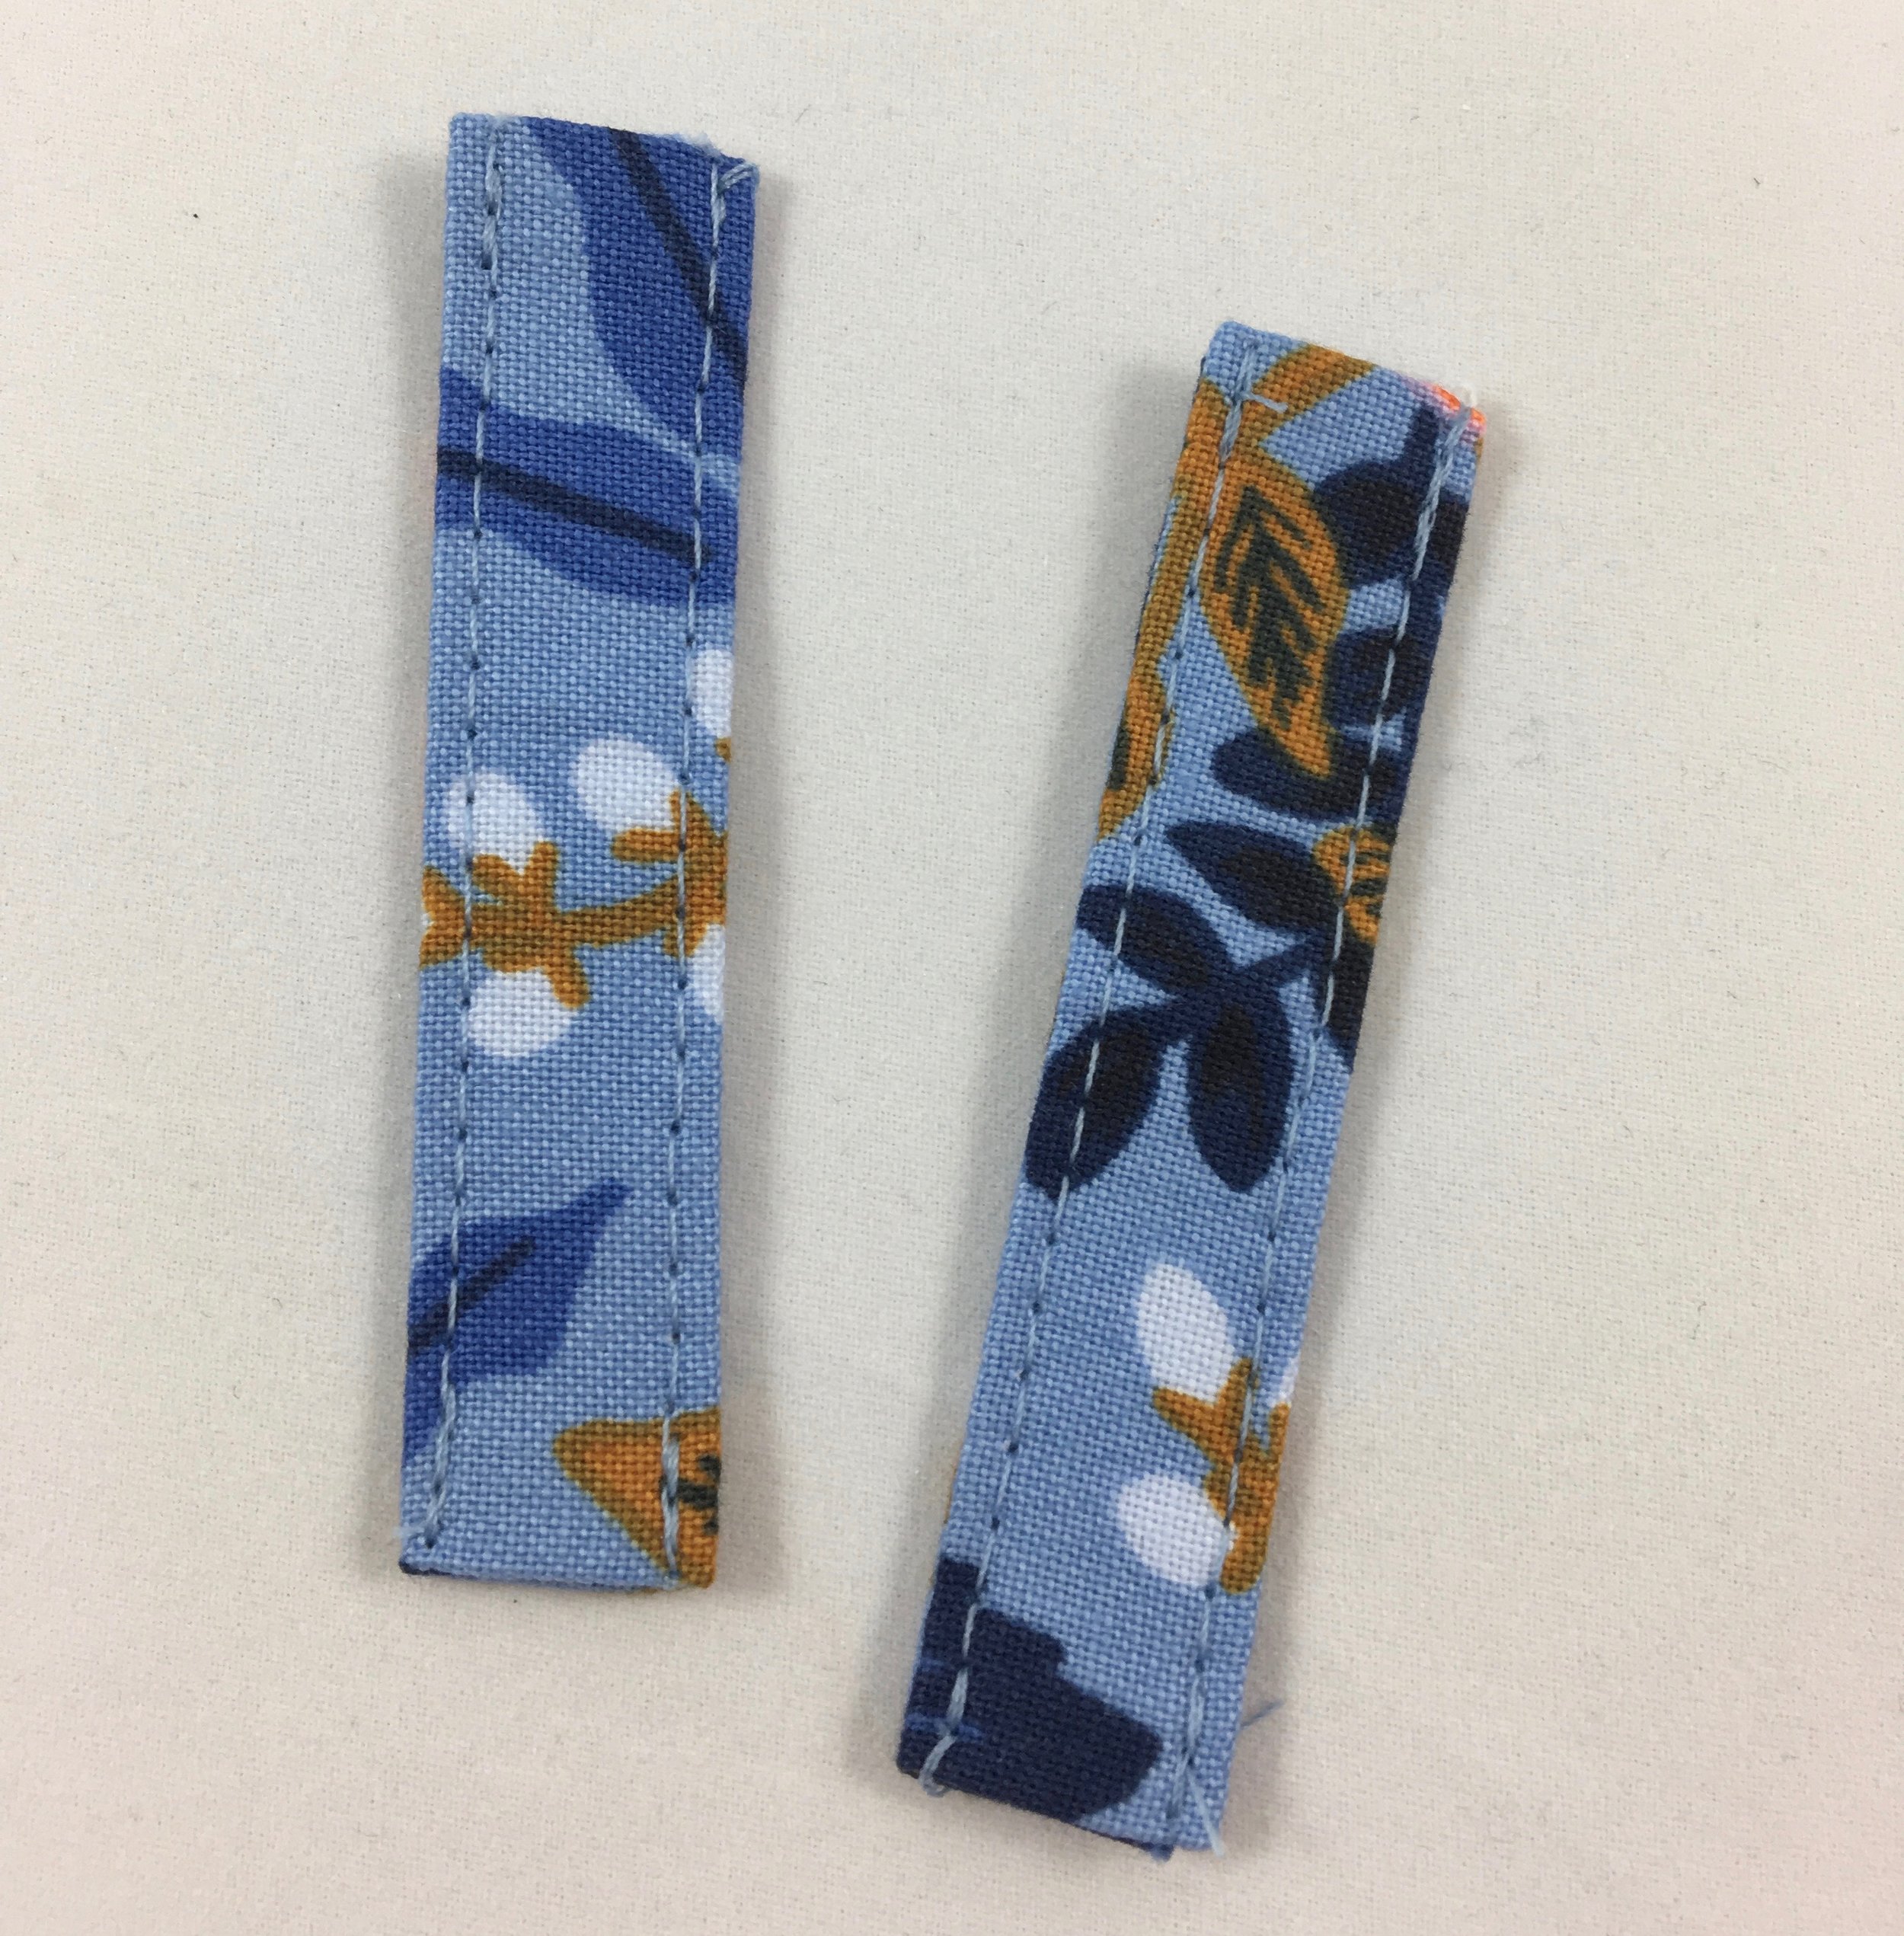
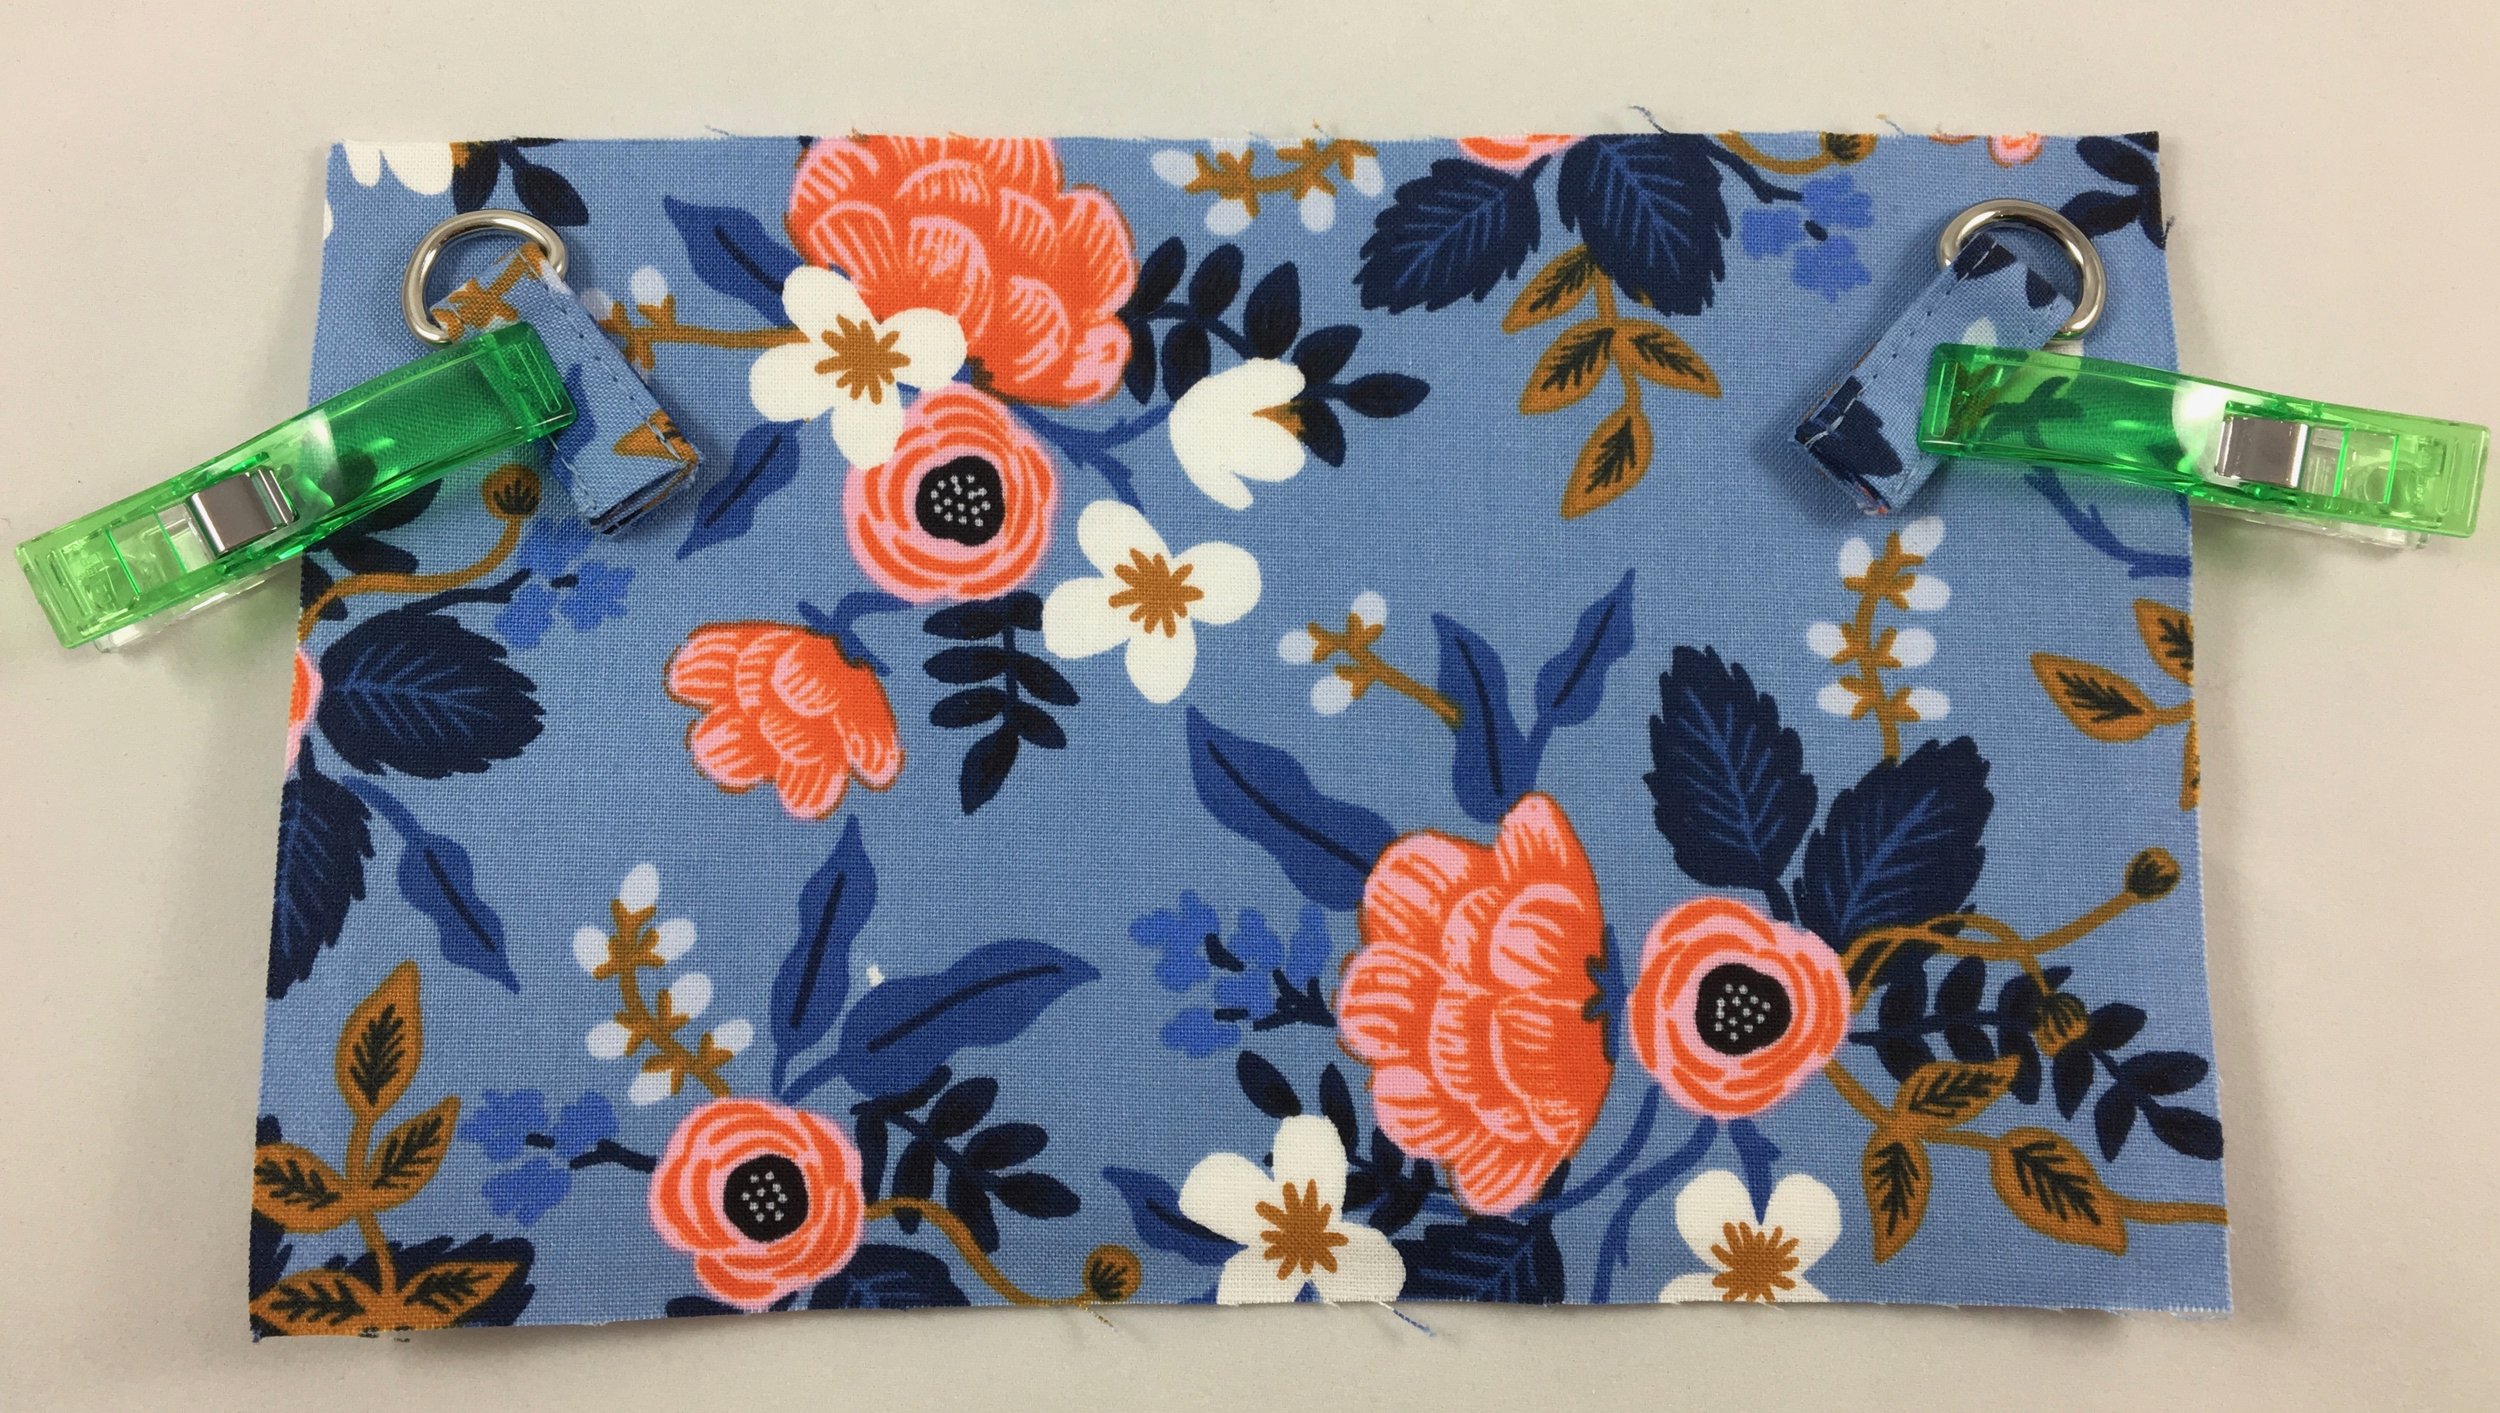
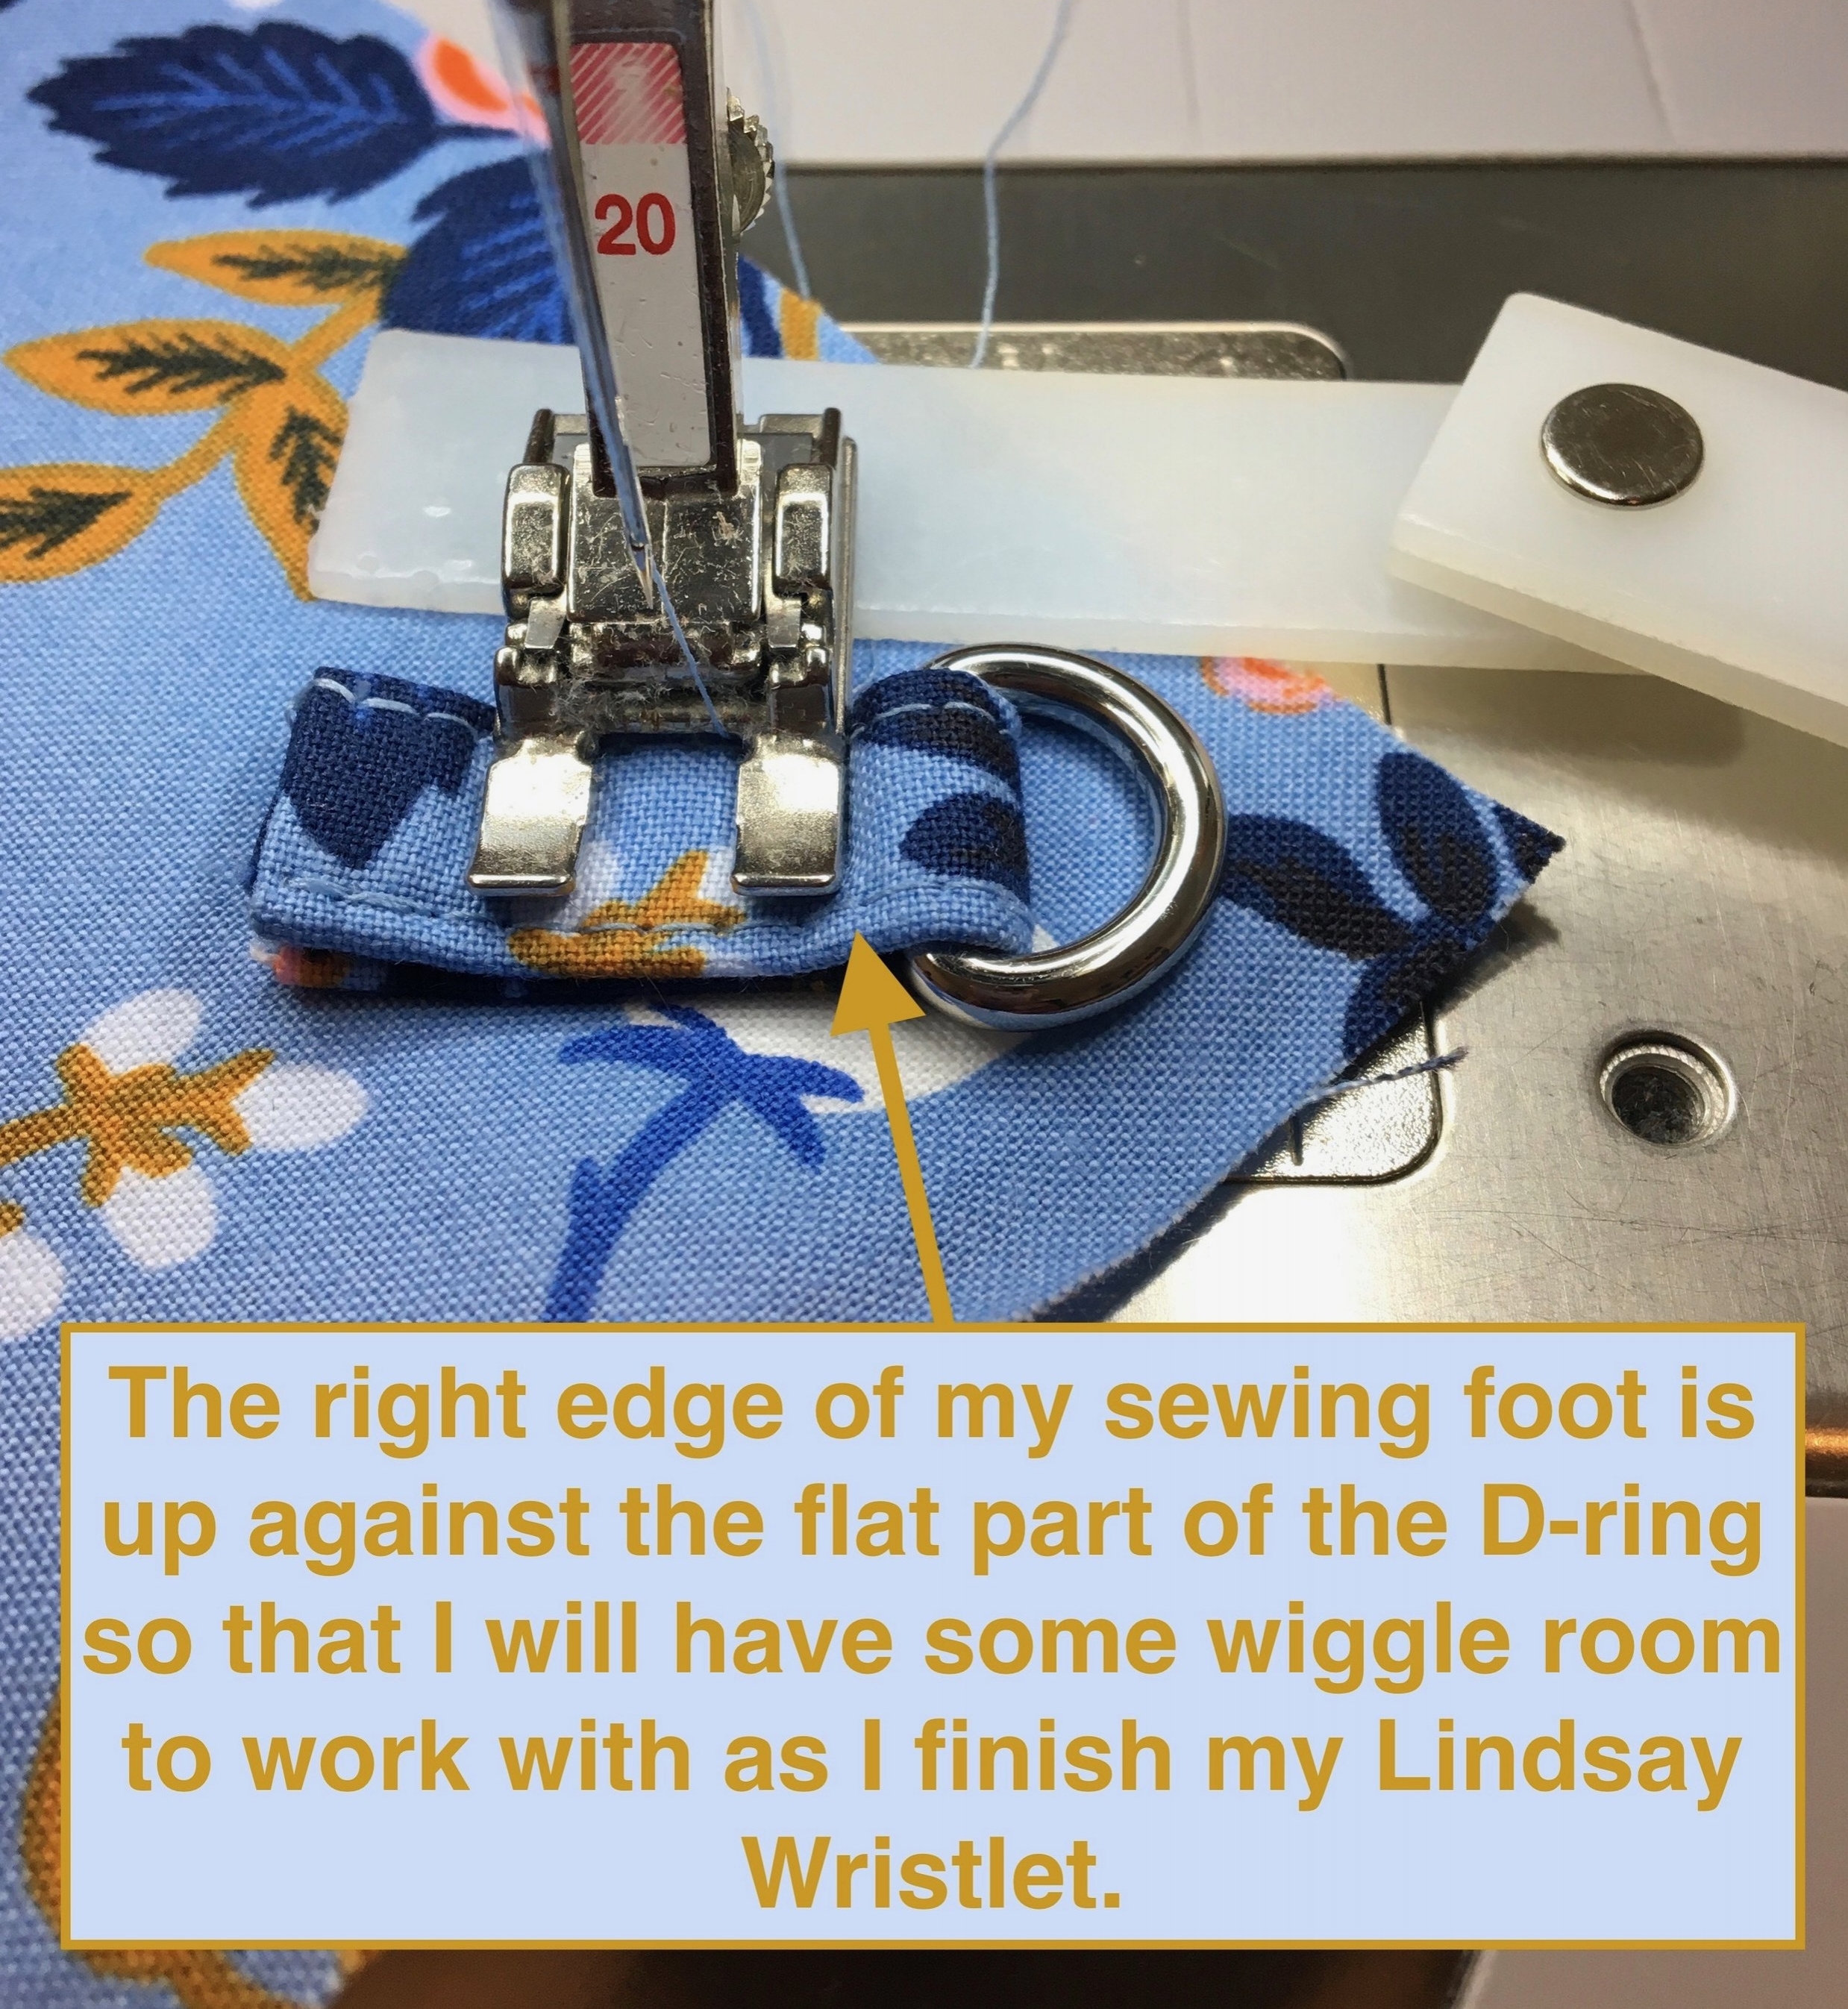
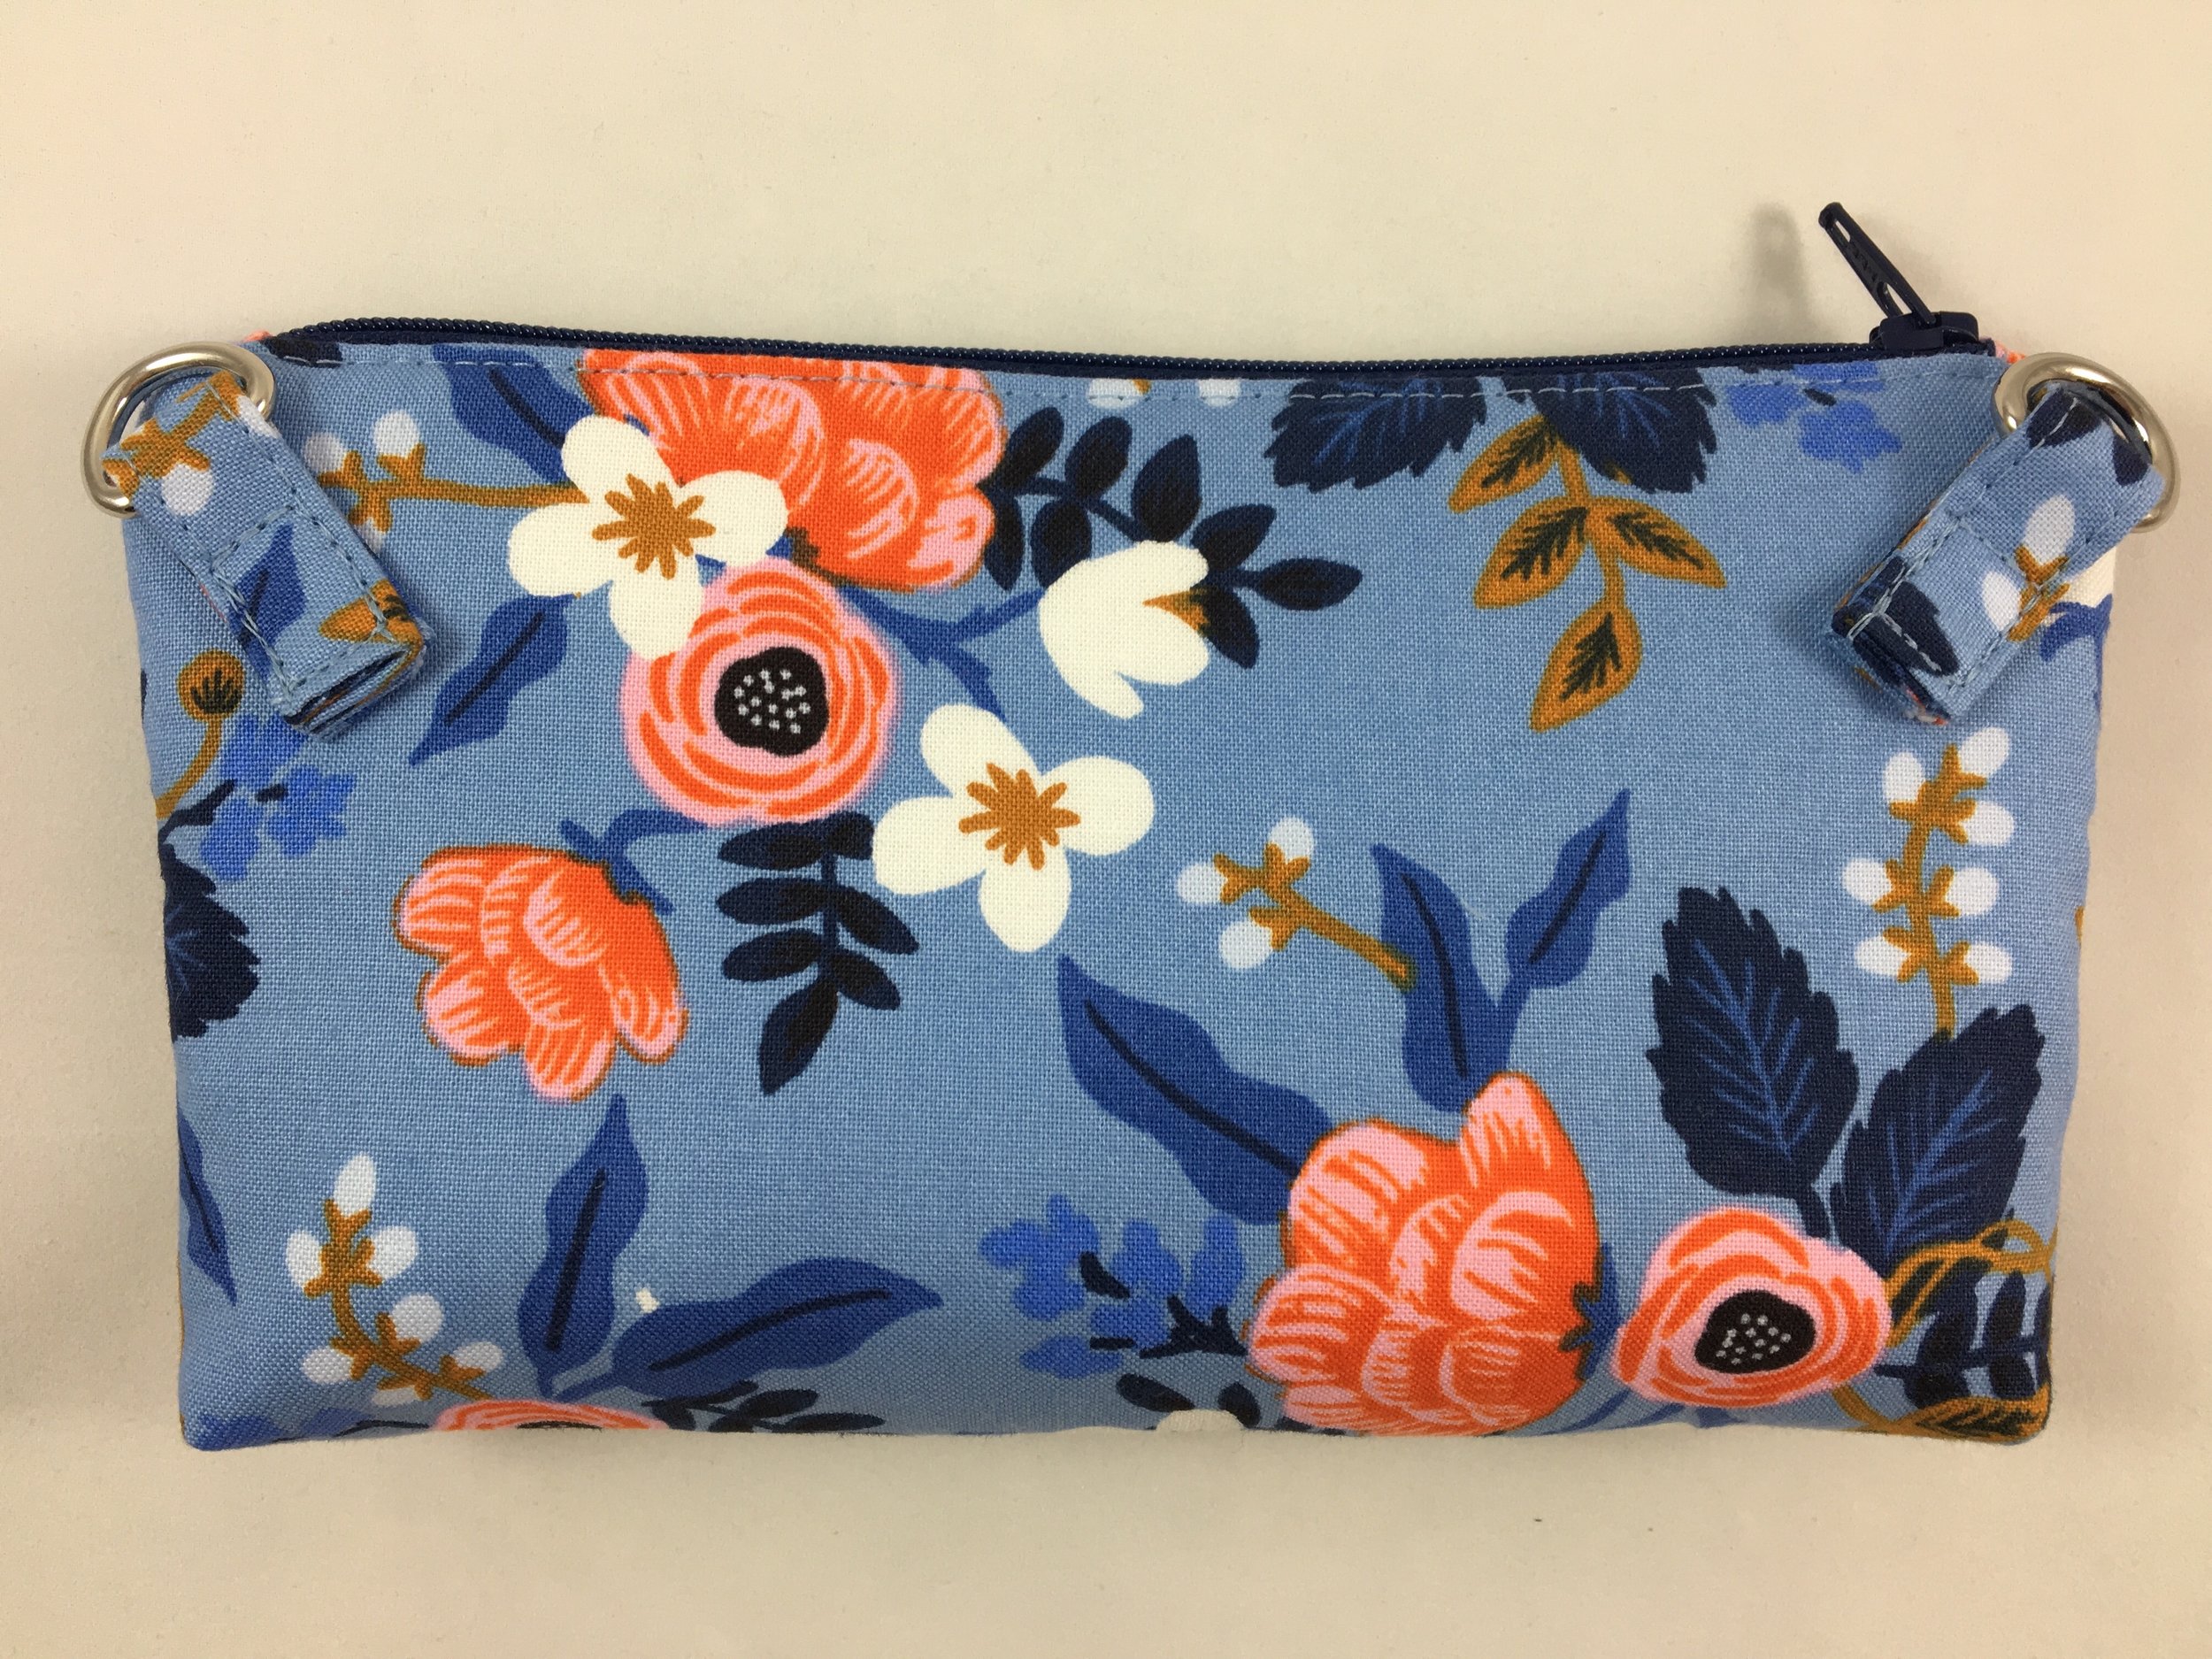
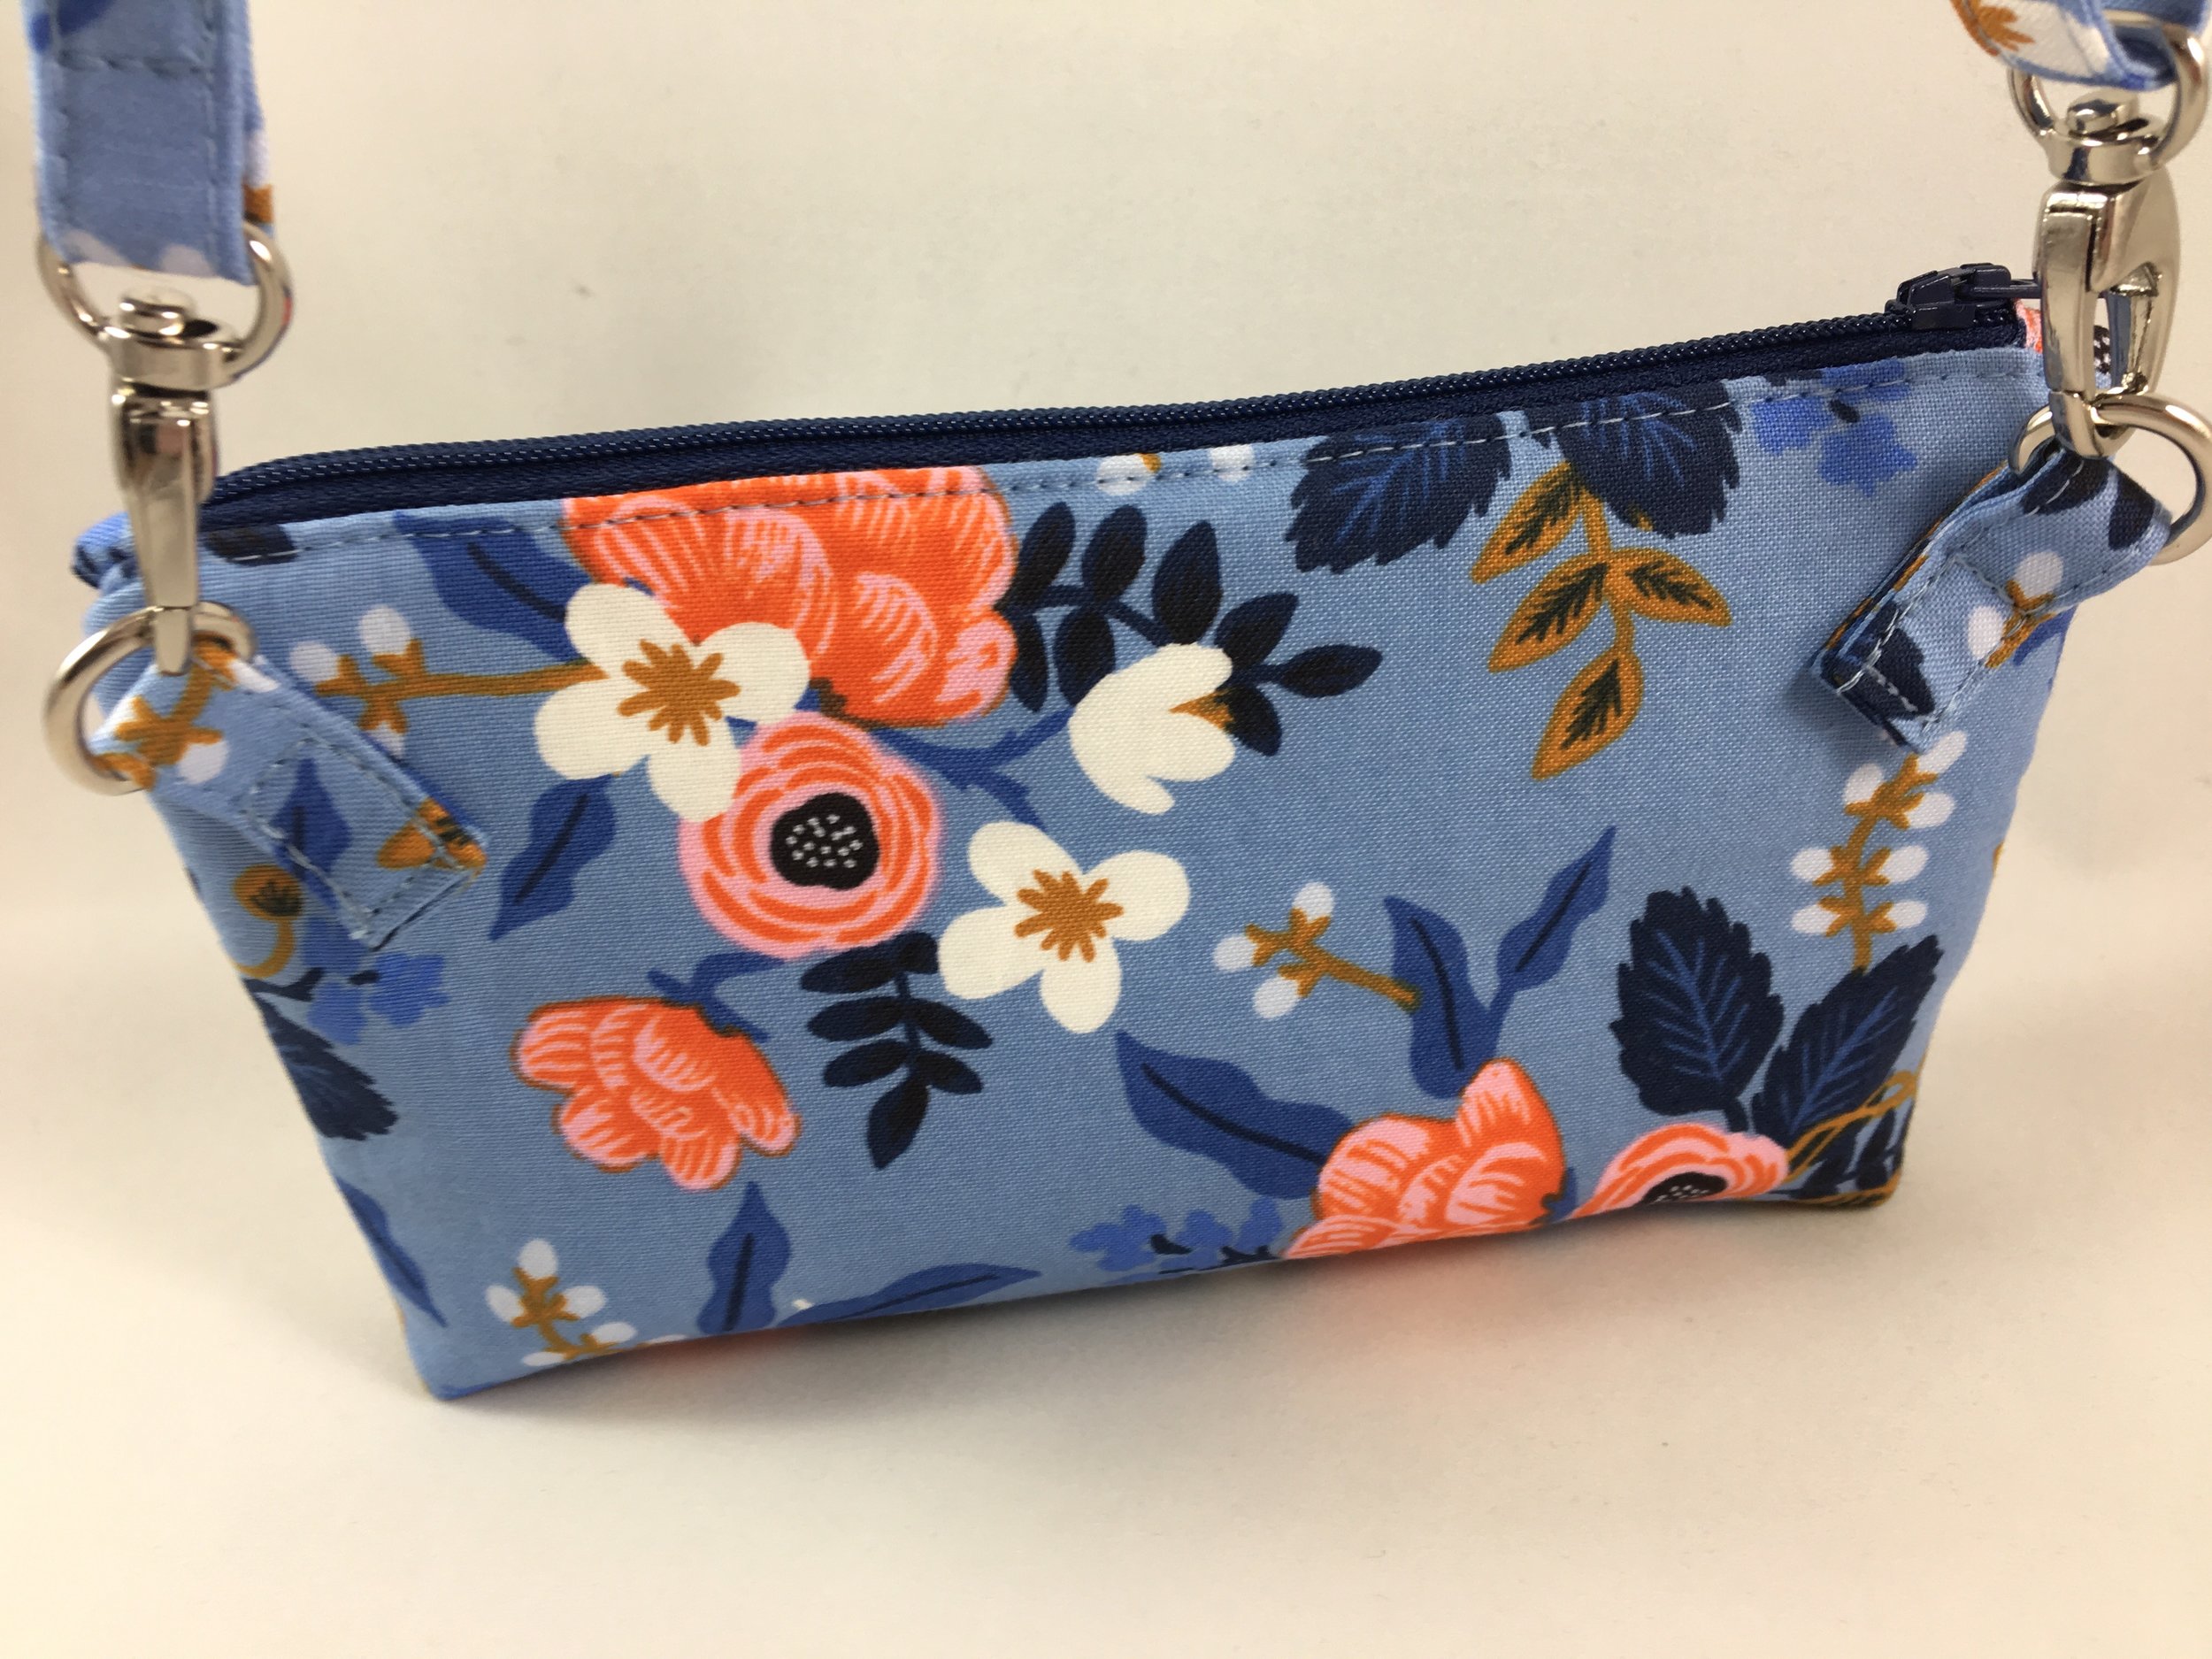
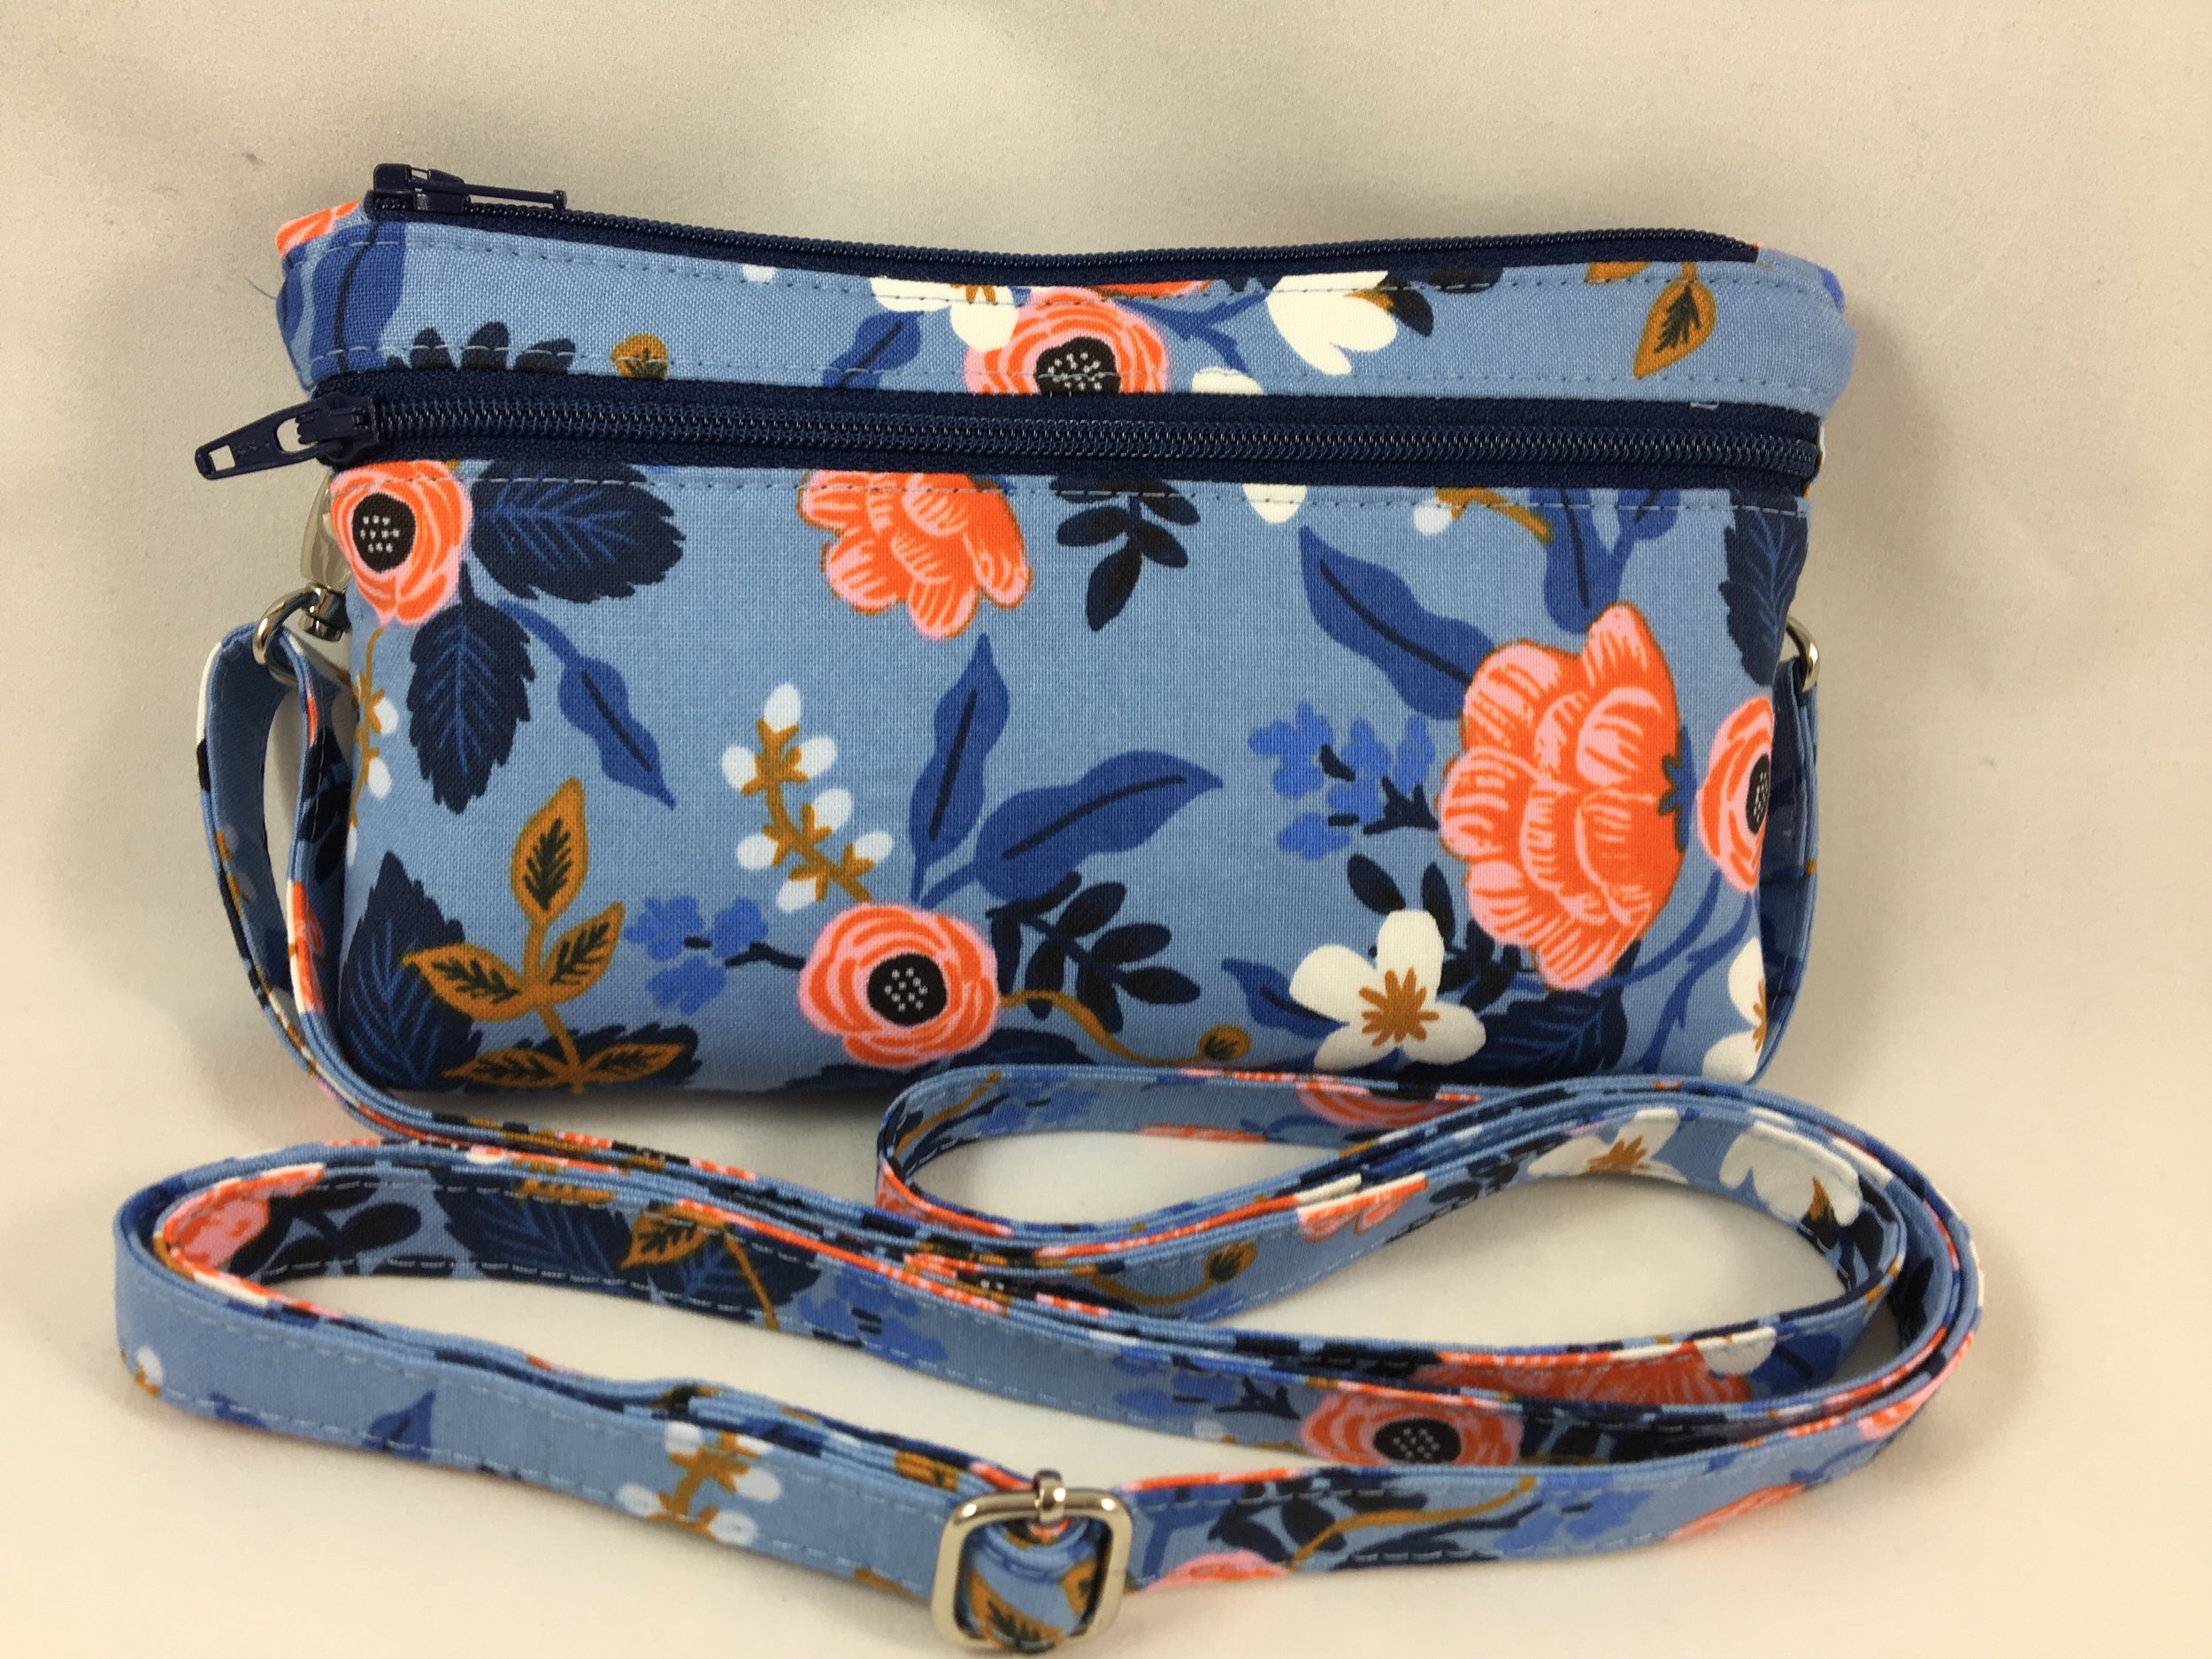
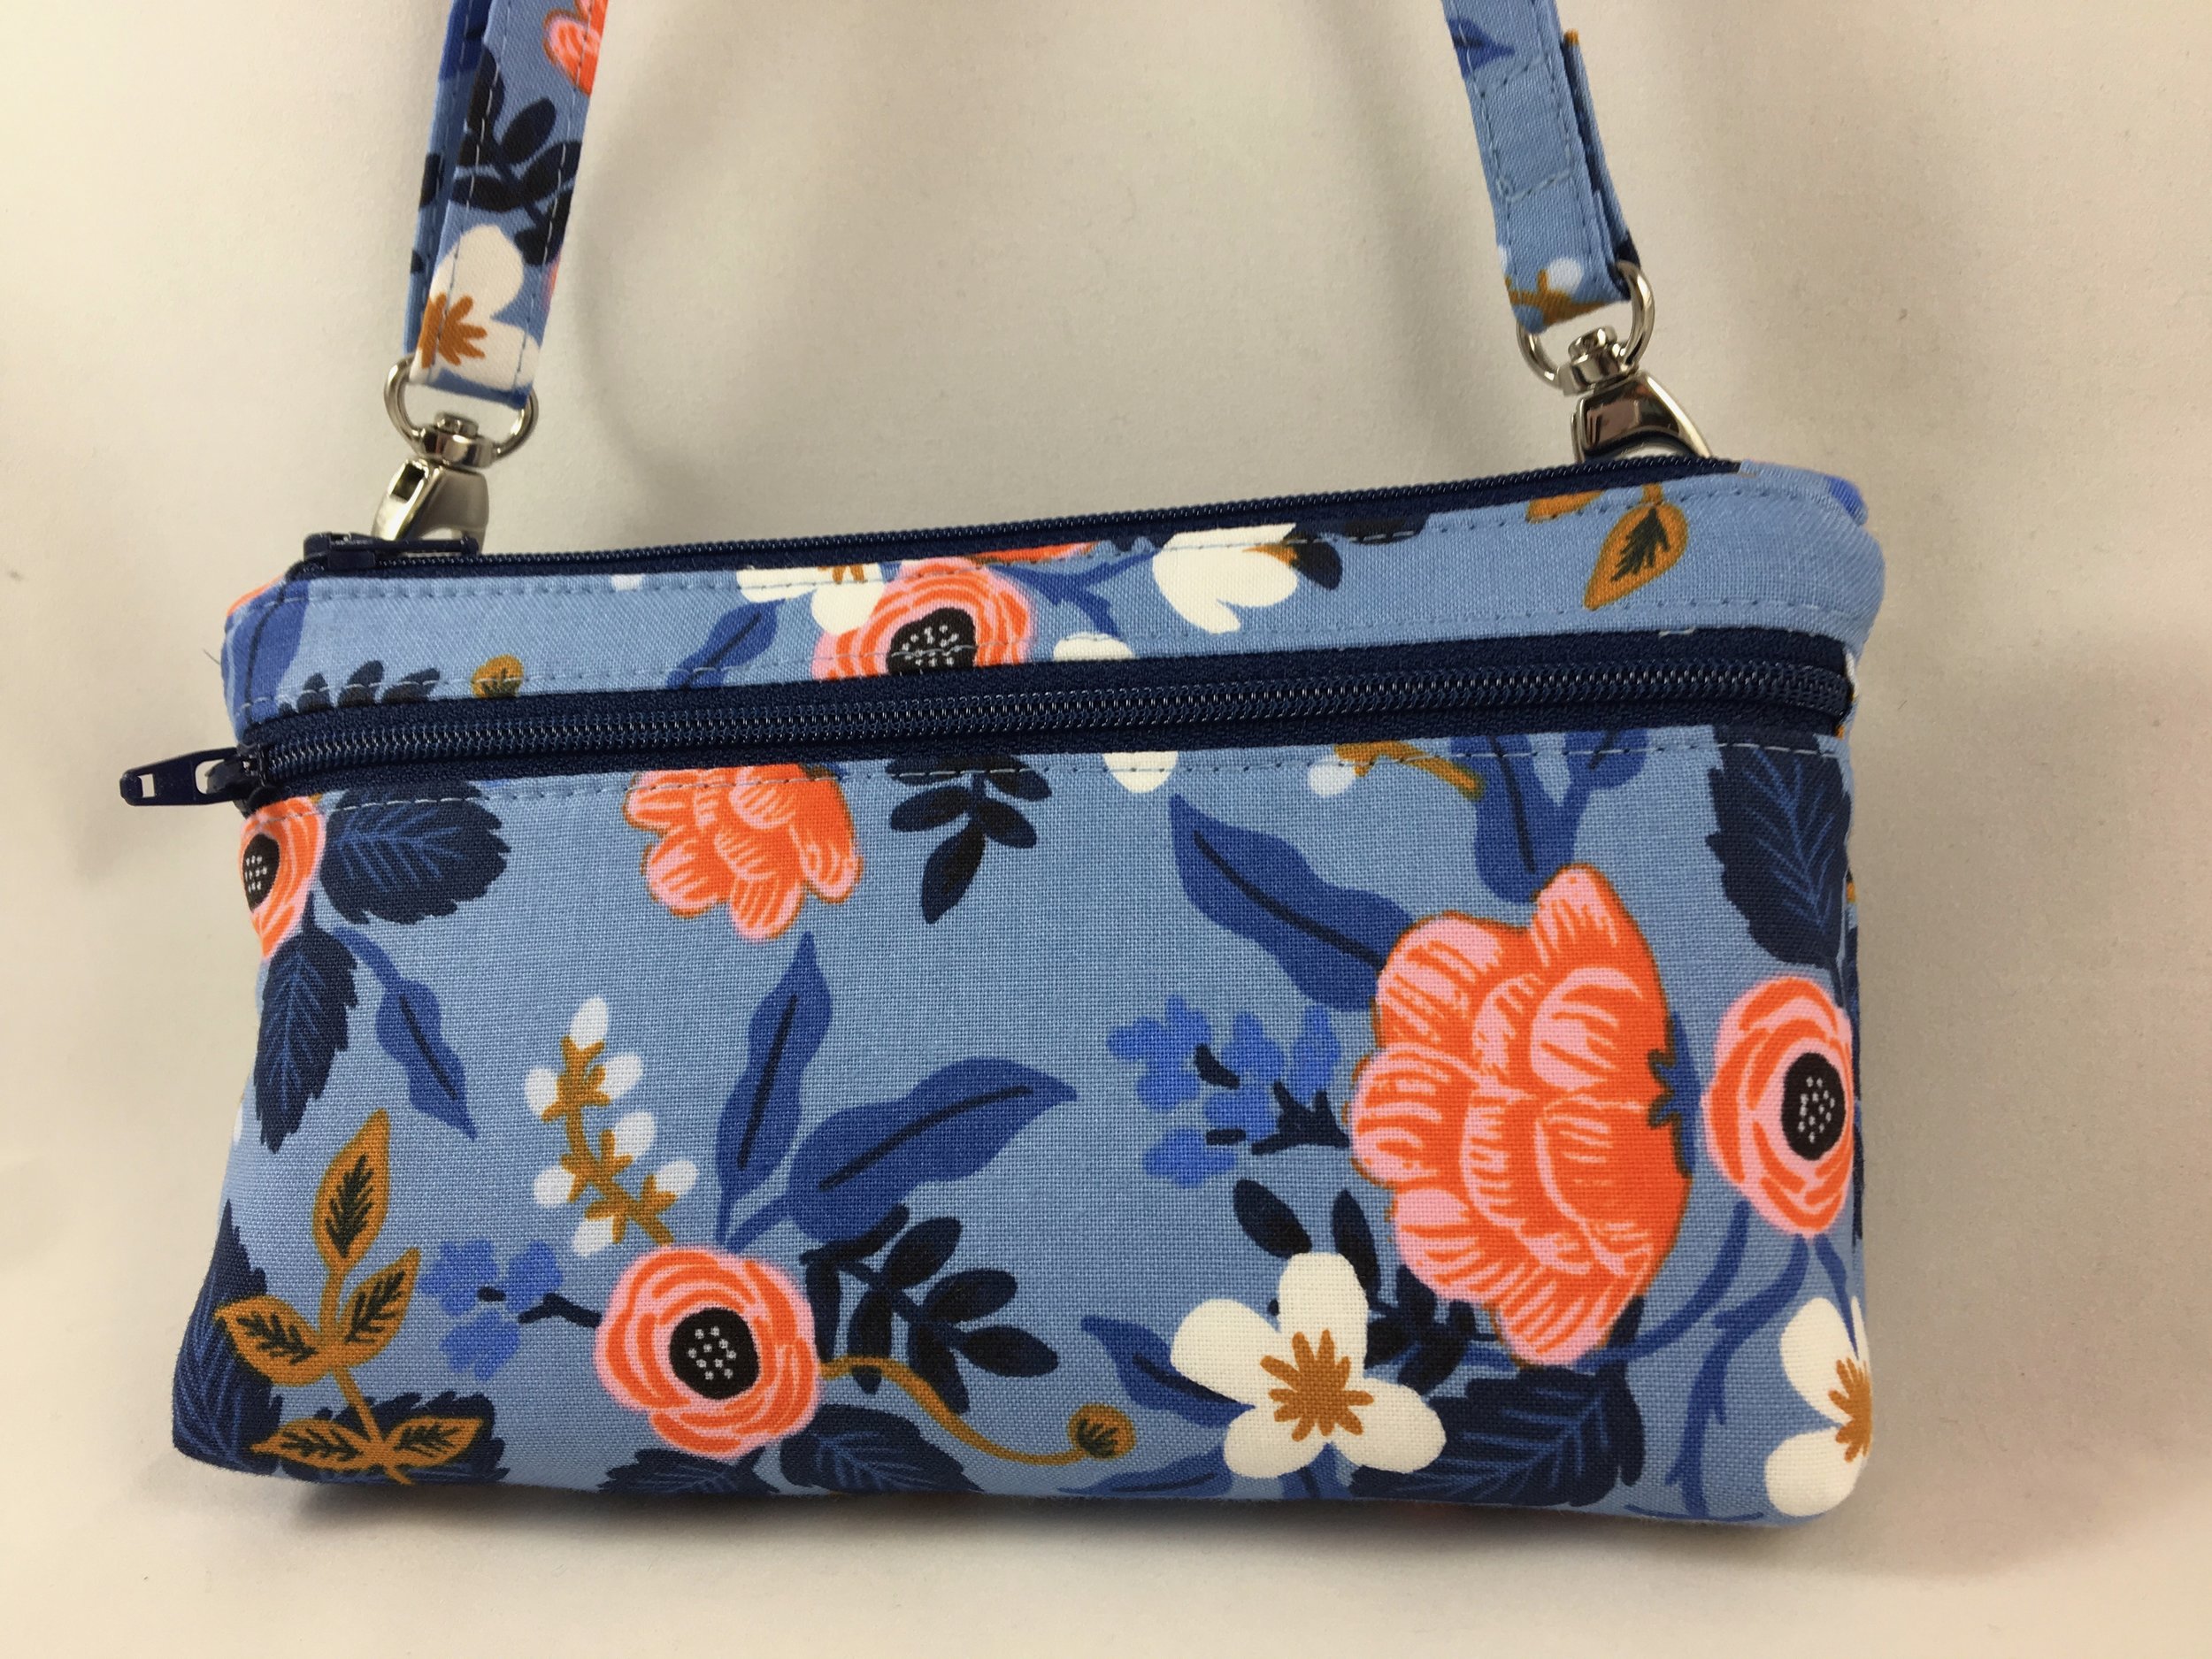
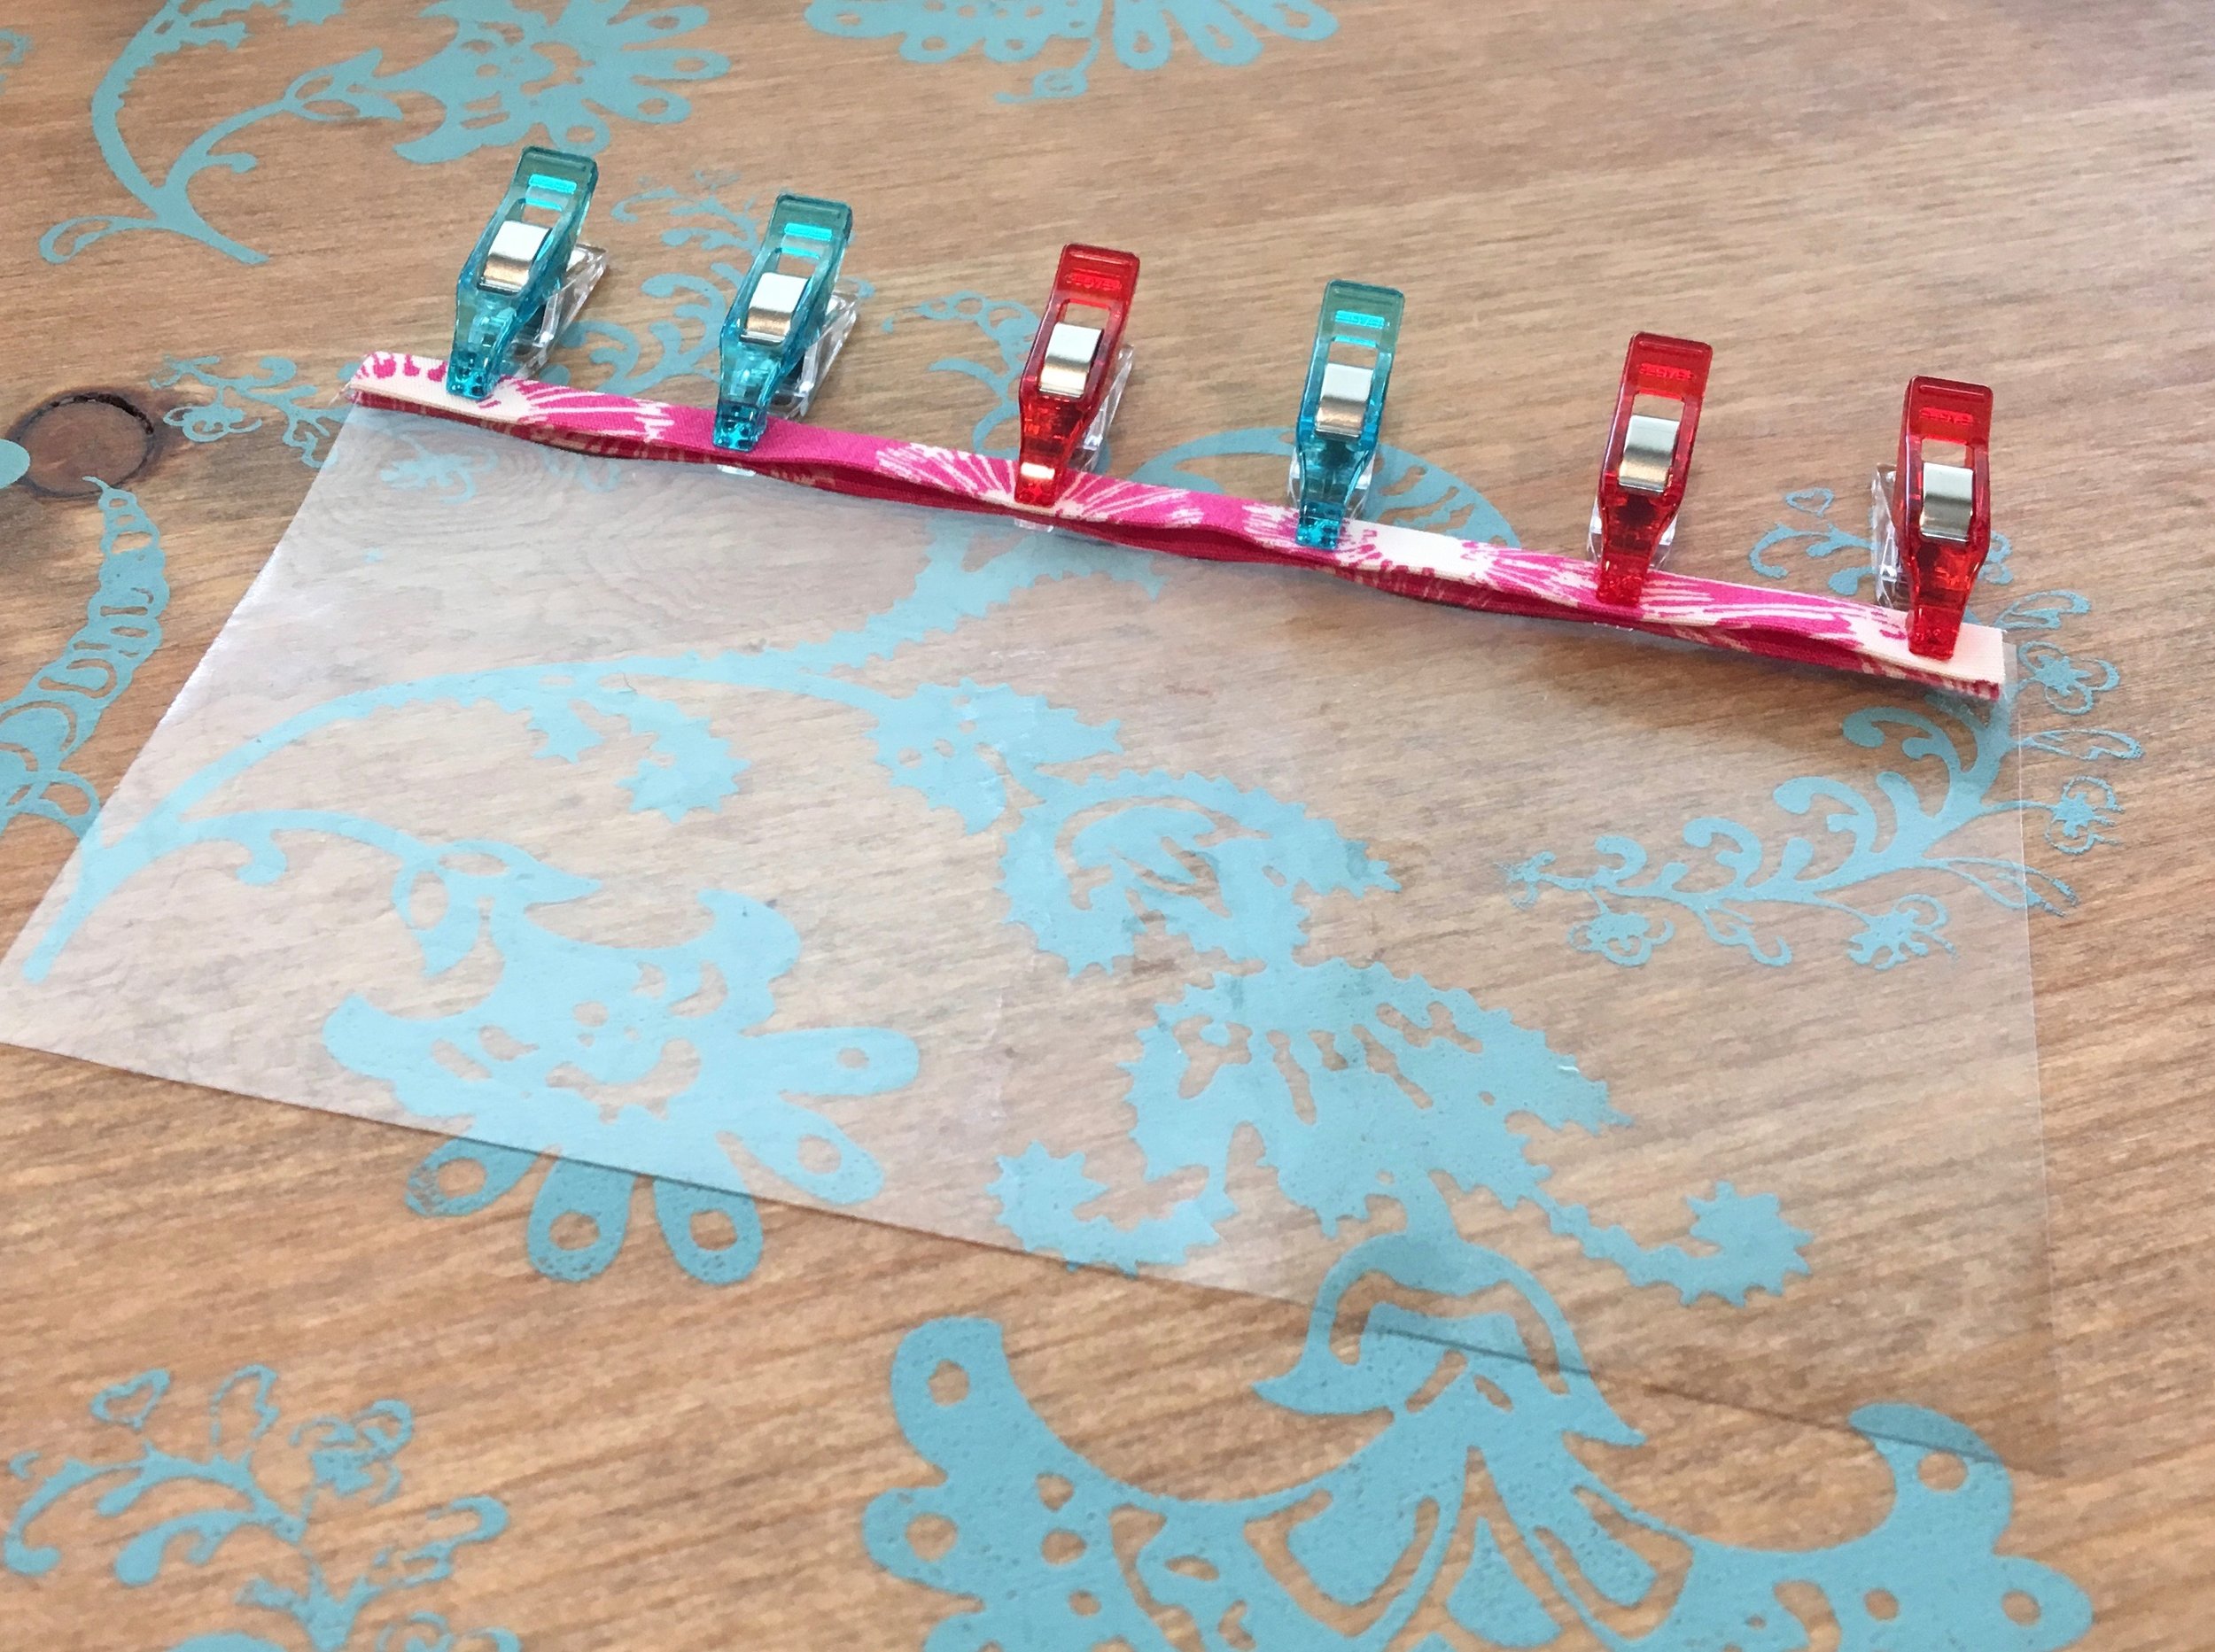
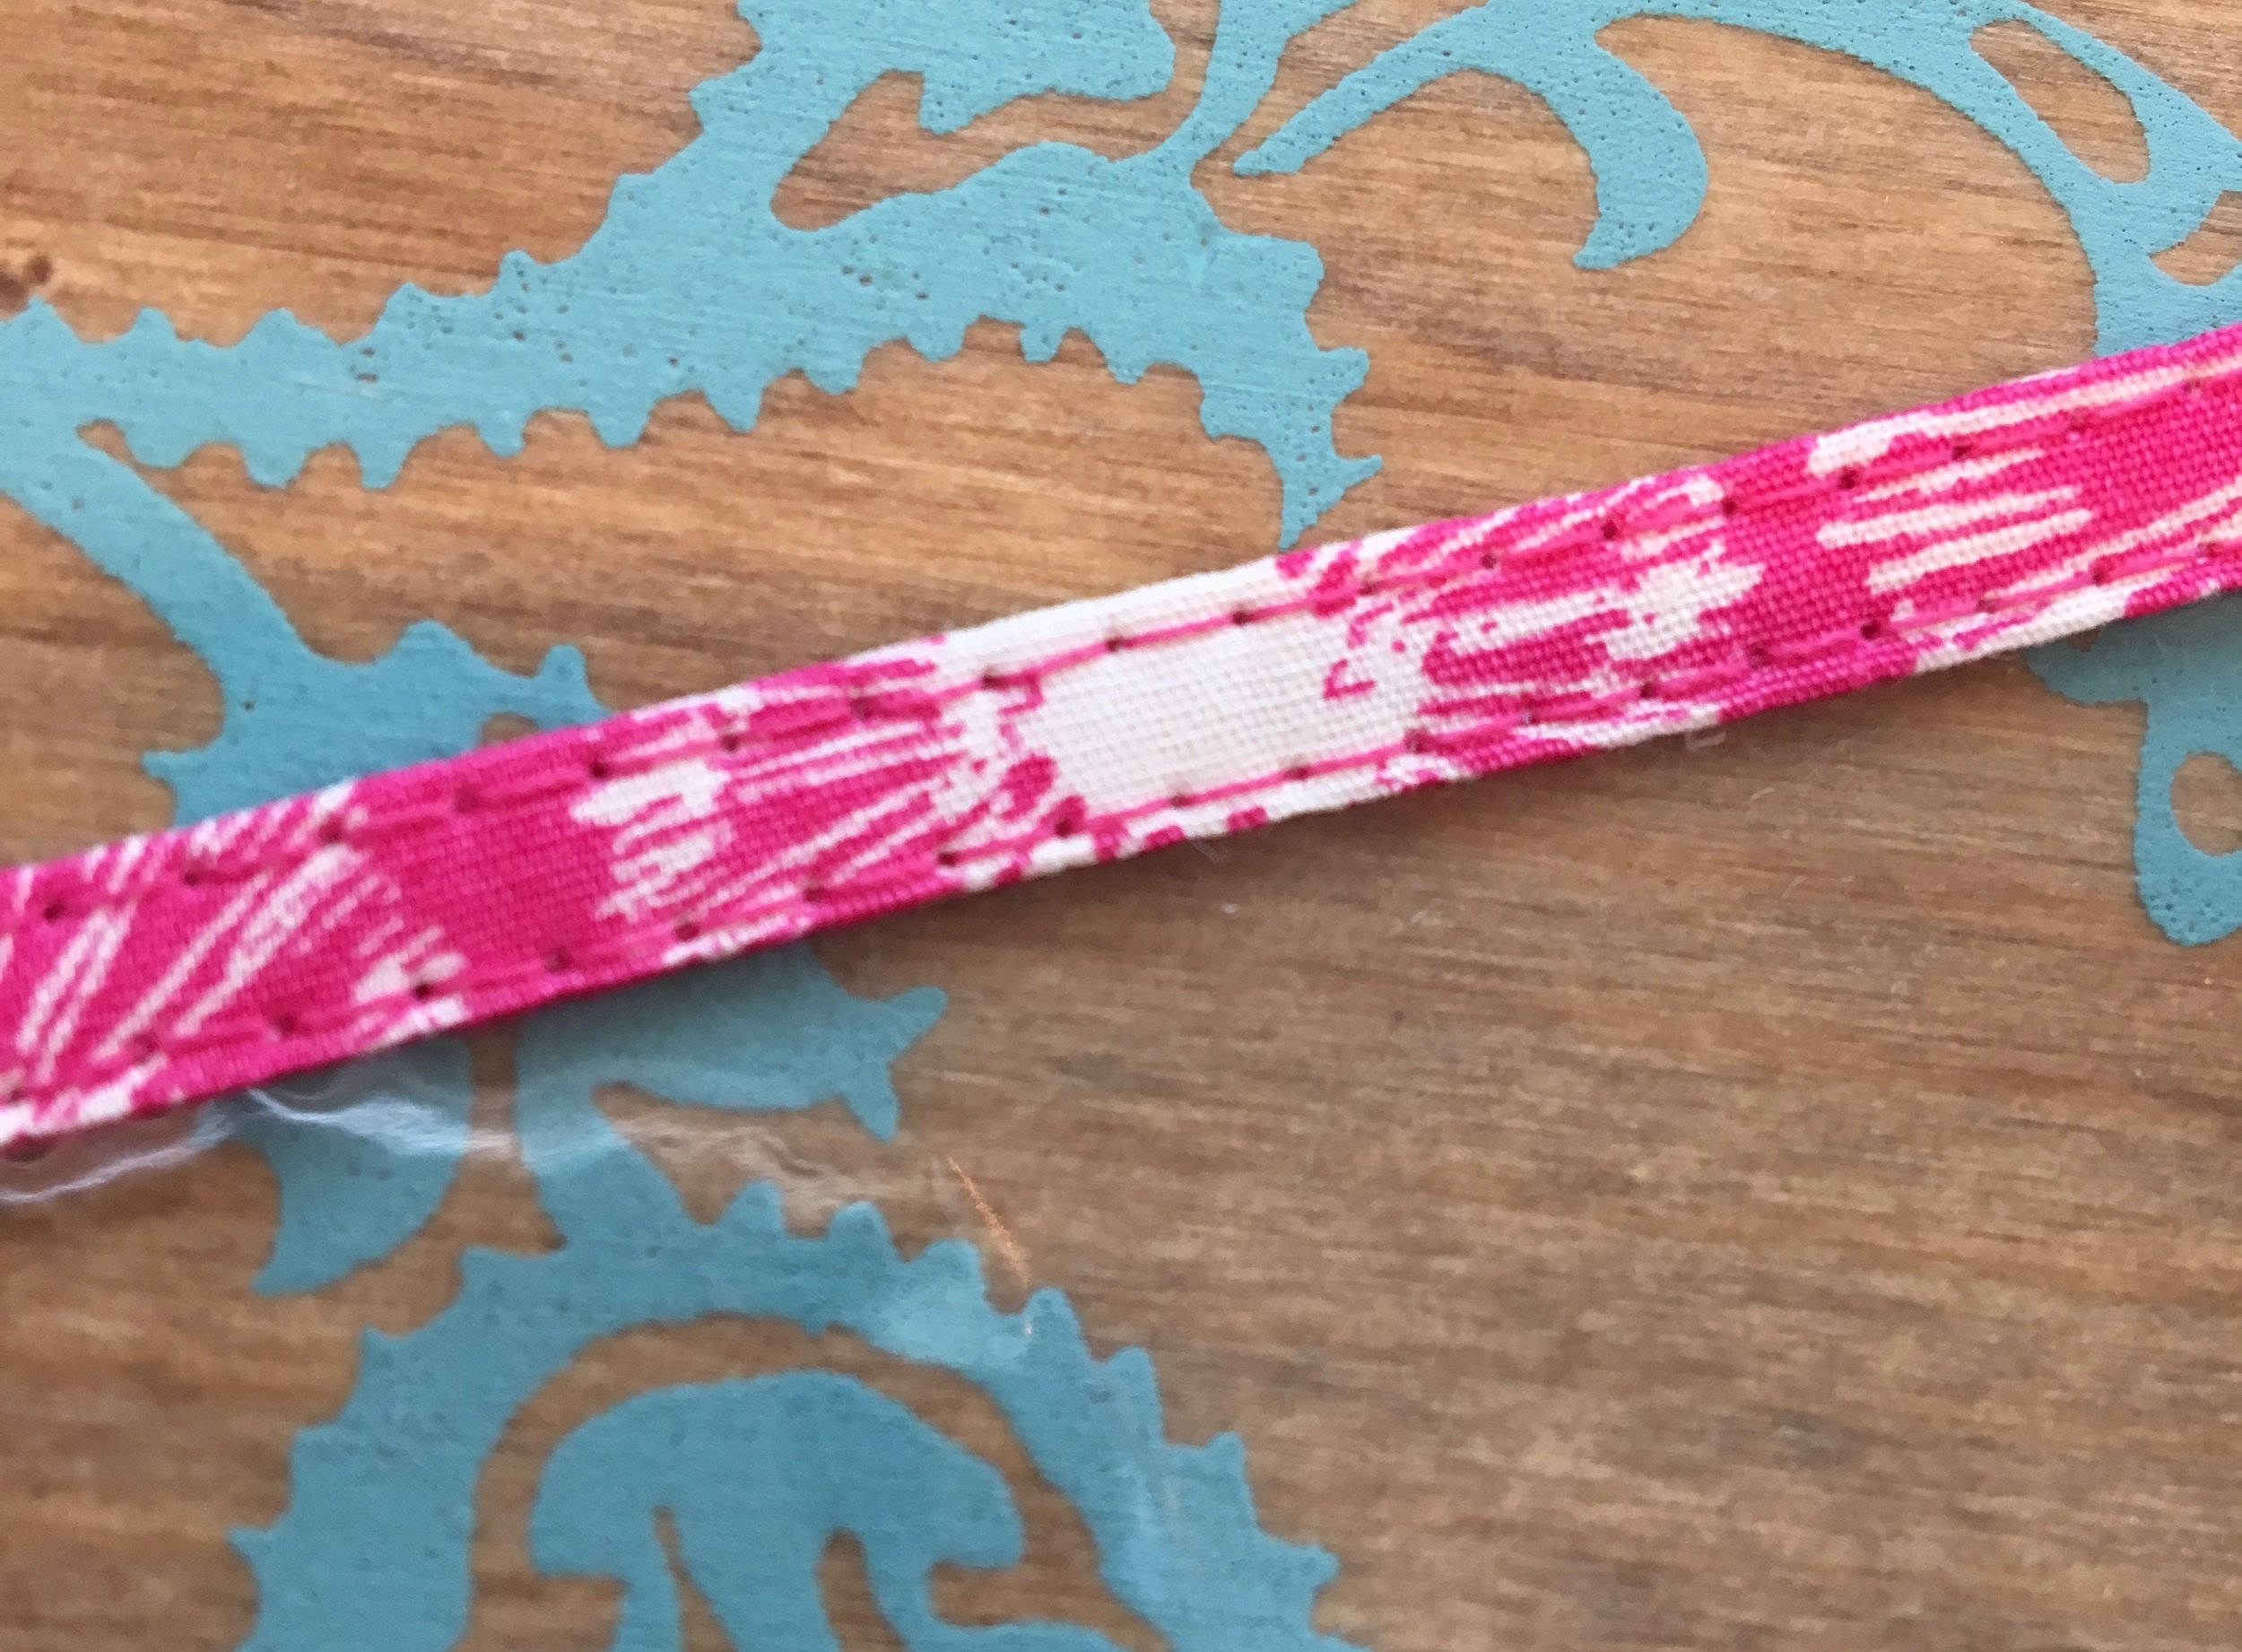
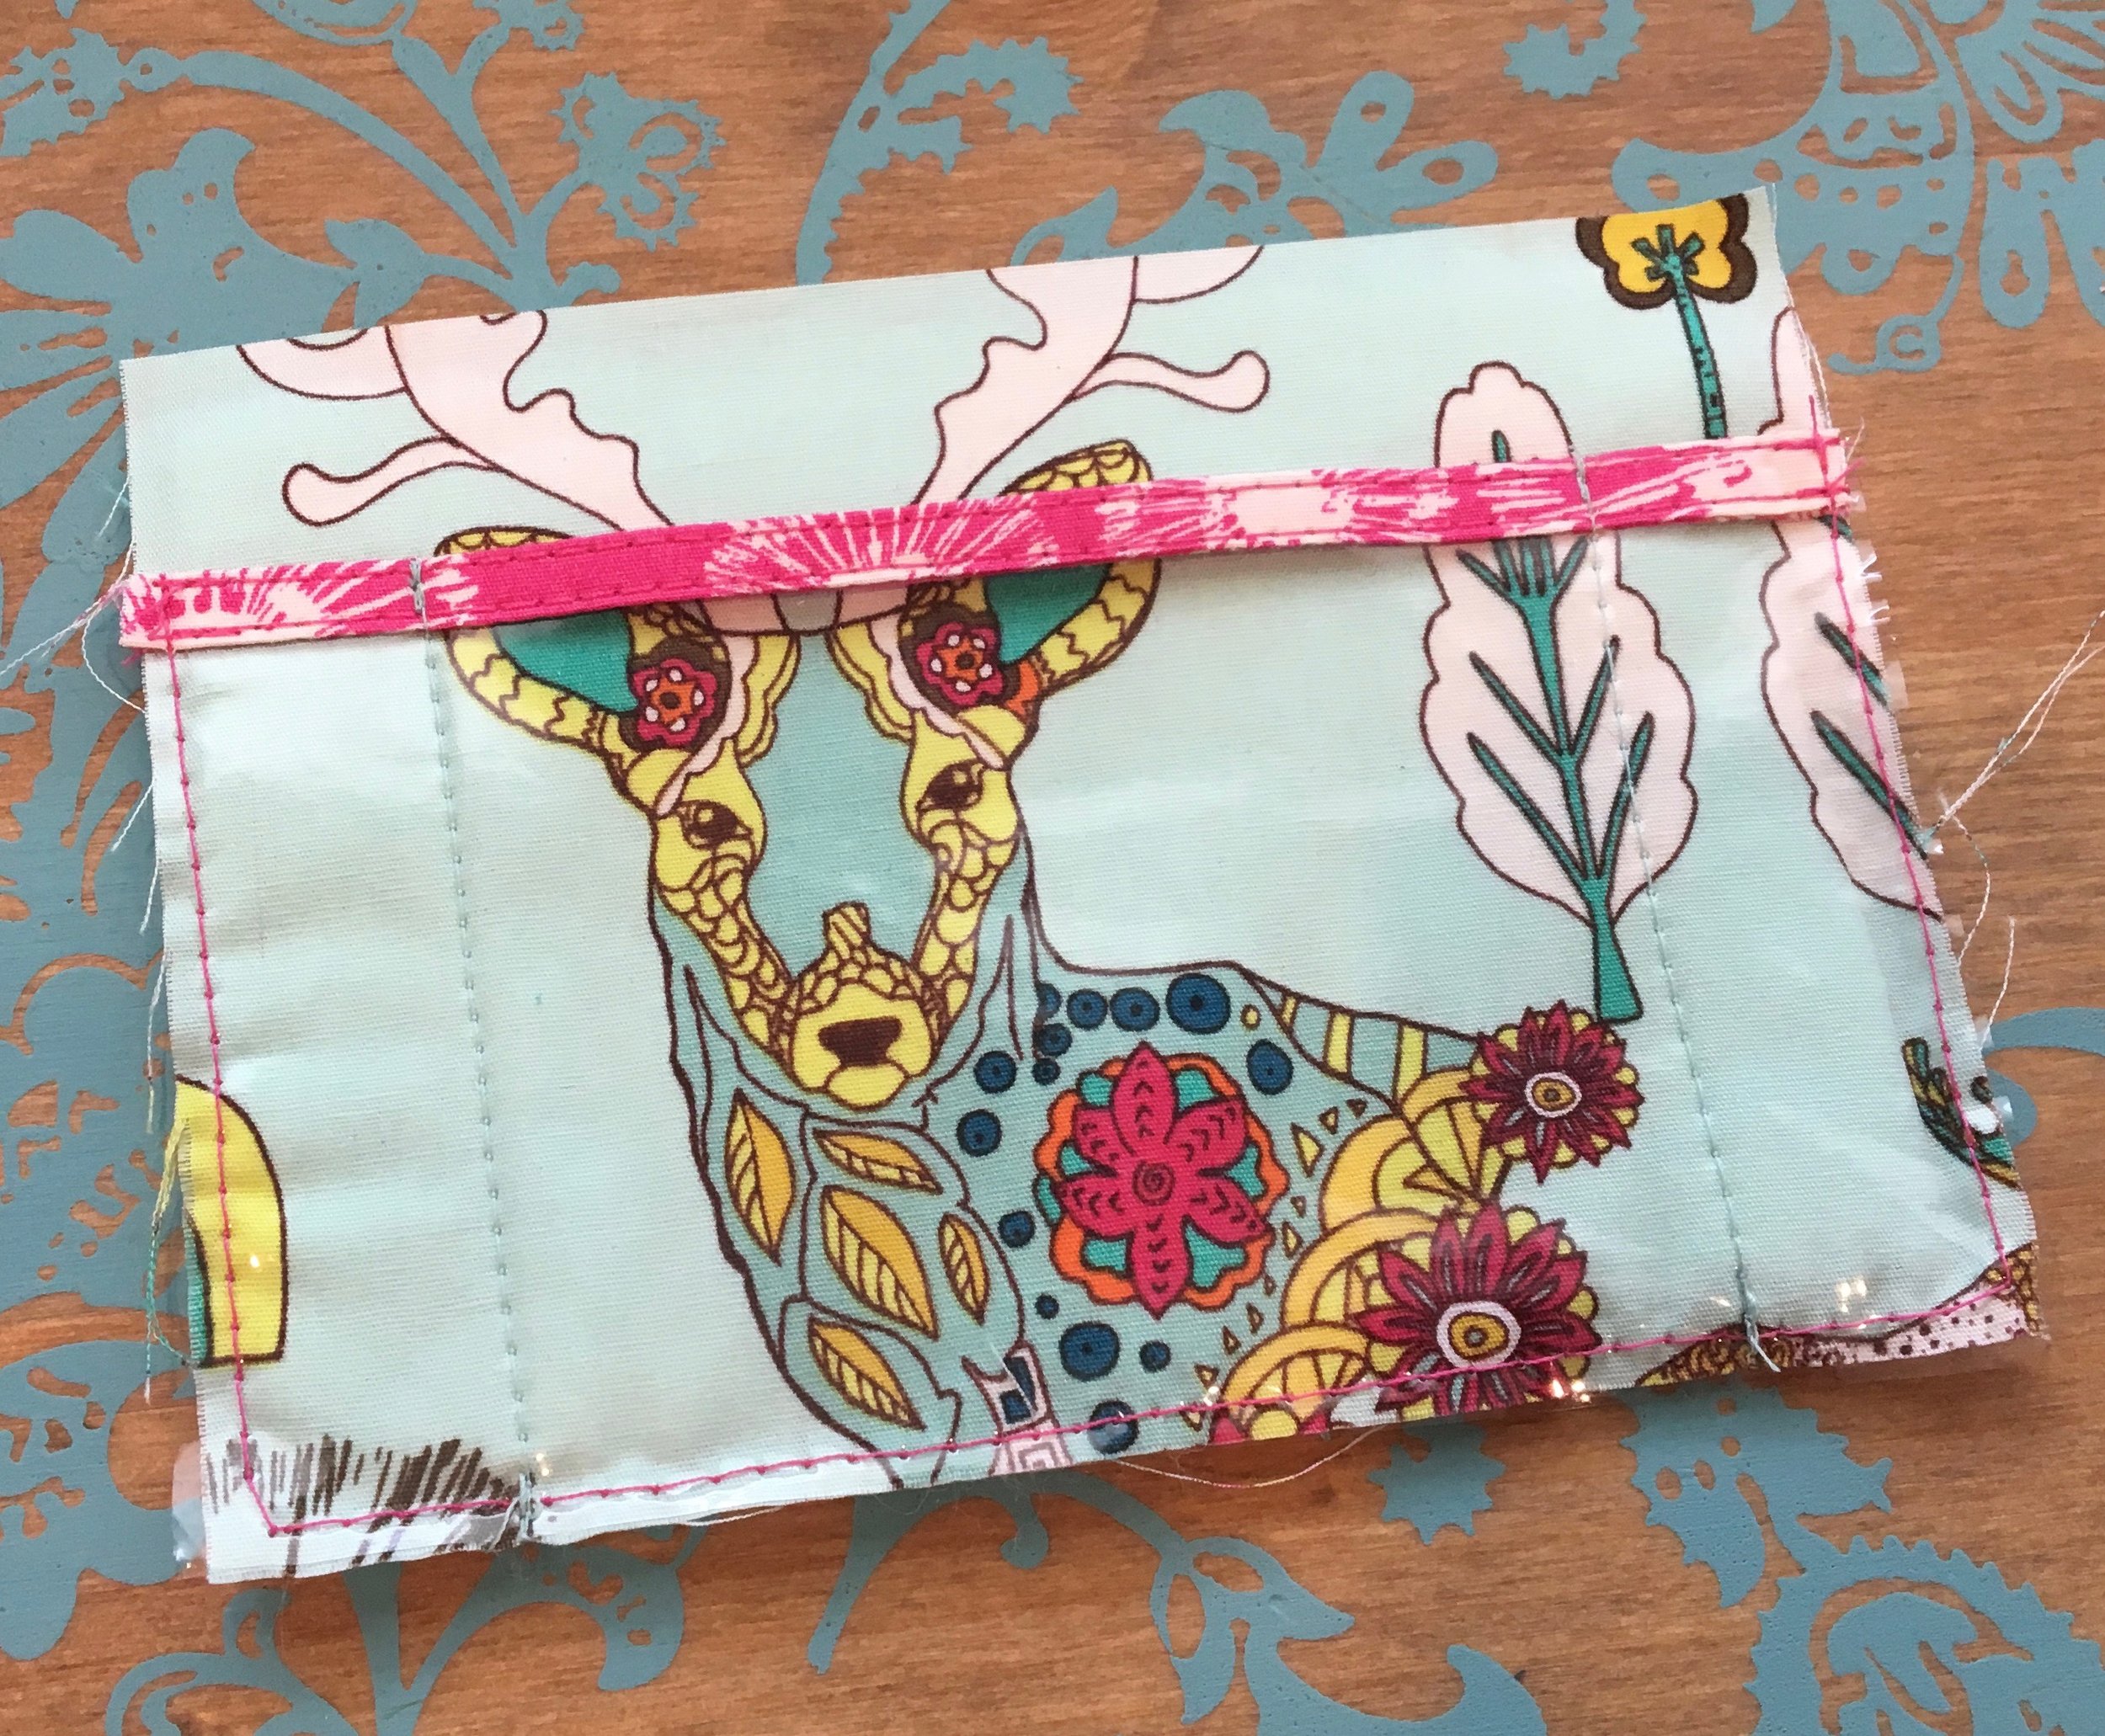
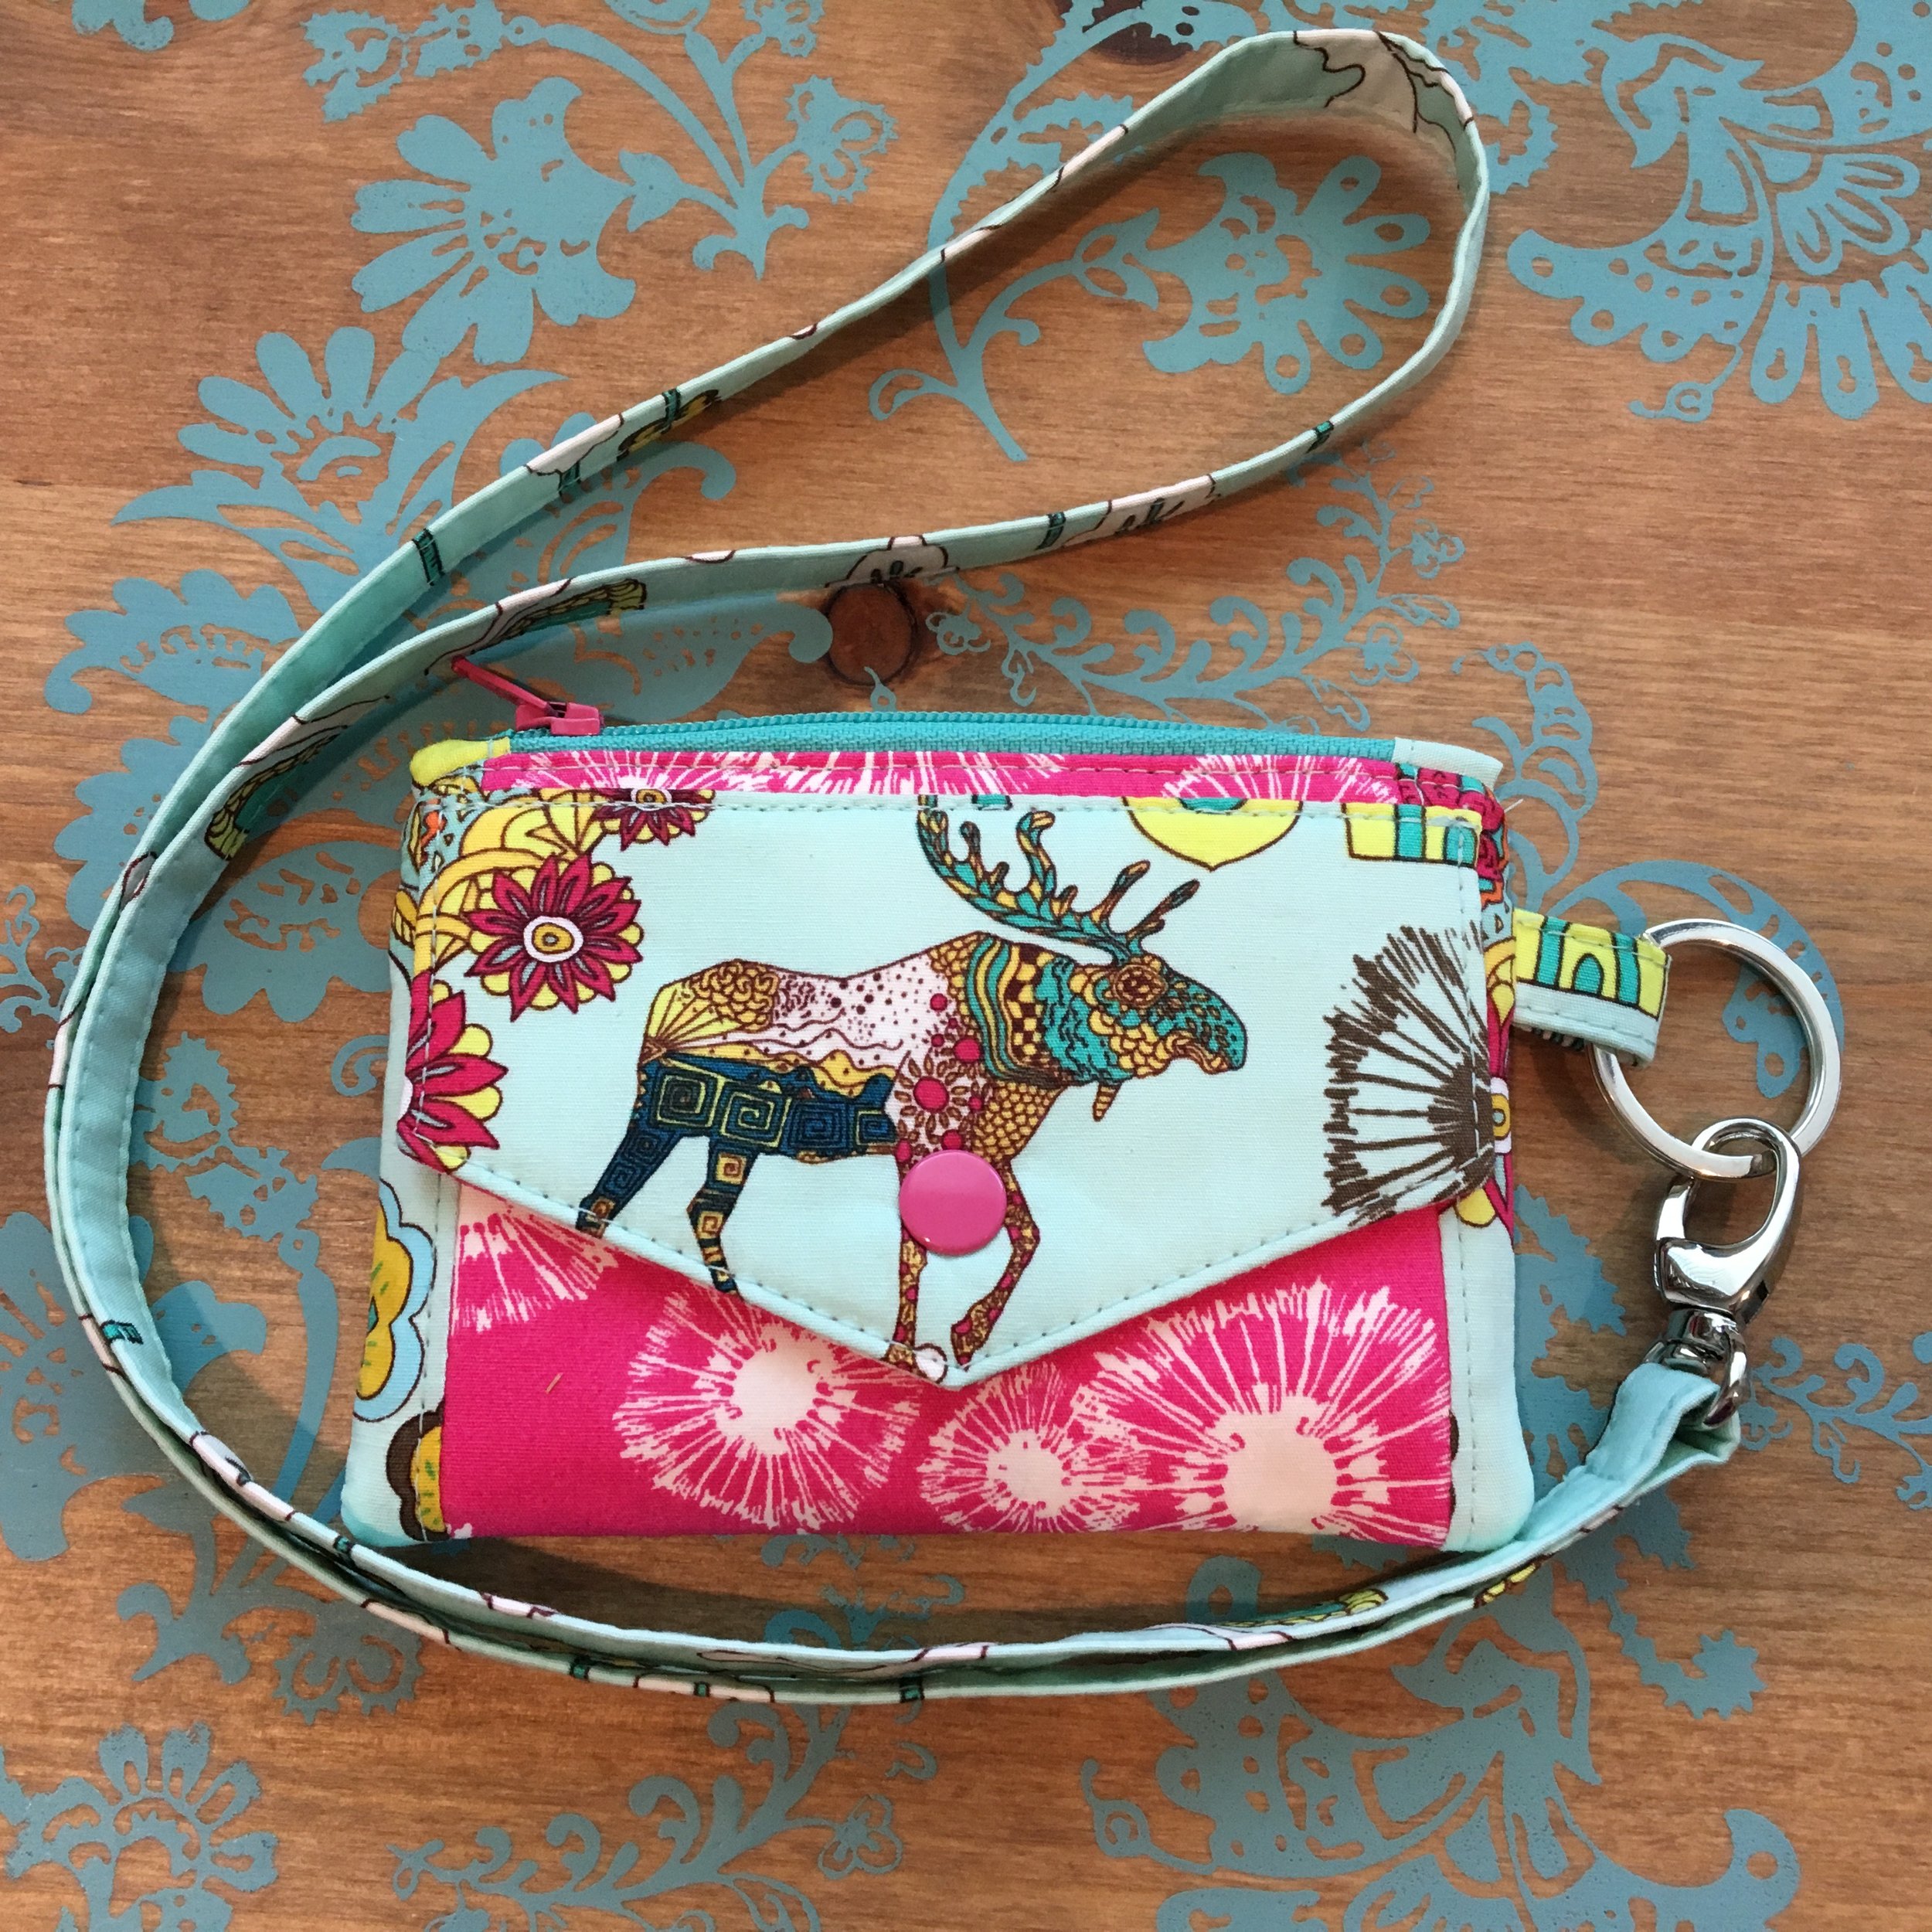
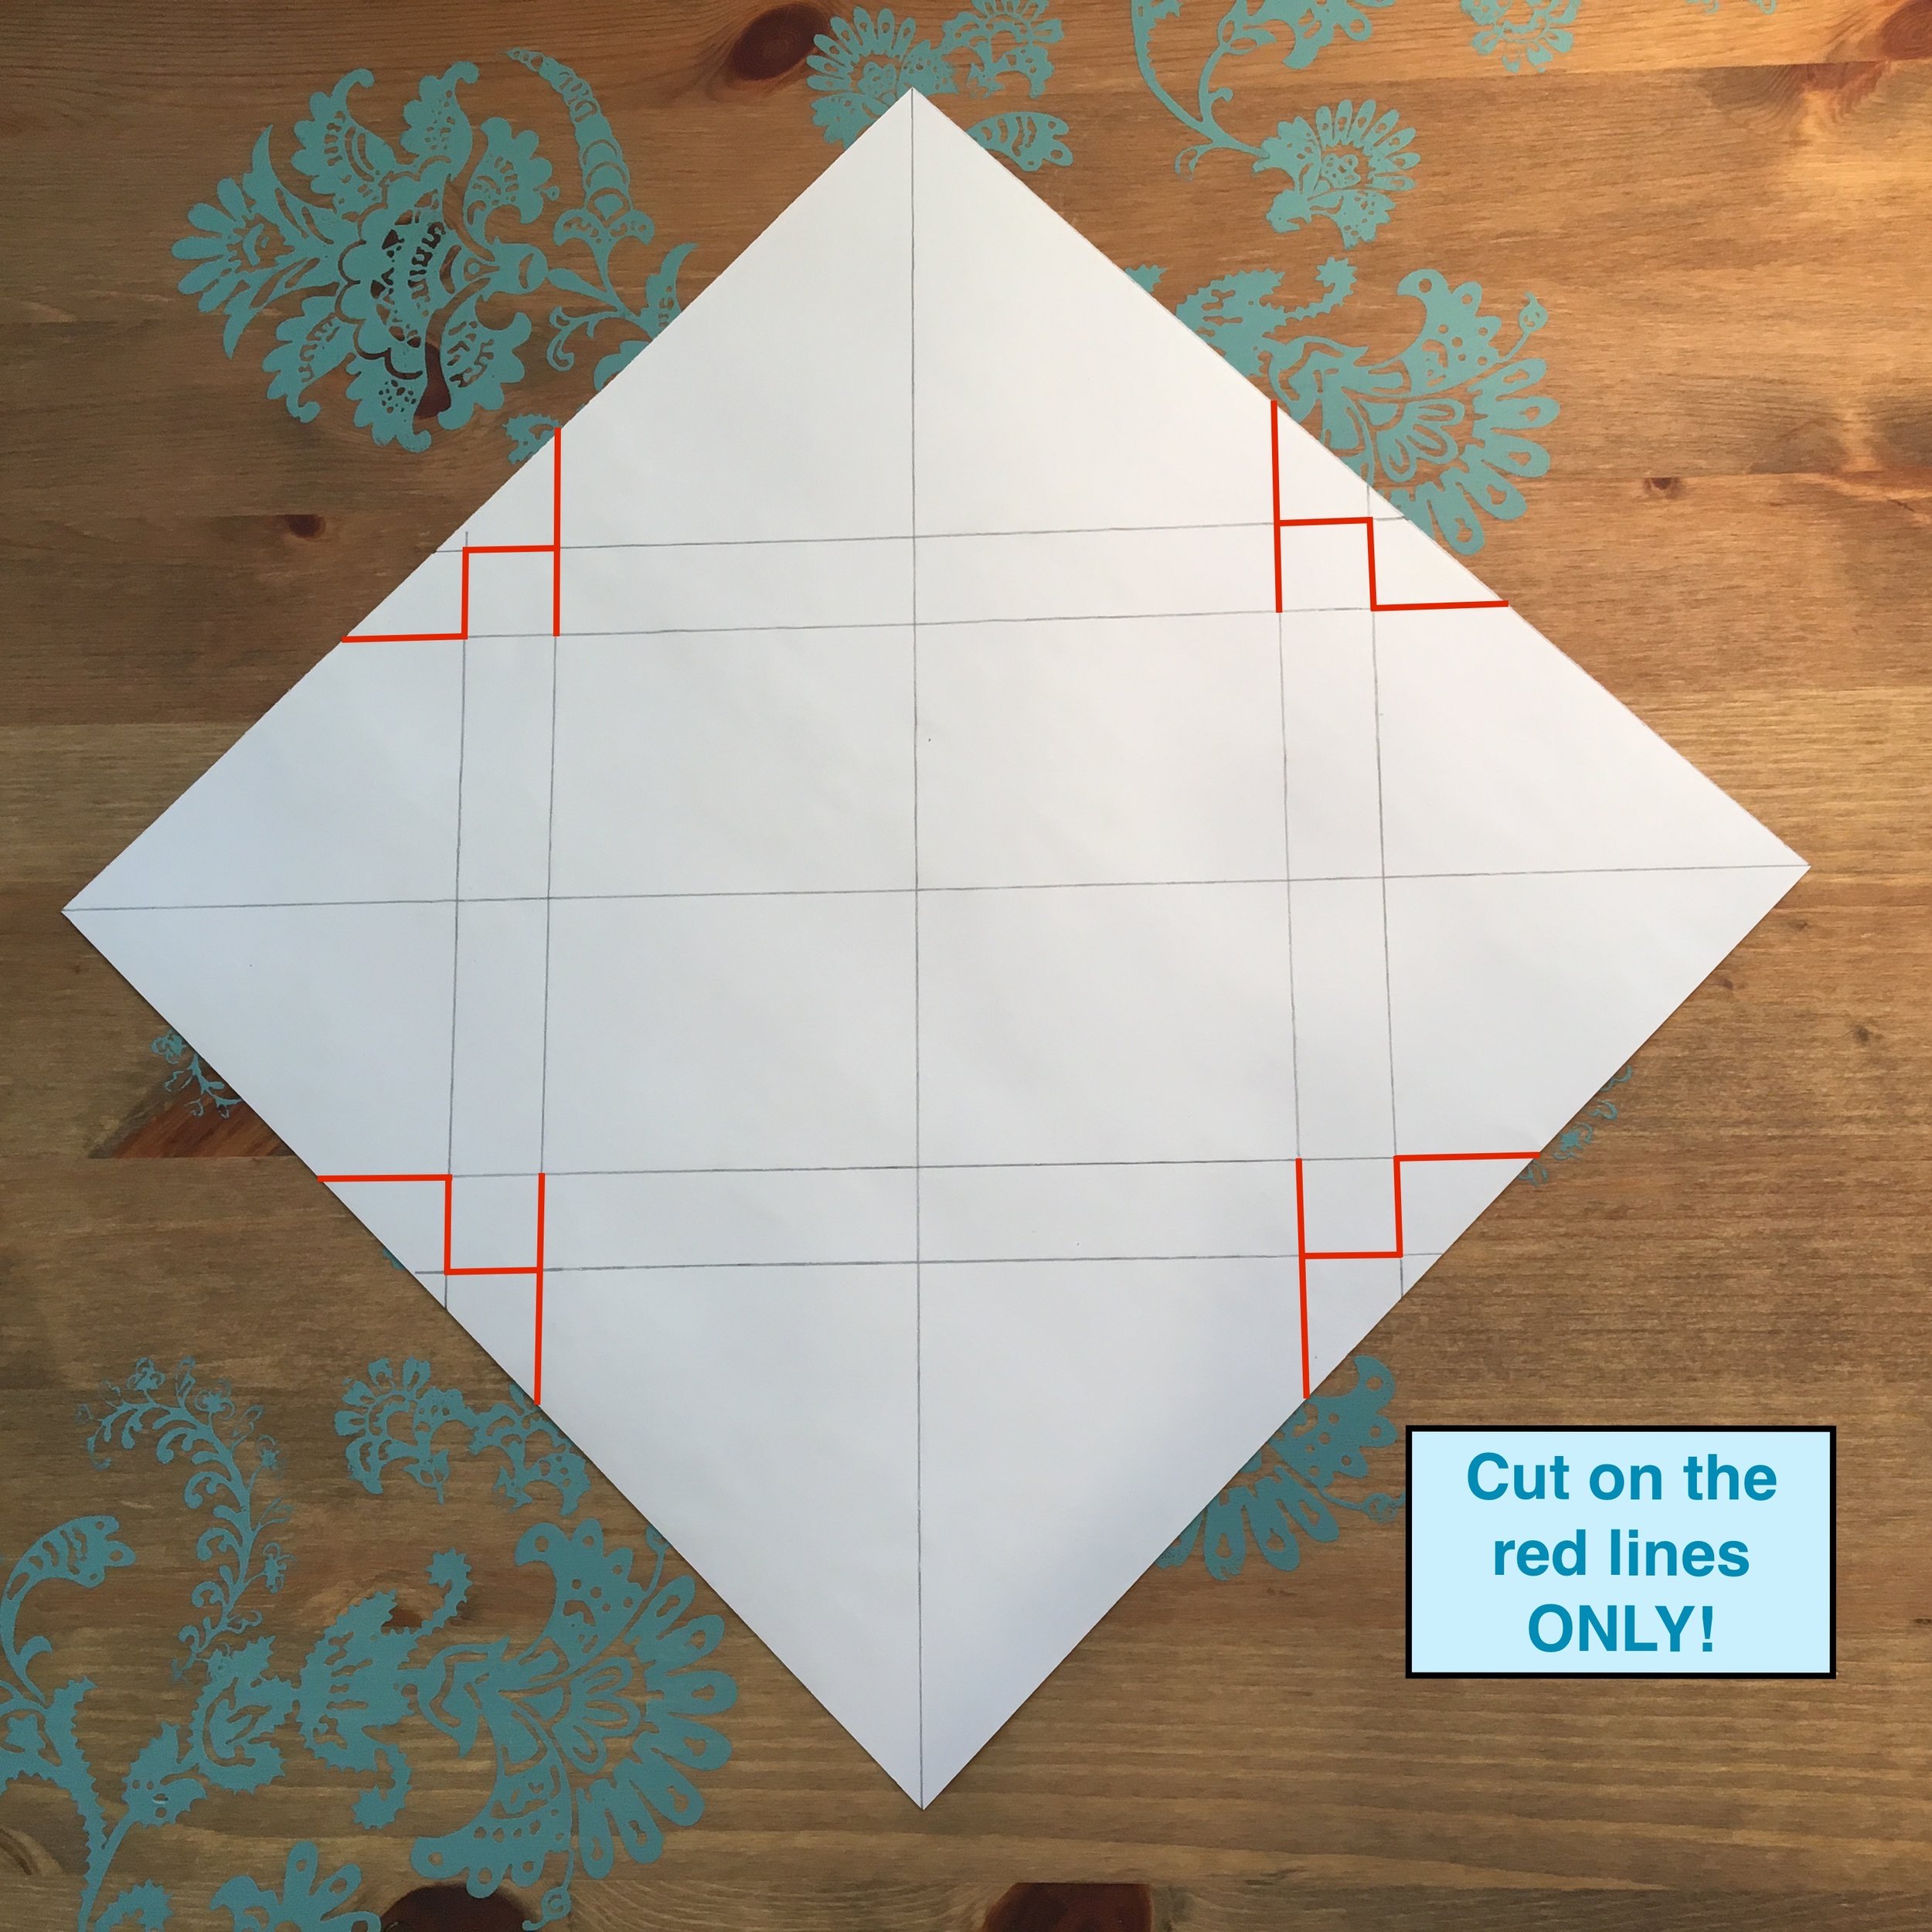
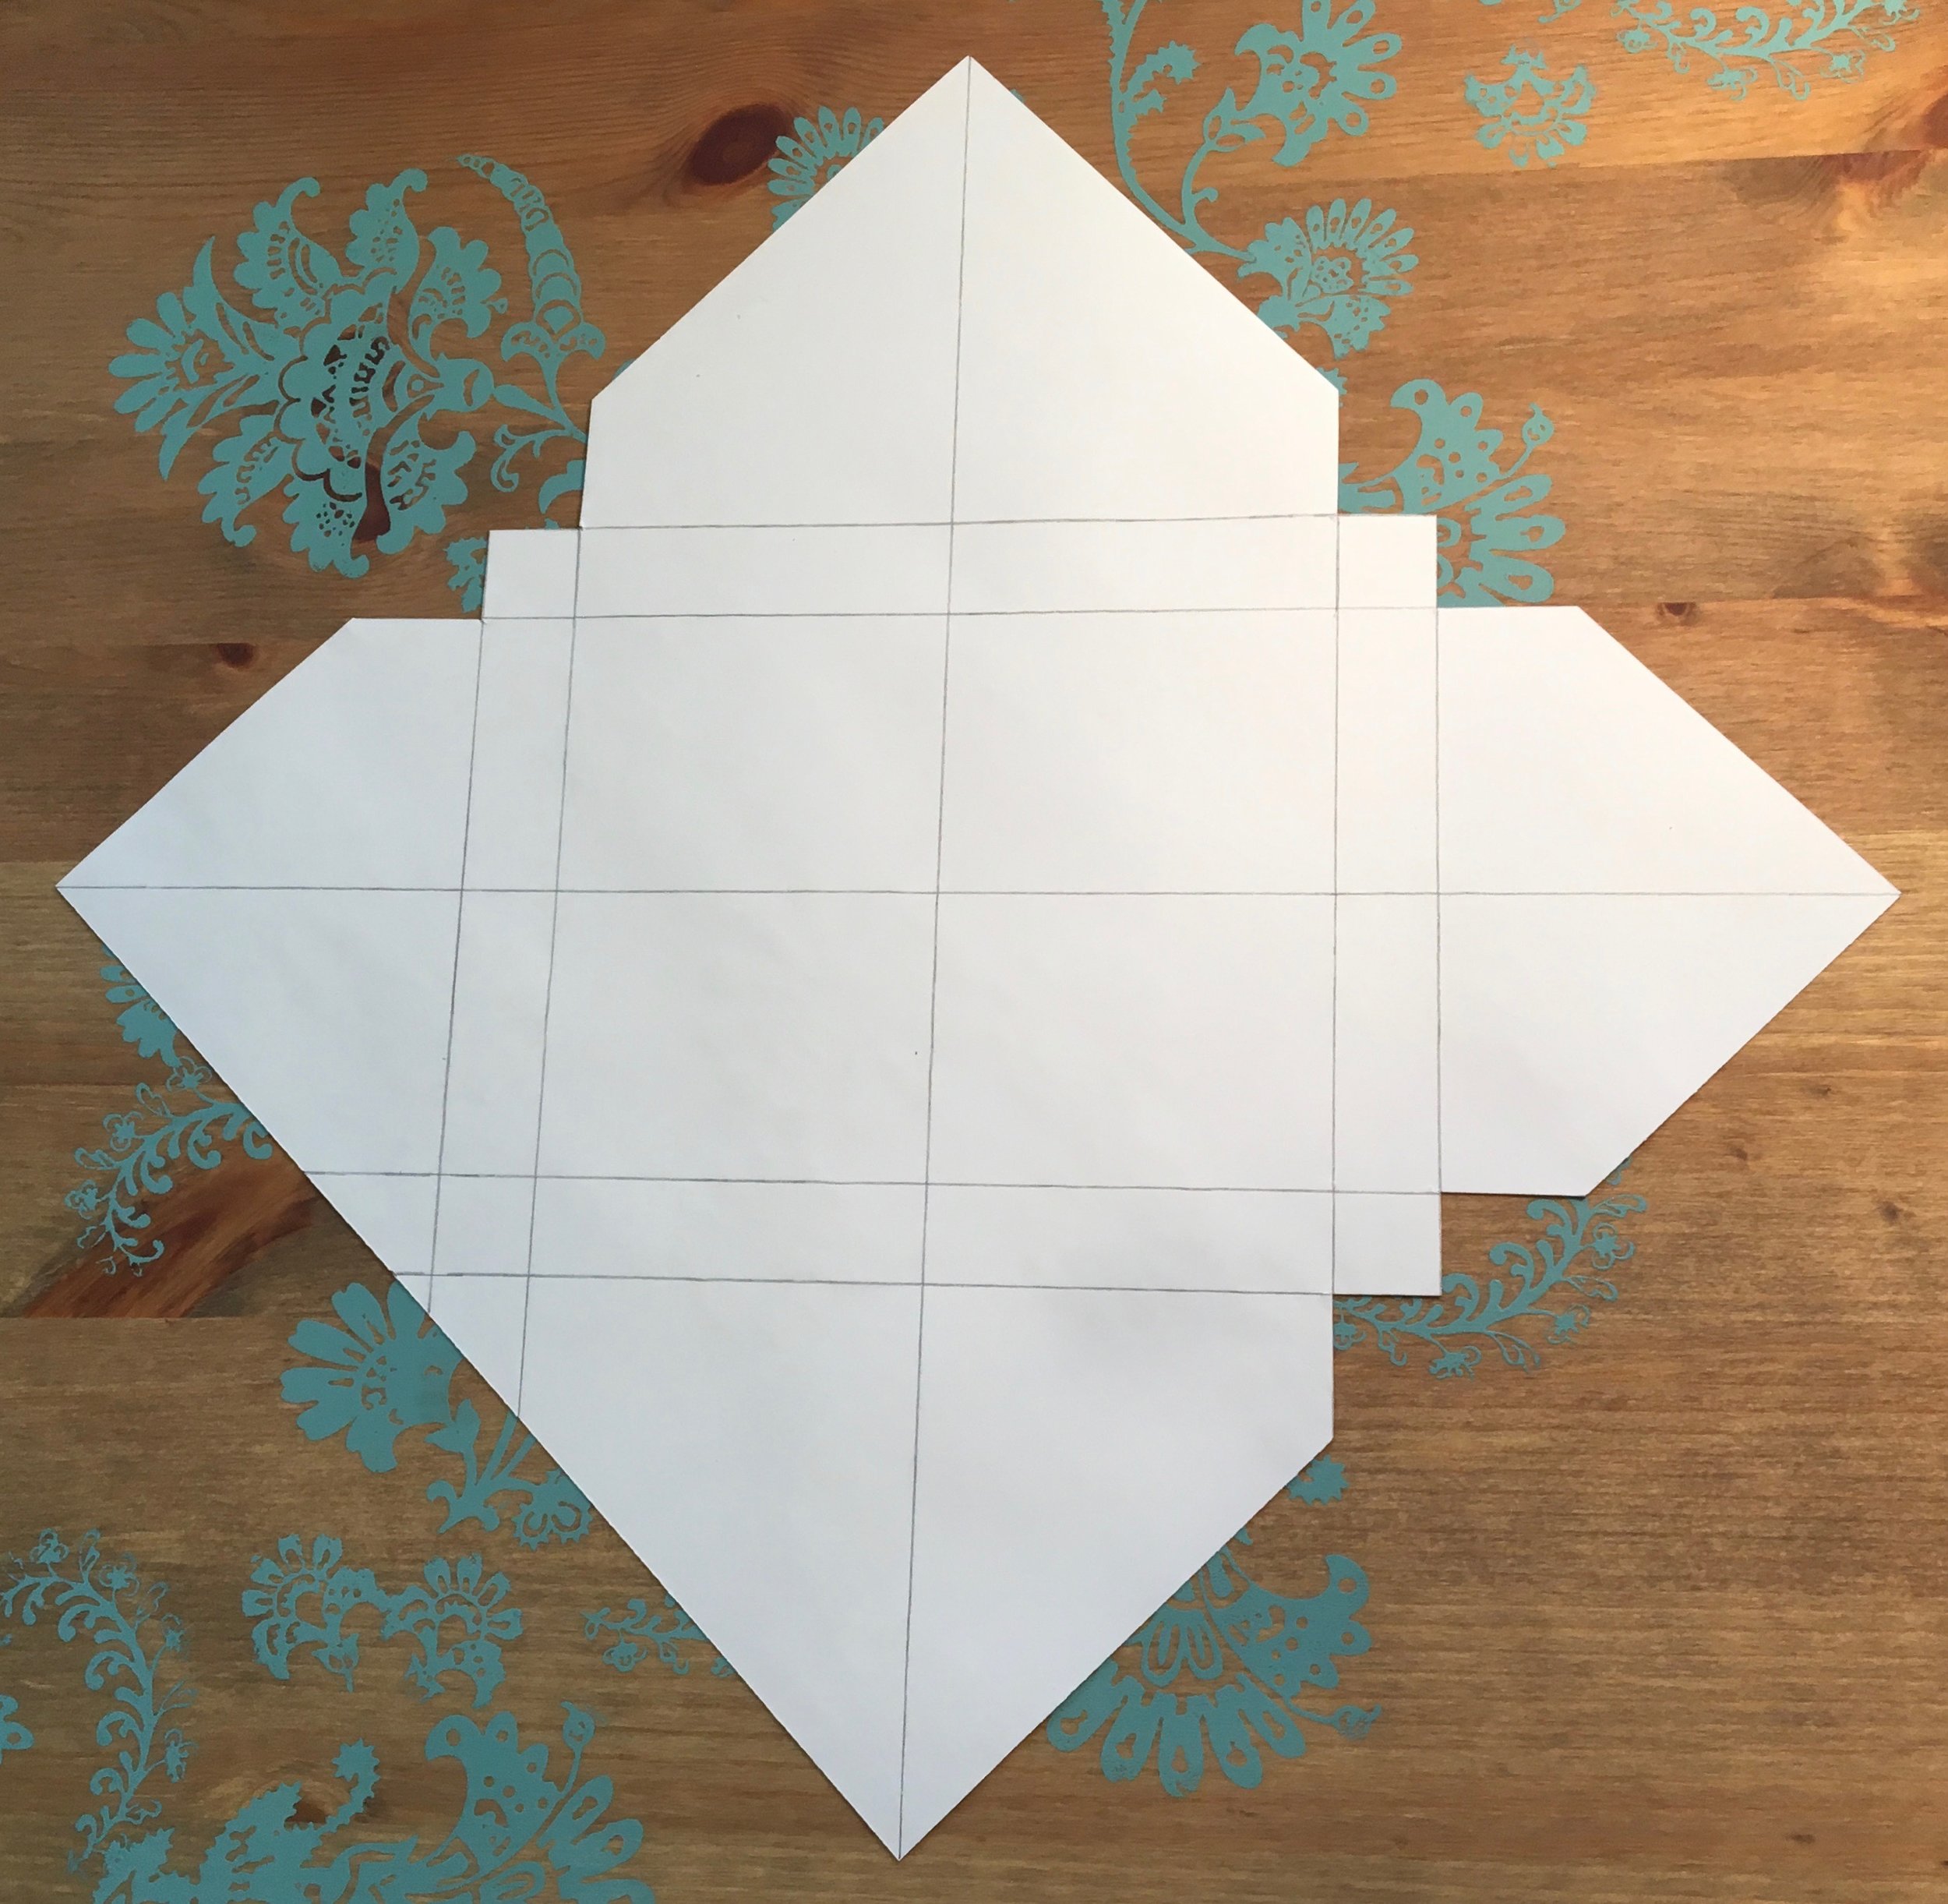
Okay, I will stop rambling on about snaps and show you the free pattern! The Snap To It Key Fob pattern is easy and fun to sew! I think you are going to LOVE it!

IMG_2406 2.jpg

Watch out though, these are also very addictive – as in, this is what you will be putting in everyone’s stockings this year for Christmas, even if they haven’t been good! ;)

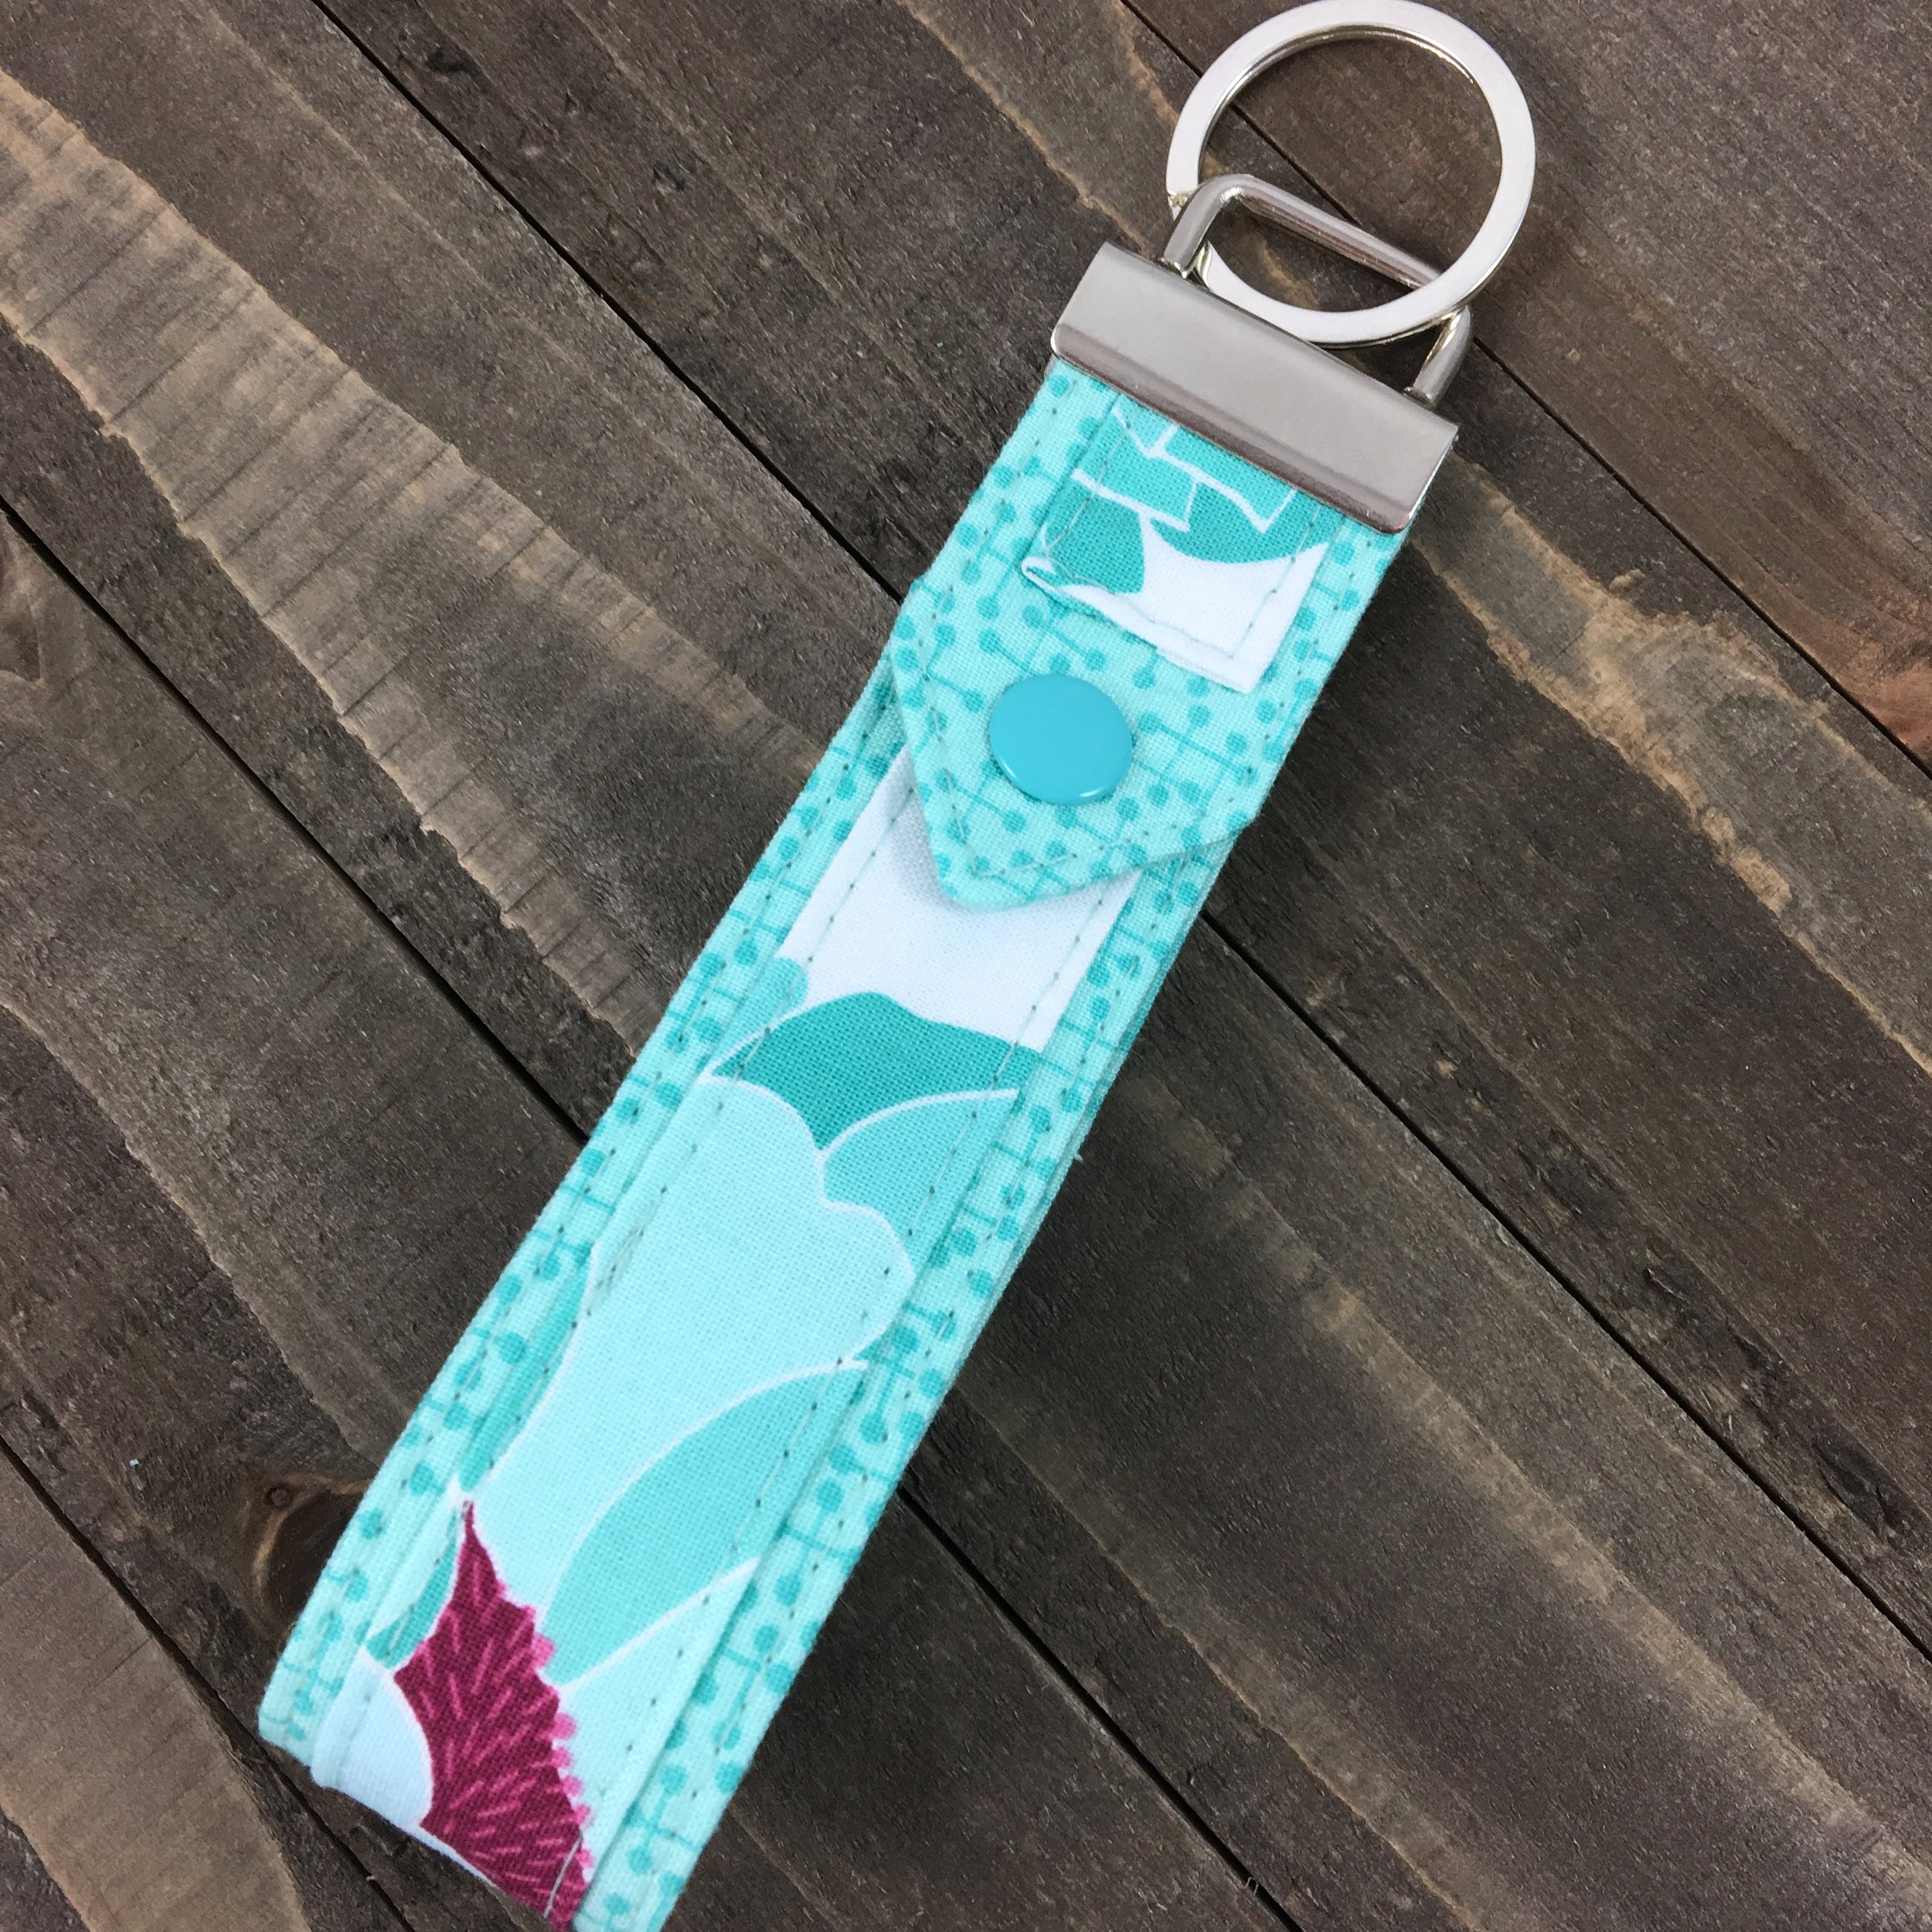
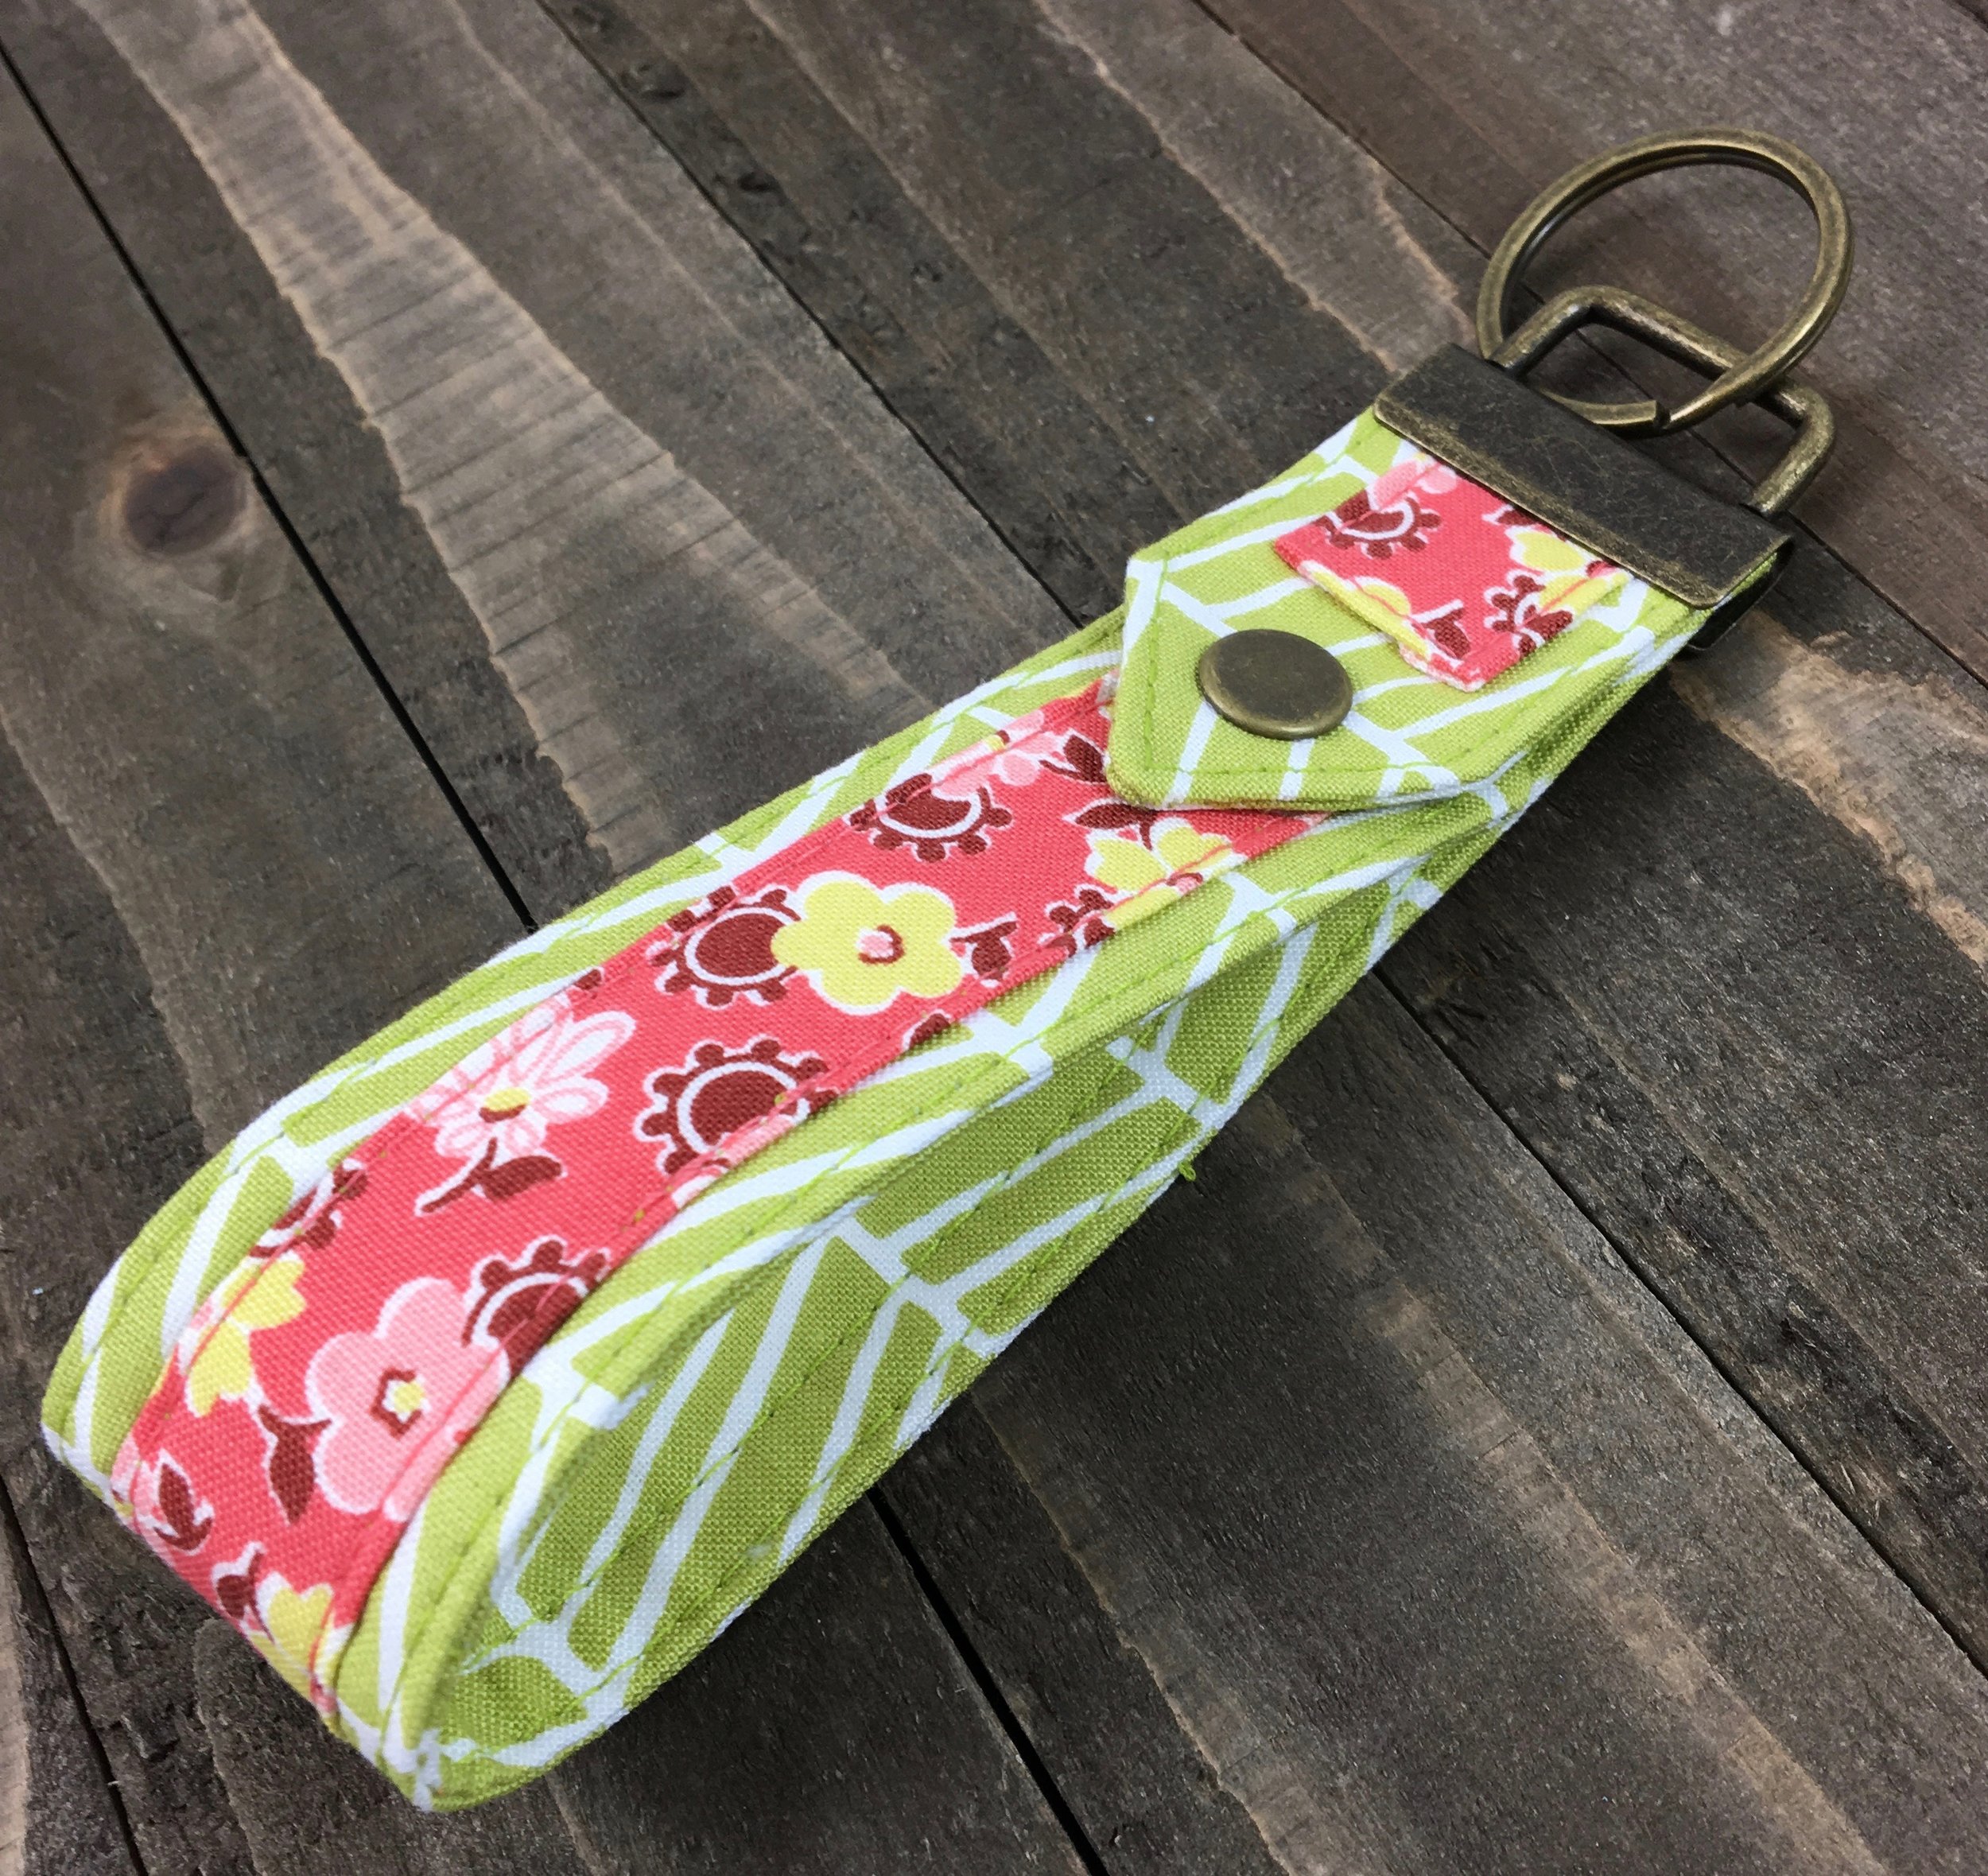
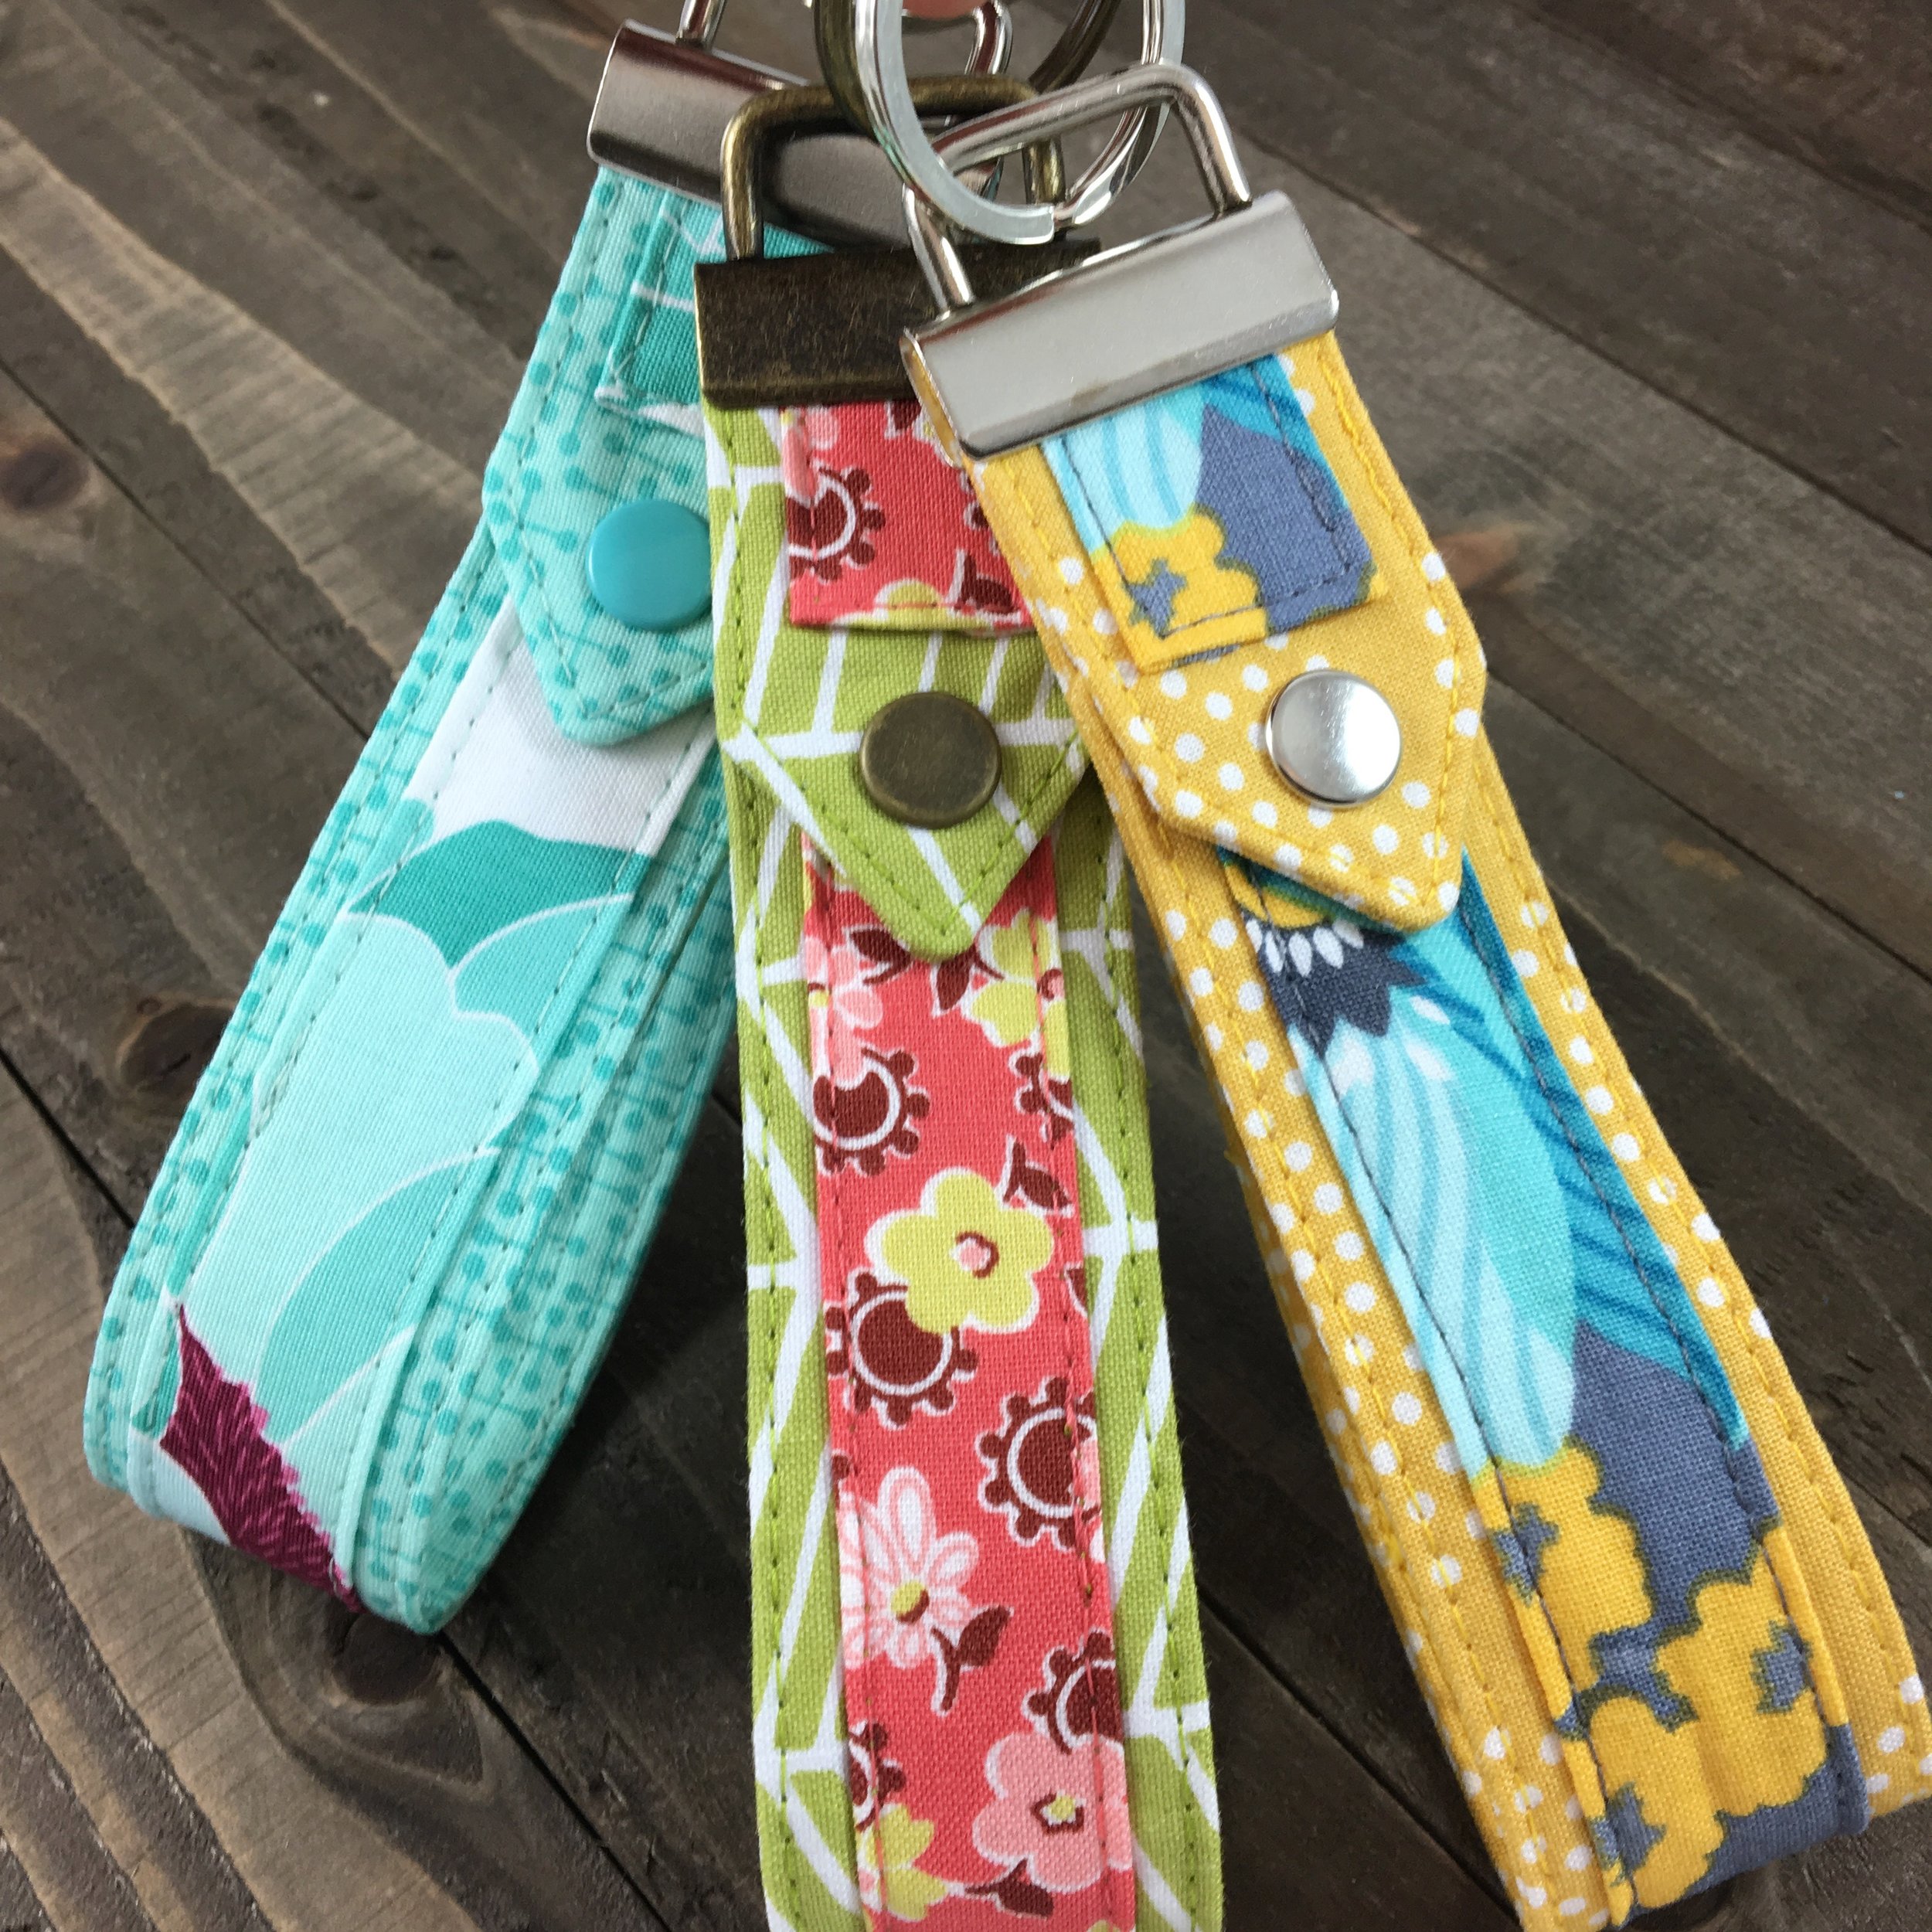
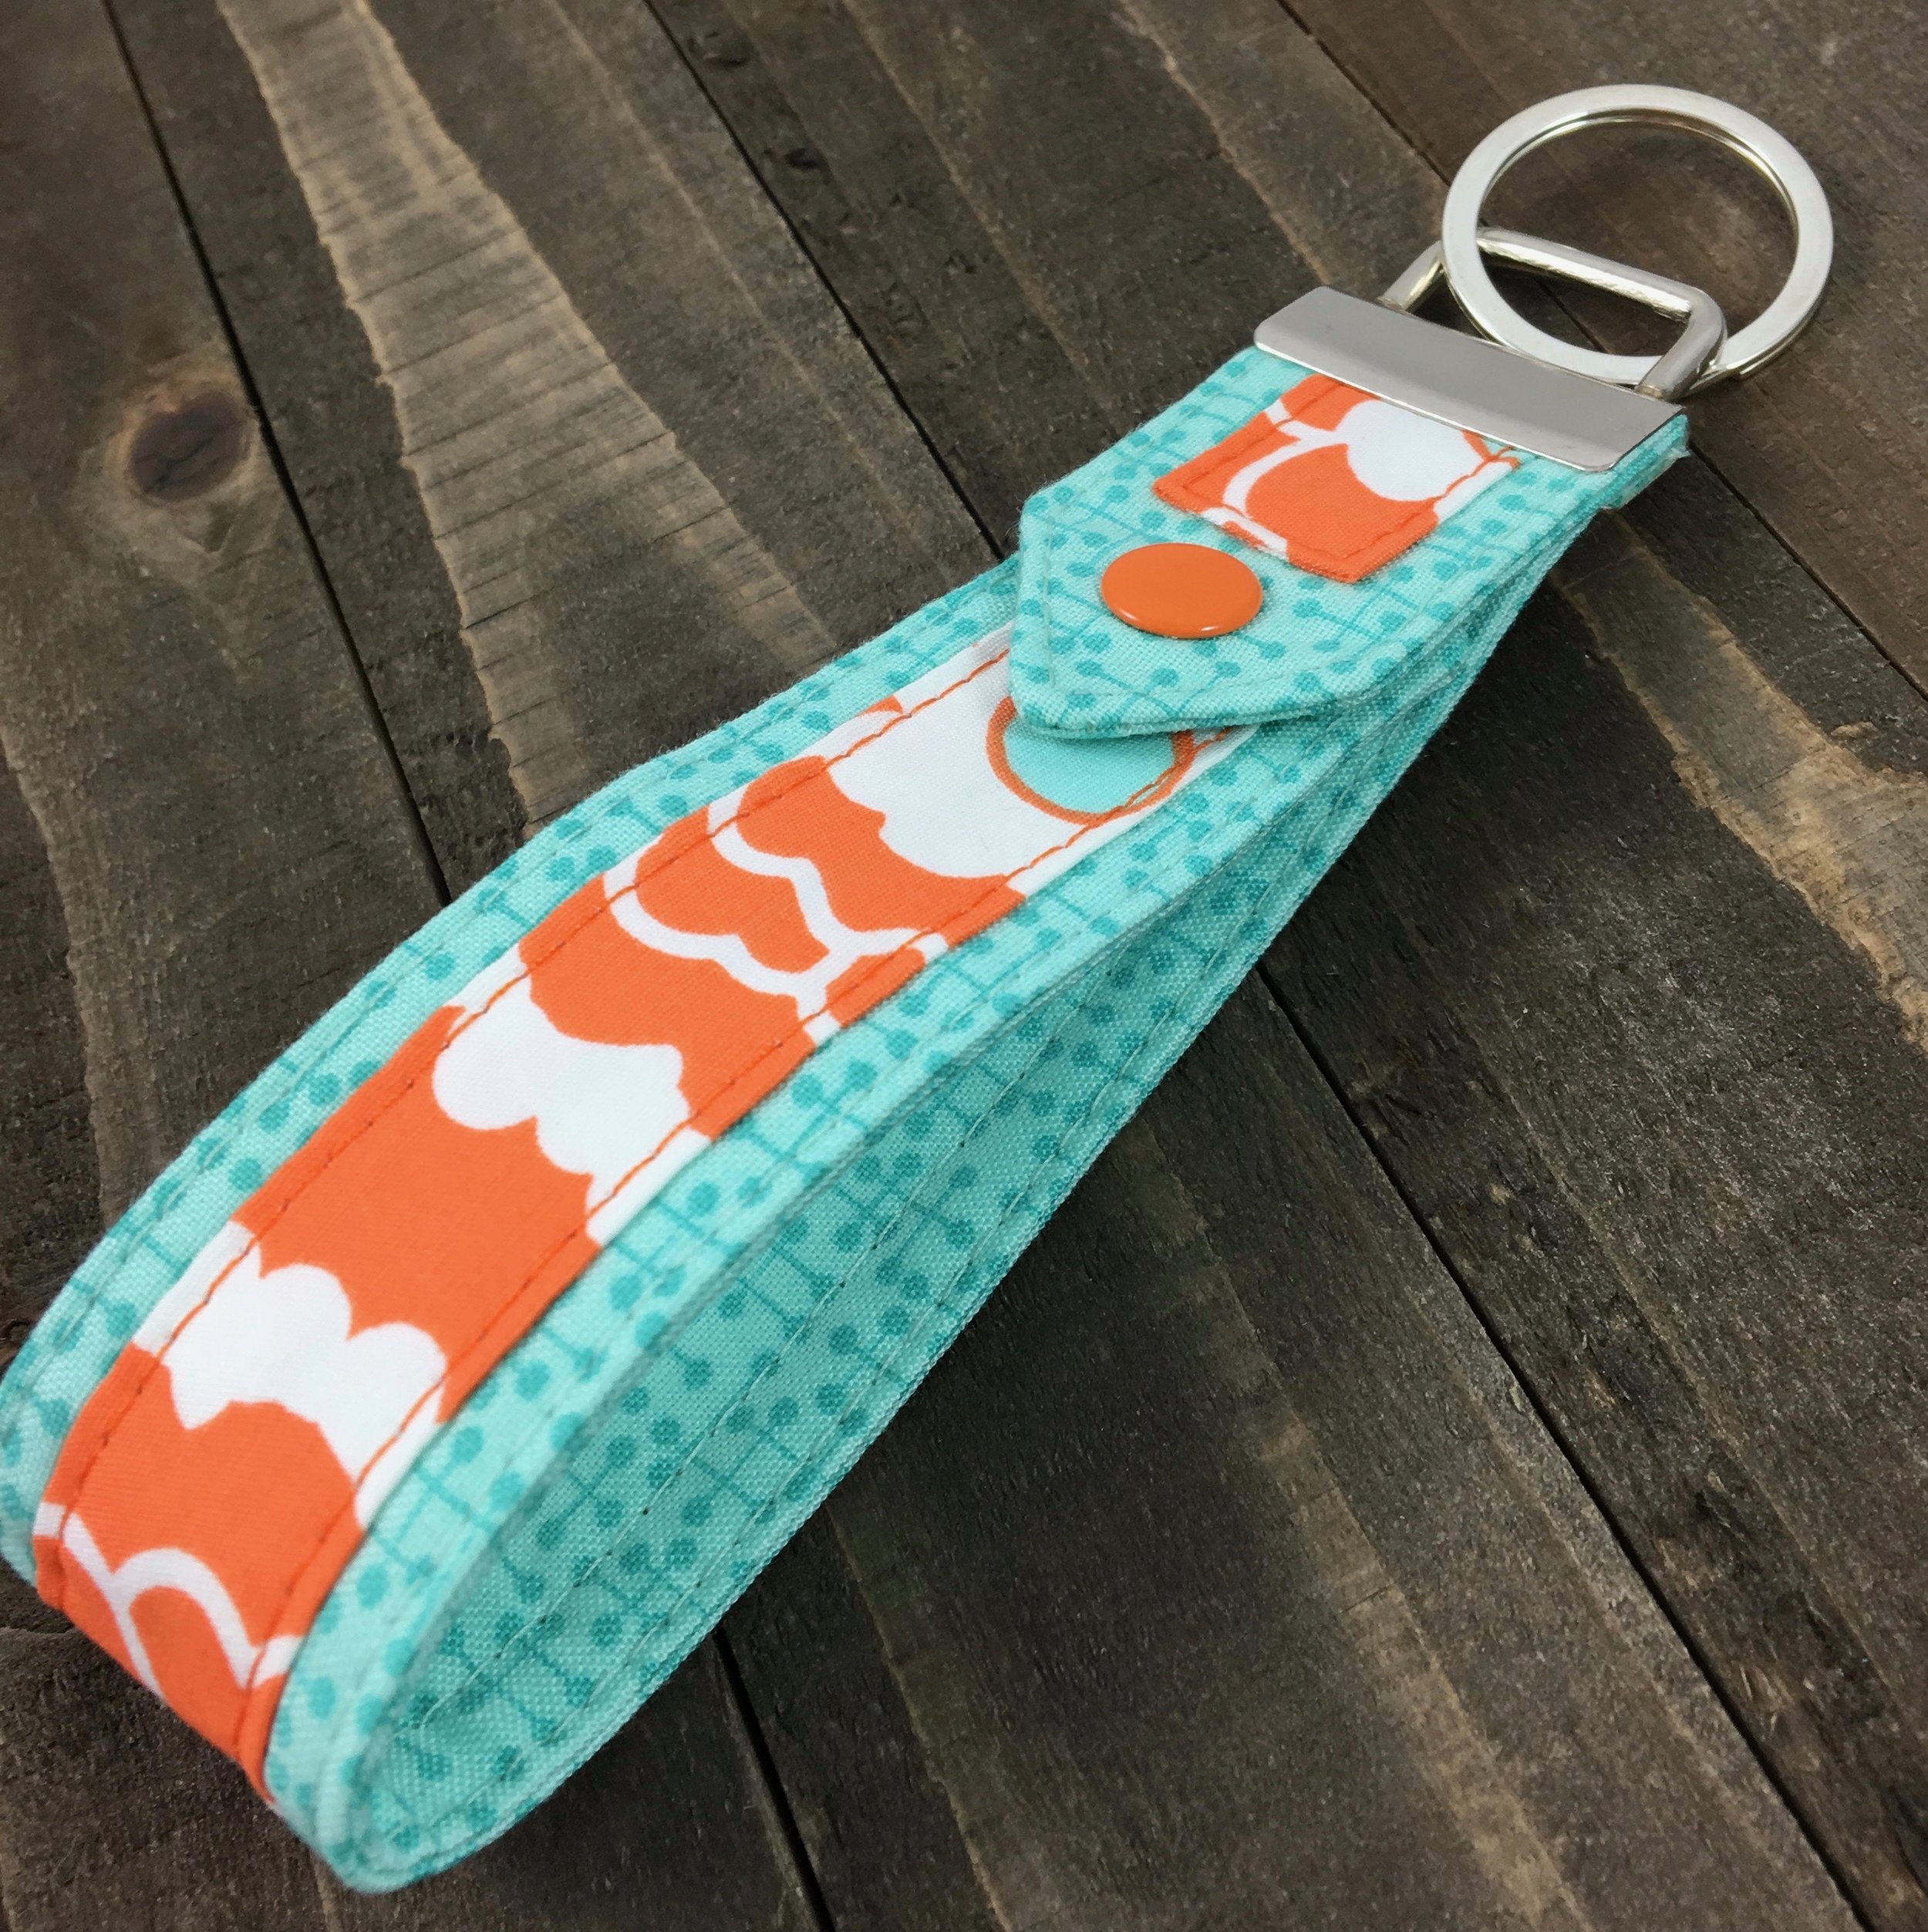
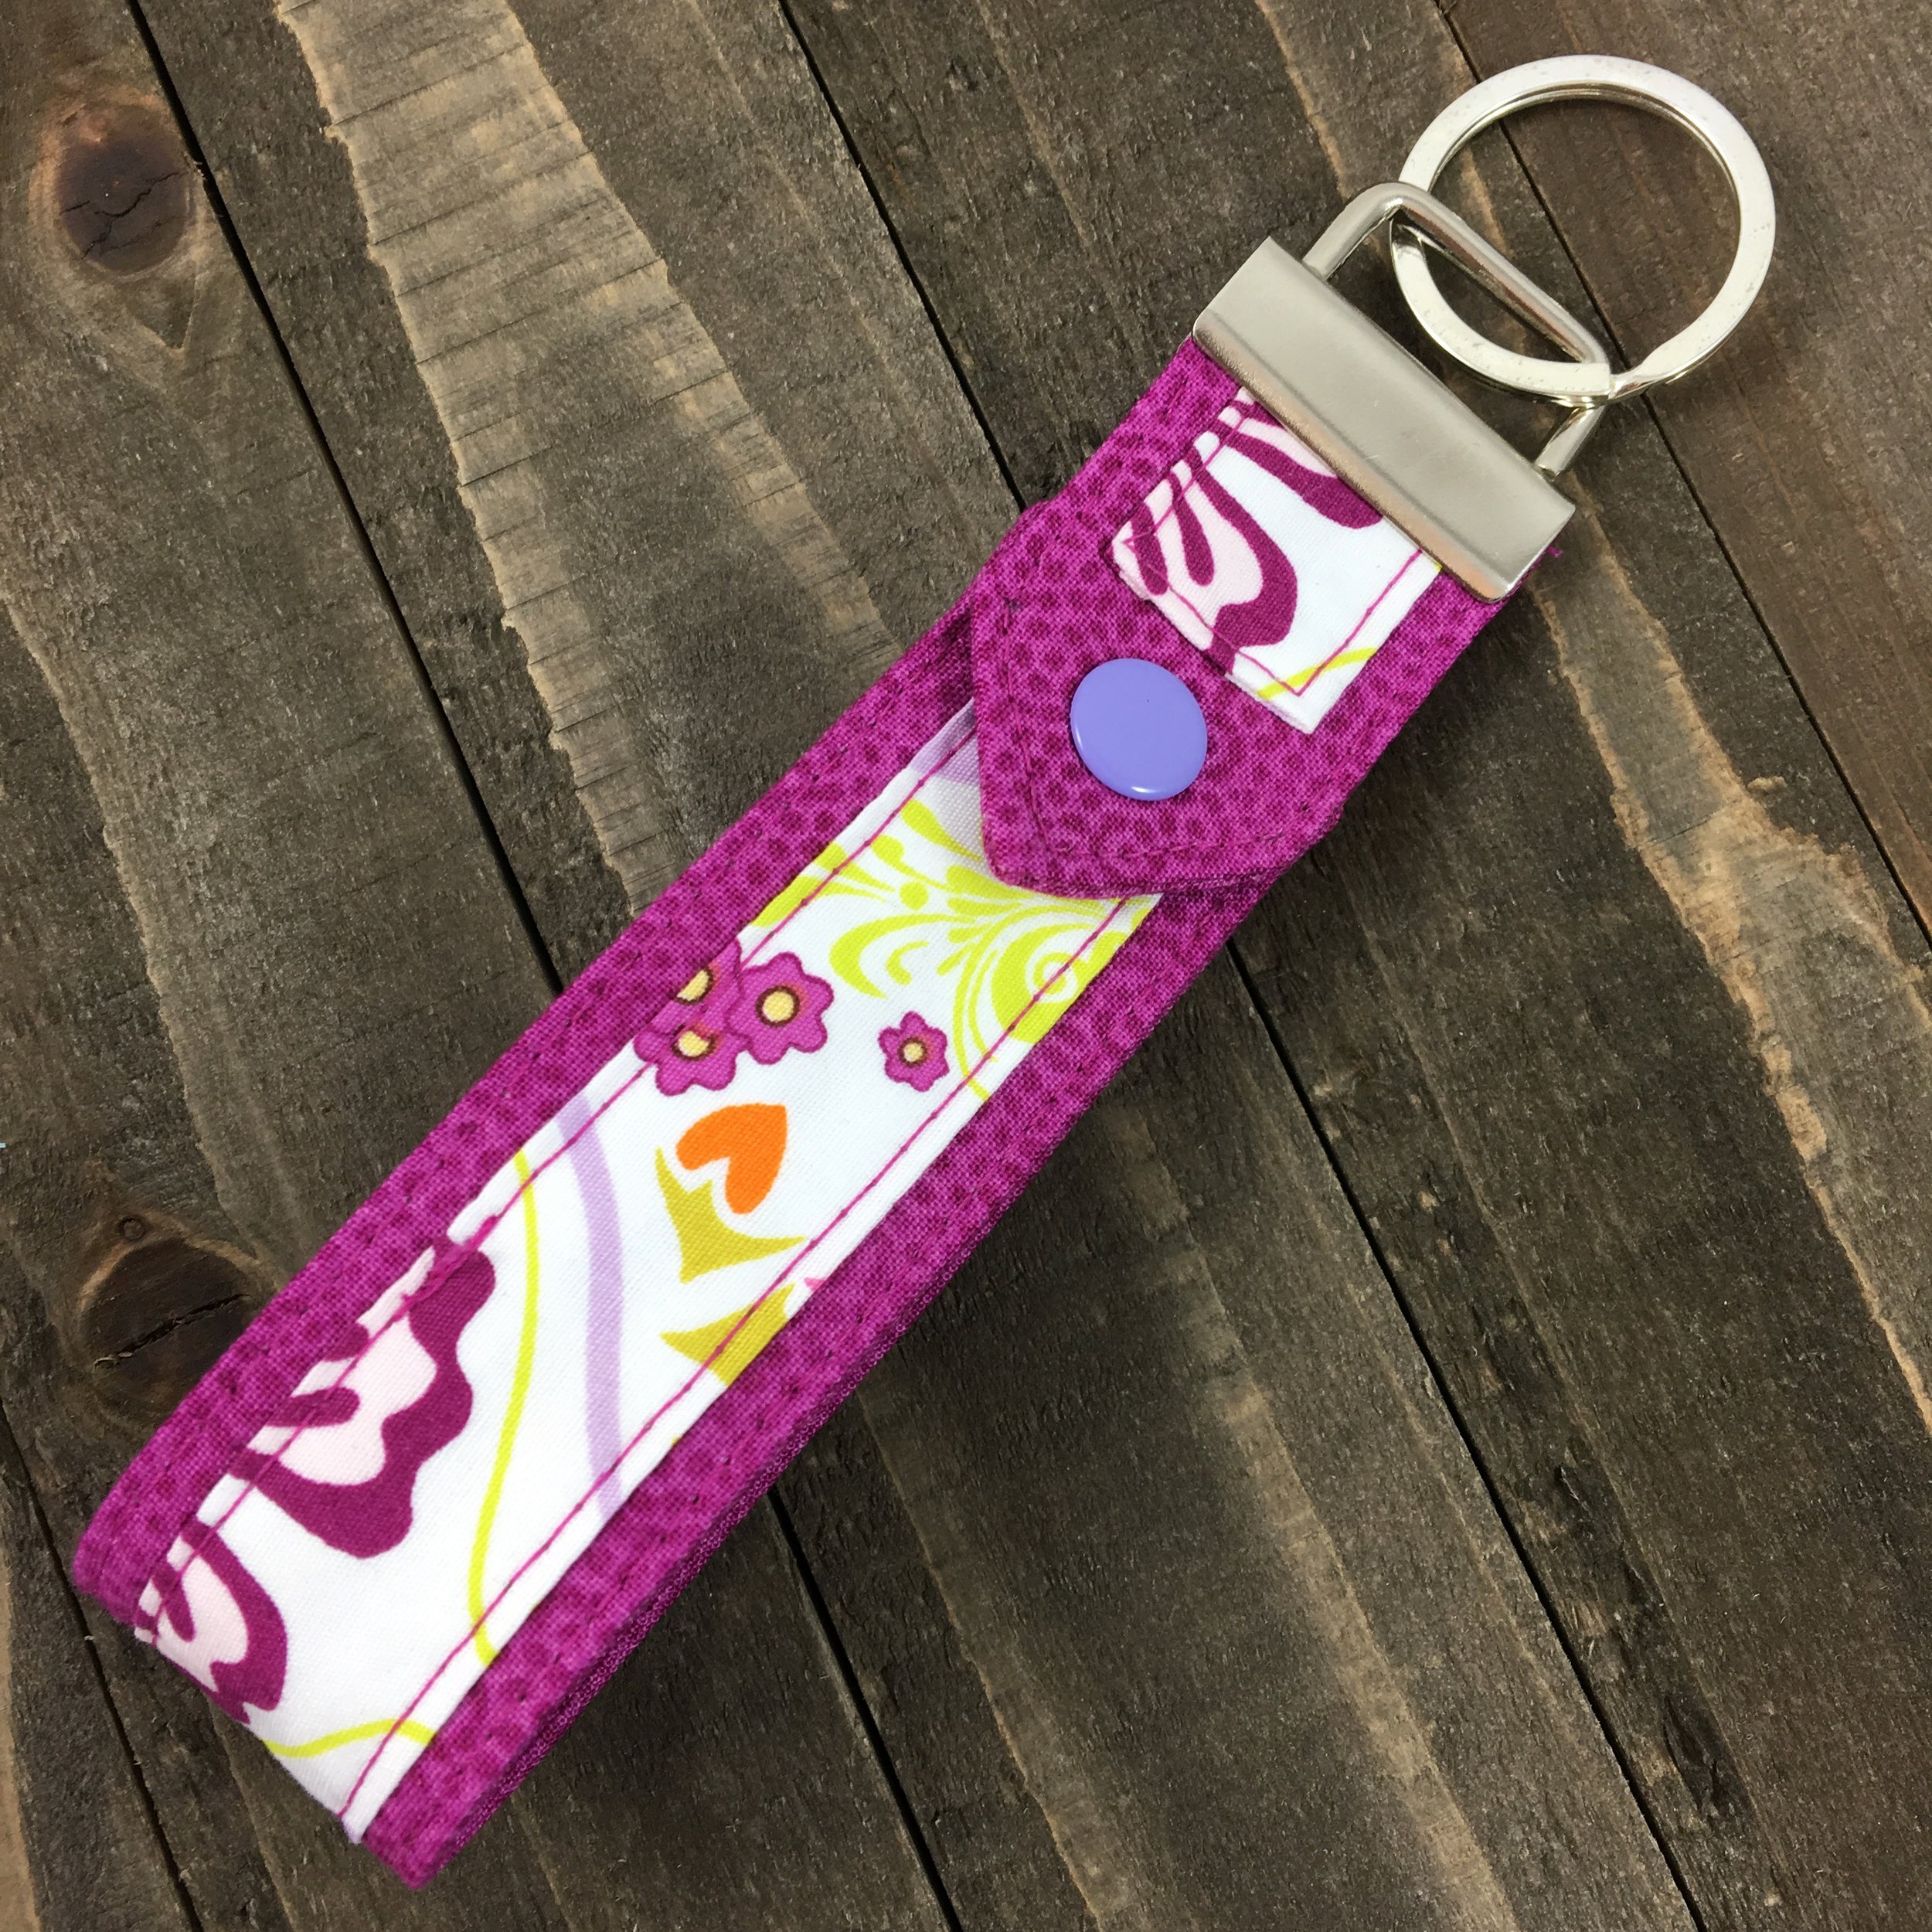
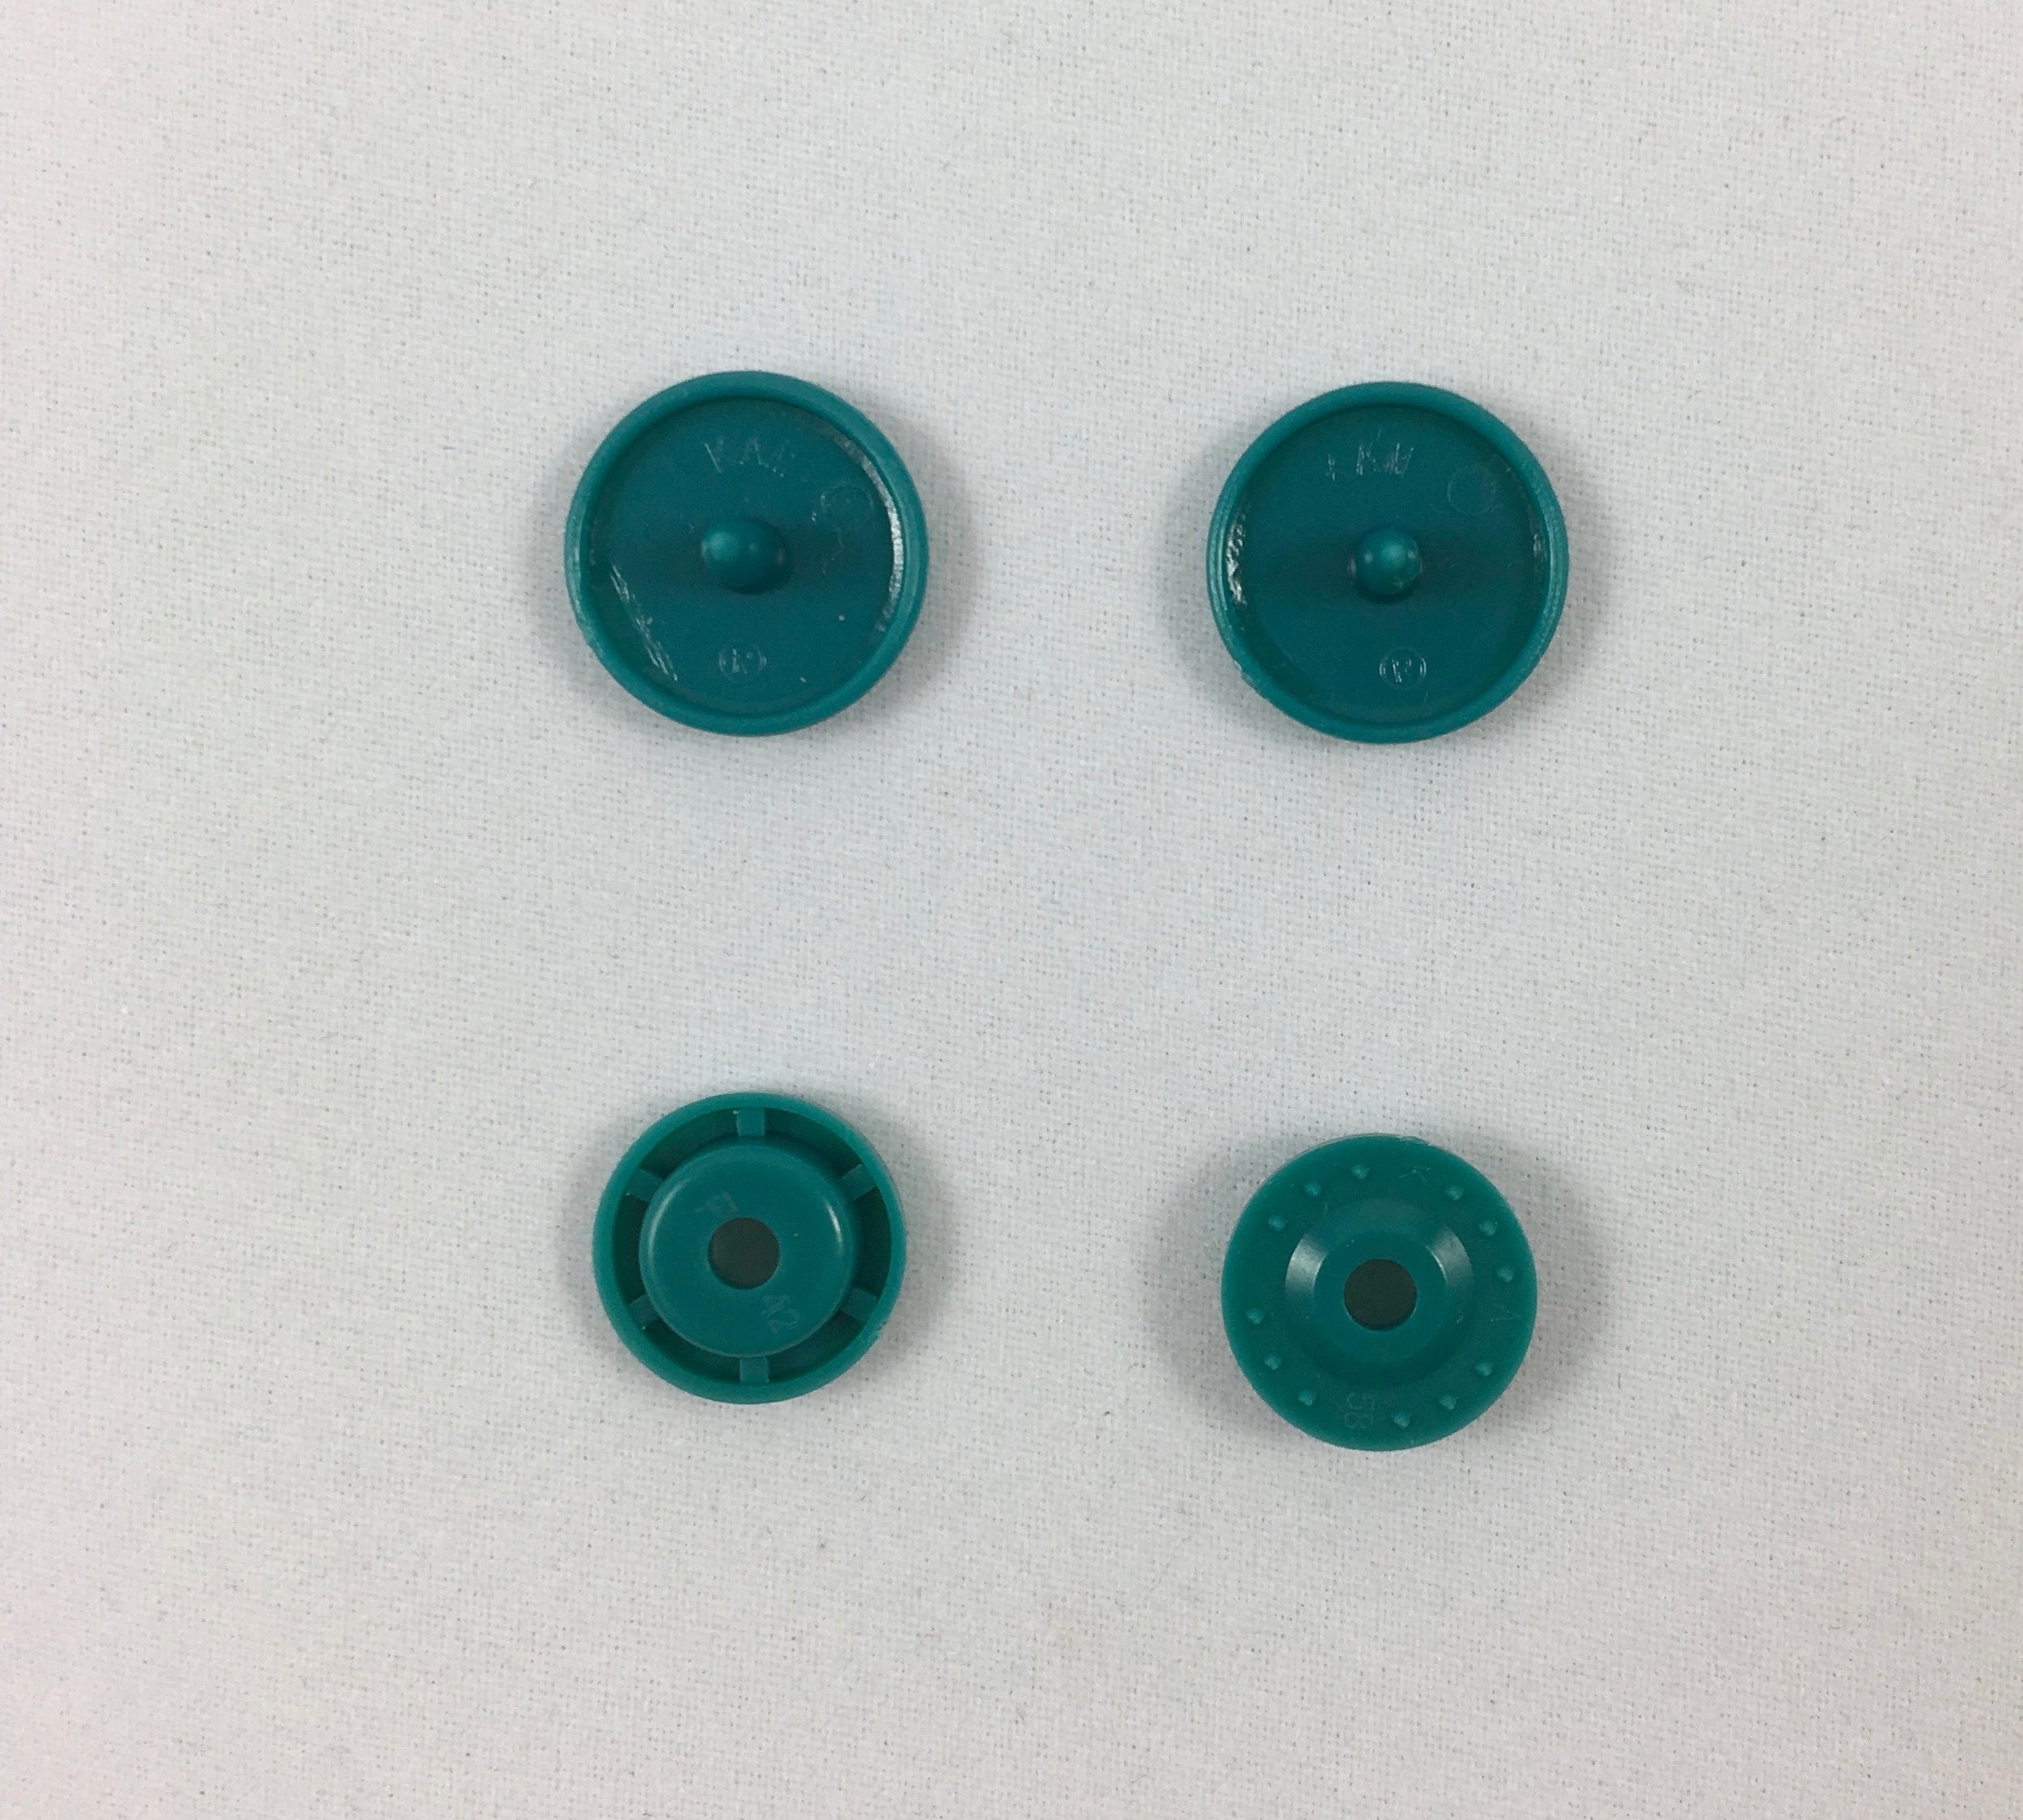
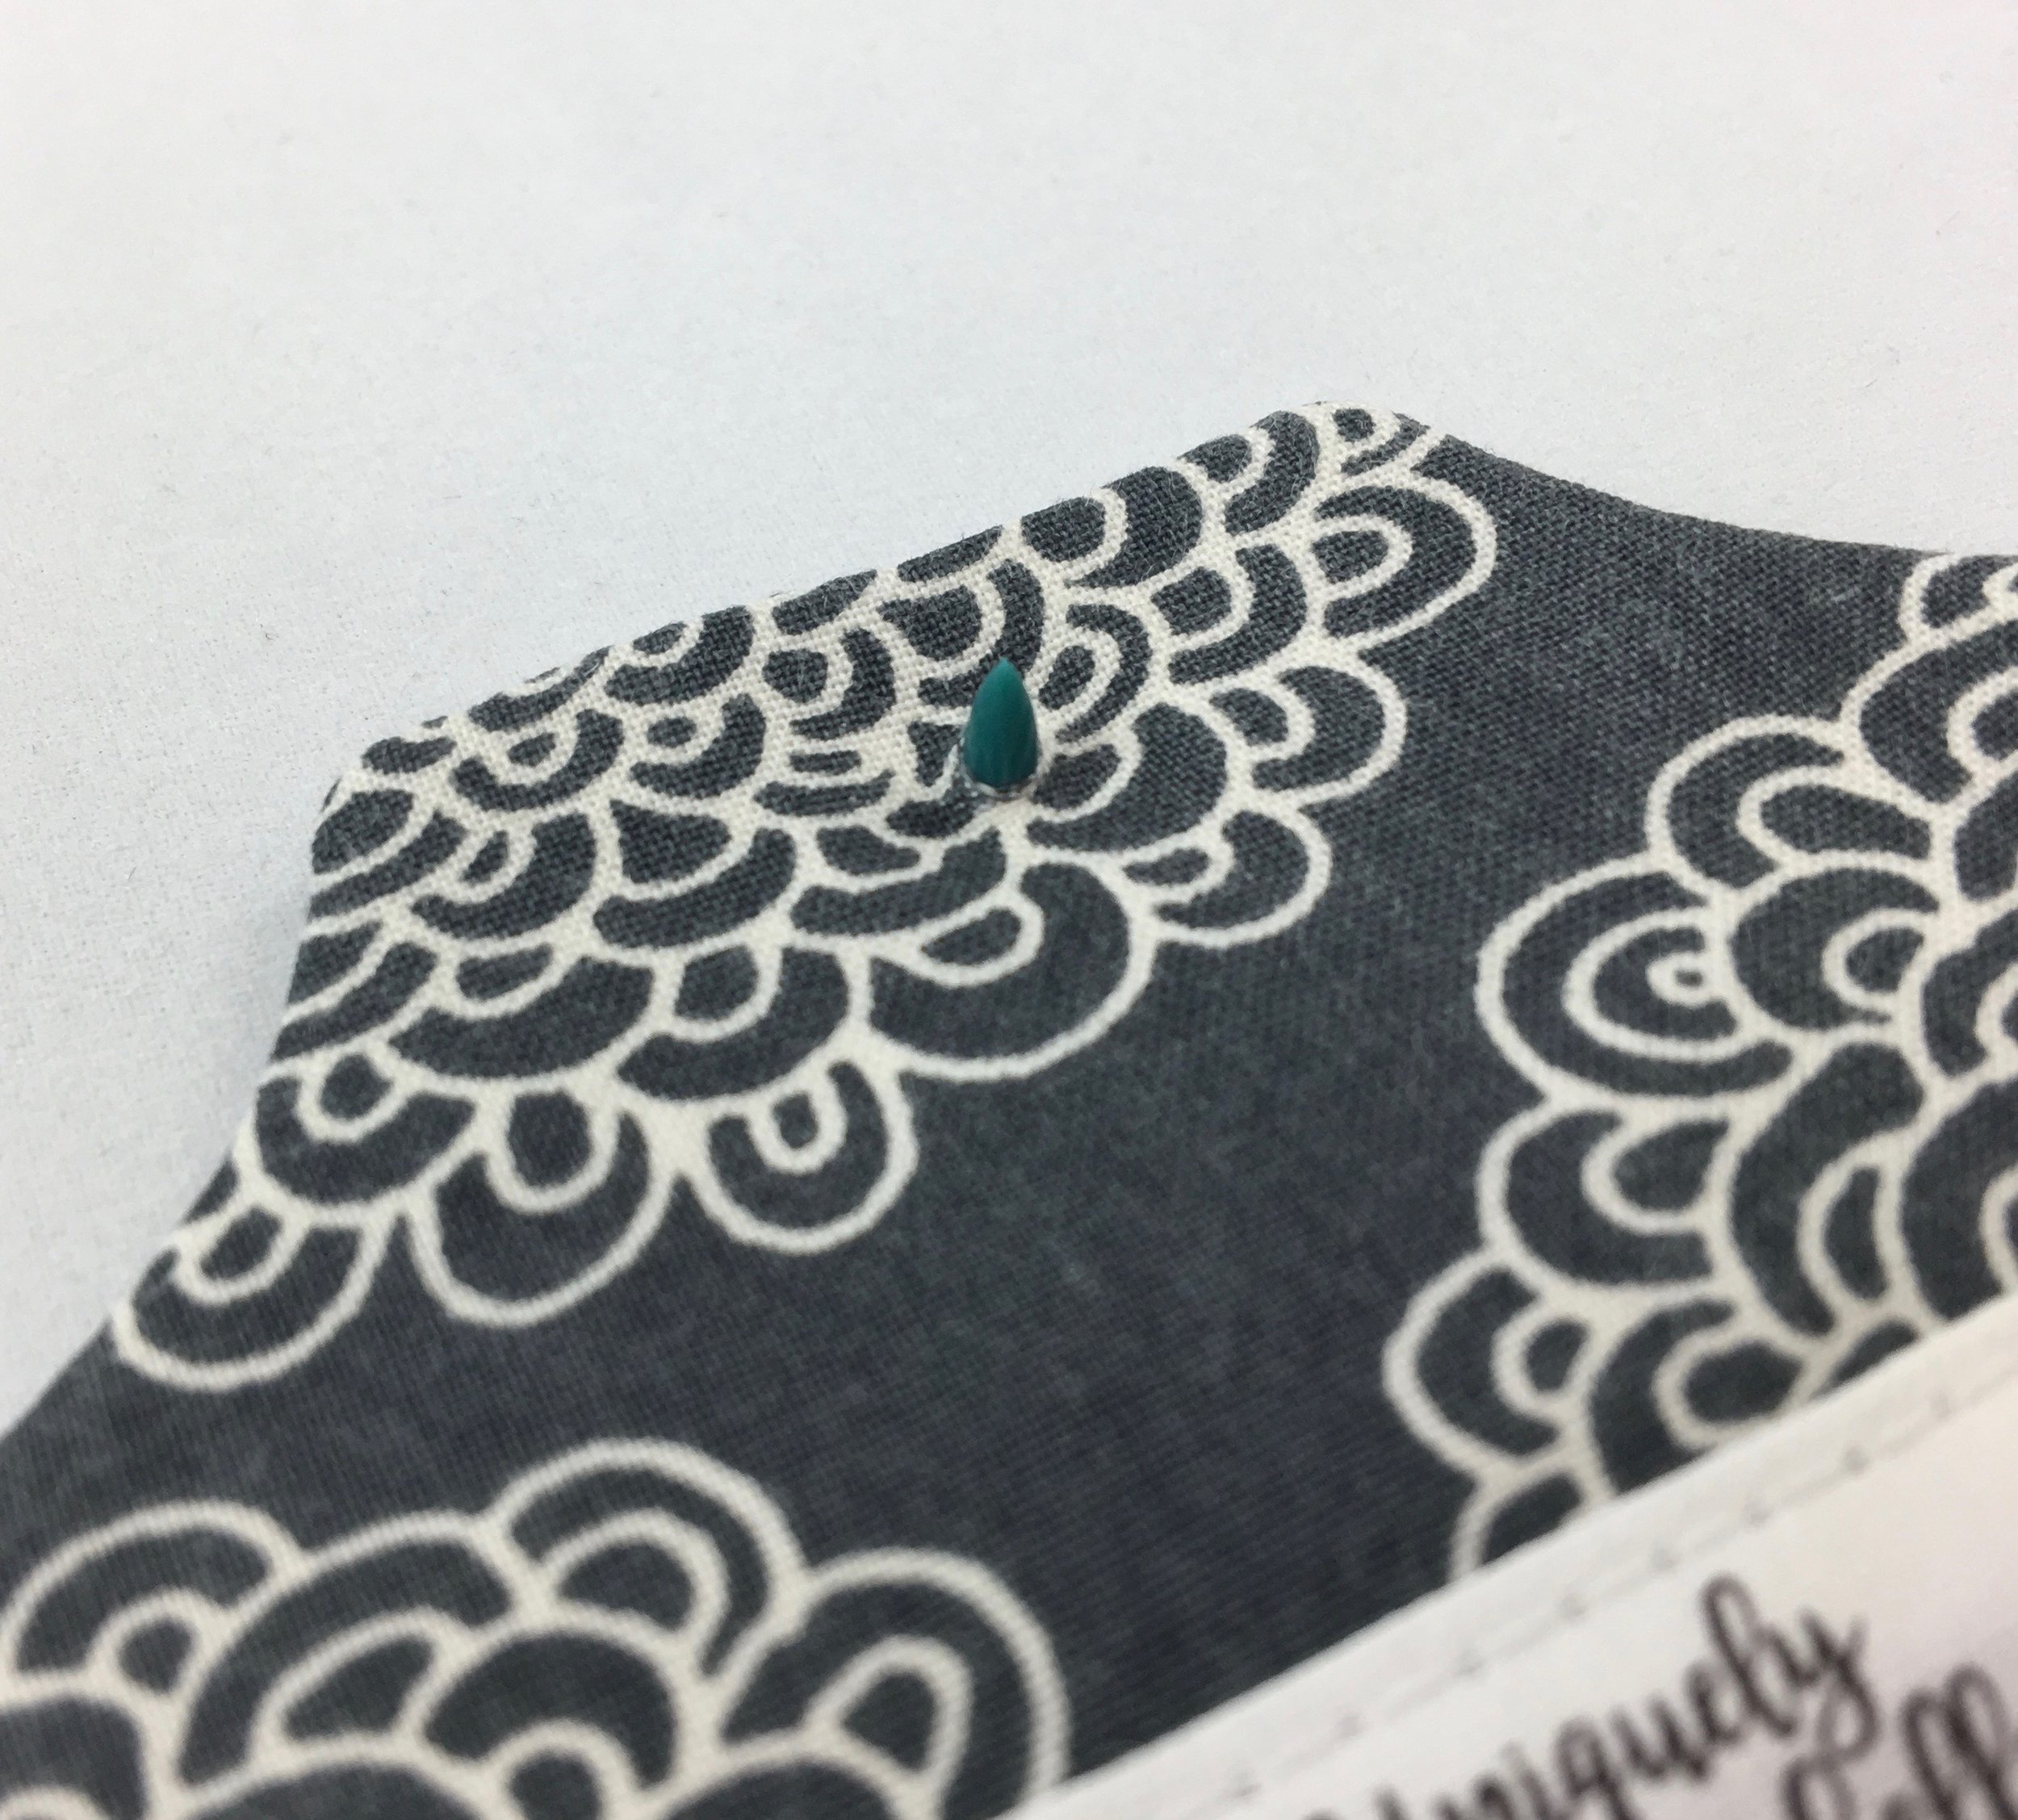
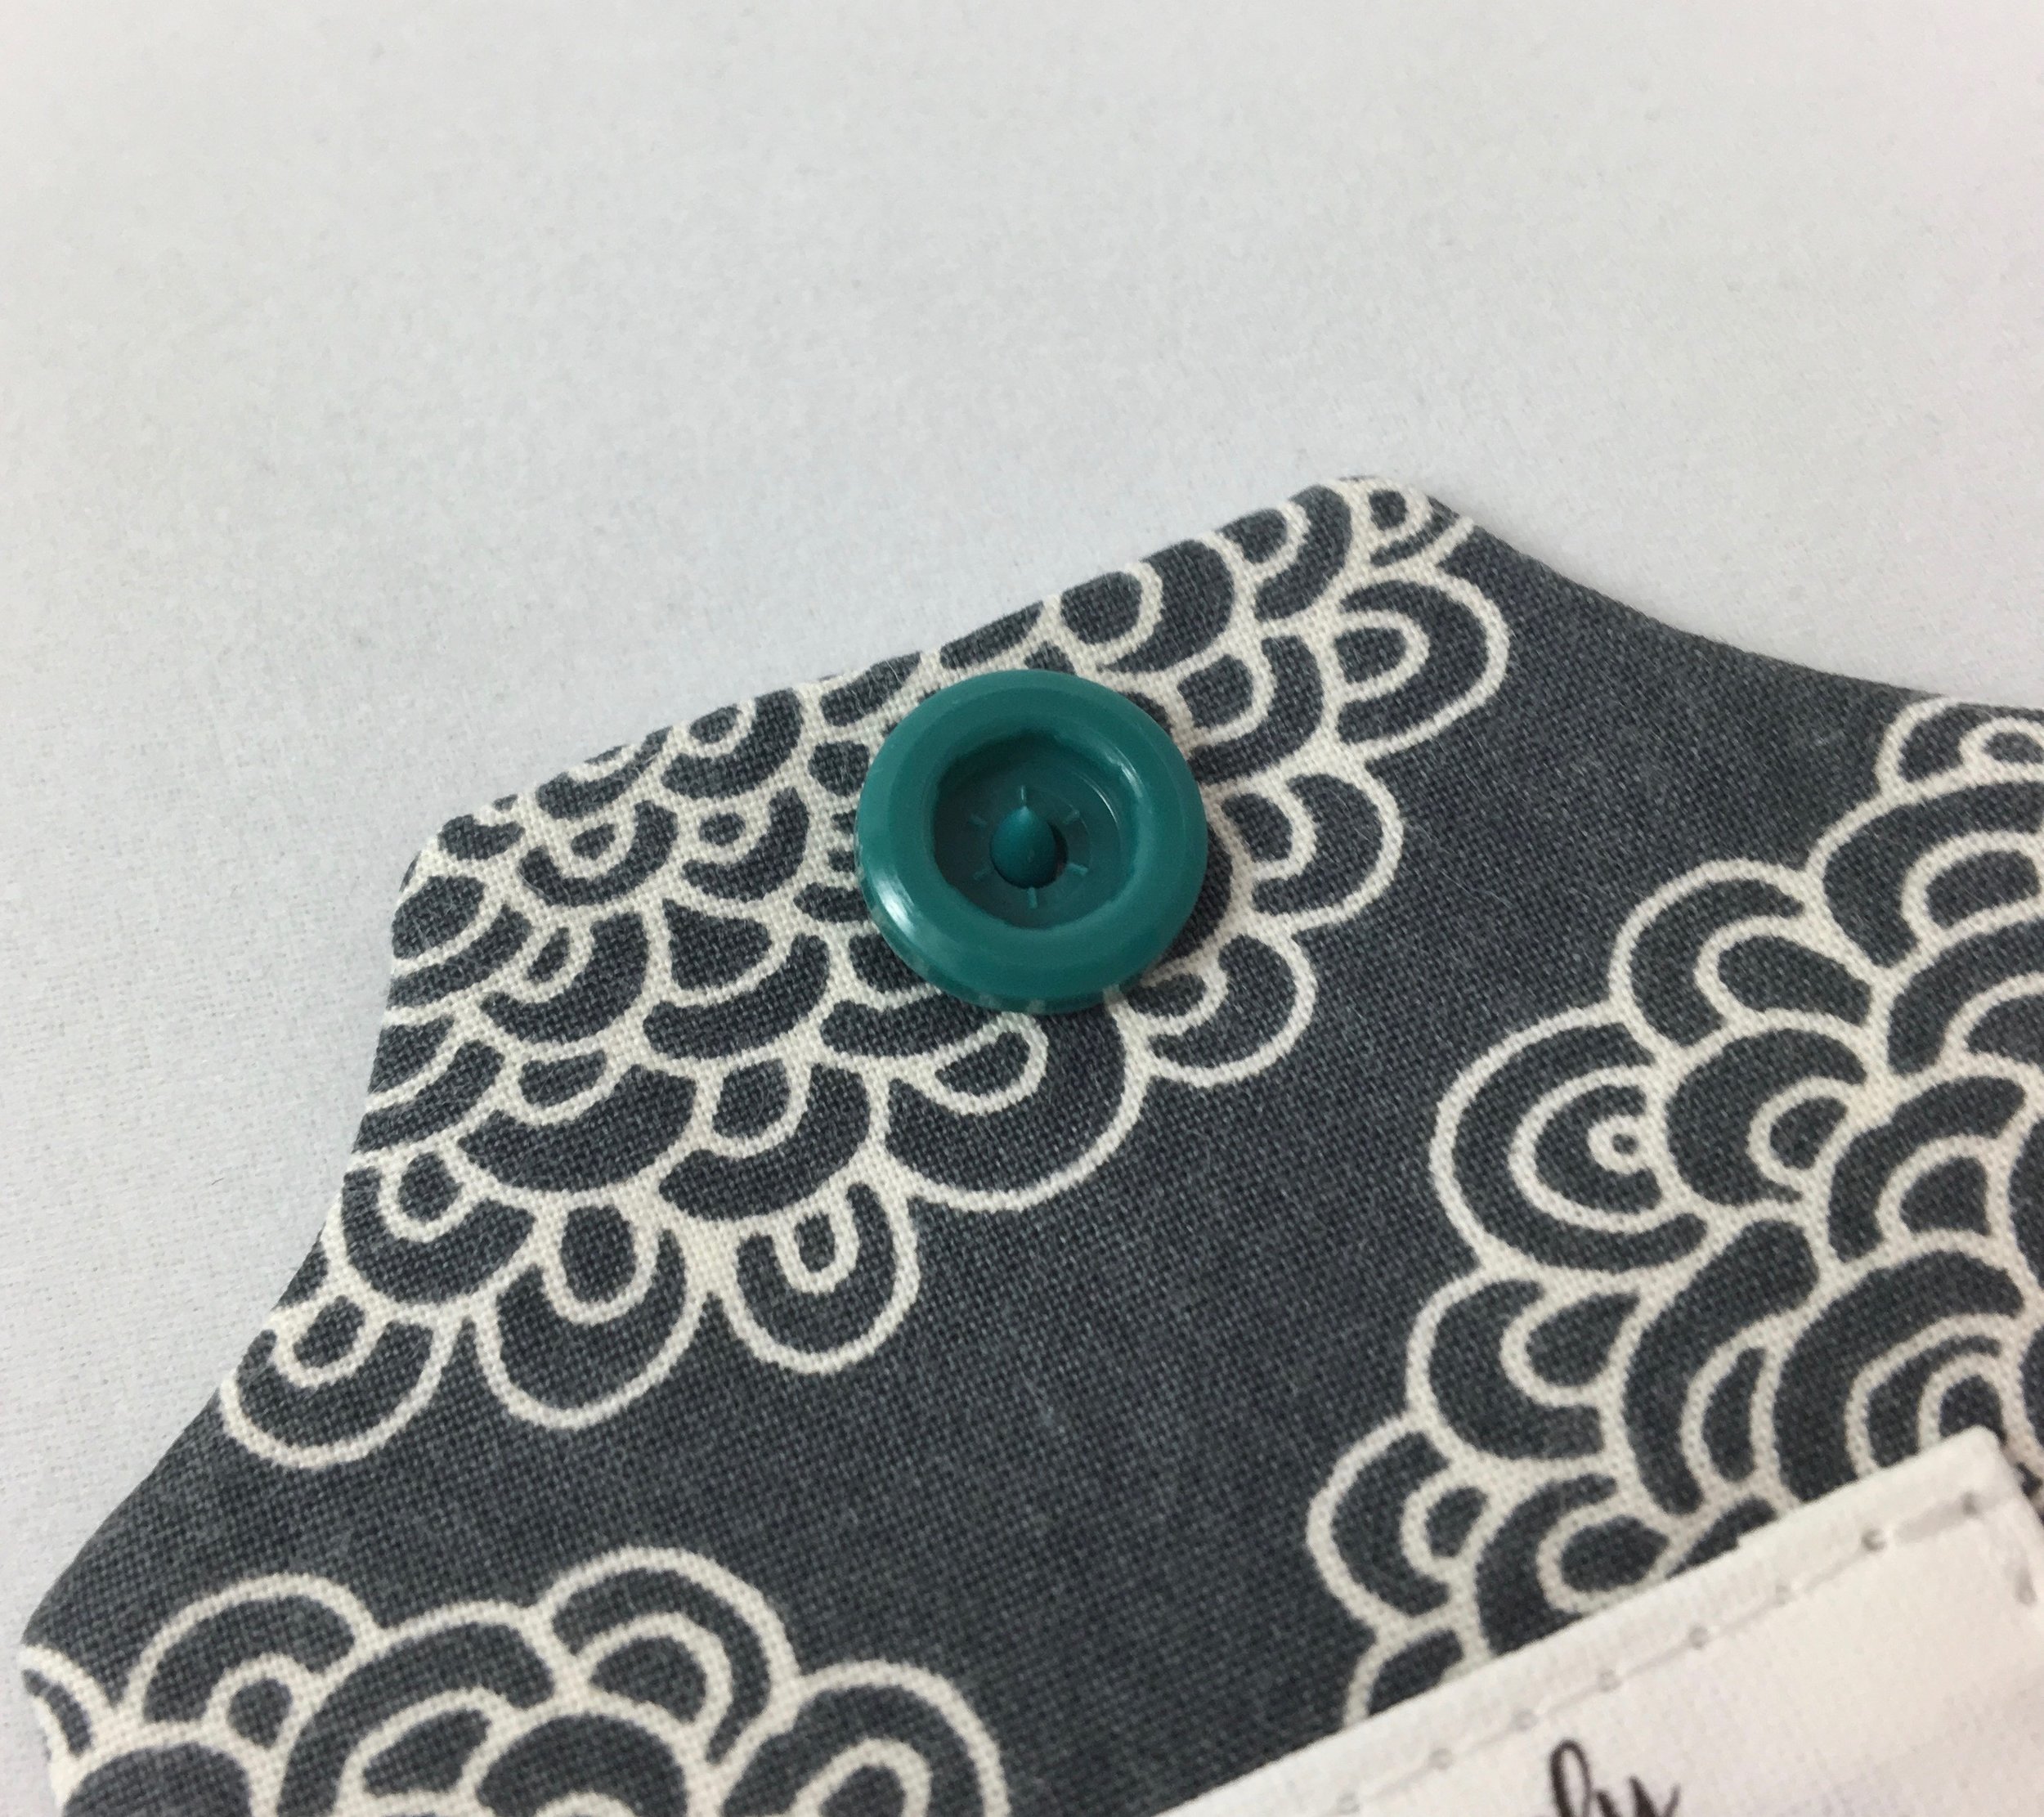
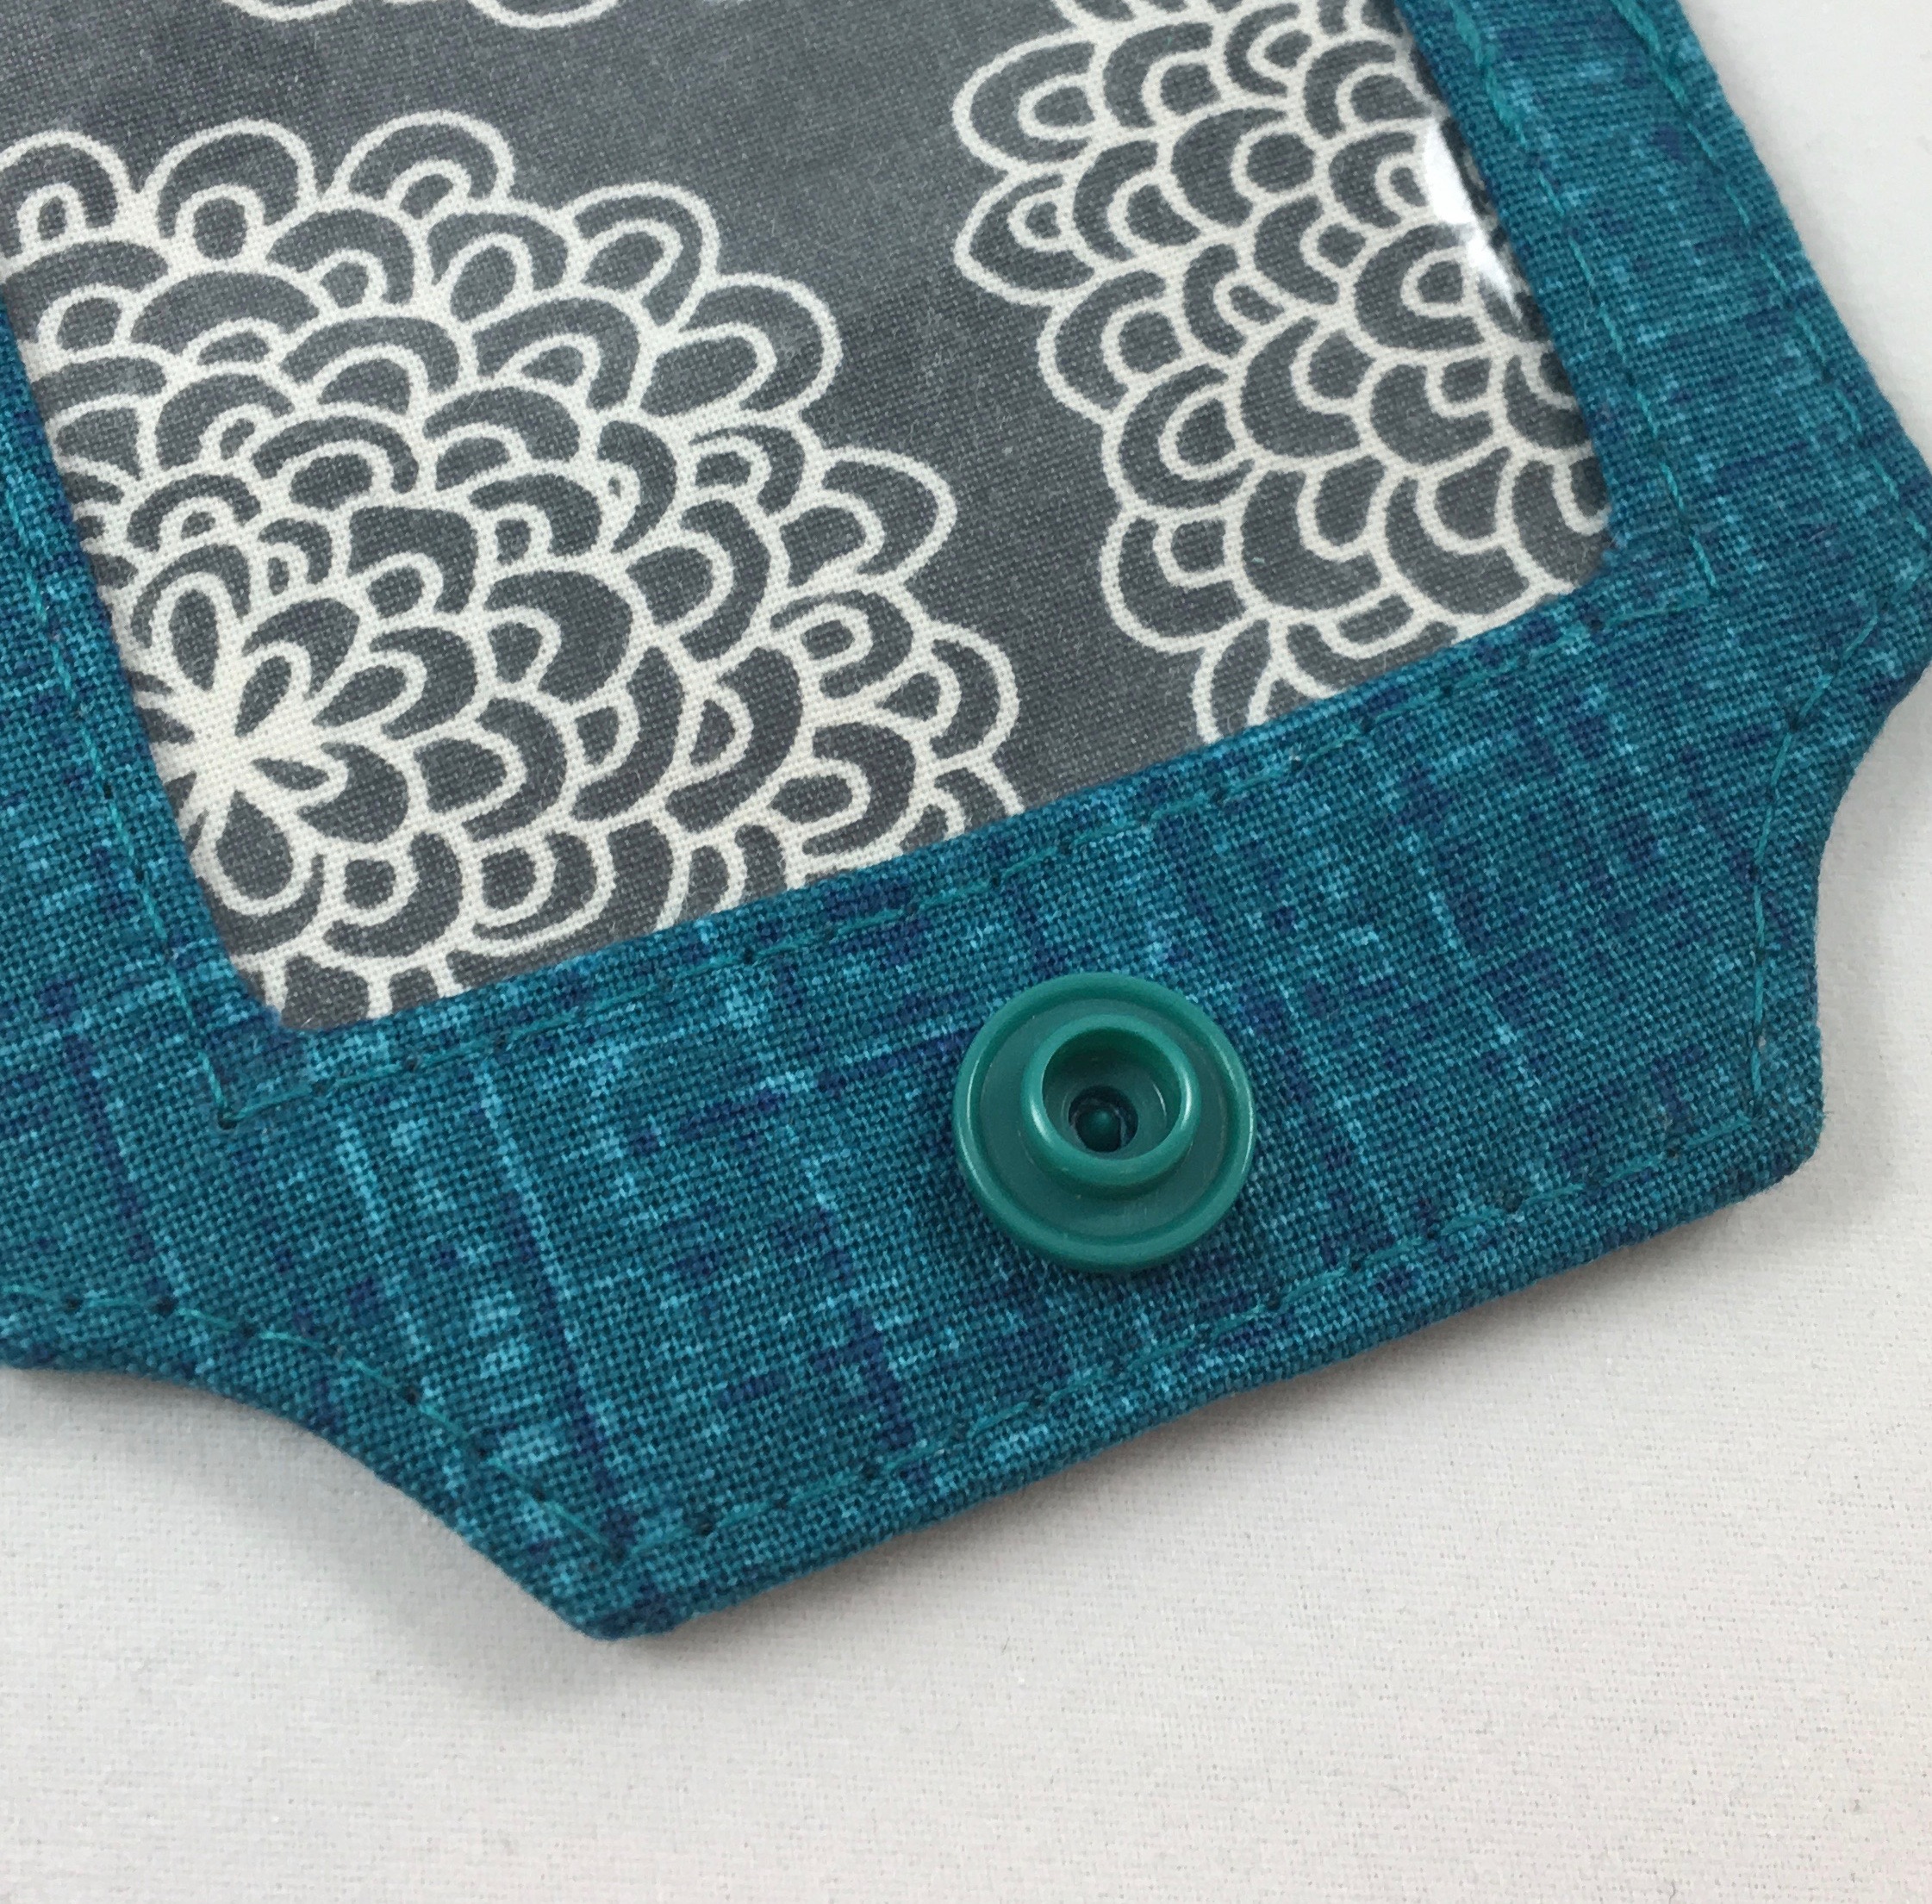
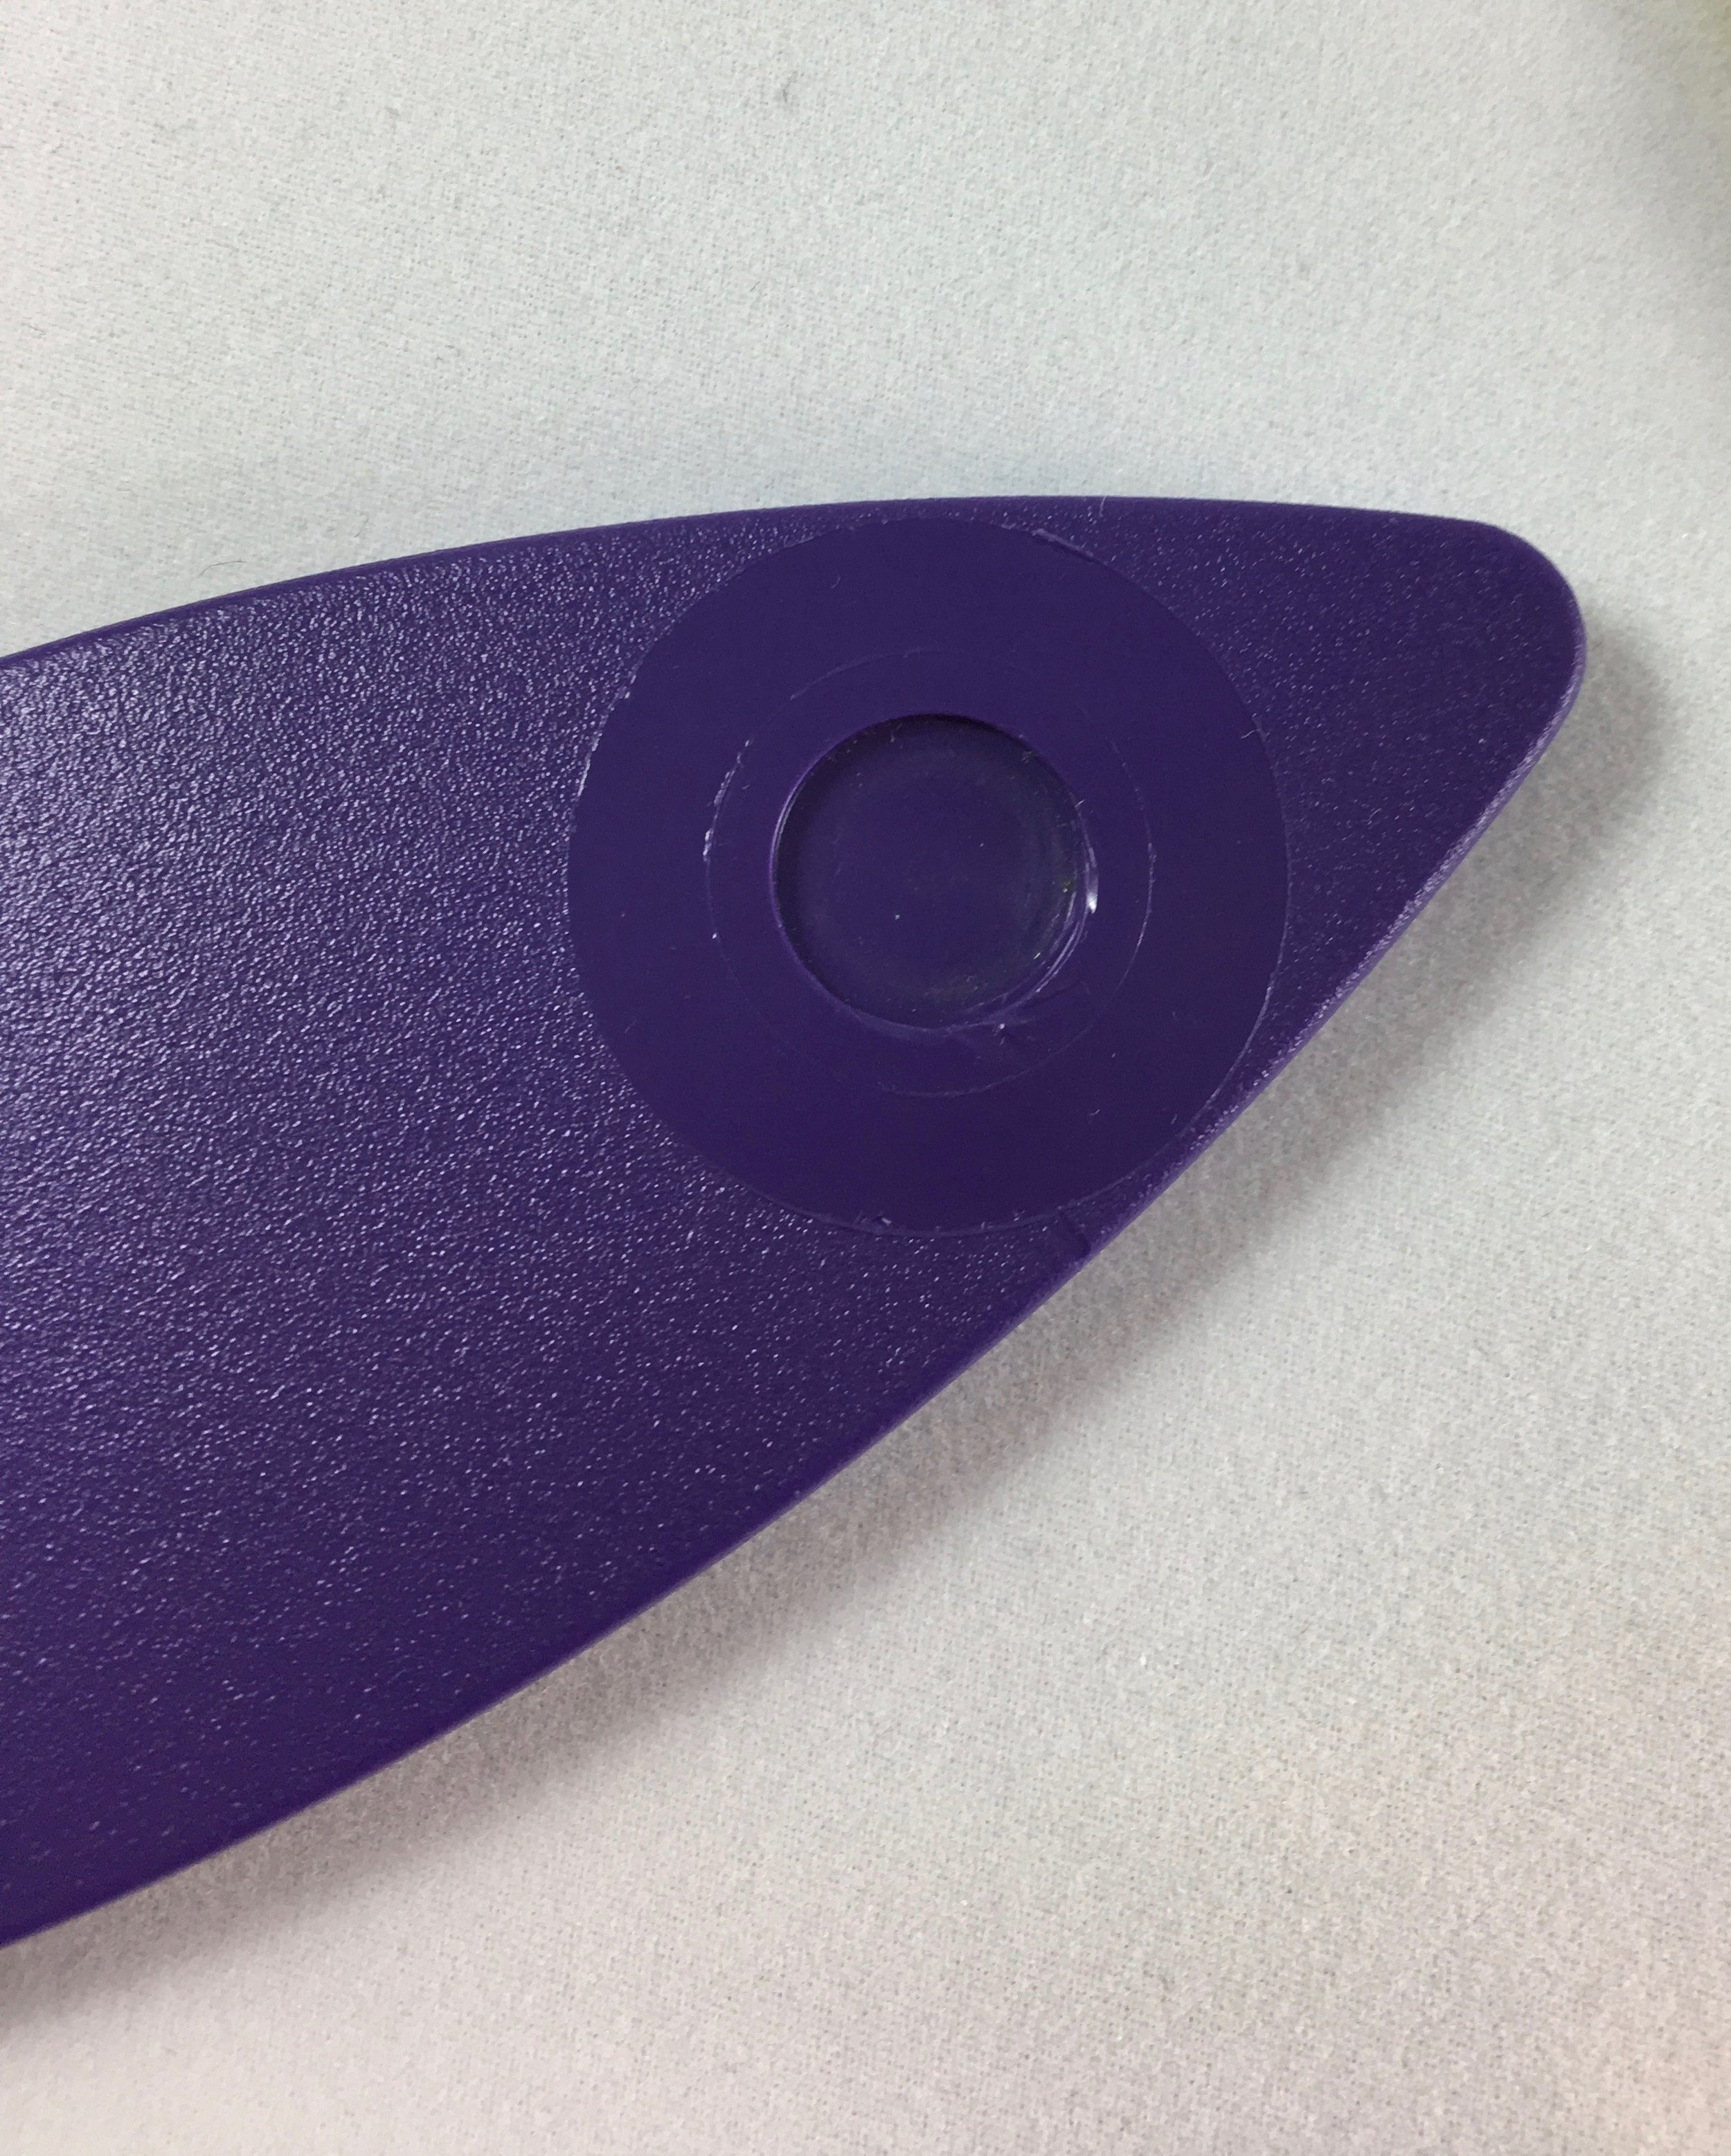
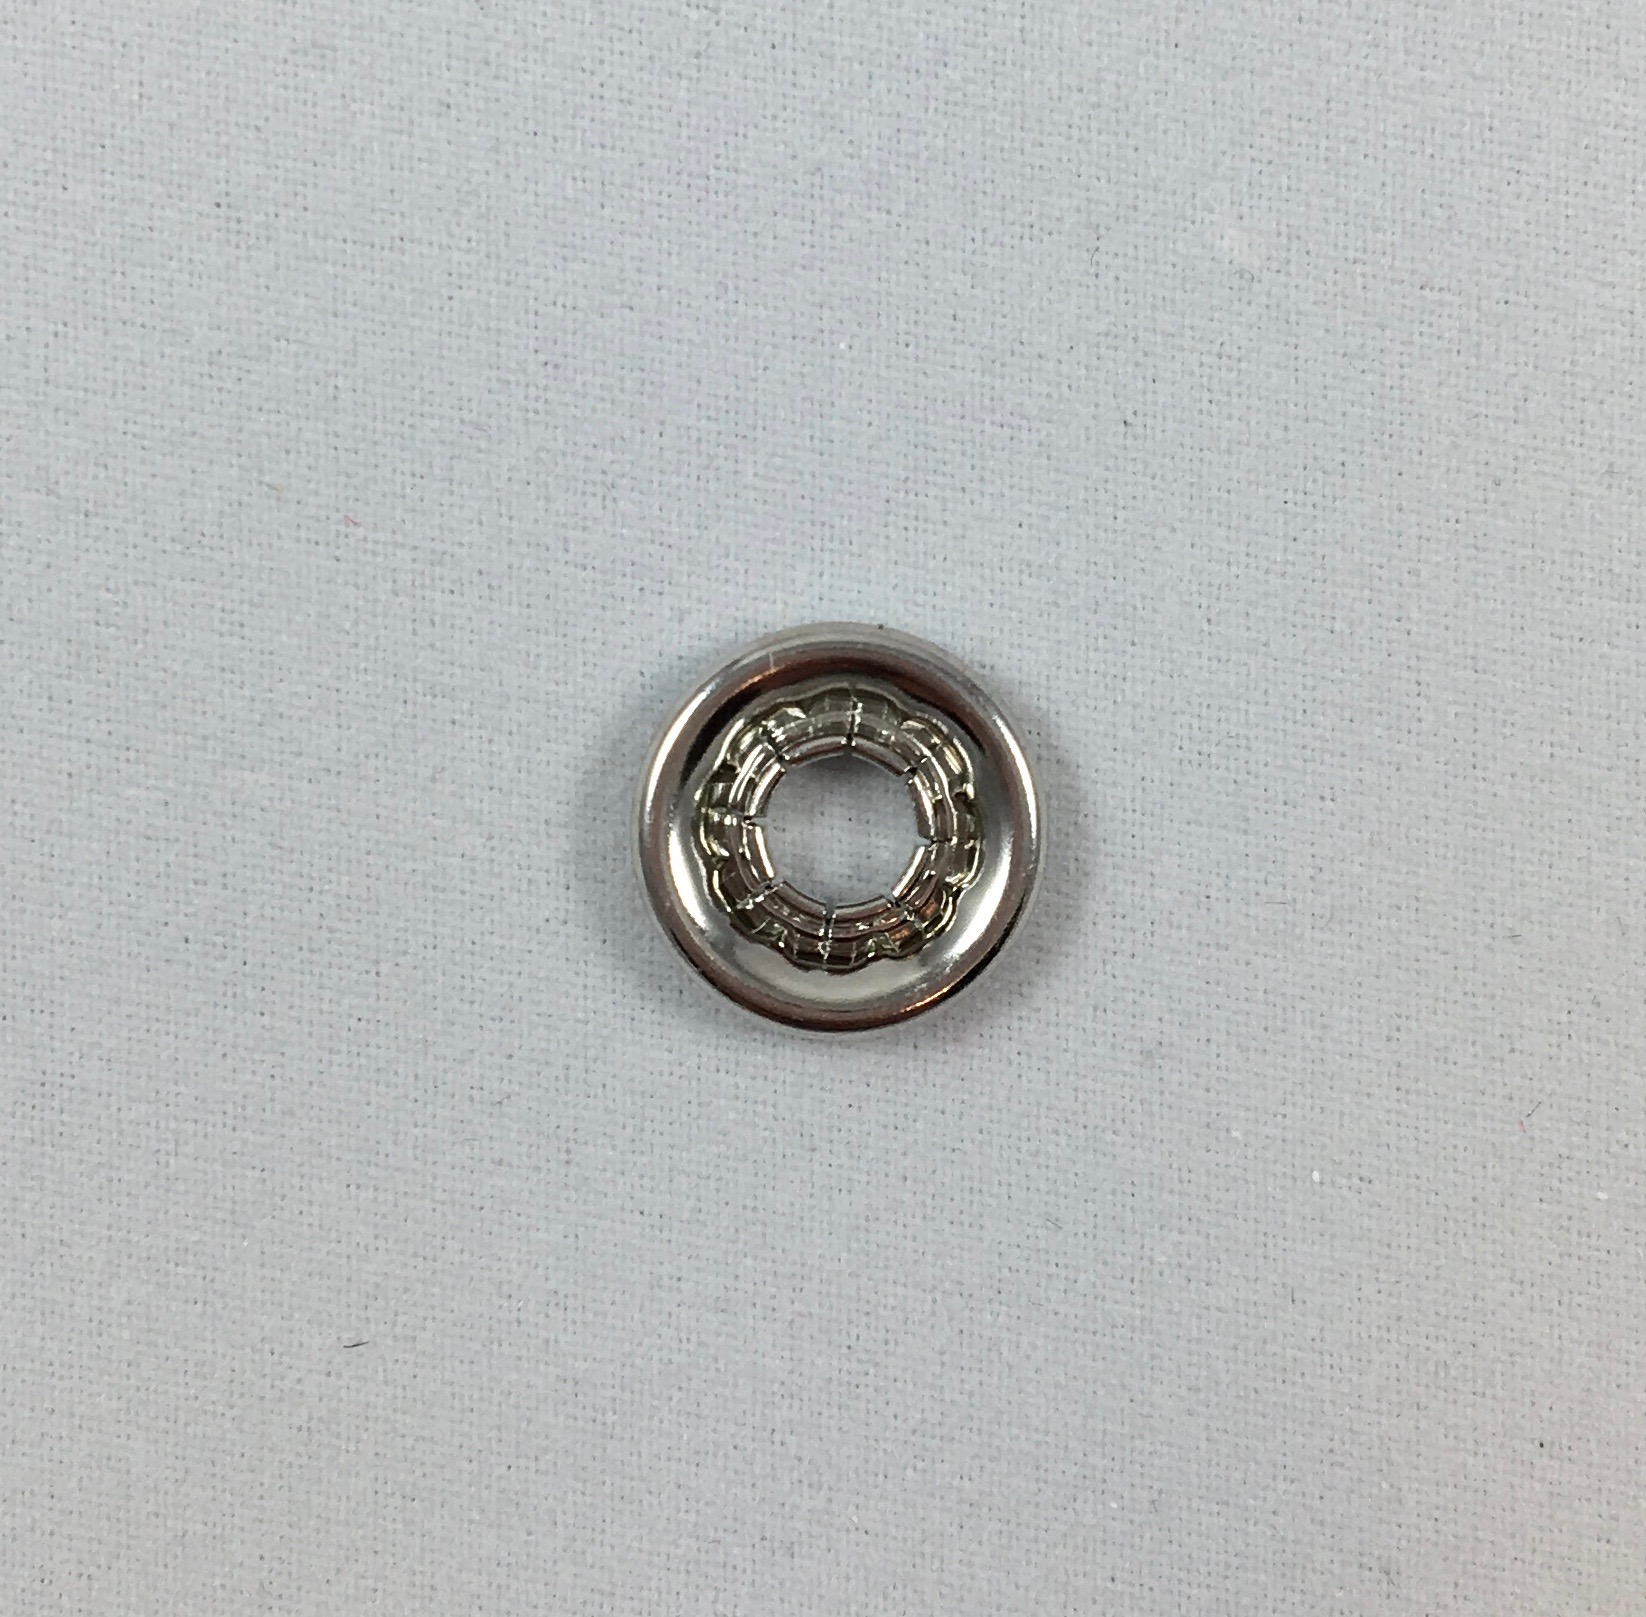
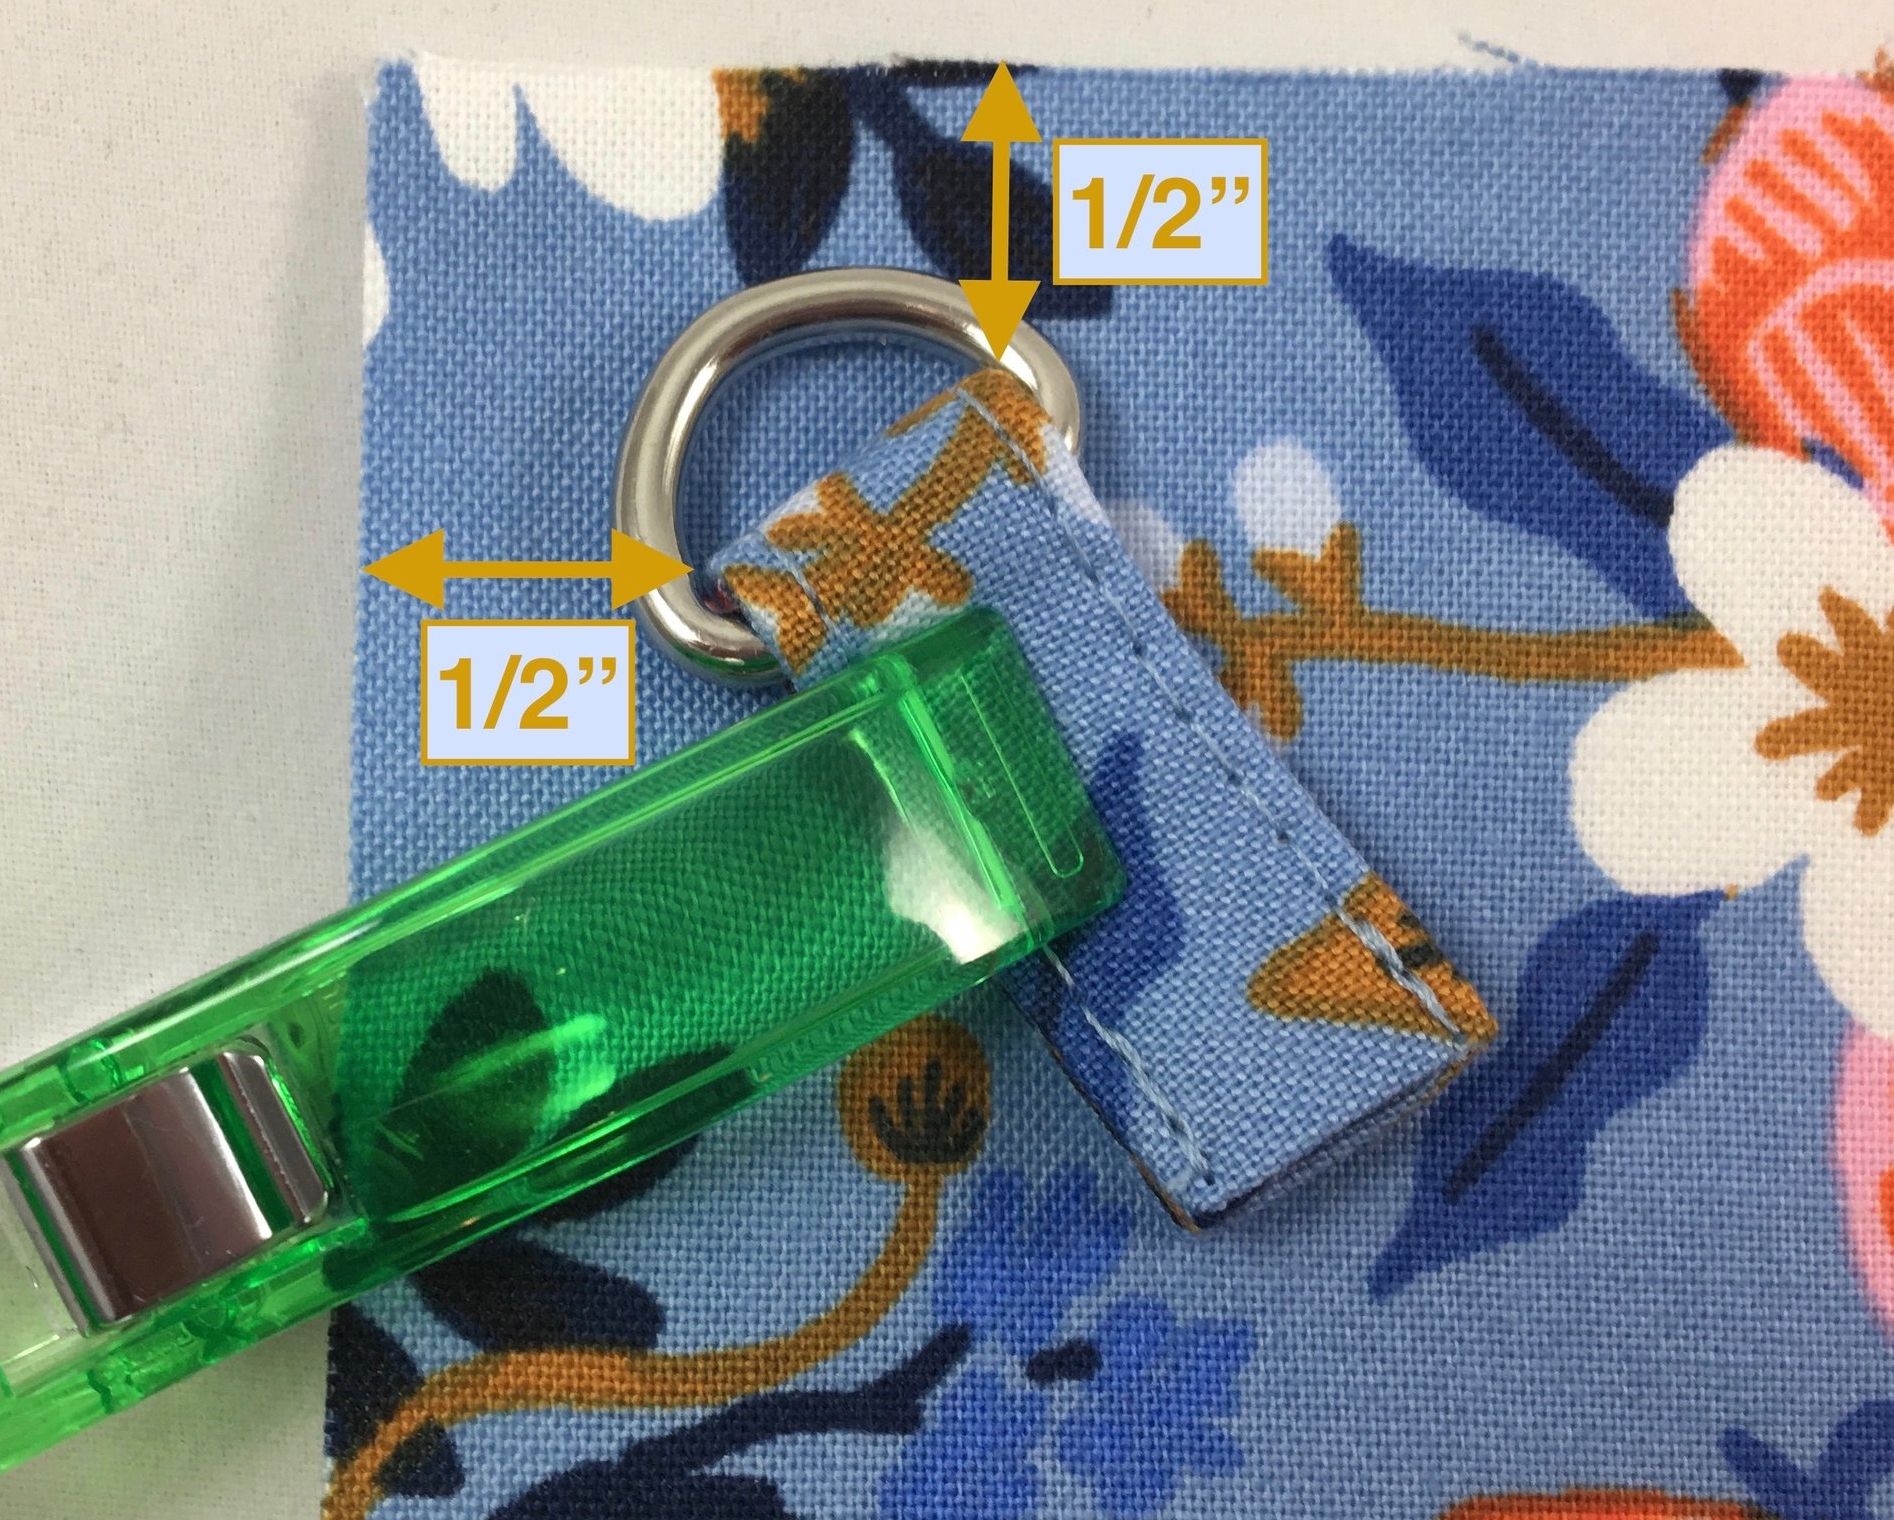
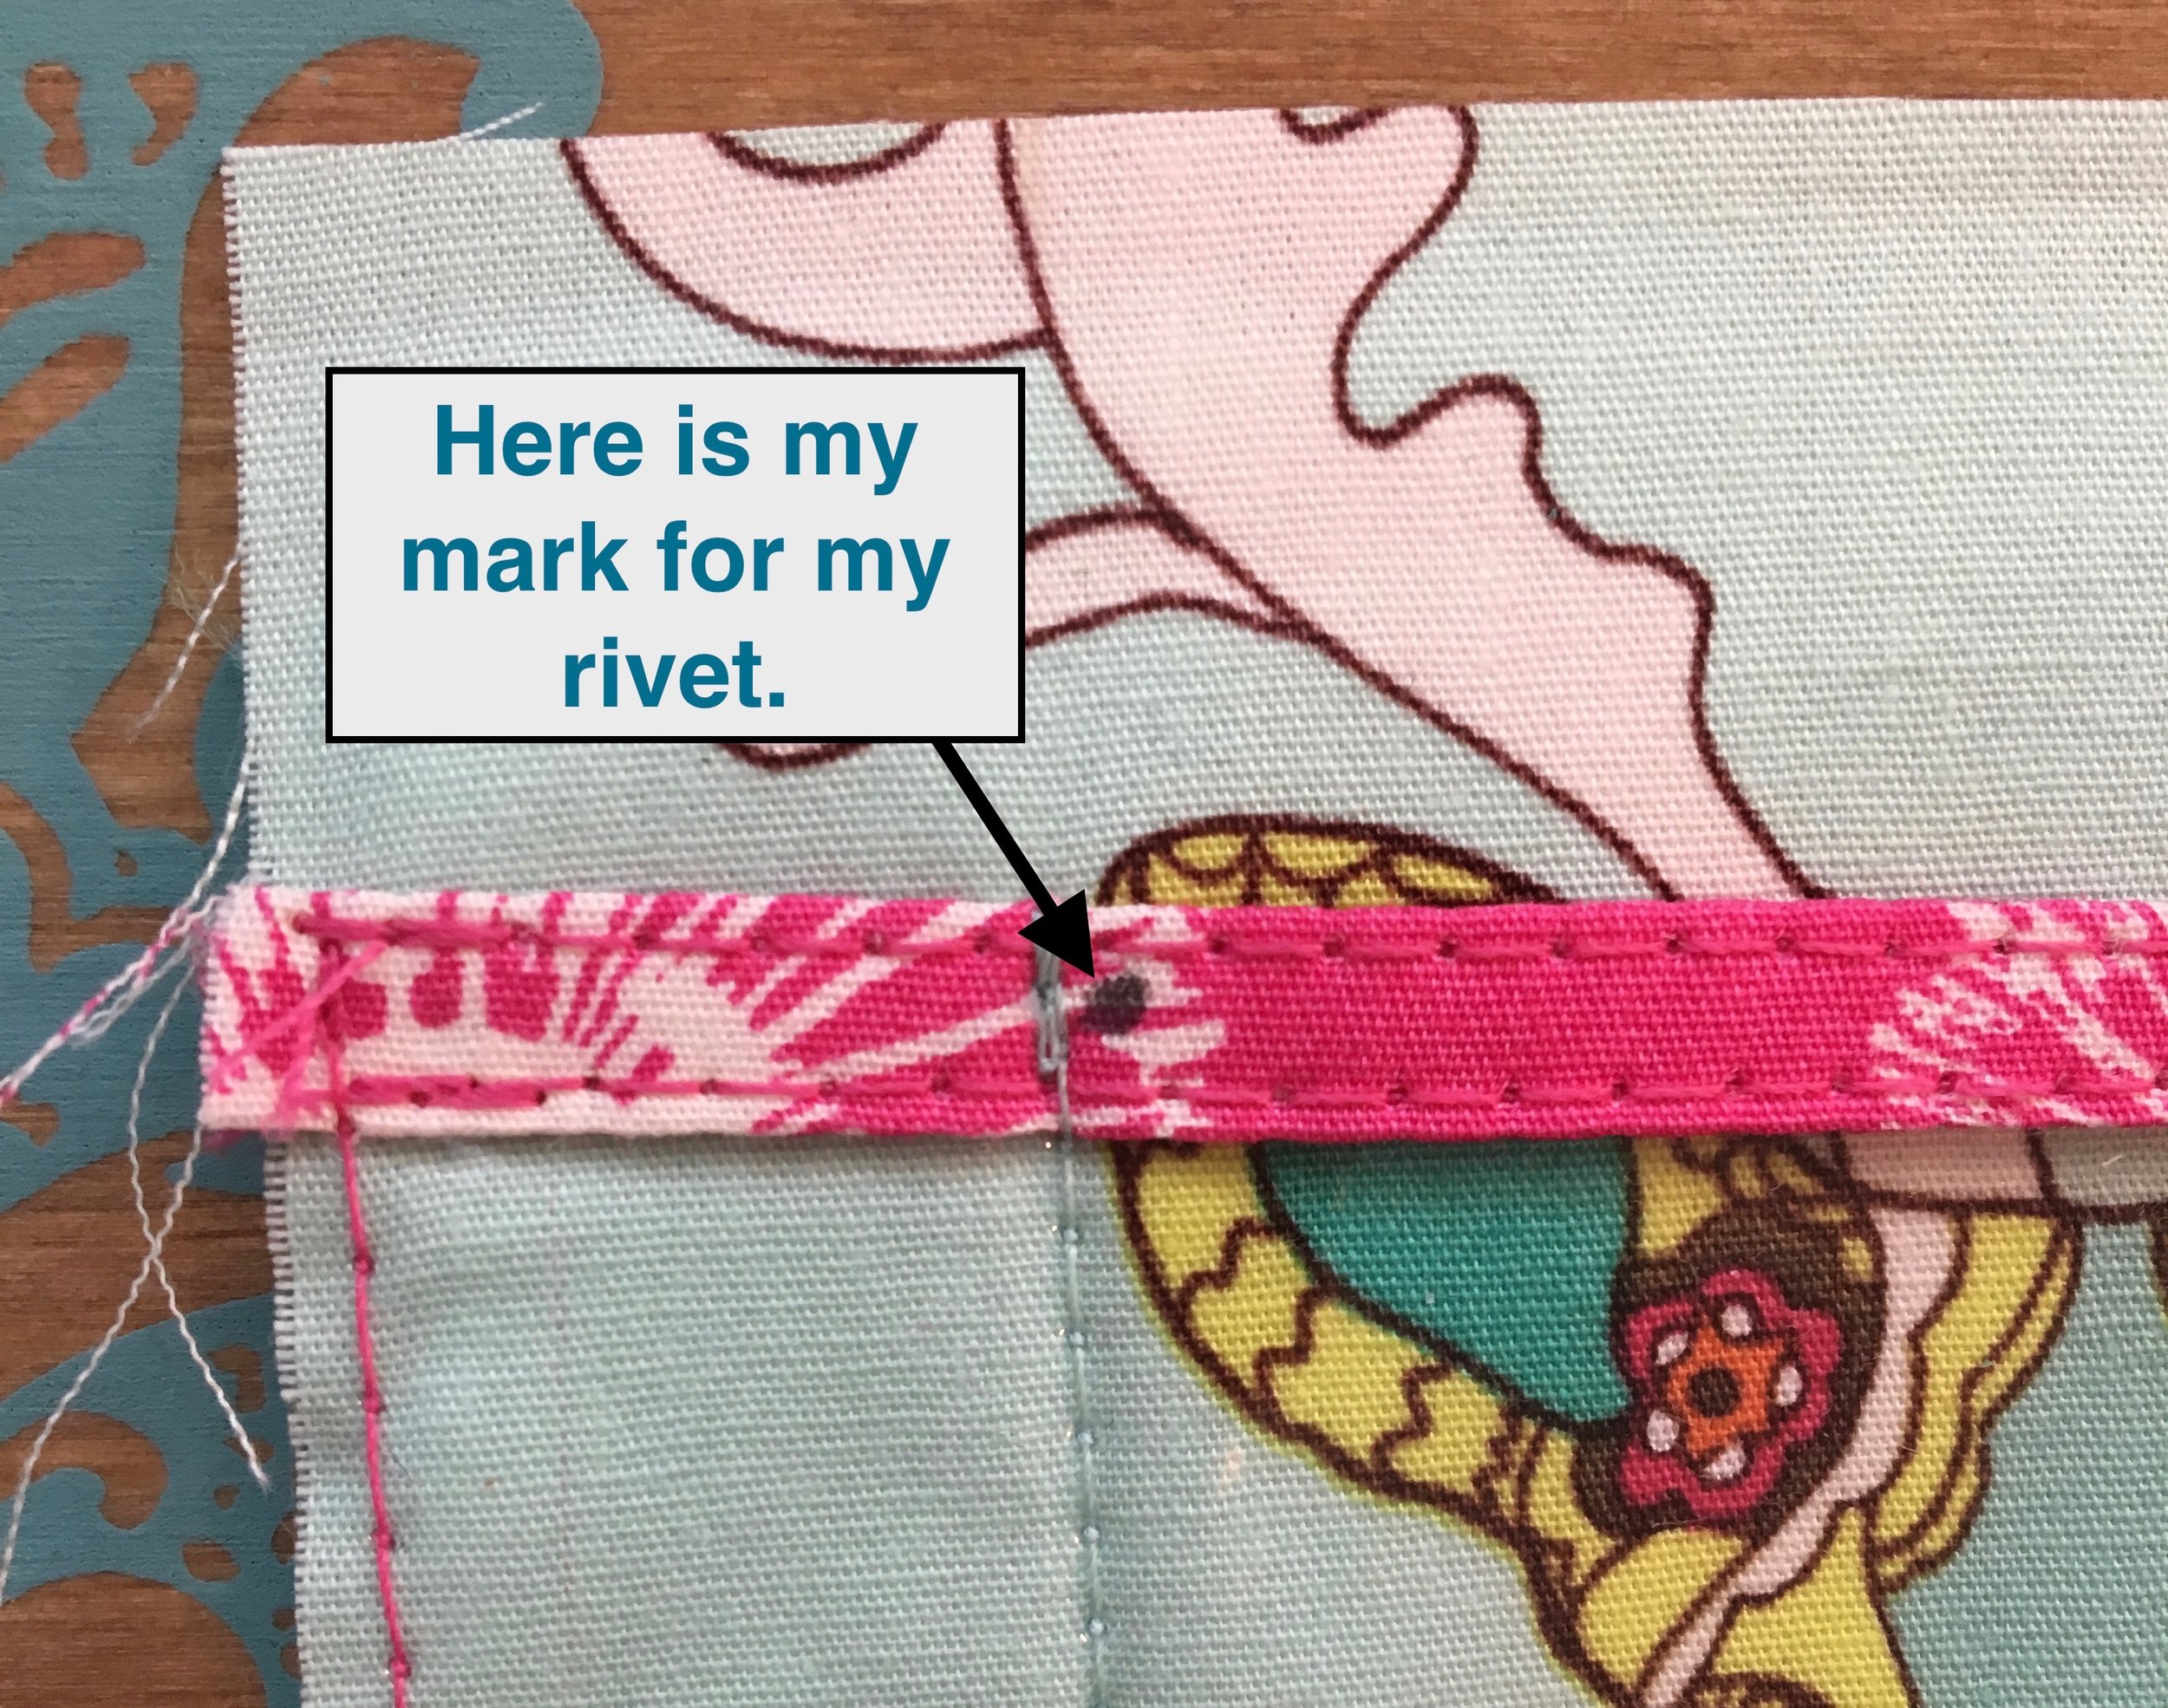
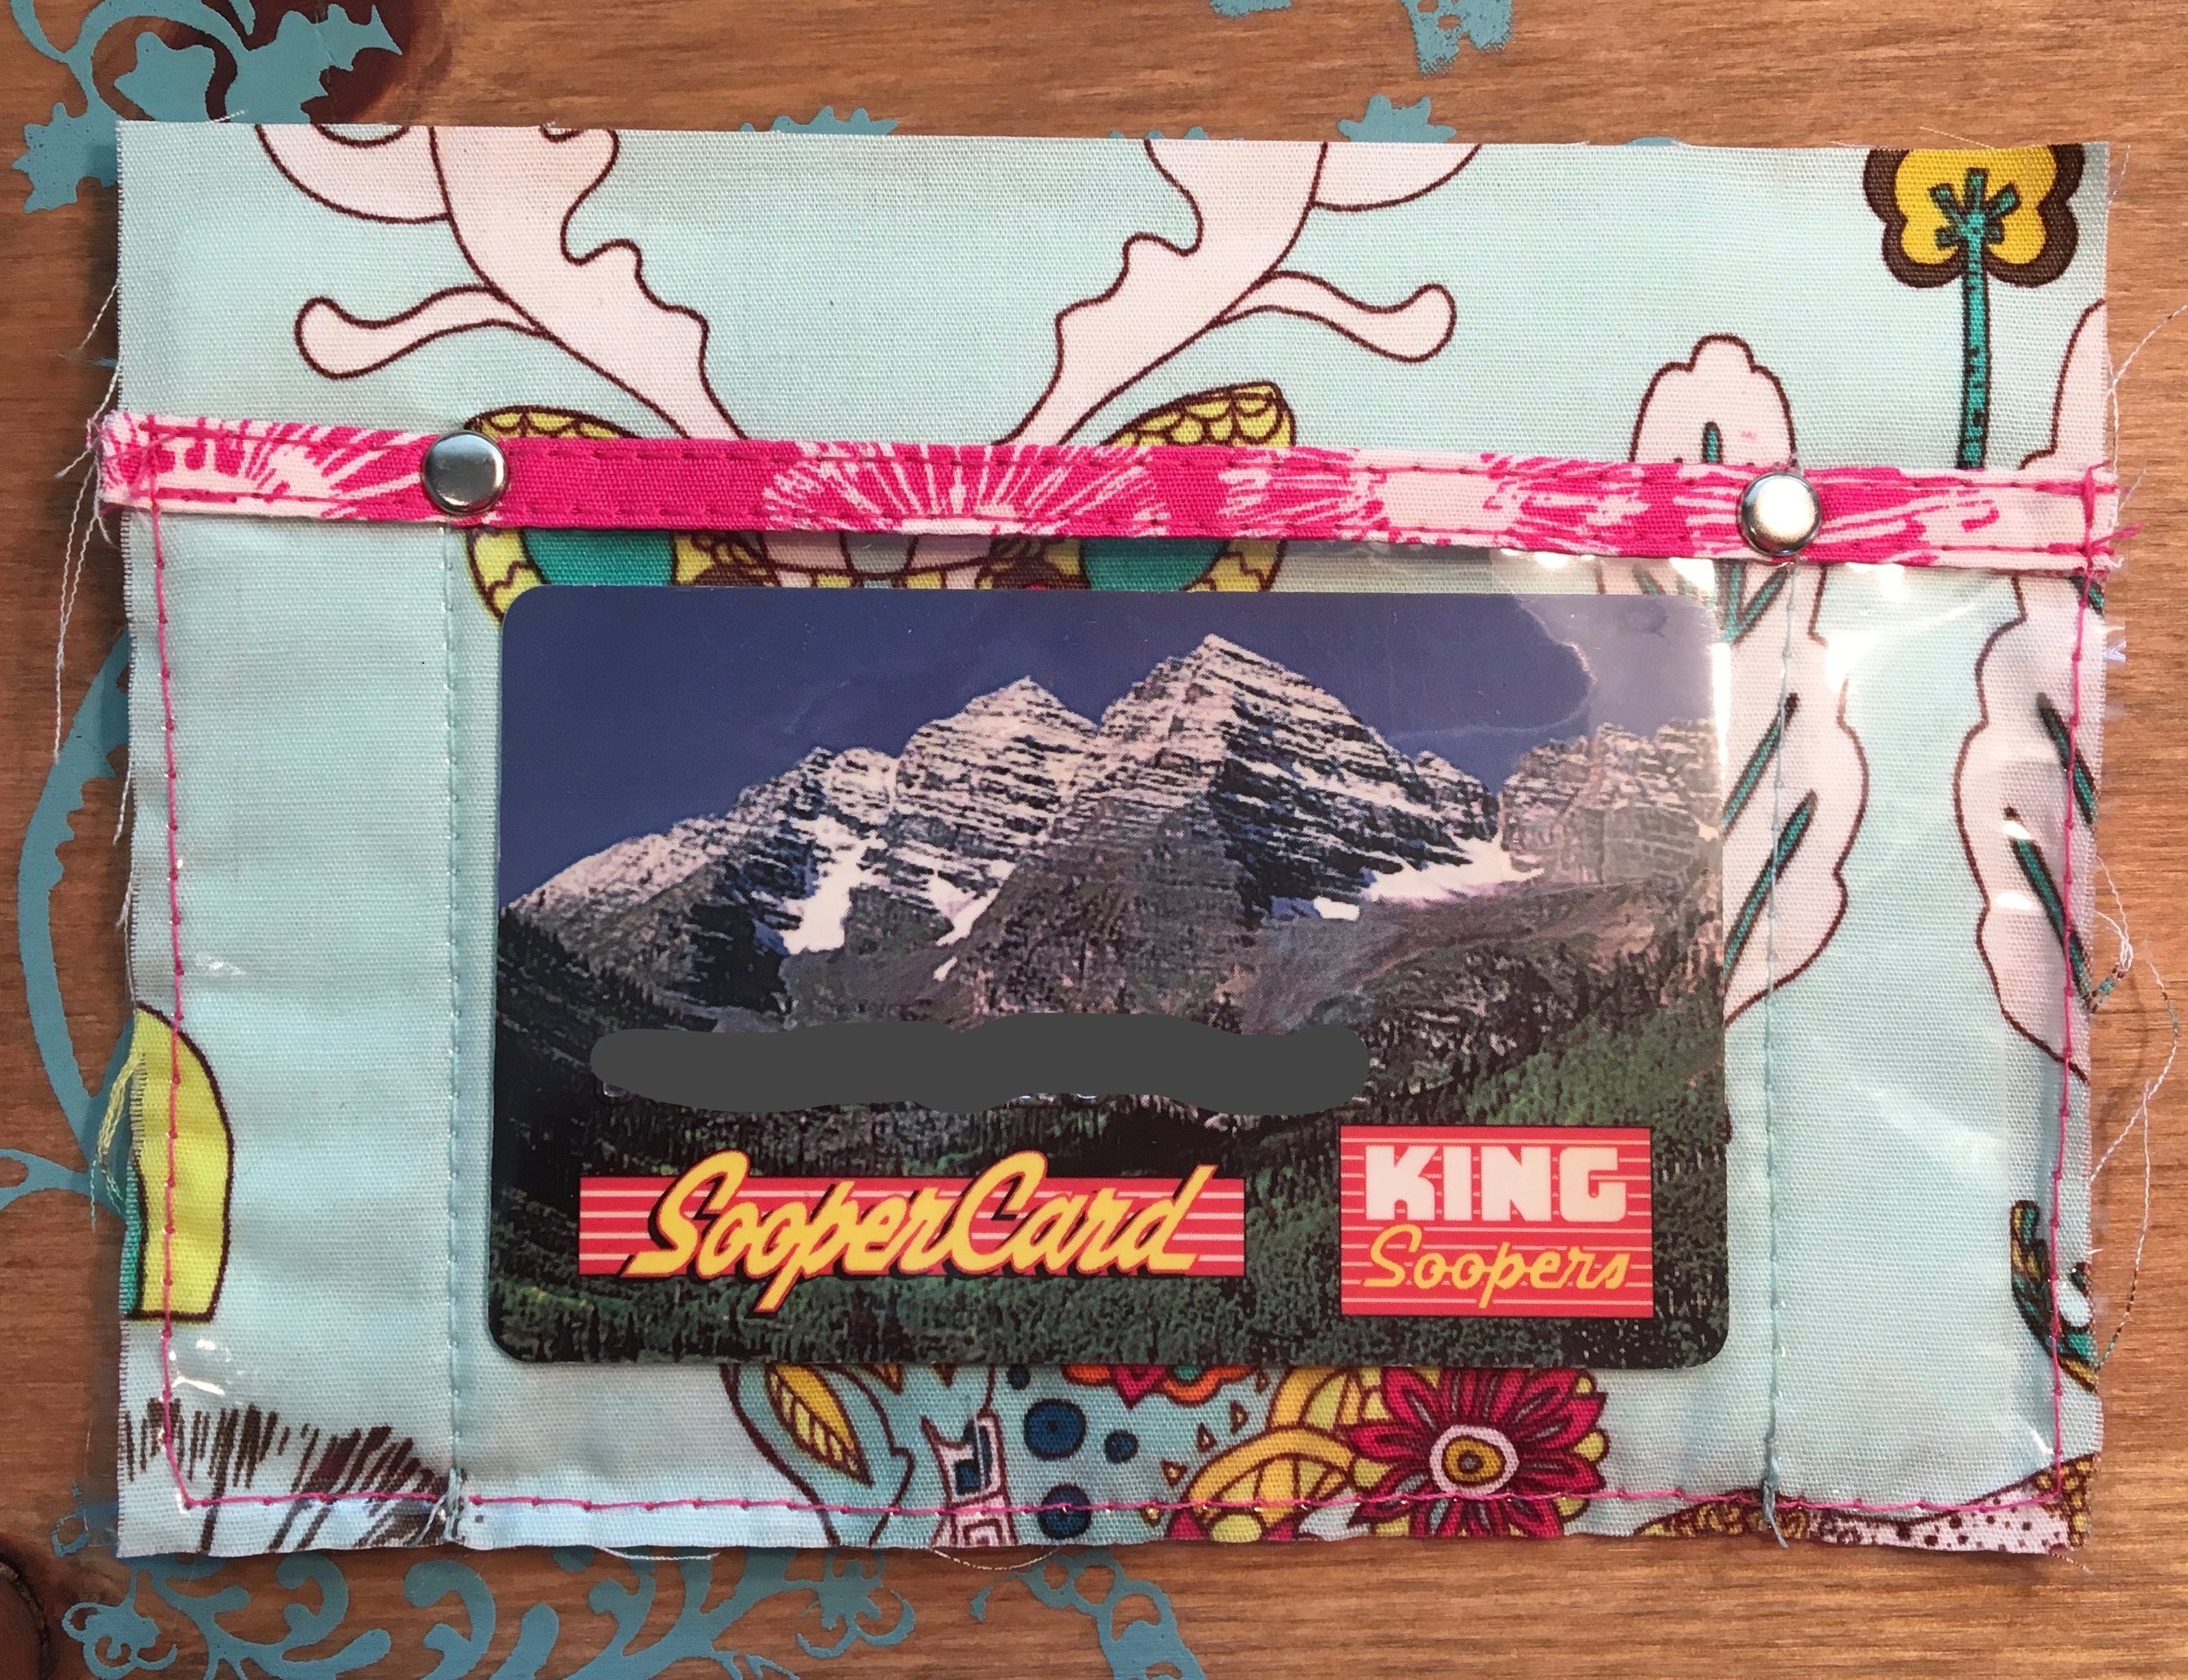
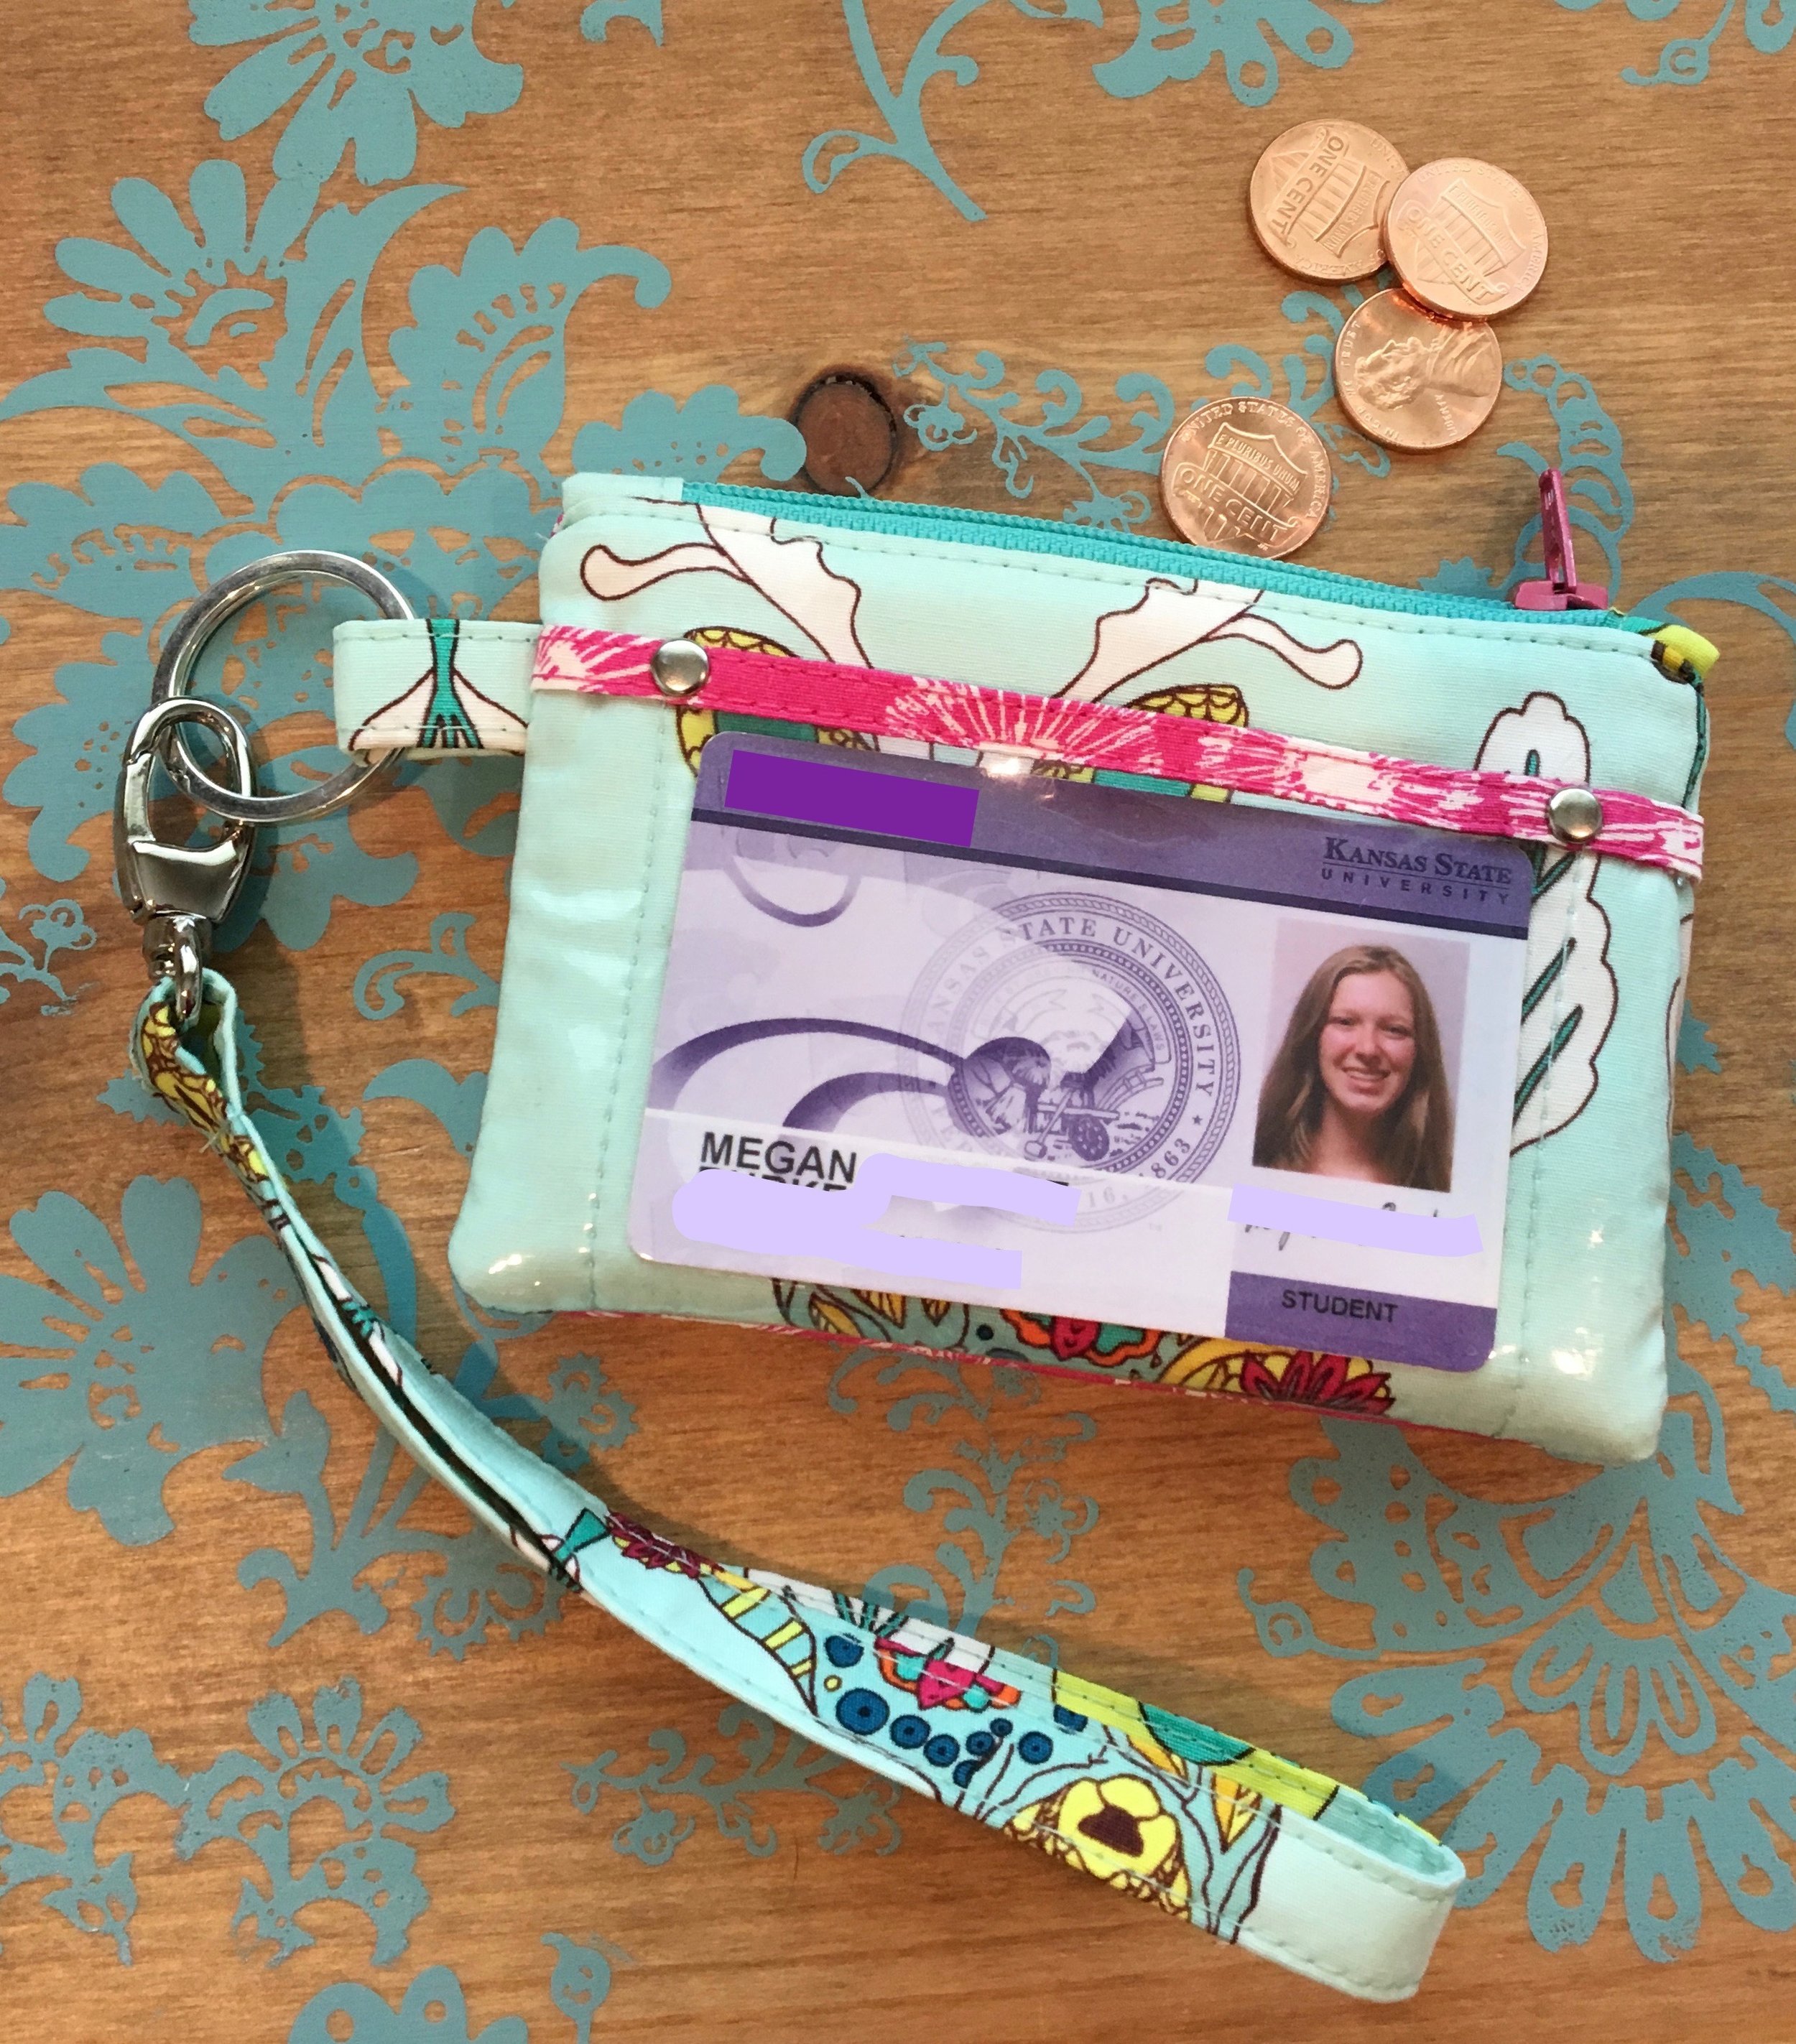
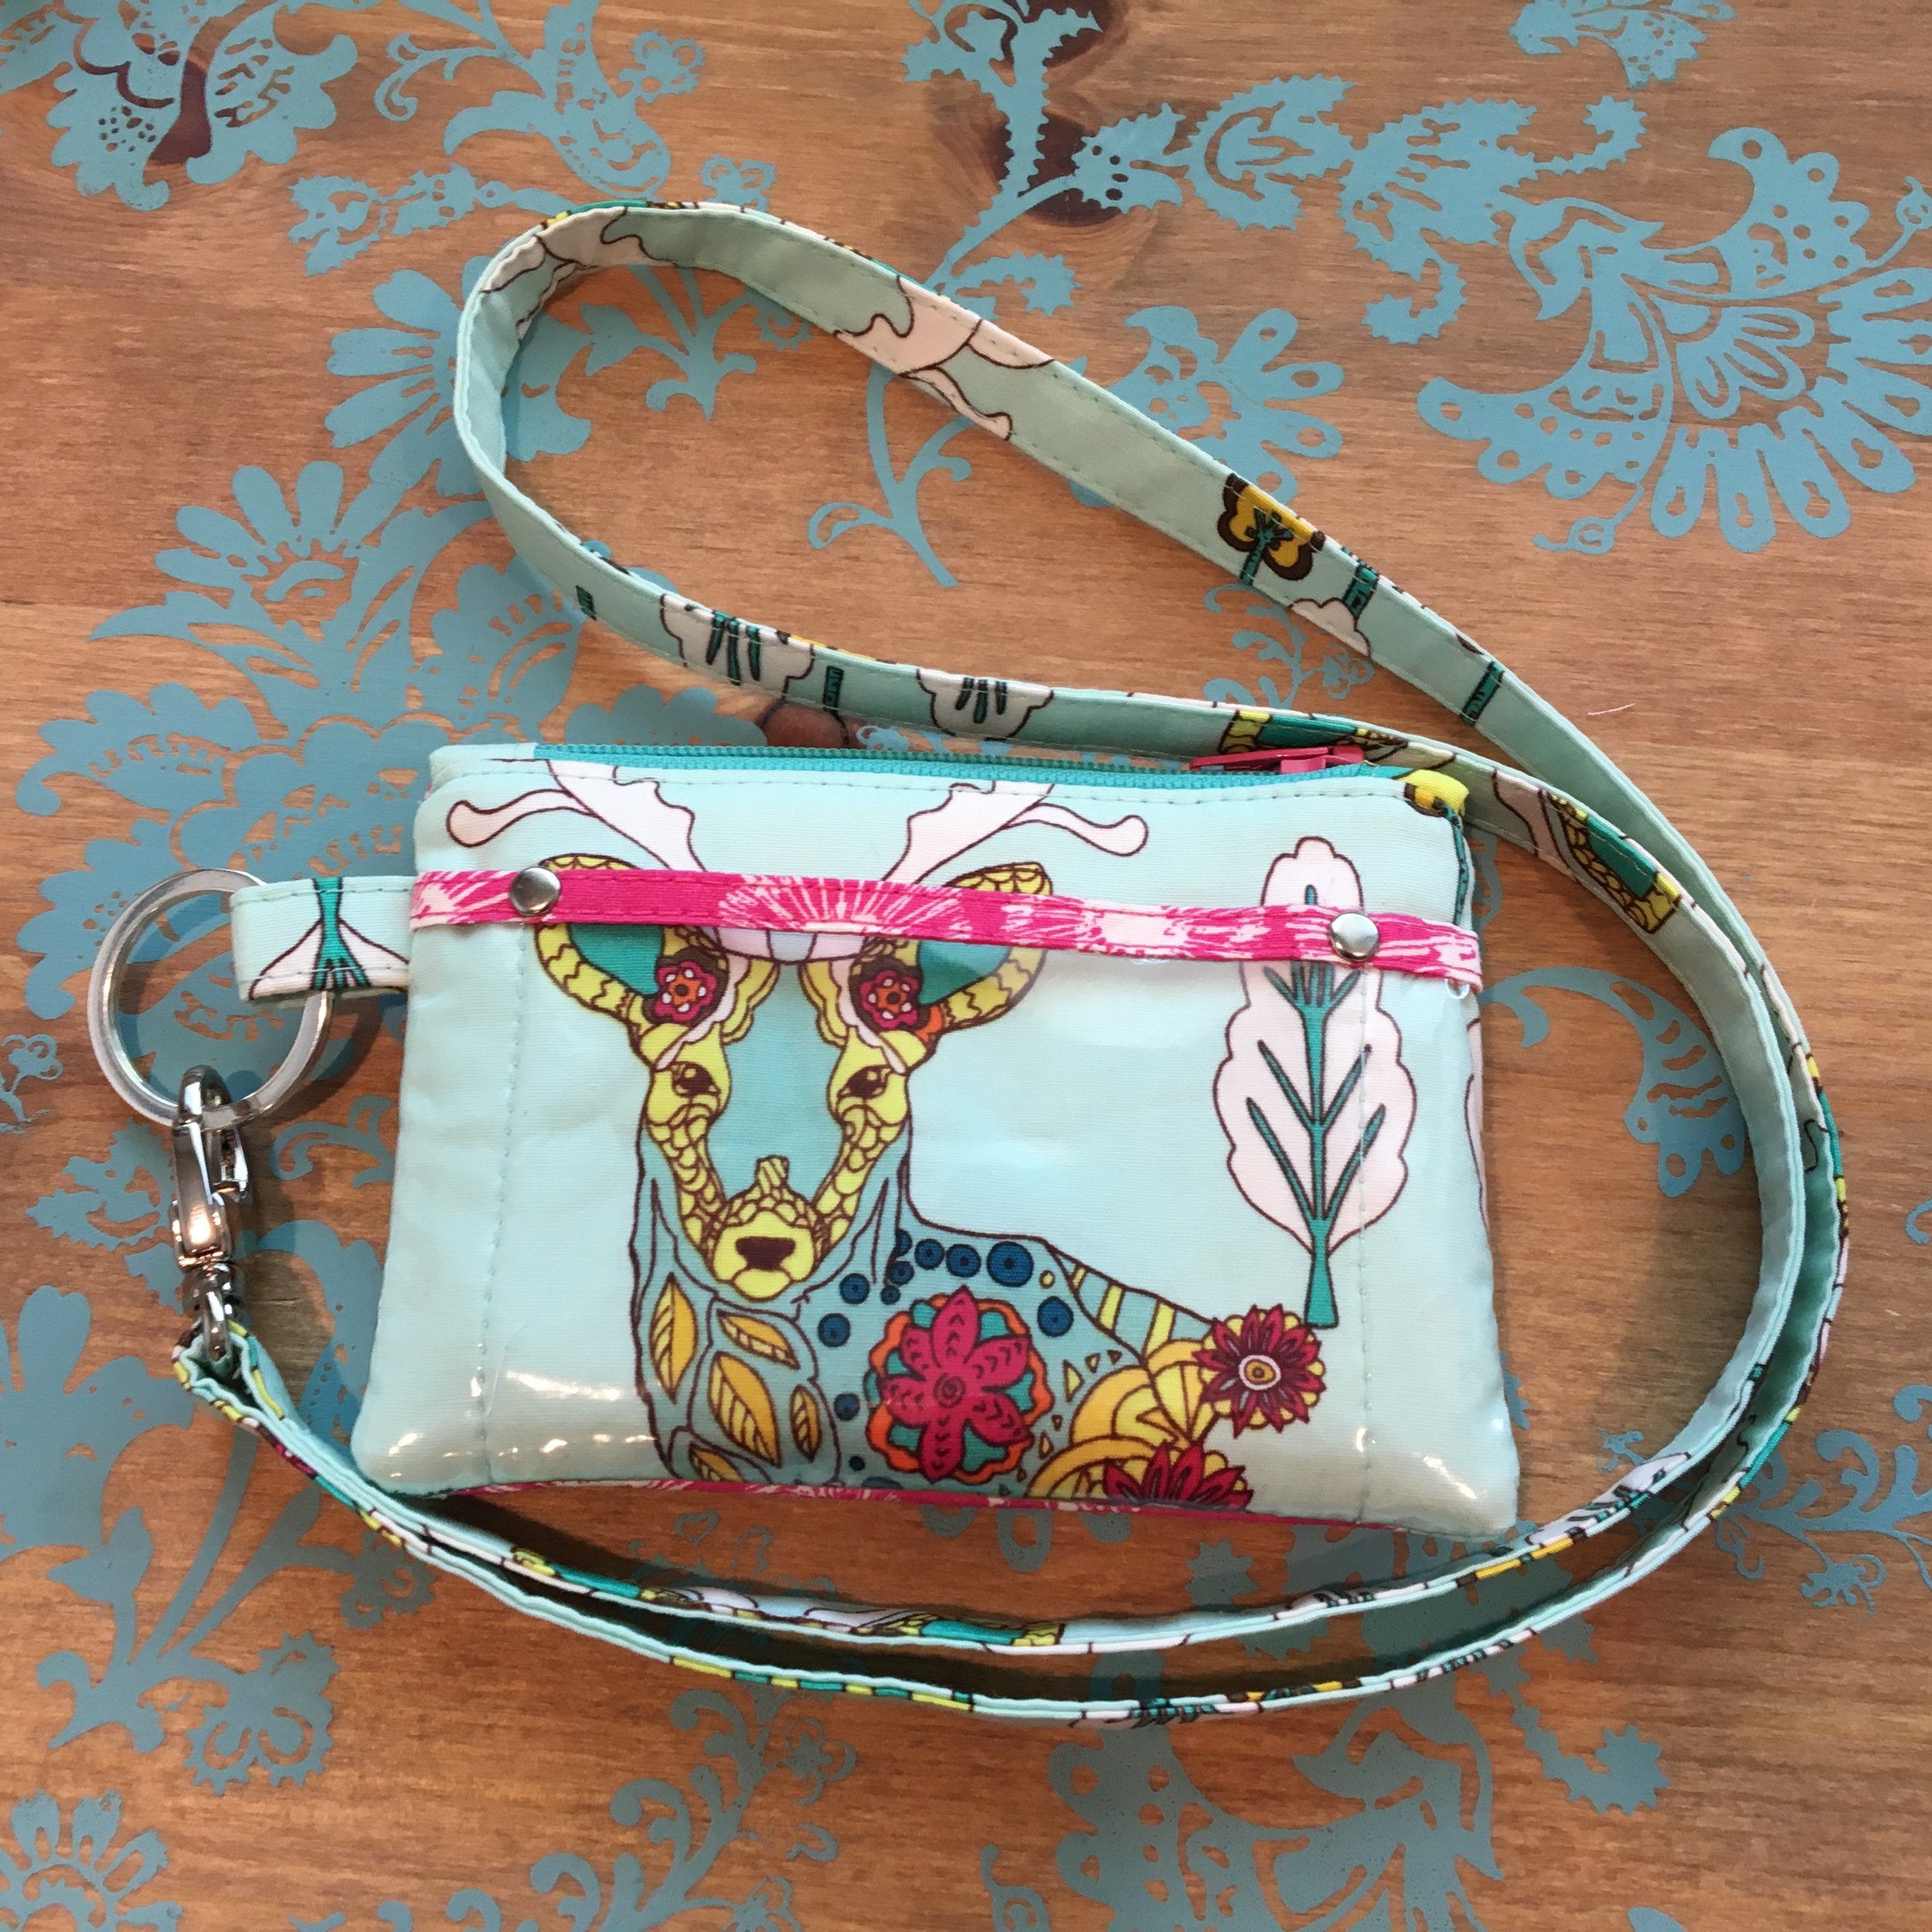
The snap on this is partially decorative, and partially utilitarian. Let’s face it, the snap is what makes this key fob look amazing, but now start thinking of how you could use the Snap To It Key Fob with its beautiful snap. Think of how nice it would be to be able to unsnap your key fob and put it on your purse strap, the baby stroller, your work bag, your belt loop, your diaper bag, your carry-on bag . . .

IMG_2512.jpg

Before I give you the link for the free pattern, I want to remind you that there is one more day in the snap blog post series that you won’t want to miss! Tomorrow I will be sharing pictures of my testers’ amazing Snap To It Key Fobs. Check out tomorrow’s post to be inspired! Also tomorrow, I will share a little Uniquely Michelle surprise I have in store for you for next week, it’s something along the lines of a giveaway!!!

IMG_2420.jpg

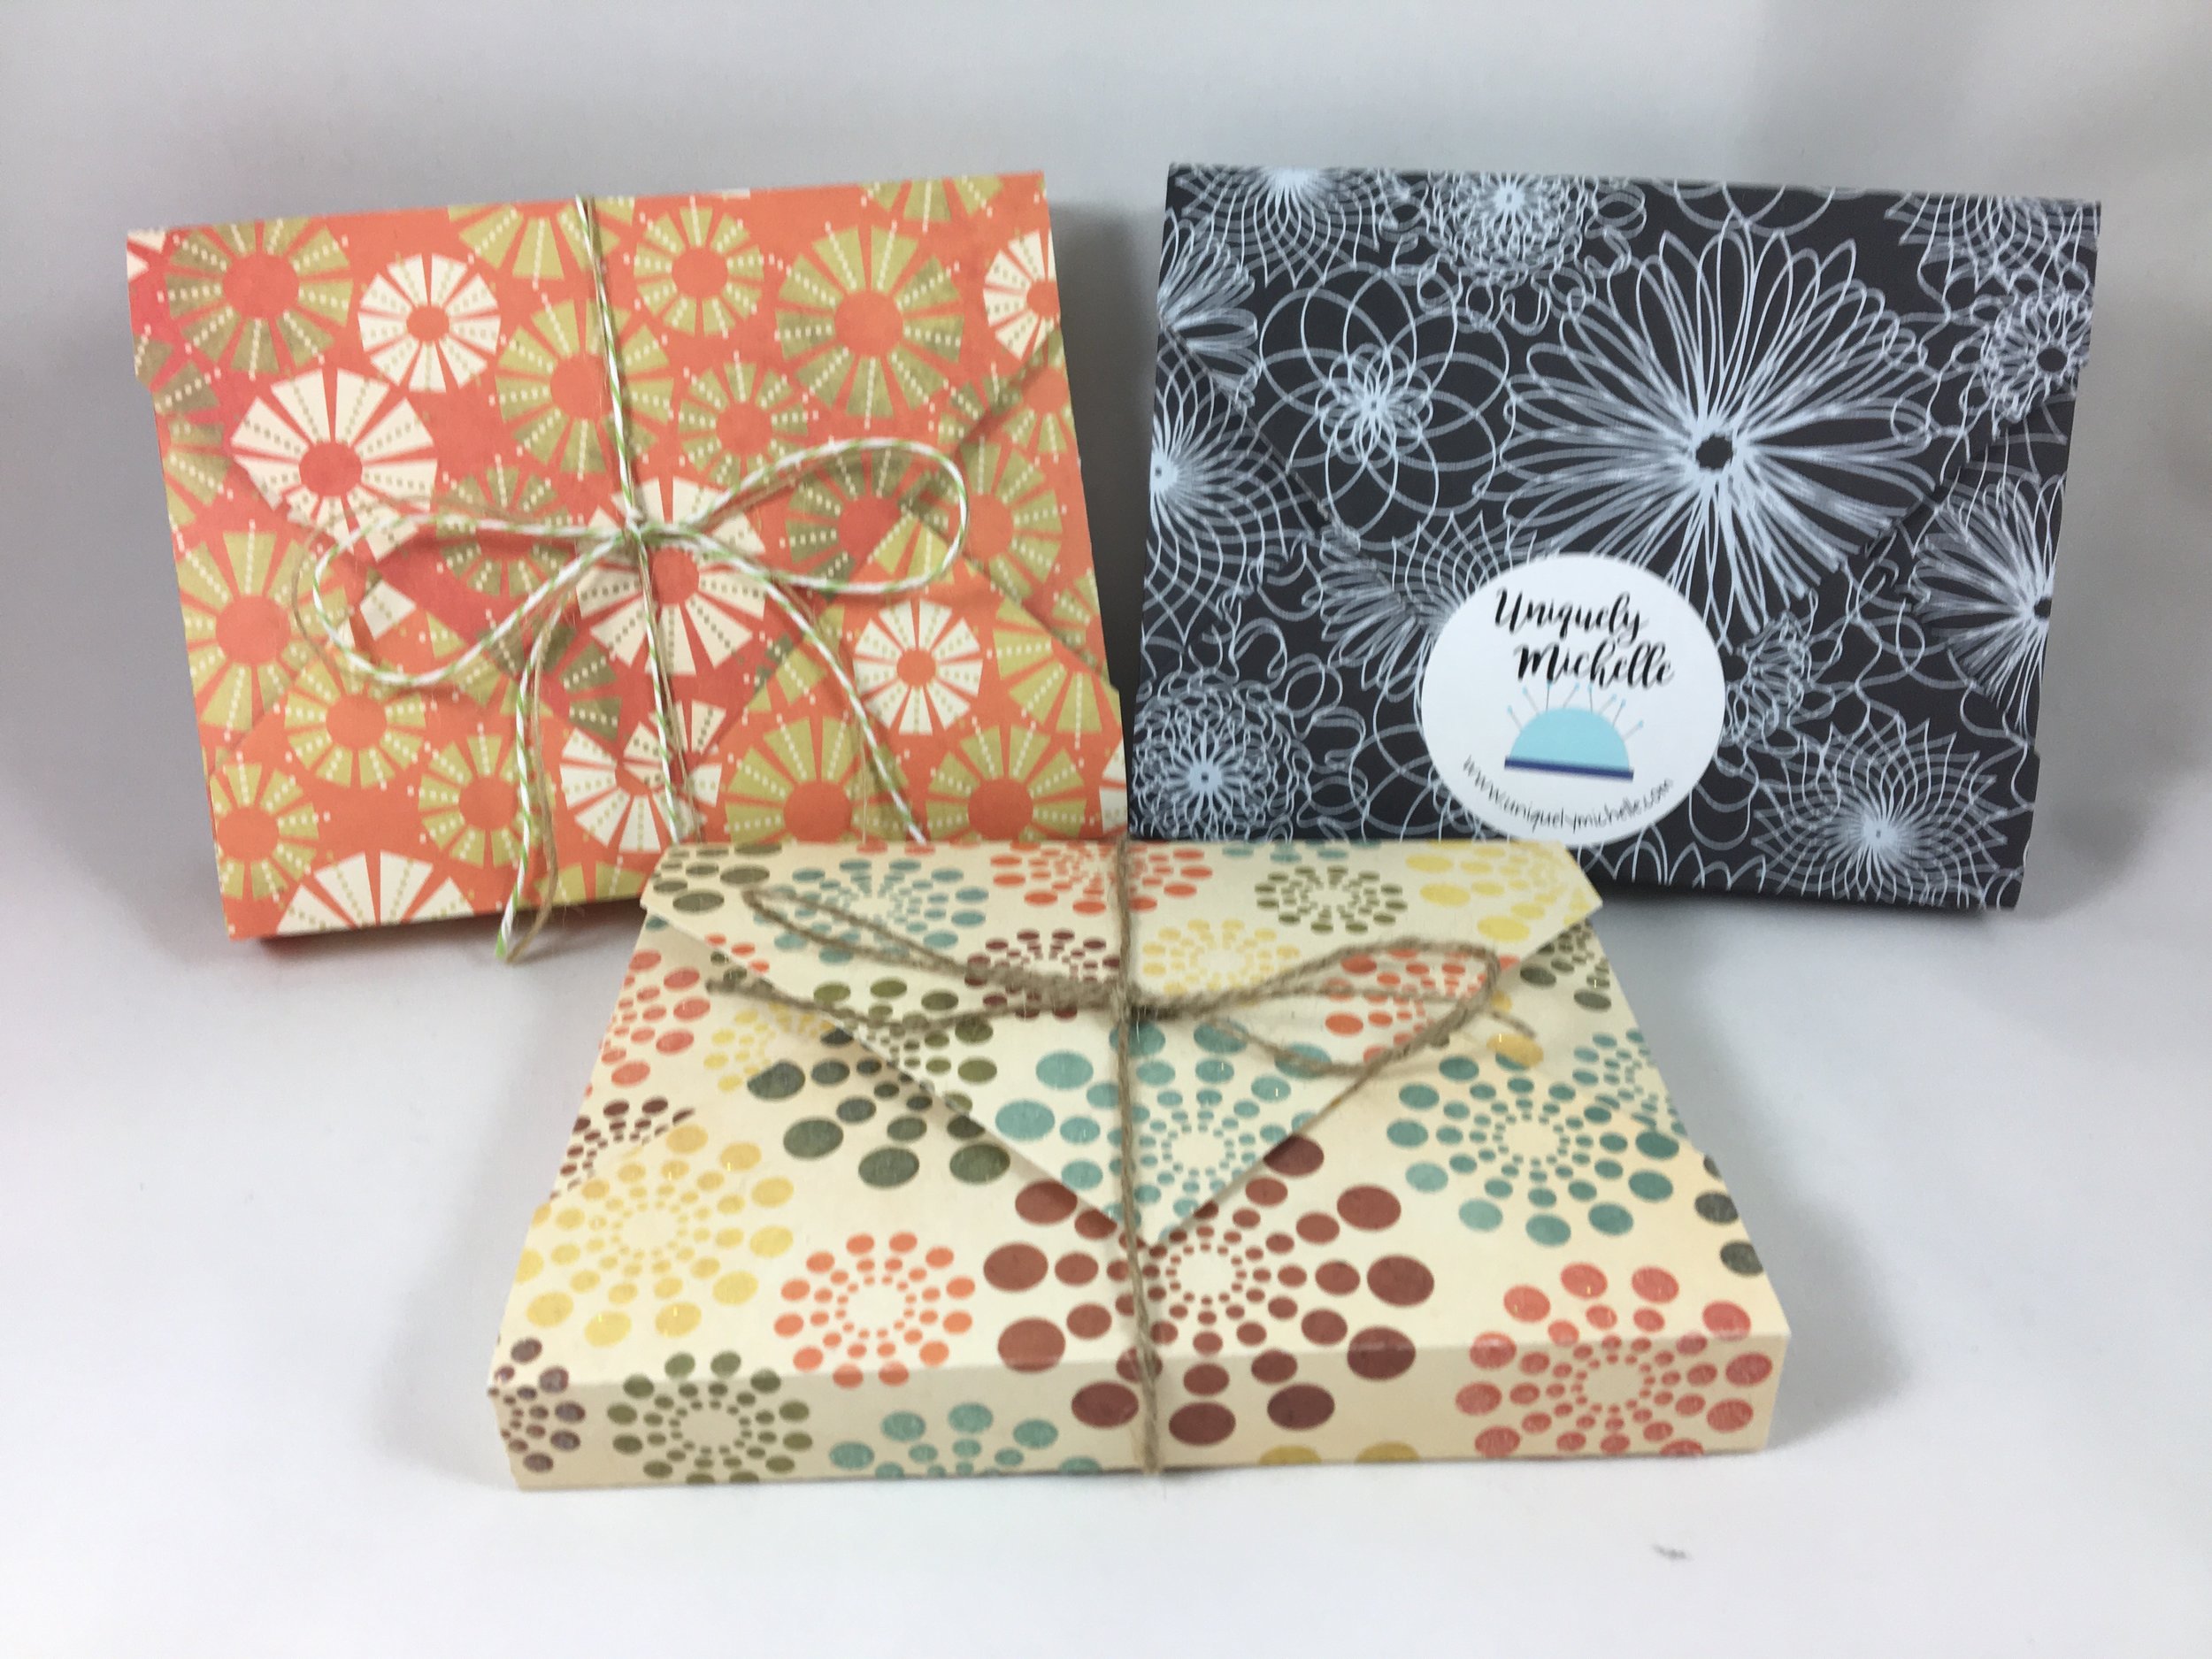
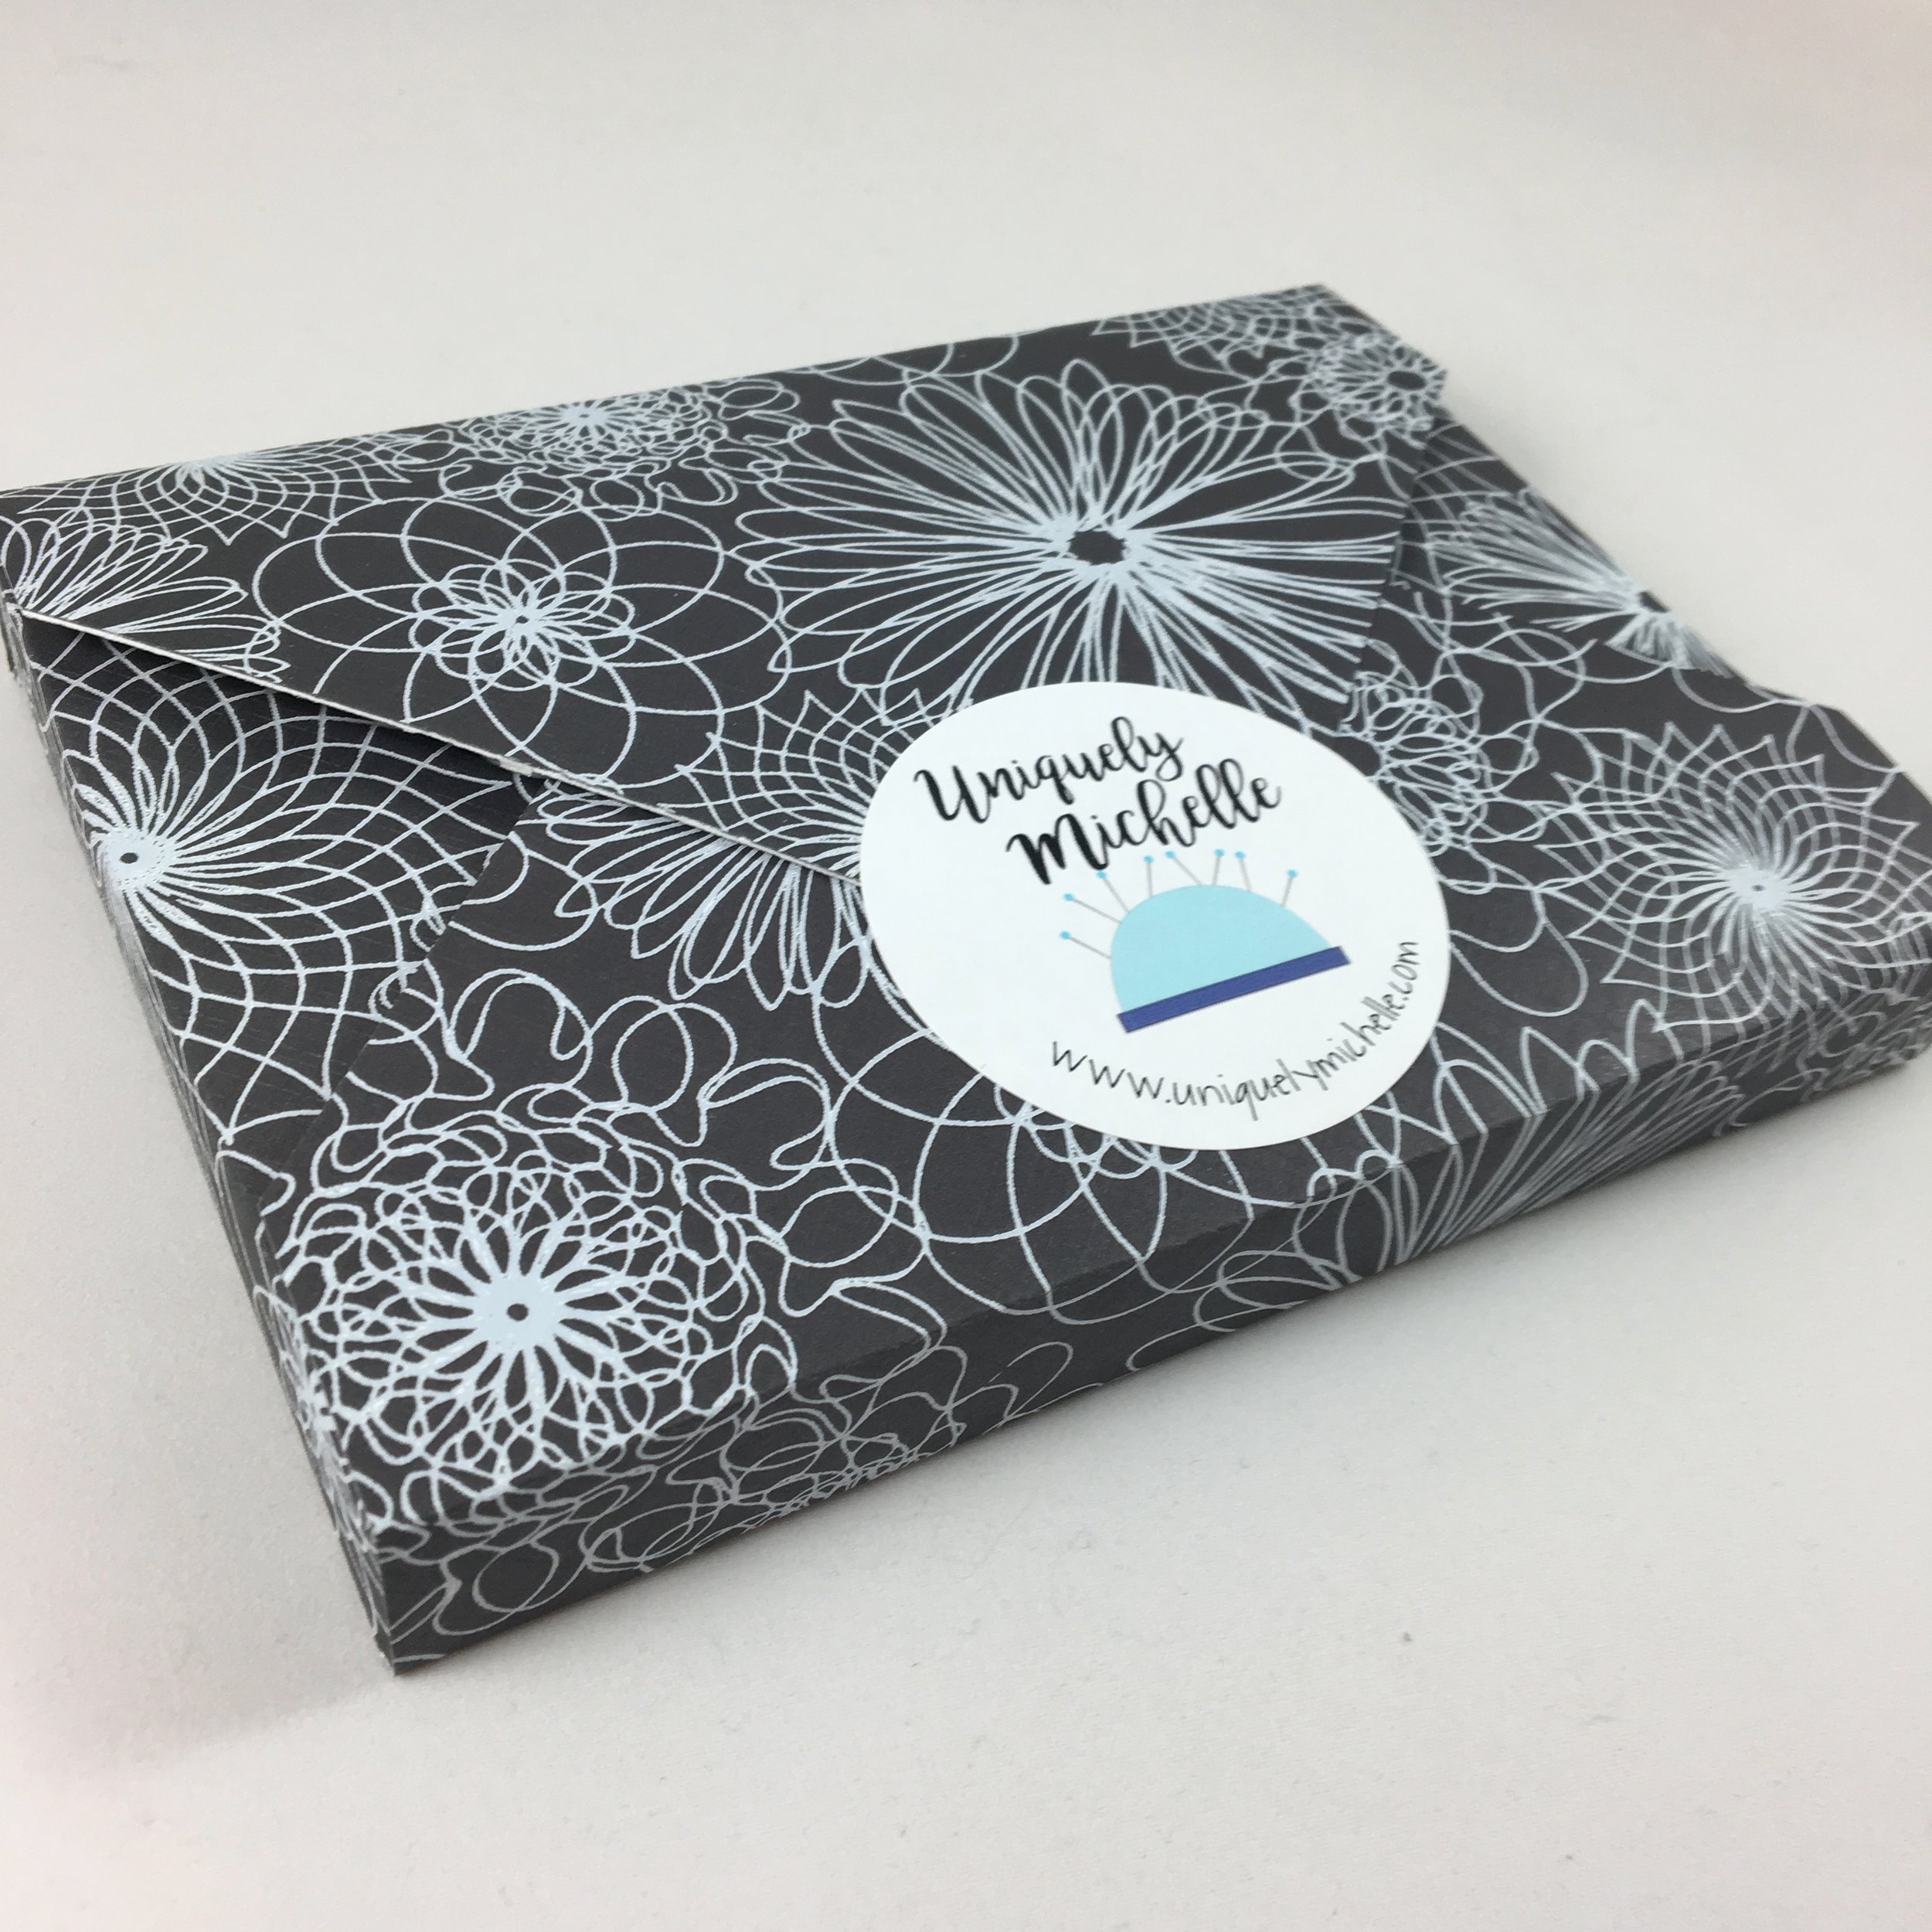
You can download the Snap To It Key Fob pattern, by going to either the Uniquely Michelle website shop or the Uniquely Michelle Craftsy Pattern Shop where you will find the pattern listed for free! Once you have made a Snap To It Key Fob, we would love to see pictures and hear all about how you feel about snaps! Please share pictures and tell us your experience with snap installation in the Uniquely Michelle Sewing Patterns Facebook group or on Instagram (use #snaptoitkeyfob and #uniquelymichelle so we can find your posts). As always we love to see your awesome creations!

IMG_2374.jpg

Sign up for the Uniquely Michelle newsletter below so that you can stay informed on all the latest happening at Uniquely Michelle including next week’s giveaway! Have fun sewing!

Snaps - Installing Plastic KAM Snaps

Michelle Burke

The snap blog post series continues here at Uniquely Michelle! I have already talked about the two different types of snaps - metal snaps were the topic of Monday's blog post and plastic snaps were the topic of Tuesday’s blog post. In yesterday’s blog post, I showed you just how easy it is to install SnapSource snaps with their SnapSource SnapSetter. Today, I will show you how to install KAM snaps. I will mention it again here that the products I recommend are based on my use and opinion of them, I have not been given anything from the companies that make my favorite products nor do they even know that I wrote this blog series.

IMG_2755.jpg

KAM snaps are super easy to install. I will be installing a size 20 KAM snap because it is the most common size, but the installation process is the same for any size, you will just need to change out the die on the KAM snap pliers to accommodate the size of the cap you are using. You will need KAM snap pliers, size 20 KAM snaps and an awl, all of which you can purchase from KAMsnaps.com. You will also need a ruler and a marking pen or pencil.

First let's get to know the parts of a KAM snap. The picture on the left shows the side of each snap piece that you will see once it is installed (the right side). The picture on the right shows the side of each snap piece that is against the fabric once it is installed (the wrong side). KAM snaps have four parts to each snap, just as metal snaps do, except two of the parts are the same. For each snap set you will have two caps, a socket and a stud. The caps have a single center prong on the back side (the top two pieces). The socket has a smooth, rounded outer ring on one side of it (lower left piece). The stud has a raised ring in the middle on the right side of it (lower right piece). Both the socket and the stud have a hole in the center – the prong will go through that hole for installation.

IMG_2764.jpg

The first step in KAM snap installation is marking the placement for both halves of your snap. Follow the instructions for the item you are making and mark the location of the snaps using a marking pen or pencil. I like to mark the side of the project where the caps will be located, but it actually doesn't make any difference since we will be putting a hole through all the layers of fabric and interfacing for each half of the snap..and mark those spots using a marking pen or pencil.

Gently push the awl through the fabric and interfacing at one of the marks you just made. Put the prong of the cap through the hole, making sure the cap is on the correct side of your project so that your snap will function as intended. Now, place the socket over the prong that is sticking out of the fabric so that the smooth, rounded side is facing away from the cap.

Put this half of the KAM snap into the KAM snap pliers pressing the cap into the black die until it clicks into place. Press the handles of the pliers together firmly, but you don’t want or need to overdo it! Check to see that the prong that was sticking out through the hole in the socket has been smooshed into a disk that will hold this half of the snap together and in place.

Before making a hole in the fabric at the other mark for the cap, I like to check to make sure the placement mark for the second part of my snap will line up with the first part of the snap I just installed. Make a hole in the location of the second placement mark with the awl and add your cap as you did for the first half of the snap, making sure you have the cap on the correct side of your project.

Place the stud over the prong that is sticking up through the fabric so that the side of the stud with the raised center ring is facing away from the cap. Put this second half of the KAM snap into the KAM snap pliers as before, pressing the cap into the black die until it clicks into place. Press the handles of the pliers together firmly and then check to see that the prong has been smooshed into a disk.

The snap is installed, so this Just the Ticket Luggage Tag is almost finished!

The snap is installed, so this Just the Ticket Luggage Tag is almost finished!

Check your snap by snapping and unsnapping it a few times. I have never had a KAM snap that I installed with KAM snap pliers not be installed well. If the fabric and interfacing are too thick for the prong to go through all the layers, you will not be able to install the snap securely. I have cut out some of the interfacing before to reduce the layers so that the snap will install securely. It is difficult to remove a KAM snap if you misplaced it since you have made a hole in the fabric, so double checking your marks is a good idea. Also, practice installing a few KAM snaps in a scrap piece of layered fabric and interfacings so that you feel comfortable with the process before adding snaps to your project.

KAM snaps are another easy-to-install snap option, that looks nice and functions well too. KAM snaps come in many different colors and since the parts of the snap are interchangeable, you can match each part of the snap to the fabric that it will be installed on.

The snap blog post series continues for two more days! I am so excited for tomorrow's blog post and I hope you are too! Tomorrow, I will be posting a free pattern that uses a snap, so get your favorite snaps out and get ready for some fun! On Saturday, I will share my testers' awesome creations, you will be inspired! And then next week . . . well, I will tell you more about that later, but I will tell you that there is more excitement coming at Uniquely Michelle. Be sure to sign up to receive the Uniquely Michelle newsletter so you don't miss anything that is coming up at Uniquely Michelle!

Snaps - Installing Metal SnapSource Snaps

Michelle Burke

This week we are talking snaps here at Uniquely Michelle! We have already talked about the two different types of snaps, metal snaps on Monday and plastic snaps on Tuesday. On Monday, I explained why I think SnapSource’s SnapSetter Tool is the best tool for installing metal snaps. I love SnapSource snaps too, they come in so many different colors and sizes. Today, I will show you how to use the SnapSetter to install SnapSource metal snaps. This tool along with these snaps  changed me from a snap hater to a snap lover! Just a quick reminder, the products I recommend are based on my use and opinion of them, I have not been given anything from the companies that make my favorite products nor do they even know that I wrote this blog series.

IMG_2676.jpg

I am going to explain how to install a size 16 snap. The process is the same when using other sizes of snaps, but you will need an adaptor base for the SnapSetter if you plan on installing size 20 or 24 snaps. You will need the size 16 SnapSetter Tool and size 16 snaps (size 18 snaps will work too), both available from SnapSource. You will also need a ruler, a marking pen or pencil and a hammer.

Let’s quickly discuss the parts of a snap so that we are all on the same page. The picture on the left shows the side of each snap piece that you will see once it is installed (the right side). The picture on the right shows the side of each snap piece that is against the fabric once it is installed (the wrong side). The cap is the colorful part of the snap that is a solid circle with prongs on the back (upper left piece). The socket has a hole in the middle and no prongs (lower left piece). The prongs on the cap secure the socket in place on the item you are making. The socket is the part that snaps to the stud. The stud has the raised center area and no prongs (lower right piece). The back ring is a circle with prongs on the back of it (upper right piece). The prongs on the back ring secure the stud in place on the item you are making.

The SnapSetter has three parts that stack together. There is the base with an indentation for the cap or bottom ring to sit. Next there is the middle part with a hole that aligns the socket or the stud perfectly. Finally the top part with a raised area that you will hit with your hammer.

IMG_2695.jpg

We are going to start by marking the placement of the cap part of your snap. Follow the instructions for the item you are making to measure the location for the cap and mark that spot using a marking pen or pencil. Make sure you are marking the part of the project and the side of that part where the cap will be placed.

IMG_2697.jpg

This is the most difficult part of installing these metal snaps and it isn't that difficult, it's just worth spending a couple extra minutes making sure you get it right. The reason it is a bit difficult is because the cap covers the mark, making it difficult to see where you are supposed to place the snap. So there is a lot of peeking under the cap while trying to get it centered on the mark.

IMG_2700.jpg

I usually eyeball it to begin with and then get out my ruler again to check if the center of the cap is where it is supposed to be on my project.

Now push the prongs through all the layers of fabric and interfacing. I like to use a clean pencil eraser to help me with this. Place the base of your SnapSetter on a solid surface, place your creation cap side down and with the cap fitted in the indention of the SnapSetter base.

IMG_2708.jpg

Next, add the middle part of the SnapSetter, this will help align everything perfectly.

Now place the socket in the hole of the middle part of the SnapSetter with the side that is more raised facing down toward the prongs. This is important so that the prongs can attach correctly. To check that you have placed your socket correctly, you should have the side that has a flower-shape look to it facing up. Place the top part of the SnapSetter over all of this and give it a few good hits with the hammer on the raised part of the SnapSetter Tool. I always think that I probably only need one good whack with the hammer, but usually give it three or four solid hits just to be sure.

IMG_2682.jpg

Now for the easy half of the snap. Follow the instructions for the item you are making to measure the location for other half of your snap and mark the spot where the back ring will be placed using a marking pen or pencil. I like to check the placement mark for the second part of my snap to make sure it will line up with the first part of the snap I just installed. Place the back ring centered, over the mark that is on the opposite side of the fabric from where the stud will be placed.

IMG_2684.jpg

Push the prongs through all layers of fabric and interfacing as you did with the prongs on the cap. Again, make sure the base of your SnapSetter is on a solid surface, place your creation back ring side down and with the back ring fitted in the indention of the SnapSetter base.

Add the middle part of the SnapSetter. Now place the stud in the hole of the middle part of the SnapSetter with the raised side facing up toward you. Place the top part of the SnapSetter over all of this and give it a few good whacks with the hammer on the raised part of the SnapSetter Tool.

This Just The Ticket Luggage Tag has its snap installed and is ready to be finished up!

This Just The Ticket Luggage Tag has its snap installed and is ready to be finished up!

I always do a quick test of the snap once it is completely installed by snapping and unsnapping it a few times. I have never had a SnapSource snap that I have installed with a SnapSource SnapSetter not turn out well. The only caution I would give you is that if your fabric and interfacing are so thick that the prongs will not go through all the layers, you will not be able to install the snap securely. I have cut out some of the interfacing before in the place where the snap will be installed to reduce the layers so that the snap will install securely. If you do have a problem with the prongs not lining up well, you can carefully use a small flathead screwdriver to pry the snap parts apart. Then you can reinstall that half of the snap.

As with most things like this, it is a good idea to practice installing a few snaps on a scrap piece. I would recommend using a couple pieces of fabric with some interfacing between them. With the SnapSetter and snaps from SnapSource, it really is easy to install pretty, metal snaps! I love the professional look that adding a metal snap gives to a bag or other creation. And with so many color options, it is easy to find a color that will match your project beautifully.

I hope your excitement is building as you now know how easy it can be to install metal snaps! Tomorrow we will talk about how to install plastic KAM snaps! Once you know how easy it is to install both SnapSource metal snaps and plastic KAM snaps, you will just have to decide which one you will use on the free pattern that I will be sharing with you on Friday! Make sure you don’t miss out on what is happening at Uniquely Michelle and sign up for the Uniquely Michelle newsletter below!

Snaps - Plastic Snaps and Where to Buy Them

Michelle Burke

Welcome to the second day of the snap blog series! Through this blog series, I am hoping to share my love of snaps with you. I haven't always loved snaps, but I have found that by using the good quality snaps along with the tools designed to install them, snaps can be fun to use! If you missed it, yesterday’s blog post was about metal snaps - which metal snaps work best and where to buy them. In today’s blog post I am going to talk to you about the other type of snap, plastic snaps. Once again,  I want you to know that the products I recommend are based on my use and opinion of them, I have not been given anything from the companies that make my favorite products nor do they even know that I wrote this blog series.

KAM snaps! This is the limited edition Pantone multi-color pack. Photo from the KAMsnaps website.

KAM snaps! This is the limited edition Pantone multi-color pack. Photo from the KAMsnaps website.

I was first introduced to plastic snaps while making Days for Girls kits that require plastic, KAM snaps. At the time, all I used was SnapSource metal snaps and so I was unsure that plastic snaps would hold up well, and I was afraid they would break easily during installation. I was wrong! KAM snaps are very strong and are very easy to install. There is another brand (Babyville) and there are off-brands of plastic snaps too, but the reviews are not as good for those as they are for KAM snaps. I don’t feel comfortable recommending them since I have not used Babyville or the off-brands. If you have some experience with these other brands, let me know in the comments.

Photo from the KAMsnaps website.

Photo from the KAMsnaps website.

KAM snaps come in a variety of colors and sizes, the most common size used in KAM snaps is size 20. Some colors of KAM snaps can be purchased in a matte finish instead of a shiny finish. KAM snaps offer some different shaped snaps and some snaps that are engraved as well.

This starter kit is also available from KAMsnaps. It includes the same items in the kit described below except it has the floral pliers instead of the basic pliers and it costs $3.00 more. (Photo from the KAMsnaps website)

This starter kit is also available from KAMsnaps. It includes the same items in the kit described below except it has the floral pliers instead of the basic pliers and it costs $3.00 more. (Photo from the KAMsnaps website)

The KAM snap pliers (required for installing KAM snaps) can be bought in a kit that includes K2 pliers (basic pliers not the floral pliers), dies for installing snaps that are sizes 20, 22, 24 and for the heart, flower, butterfly and star shapes, 100 sets of size 20 snaps, an awl, and a screwdriver (used to change the dies) for $16.99. The only other tools that you need to install KAM snaps is a ruler and a marking pen or pencil.

Now that I have shared my recommendations for both metal and plastic snaps, I will tell you that metal SnapSource snaps are my go-to favorite snaps. I like the professional look that metal snaps give to a project and I think they are more durable in the long run. That being said, I think KAM snaps are a very good option and can in some cases (items made for babies) can be a better option. I don't think you can go wrong with either SnapSource metal snaps or plastic KAMsnaps.

I am excited for the next two posts in the snap series! The next two posts are all about what usually scares people away from using snaps, installation. Tomorrow, I will show you how easy it is to install colorful SnapSource metal snaps using the SnapSetter Tool. Then on Thursday I will walk through the installation process for KAM snaps. By Friday, I think you will be excited to install some snaps yourself, so I will share a quick and fun little FREE pattern for you that includes a snap! Make sure you don’t miss out on what is happening at Uniquely Michelle and sign up for the Uniquely Michelle newsletter below!

Snaps - Metal Snaps and Where to Buy Them

Michelle Burke

Snaps . . . does the mention of the word make you cringe? Maybe you are like me and you love them! But I have not always loved snaps, for a long time I actually hated them. I hated having the cute baby outfit mostly finished only to fail about half the time I tried to get the snaps installed well. Then I was introduced to a new way to install snaps and that completely changed my mind about snaps – now I LOVE them! Before we go any further, I want you to know that the products I recommend are based on my use and opinion of them, I have not been given anything from the companies that make my favorite products nor do they even know that I wrote this blog series.

A Just the Ticket Luggage Tag with a metal snap from SnapSource.

A Just the Ticket Luggage Tag with a metal snap from SnapSource.

This week, I am going to talk snaps – the different types available, where to buy them, and how to install them. Toward the end of the week, I will share a free pattern with you that has a snap, so you can try it out. I think once you know more about snaps, you will enjoy installing them as much as I do.

A metal snap from SnapSource on a Kristine ID Wallet.

A metal snap from SnapSource on a Kristine ID Wallet.

Today, I am going to introduce metal snaps - where you can purchase these snaps and the tool you will need for installing them. There are two types of snaps available, metal and plastic. Both of these have their advantages and if you get the correct brands and tools, they are both easy to install correctly almost every single time.

When I started using snaps, I bought them from JoAnns. They were just the regular metal, ring snaps that are best installed with a plier kit for installing snaps and grommets. Sounds easy enough, but this is the point where I learned to hate snaps. The pliers did not work as well as I had hoped. It was almost as easy to set a snap wrong as to set it correctly. Looking at the reviews for this product (Dritz Plier Kit for Installing Assorted Snaps) on JoAnns, you will see that I am not the only one who struggles getting the pliers to work well. I do not recommend this product.

The SnapSetter Tool from SnapSource. Image from SnapSource.com

The SnapSetter Tool from SnapSource. Image from SnapSource.com

The best metal snaps and tool for installing them are from SnapSource. The SnapSetter Tool by SnapSource is what changed me into a lover of snaps. SnapSource also has a wonderful assortment of snaps available to choose from in a large variety of sizes and colors.

I have used my SnapSetter Tool with SnapSource snaps for several years and it is still going strong. I have the size 16 SnapSetter tool. The size 16 SnapSetter Tool can be used for cap and pearl snaps that are sizes 16, 18, 20 and 24. You will need a SnapSetter Tool Adaptor Base for pearl snaps that are sizes 16 and 18 and cap snaps that are sizes 20 and 24. The SnapSetter Tool is $9.00 and the adaptor (if you decide to purchase it) is only $3.25.

Colorful snaps from SnapSource. Image from SnapSource.com

Colorful snaps from SnapSource. Image from SnapSource.com

The snaps range in price depending on size and type (pearl snaps are more expensive), but you can get 10 sets of size 16 cap snaps (the most common size for metal snaps) for $3.75 or 50 sets for $10.30. The only other tools you need are a hammer, a ruler, and a marking pencil or pen.

I am so excited about this week's blog posts about snaps. I hope you come to love snaps as much as I do by the end of this week! Tomorrow, I will discuss plastic snaps and let you know which ones I use and why. Installing metal and plastic snaps will be the topics of Wednesday and Thursday's blog posts. Then on Friday, I will be sharing a free pattern that uses a snap! Make sure to keep up with all the posts this week by signing up for the Uniquely Michelle newsletter below!

Another Option for Adding A Crossbody Strap to the Lindsay Wristlet

Michelle Burke

The Lindsay Wristlet is practical to use and fun to sew. I love taking my Lindsay Wristlet to the grocery store or sporting events and it is my go-to bag all summer long when I don't feel like having the extra bulk of a large bag. The only thing that I have sometimes wished for is to be able to carry a Lindsay Wristlet hands-free. A wristlet is somewhat hands-free, but it can get in the way when it is dangling from your wrist. During Lindsay Wristlet Week a couple of years ago, I wrote a blog post tutorial on adding a crossbody strap to the Lindsay Wristlet. It was a good option, but I wanted to be able to eliminate the strap connectors from the sides. I didn't like that they stuck out in an odd way when I was using my Lindsay Wristlet without the crossbody strap but instead with a wrist strap or as a wallet with no strap at all.

IMG_4217 2.jpg

I am happy to say that I came up with a solution! I just changed up the placement of the strap connectors, adding them to the back of the Lindsay Wristlet instead of to the side seams. I tried this option out on the Lindsay Wristlet that I made myself for a trip that my husband and I took to Europe this spring. I wore my Lindsay Wristlet as a crossbody bag most of the time. Sometimes I had it on a lanyard when we were in the more sketchy parts of Rome where the pick-pocketers are an issue. I used it as a wristlet occasionally and I put it in my carry-on, in wallet form, without any straps when we flew or traveled by train. It was a perfect little travel companion that held my passport, credit cards, cash, phone, and lip gloss. 

So, would you like to wear the Lindsay Wristlet as a crossbody? Well then, I wrote this tutorial for you!  This is an easy and quick supplement to the Lindsay Wristlet pattern! You will need to refer to the Lindsay Wristlet pattern for the fabric and interfacing cuts and instructions for making the majority of the wristlet. Let's get started!

There are a few extra materials you will need to add a crossbody strap. You will need:

  • From the exterior of the fabric, you will need to cut 1 piece @ width of the fabric x 2" high, and a second piece @ 25" wide x 2" high 
  • From the SF101, you will need to cut 1 piece @ 50" wide x 1" high (this can be pieced together too)
  • A second 1/2" D-ring
  • 2 - 1/2" swivel snap hooks
  • 1/2" ajustable strap slider

1. Cut out two Anchor Pieces (not just one) @ 3" x 2" each. You will also cut out two pieces of SF101 @ 2 1/2" x 1". Center the interfacing on the back of the Anchor Pieces and fuse into place. (see photo below)

IMG_1808.jpg

2. Fold the two short ends of one of the Anchor Pieces to the wrong side 1/4" and press in place. (see photo below)

IMG_1810.jpg

3. Fold the Anchor Piece in half the long way, wrong sides together and press. Now, fold the two raw long edges into the center fold, wrong sides together and press. With all the folds in place, press the Anchor Piece well. (see photo below) Repeat this step for the second anchor piece.

IMG_1817.jpg

3. Top stitch the long edges of the Anchor Pieces 1/8" from the edges. (see photo below)

IMG_1818.jpg

4. Fold each Anchor Piece in half over a 1/2" D-ring and pin or clip the ends together and set these aside while you work on making your Lindsay Wristlet following the instructions given in the pattern. (see photo below)

IMG_1820.jpg

5. Before starting step 11 (Adding the Main Zipper) of the Lindsay Wristlet pattern, you will need to add the Anchor Pieces to Piece C (the Back). I place one Anchor Piece, at an angle so that the center of the D-ring is pointing directly at one of the upper corners of the Back piece. I also make sure that each folded upper corner of the Anchor piece is 1/2" away from the nearest raw edge of the Back piece. Pin or clip (you need large clips for this) in place. Repeat this step with the other Anchor Piece on the other upper corner of the Back Piece. (see photos below)

6. Top-stitch a box at the end of the Anchor Piece through both ends of the Anchor Piece and the Back Piece. To make it easier to sew the Back Piece to the wristlet later, I like to give the D-ring a little wiggle room. To do this, I start by topstitching the part of the rectangle that will be closest to the D-ring, so that the flat edge of the D-ring is at the outer edge of my sewing foot and I sew across that short section with my needle centered. (see photo below left) Once you have sewn across the Anchor Piece fairly close to the D-ring, make a box by sewing 1/8" from each edge of the end of the Anchor Piece. (see photo below right)

Hint: I use my Bernina Height Compensation Tool to keep my sewing foot level as I sew the Anchor Piece in place. This keeps my stitches nice and even. (see photo below) To read more about how the Bernina Height Compensation Tool works, check out this blog post: Sewing Has Its Ups and Downs.

7.  Continue following the instructions given in the Lindsay Wristlet sewing pattern to finish making your Lindsay Wristlet. You know that wiggle room I mentioned in step 6? You will appreciate it when you sew the main zipper in place and when you are on the final step of the pattern because you will be able to move the D-rings well out of the way as you sew nearby. (see photo below)

IMG_1830.jpg

8.  One more thing is needed - the crossbody strap! To make the crossbody strap, refer to the blog post from Lindsay Wristlet Week, "Adding a Crossbody Strap to the Lindsay Wristlet - Part 2." 

The Lindsay Wristlet sewing pattern is available to purchase from the Uniquely Michelle Website Shop, the Uniquely Michelle Etsy Shop or the Uniquely Michelle Craftsy Pattern Shop

Make sure to keep in-the-know on all the latest happenings at Uniquely Michelle by signing up for the Uniquely Michelle newsletter below!

Pam's Alternate ID Window for the Kristine ID Wallet

Michelle Burke

Last month I shared a tutorial for an alternate way of making the ID window pocket for a Kristine ID Wallet that Mary Wauters Divita had shared with us on the Uniquely Michelle Sewing Patterns Facebook Group. Today, I am sharing yet another alternate way to make the ID window pocket for a KIDW! This method is one that Pam Sutey came up with. I like Pam's method for making the ID window pocket, it is simple and great for showing off a favorite fabric. Check out the great Kristine ID Wallets that Pam made using her method in the slideshow below!
Don't you just love the way Pam's Kristine ID Wallets look? Pam shared her method with me so I could share it with you - thanks Pam! I made a Kristine ID Wallet using Pam's method because I wanted to be able to add process pictures to Pam's tutorial, but also because I wanted to try it out. Pam's method is fabulous, I really think you will like it . . . and of course the extra bling that the rivets add is perfect!
Here is Pam's method for making her alternate ID window pocket in her own words:

I had 2 reasons to experiment with the ID pocket:

1. My work ID needed a bit more room to show the entire front of the badge.

2. I wanted to show off some fabric I had fussy cut and was certain I would use too many brain cells trying to match up the ID pocket frame.

Here is what you need that is different from what you need for the Kristine ID Wallet pattern:

Cut one piece of vinyl 5 1/2" x 3" (same width as the wallet back)

Cut vinyl pocket fabric trim 5 1/2" x 1".  No interfacing needed on the trim.

2 rivets - I used very small ones, 5mm width and a short post.

IMG_2030.jpg

Fold and press the fabric trim piece in half the long way, then fold the raw long edges in toward the center crease to create 1/4" binding (see photo below).

IMG_2034.jpg

Slip the top edge of the vinyl into the open side of the 1/4" binding and top stitch close to both long edges to create the top trim (see photos below).

Make a small mark at the top and bottom of the wallet back piece, 7/8" in from the left side and 7/8" in from the right side - these seams will reduce the width of the pocket (see photo below). Without the seams, the vinyl pocket might be too loose, allowing the ID to slip out.

IMG_2045.jpg

Clip the vinyl pocket to the wallet back piece, keeping in mind which direction you want your back piece to go if you are using a directional fabric. Line up the sides and bottom edges of the wallet back and the vinyl pocket (see photo below).

IMG_2047.jpg

Use an ID badge, credit card, or business card to test the pocket space to make sure it is the size you want it, keeping an eye on the 7/8" markings you made on either side.

Baste the 3 sides - I used a teflon foot to help move the vinyl along. (I used a walking foot for this and that works too . . . just another option! - Michelle)

Sew the 2 seams which are 7/8" in from each side edge, starting at the top edge of the binding. Sew back and forth a few times at the top to really secure the pocket, then sew down to the bottom. (Note: I didn't draw the entire 7/8" lines on the wallet back, not wanting to have to worry about removing them later. I simply lined the top/bottom marks up at my machine, put my needle down into the top of the binding edge, and then used markings on my machine bed to keep a straight line going down. Yikes - so many words to explain that - you can almost just eye-ball it. ha!) (see photo below)

IMG_2070.jpg

I added small rivets to the top of the vinyl pocket at each 7/8" seam line for two reasons: I really like rivets and wanted to add a bit more bling to the wallet but more importantly, the rivets give a tiny little extension to those 7/8" seam lines. To insert an ID, I have to angle in just a bit around the rivet, before pushing the ID on into the pocket. I am hoping that adds a bit more security. (I love the added rivets! Just a quick note, I marked the holes for the rivets just to the inside of each line of stitching so that I didn't end up cutting my stitches in the process of adding the rivets. - Michelle)

After the small rivets are installed, the wallet is constructed following the pattern as written.

Thanks so much Pam for your great instructions! You can see more of Pam's beautiful work on Instagram @bluebyebye.
If you would like the pattern for the Kristine ID Wallet, you can purchase it from the Uniquely Michelle Website Shop, the Uniquely Michelle Etsy Shop or the Uniquely Michelle Craftsy Pattern Shop
Make sure to sign up below to receive the Uniquely Michelle newsletter so you can keep up with the latest happenings at Uniquely Michelle!

Kristine ID Wallet Gift Box Tutorial

Michelle Burke

Recently, I gave a Kristine ID Wallet as a gift to a young lady for a high school graduation gift. I wanted to wrap it in some pretty wrapping paper, but I didn't have a box that was a good size for holding the wallet along with the matching wrist strap and lanyard. I remembered making a gift box once for a Necessary Clutch Wallet and decided to work out a custom gift box to fit a Kristine ID Wallet with enough space to also fit a wristlet strap or a lanyard or both. By the way, if you don't have the Kristine ID Wallet pattern, I have links where you can purchase the Kristine ID Wallet pattern at the end of this post.

IMG_1470.jpg

The Kristine ID Wallet makes a great high school graduation gift, but it is also a perfect gift for any teenage girl or girl in her early twenties. Nurses and medical staff also like the Kristine ID Wallet with the lanyard option for holding their badge and other necessities. Teachers and other's who wear an access or security badge daily, love this wallet. It is also great for a quick trip to the grocery store, holding just what you need while leaving you hands-free to shop. I have given several Kristine ID Wallets as gifts and they are always well received. Now to add an even more personal touch - let's make a gift box to hold your fabulous Kristine ID Wallet creation!

I am excited to share this little tutorial for making a gift box for the Kristine ID Wallet! This gift box is easy to make, you only need:

  • 10" square of pretty card stock,

  • ruler (an acrylic sewing/quilting ruler works well for this)

  • pencil and eraser

  • scissors

  • glue dots, glue or double-sided tape

  • about 10-15 minutes

IMG_1630.jpg

I like the card stock that has a coordinating pattern on the opposite side so that the box looks pretty inside and out, but of course this is not necessary. Using card stock with printing on both sides can make it more difficult to see your fold lines that you will be marking - a bit of a drawback and therefore something to consider.

You will need to cut a 12" square piece of card stock down to a 10" square first. Once you have done this, place your card stock piece wrong side up and make a light pencil line from one corner to the opposite corner. Repeat this, making another line from one of the other corners to the opposite corner from it. These are your center lines that you will use to measure all your other cut and fold lines from. (See photo below) You will turn the paper so it is on point. Decide which of these lines will be your vertical line. This will determine how the design of the card stock looks on your box. The design will be on the diagonal, but if the design on your paper is directional, you will want to consider this as you make the rest of the marks for your box.

IMG_1635.jpg

From your vertical, center line, draw two lines 3" away on either side. Draw two more lines that are 3/4" away from each of the lines you just made. These two lines should be further away from the vertical, center line. (See photo below - all vertical lines are blue) From your horizontal, center line, draw two lines 2 1/4" away on either side. Draw two more lines that are 3/4" away from each of the lines you just made. These two lines should be further away from the horizontal, center line. (See photo below - all horizontal lines are green)

IMG_1644.jpg

Now we need to cut along some of the lines. I have the lines that need to be cut highlighted in red in the photo below. You will want to pay attention to this closely as there are some cuts that you will make on the vertical lines, but you will not cut on the corresponding horizontal line. Done correctly, the cuts will make the tabs for gluing your gift box togethe.

IMG_1644 2.jpg

The photo on the left, below, shows how it looks once most of the cuts are made. The photo on the right below shows how the cuts make a tab for gluing.

The remaining lines indicate where you will need to make folds. I find it is easier to score these lines first using a ruler and scoring tool. There are actually tools that are made for scoring paper and card stock, but I have found my favorite scoring tool is something that lives in my kitchen . . . a butter knife. Use the smooth, non-serrated edge of the knife to score your card stock. It is best to use a ruler or straight edge to make sure you get a good, straight fold line. Just line up your ruler along each of your fold lines and pressing down firmly, draw the smooth side of your butter knife along the pencil line. (See photos below) Make sure you do not score the center lines - I like to erase the center lines at this point so that I don't forget and score them too!

Once all the lines have been scored, fold along all the lines so that you are folding everything toward the inside of the box. The scoring really helps, huh!?! Take a minute to erase your pencil lines not so they aren't so obvious. (See photo below)

IMG_1653.jpg

With your folds ready to go, we just need to tape or glue the flaps in place on the inside front and back sides of the box. I have tried double-sided scrapbooking tape, Alleen's Tacky Glue, and Zots glue dots for this. Each of these works, but I think the one that works best is the Zots glue dots. If you use glue, you will only need a drop, but you will also need to hold each corner in place once you have added the glue for several seconds to make sure it is holding securely. It is good to give the glue 10-15 minutes to dry well before putting a Kristine ID Wallet in the gift box. The glue works, but is more time consuming. The double-sided tape isn't quite as sticky as I would like for this application - it works, just not super well. The Zots are fast and hold the tabs in place very well. I placed the Zots on the inside of the side piece where the tab needs to go, but you can also place the glue dots on the outside of the tab and then put the tab in place. I found four glue dots work well. (See photo below)

IMG_1655.jpg

A coordinating sticker, a piece of Washi tape, or a glue dot work well to hold the final flap of the gift box closed. A ribbon or some twine wrapped around the gift box and tied with a bow will also work well to keep the gift box closed while making it look even more festive.

IMG_1674.jpg

For the gift I gave, I used both a Uniquely Michelle sticker and a couple pieces of twine to hold the gift box closed and to decorate it a bit - sometimes adding more is just more fun!

IMG_1352.jpg

In the photos below, you can see how I position everything in the box so that it fits well. Then as the recipient opens their pretty gift box, she sees the entire handcrafted-by-you-especially-for-her Kristine ID Wallet!

IMG_1659.jpg

Having a few gift boxes available for sale at a craft fair, may help sales - someone may be buying a Kristine ID Wallet for themselves and then when they see the gift boxes, they may decide that they would love to gift a couple more wallets!

Have fun making these gift boxes for your Kristine ID Wallets and have even more fun giving them as gifts! If you don't have the Kristine ID Wallet pattern, you can purchase it and all other Uniquely Michelle sewing patterns in the Uniquely Michelle website shop, the Uniquely Michelle Bluprint pattern shop or the Uniquely Michelle Etsy shop.

The best place to buy Uniquely Michelle sewing patterns

Michelle Burke

Did you know that, of the three Uniquely Michelle shops, there is one that stands out as the best? It's true, not all Uniquely Michelle shops are created equal. Recently, I updated all my listings in all three of my shops - Etsy, Craftsy and the Uniquely Michelle website shop. One reason I updated the listings in the Uniquely Michelle shops is I wanted to add links within the listings that would be helpful for customers to find those hidden treasures - tutorials, sew alongs, etc. that can be buried in blog posts.

Unfortunately, Etsy and Craftsy will not allow me to add external links. Basically, Etsy and Craftsy want you to stay on their websites once you are there and not get distracted by going elsewhere. I understand this, but I still wanted customers to have the ability to link to the hacks, tips, sew alongs, etc. that are out there for some Uniquely Michelle patterns. The only place that I can do this is the Uniquely Michelle website shop.

For this reason, I feel that the best place to buy a Uniquely Michelle pattern is from the Uniquely Michelle website shop. I am so excited that a customer can go to a listing for a Uniquely Michelle pattern in the Uniquely Michelle website shop and find links to some great bonus information for that pattern like, Lindsay Wristlet Week or the tutorial for making an alternate ID window for the Kristine ID Wallet. By the way if you are wondering if my recommendation has something to do with profits, but it doesn't, Craftsy wins that prize.

The links that are part of the listing for the Lindsay Wristlet on the Uniquely Michelle website shop.

The links that are part of the listing for the Lindsay Wristlet on the Uniquely Michelle website shop.

Even if you have already purchased one of the Uniquely Michelle patterns, the Uniquely Michelle website shop is a good resource. You can go to the listing for the pattern you are making and see links to the various blog posts that can help you as you make your item or give you some fantastic ideas of how to make it even better. As you might guess, the Kristine ID Wallet has several links to blog posts and tutorials.

Some of the links that are part of the listing for the Kristine ID Wallet in the Uniquely Michelle website shop.

Some of the links that are part of the listing for the Kristine ID Wallet in the Uniquely Michelle website shop.

So when you have a chance, check out the links included in the listings for the patterns in the Uniquely Michelle website shop. I will continue to add links that are relevant to each pattern so that it continues to be a great resource for information for Uniquely Michelle patterns.

Make sure to sign up to receive the Uniquely Michelle newsletter below so you can stay in-the-know on all things Uniquely Michelle!

Kylie Simonton's eBook, Mastering the Craft of Craft Shows - A Review

Michelle Burke

I was excited to see that Kylie Simonton of Lean Mean Sewing Machine wrote an eBook about selling handcrafted goods at craft shows! Her book is called, Mastering the Craft of Craft Shows. Today, I am sharing my impressions of Kylie's eBook as well as giving you an idea of what you will find in her book that makes it worth purchasing. I do not know Kylie personally, but I do know enough about her through Facebook to know that she always seems to be selling her handcrafted bags at craft shows . . . and she is very successful at it! I knew that her eBook would be something that Uniquely Michelle customers who sell their handcrafted bags might find useful - this is the reason I bought her eBook, and the reason I am writing this review. I was very impressed with all the great information that Kylie includes in her Mastering the Craft of Craft Shows! Near the end of this post, I have included some questions that I asked Kylie and of, course her answers - don't miss this opportunity to get even more information from Kylie! Now, read on to find out more about Mastering the Craft of Craft Shows! There is also an opportunity for you to win Kylie's eBook in a GIVEAWAY - see details at the end of this post!

Kylie started selling at crafts shows in 2014. She hasn't been successful selling at every show (she shares a story about this in her book), but she has methodically worked to determine what works and what doesn't. She shares her wealth of knowledge in her eBook, Mastering the Craft of Craft Shows. Kylie not only shares her tips on how to be successful selling at craft shows, but she does so in an easy-to-understand way that gives the reader confidence to implement her practices. 

Mastering the Craft of Craft Shows includes an introduction and 12 chapters. Each chapter addresses a different topic, from determining your inventory and seasonal trends, to the pricing and displaying of products. Kylie spends several chapters on customer-related issues; like what forms of payment to accept, how to promote and sell products, how to engage with customers (both the good and the not-so-good), and how to really listen to customers to improve future sales. You will even learn how to deal with competitors at crafts shows. The final chapter of Kylie's eBook is an extensive list of what to bring to a craft show, both what you will need for selling your handmade goods as well as what you will want for your personal comfort too.

I really like Kylie's chapter on pricing where she talks about how it can be difficult to ask people to pay what an item is actually worth and how she has worked through this. Kylie also goes through an example of EXACTLY how she determines the accurate and fair price an item - this chapter is useful even if you don't sell at craft shows, but sell through another avenue.

The chapter in Kylie's eBook on choosing the right craft show was very interesting. Her insight on how to choose crafts shows may not be what you would expect, but Kylie shares her experiences to explain her reasoning on which craft shows to choose to sell at and why some are not worth your time and effort.

Each chapter ends with homework . . . yes homework. But no worries, the homework is very beneficial; it is designed to get you thinking about what will work for you and how you can have success selling at crafts shows. Kylie suggests in the introduction to her eBook that you take notes as you read her book, and I would recommend that too. I love Kylie's thought that, "The only dumb ideas are the ones not written down!" I highly recommend this eBook if you have thought about selling or already sell in craft shows. If you are thinking about getting into craft show vending, this book will help you get started and it will help you avoid some pitfalls. If you  already have experience selling at a few craft shows, this book will give you great tips and ideas for taking your craft show selling to the next level.

You can purchase Mastering the Craft of Craft Shows eBook in PDF format on her website, Lean Mean Sewing Machine. If you would prefer the eBook format rather than the PDF format, it is available on Amazon and iBooks, just search, "Mastering the Craft of Craft Shows" on either Amazon or iBooks. 

I asked Kylie a few questions that I had after reading her book. I think you can get even more insight from her answers, so I have included them here - enjoy!

In your book, you talk about your “$20 profit craft show” - yikes! Other than that show, have you always been successful selling at craft shows? Has your success increased over time?

I would say that my success has increased over time, but I think it’s because I finally took a step back and realized that shows with multi-level marketing vendors yielded less sales for me. Once I stopped applying to those shows, I noticed a day and night difference in sales. (Multi-level marketing vendors are vendors that sell products like Lularoe, Scentsy, etc.)

Where does the majority of your profit come from, craft shows or online sales?

A majority of my profit comes from craft shows. I find that people like to see, touch, feel, and open products in person. If they can get a better view of the product and imagine themselves using it, they are more likely to purchase whatever item I’m selling. It also helps that they see the maker behind the products. It makes things more personal and people LOVE when you remember them the next time around.

Does selling at crafts shows increase your online customer base and therefore your online sales?

I have definitely had an increase in online sales because of my presence at craft shows. I often receive emails with a “hey, I saw you at [location] and I loved/bought some of your products.” This especially comes into play around big holidays such as Christmas. Lots of people are flocking towards handmade for unique gifts not sold in stores.

Do you offer a custom order option at craft shows? If so, how important is that to your overall profit?

I do offer custom orders to potential customers who visit my booth at craft shows. They may not turn around right away and order from me, but I give them a business card and tell them to email when they are ready. These same people usually get in touch with me around the holidays, birthdays, graduation, etc. when shopping for gifts for loved ones. I would say that it is important to overall profit not just from that one person, but to all the people that they tell. People are so blown away when I make something custom for them. Word of mouth is probably the best advertising a business owner could possess. If you “wow” one person, you’re sure to wow at least one more.

Thank you Kylie for sharing such a wealth of valuable information in your Mastering the Craft of Craft Shows eBook and for answering my questions! Check out Kylie's Lean Mean Sewing Machine website, follow her on Instagram, on her Lean Mean Sewing Machine Facebook Page, and join her Lean Mean Sewing Machine Facebook Group.

How about a giveaway? This is such a great book that I am giving one PDF version away! And . . . Kylie wants to give a copy away too, so now you have two chances to win a copy of her book! To enter the GIVEAWAY, just comment on this post! You only need to comment once to be entered in the drawing. I will randomly draw two winners to receive a copy of Kylie's, Mastering the Craft of Craft Shows on Thursday, July 12th at 10:00am MST. 
Good Luck!