contact Me

Use the form on the right to contact Me.


123 Street Avenue, City Town, 99999

(123) 555-6789

email@address.com


You can set your address, phone number, email and site description in the settings tab.
Link to read me page with more information.

Blog

Enlarging the Lindsay Wristlet

Michelle Burke

I am so excited to have two guest posts, one today and one tomorrow, from the talented Kristina of  Restitch. Kristina makes and sells beautiful custom handmade bags, purses and wallets. She has made several Lindsay Wristlets and she has made some alterations to a few of them as well. I asked Kristina if she would write a blog post (or two) for me for Lindsay Wristlet Week and she agreed - I was so excited! I know you will love her tutorials explaining how she has changed up the Lindsay Wristlet some and I know you will also love her fun, southern charm that comes through in her writing. To see more of Kristina's work (her stock is low right now because her creations have a tendency to get bought up really fast) you can go to her website, like her Facebook page, and follow her on Instagram
And now here is Kristina . . .

Hello everyone!

I am tickled pink that Michelle has graciously asked me to do a couple of guest blog posts for Lindsay Wristlet week describing how to enlarge a pattern and how to make a neat little slip pocket on the outside of the Lindsay Wristlet!

My name is Kristina and I am the owner of Restitch.  I’m newer to the bag making world but I’ve been sewing a long time. I opened my little bag making shop about 8 months ago and haven’t looked back since! I stumbled upon this amazing pattern of Michelle’s totally by accident! I had bought a little zipper pouch about 2 years ago for my purse from a handmade seller. I decided to get online one day and see if I could find it again since I had worn it out. Lo-and-behold there was Michelle’s pattern for the Lindsay Wristlet! That was exactly what I was looking for and I’ve been making these great little bags ever since!

Today I’m going to teach you how to enlarge the Lindsay Wristlet!

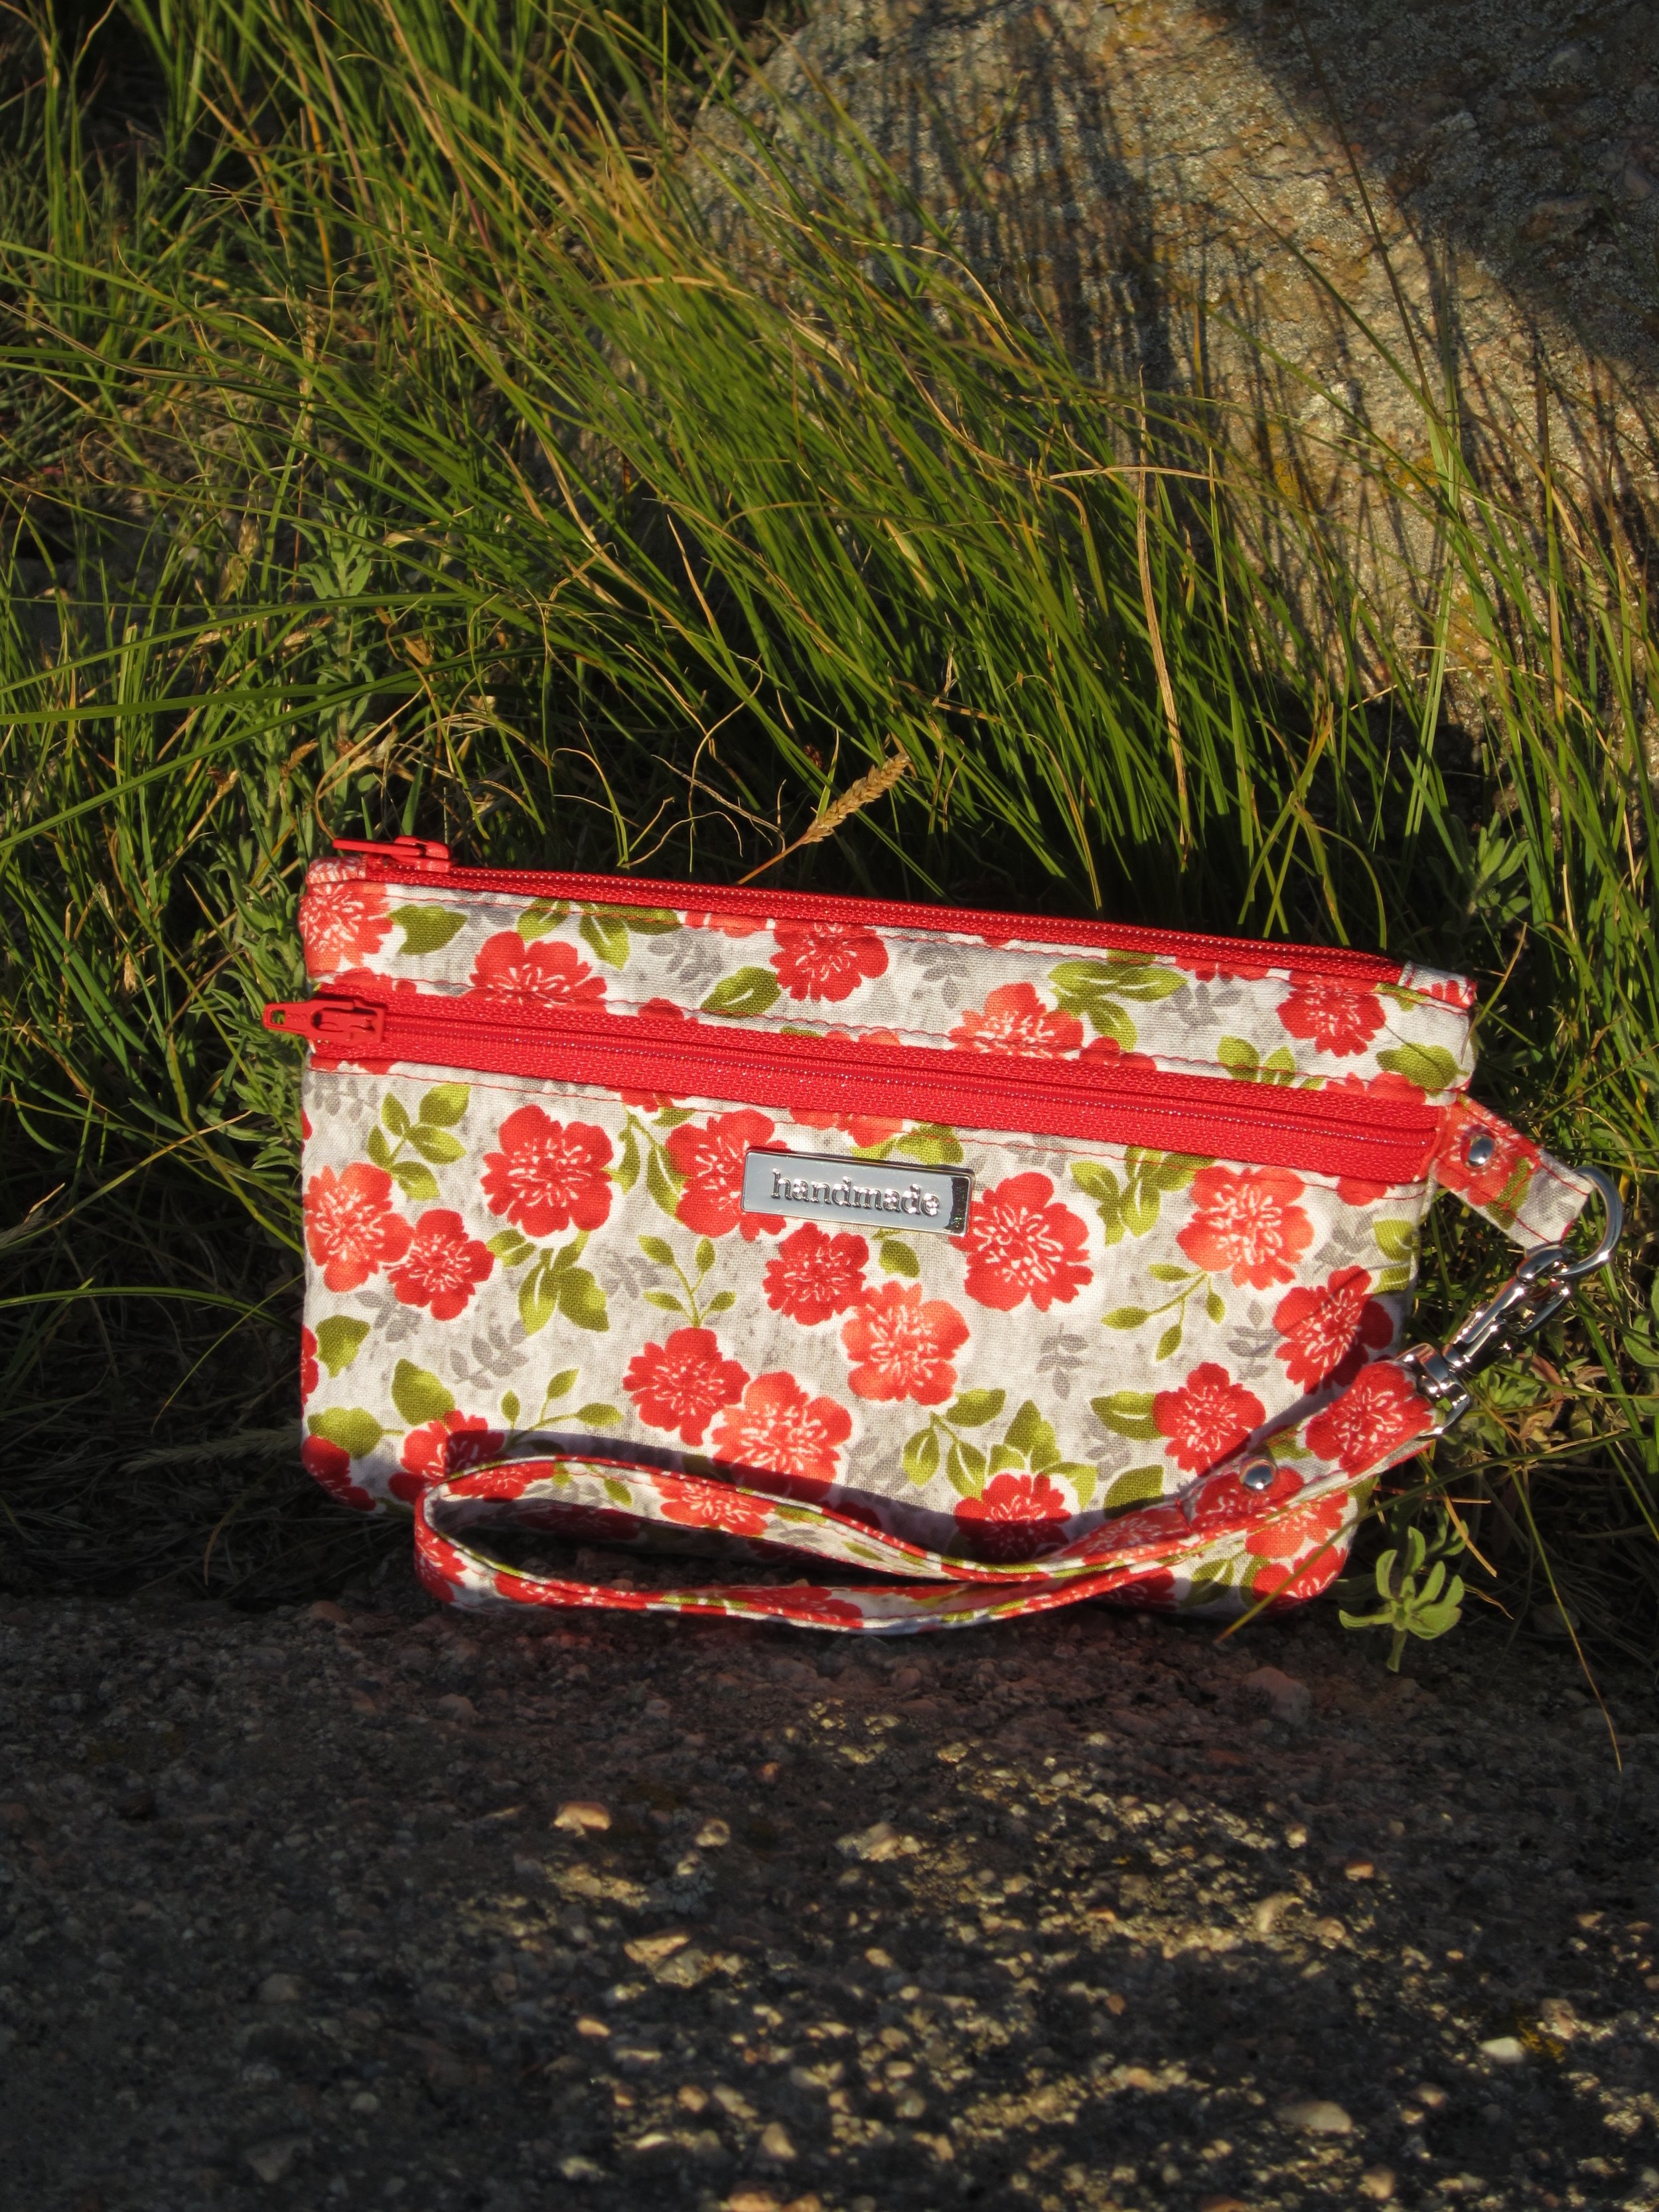
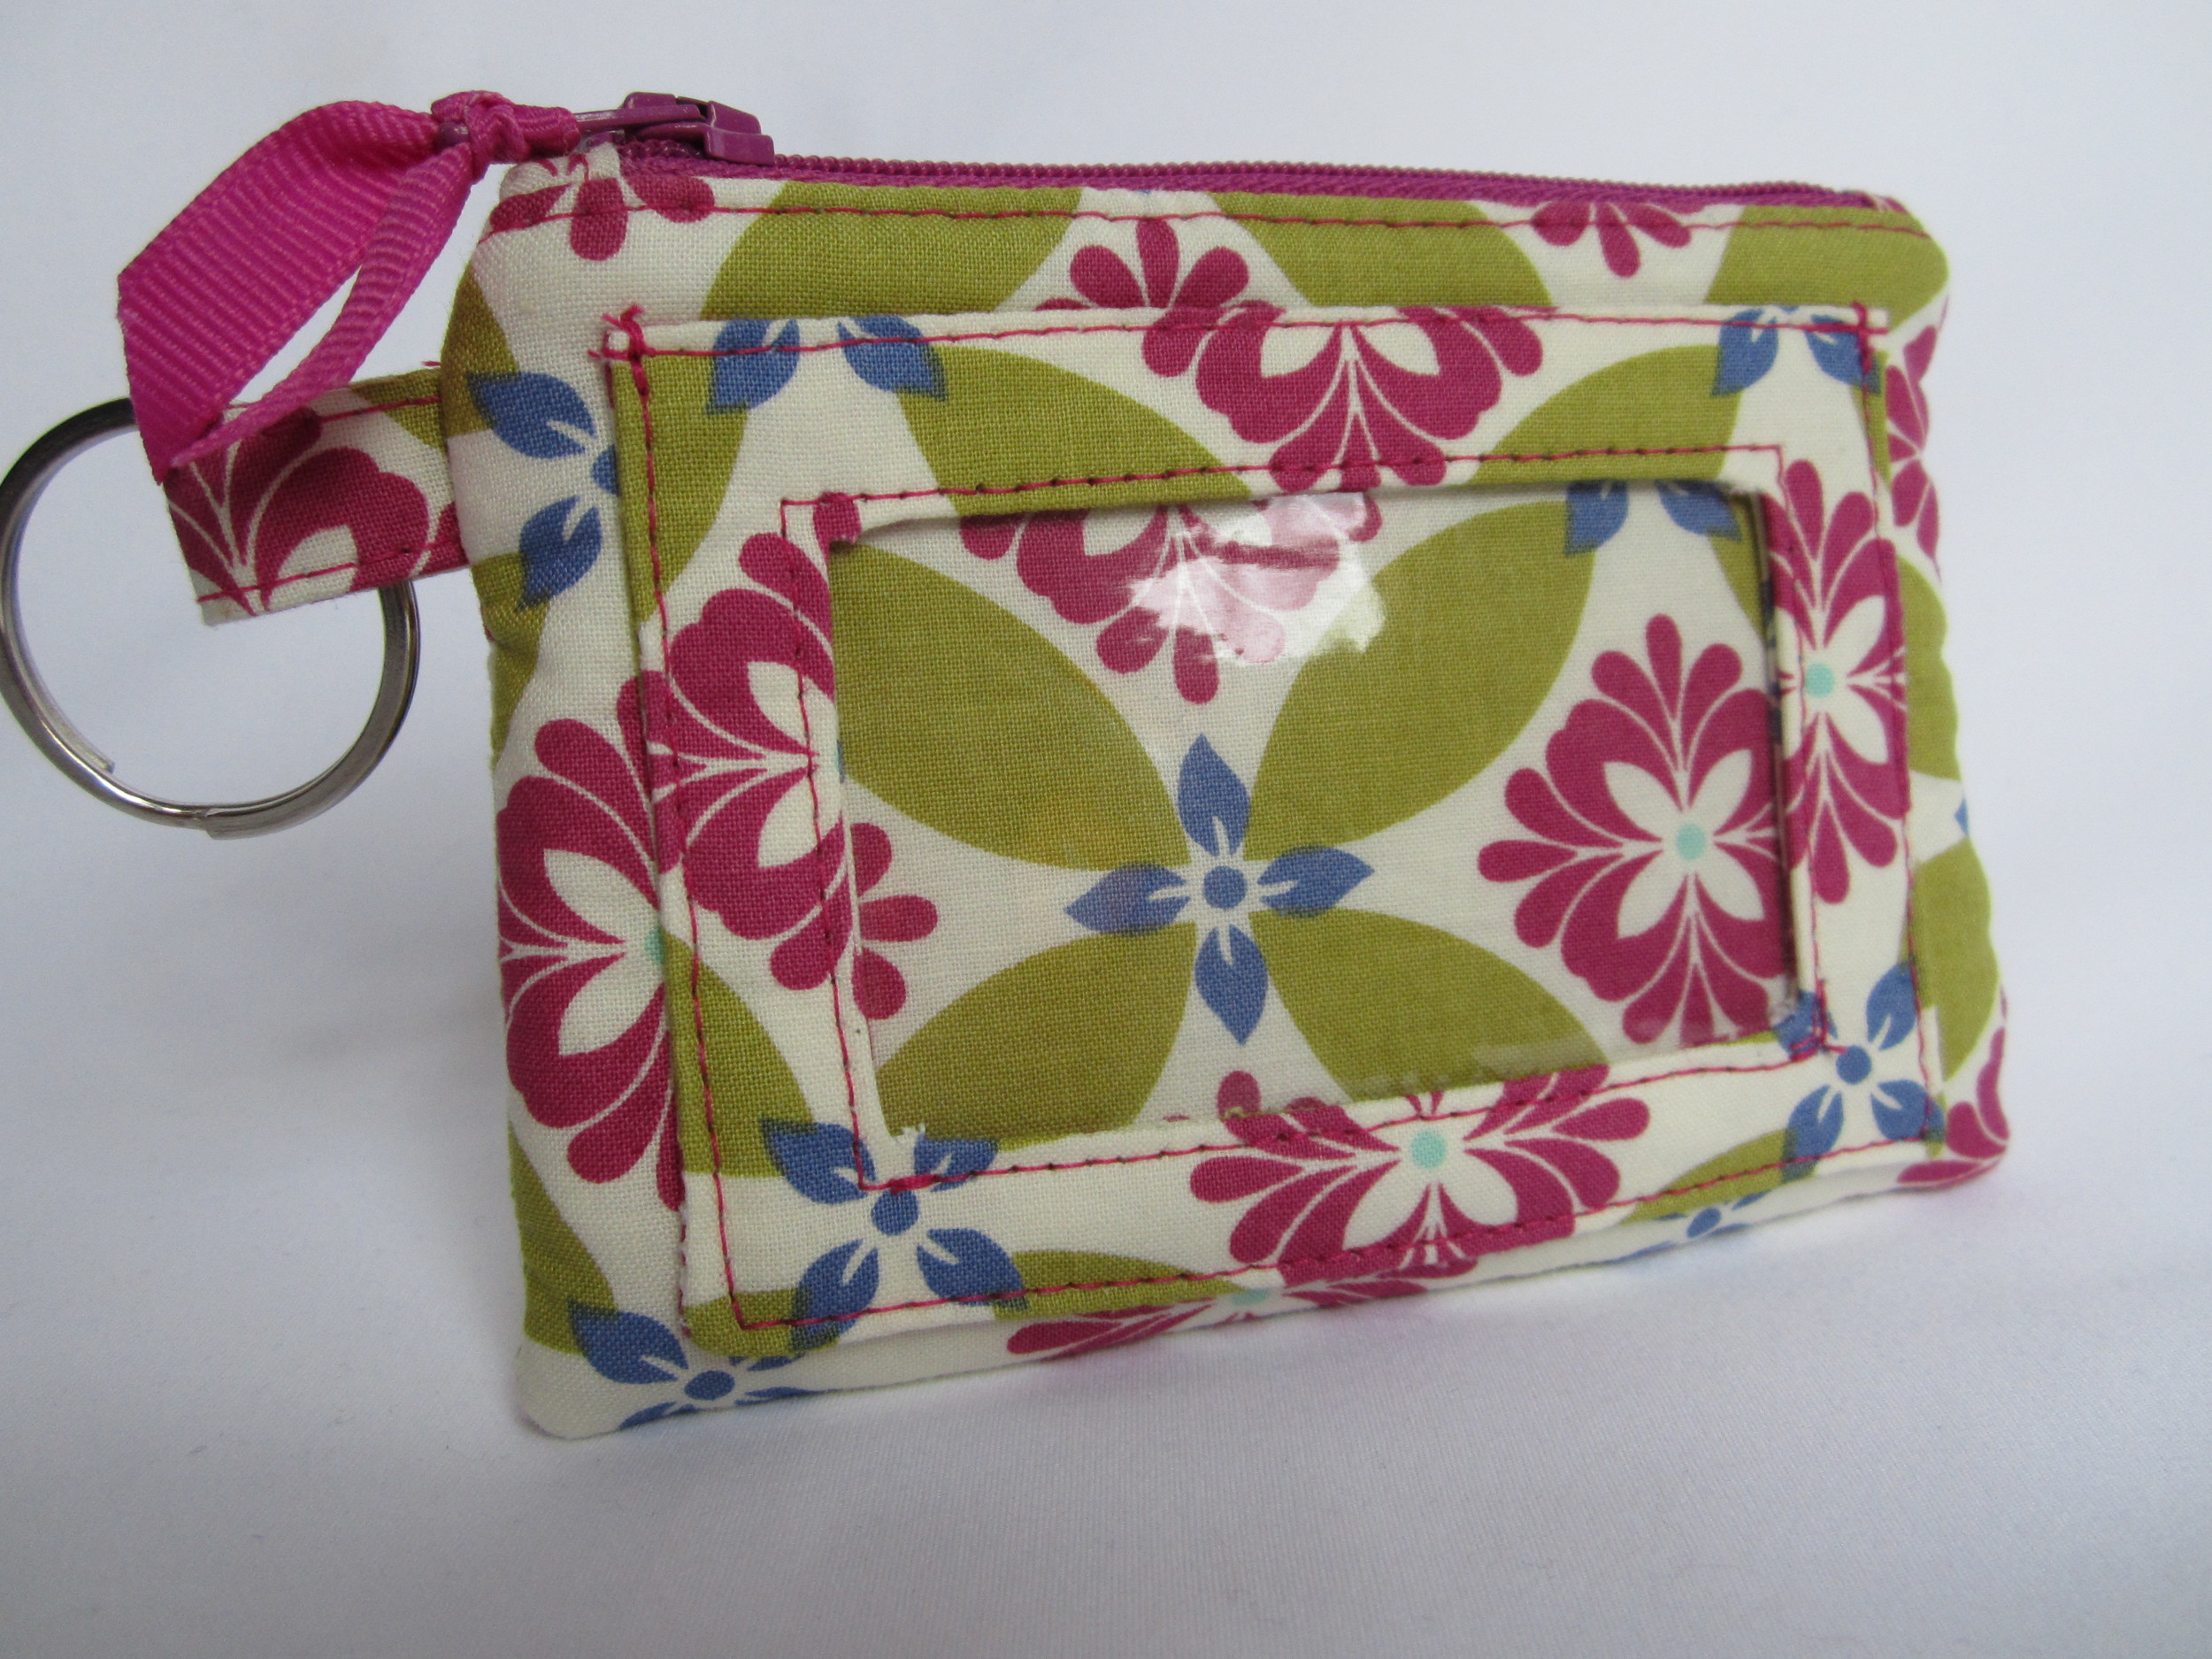
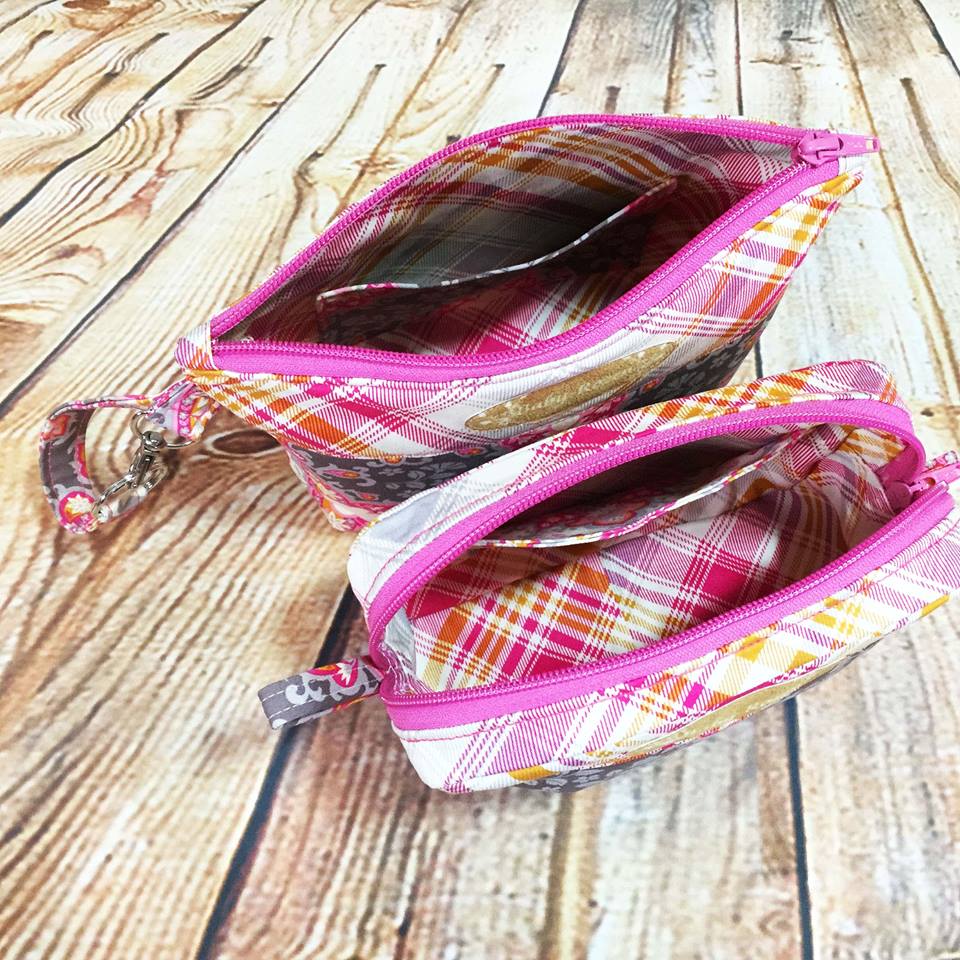
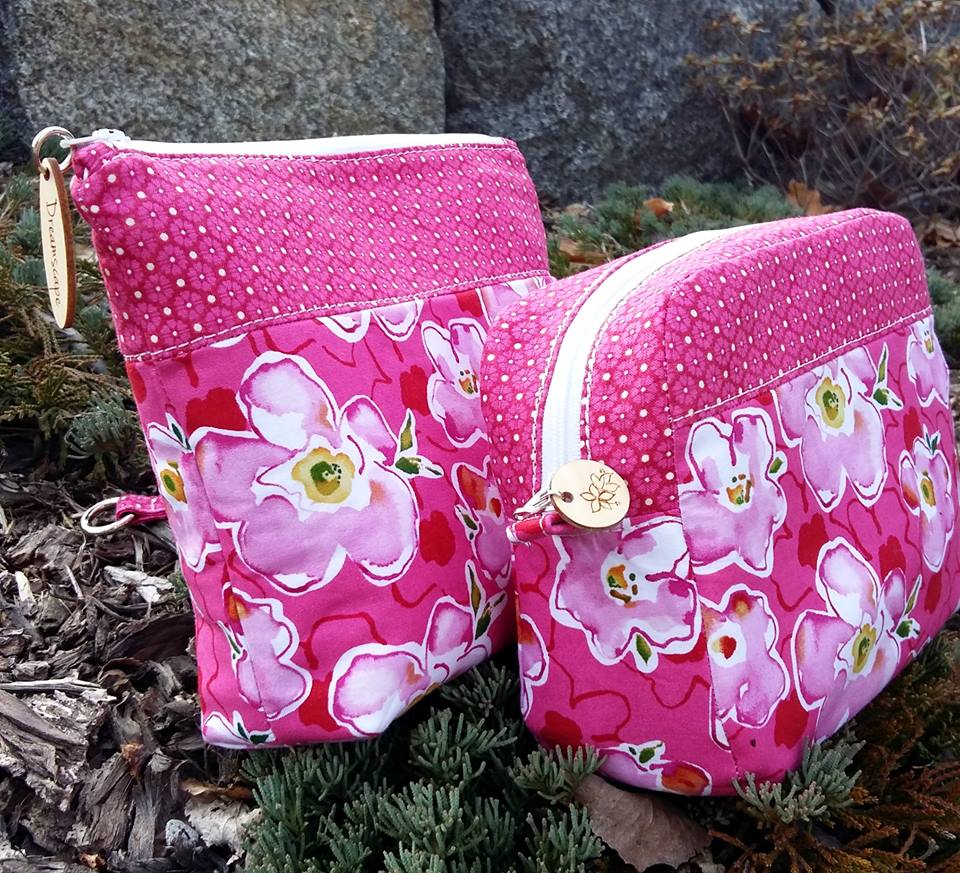
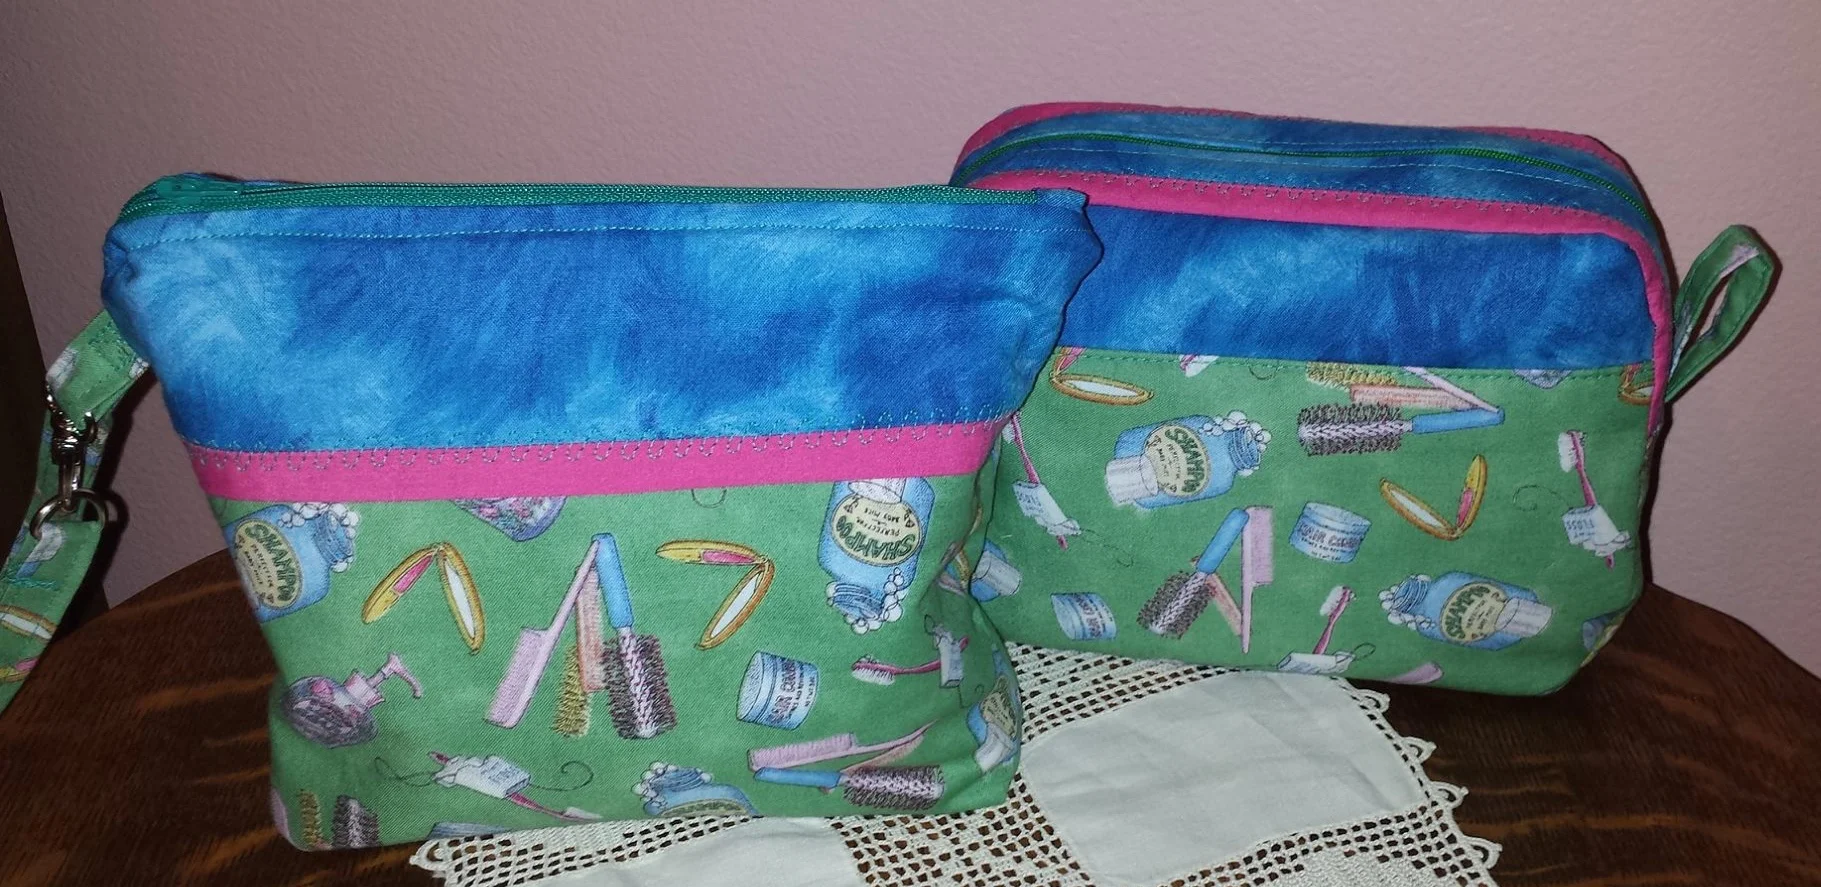
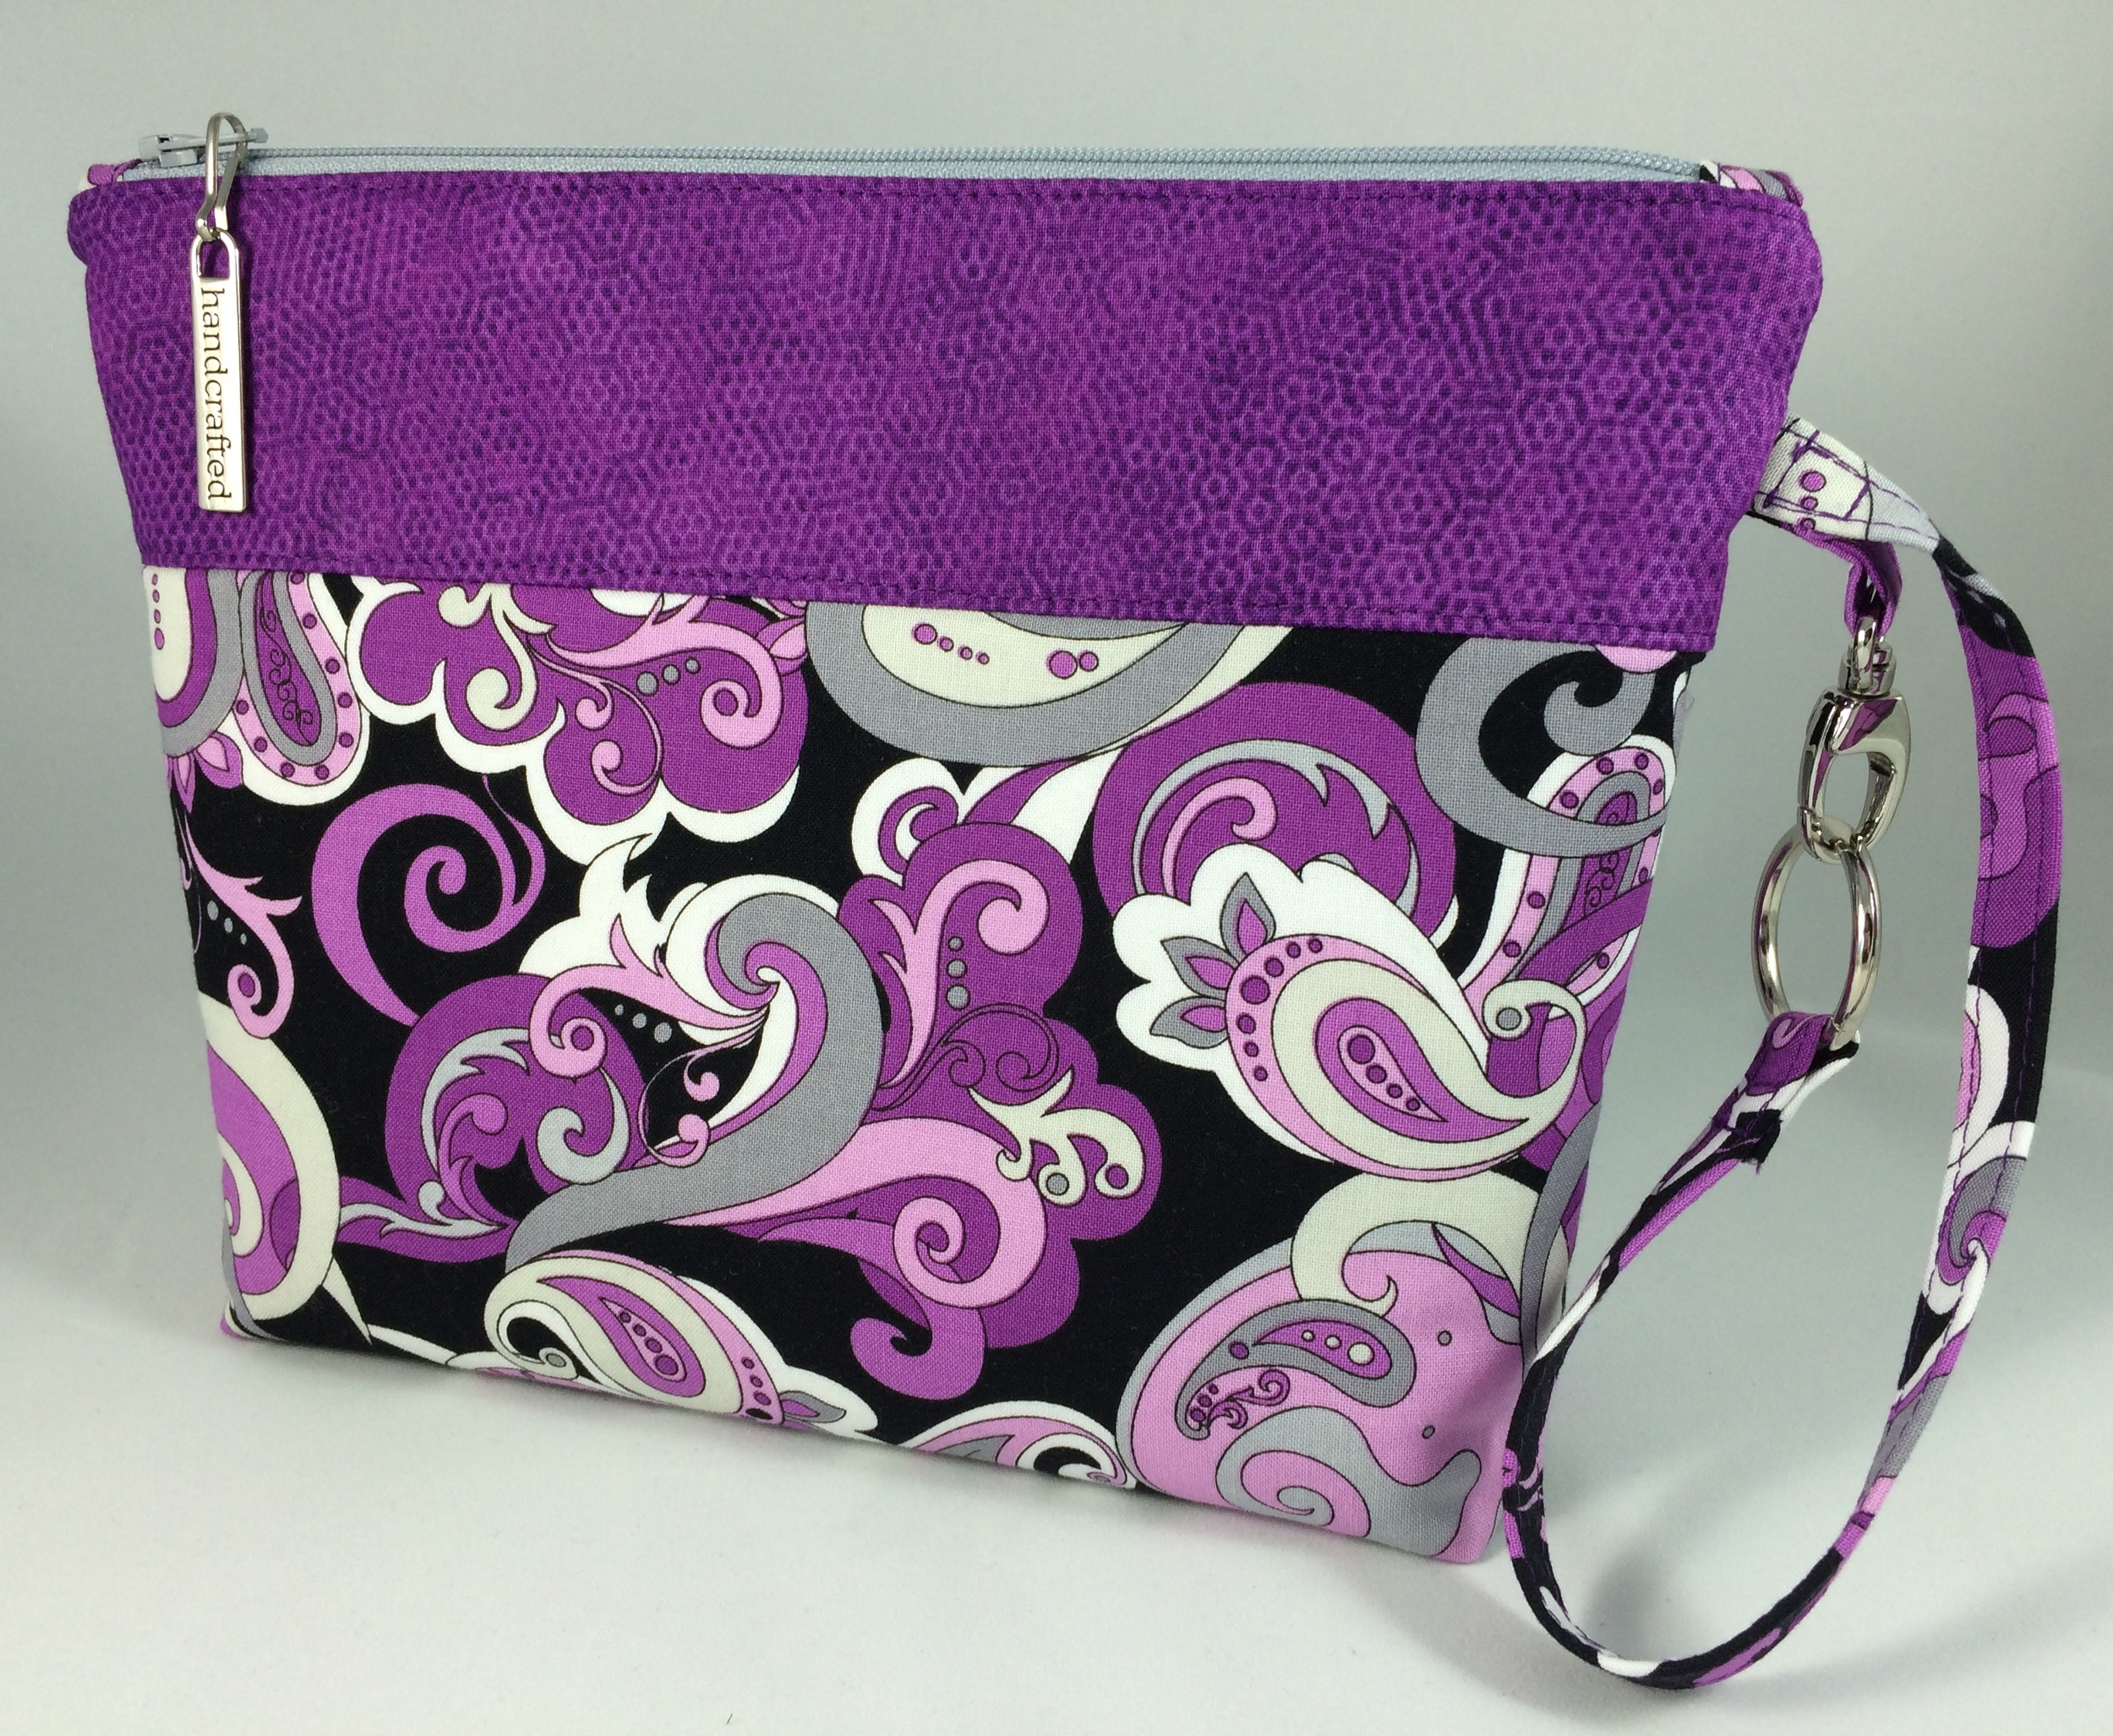
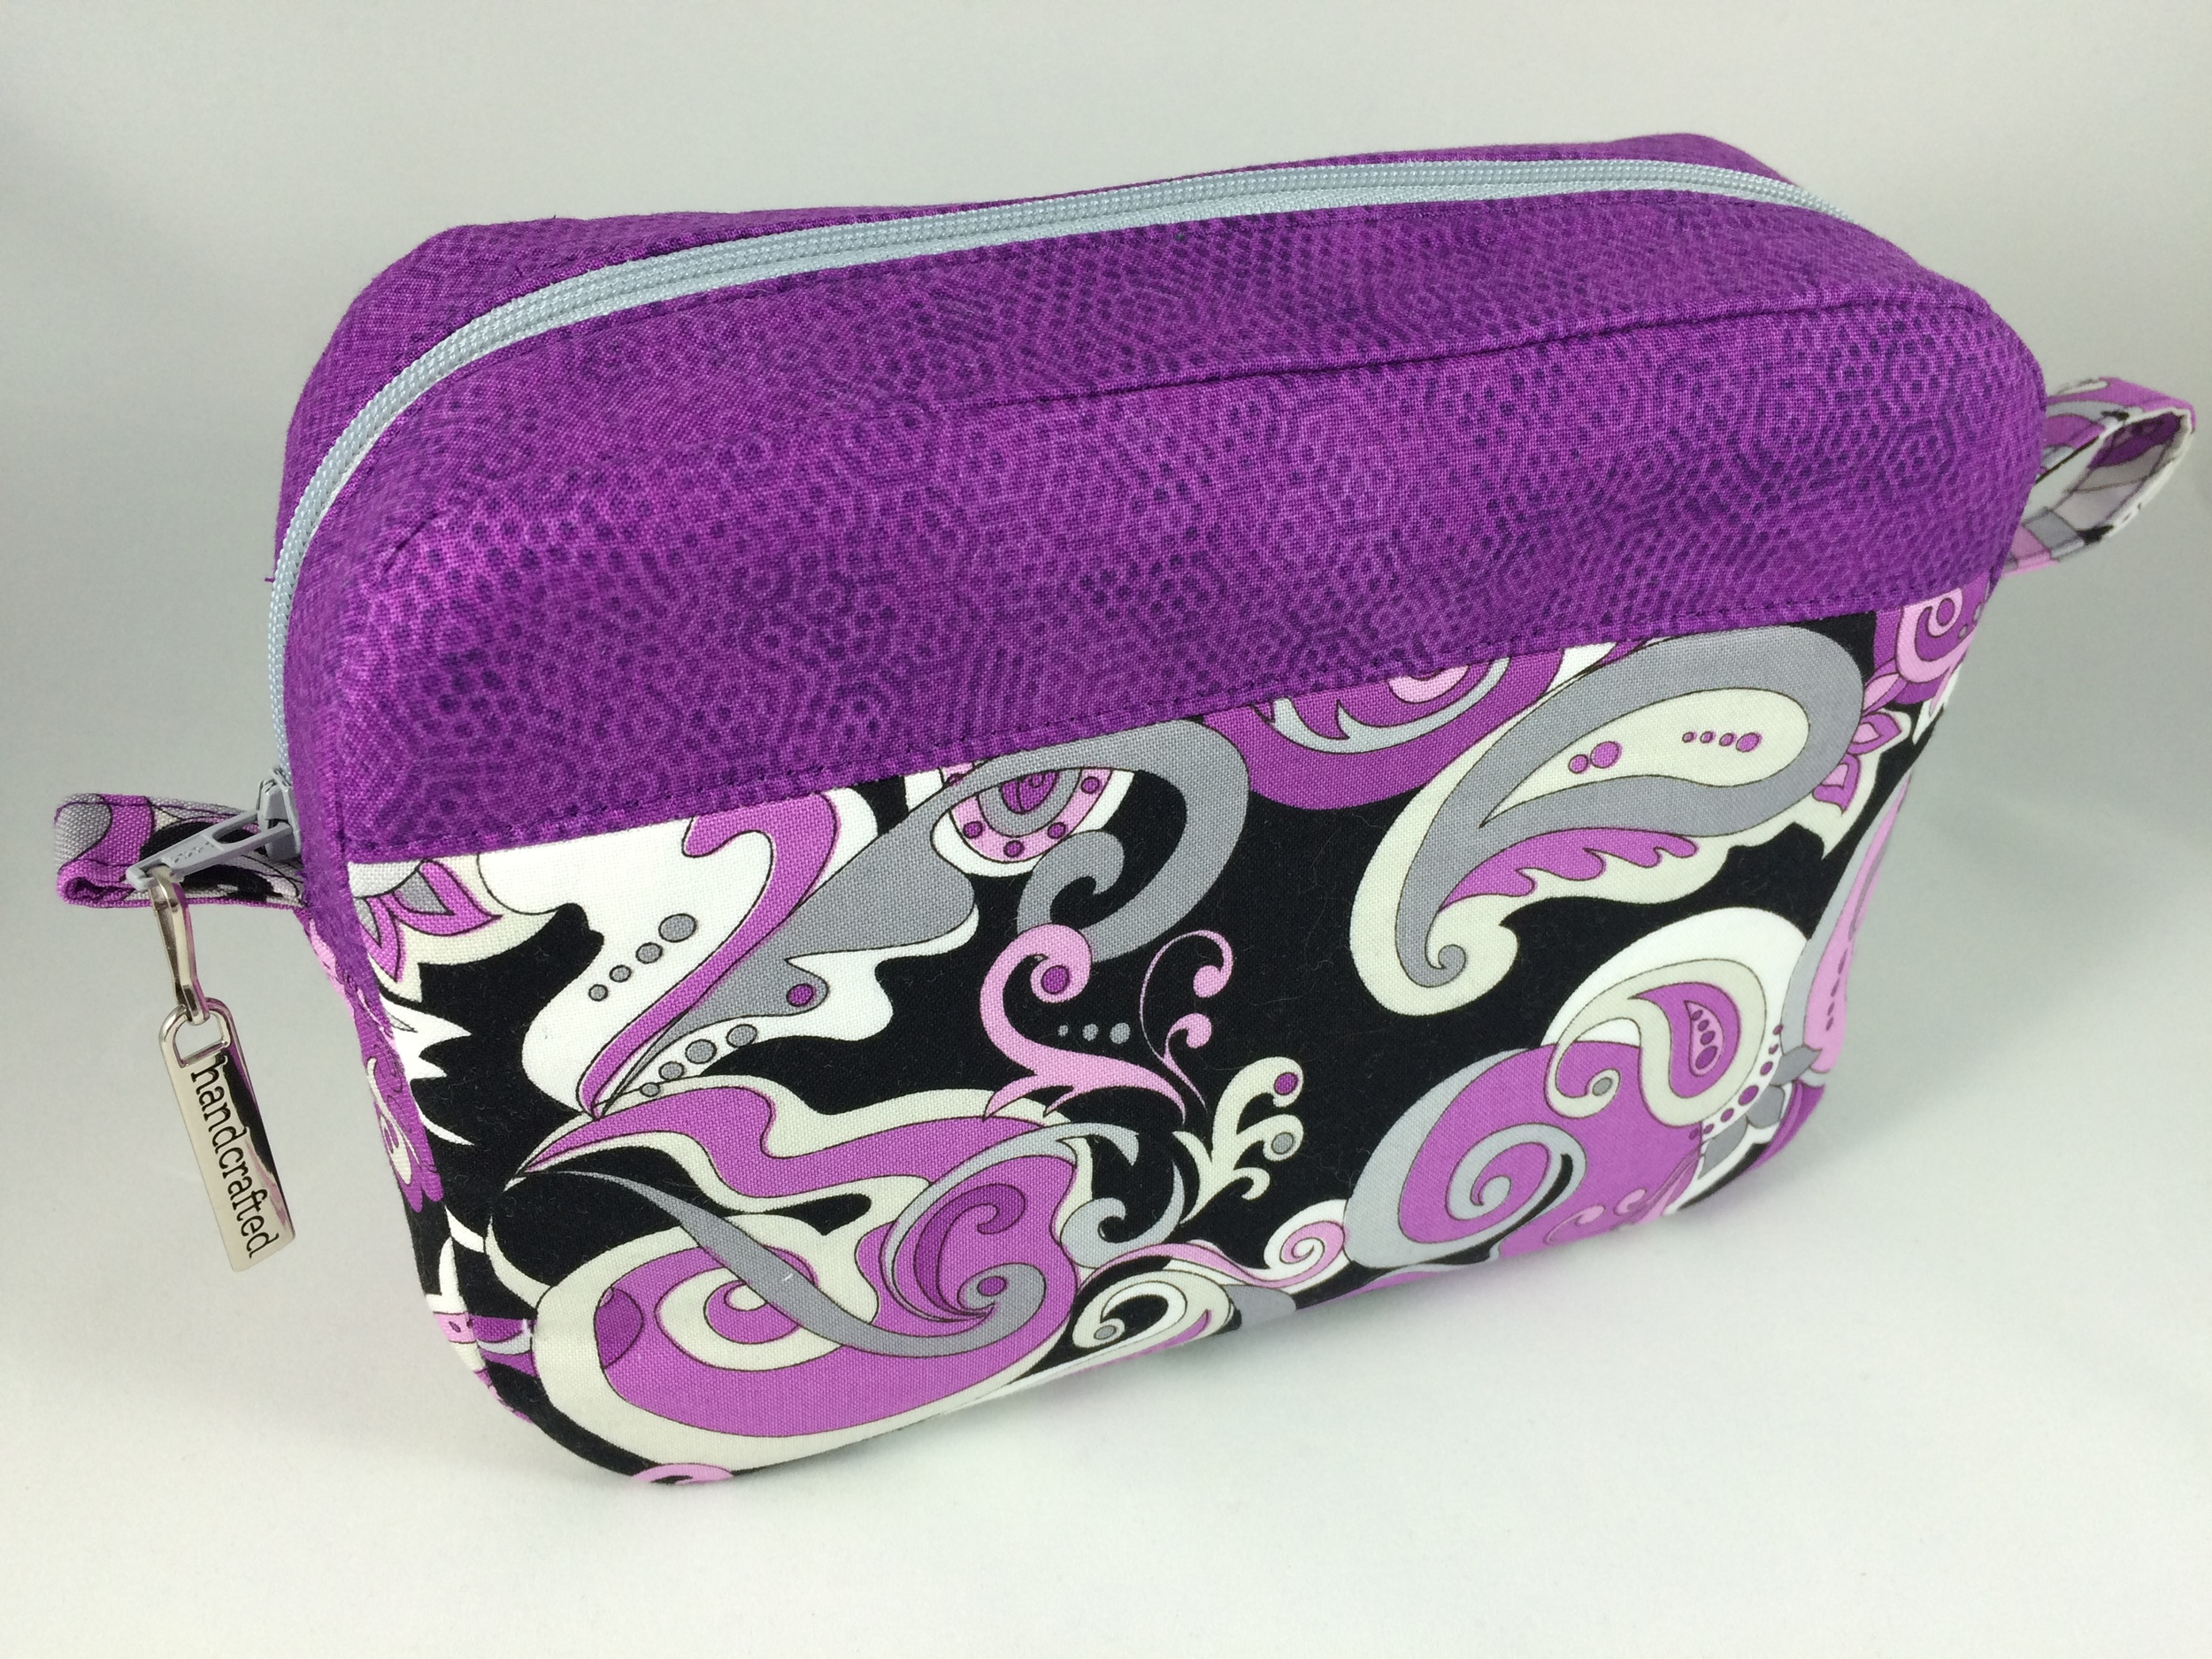
Here is an example of an enlargement of the Lindsay Wristlet. The one on the left is enlarged by 20% (essentially adding 1.5 inches to the final measurements. The final dimensions are about 6 x 8 inches). The one on the right is at the original pattern dimensions. You can really make it as big as you want and perfect for your needs!

Here’s how you do it:

-Take your original dimensions and decide how much larger you want the final piece to be.

-We’ll use 8 inches as the original measurement (see picture below).

-Take your original measurement and multiply that by the percentage larger you want it to be. In this case 25% or .025 (always add a decimal point and a 0 in front of your percentage number). The results would be 2 inches!

Now, you might want to figure out what percentage it would be if you merely added 1 inch to all dimensions. Easy peasy! Simply divide A by B, then take that number and move the decimal place two spaces to the right. That's your percentage! 

Wasn’t that so much easier than you thought? Now just go thru your measurements line by line and calculate the new measurements! Remember to calculate the new lengths for your zippers too!

Or..you can Google a percentage calculator. BUT I’m hoping you’re not the latter and actually want to calculate it yourself! No? That’s ok :)

Thanks Kristina!!! Tomorrow Kristina shares how she adds an exterior slip pocket to the Lindsay Wristlet - her technique for doing this is awesome!
Remember to enter the giveaway! Details on the giveaway and the Uniquely Michelle sale are in yesterday's blog post!

Sign up to receive email newsletters from Uniquely Michelle:

Lindsay Wristlet Week - The Giveaway!

Michelle Burke

I am so excited! Today is day two of Lindsay Wristlet Week - a week full of discovering ways to change up the Lindsay Wristlet a bit. Yesterday's blog post was a tutorial about how to add a feature fabric panel to the Lindsay Wristlet. I am excited for the next two guest blog tutorials that will be posted here Wednesday and Thursday; you will love them! Today is all about the giveaway - of course there has to be a giveaway during Lindsay Wristlet Week! I will be giving away a Lindsay Wristlet pattern to three lucky winners; one on Instagram, one on the Uniquely Michelle Facebook page and one on the Uniquely Michelle Sewing Patterns Facebook group. You can enter at all three places to increase your chance of winning!

This is the picture to look for to enter the contest on Instagram & Facebook!

This is the picture to look for to enter the contest on Instagram & Facebook!

To enter the Lindsay Wristlet pattern giveaway, all you have to do is leave a comment on the "Lindsay Wristlet Pattern Giveaway" posts in each place - that's it! I will draw one winner randomly from each social media spot at 7:00pm (MST) on Thursday, October 20th. The picture above is the one to look for to enter the giveaway!

Don't forget the SALE that is going on all week! You can get 15% off all Uniquely Michelle patterns by entering the coupon code LINDSAYWEEK during checkout in my Website Shop or in the Uniquely Michelle Etsy Shop. You can also purchase patterns from the Uniquely Michelle Craftsy Pattern Shop where I have reduced the prices to reflect the 15% off. 

Please share pictures of your Lindsay Wristlets and any other Uniquely Michelle creations you make on Instagram (#UniquelyMichelle) and on the Uniquely Michelle Sewing Patterns FB group! I love seeing everyone's creations! 

Keep up to date on Lindsay Wristlet Week and all the latest happenings at Uniquely Michelle by following Uniquely Michelle on Instagram, liking the Uniquely Michelle FB page, and joining the Uniquely Michelle Sewing Patterns FB group. Notice how I just gave you one last chance to click on all three social media place to enter the contest! ;)  Good Luck!!!


Sign up to receive email newsletters from Uniquely Michelle:

Adding a Feature Fabric Panel to the Lindsay Wristlet

Michelle Burke

It's Lindsay Wristlet Week! This will be a fun week to get inspired to not only make a Lindsay Wristlet, but also to change things up a bit along the way. This is the first tutorial of the week giving you an idea of how you can alter the Lindsay Wristlet in a fun way. Other than tutorials, you can also look forward to a giveaway and a sale during Lindsay Wristlet Week, but first let's talk about one way to change things up a little with the Lindsay Wristlet!

Have you ever had just a little bit of a fabric but you still want to use it for a bag? That is what happened to me when I wanted to make a Lindsay Wristlet using an out of print Tula Pink fabric I have called Raccoon. It is a perfect feature fabric, but I only have a little bit and I didn’t want to use my entire little bit on one project. Fortunately I also have quite a bit of the Pixel Dot fabric that coordinates with the Raccoon fabric. I decided I could combine the two to make a fabulous Lindsay Wristlet featuring a single raccoon on the front without using all of my precious fabric. By the way, I looked to see if anyone is still selling the Raccoon Tula Pink fabric - I found it on Etsy for just under $25 for a FAT QUARTER! There is a reason I try to use the little bit I have sparingly!

To feature the Raccoon fabric on my Lindsay Wristlet without using very much of it, I divided the front pieces of wristlet into three parts. A center panel that is larger – the perfect size for a single raccoon, and two side panels that are smaller. Usually when making a Lindsay Wristlet, you use one exterior fabric for the front pieces, the back, the wrist strap, the anchor piece and the interior single card pocket. The only place I used the Raccoon fabric was the middle panel on the front and also the single card pocket on the interior – not much Raccoon fabric needed by doing it this way!

There is a raccoon on the interior too - the single card pocket!

There is a raccoon on the interior too - the single card pocket!

It may seem like there is a lot of math involved to figure out exactly how to divide the front into three pieces while remembering to add seam allowances, but once you know how to do it, it’s not that difficult. I could give you exact dimensions for the way I divided my front pieces, but that may not work for the fabric that you are trying to feature, so instead I made up a worksheet for you to use.  Using the worksheet, you can divide any square or rectangular piece on any bag pattern into three vertical panels where the two side panels are the same size. The worksheet is designed to make it so that you can determine how wide you want your middle panel to be when finished. That way you can make it just the right size to show off a particular part of a design on a favorite fabric, or you can just make it the size that fits a scrap of fabric you want to use. You can download and print the worksheet here: Three Vertical Panels Worksheet

This is a picture of the worksheet, but you download it and print it by clicking on the link above this picture.

This is a picture of the worksheet, but you download it and print it by clicking on the link above this picture.

Once you have the fabric pieces cut, just sew them together using the given seam allowance in the pattern and then press the seam allowances toward the outside edges.

All sewn together and top-stitched!

All sewn together and top-stitched!

I like to add a pretty top-stitch 1/8" from the seam on each of the outer panel pieces.

Here is a close-up of my pink top-stitching.

Here is a close-up of my pink top-stitching.

Once it is top-stitched, you can add the interfacing just as you would if it were a single piece of fabric.

Interfacing added and ready to continue with the pattern instructions!

Interfacing added and ready to continue with the pattern instructions!

That's it - you can continue making your Lindsay Wristlet following the pattern!

If you are familiar with the Lindsay Wristlet, you may notice that this one has something extra to it. More on this "something extra" later this week!

If you are familiar with the Lindsay Wristlet, you may notice that this one has something extra to it. More on this "something extra" later this week!

If you don't have the Lindsay Wristlet Pattern yet, you can purchase it here on my website in the "shop" section. It is also available in my Etsy shop and on Bluprint. During Lindsay Wristlet Week you can get 15% off any of my patterns by using the coupon code LINDSAYWEEK during checkout on my website shop or my Etsy shop. On Craftsy I have already reduced the prices. The sale will run through Sunday, October 23rd at 10:00pm (MST).

To join in the fun, enter the giveaway and share your beautiful Lindsay Wristlet (or other Uniquely Michelle) creations, please follow Uniquely Michelle on Instagram, like the Uniquely Michelle Facebook Page, and join the Uniquely Michelle Sewing Patterns Facebook Group! Also sign up below for the Uniquely Michelle Newsletter to hear about the latest happenings at Uniquely Michelle! I would love to see how you feature special fabrics or use up scraps by making a Lindsay Wristlet using this method. 


Sign up to receive email newsletters from Uniquely Michelle:

Some Information About Clear Vinyl

Michelle Burke

Having three Uniquely Michelle patterns (the Kristine ID Wallet, the Just the Ticket Luggage Tag, and the Set To Go Cosmetic Bag Set) that have clear vinyl in their materials list has prompted quite a few questions. Most of the questions involve the thickness or gauge and options for buying clear vinyl. If you have questions about sewing with clear vinyl, you will find answers to those questions in the patterns themselves. Especially the Set To Go Cosmetic Bag pattern; it includes an entire page of hints and tips for sewing with clear vinyl.

Clear vinyl comes in a variety of gauges. I have seen anywhere from 4 gauge to 60 gauge clear vinyl for sale on the internet. The higher the gauge number, the thicker the vinyl. 20 gauge vinyl is very thick, probably thicker than you want to use for sewing anything bag related. If you are using clear vinyl as part of the lining of bags, as in the Set To Go Cosmetic Bag pattern, a 4 to 8 gauge vinyl is great. It is still very durable, easy to sew, and not so thick as to interfere with the finished look of the bag. Actually, adding clear vinyl to the lining of a bag can help hold the shape of the bag very nicely. Personally, I like to use a 4 gauge clear vinyl for lining a bag.

If you are using clear vinyl for an ID window pocket on a wallet (Kristine ID Wallet) or luggage tag (Just the Ticket Luggage Tag), a 8 to 12 gauge clear vinyl works well. A little thicker vinyl adds some stiffness to the ID window pocket making it easier to insert or remove a business card, credit card or ID card into or out of the pocket. My personal preference for vinyl for ID window pockets is 12 gauge clear vinyl. You will notice that 8 gauge clear vinyl crosses over for use as a bag lining as well for a ID window pocket, so if you only want to buy one gauge of clear vinyl, 8 gauge would be the best choice.

I buy my clear vinyl from JoAnn Fabrics because I have one close by, but it is sold on the internet by several different stores as well. I searched, "clear vinyl by the yard" and came up with many options for purchasing clear vinyl including JoAnn Fabrics, Online Fabric Store, Fabric.com and Hobby Lobby. There are others too, but these are the stores I am most familiar with. Clear vinyl is 54-inches wide, so it isn't too expensive to buy. Instead of buying clear vinyl though, another option is to reuse some that you have from something else, such as the clear bag that a bedding set came in. 

Please share any other uses you have found for clear vinyl in your sewing adventures or any recycle/reuse options you can think of for clear vinyl. I would love to hear what you have to say!


Sign up to receive Email newsletters from Uniquely Michelle:


The Travel Collection - Three Travel-Related pdf Patterns

Michelle Burke

I mentioned The Travel Collection briefly in one of my recent posts about my latest pattern, the Set To Go Cosmetic Bag Set. I didn't feel like it did it justice though, so I thought I would tell you a little more about The Travel Collection. The Travel Collection is a collection of three Uniquely Michelle pdf patterns that are all travel related. The benefit of purchasing the Travel Collection is that you get all three patterns at a reduced price compared to purchasing each pattern individually. The collection includes the Sidekick Tote & Megan Travel Tote, the Just the Ticket Luggage Tag and my recently released pattern, the Set To Go Cosmetic Bag Set.

The Sidekick Tote & Megan Travel Tote is a great pattern for a tote that is loaded with pockets and comes in two sizes. The Sidekick Tote is good to use for work, as an everyday bag, or it would make a good diaper bag. The larger Megan Travel Tote is perfect for travel! It is a very large tote bag with plenty of room to pack for a weekend away. 

Pictures and Megan Travel Tote by Jenniffer Howling

The Just the Ticket Luggage Tag is a quick and fun sew that is just as cute as it is practical. The Just the Ticket Luggage Tag has a clear ID window pocket for a business card. The pocket is covered with a flap that closes with a snap so that no one can see your personal information. I love putting one of these on my black luggage to give it some personality and to make it easy to find at the baggage claim. 

The final pattern in The Travel Collection is the Set To Go Cosmetic Bag Set. This set has two different styles of cosmetic bags. The pattern includes instructions, tips and hints for adding clear vinyl to the lining, making them easy to keep clean! The wrist strap on one of the Set To Go Cosmetic Bags opens up and can be put through a loop on the other bag so that they can be carried together. 

I am excited about The Travel Collection because it offers such a great collection of pdf patterns for you to make for your next trip or to make as a very nice gift for a friend or relative. The price is fantastic too - $18.50 for all three patterns. It would cost $22.00 to purchase each of these patterns individually. 

I hope you enjoy sewing this amazing set of patterns! Please remember to share pictures of your creations on my Uniquely Michelle Facebook Page and/or on Uniquely Michelle on Instagram. To purchase The Travel Collection visit my Etsy Shop or my Craftsy Pattern Store.

Don't forget to sign up for the Uniquely Michelle newsletter below!


Sign up to receive email newsletters from Uniquely Michelle:

The Set To Go Cosmetic Bag Set - The Testers' Creations

Michelle Burke

I had a wonderful group of testers for the Set To Go Cosmetic Bag Set pattern! They provided great feedback and edits on this pattern and they also shared wonderful pictures of the creations they made using the Set To Go Cosmetic Bag Set pattern! I want to show you their beautiful creations so you can see their work, but also so you can be inspired!

Nancy Spaulding of Baby Rozen Design made her Set To Go Cosmetic Bag Set with some bright fabrics and bright pink zippers to match! I love the gray fabric with the pink and orange pops of color - so pretty!

Nancy chose to line her cosmetic bags in fabric without adding the optional clear vinyl, so the slip pockets in her bags are also fabric. That plaid is so bright and fun! You can see more of Nancy's amazing work on her Baby Rozen Design Facebook Page or in her Etsy shop.

This purple Set To Go Cosmetic Bag Set was made by Marilyn Brandt of Shades of Bold. The triangle and polka dot fabric look really beautiful together and I think the purple is a perfect choice for cosmetic bags.

Marilyn added the clear vinyl to the lining of her Set To Go Cosmetic Bag Set. You can see some of the shine from the clear vinyl in the pictures, but because it is clear vinyl, the pretty lining fabric shows through! Of course one of the main benefits of lining a bag with clear vinyl is that it makes it easy to keep the inside of the bag clean. You can also see the clear vinyl pockets in Marilyn's bags topped with fabric. This pattern provides all the tips and hints you need to sew with clear vinyl even if you have never sewn with it before! Marilyn wrote a blog post about the Set To Go Cosmetic Bag Set! You can read her post about this pattern on her Shades of Bold blog along with posts she has written about many other fabulous bags that she has made. 

Sue Reed of Dreamscape Studio made this pretty, pink Set To Go Cosmetic Bag Set. This set is perfectly girly and fun with its many shades of pink fabric!

This picture of Sue's Set To Go Cosmetic Bag Set shows how the two bags can be attached using the wrist strap of the Set To Go Cosmetic Bag pouch. This feature makes this set easy to grab and go - perfect to take to the gym, work, or on a trip! You can see more of Sue's beautiful work at her Dreamscape Studio Facebook Page.

Carolyn Hoxton made two Set To Go Cosmetic Sets! The cosmetic-themed fabric she chose to use for both sets is perfect! If you look closely, you can see the fancy stitches that Carolyn likes to add to her bags.

Looking at this Set To Go Cosmetic Bag Set made by Linda Flythe makes me want to take a trip to the ocean! This set looks so classy with the solid navy fabric accented with nautical fabric.

If the last Set To Go Cosmetic Bag Set was ready for an ocean vacation, this gorgeous set made by Crystal Lopez is ready for a trip to Disney! This princess fabric paired with black leather looks classy - like something my young adult daughters or myself would take on a Disney vacation.

Ke Hom is relatively new to sewing, but did a beautiful job making this Set To Go Cosmetic pouch! I love the soft gray fabric with the pink flowers. The gray polka dot coordinating fabric matches perfectly.

I love how Laura Hyder reversed the main fabric and the coordinating fabric between the two bags. This Set To Go Cosmetic Bag Set is fun and whimsical!

Paula Faes' Set To Go Cosmetic Bag Set looks like it is ready for a trip to the Southwest or Mexico. I love the solid gray main fabric paired with the bright oranges of the coordinating fabric!

This perfectly sweet floral Set To Go Cosmetic Bag Set made was made by Jenniffer Howling. I love how she used a different color zipper on each bag!

As always, a big THANK YOU to my testers! You are so instrumental in the pattern-making process. I really appreciate all your hard work! 

I hope you have enjoyed looking at all the Set To Go Cosmetic Bag Sets that my testers made and I hope you have been inspired as well! If you would like to make your own Set To Go Cosmetic Bag Set, you can purchase the pattern from my Etsy Shop or from my Craftsy Pattern Shop! Please share the creations you make using Uniquely Michelle patterns by posting on my Uniquely Michelle Facebook Page or tag me (@uniquely_michelle) when you post on Instagram! Don't forget to enter the Set To Go Cosmetic Bag Set giveaway by commenting on the "GIVEAWAY" posts on the Uniquely Michelle Facebook Page AND on Uniquely Michelle on Instagram. You can see details about the giveaways on each post.

Sign up to receive the Uniquely Michelle newsletter below! 


Sign up to receive email newsletters from Uniquely Michelle:

I'm Set To Go! Are you Set To Go?

Michelle Burke

Today is the day for the Set To Go Cosmetic Bag Set pattern to be released and there is so much more going on as well! I now have a Travel Collection that includes three pdf patterns available for purchase, my first newsletter is going out today, and later today I will be announcing a couple of giveaways! 

But first, the new pattern! The Set To Go Cosmetic Bag Set includes all the instructions and photos you will need to make two cosmetic bags.

One bag is a zippered pouch that includes two interior slip pockets and a wrist strap. The other bag in this set is a zippered case that has one interior slip pocket. It includes a large loop on one side.

One of the great features of this set is you can easily attach them together to carry as one. The wrist strap on the pouch has a swivel snap hook that clips to an o-ring.

When you unclip the swivel snap hook, you can put the wrist strap through the loop on the case, clip it onto the o-ring again and carry both with one strap! This makes the Set To Go Cosmetic Bag Set very convenient for on a trip, to the gym or to the office.

Another great optional feature with this pattern is the included instructions for adding clear vinyl to lining of the inside of both Set To Go Cosmetic Bags. Clear vinyl is durable and makes it easy to keep the interior of the bags clean while still letting you see the pretty lining fabric. If you have not sewn with clear vinyl before; don't worry, there are plenty of hints and tips to help you along the way. By the end you will be an expert on sewing with clear vinyl. You can purchase the Set To Go Cosmetic Bag Set pattern from my Etsy shop or from Craftsy.

The Set To Go Cosmetic Bag Set is also part of my new pattern collection! I now have THREE patterns that are travel related, so I decided to combine the three into a collection that can be purchased at a discounted price.

The Travel Collection includes the Sidekick Tote & Megan Travel Tote, the Just the Ticket Luggage Tag, and the Set To Go Cosmetic Bag Set. This collection is available from my Etsy shop and from Craftsy. How fun to travel with an entire set of handmade items that you have made and are just your style!

THE GIVEAWAY! I know everyone loves a giveaway, so why not have a couple giveaways! I am running giveaways on the Uniquely Michelle Facebook page and on Uniquely Michelle on Instagram. Make sure to look for the GIVEAWAY posts, those are the ones you need to comment on to enter the drawings. I will randomly draw winners on Thursday, April 21st. There are two possible prizes on each social media site for a total of four prizes! On Facebook I will have a drawing to win a handmade Set To Go Cosmetic Bag Set and another drawing to win a Set To Go Cosmetic Bag Set pdf pattern. I will have the same two drawings on Instagram, except the handmade Set To Go Cosmetic Bag Set will be a different than the Facebook set. You can enter all four drawings if you would like! Please follow the instructions for entering on the GIVEAWAY posts on the Uniquely Michelle Facebook Page and on Uniquely Michelle on Instagram!

To receive the Uniquely Michelle newsletter, sign up below!


Sign up to receive email newsletters from Uniquely Michelle:

What's New???

Michelle Burke

A lot has been going on at Uniquely Michelle! The first Uniquely Michelle newsletter will be going out soon! In the Uniquely Michelle newsletter, I will keep you updated on any upcoming pattern releases, share pictures of bags made using my patterns and I will include a promotion every so often too. You can sign up to receive my newsletter by filling out the form at the end of this post.

 I am very excited about a new pattern that will be released in a few days (another good reason to sign up for the newsletter)! I am not ready to tell you too much about it, but I have a few preview pictures that I am willing to share to keep you guessing.

This pattern doesn't require a lot of hardware. Actually what you see in the above photo pretty much covers it for hardware!

This is a picture of the inside of one of the bags. If you are wondering, yes that is clear vinyl. Lining the bags with clear vinyl is an option included in this pattern. Even if you have not worked with clear vinyl before, this pattern will give you all the tips and tricks you need to use it in the bags you will make with this pattern and in all your bag making!

I am sharing this picture just because I love that napping fox! :)

Remember to sign up for the Uniquely Michelle newsletter below!


Sign up to receive email newsletters from Uniquely Michelle:

A New Hoodie for Me

Michelle Burke

My hoodies were falling apart. This is a problem because I like to wear a hoodie in the morning and evening when the house is a little cooler. I had two hoodies, one had a broken zipper and both had holes in them. Instead of buying a new hoodie though, I decided to make one and I am so glad I did. I made the Sol Hoodie by Jamie Christina.

I was attracted to the Sol Hoodie for its use of ribbon as a trim, the thumb holes in the sleeve cuff and the option of lining the hood. It was a great pattern to make with easy-to-follow instructions that include diagrams. I added a lining to the body of the hoodie because I used light-weight knits and I wanted to make sure it would keep me warm. (The lining of the body was my own addition and not an option with this the pattern.)

 I wanted to showcase the Tula Pink Sprout in Midnight ribbon that I chose, so I used a dark gray heather knit for the hoodie, a light gray heather knit for the lining of the body and a solid aqua knit for the hood lining.

I changed things up a bit with how I added the ribbon trim. The instructions have the trim sewn into the seam with the zipper as well as the front edge seam of the hood; this would mean that part of my ribbon wouldn't be visible because it would be within the seam allowance. I really loved the ribbon I chose and I wanted all of it showing, so I added the ribbon after I sewed those seams and placed it about 1/8" away from the seams.

It was easy to top-stitch the ribbon into place and I liked the extra stability those seams added to the lining layers.

I don't use the thumb holes all the time, but they are great for chilly morning walks with the dog.

When I am not using them, I just tuck the lower half of the cuff up into the sleeve and it wears like a normal hoodie without thumb holes.

As some of you may know, I have two daughters, one who is in college and the other is finishing her senior year of high school. When I said that I was going to make myself a new hoodie, both responded with, "Why not just buy one???" I told them that it would be fun to make one and that it would be my very own - no one else would have one exactly like it. Their responses involved some slight rolling of the eyes and shrugging of the shoulders. Once my hoodie was finished, both my daughters said, "Mom, I really like your hoodie!!!" :) I love showing my daughters that handmade doesn't mean unattractive, it can actually look better than what you buy in the store and the quality is usually better too! 

Have fun sewing!


Sign up to receive email updates from Uniquely Michelle:

Taking a Break from Sewing to Get Things Done

Michelle Burke

I haven't been writing much recently because I needed a break from sewing for my business to get some other things done.  I did do a little selfish sewing recently and some non-sewing business related to-do's, but I also spent a lot of time with my family too.  If you want to get to know a little more about me and what I do when I am not designing patterns or sewing, read on.

During the holidays, I spent a lot of time with my family.  This year is our youngest daughter, Sarah's last year at home before heading off to college, so my husband and I are enjoying every minute of it that we can.  Our oldest daughter, Megan is in her second year of college at an out-of-state school, so the holidays are a very special family time for us.

I guess we didn't get enough time together during the holidays, because recently my husband, Sarah, our dog Chessie, and I took a road trip to visit Megan at school.  I love road trips!  When I am not driving, one of the things I like to do is crochet.  I have been working on crocheting an afghan for Sarah to take to school with her.  Sarah picked out the yarn, her favorite colors.  Now I just hope I can finish it before this fall.

I have been working on this when I have time for over a year now.  It is almost finished!

I have been working on this when I have time for over a year now.  It is almost finished!

We had a great time visiting Megan and letting A LOT of college kids pet Chessie, our goldendoodle.  I have learned that college kids really miss their pets and love to be around anyone's pet.  Fortunately, Chessie loves to be with people, it was very much a win-win! 

A picture from our visit with Megan.  Megan and Sarah are enjoying some ice cream and Chessie was excited to meet EVERYONE!

A picture from our visit with Megan.  Megan and Sarah are enjoying some ice cream and Chessie was excited to meet EVERYONE!

I will have to admit, I also bring work with me when we travel.  I find that a road trip is a great time to plan for upcoming sewing projects and pattern designs.  I take all my file folders, notebooks, sketchbooks, pens, pencils, iPad, and more in my personal Sidekick Tote.  It works really well with all the pockets to keep me organized and there is plenty of space for everything I need.

My Sidekick Tote is packed and ready to go on a road trip.

My Sidekick Tote is packed and ready to go on a road trip.

Speaking of work, I spent a lot of time recently making sure I had everything organized for filing taxes, not a fun project, so I am happy to be finished with it.  I now have everything set up to be more organized with my business finances for this year - I hope it works and I can stay on top of it! 

My daughters laugh at my "retro" calculator.  I don't think it is that retro and it still works! :)

My daughters laugh at my "retro" calculator.  I don't think it is that retro and it still works! :)

I have spent some time sewing too!  Our church is putting together School Kits that will be distributed to children whose families don't have the money to buy school supplies and therefore the kids don't go to school.  The school supplies are put into a handmade drawstring backpack.  I love finding ways that I can sew something to donate that makes it possible for kids to be educated around the globe.  I really enjoyed sewing up a few drawstring backpacks for this purpose.  I know the Sunday School kids at our church are going to love filling them with the donated school supplies!  If you are interested, check out the information on sewing the backpacks for these School Kits and see where they go!

Six drawstring backpacks to be filled with school supplies for kids who need them around the world.

Six drawstring backpacks to be filled with school supplies for kids who need them around the world.

I have to admit that I also did some selfish sewing.  We needed new curtains in our bedroom, so I made those as well as some pillows to match.  I am always amazed at how new curtains and a few throw pillows can change the look of a room.  I feel like our bedroom has a very serene, peaceful look to it now - I love it!

It looks so peaceful, it makes me want to take a nap. ;)

It looks so peaceful, it makes me want to take a nap. ;)

Now you know a little more about me and what I have been up to recently.  Currently, I am working on sewing some samples of a new pattern that I designed.  Hopefully I will be ready to share some sneak peeks in a couple of weeks and have the pattern ready for purchase next month!  Thanks for reading - now back to my sewing room!!!


Sign up to receive email updates from Uniquely Michelle: