The Kristine ID Wallet - One Month Later - Tips and a Giveaway!
Michelle Burke
One month ago today, I released the Kristine ID Wallet pattern. It has been fun to see how well it has been received! I have one sewist who has added pictures of her Kristine ID Wallets to my Uniquely Michelle Facebook Timeline and then I post them to the page so everyone can see her lovely work - thanks Denny Stewart for sharing!

One of Denny Stewart's Kristine ID Wallets!
By the way, Denny Stewart sells handmade item, including Kristine ID Wallets in her Etsy shop, SewWhatAB and you can also see her creations on her Facebook page, Sew What?
If you have made the Kristine ID Wallet and you don't mind sharing pictures, please post them to my Uniquely Michelle Timeline and I will share them on the Uniquely Michelle page. It is fun to see how different fabric choices and placement make the wallet look so different. I have seen anything from classy, cute, edgy, and just fun, but I would always love to see more - everyone loves pretty pictures!
I decided to use this one month anniversary to blog about some tips that make sewing the Kristine ID Wallet even easier! First, let me say that I have never received any profit of any kind from the makers of the products that I mention in this blog post. I just want to share with you some products that I have used and like so that you can decide if you think it might be something you might like to use. Also, you will want to keep reading to the end, I will make it worth your time I promise. :)
The first tip is from one of my pattern testers, Sheri Nelson Fowler of Sassy Pants Satchels. Sheri didn't use double sided tape when she was making the ID Window Pocket for her Kristine ID Wallet, instead she used fabric glue (Fabric-Tac). She said it worked well, but it was a little messy. I wanted to give it a try, so I bought Dritz Fabric Glue Stick "for temporary basting and positioning."

This is everything you will need to utilize the first two tips as you make your Kristine ID Wallet.
I though the glue stick might be less messy. I loved the way it worked! Because the glue stick is "temporary," I could reposition the fabric if I didn't like the way I had it the first time. It also made adding the clear vinyl easier since it was dry and not sticky for that step. Thanks for the great tip Sheri!

I put the glue at the base of the triangle near the fold line.
The next tip comes from Paula McCormick Faes, another one of my pattern testers. Paula's tip is also for making the ID Window Pocket. Paula describes her method best: "When folding back the triangles onto the tape, use an old credit card and fold the entire triangle at one time. Then use the end of the credit card to push it down firmly onto the tape. It is almost like pressing."
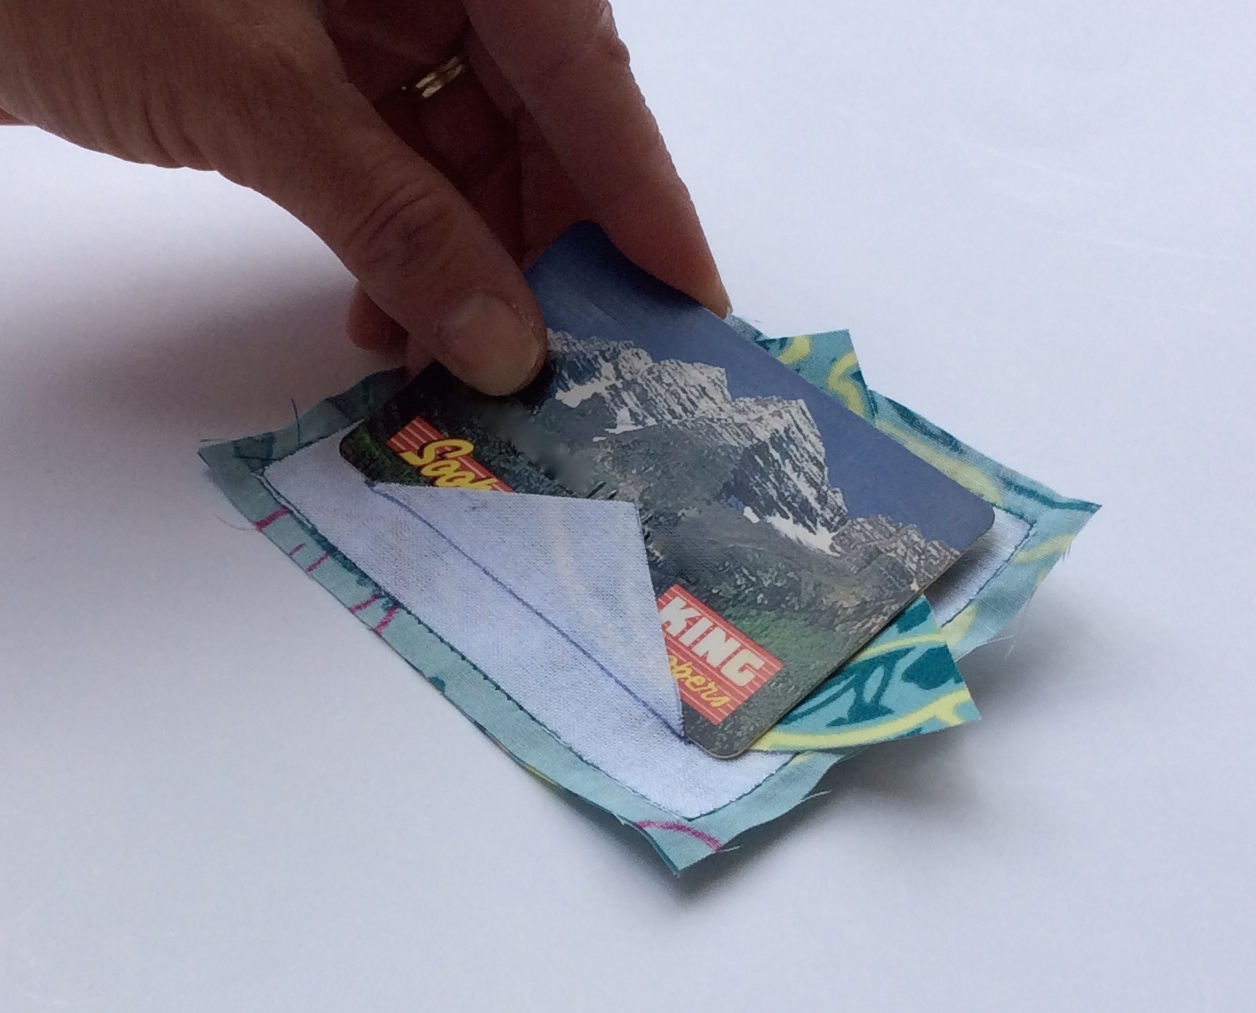
I followed Paula's directions and placed the edge of the card right at the base of the triangle at the fold line.

Then I used the card to fold back the entire triangle at once.

Finally, I used the edge of the card to press the fabric down so the glue would hold. So nice and easy Paula!
Paula's method works like a dream. It makes it quick and easy to get a straight, professional-looking fold on the ID Pocket Window. I found that Paula's method also works well with the Fabric Glue Stick mentioned above. Wonderful tip Paula, thanks!
Marilyn Brandt of Shades of Bold came up with the final tip. Marilyn is another one of my pattern testers and she likes using long prong snaps instead of magnetic snaps to close the envelope flap on the Kristine ID Wallet. It had been years since I used long prong snaps (I used them on baby clothes for my girls who are now teenagers). She reminded me that they are easy to install with the Snap Source Snap Attaching Tool, and the long prong snaps from Snap Source come in so many great colors!

Everything you need to attach a long prong snap!
The only change when making the Kristine ID Wallet with a long prong snap instead of a magnetic snap comes with the installation of the male part of the snap. Instead of installing the male part of the snap to the lining part of the flap only, you make the flap to the point that you finish the top stitching. Then you attach the male long prong snap following the directions included with the Snap Attaching Tool. The other change in the directions is that you don't need to add the extra piece of Peltex interfacing for either parts of the snap. I love the look of the long prong snaps on the Kristine ID Wallet! Thanks Marilyn for this fabulous tip!

The Snap Attaching Tool holds everything in place nicely.

A couple hits with the hammer and . . .
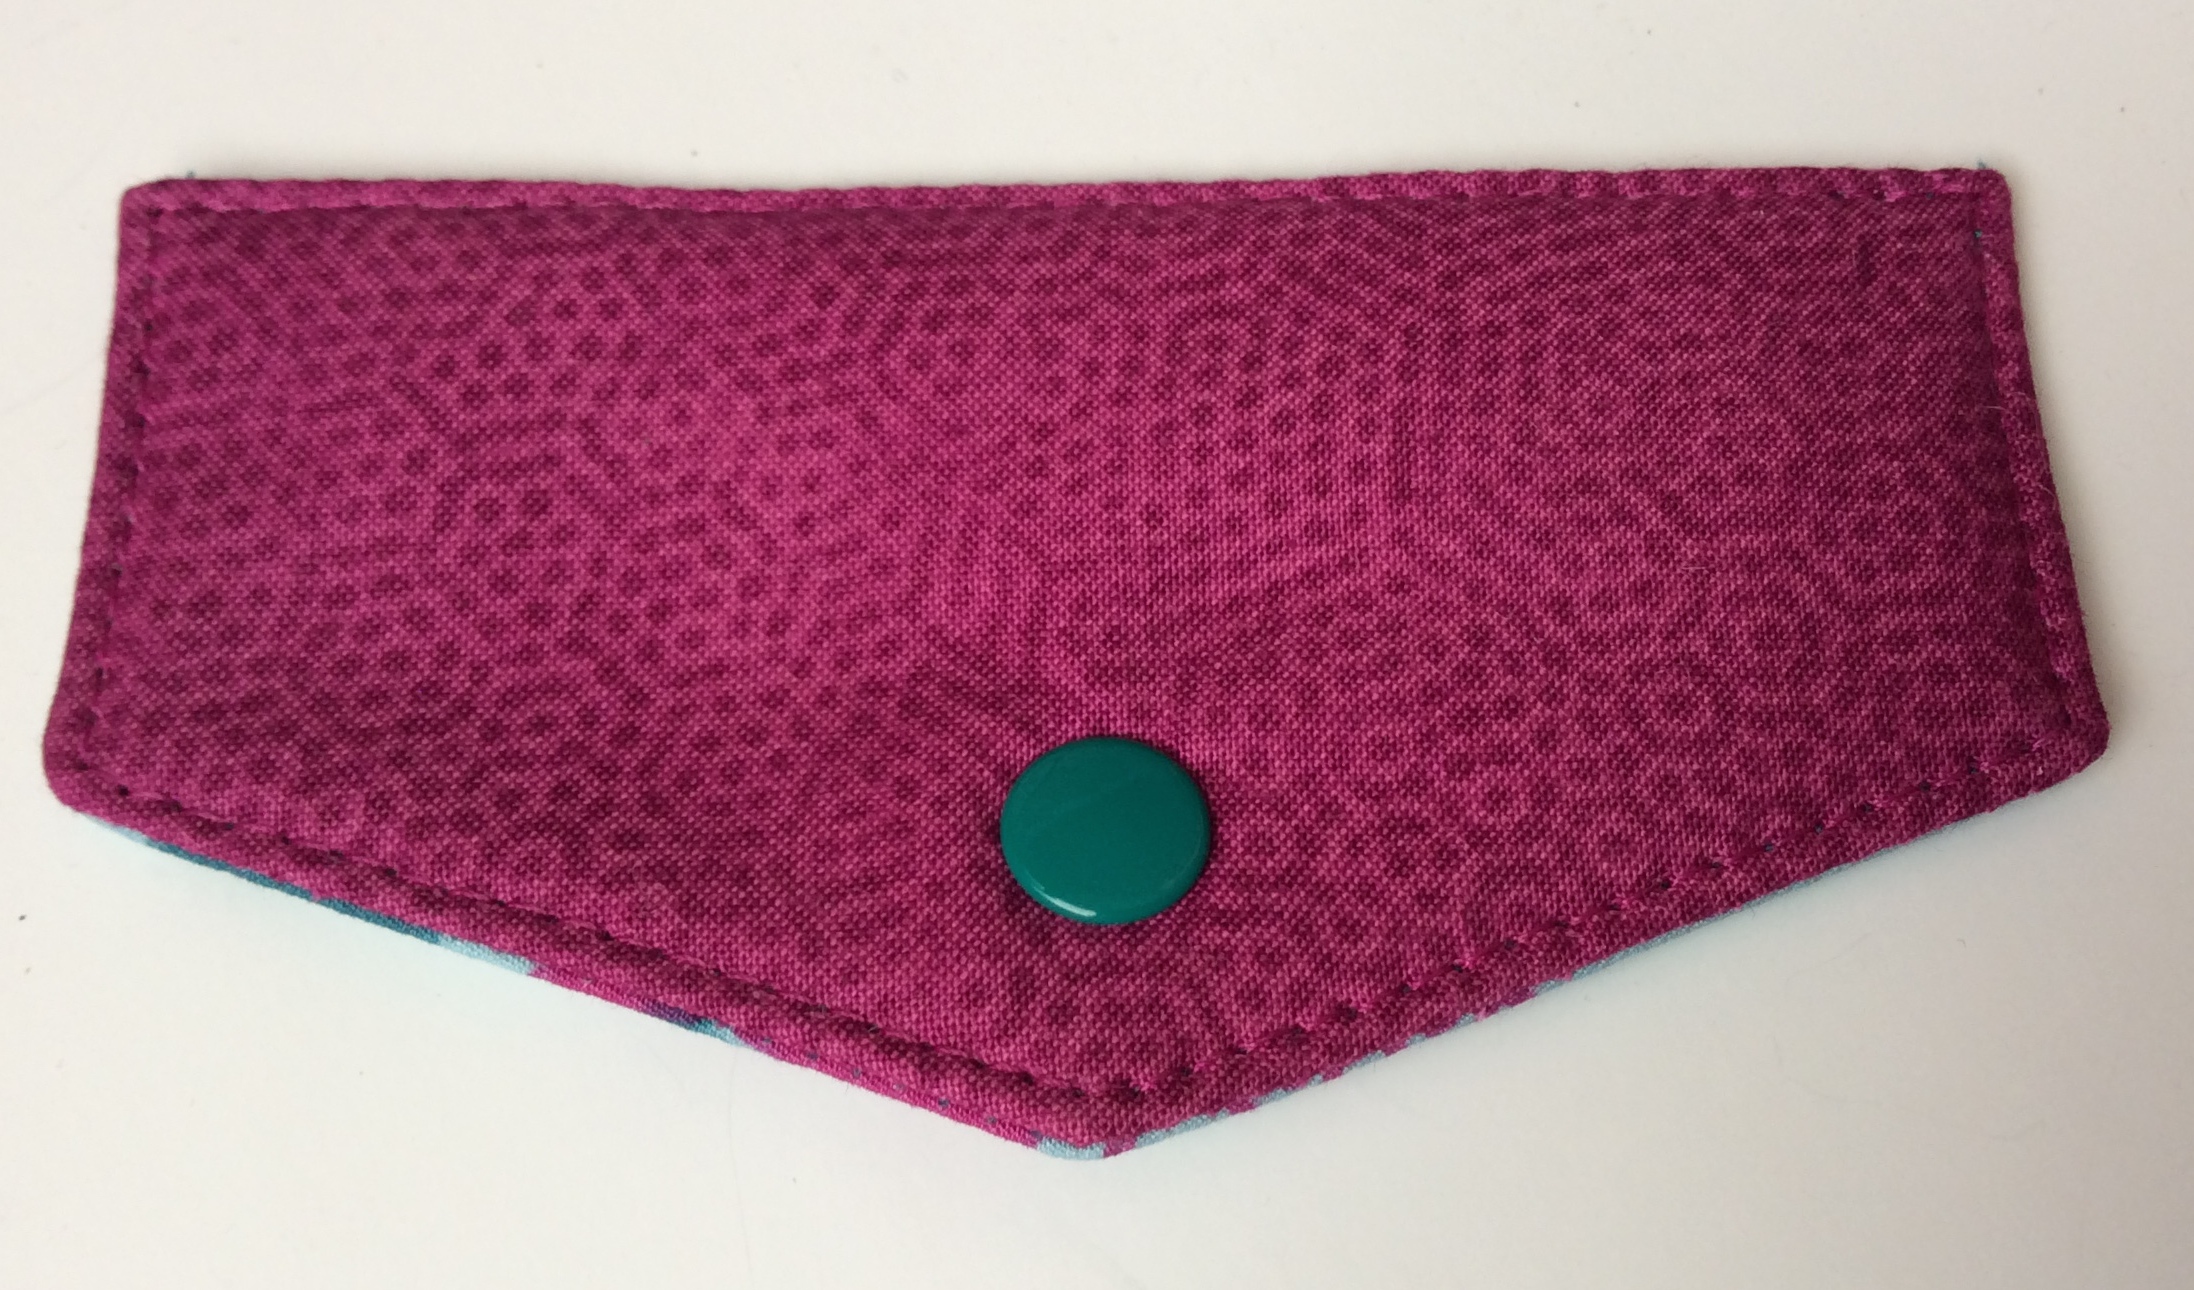
. . . the snap is in place! I love the color of this snap because it brings out the lining color!
I hope that just reading these great tips for making the Kristine ID Wallet have made it worth your time to read through this blog post, but I do have one more item - actually it is two more items. I have two giveaways on my Uniquely Michelle Facebook page going on now through, Saturday, June 13th! All you have to do is comment on the post for the item you would like to win to be entered into the random drawing for that item. If you are interested in both items, comment on both posts! One post will be for the Kristine ID Wallet Giveaway in which the winner will receive a Kristine ID Wallet along with a matching wrist strap and lanyard. The second post will be for the Kristine ID Wallet PDF Pattern Giveaway in which the winner will receive one Kristine ID Wallet PDF Pattern. Use the link below to go to my Uniquely Michelle Facebook page to see more details and enter one or both giveaways - Good Luck!!! Here is the link for the Uniquely Michelle Facebook page: Uniquely Michelle on Facebook
If you want to buy the Kristine ID Wallet PDF Pattern, you can find it in my Etsy shop or on Craftsy. Here are the links: Uniquely Michelle on Etsy and Kristine ID Wallet on Craftsy.