Kristine ID Wallet Week - Using Cork or Faux Leather as an Accent
Michelle Burke
Welcome to the first day of Kristine ID Wallet Week! I am so excited to share with you some fantastic ideas of my own as well as some from some Kristine ID Wallet experts for taking your Kristine ID Wallet to the next level. I am also excited for the giveaways and I hope you are too! If you are not sure what Kristine ID Wallet Week is all about, check out yesterday's post. To make sure you don't miss any of the fun, make sure to check out all the Uniquely Michelle social media links at the end of this post. All the details for today's giveaway is at the end of this post too . . . but first today's Kristine ID Wallet tutorial! Today I am going to show you how I add a cork or faux leather flap and ID window pocket to the Kristine ID Wallet.

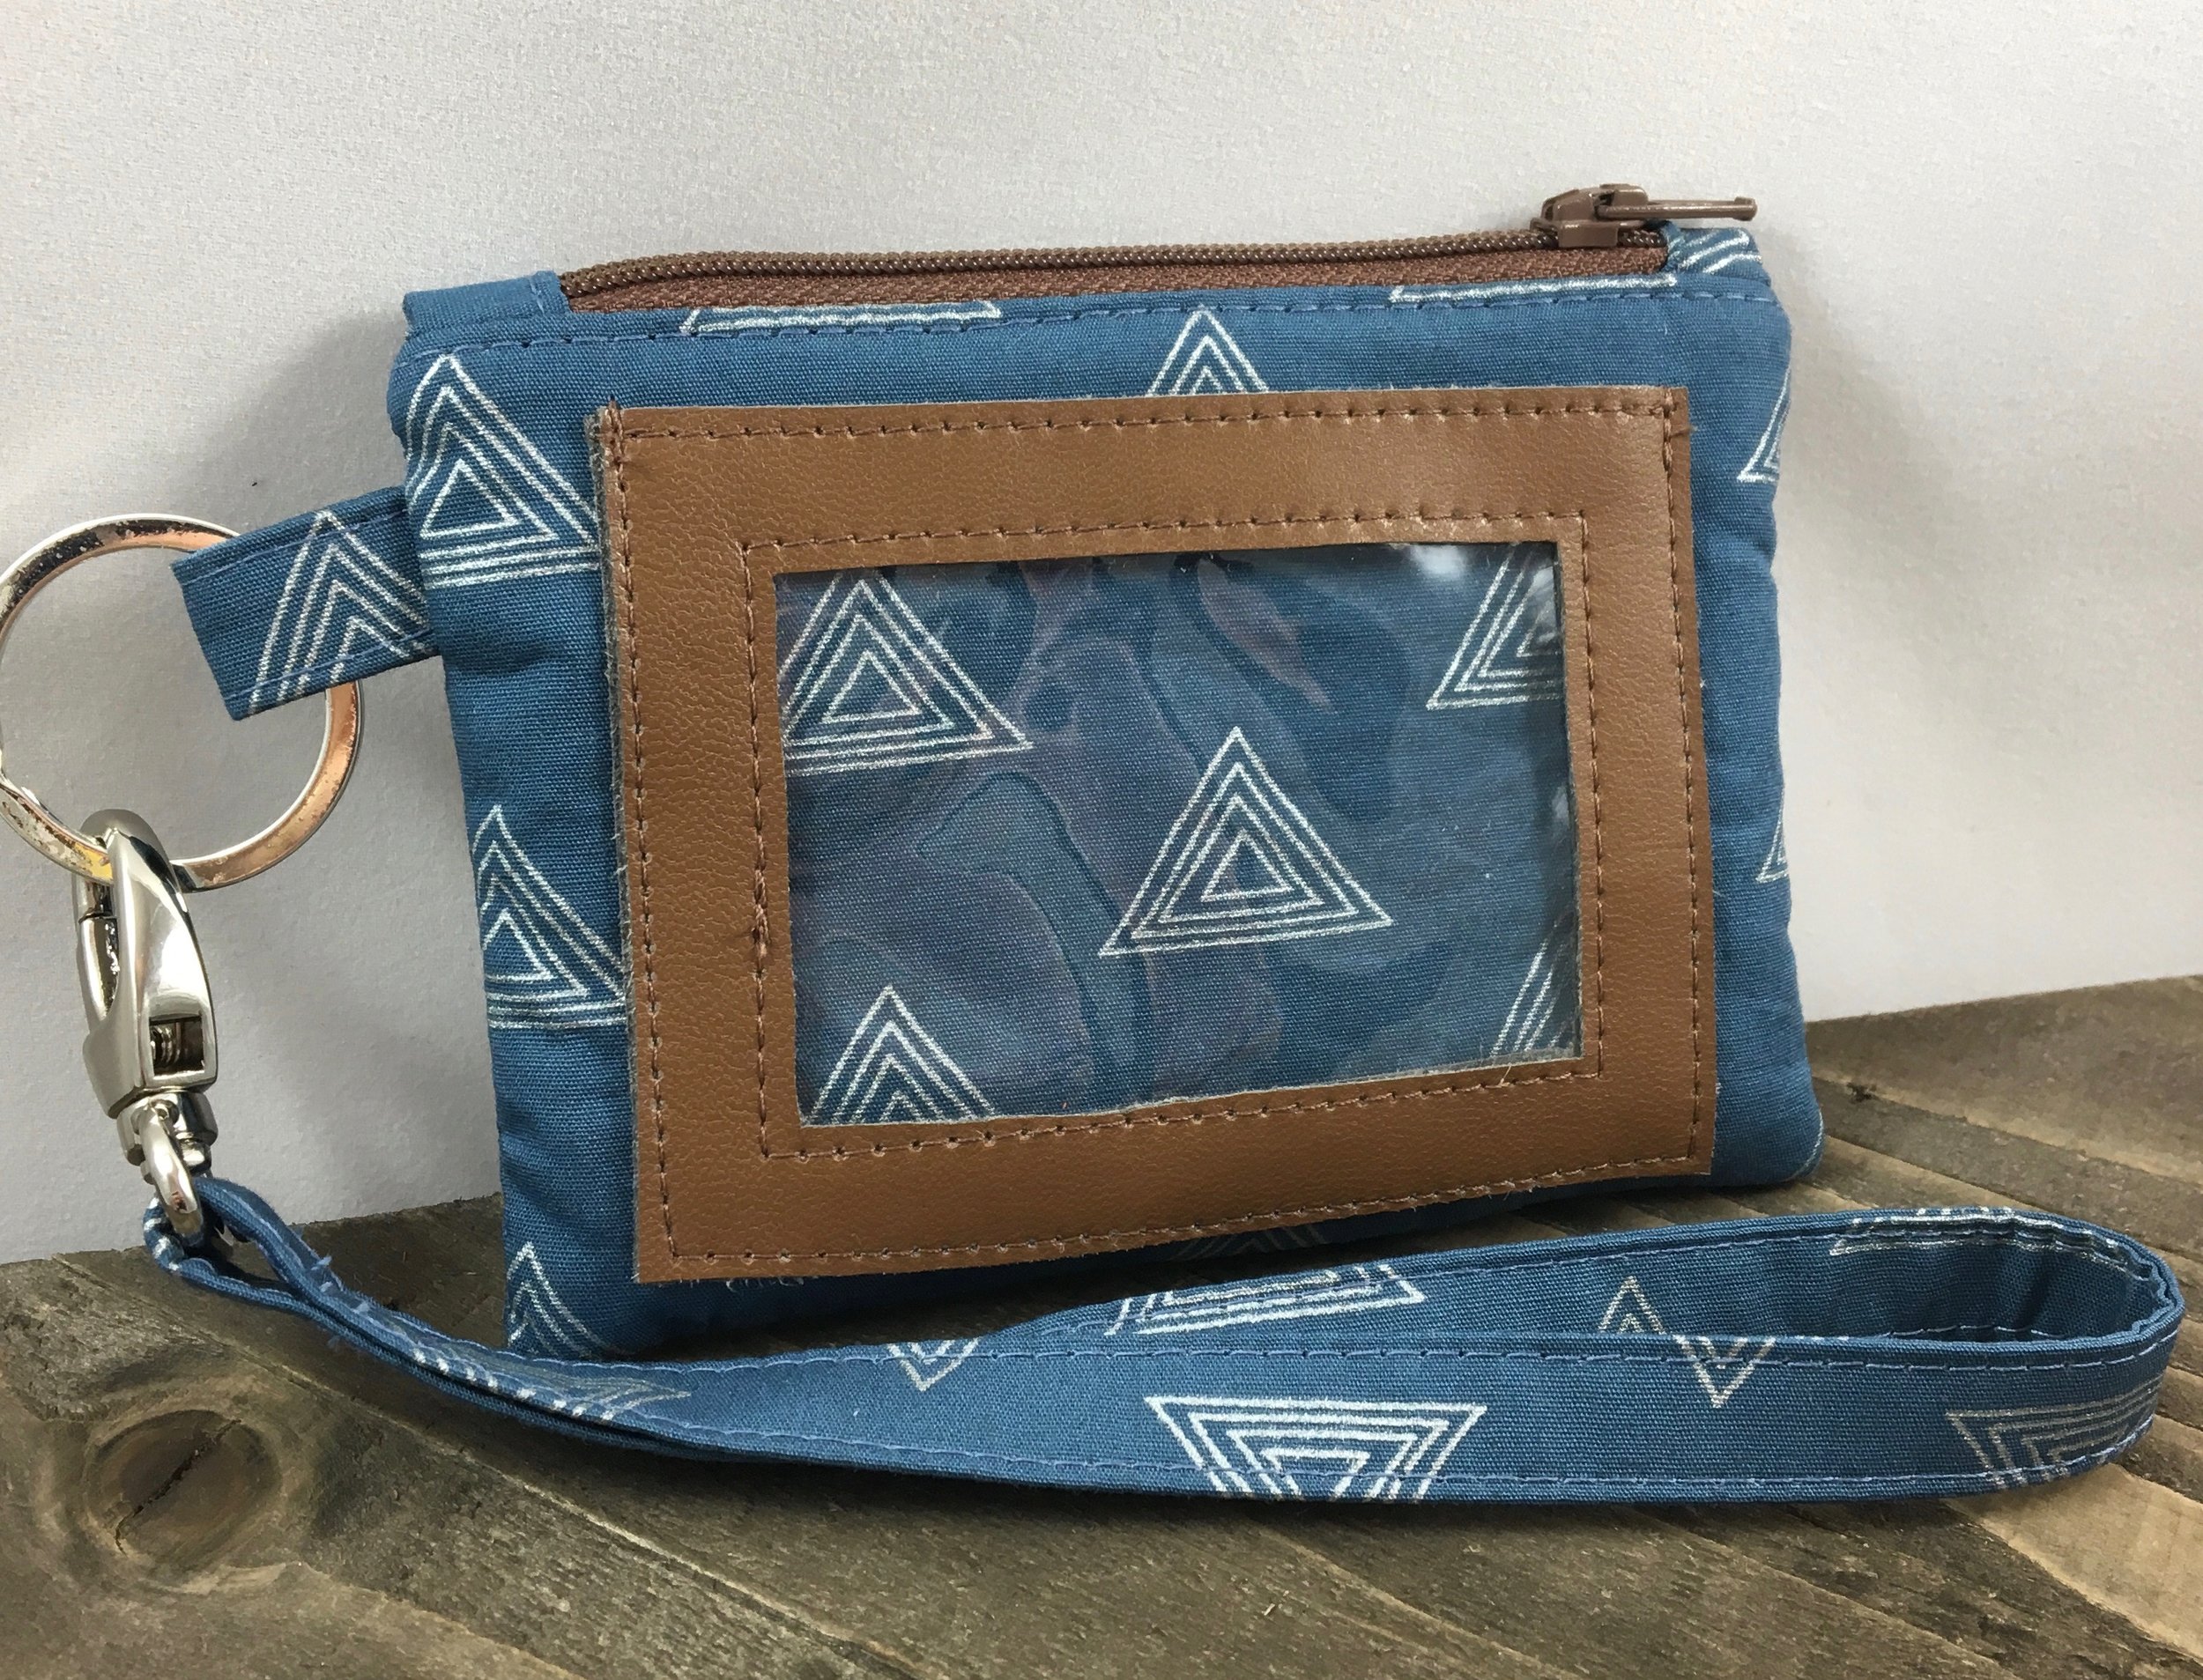
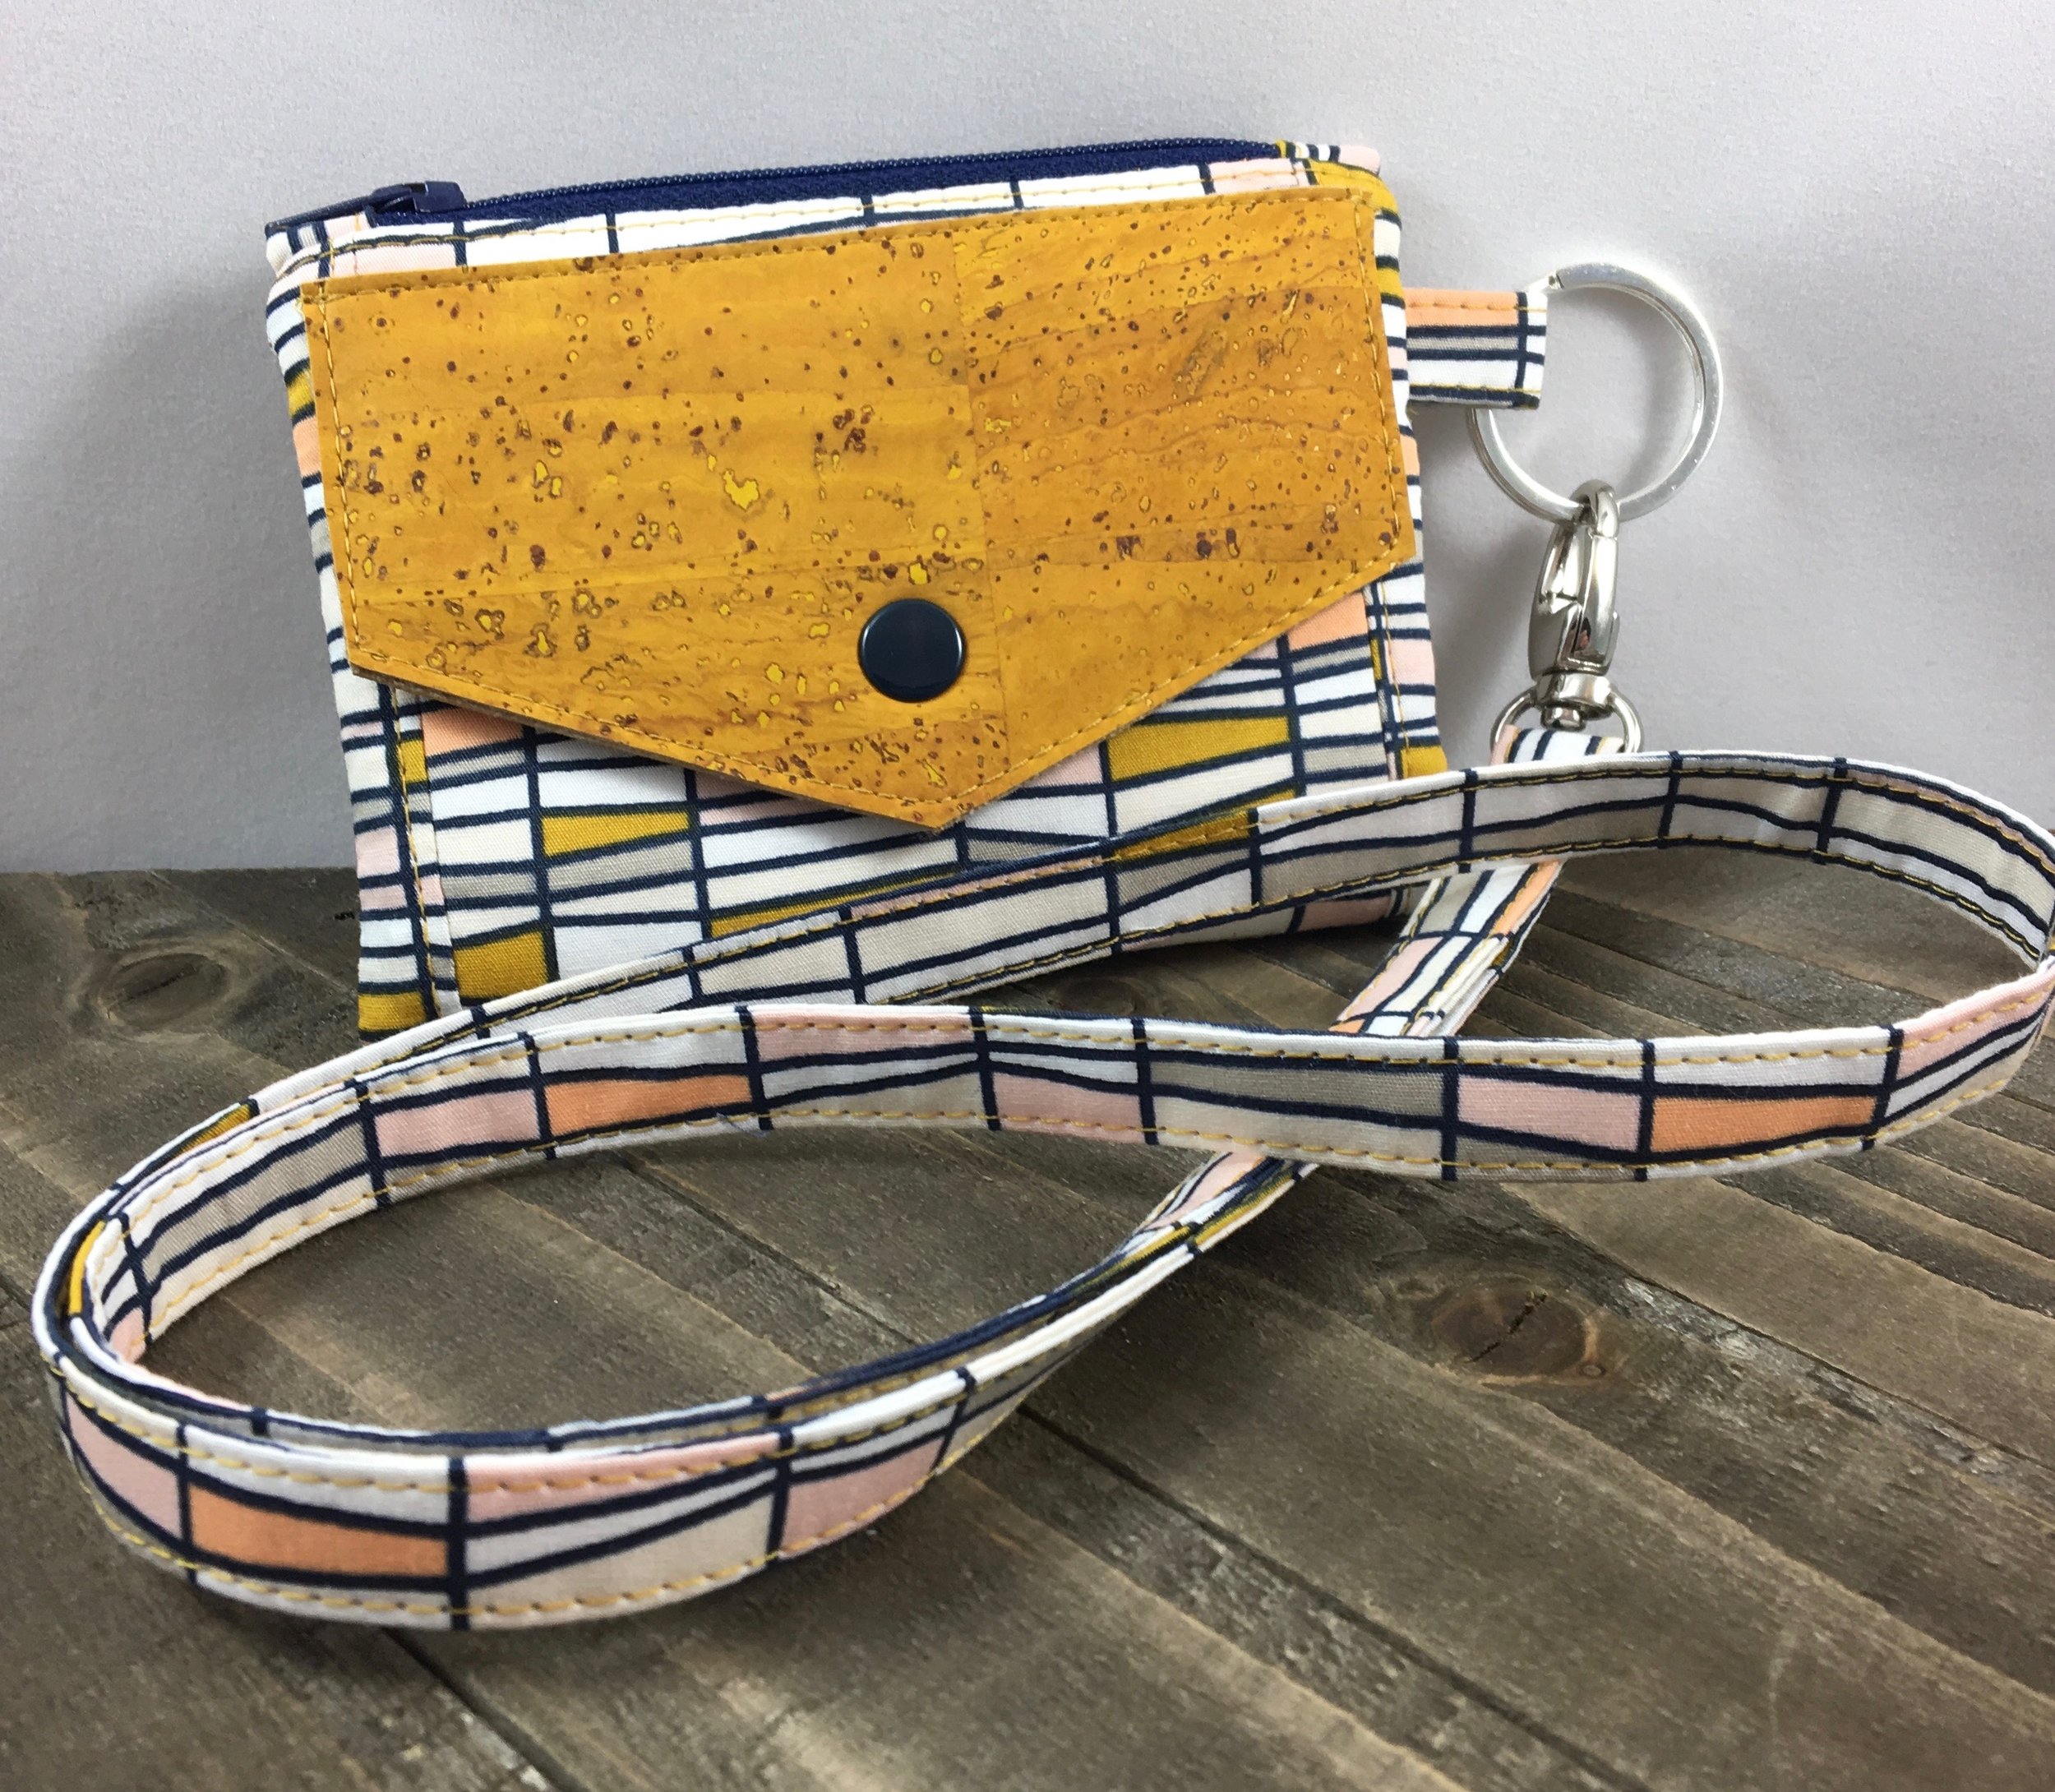
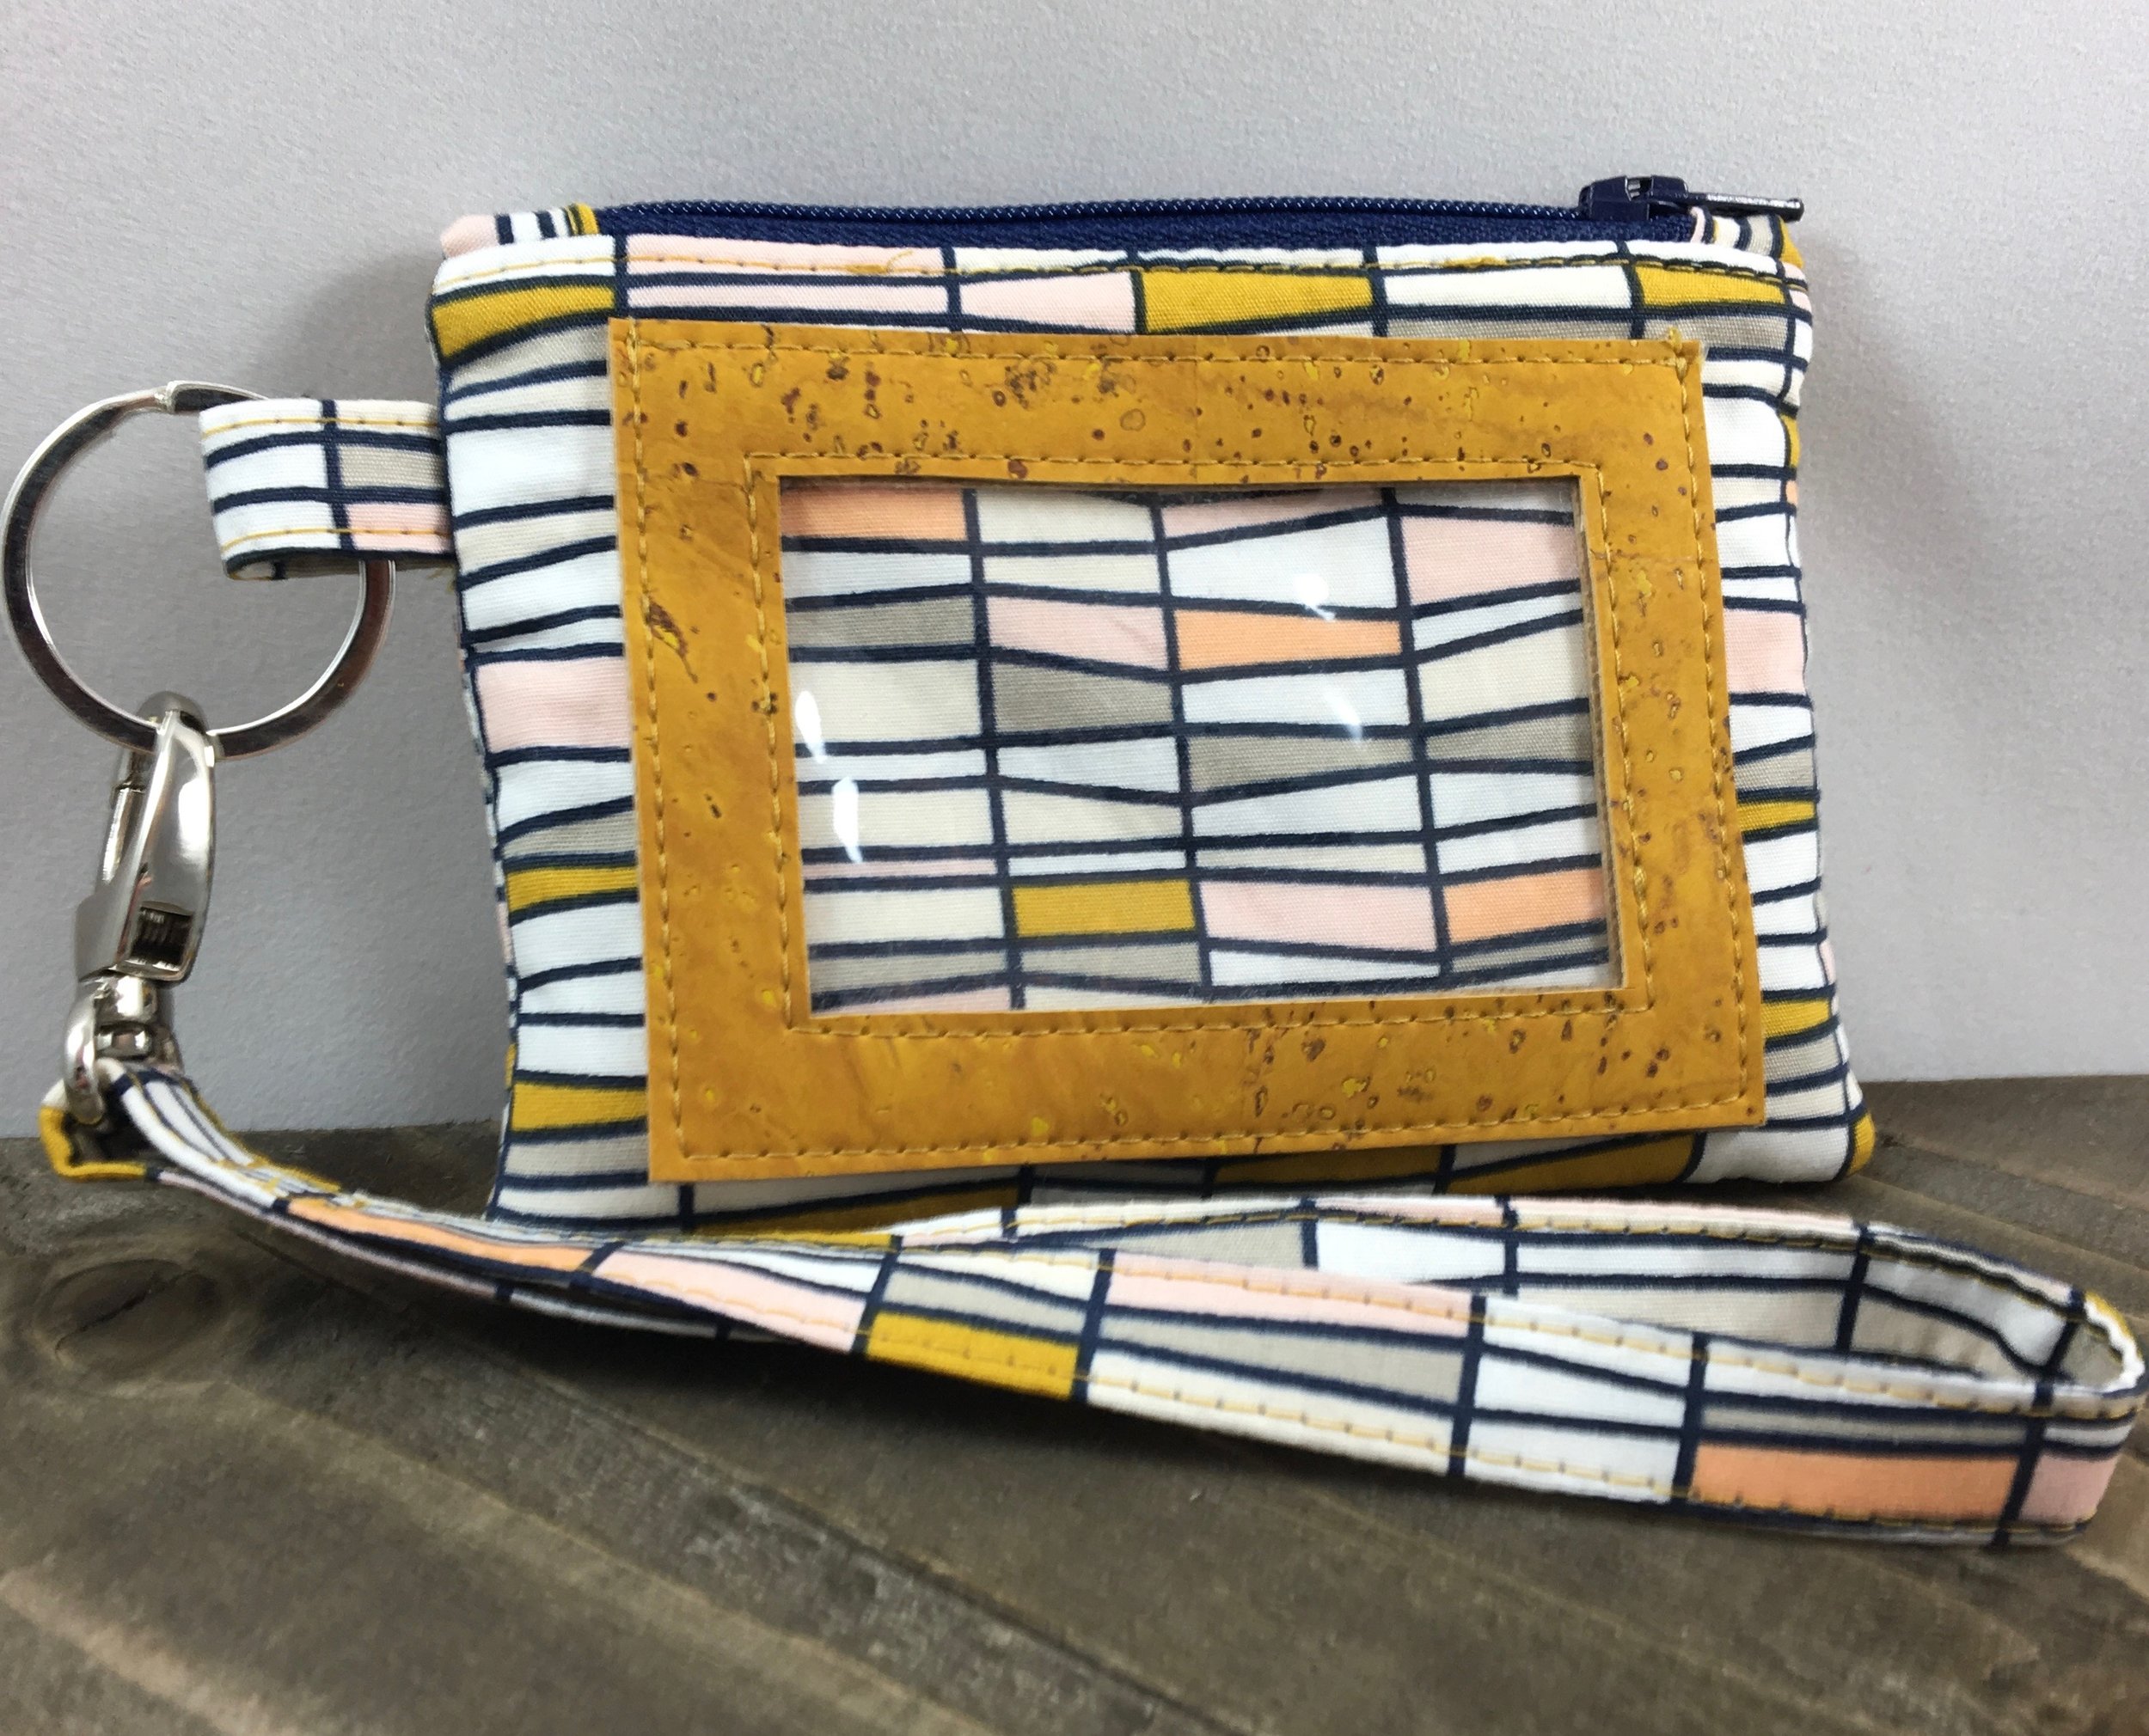
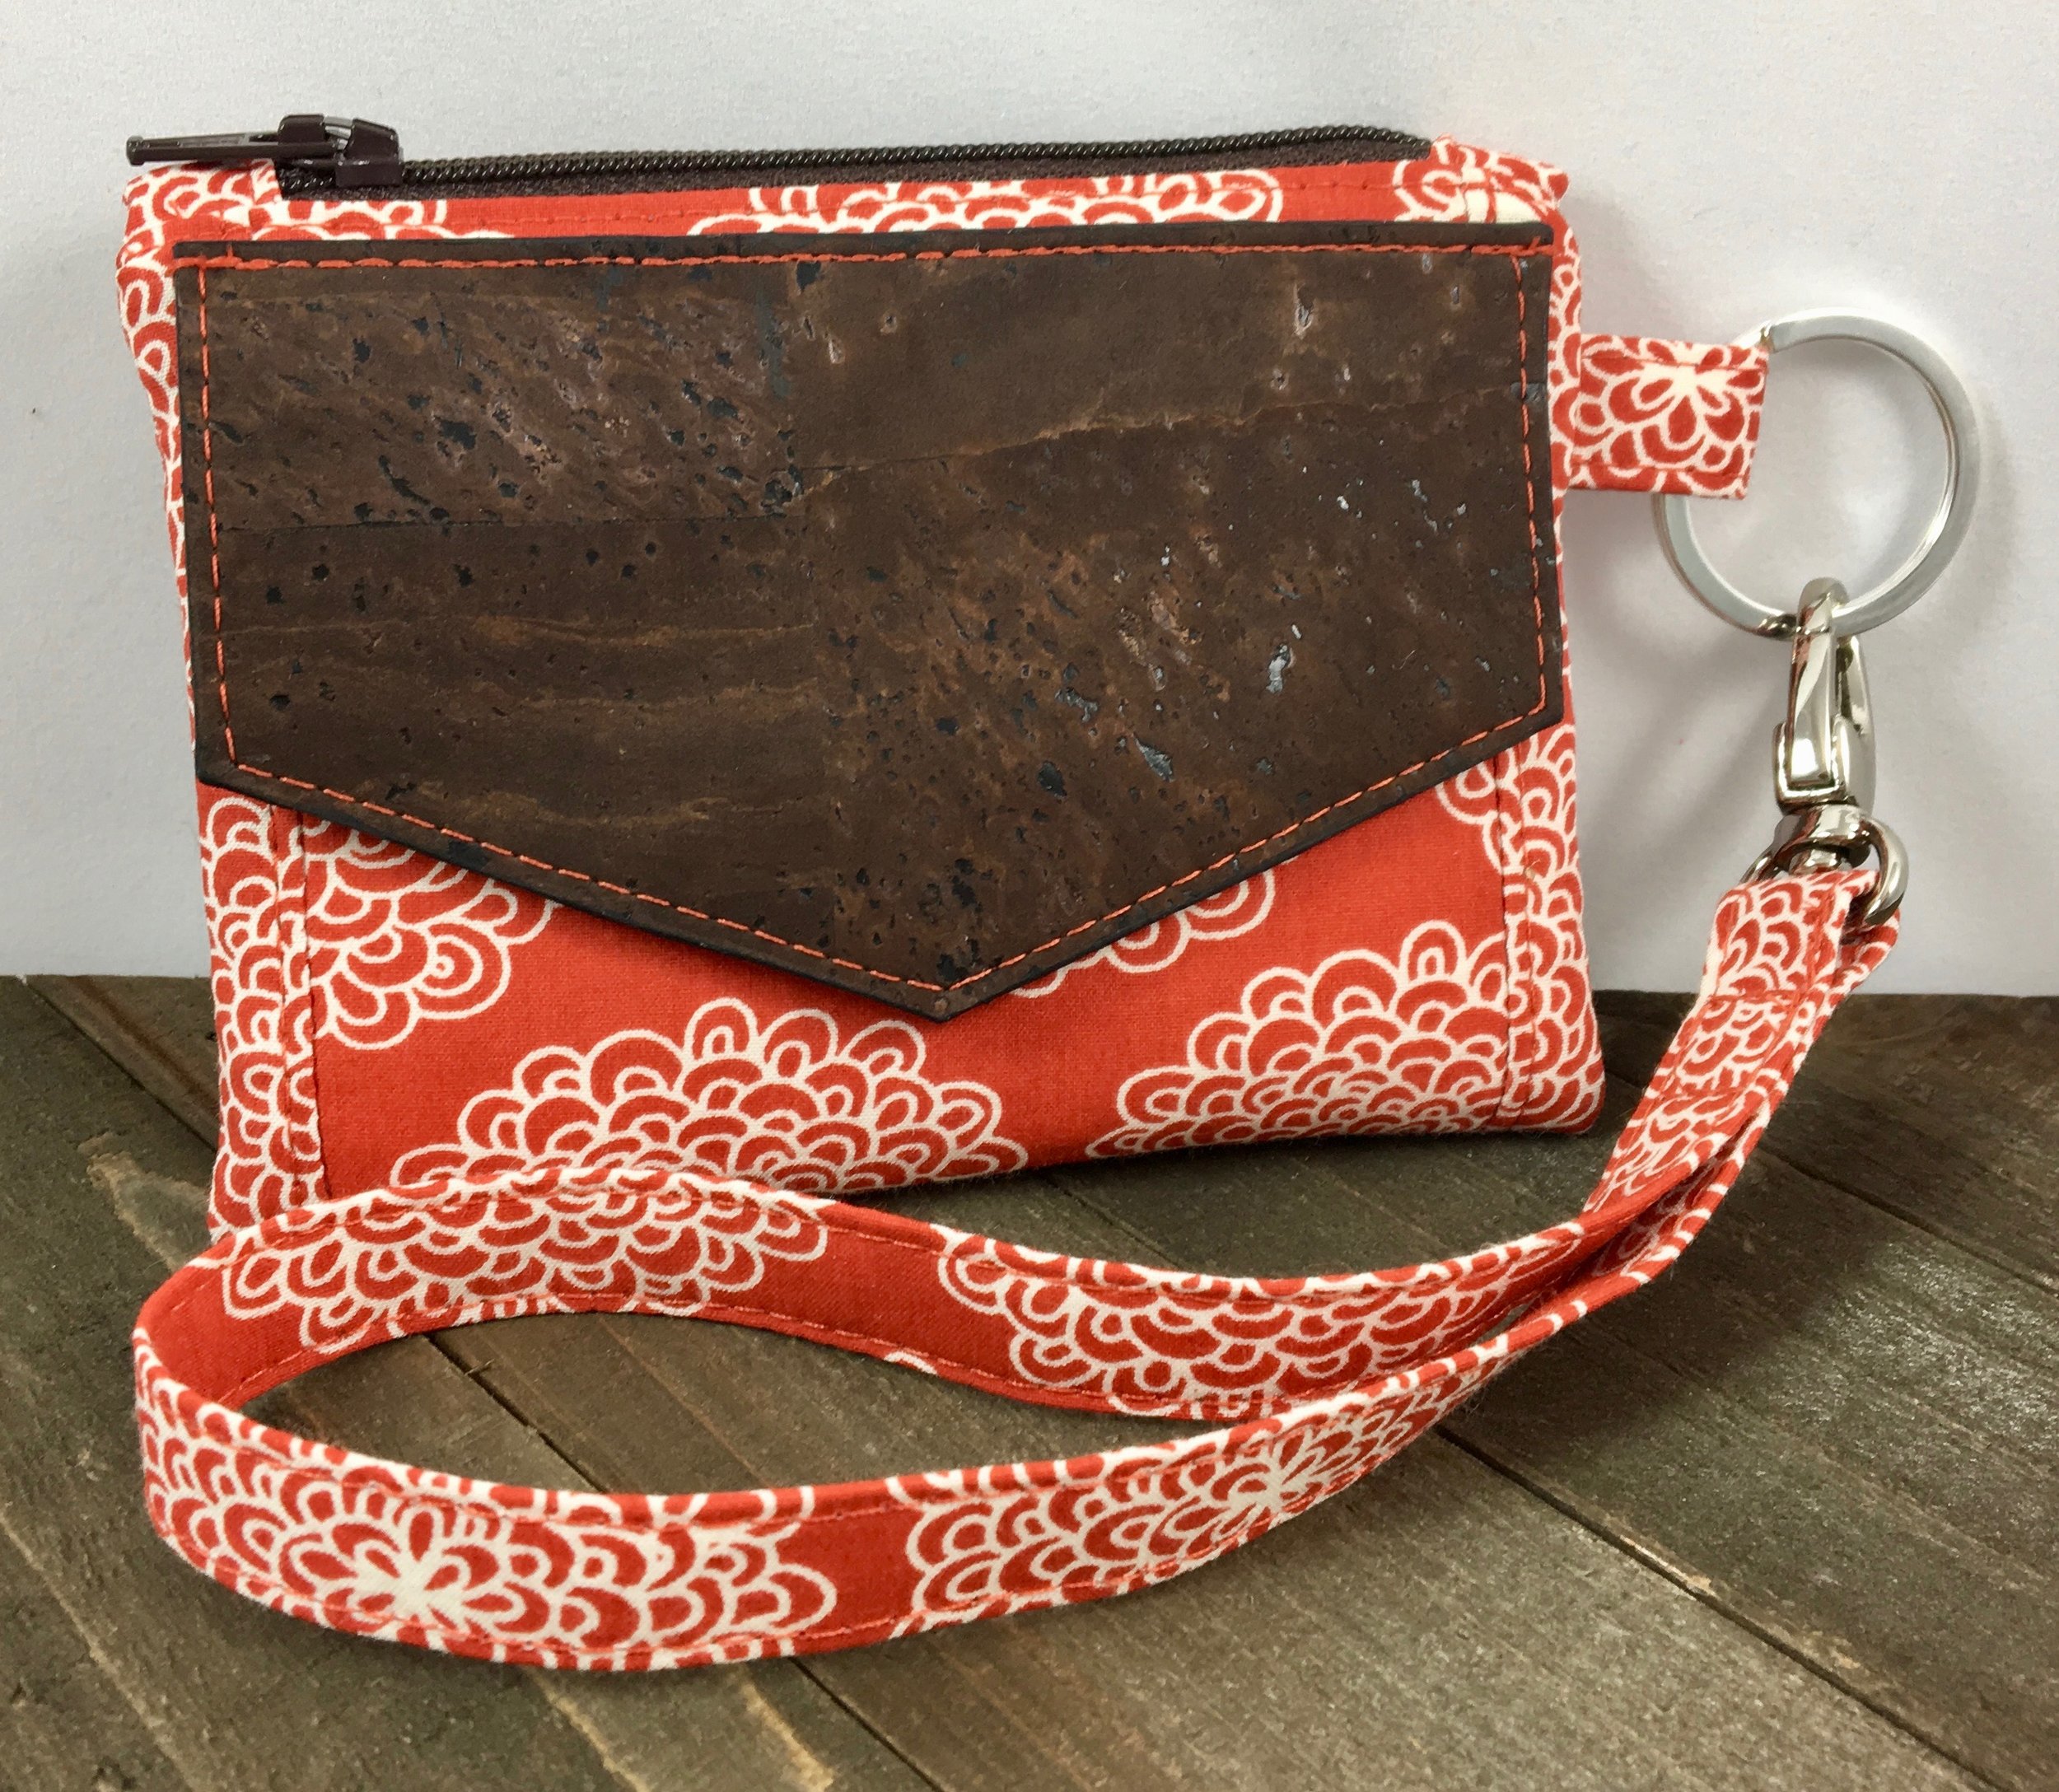
I love fabric, but sometimes adding a little faux leather or cork fabric added as an accent to a bag or wallet can really make it special! I made a few Kristine ID Wallets using faux leather or cork to make the flap and ID pocket and I think they turned out well, so I thought I would share how I did it - it's actually really easy! Since faux leather and cork don't fray, using either one for the flap and ID window pocket is a quick and fun way to sew these components of the Kristine ID Wallet.

If you don't have the Kristine ID Wallet pattern yet, check out the links near the bottom of this post and don't forget to use the coupon code to get the special Kristine ID Wallet sale price. The cork I used is from Sew Sweetness (brown - monk's robe) and from MM Cork Supply (yellow). The gold cork was from a cork sample pack and each 9" x 6" piece gives you just enough to make the flap and ID pocket for a Kristine ID Wallet! I got the faux leather from Sew Sweetness, it is gorgeous and so thin - very easy to work with!

Let's start with the flap. First we need a pattern piece for the flap that doesn't include a seam allowance. To do this, just print up a flap pattern piece and then measure and draw lines 1/4" in from the edge for all 5 edges of the flap to account for the seam allowance. Cut off the 1/4" seam allowance and then you have the pattern piece you need for making the flap with faux leather or cork. I cut my flap pattern pieces from heavy duty template plastic so that I can use my rotary cutter to cut the fabric for my flap.
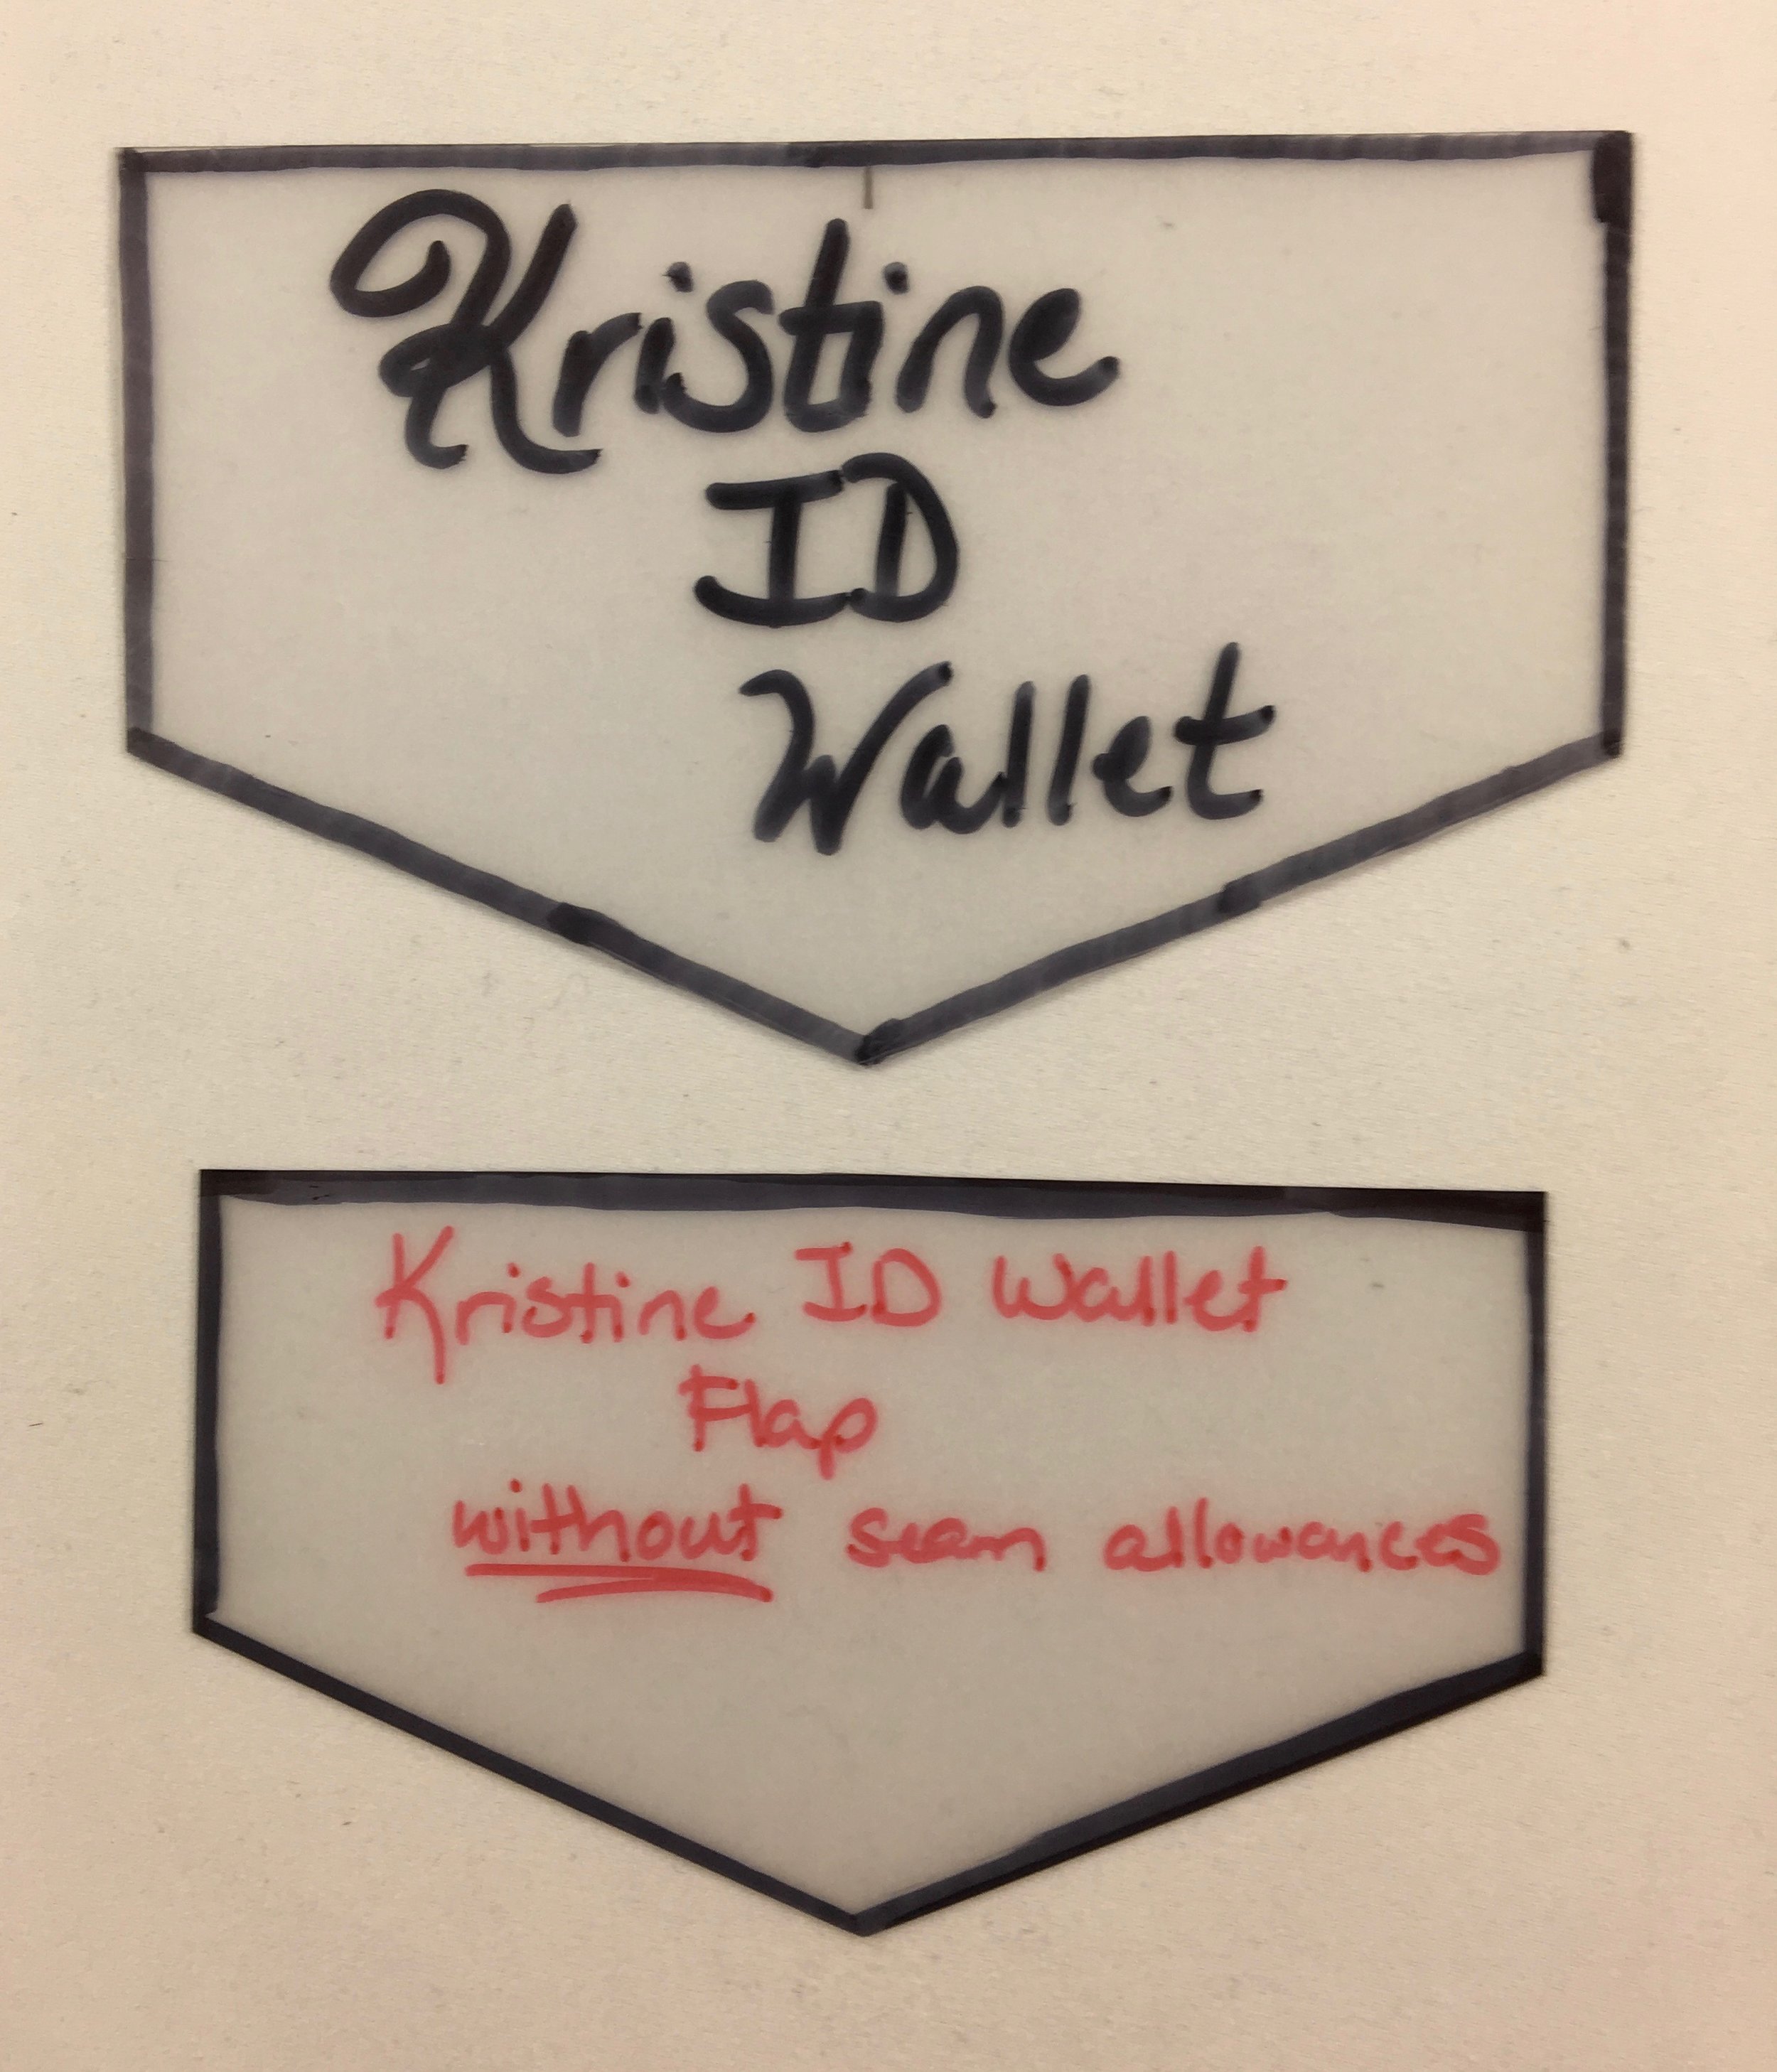
I like to draw a black line in Sharpie around the edge of the pattern piece that I make out of template plastic - it makes it easier to see the edge.
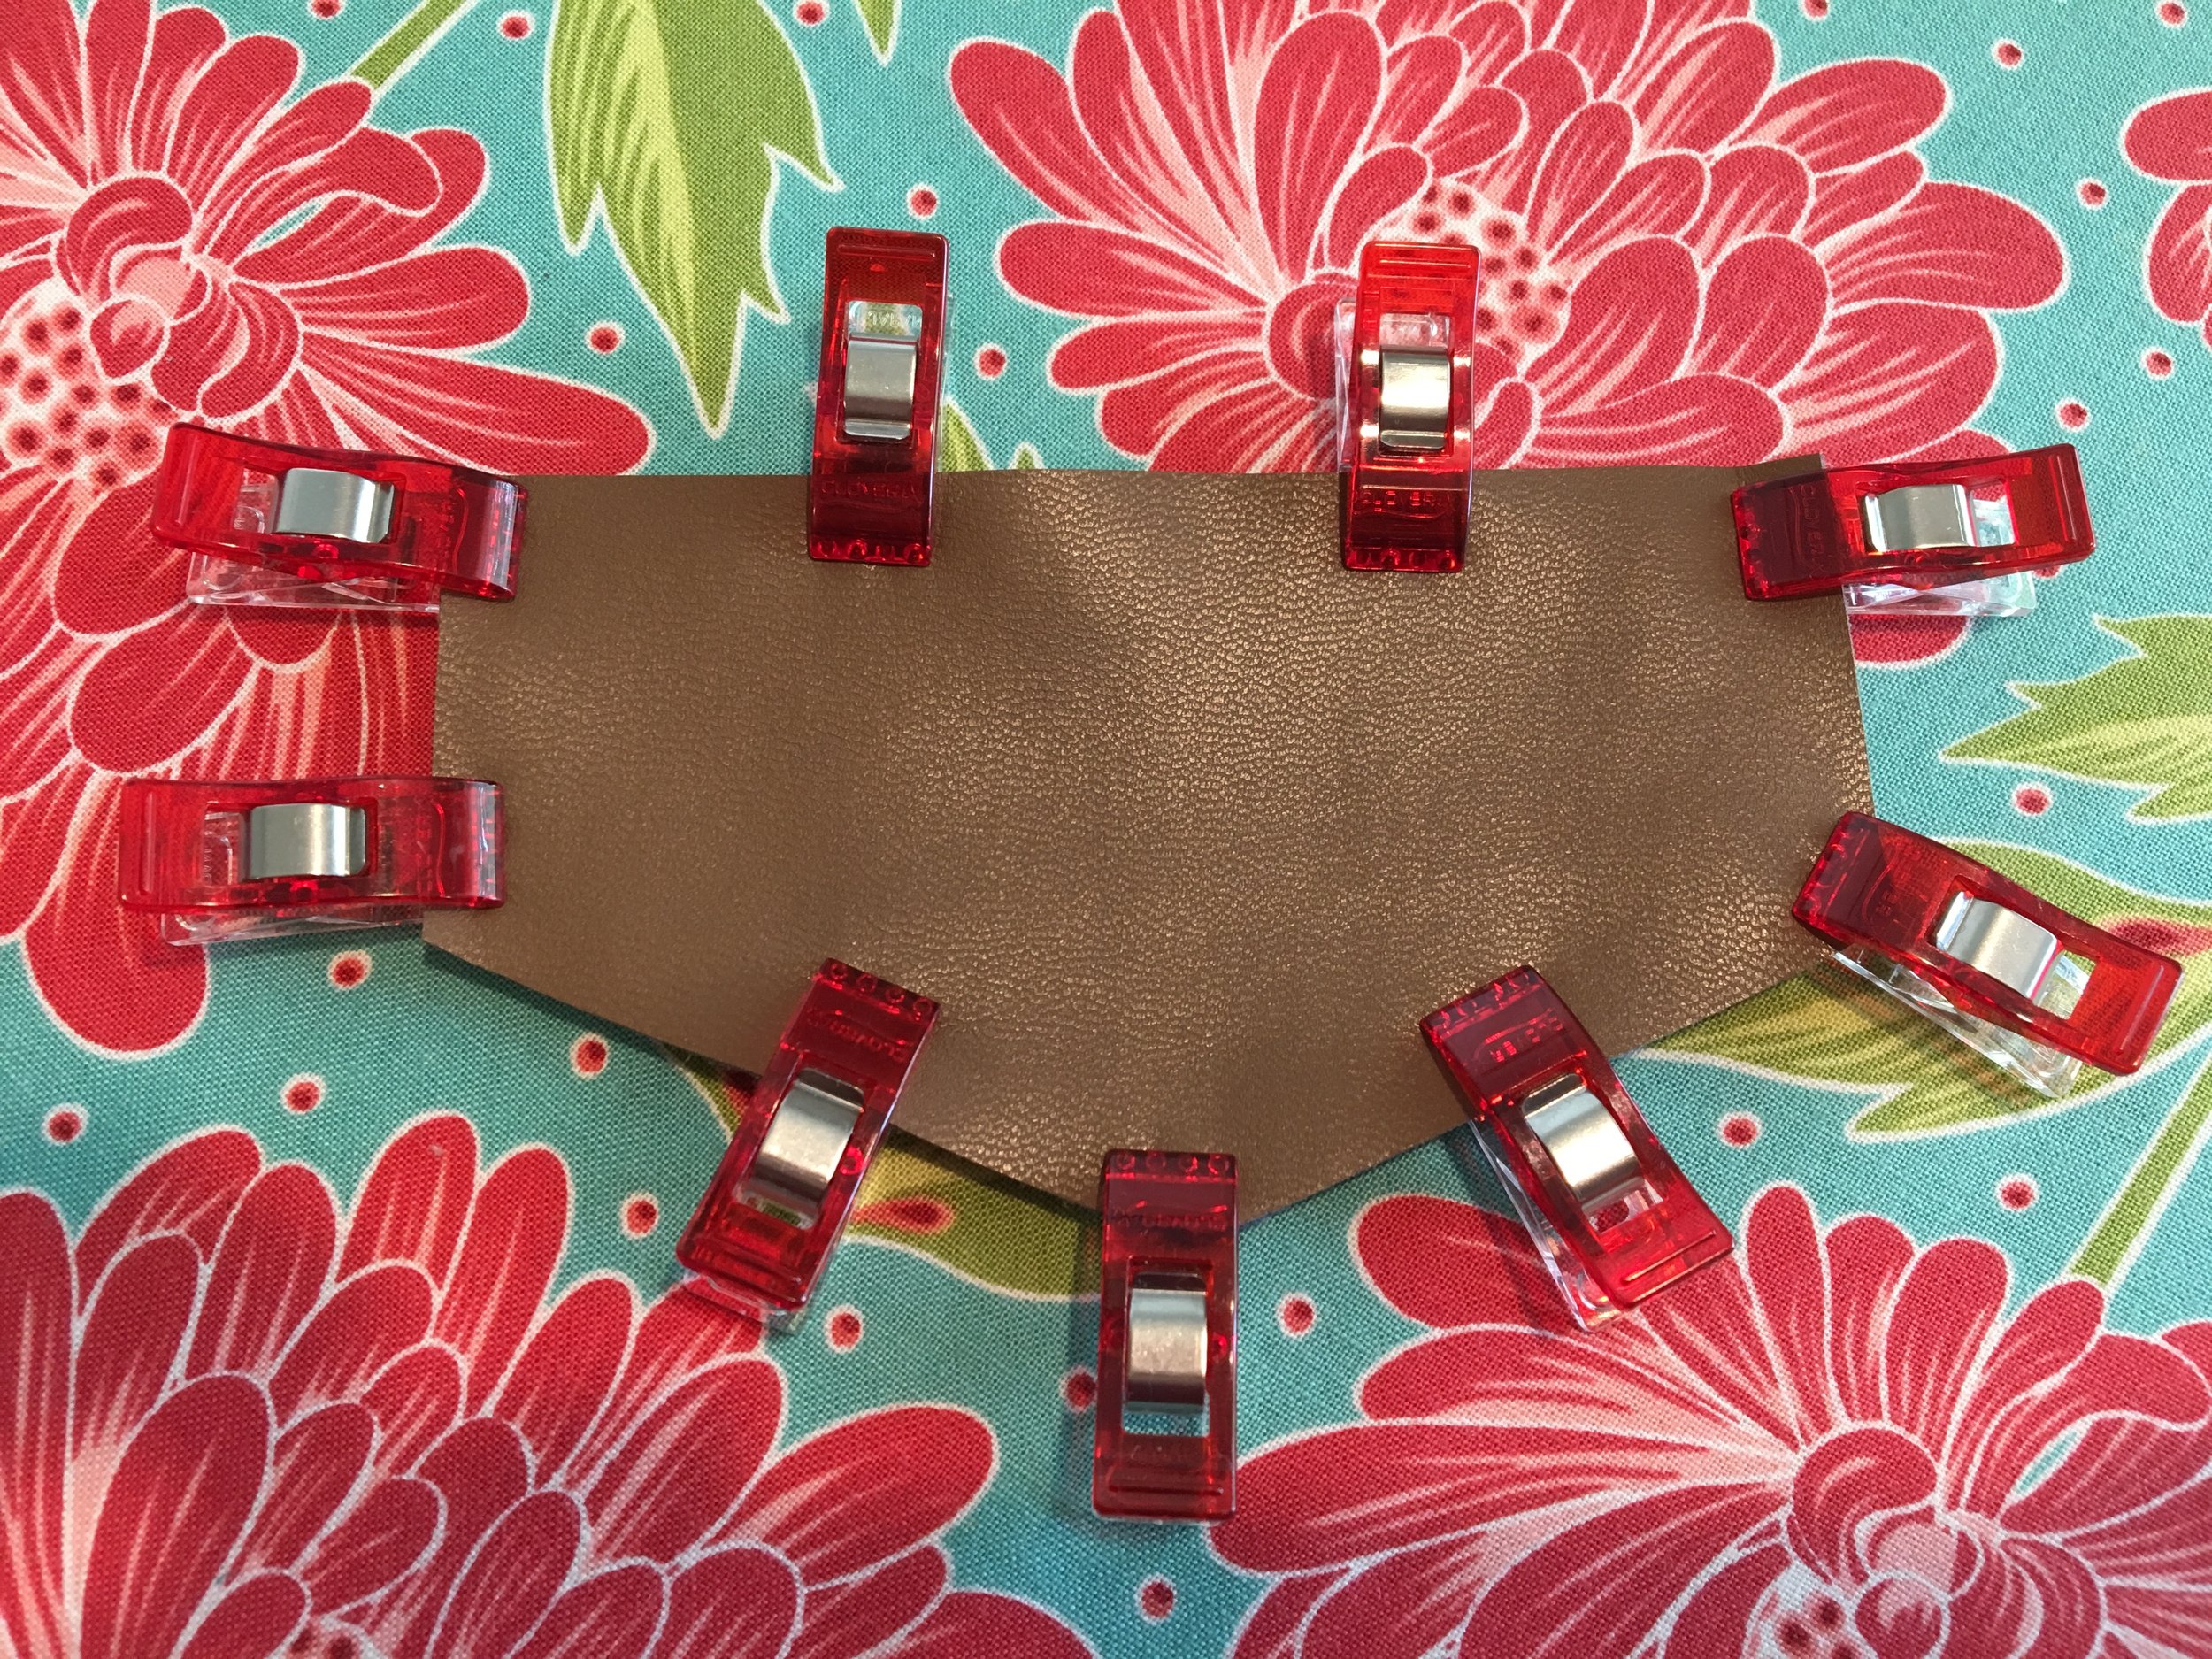
For the flap, cut out two flap pieces using your new, seam-allowance-free pattern piece from the cork or faux leather. I like to cut one with the pattern piece facing up and the other with the pattern piece facing down so that the edges of the flap are more likely to match perfectly. I don't use SF101 on the flap, but I still use fusible fleece for the exterior piece of the flap - I like the feel of the flap with the fusible fleece and it makes the prongs from the magnetic snap less noticeable through the cork or faux leather. If you are using a fairly thick faux leather, you may not need the fleece at all. Another hint - I cut the fusible fleece from the flap pattern piece that doesn't have a seam allowance and then I cut another 1/4" off all the edges of the fleece so that there is no chance of it peeking through between the two pieces of cork or faux leather.

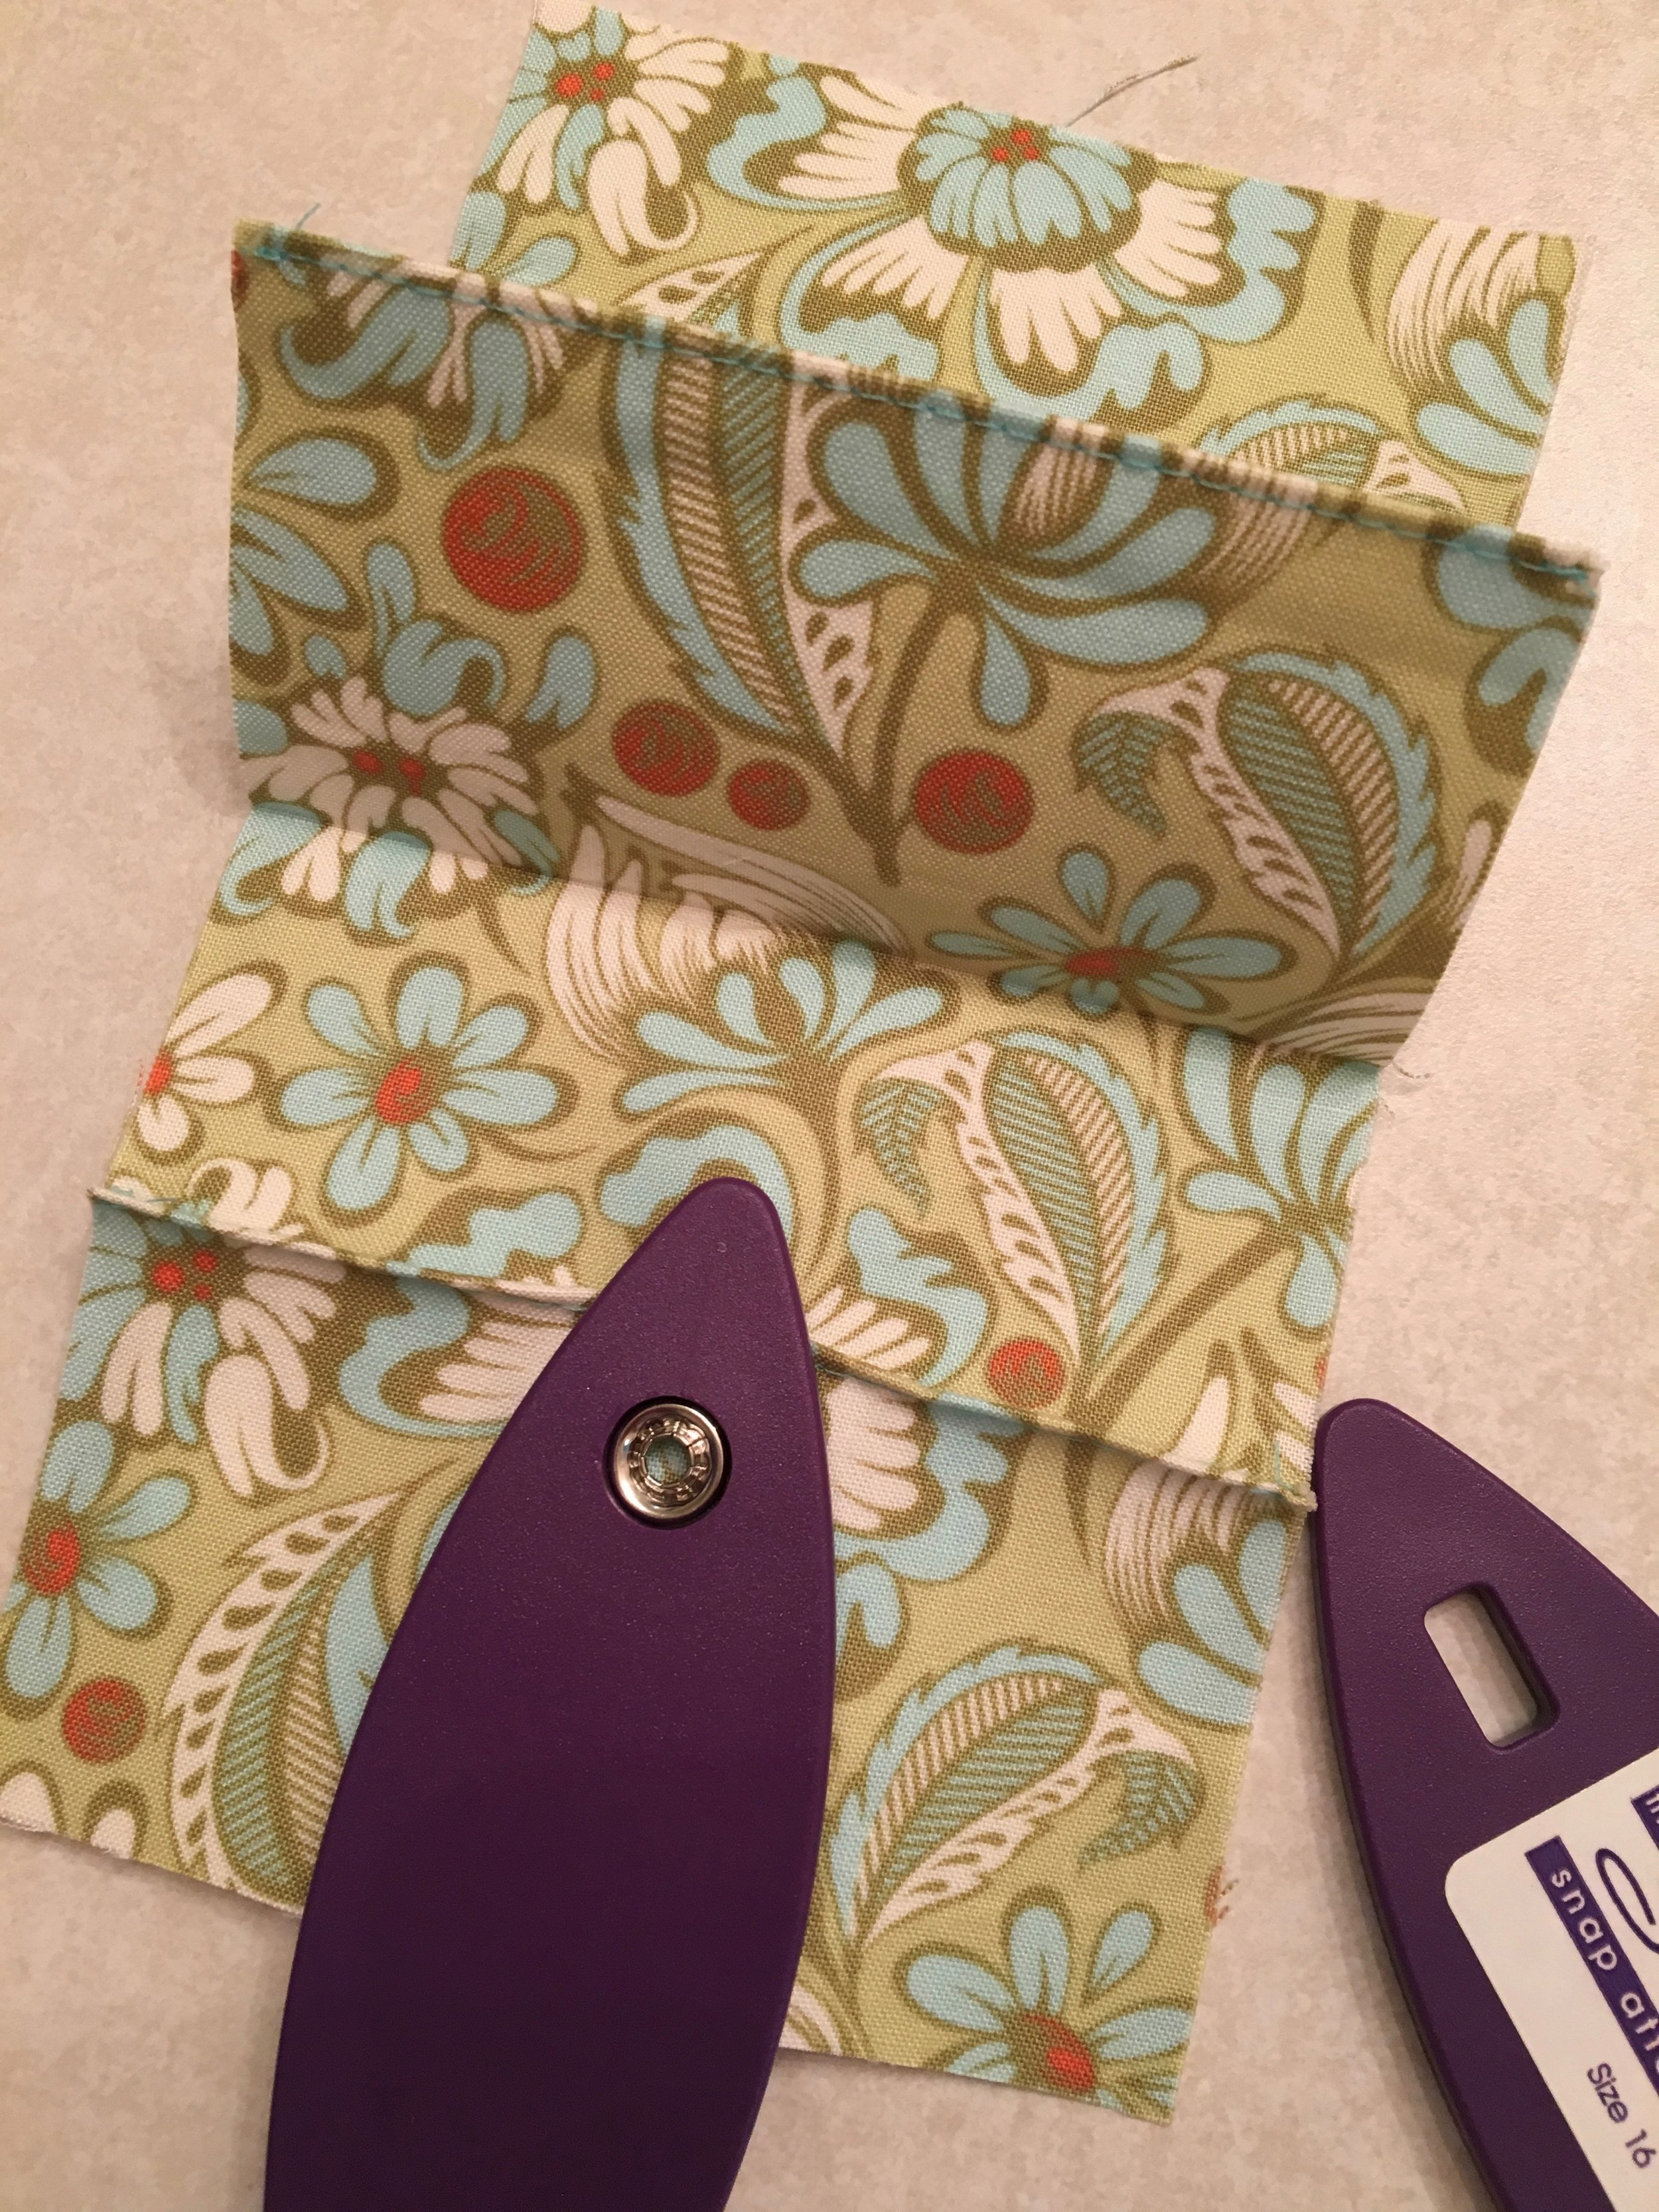
Add the male half of the magnetic snap now following the directions in the pattern, except measure down 1 3/4" down from the top raw edge of the flap (it won't be folded down as it is in the pattern). Place the flap pieces wrong sides together and use clips to hold them together. You may need to trim the pieces so that the edges match well. Top-stitch 1/8" away from the edges of the flap.
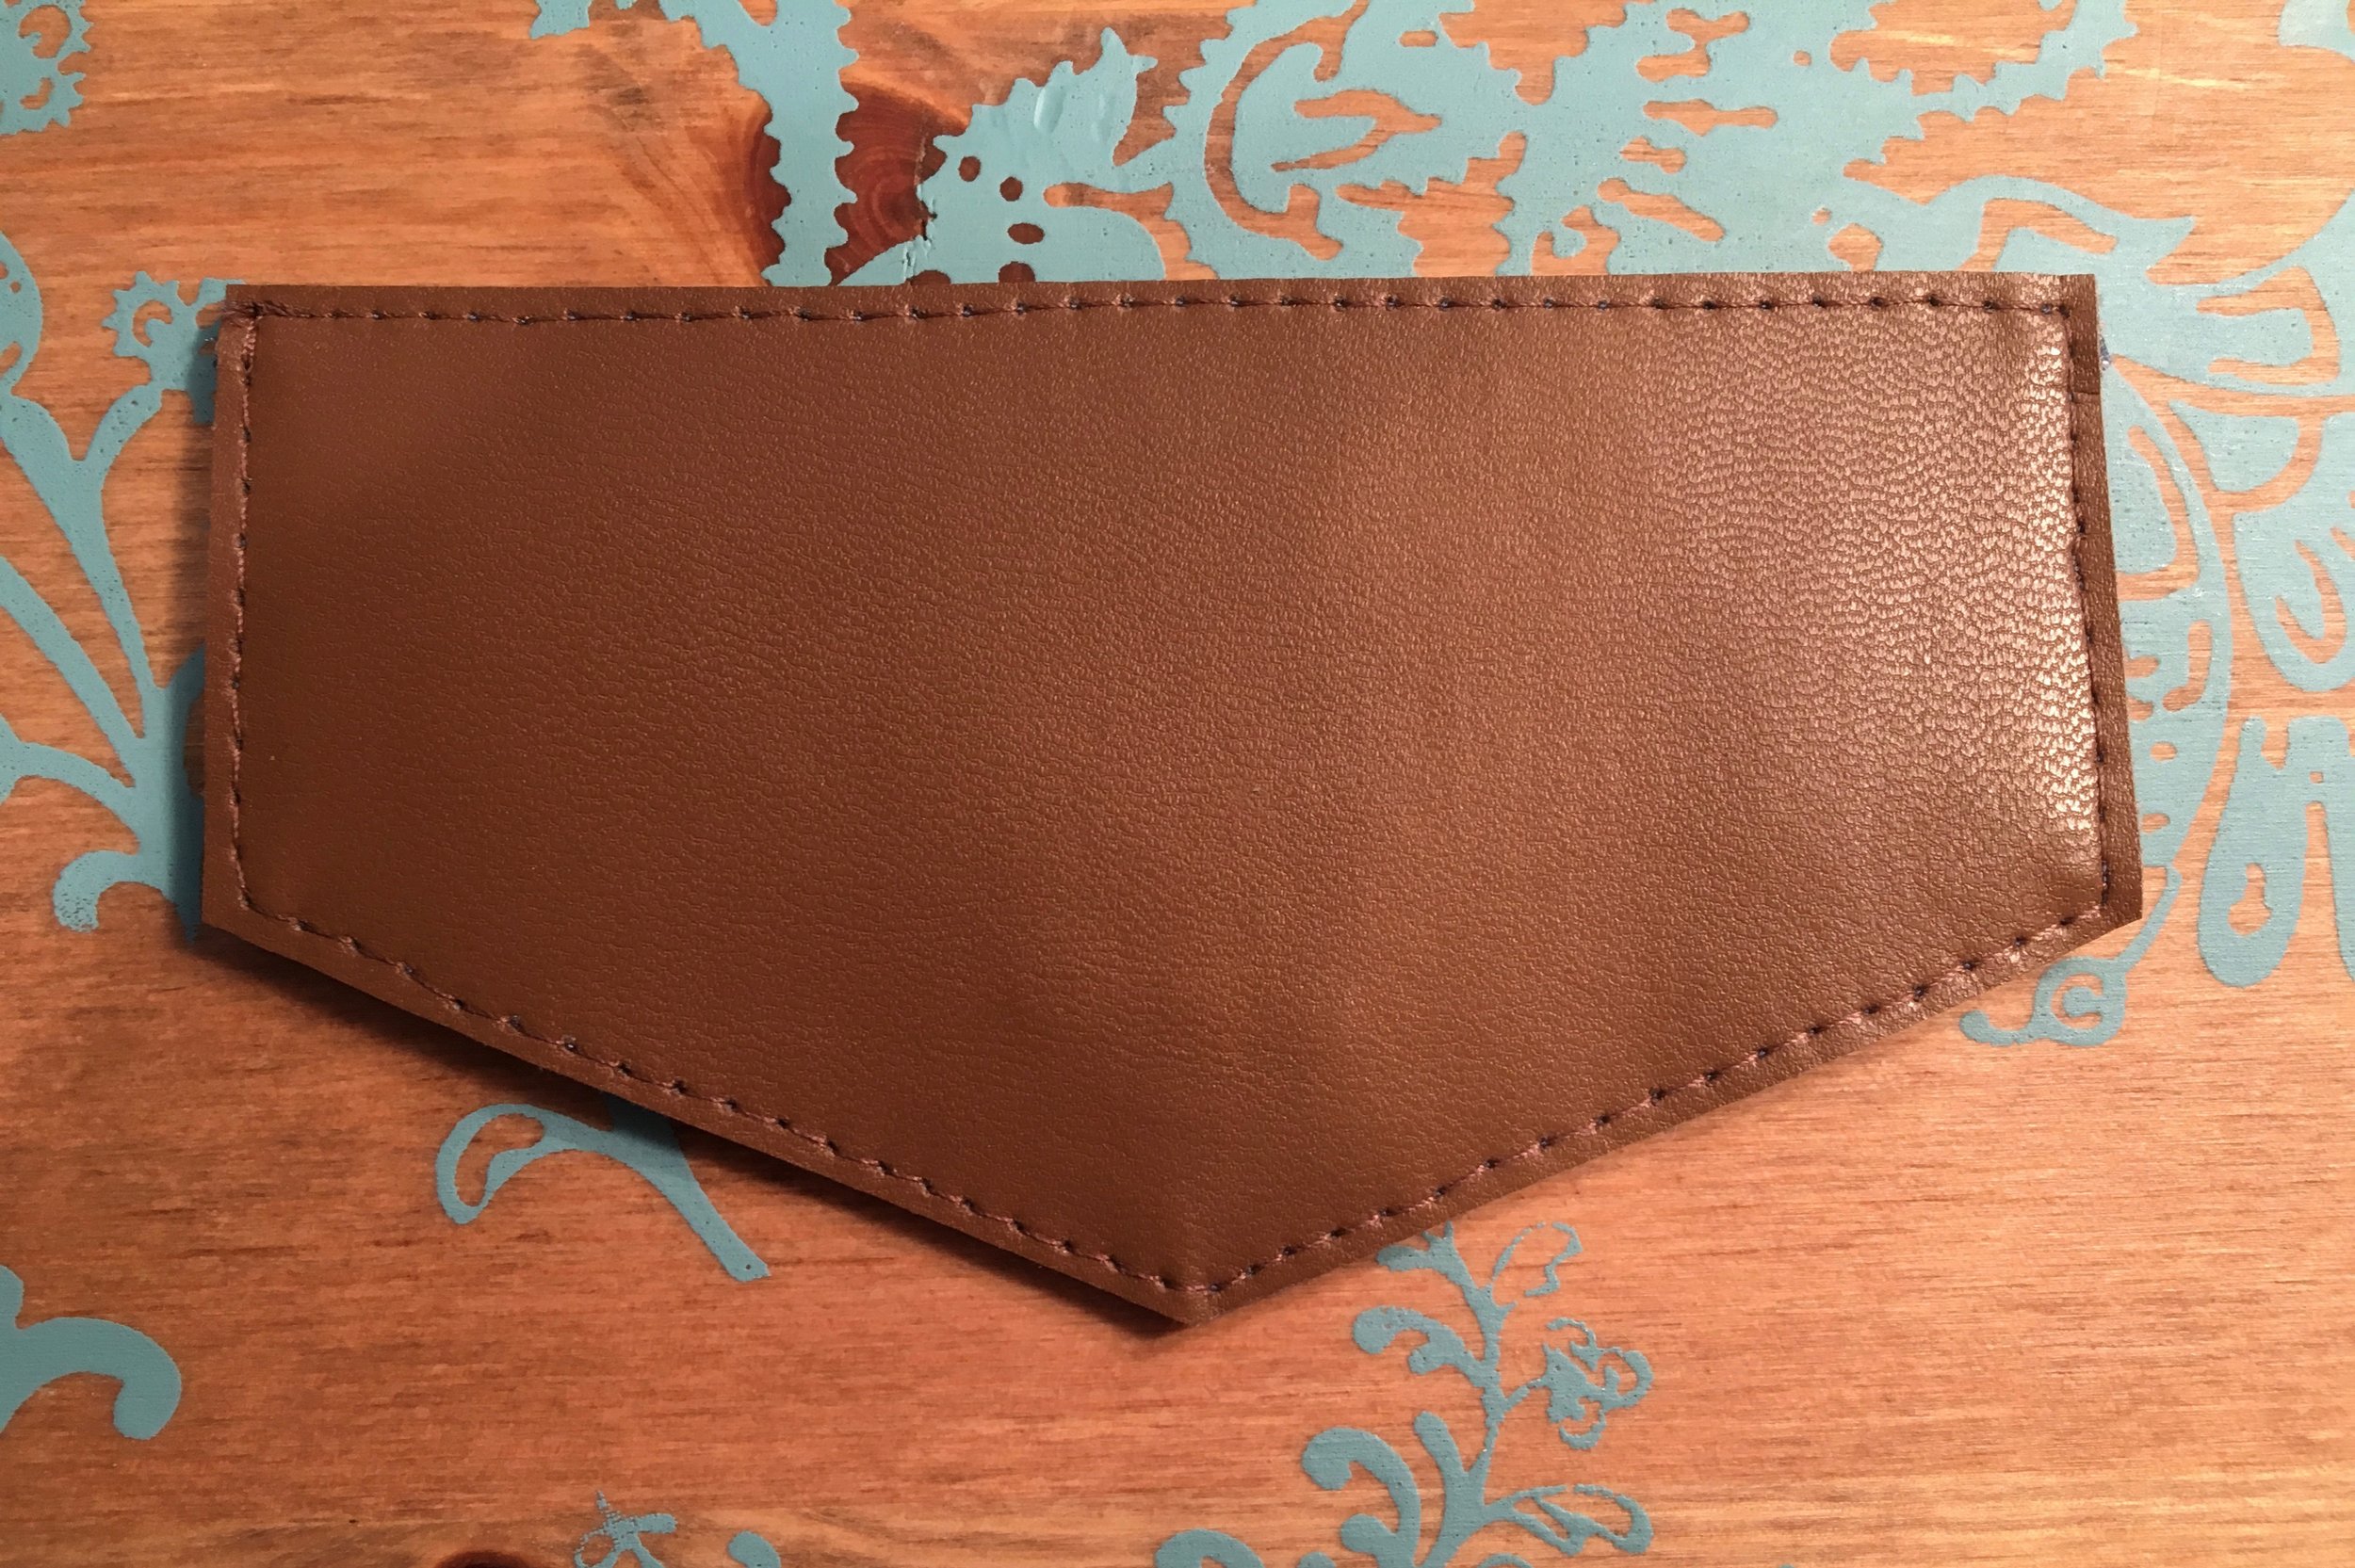
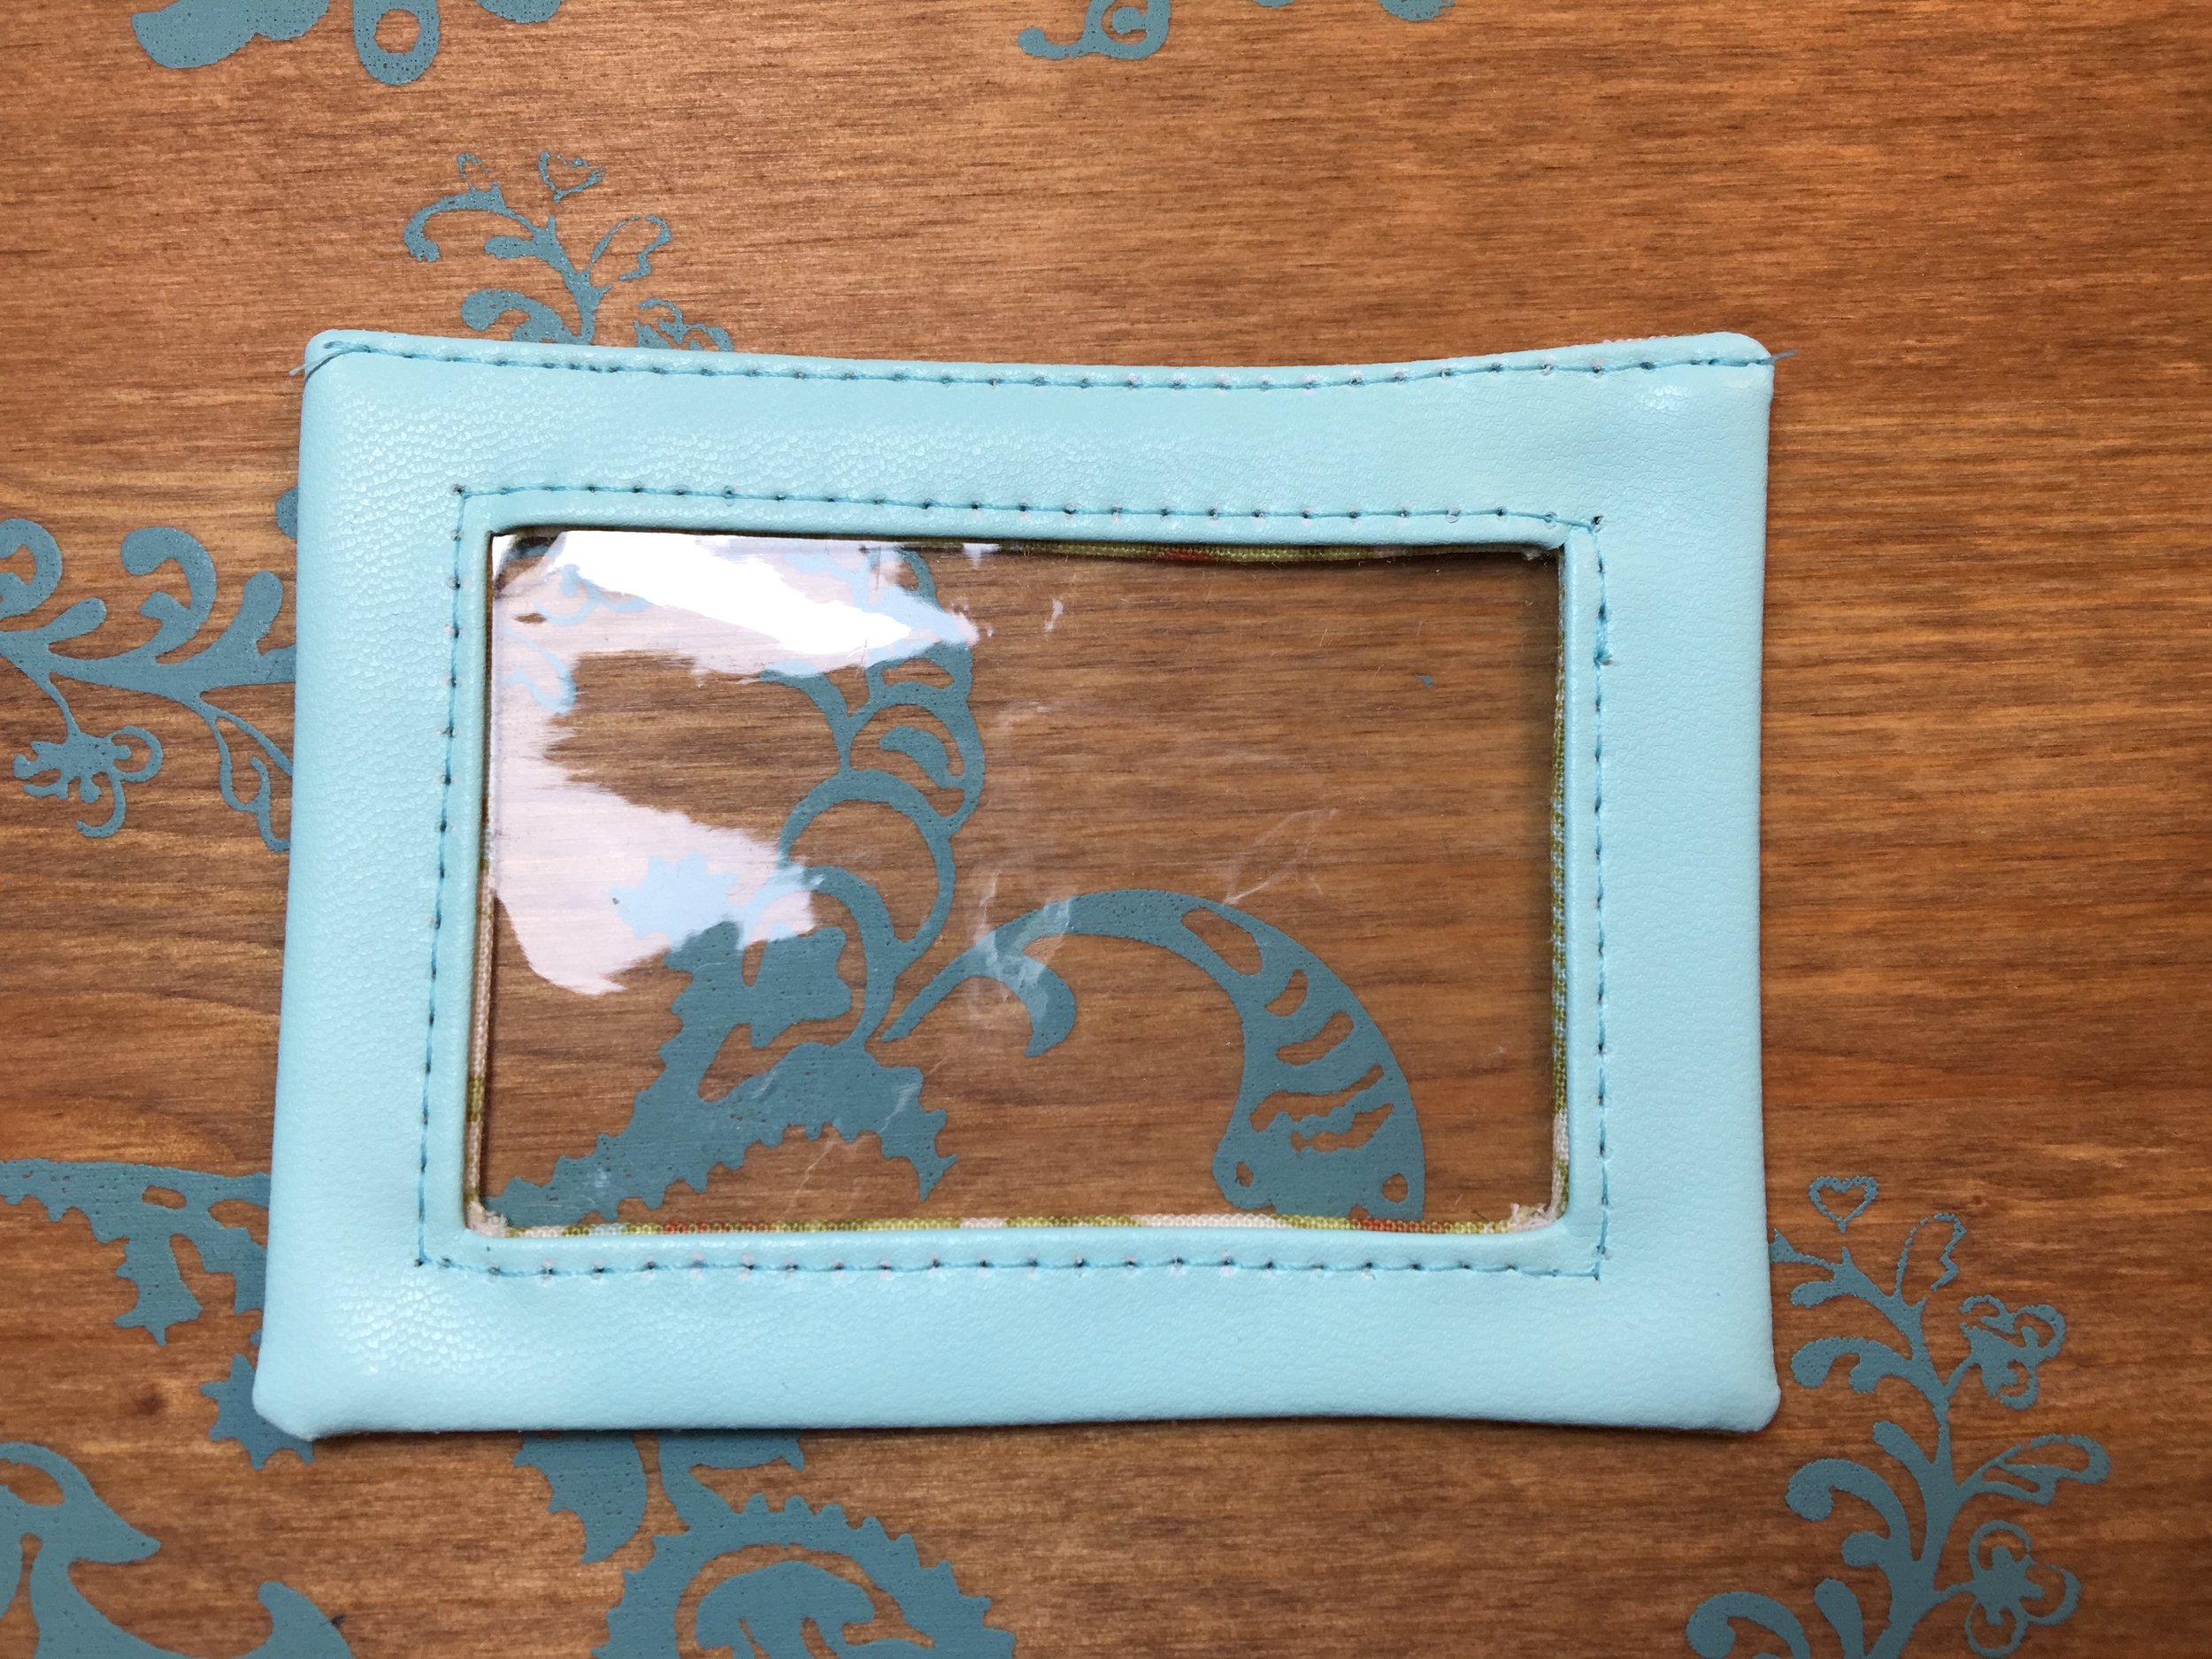
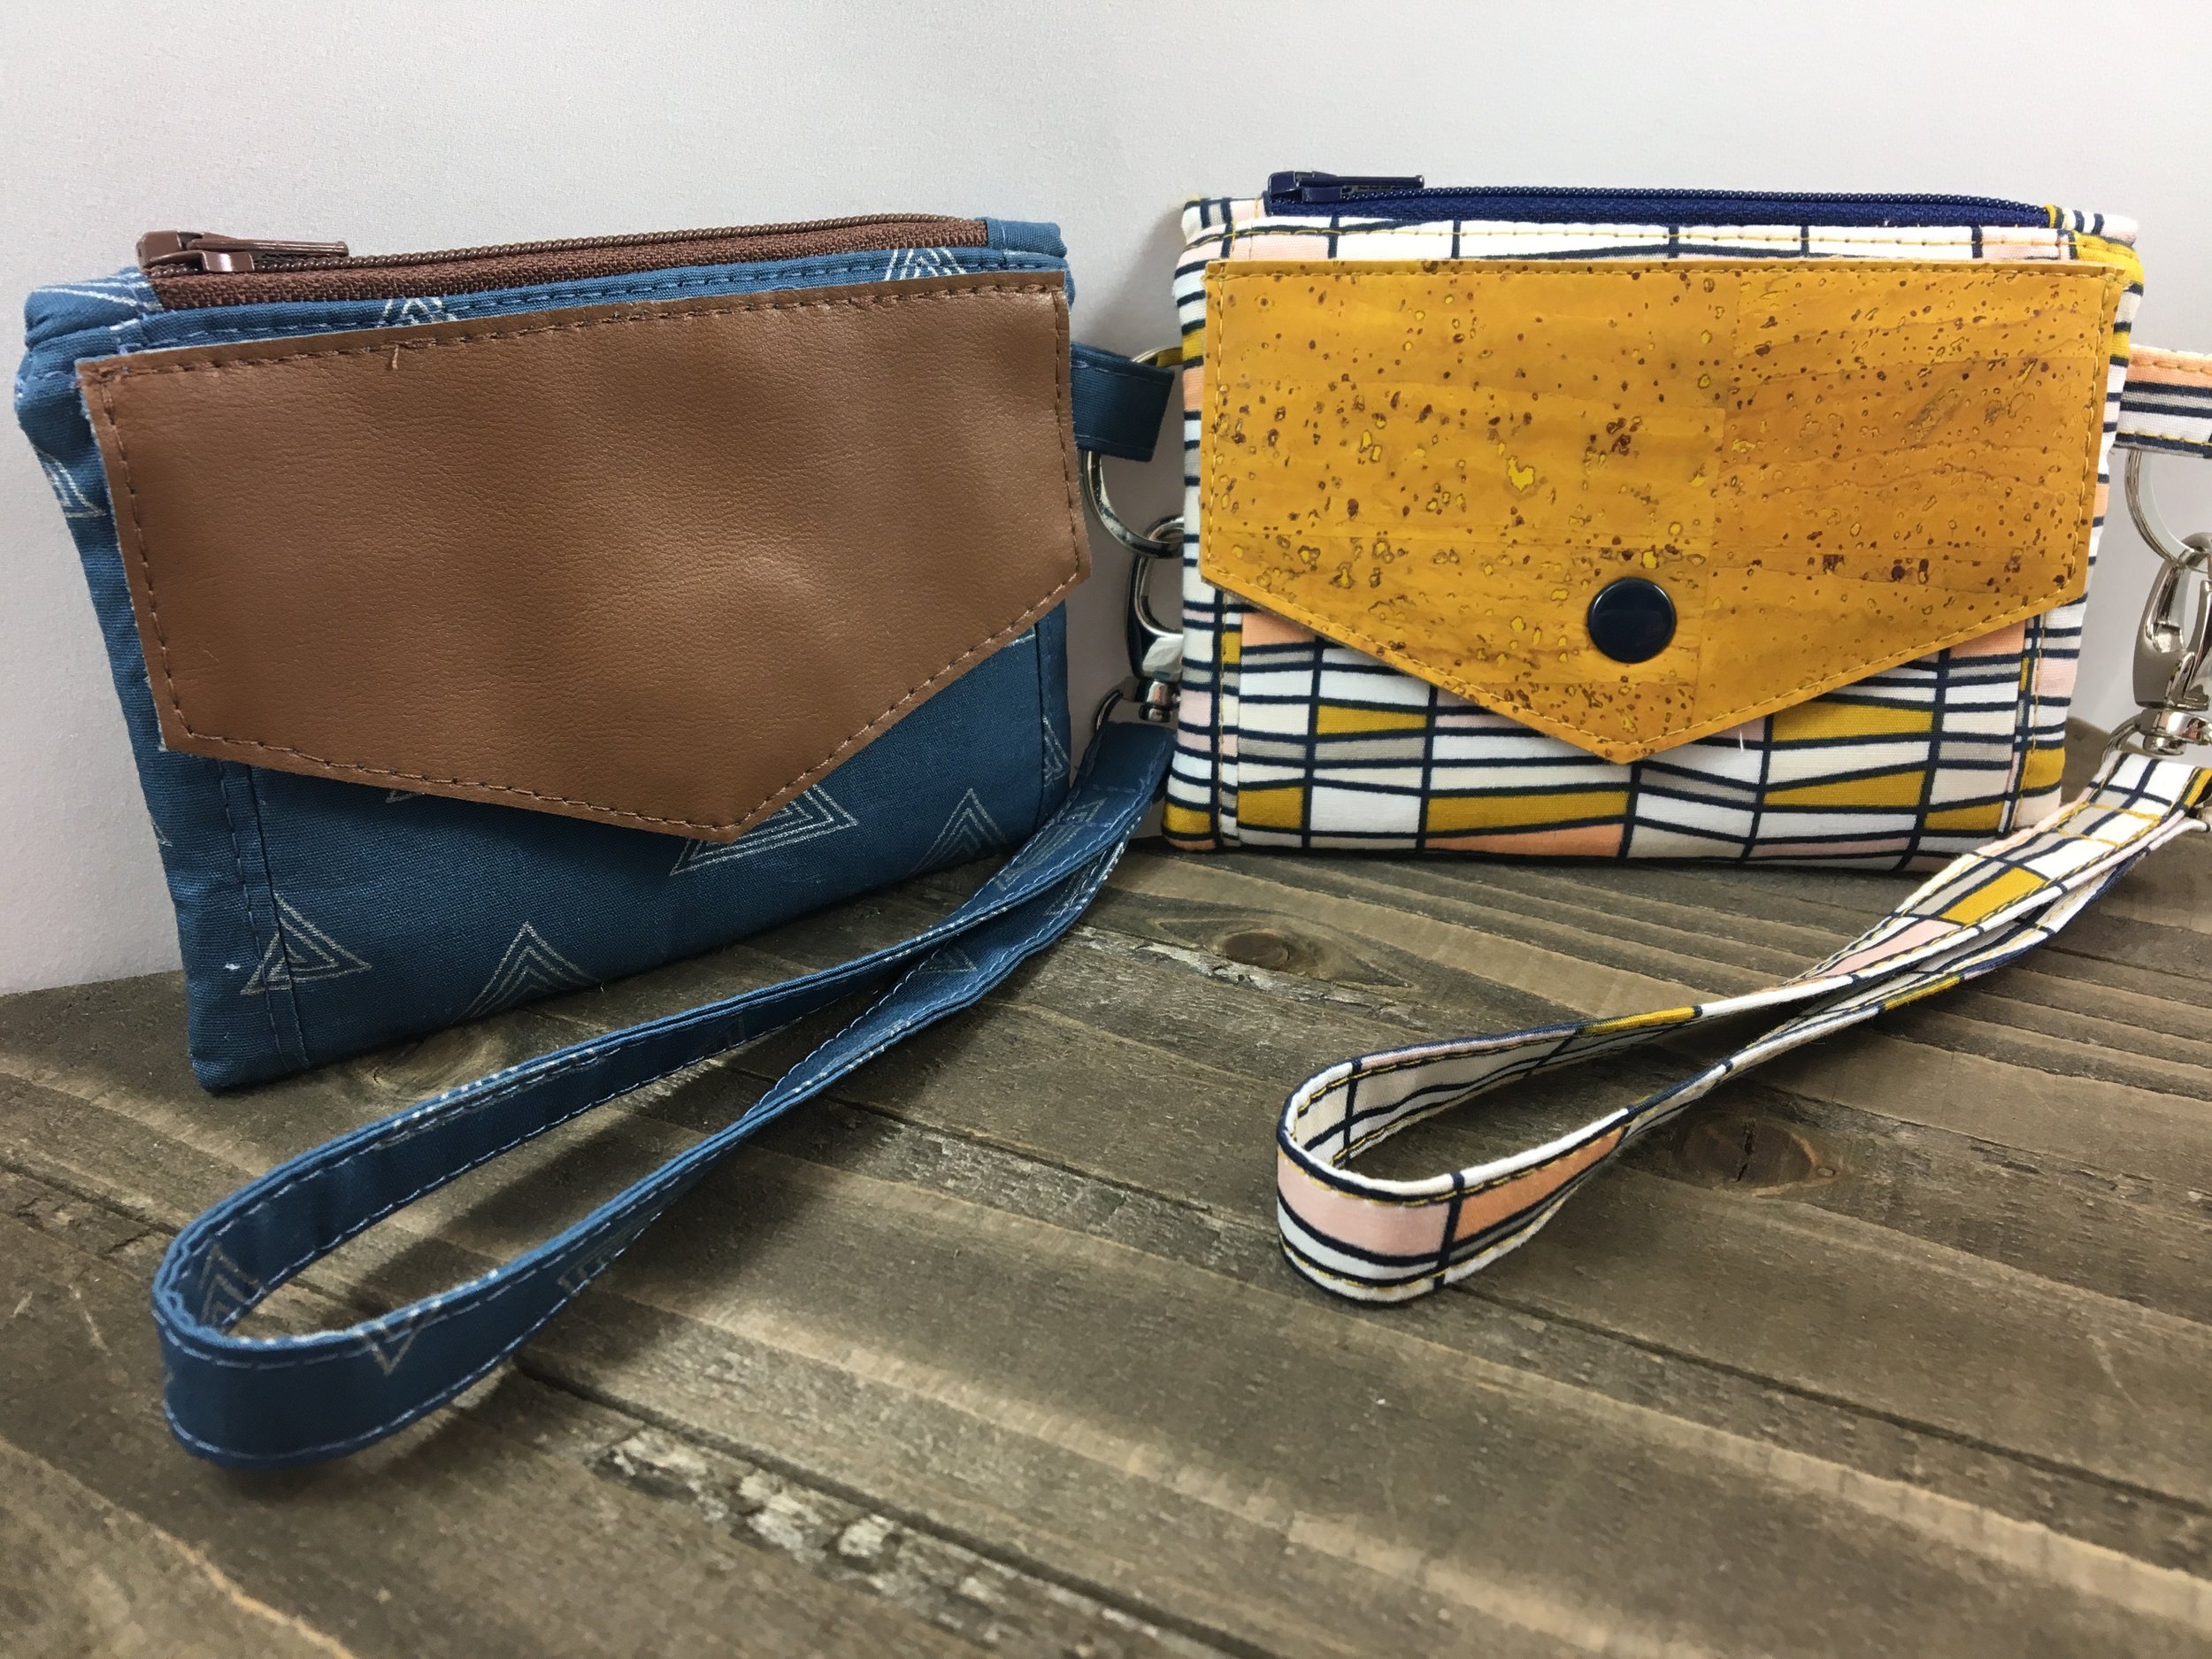
So I will have to say, the faux leather from Sew Sweetness is so thin, that I wanted to use it to make a flap for a Kristine ID Wallet following the directions in the pattern. I didn't use SF101 again, but I did add fusible fleece to the exterior piece. I also added a regular snap rather than a magnetic snap, just because I had one that matched so well. This flap went together beautifully! I had no problem with it being too bulky at all. The only variation that I made was to use double sided tape along the top edges to keep the them folded down as I sewed the flap together as I followed the directions in the pattern. I really love the way it turned out!

So as I mentioned above, I added a regular size 16 snap to a couple of my Kristine ID Wallets. If you want to add a regular snap, add the male half of the snap after you have top-stitched around the edge of the flap since it goes through all the layers of the flap. (I use snaps from Snap Source - they have a lot of colors and their snap setting tool is awesome!)

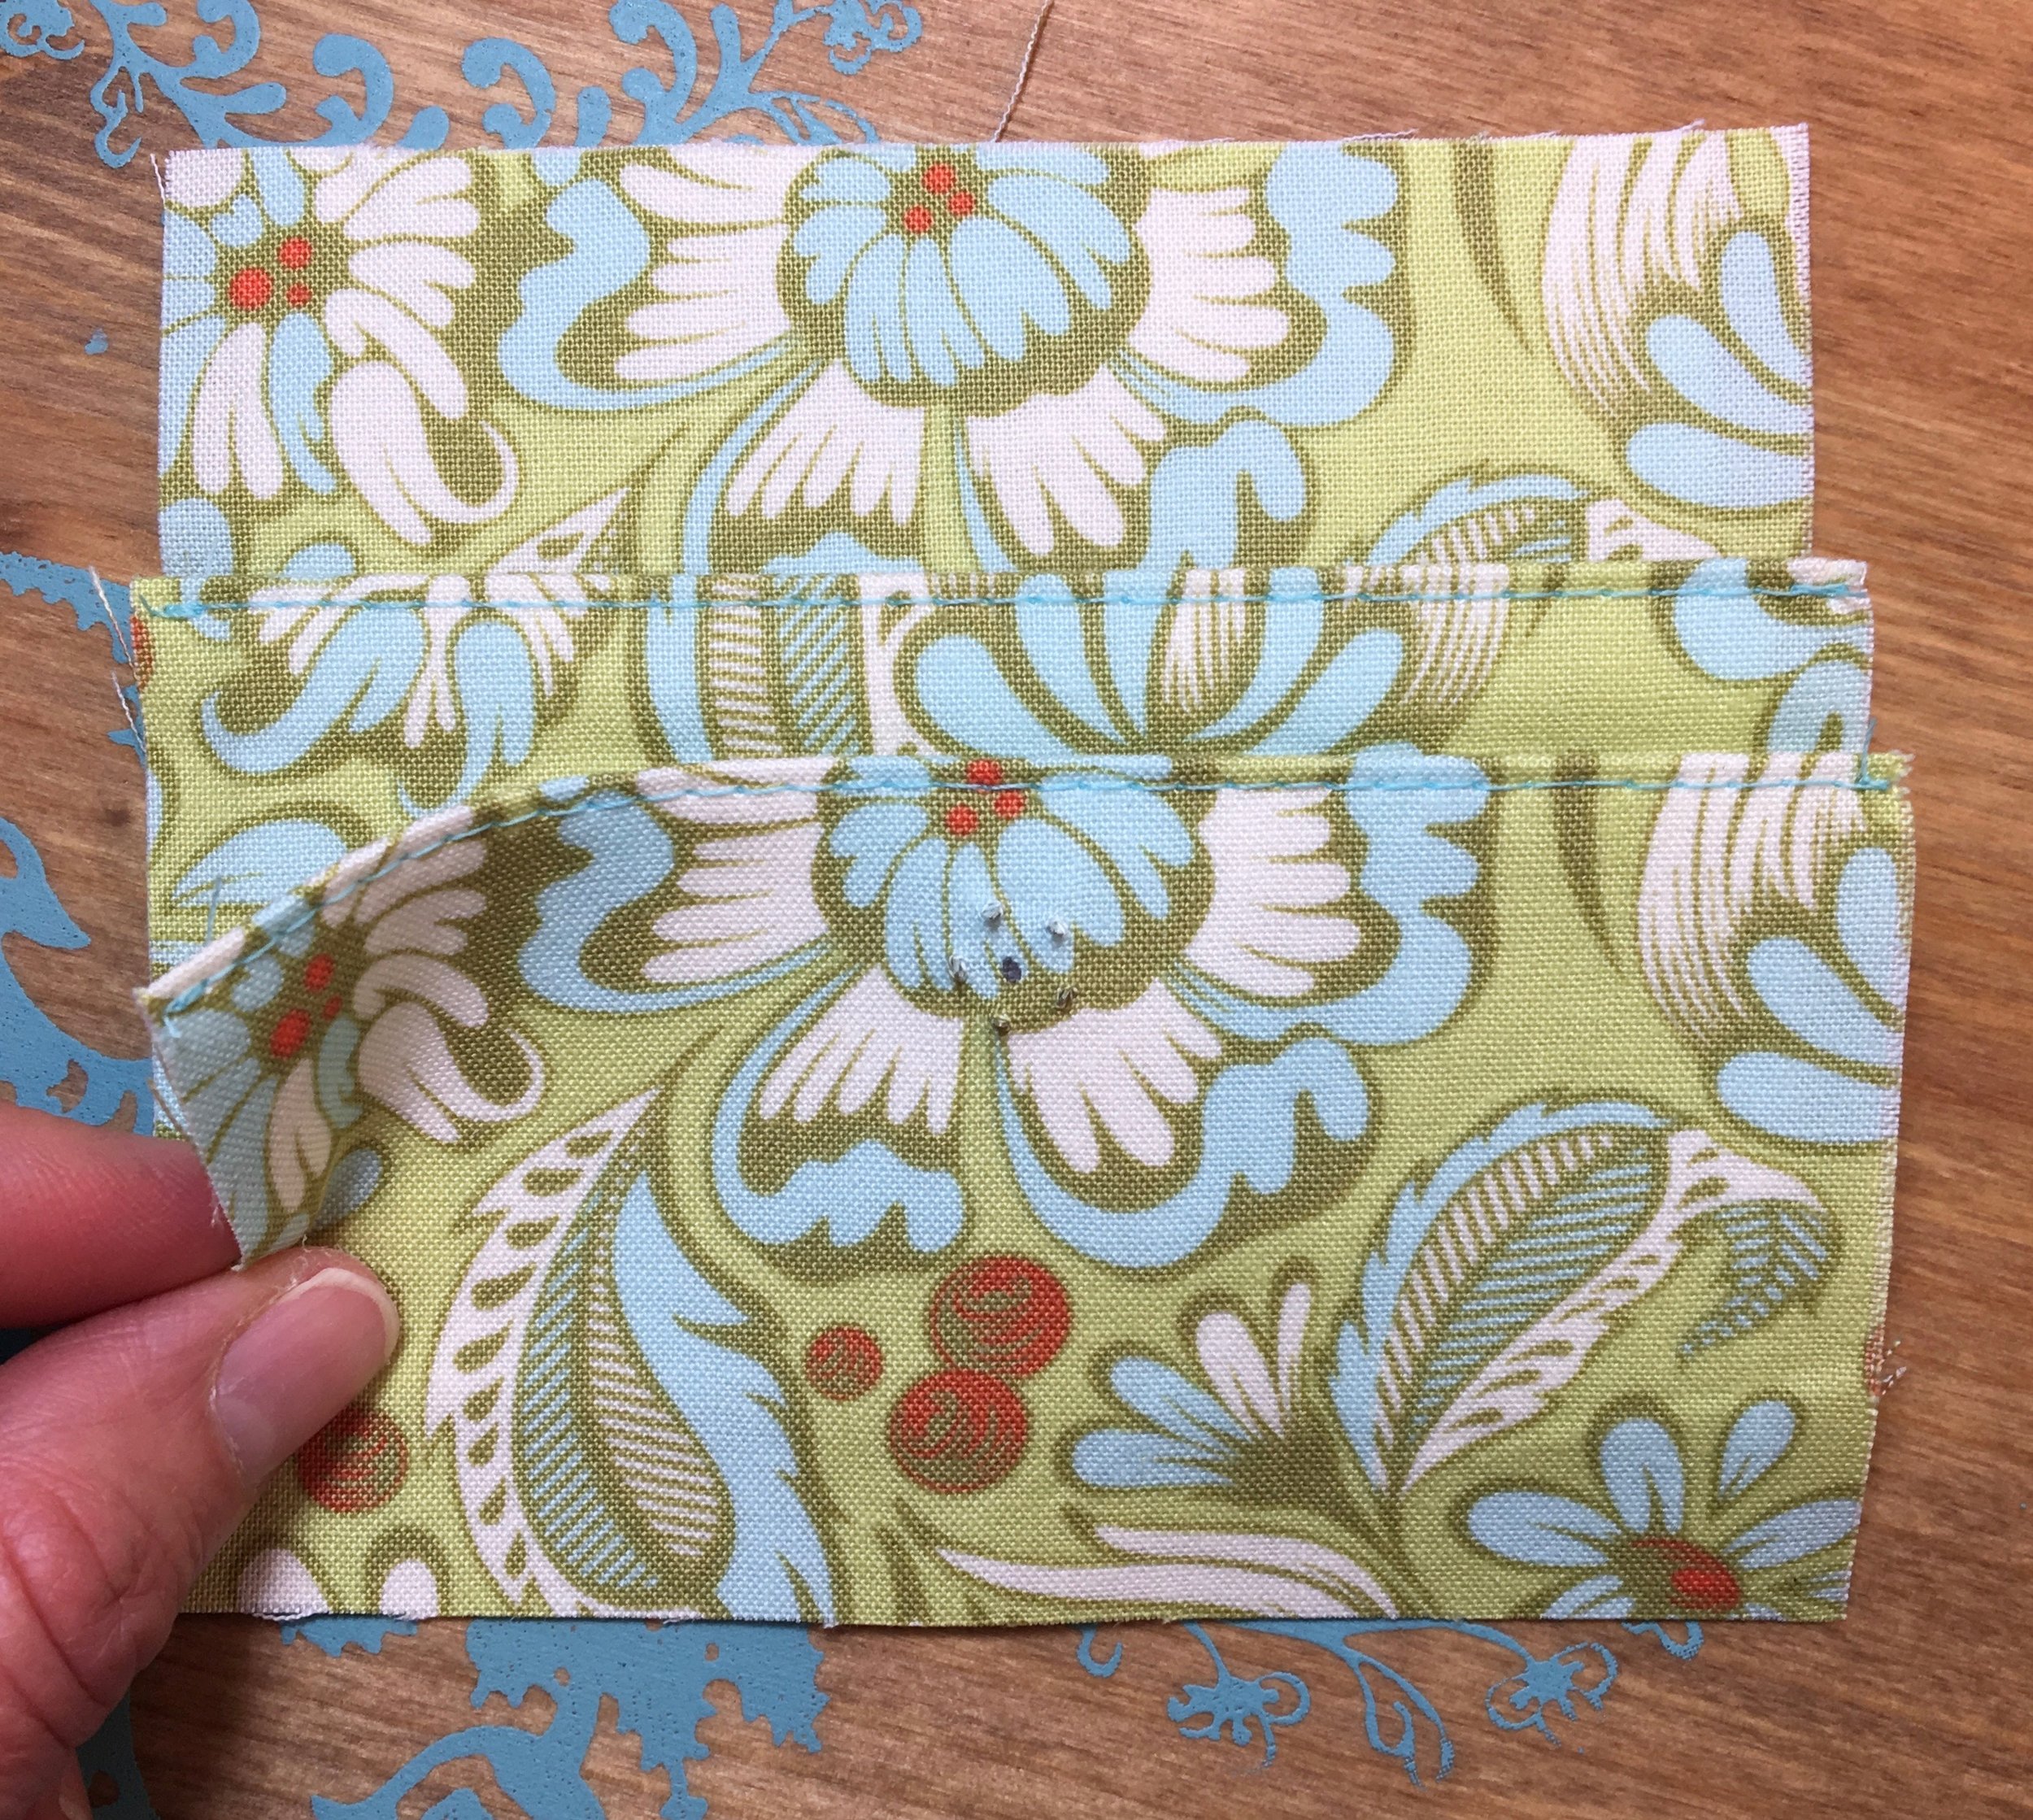
When adding the female snap to the card pockets, add it BEFORE stitching the sides of the card pockets together, it is best if the card pockets can be unfolded so that you can get the snap setter in there to do its job. Make sure you cut the card pocket piece down to size first though (the last sentence on page 8 of the pattern), otherwise your snap placement will be off.
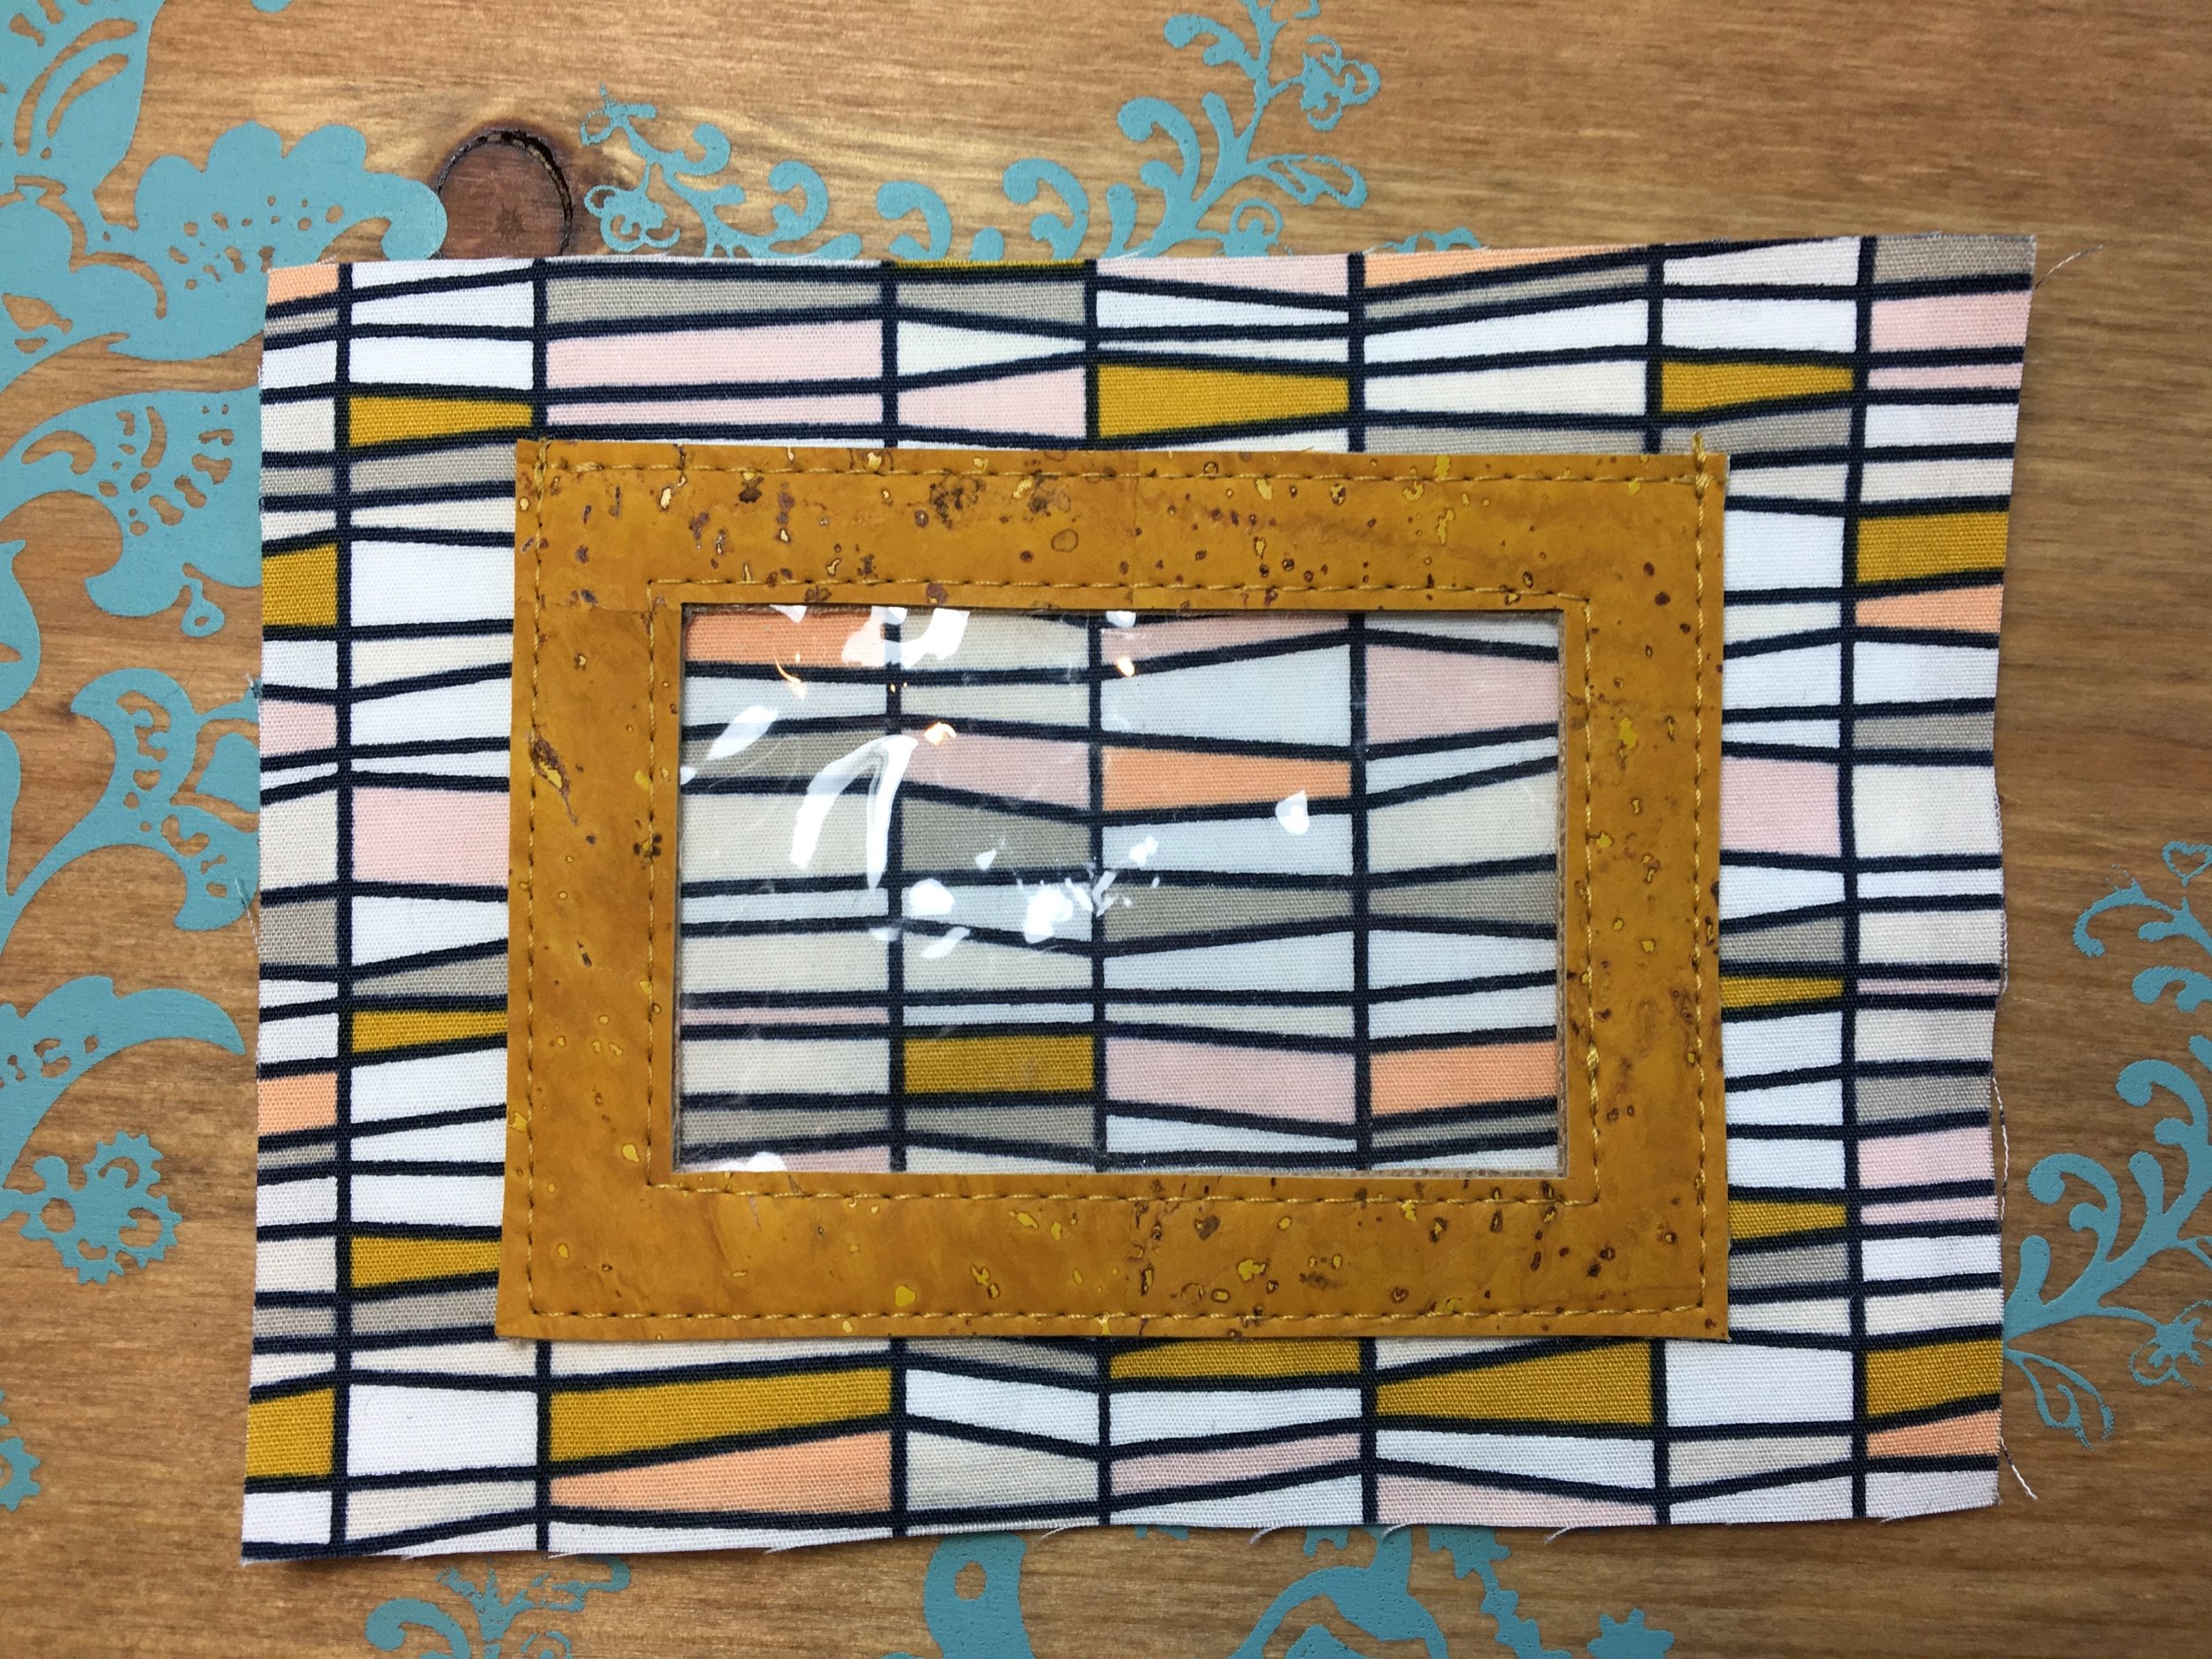
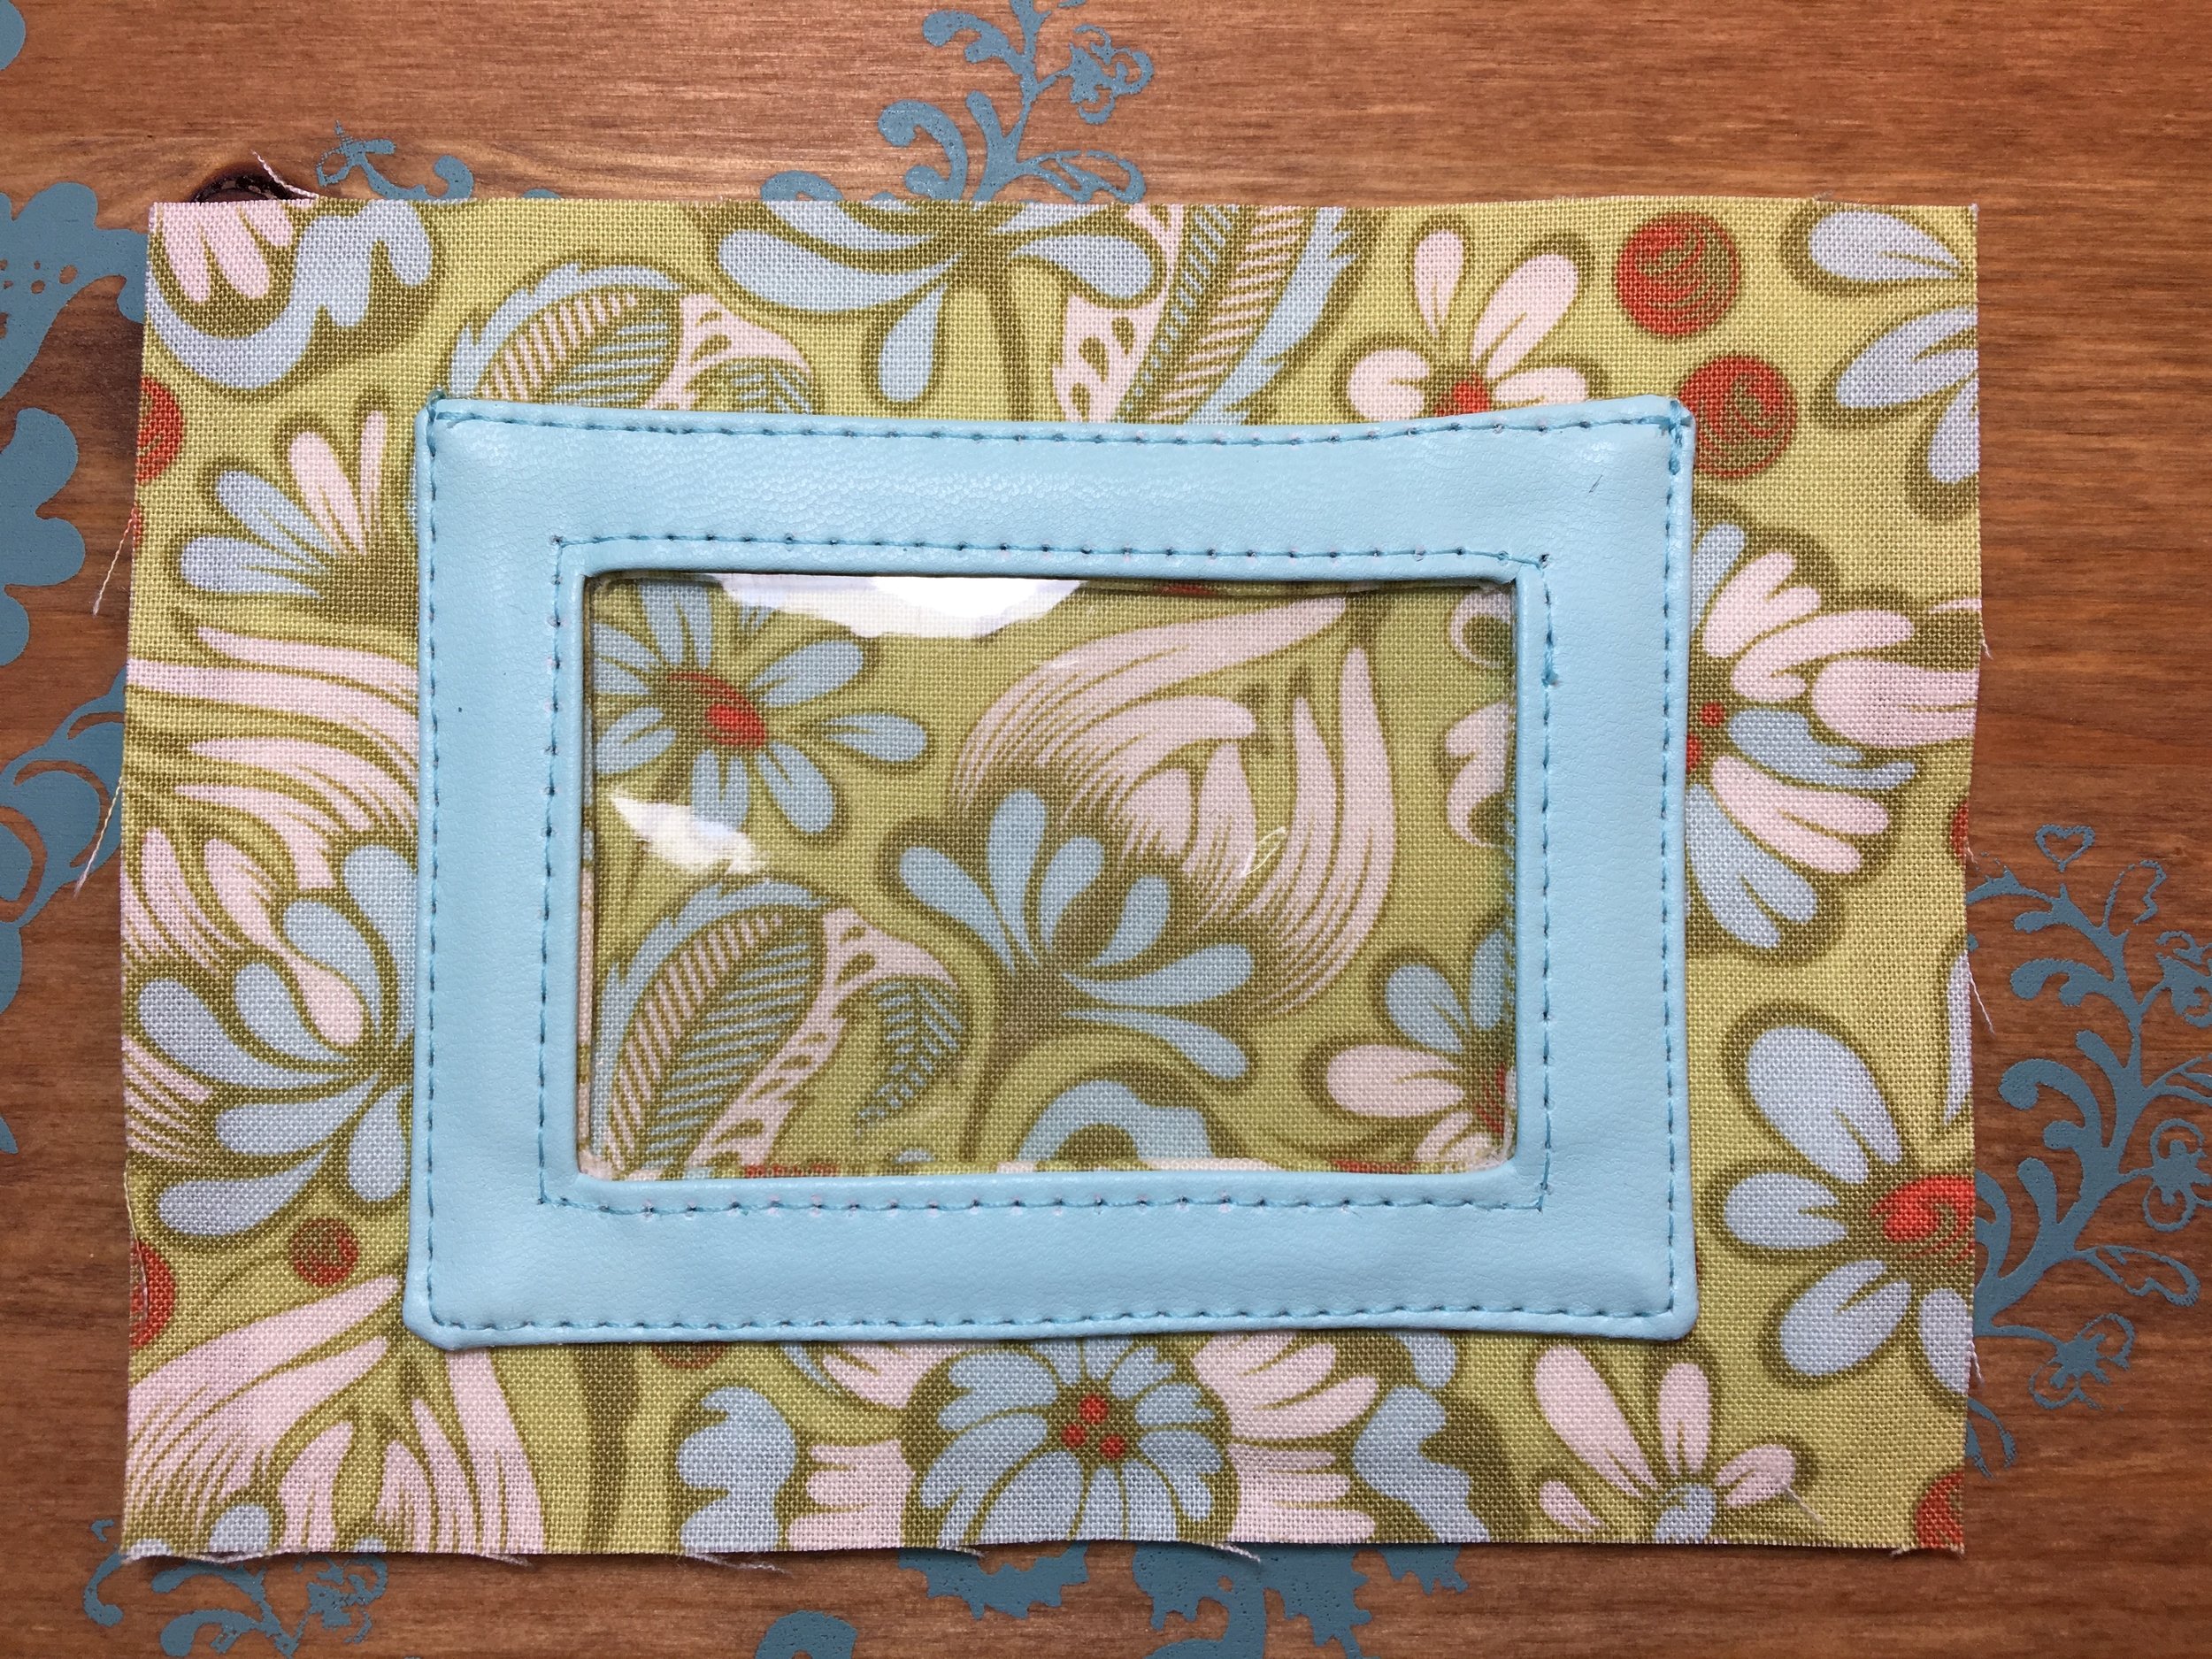
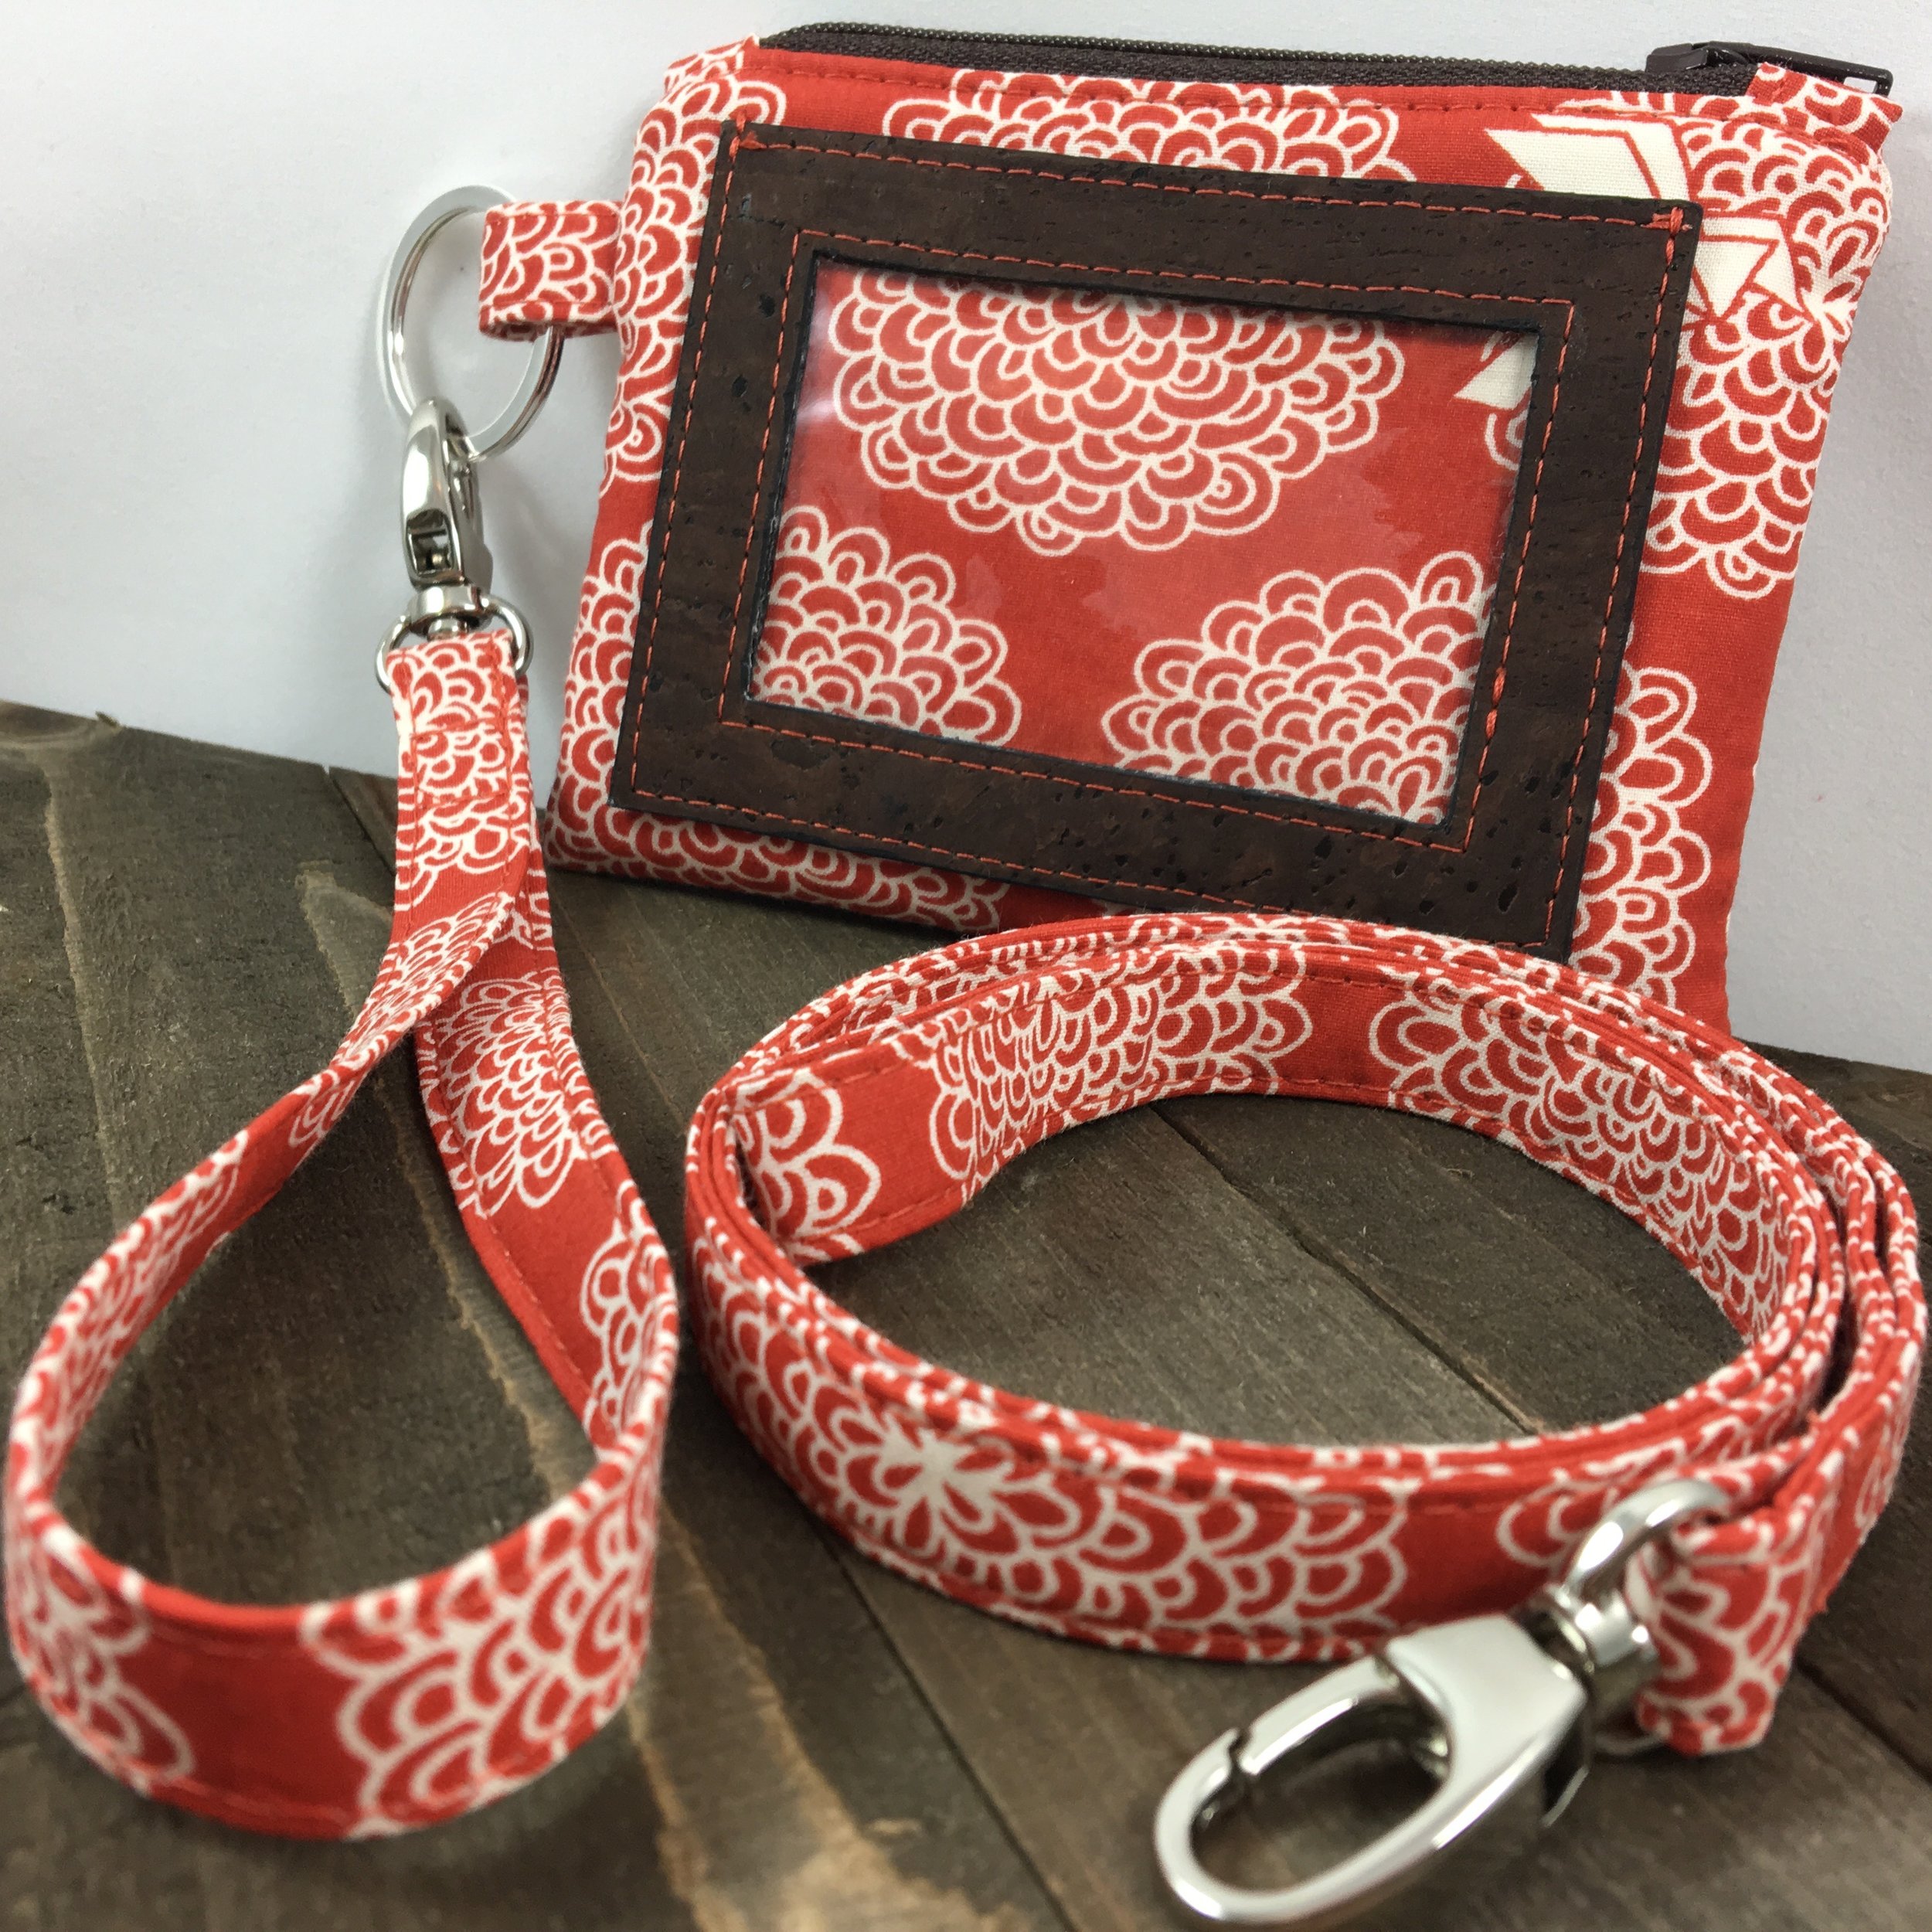
Now on to the ID Window Pocket. I don't use any interfacing for the ID Window Pocket when making it with cork or faux leather. Just as with the flap you don't need the seam allowance for the ID Window Pocket, so you will cut two pieces out of your cork or faux leather that are 3 3/4" x 2 3/4". Do not sew the pieces together until after you after you cut the center of the rectangle out for the window. To make the window, instead of folding back the center area as described in the directions for making the ID window, we will be cutting on the rectangle lines. Use the same measurements to make the rectangle in the center of each ID Window Pocket piece, just measure from the raw outer edge instead of the measuring from the stitches.

I was able to draw the rectangle for cutting out the center of the window pocket on the back of the faux leather (and on the cork) using my Frixion pen.
Once you cut out the window from each piece, place the pieces wrong sides together, matching the edges and use clips to hold them together. You may have to trim here and there to make sure the edges match up really well. Top-stitch 1/8" away from the top edge, this will make it easier to keep the two pieces together as you add the clear vinyl. Place the clear vinyl between the two pieces of cork or faux leather and sew 1/8" from the edges of the window opening. Place your ID Window Pocket on the Back piece of the Kristine ID Wallet and top-stitch 1/8" away from the sides and bottom edges of the pocket. Easy as can be!
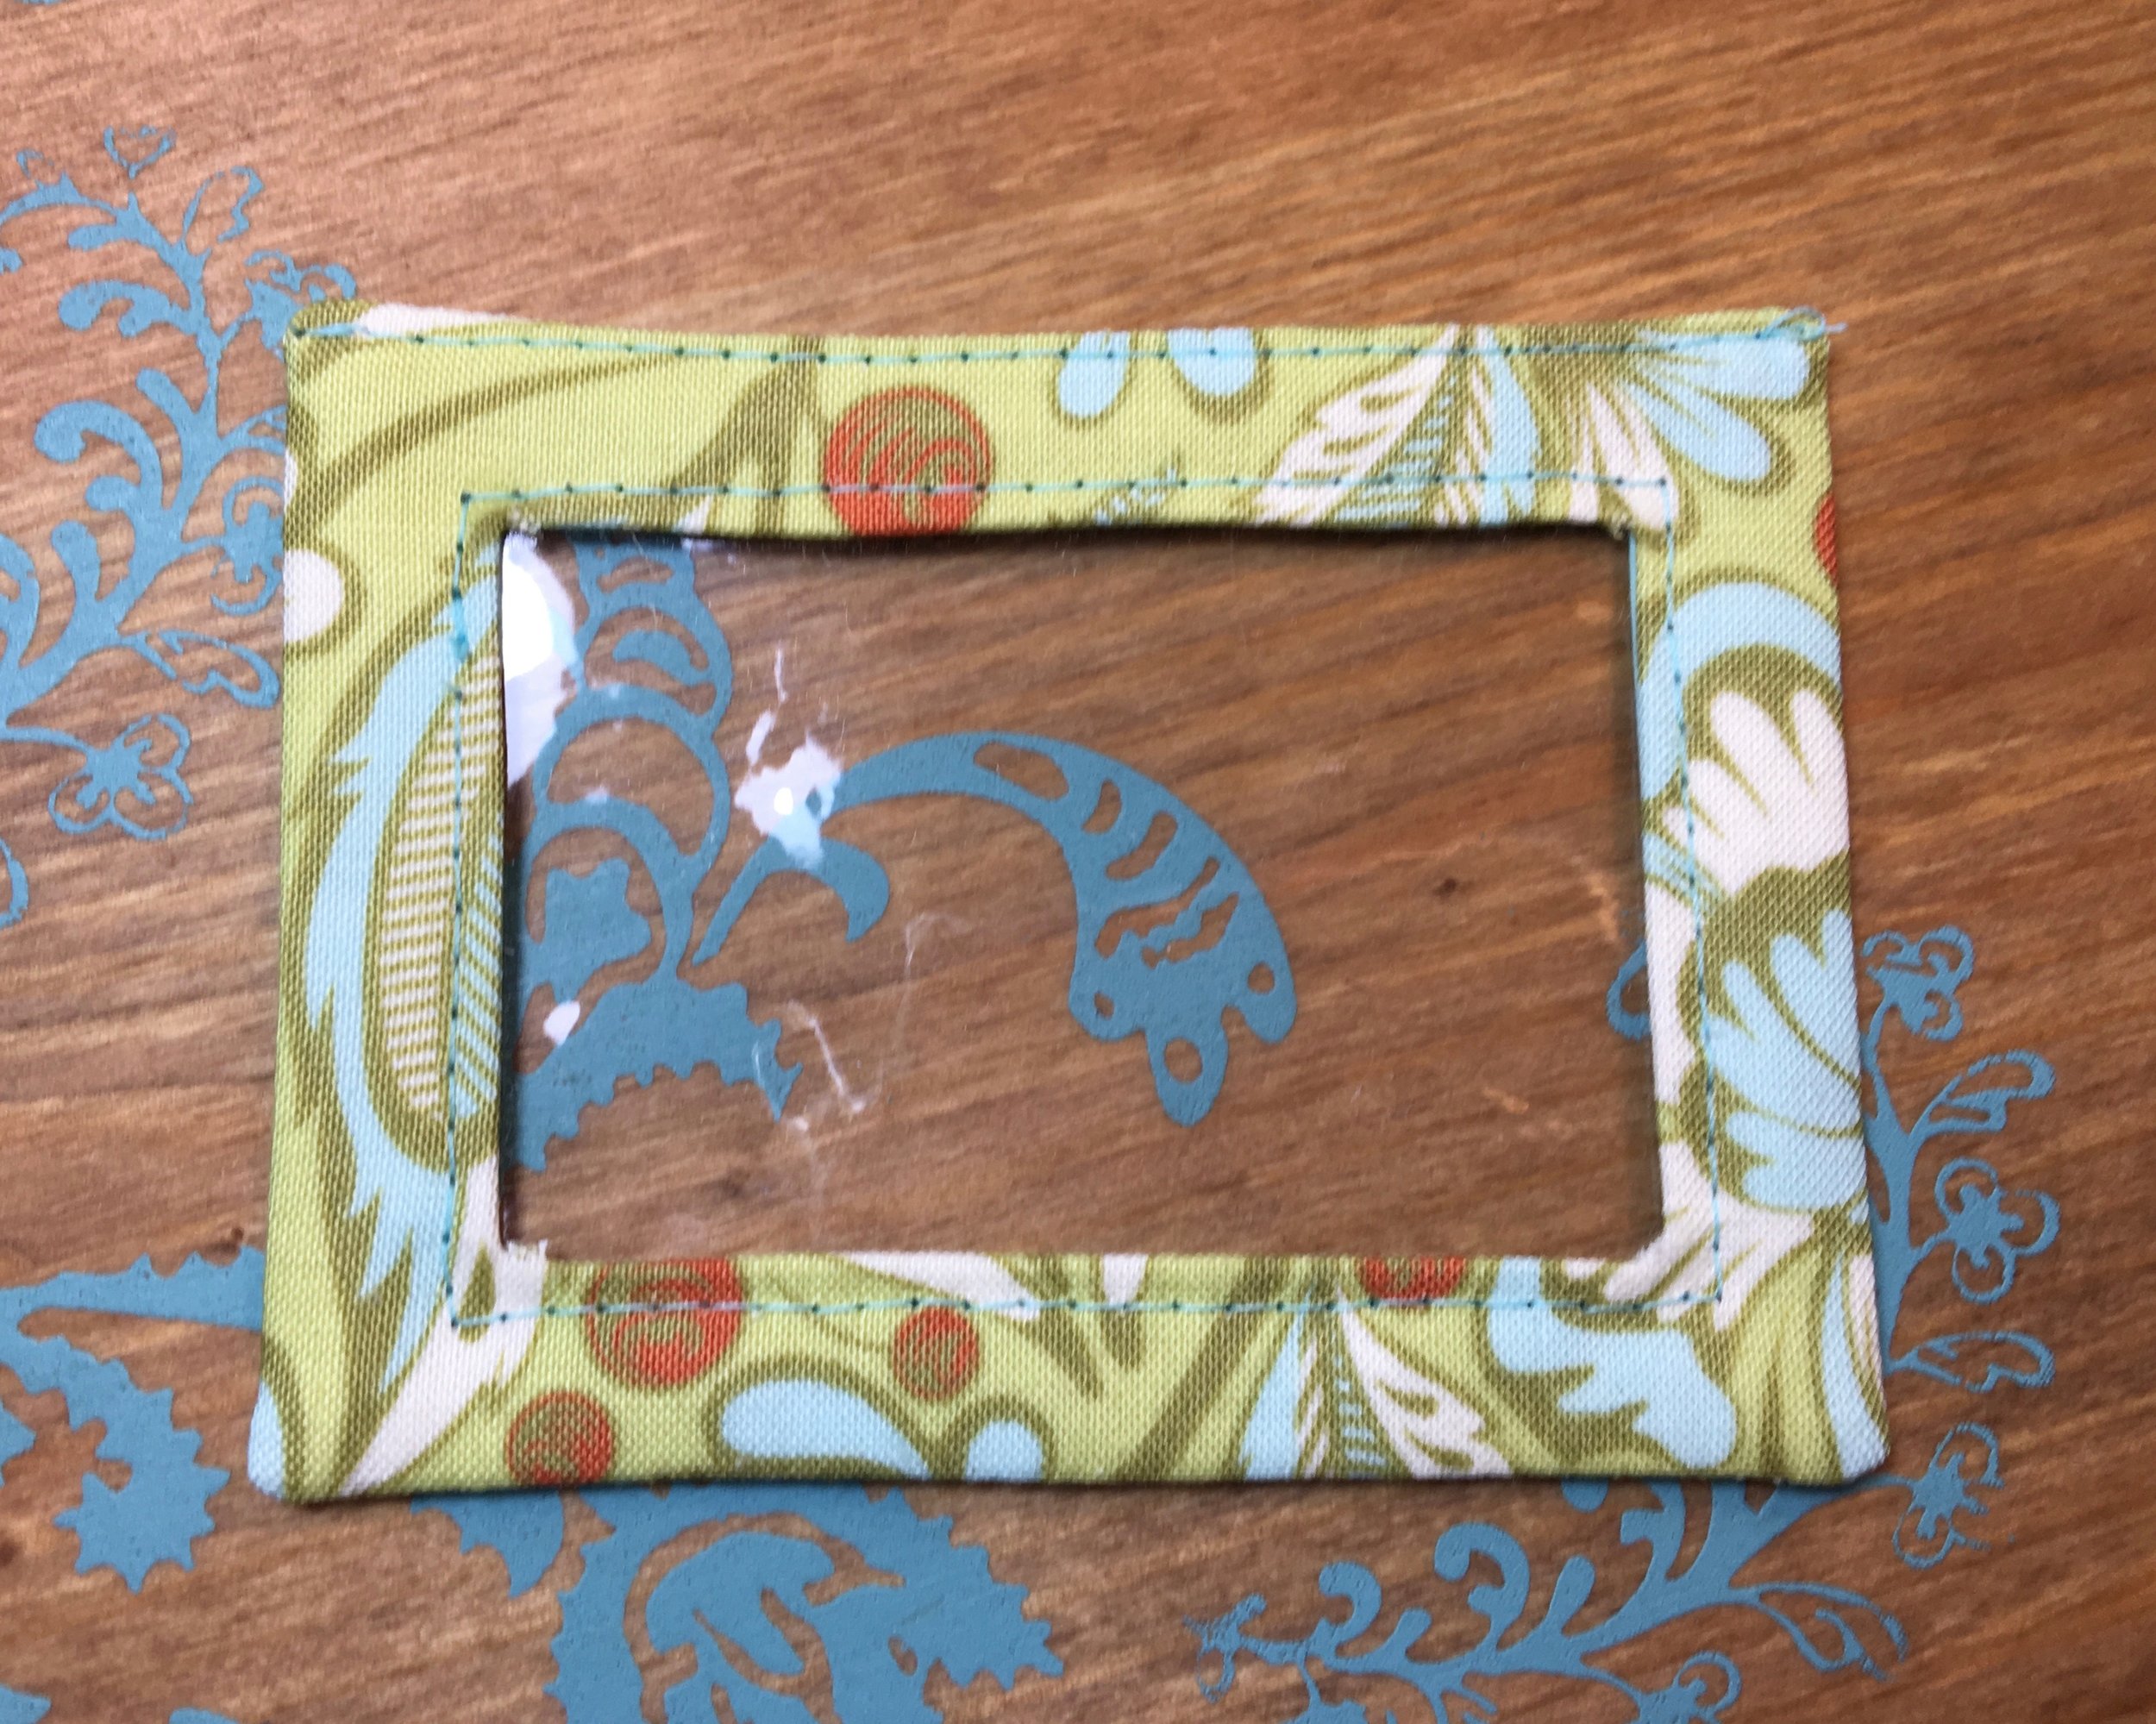
I actually made the ID Window Pocket for the Kristine ID Wallet below following the directions in the pattern - the faux leather from Sew Sweetness is so thin that it was easy to do. I used the exterior fabric for the inside of the pocket just because I felt like it, but you could use faux leather for both the exterior and lining of the ID Window Pocket. I was able to draw the rectangle and X on the back of the faux leather without any problem, but you could add SF101 to the back just for this purpose if needed.
As you can see some of the steps are easier when using cork or faux leather to make the flap and ID Window Pocket for the Kristine ID Wallet. I also think it adds a nice contrast! A couple of things to remember - you will want to test how the faux leather with your iron to make sure you can use it to fuse the fusible fleece to the back of the faux leather. I was able to fuse the fleece to the wrong side of the flap as long as the right side of the faux leather was facing down on my ironing board. If you cannot fuse the fleece in place, you could glue the fusible fleece in place! Cork seems to handle a hot iron just fine, although I would test it first just to be sure.


I am excited to see how you add cork or faux leather to your Kristine ID Wallets! Please share your creations in the Uniquely Michelle Sewing Patterns Facebook Group! If you don't have the Kristine ID Wallet pattern and would like to purchase it, you can get it (and all Uniquely Michelle patterns) for 15% off now through Sunday, August 20th. Use coupon code KIDWWEEK when purchasing from Etsy or the Uniquely Michelle Website Shop. The prices on Bluprint already have been discounted.
Join all the fun during Kristine ID Wallet Week by following Uniquely Michelle on Instagram on the Uniquely Michelle Facebook Page and join the Uniquely Michelle Sewing Patterns Facebook Group. And now for today's giveaway!!! Today's giveaway winner will receive an exclusive coupon code for 50% off on one pattern from the Uniquely Michelle Etsy Shop or from the Uniquely Michelle Website Shop. To enter, just comment on today's post (it will include like the picture above) on the Uniquely Michelle Facebook Page. Make sure you comment on the post on the Uniquely Michelle Facebook Page, if you comment on the posts on other social media sites for today, you will not be entered in the drawing for the giveaway! I will randomly draw a winner for today's giveaway at 8:00pm MDT and I will post the winners name on all social media sites soon after! Good Luck!!!