Adding An Exterior Slip Pocket to the Lindsay Wristlet
Michelle Burke
As Lindsay Wristlet Week continues, Kristina of Restitch is back today to explain how she adds an external slip pocket to the Lindsay Wristlet. I love her slightly unconventional, but very easy and awesome way of doing this and I think you will love it too! You can read more about Kristina in yesterday's blog post, but I want to give you the chance to see her beautiful work again today by going to her website, liking her Facebook page, and following her on Instagram!
And now here is Kristina . . .
Hi everyone, it's Kristina again! Today I am going to teach you how to add a slip pocket to the outside with a fun little trick!
Ya’ll this will seriously blow your mind and you’ll use it ALL the time because it looks that good! I’m going to show you how to add an exterior slip pocket with a cute trim band at the top. It’ll look like you stitched that baby on with much precision and it’ll honestly up your game on bag making! Here’s what I’m talking about:

See that orange and white polka-dot band? That’s what we are going to make!
Start off by calculating how tall you want the slip pocket to be. In most cases, you want the pocket to only take up about 75% to 80% of the side of the bag. If you do it too low, things will fall out and if you do it too high then it’ll interfere with the zipper on the top opening. In this case, my pocket was going to be 8” x 4” completed.
Here we go:
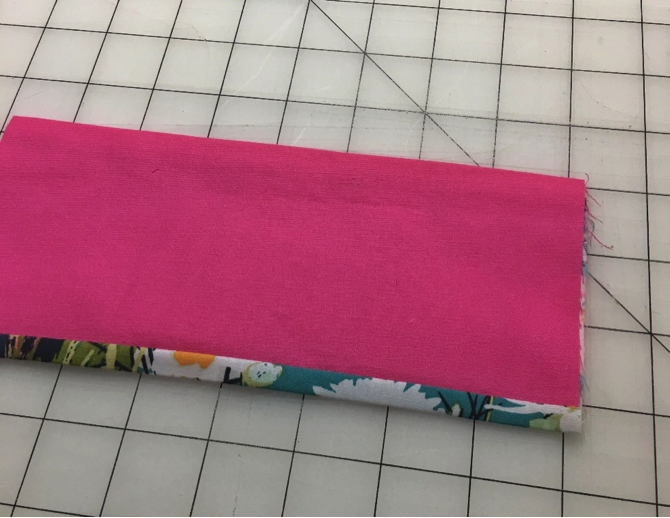
--Cut out two pieces: one of the exterior fabric and one of the lining fabric. They should both measure 8” x 4.5” - With right sides facing each other, sew one of the long side together with a ¼” seam allowance.

--Sew down the other long side with the same seam allowance. It should now look like this:

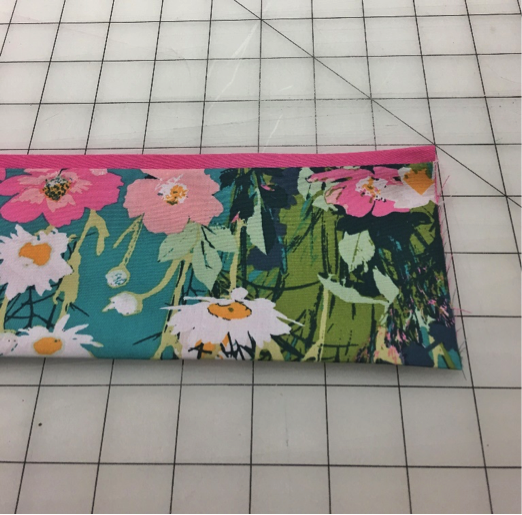
-Turn it right side out and press down your seams. Here is where it gets fun! Right side facing up, take and roll your seam allowance towards your body. So that the fabric on the underside is now showing at the top of the pocket. Like this:
Are you seeing it?!
Decide how much of a band you want on the top of your pocket and adjust accordingly. Once you’ve figured that out, give it a good press. It should look something like this:
Huzzah! Aren’t we so fancy!!
Here are a few suggestions about this pocket: I topstitch everything. I think it looks more professional and clean if you have a nice row of fat top stiches to keep everything in place. I just top stitch about a ¼ inch in with a nice long stitch.

Another thing you can do is add some sort of closure. I like snaps! But you could also use Velcro or something similar. THIS is the step you’ll have to add the closure and is the only time you’’ll be able to do this! Line up your pocket with the main body piece and mark where you want you closure to be.

-Clip/pin your exterior pocket to the exterior Main Body C. Make sure to line up your edges and make sure the band looks straight. Stitch around the pocket piece at a 1/8” seam allowance. We want to just hold it in place during assembly.

And there you have it! Assemble the rest of the bag as per the instructions!
You can use this trick on almost any sort of slip pocket and it is such a nice little touch. Here is the finished product!!


I hope I have given you some great ideas on how to make this awesome bag even better!
Thank you Michelle for having me!! I truly enjoyed sharing this with y’all!!
Thank you Kristina! It has been great learning from such a talented bag maker!
Over the next two days, I will share how you can add a cross-body strap to the Lindsay Wristlet!
Today is the last day to enter the giveaway - I will draw names at 7:00pm (MDT) for three lucky winners to receive a Lindsay Wristlet pattern! Details on the giveaway and the Uniquely Michelle sale are in Tuesday's blog post!
Sign up to receive email newsletters from Uniquely Michelle: