Kristine ID Wallet Week - Making a classy Kristine ID Wallet
Michelle Burke
I will start day 3 of Kristine ID Wallet Week by announcing the winner of yesterday's giveaway! The winner of a free Uniquely Michelle pattern is Linda Crawford! Congratulations Linda! If you would like to enter today's random drawing, check out the information at the end of this post!
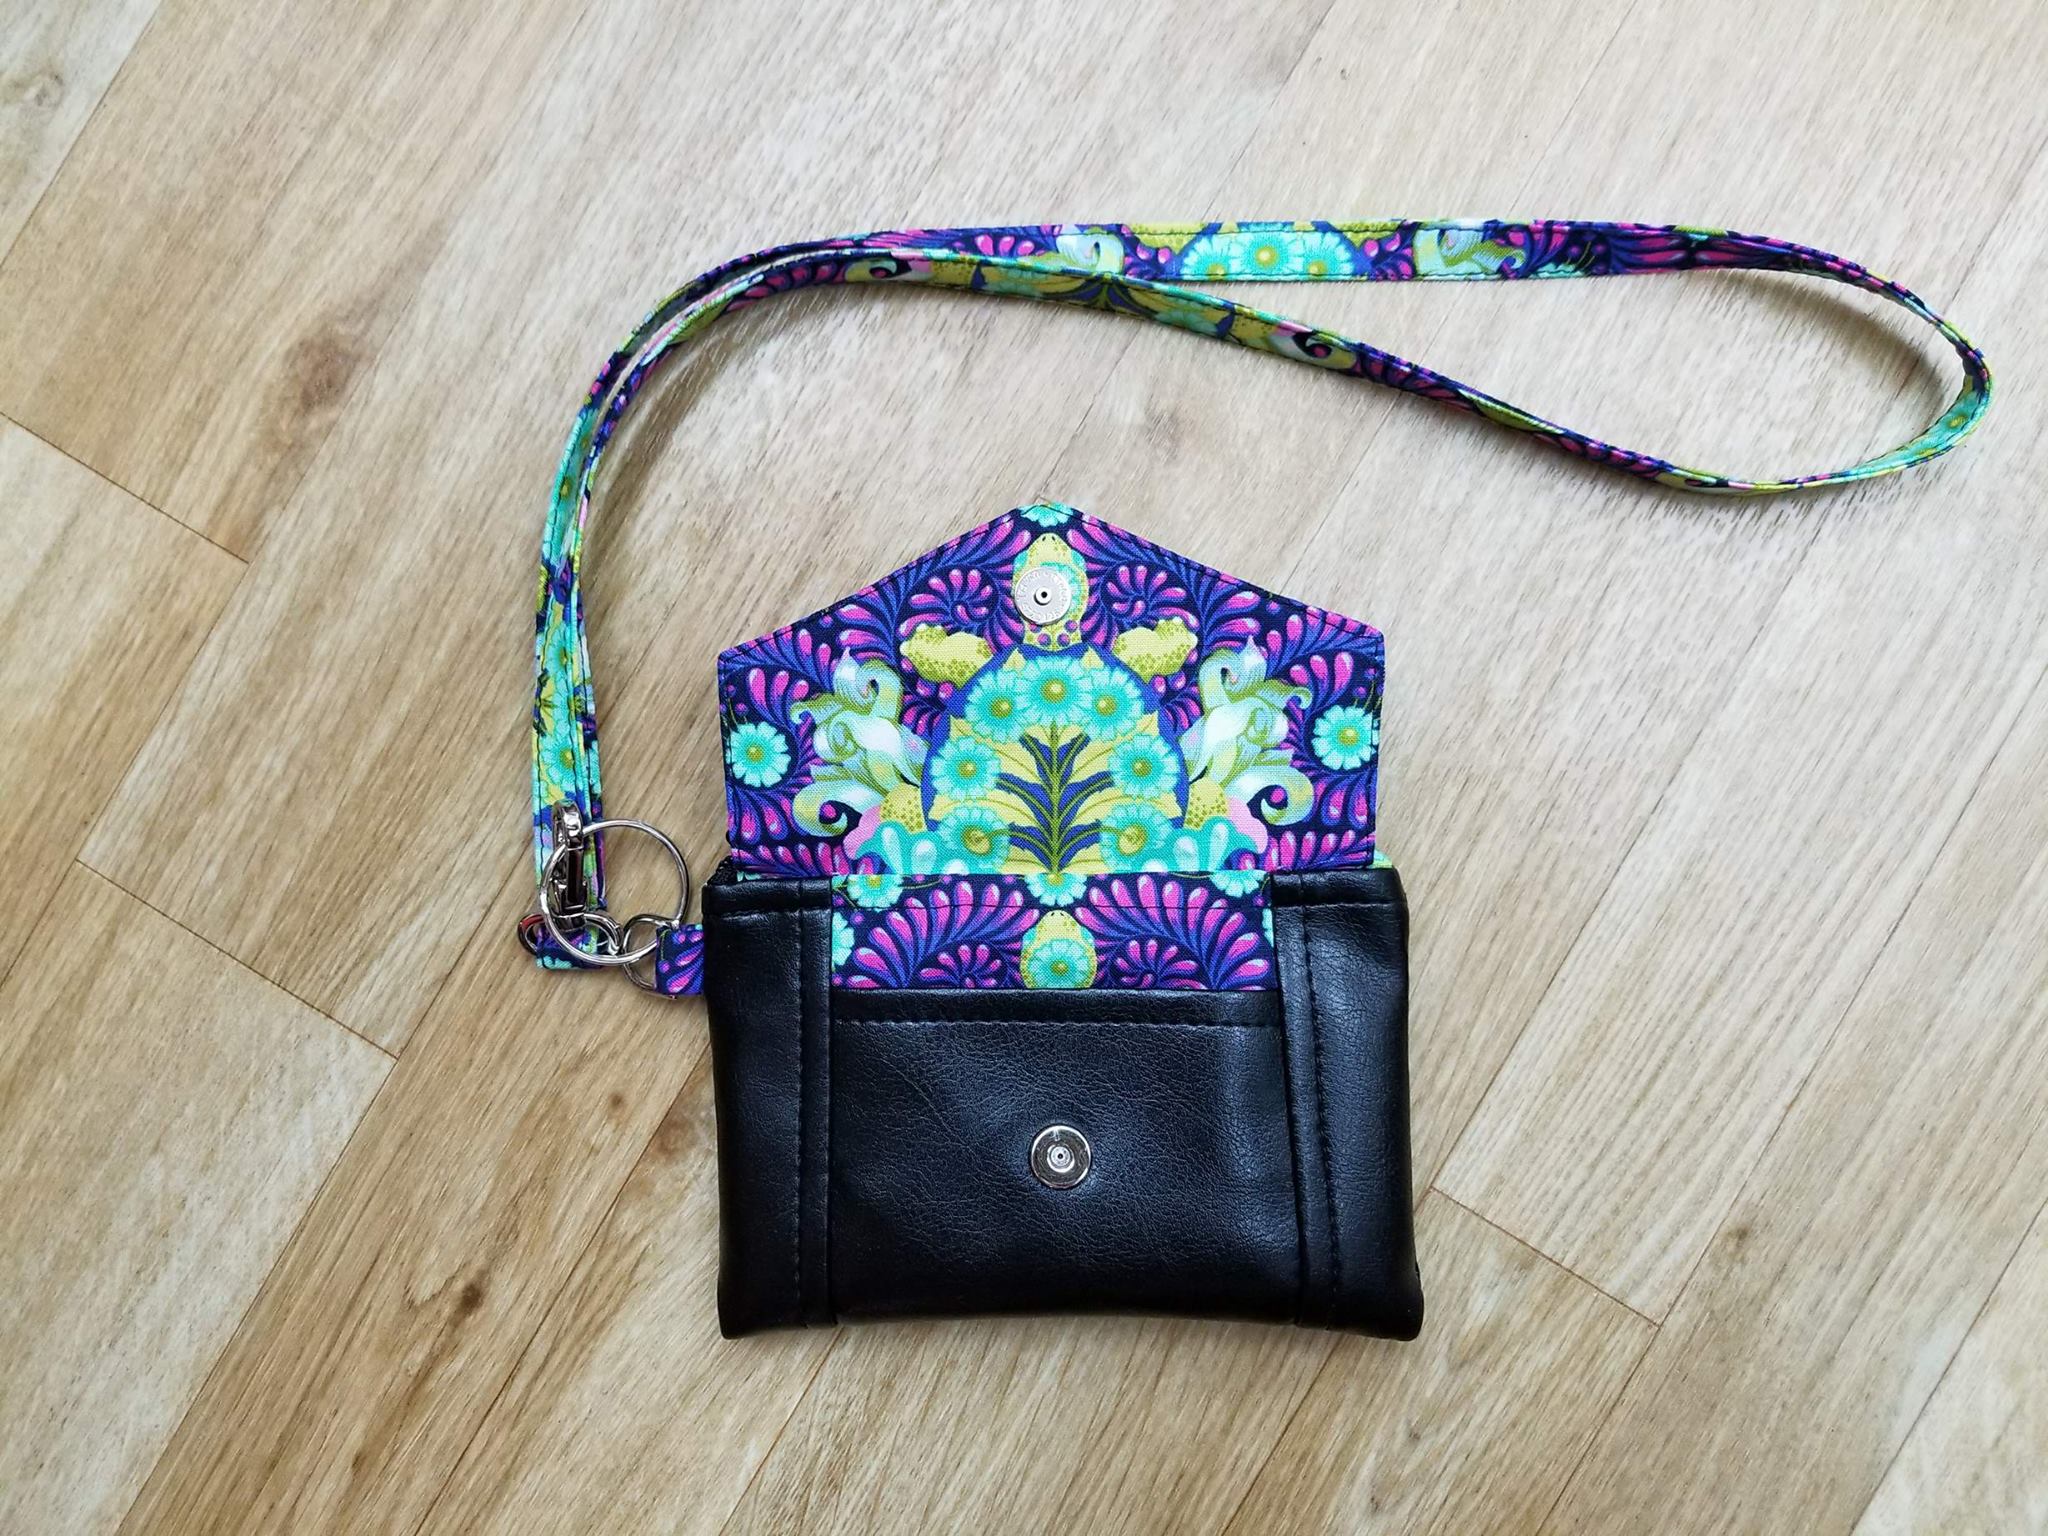
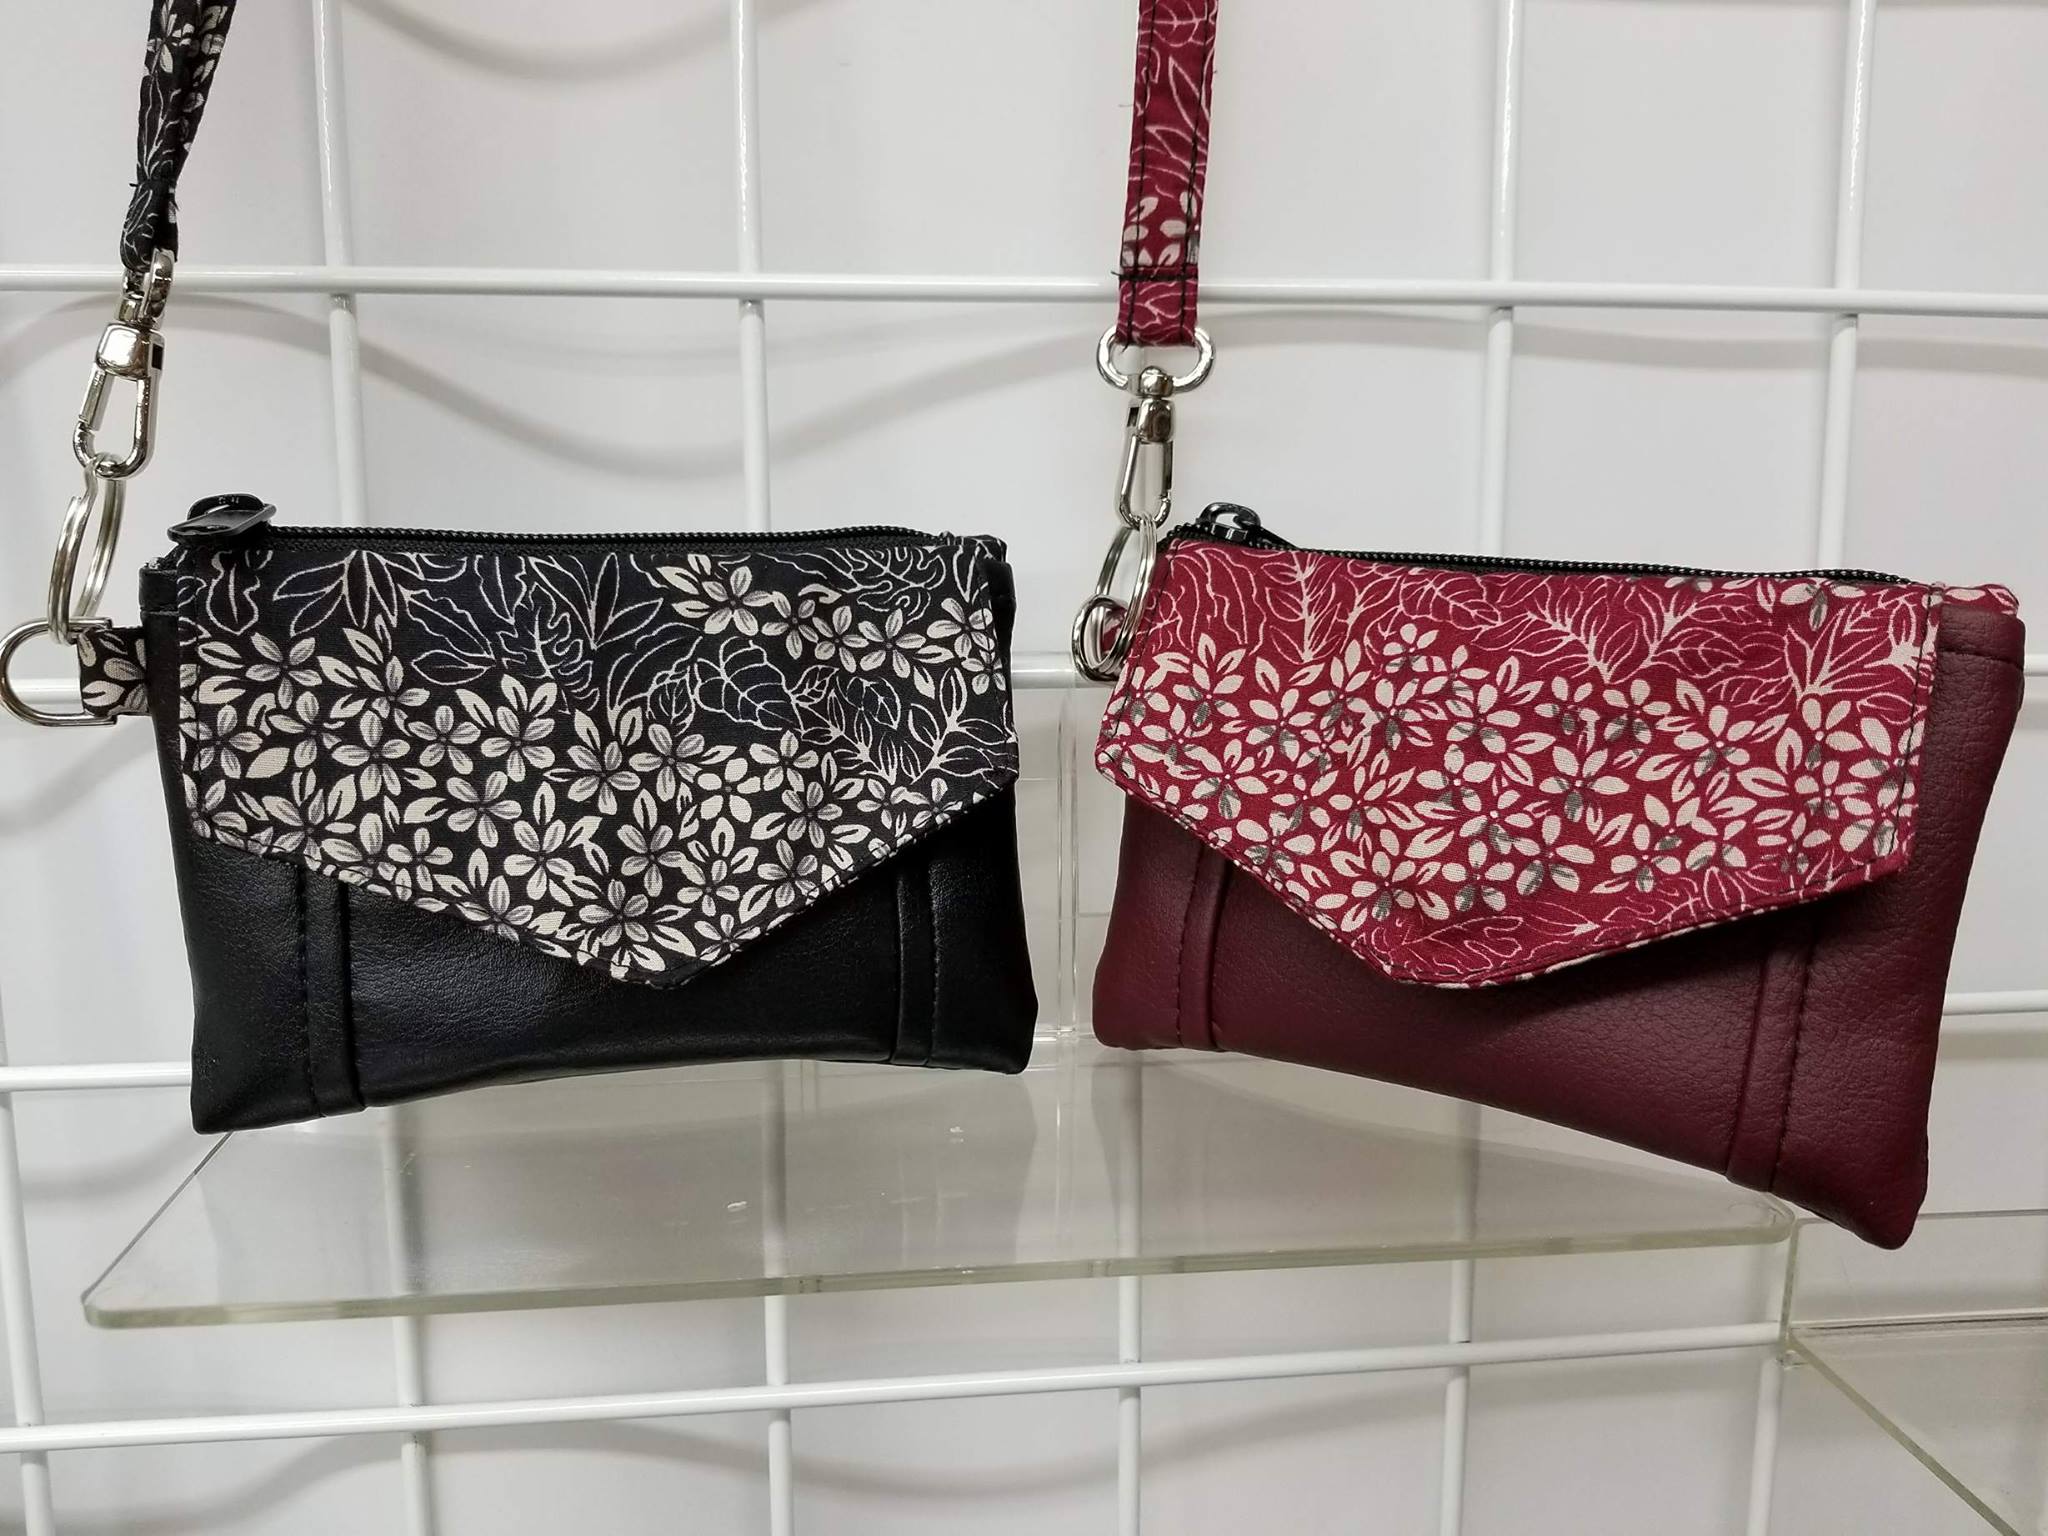
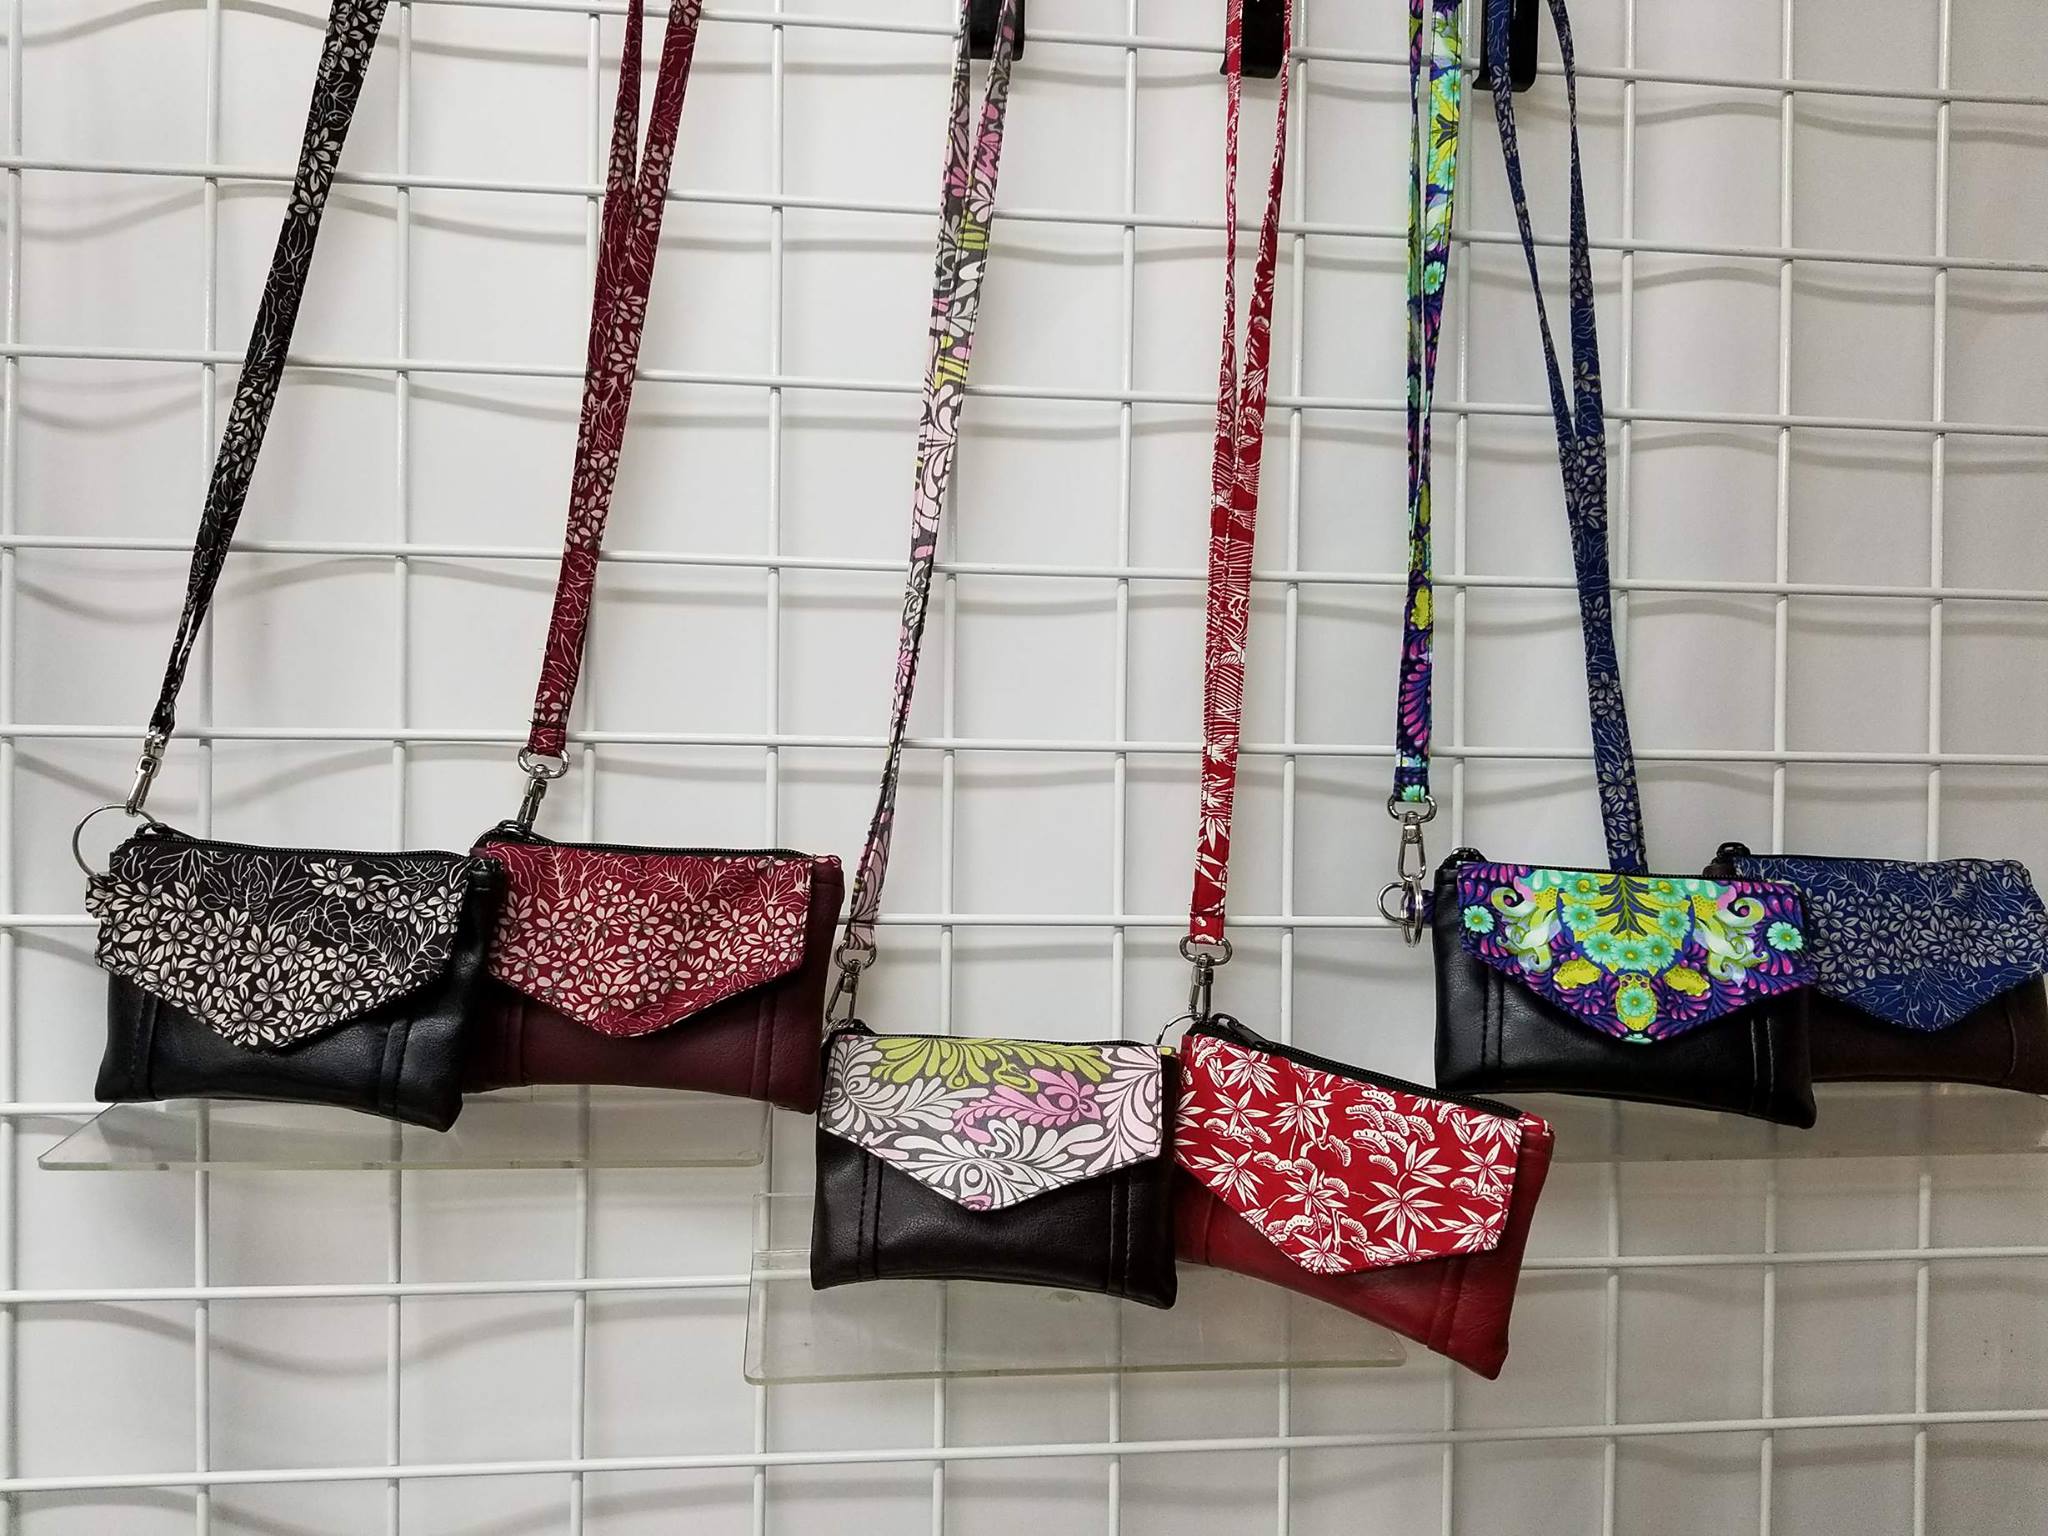
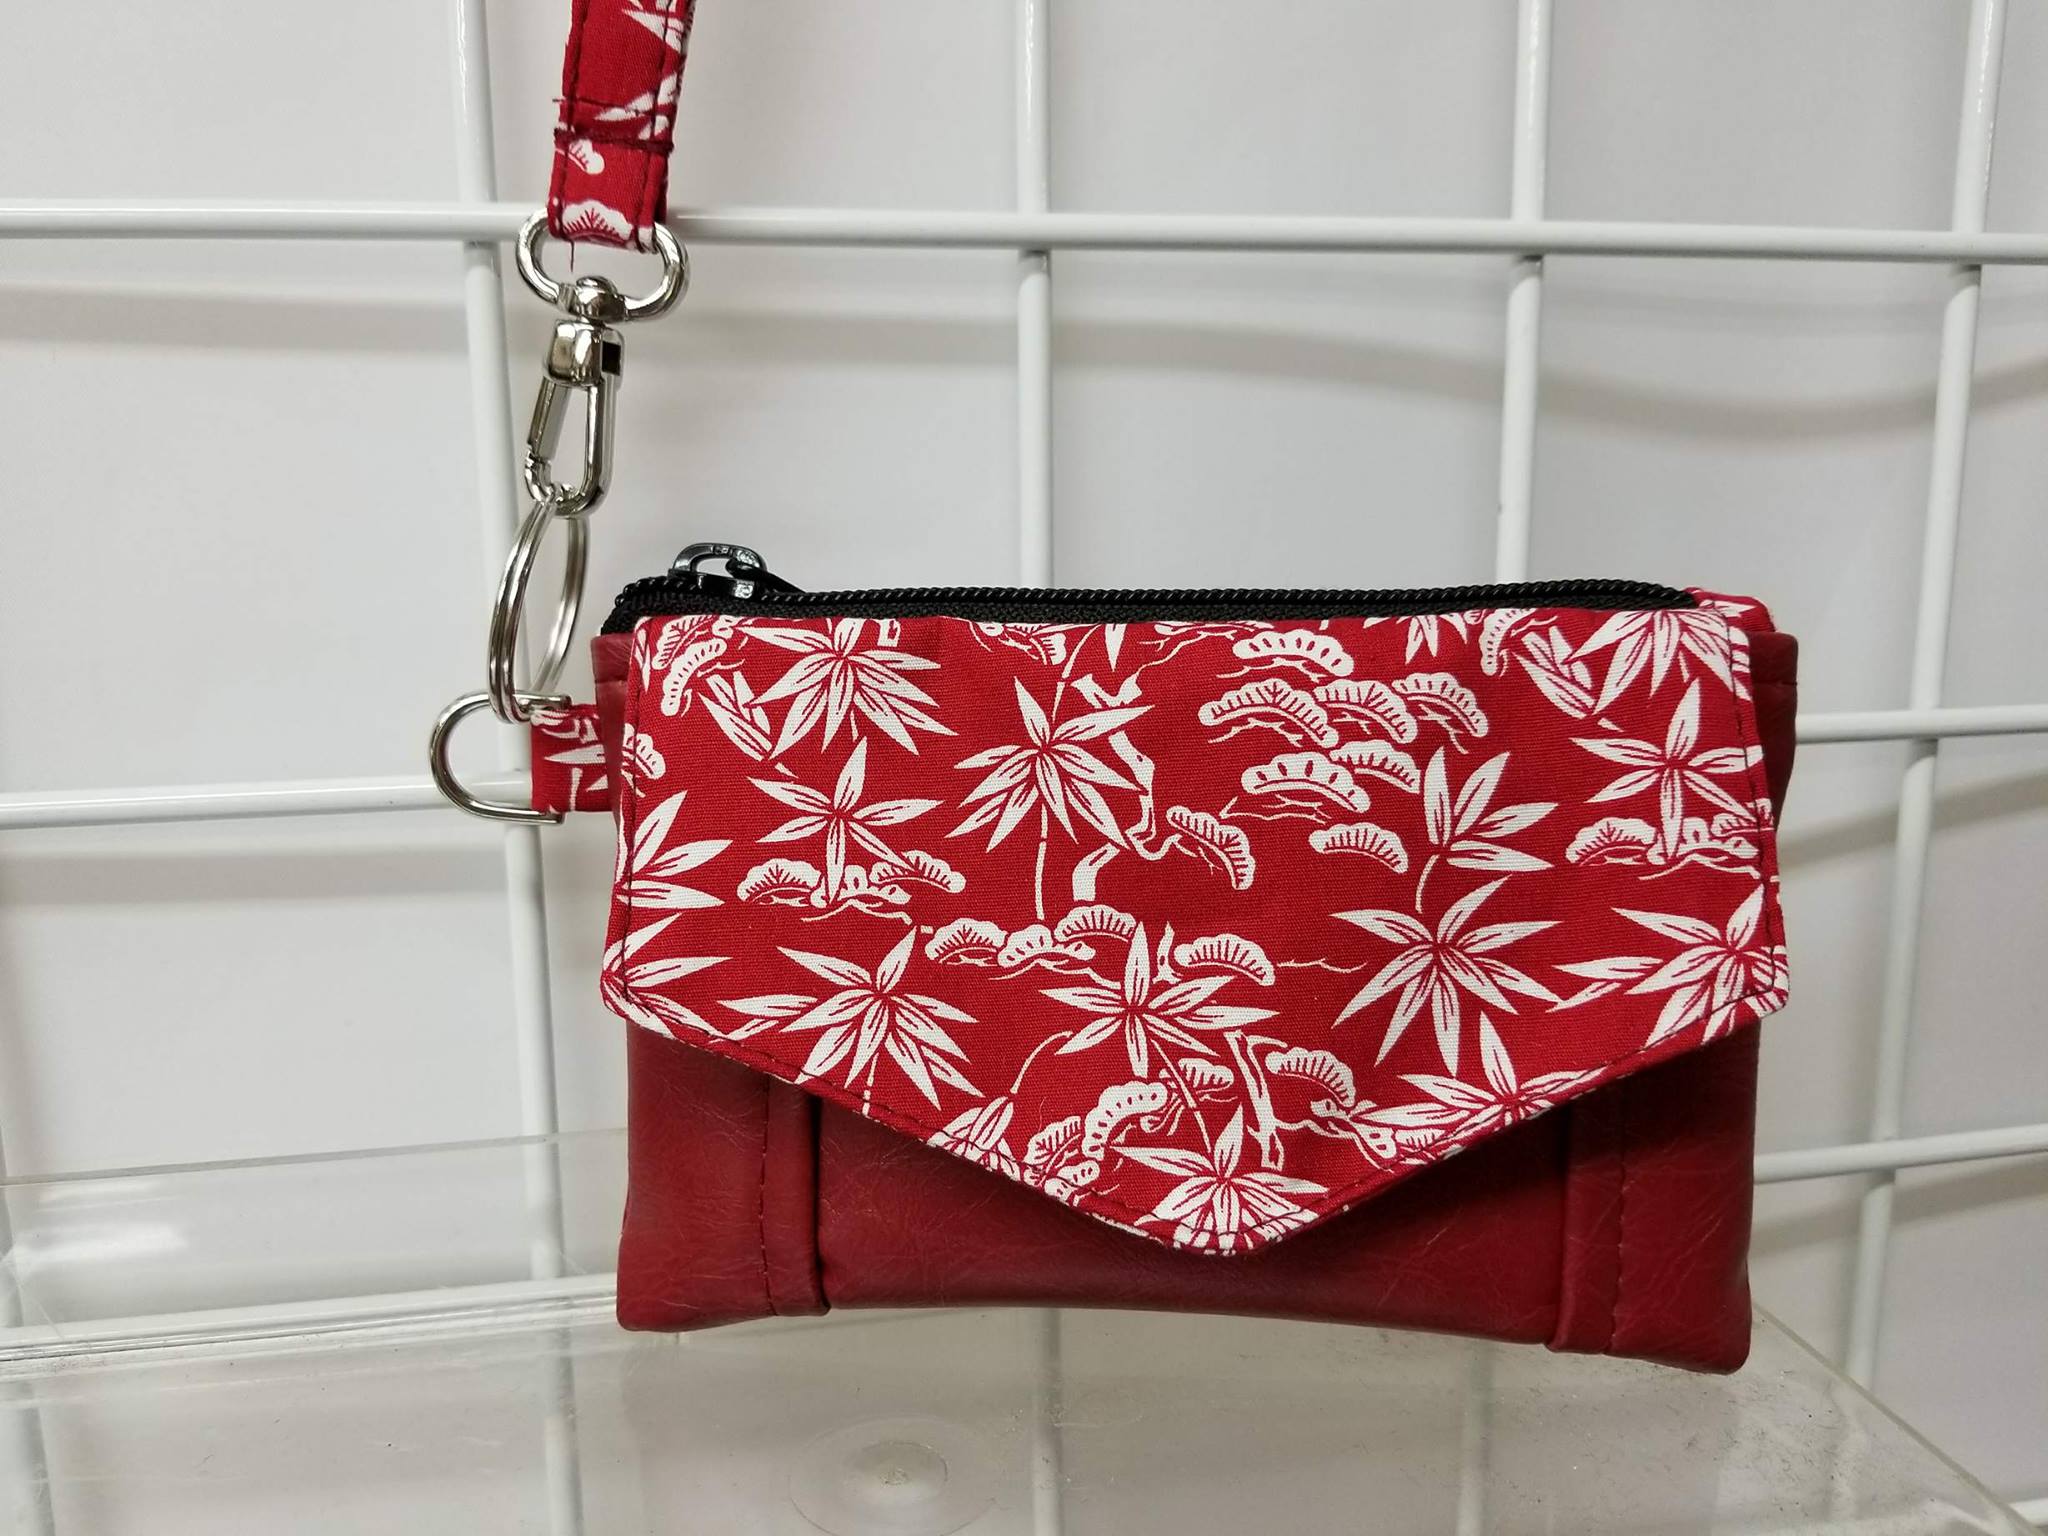
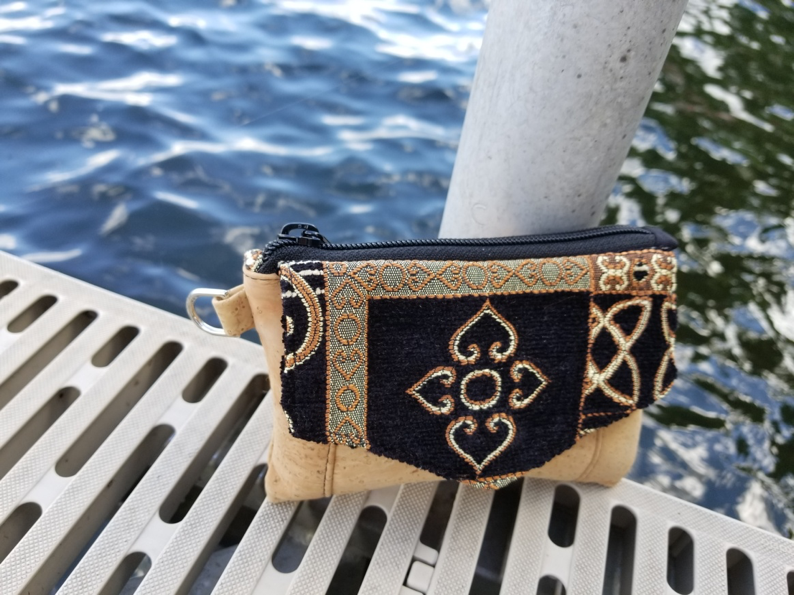
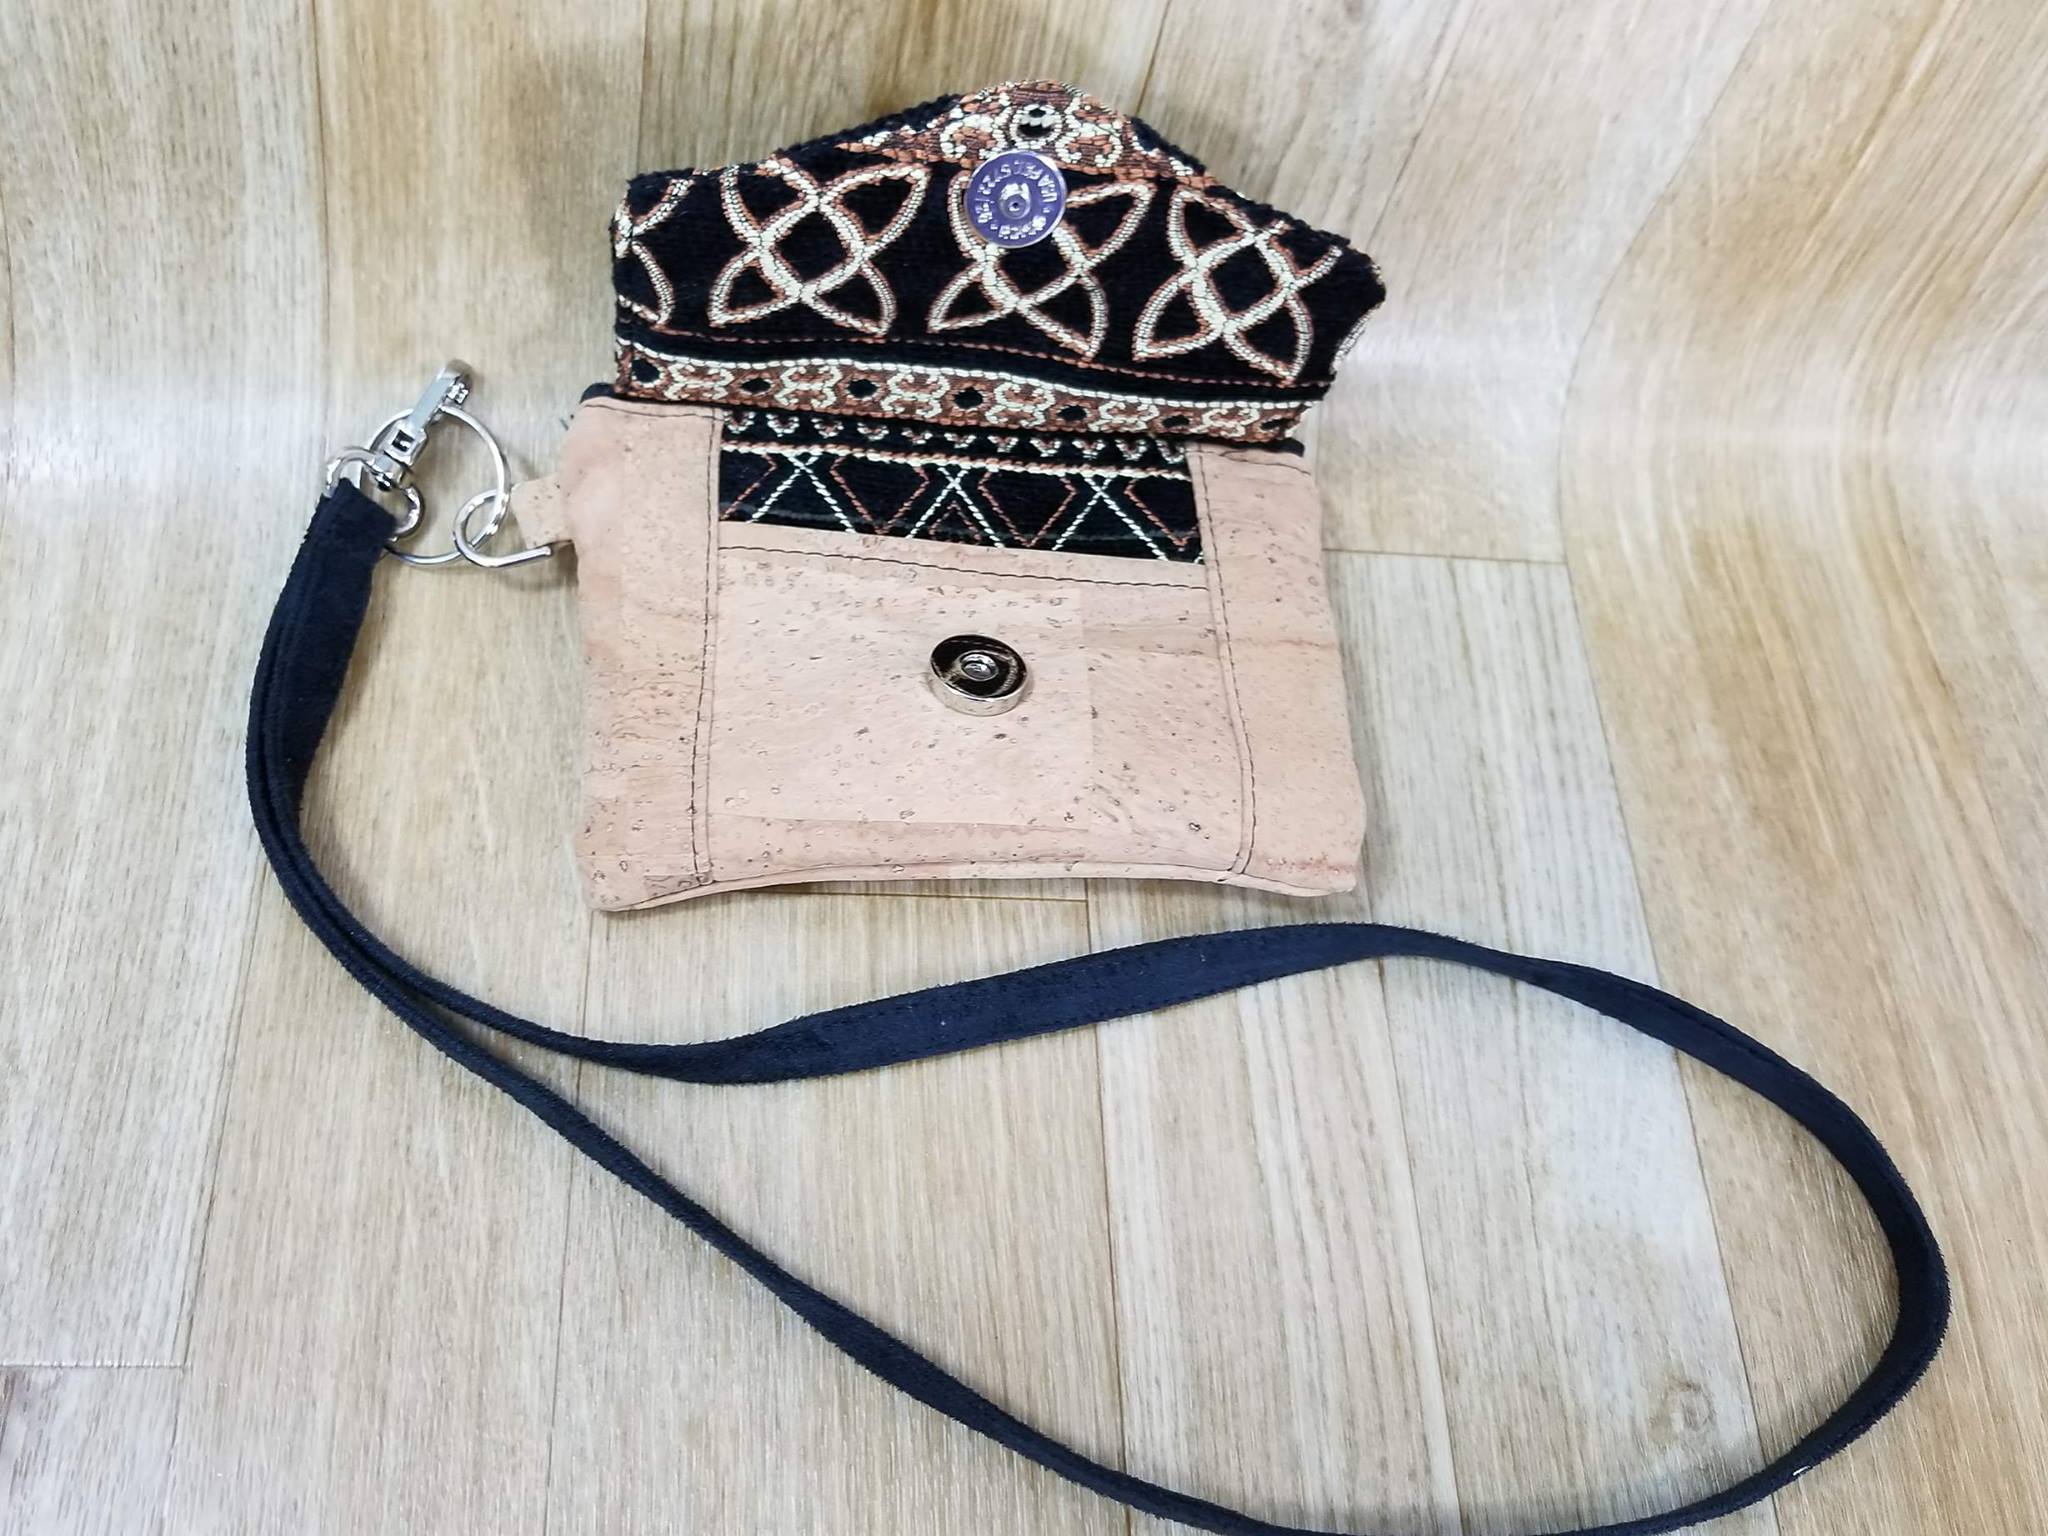
Have you seen Cindy McGreevey's beautiful and classy Kristine ID Wallets? If not you are in for a treat today! For day three of Kristine ID Wallet Week, we get to learn some awesome alterations for the Kristine ID Wallet! Cindy McGreevey of Cindy’s Creative Bags is going to show us three alterations that she has made to the Kristine ID Wallet making it easier to make the entire wallet out of decorator fabric, faux leather or cork - giving this little wallet a very classy upgrade.

Cindy has been sewing for a long time. She started her sewing career working a couple ski wear manufacturers, first Slalom Ski Wear and then Bogner, a very high end ski wear manufacturer. Cindy currently owns and operates Cindy’s Creative Bags VT llc and has for 15 years, making and selling hand-crafted bags. She sells at craft shows, online and wholesale with the help of a sales rep (Up North Trading). Cindy has a lot of sewing production and business experience that helps her alter a pattern like the Kristine ID Wallet to make it work the way she wants it to.
Now let’s hear from Cindy!
Hi, I’m Cindy from Cindy’s Creative Bags. First, I was honored when Michelle Burke, designer of Uniquely Michelle asked me to write this tutorial - thank you for this opportunity! I also want to say that doing this tutorial showed me how much work goes into writing a pattern!
Here are the changes I have made to the Kristine ID Wallet pattern:
I make it wider and a little taller (the finished size is 6” wide x 4” high)
I put the credit card pockets on the inside of the wallet
I added a slip pocket under the flap on the outside of the Kristine ID Wallet
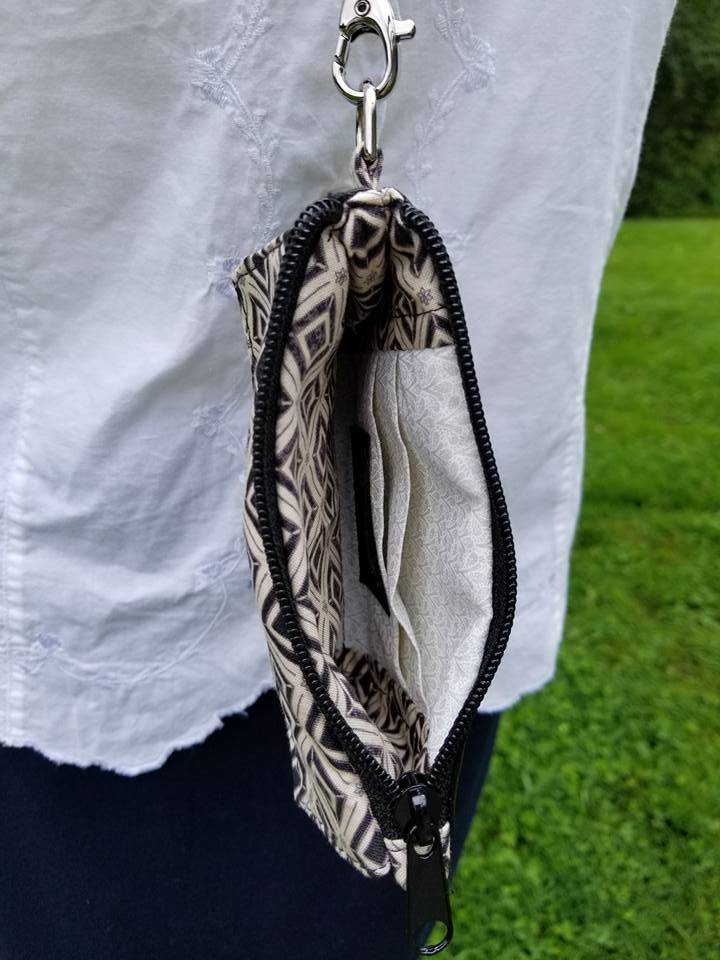
The Card Pockets (these are in the interior of the wallet and make up one side of the lining):
Cut 1 piece of fabric for the card pockets that is 4 1/4” wide x 15 1/2” high (11.5cm x 39.5cm)
Cut a piece of SF101 that is 4 3/4” wide x 4 3/8” high (12cm x 11cm)
Cut 2 side pieces for the card pockets from the lining fabric 2" wide x 4 3/4" high (5cm x 4.75cm)
Follow the instructions in the pattern for the Kristine ID Wallet for making the lines on the card pocket piece except add one more card pocket so that you will have three card pockets in the end. Once the card pockets are made, sew the sides of the card pockets onto each side of the card pocket right sides together. Press the seams away from the center and then I edge stitch each seam.
The Envelope Flap:
Cut 2 Envelope Flaps from the exterior fabric that measure 6 1/2" wide x 4 1/8" high to the point (16.5cm x 10.5cm)
Add the male part of the magnetic snap, setting it 1" (2.5cm) up from the point of the flap. Place the flap pieces right sides together and sew all the sides except the top. Turn the flap right side out and edge stitch the sewn sides. Tack the top closed and mark center.
The Front Slip Pocket (under the flap):
Cut 2 pieces from the exterior fabric that are 4 1/2" wide x 4 7/8" high (11.5cm x 12.3cm)
Cut 1 piece from the lining fabric that is 4 1/2" wide x 2 3/4" high (11.5cm x 7cm)
Cut 2 side pieces from the exterior fabric that are 2" wide x 4 3/4" high (5cm x 12cm)

Sew the small lining piece (4 1/2" x 2 3/4") to the front slip pocket piece (4 1/2" x 4 7/8"). Top-stitch 1/8" down on the lining piece.

Next, fold this in half and top-stitch 1/8" on the fold. Set the female magnetic snap 1 1/8" (3cm) down from the top of the fold. Lay the pocket piece you just made on top of center exterior piece (the other 4 1/2" x 4 7/8" piece) and tack three sides.

Sew the sides (2" x 4 3/4" pieces) to the pocket with right sides together. Press the seams away from the center and then edge stitch each seam. Mark center at the top of this for flap placement.

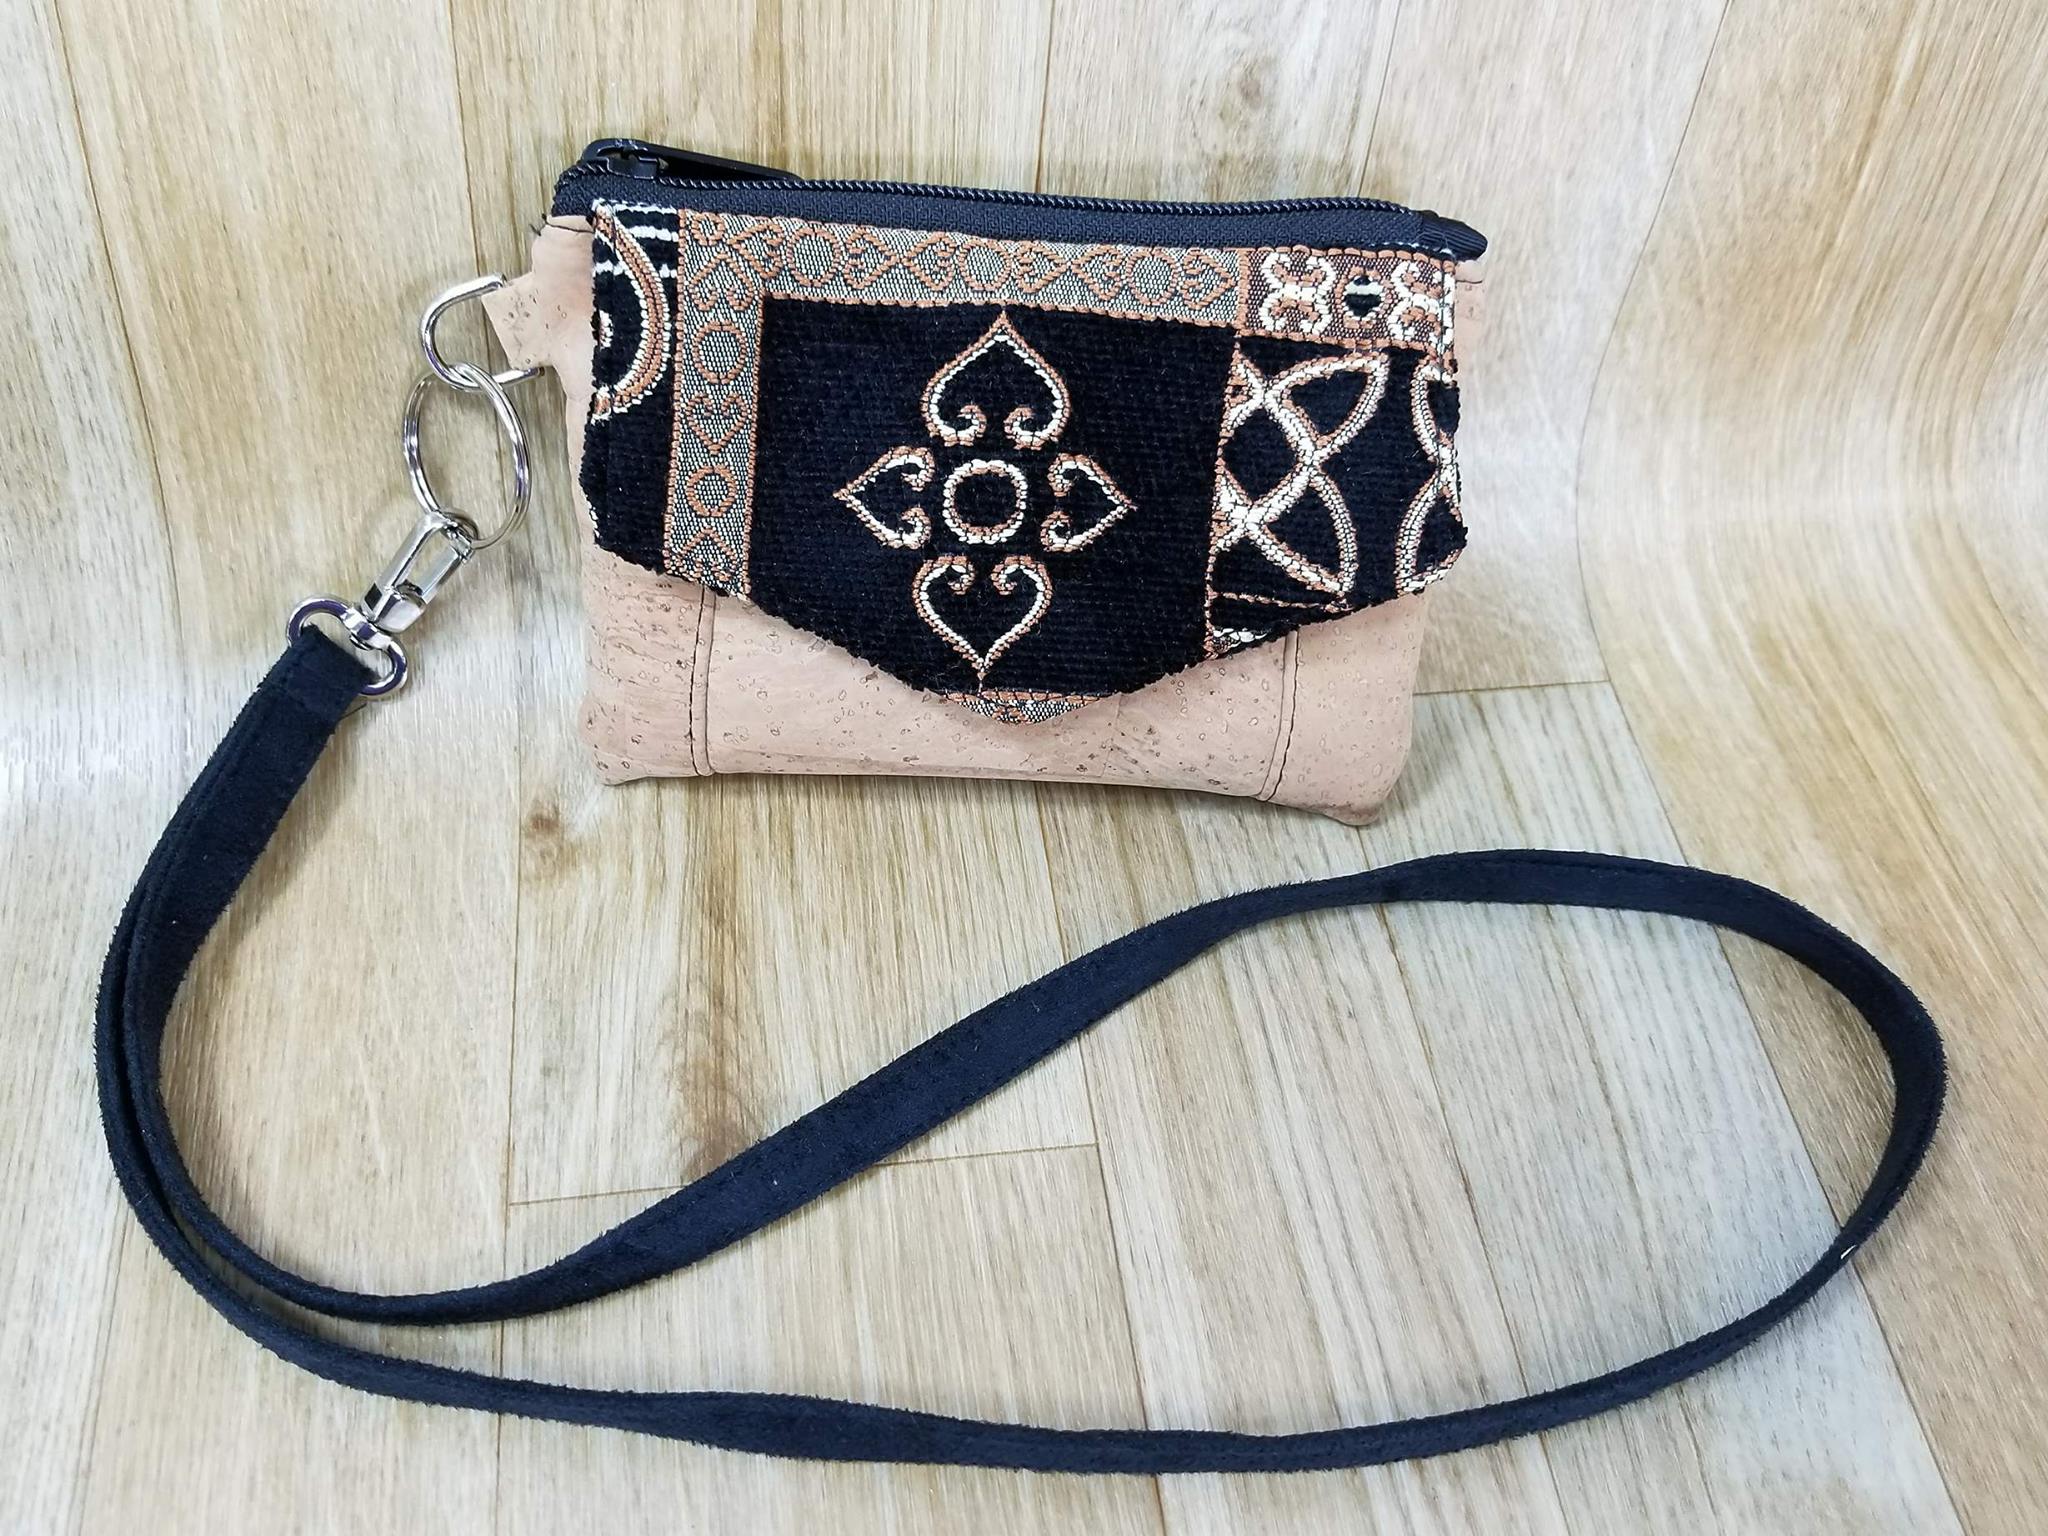
Tack flap to the top matching the center marks.

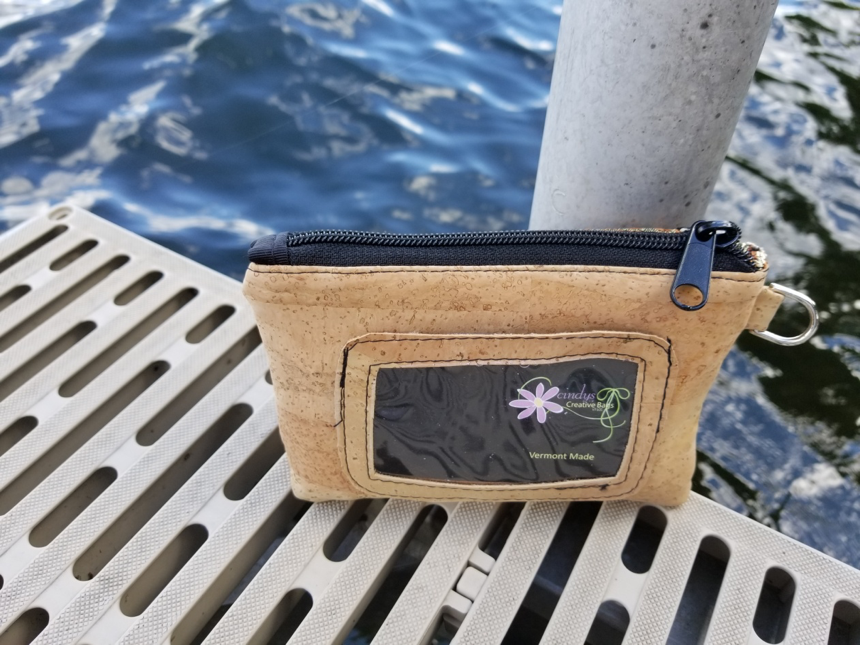
I then follow the Kristine ID Wallet pattern instructions for the ring loop, zipper end tab and wrist strap or the lanyard. Also, it is important to know that I cut one exterior piece for the back (the side with the ID window pocket) and one lining piece that are each 7" wide x 5 " high (17.75cm x 12.75 cm).
Zipper:
Cut the zipper @ 6 1/4" (16cm). I turn the closed end of the zipper under 3/8" (1cm) making the zipper 5 7/8" (15cm) long. Sew the zipper in place following the directions in the pattern.
I finish the Kristine ID Wallet following the pattern instructions except I have a trick for reducing the bulk in the lining.

When I am sewing the lining pieces together at the sides, I leave the bottom of the lining open across the entire bottom edge. I then make 2 marks from one of the bottom corners of the lining, one mark that is 3/4" (2cm) from the corner on the side edge of the lining and the other that is the same distance from the corner on the bottom edge of the lining. I draw a line between these two marks (making a little triangle in the corner) and then I trim that little triangle off. I repeat the above steps for the second corner. I sew those bottom angled edges before turning the wallet right side out. Once it is turned right side out, I close the hole in the bottom of the lining. Removing the corners from the lining make it less bulky!

I hope you have enjoyed my tutorial on the Kristine ID Wallet. I want to thank my granddaughter, Skylar for all her help with this tutorial and Michelle Burke, designer of Uniquely Michelle.
Thank you Cindy for sharing this awesome tutorial! I love how she solved the problem of excess bulk when making the Kristine ID Wallet out of heavier fabric by making the wallet a little larger and moving the card pockets to the inside of the wallet. I also loved that she added a slip pocket under the envelope flap - what a great idea! Check out Cindy's beautiful creations in her Etsy shop, on her Facebook page, and on Instagram.
There is a lot going on with Kristine ID Wallet Week! Don't forget that all Uniquely Michelle patterns are 15% off during Kristine ID Wallet Week. Use coupon code KIDWWEEK during check out at the Uniquely Michelle Etsy Shop or the Uniquely Michelle Website Shop. The prices in the Uniquely Michelle Bluprint Pattern Shop reflect the 15% discount. Make sure to keep up on everything going on this week by following Uniquely Michelle on Instagram or on the Uniquely Michelle Facebook Page. You can also join the Uniquely Michelle Sewing Patterns Facebook Group and you can sign up below to receive the Uniquely Michelle newsletter.

Make sure to comment on the post on any Uniquely Michelle social media platform (link below) to be entered in today's giveaway!
Today's giveaway is a Kristine ID Wallet Kit! The kit includes everything you need to make a Kristine ID Wallet with a wrist strap and either enough faux leather or cork to use to make the flap and the ID window pocket (see Monday's blog post for the tutorial on how to do this). To enter just comment on one of the posts with the above photo in any of the Uniquely Michelle social media platforms! Here are the places you can find the post and comment:
You can comment on more than one post to increase your chances of winning. The drawing will take place tomorrow morning at 9:00am MDT. I will announce the winner in tomorrow's blog post and Instagram and Facebook posts! Good Luck Everyone!!!