Another Option for Adding A Crossbody Strap to the Lindsay Wristlet
Michelle Burke
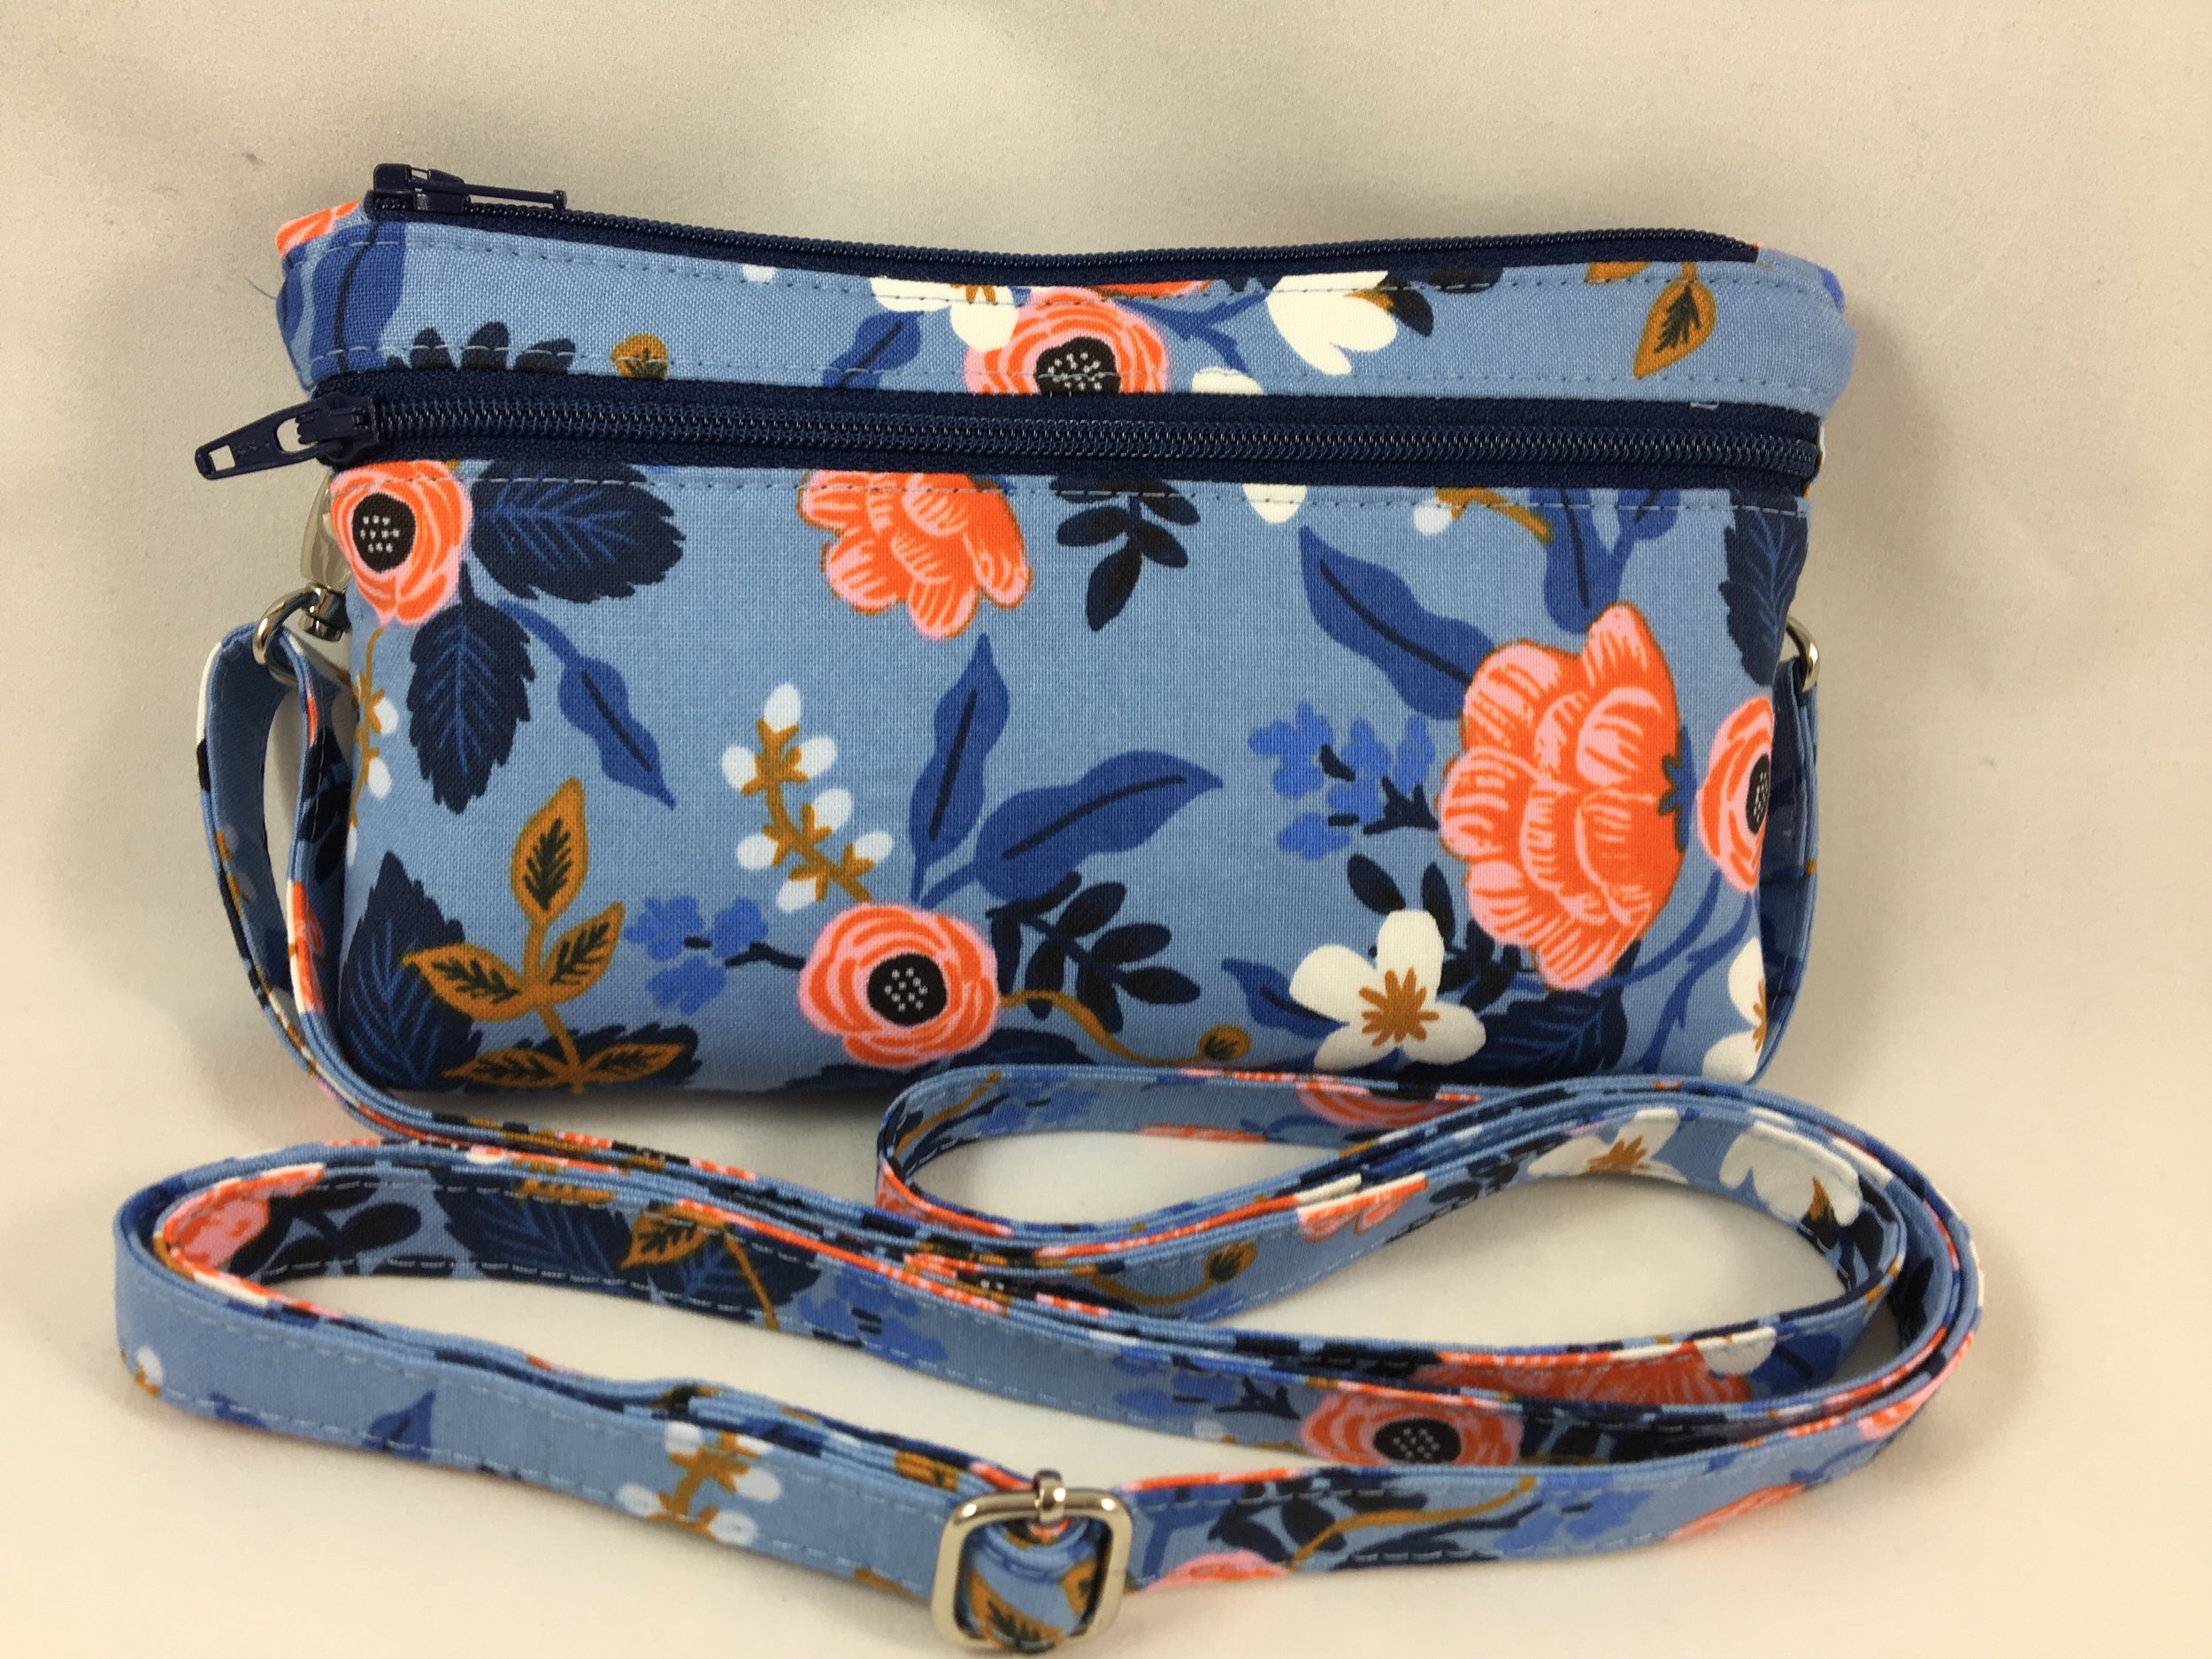
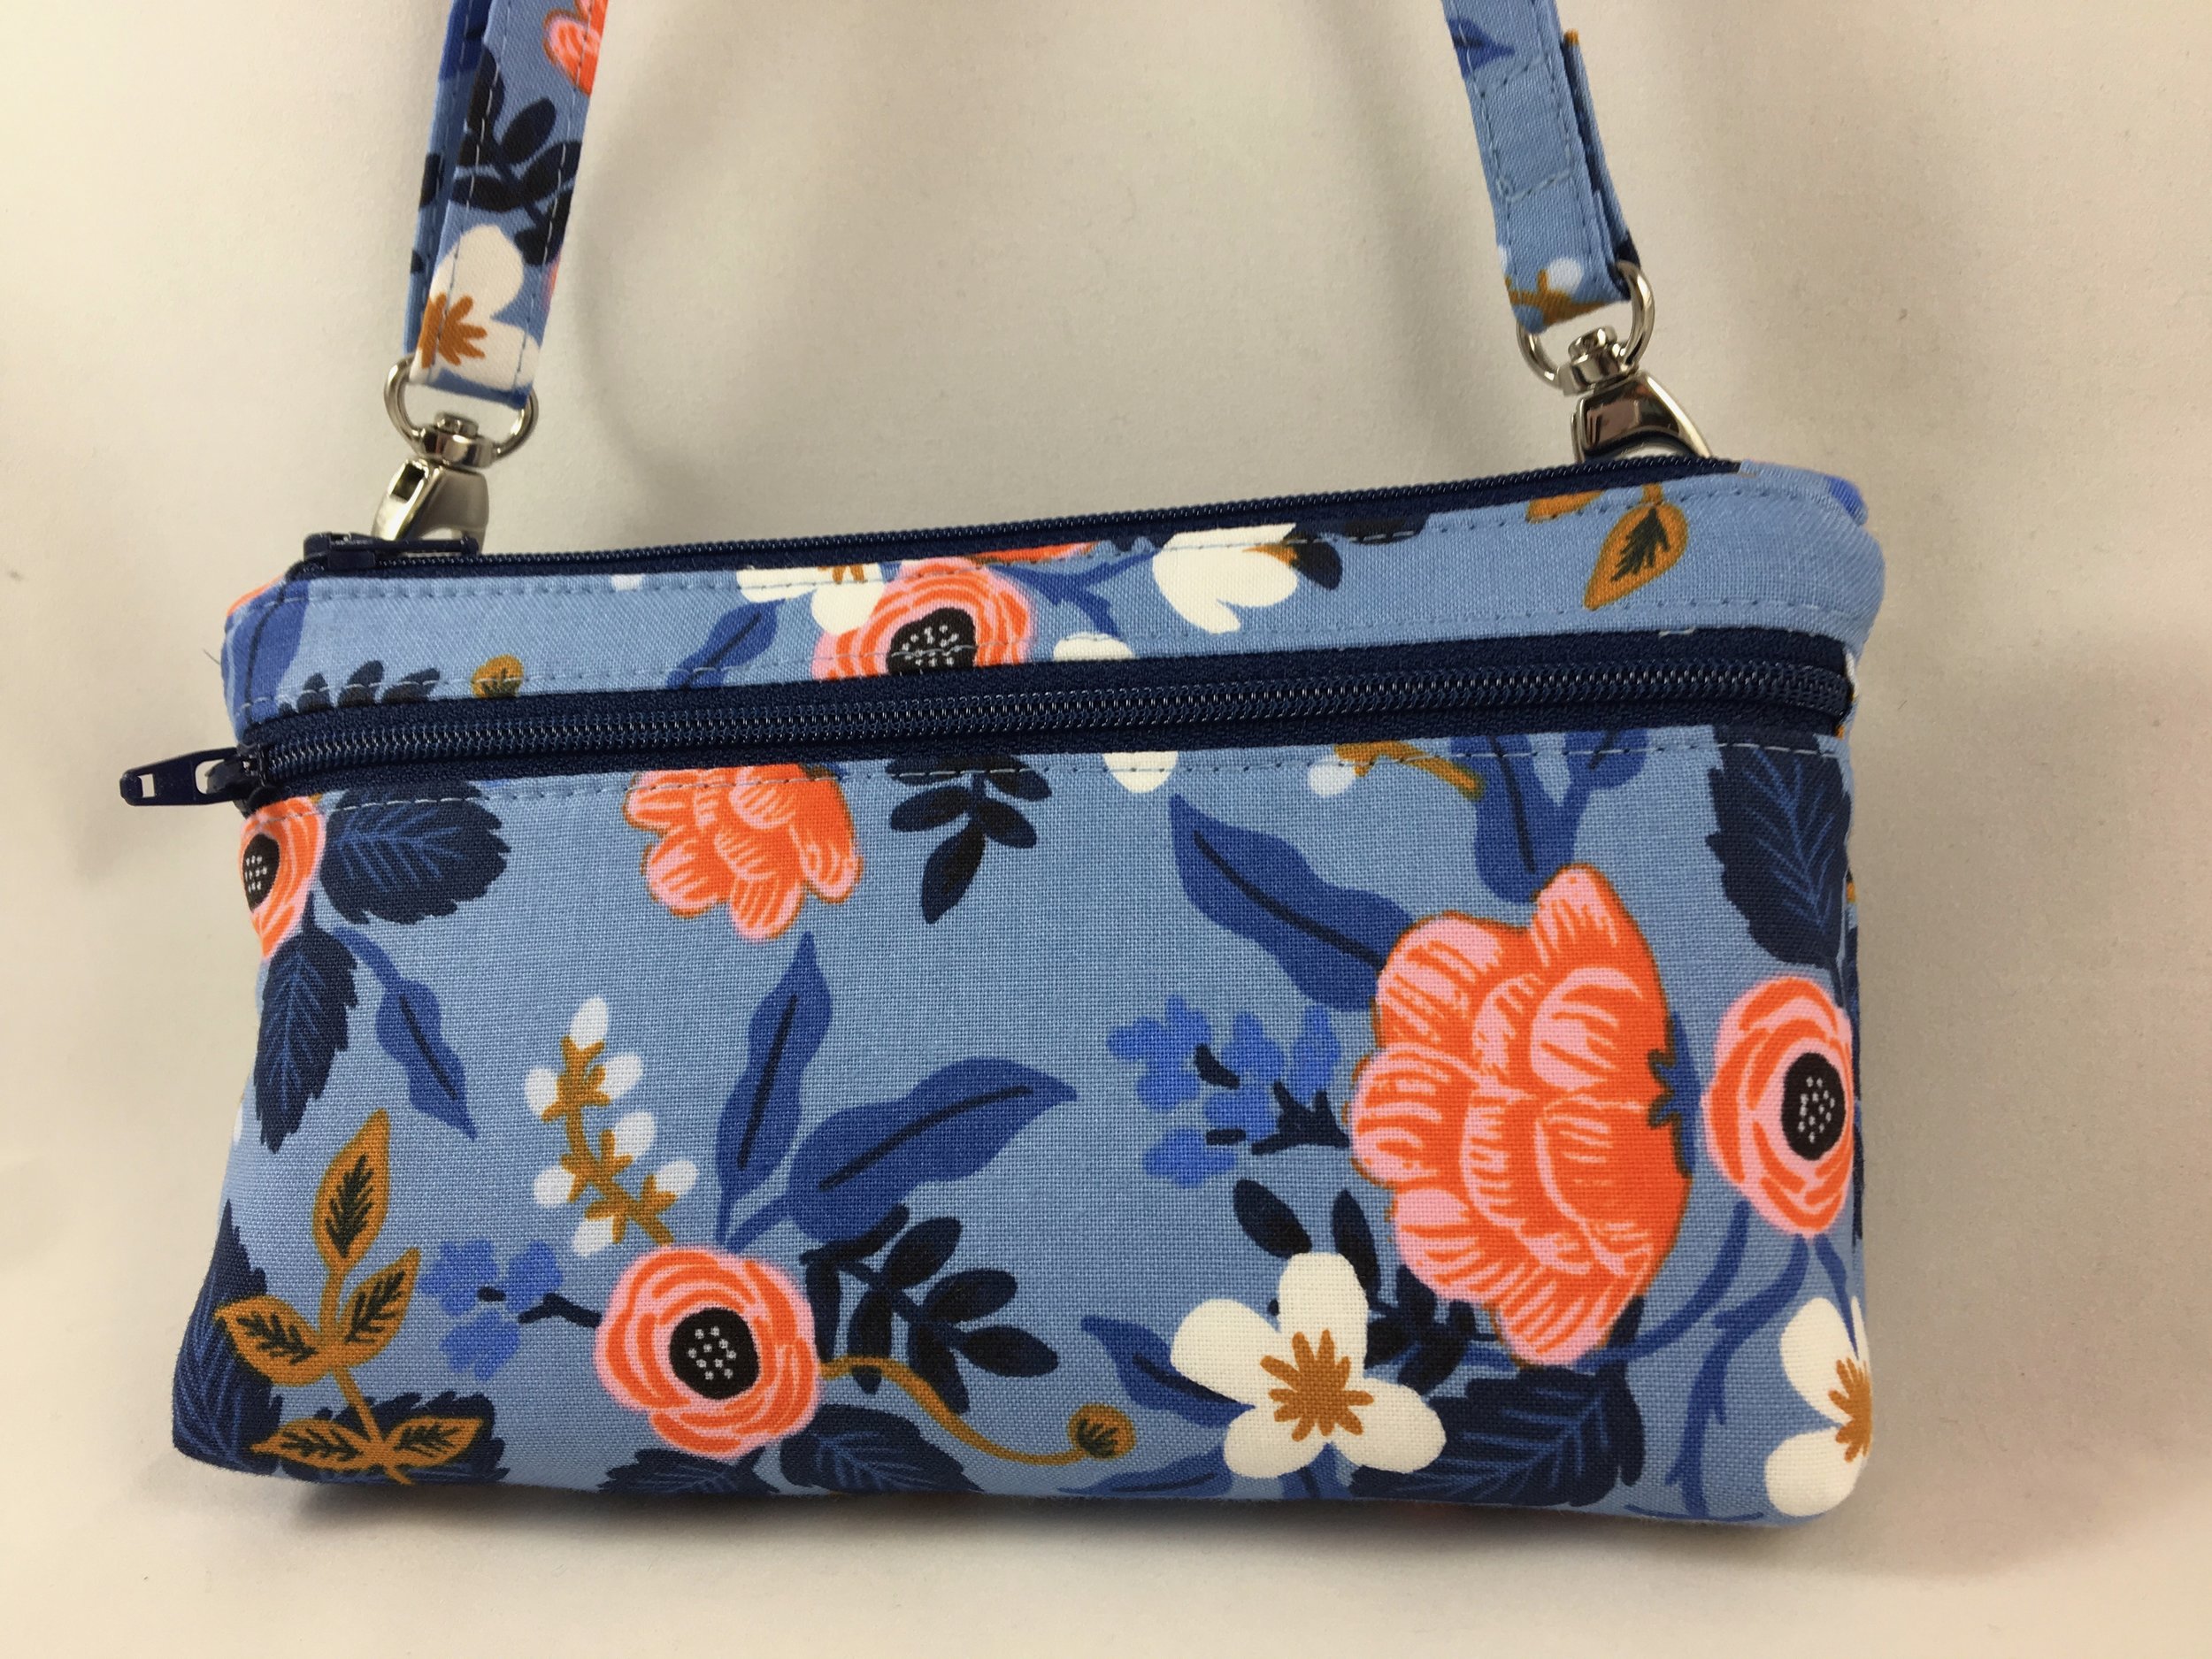
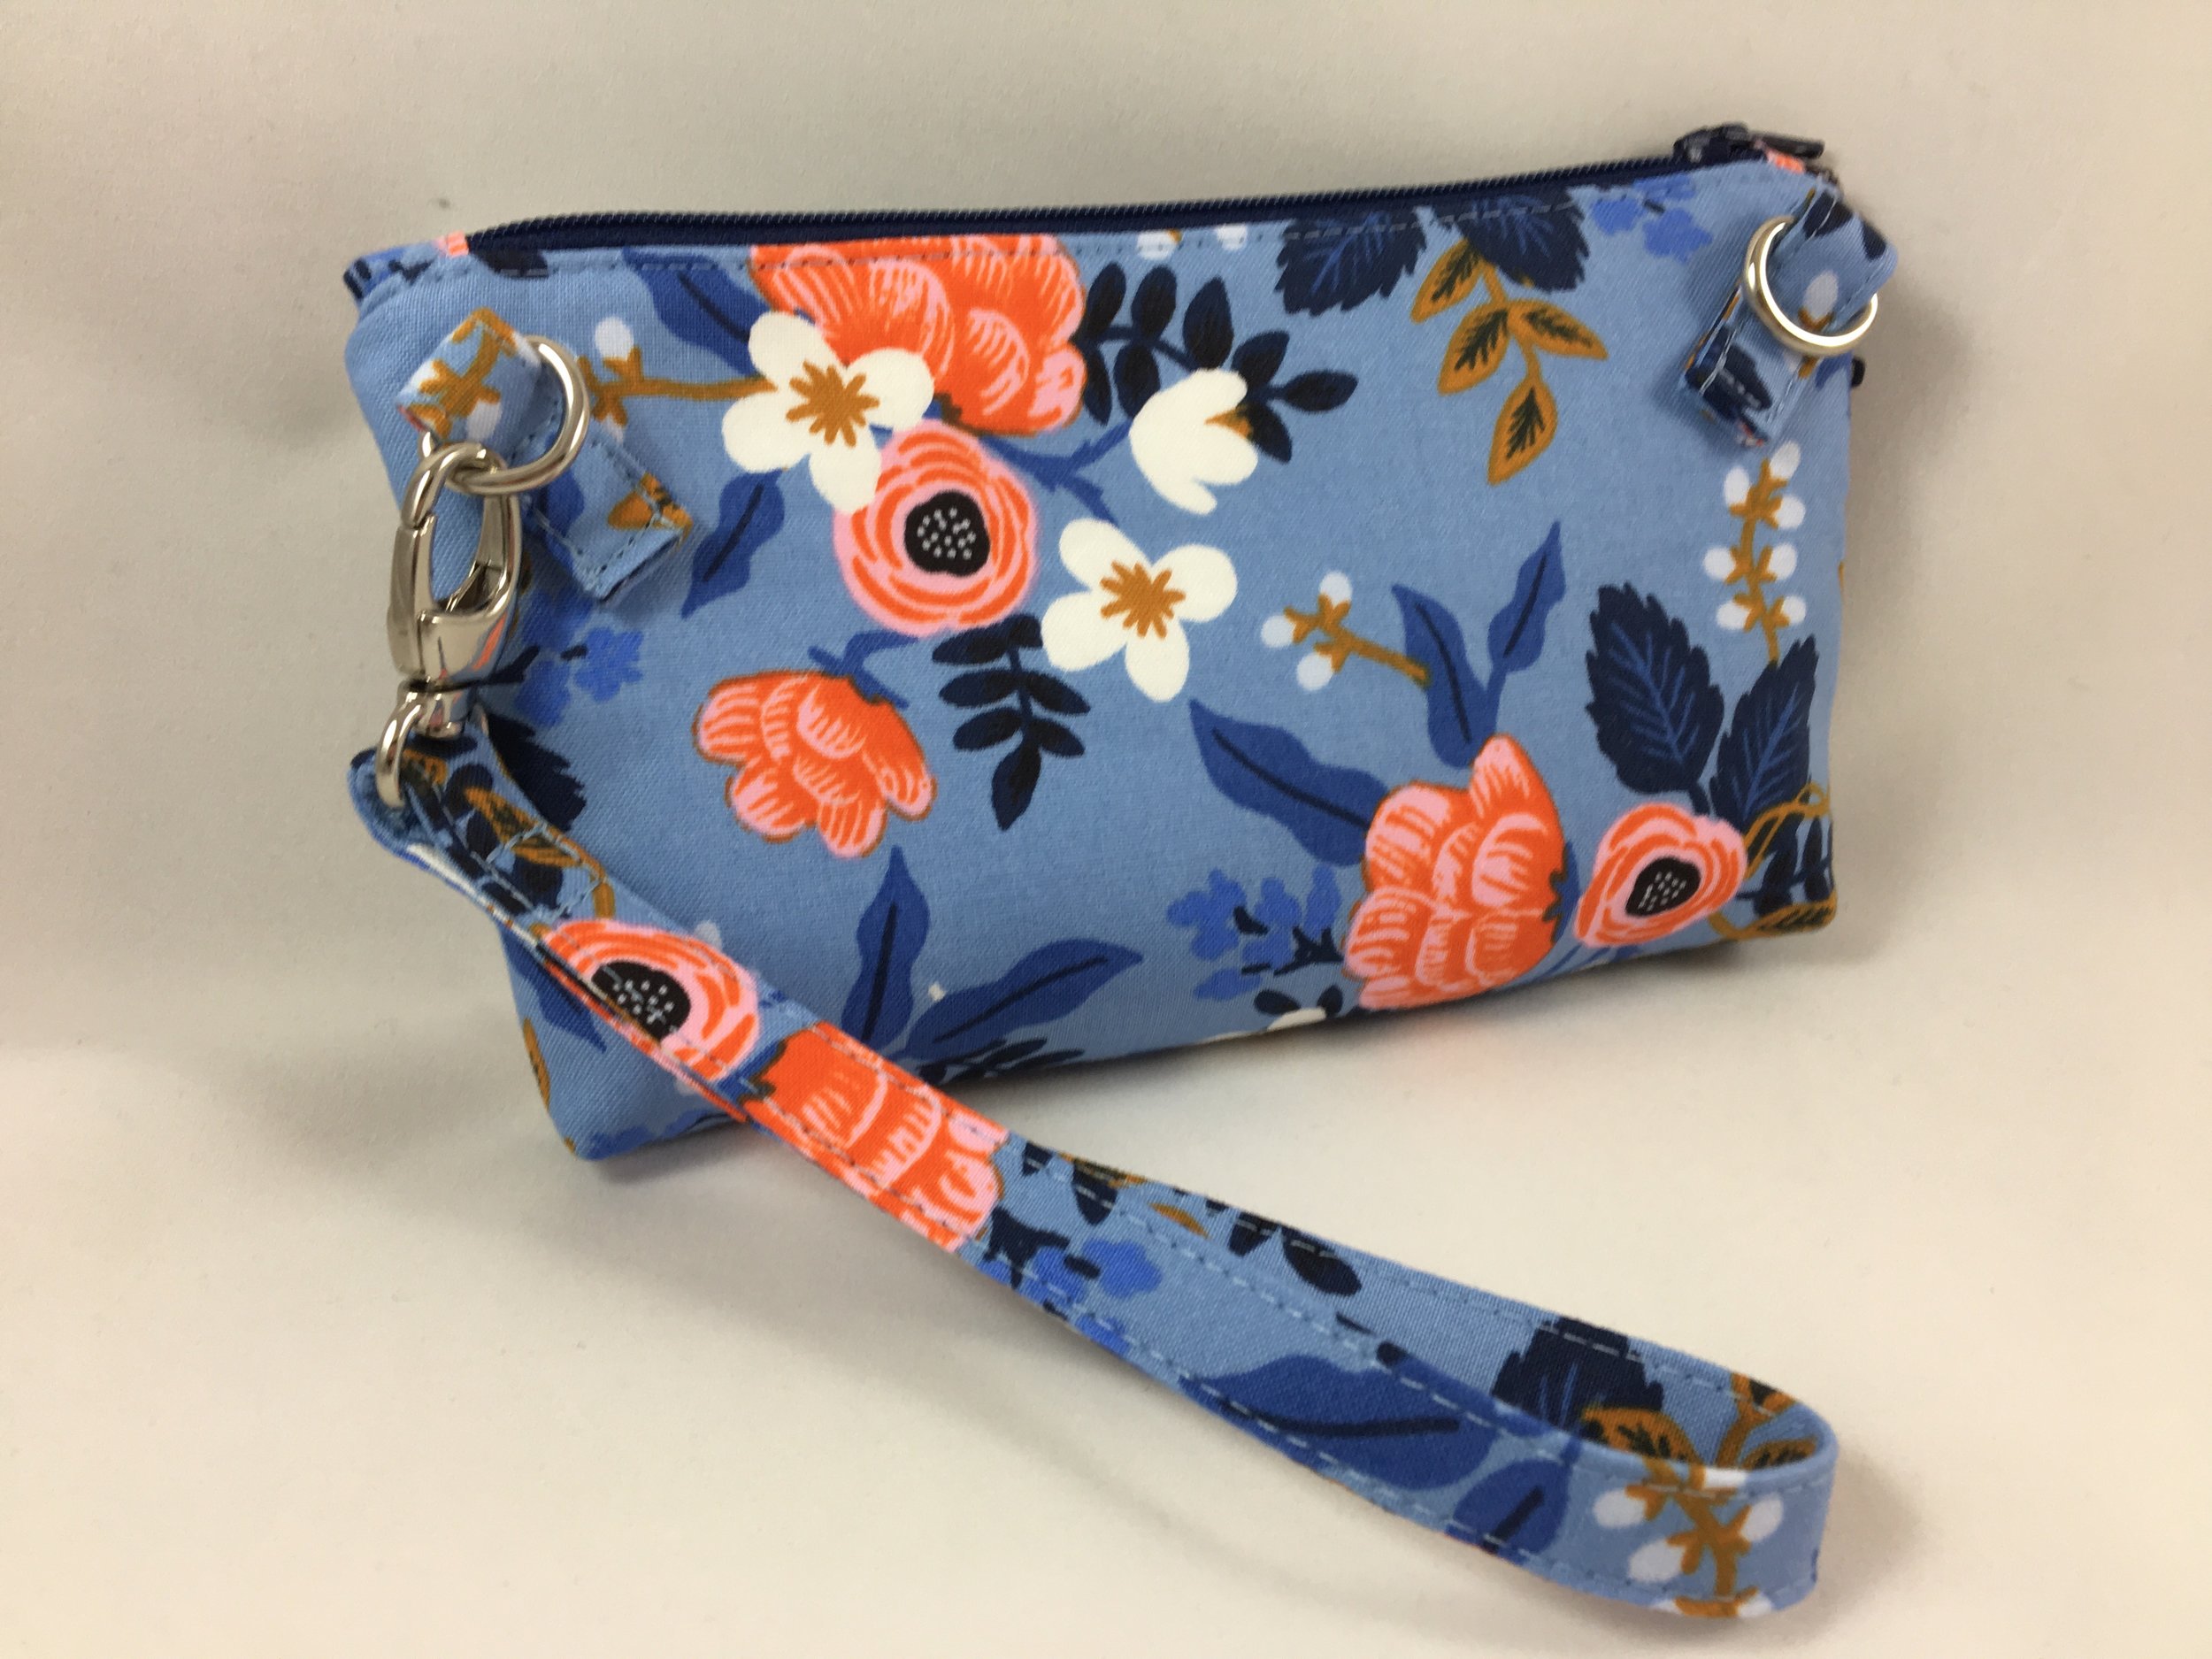
The Lindsay Wristlet is practical to use and fun to sew. I love taking my Lindsay Wristlet to the grocery store or sporting events and it is my go-to bag all summer long when I don't feel like having the extra bulk of a large bag. The only thing that I have sometimes wished for is to be able to carry a Lindsay Wristlet hands-free. A wristlet is somewhat hands-free, but it can get in the way when it is dangling from your wrist. During Lindsay Wristlet Week a couple of years ago, I wrote a blog post tutorial on adding a crossbody strap to the Lindsay Wristlet. It was a good option, but I wanted to be able to eliminate the strap connectors from the sides. I didn't like that they stuck out in an odd way when I was using my Lindsay Wristlet without the crossbody strap but instead with a wrist strap or as a wallet with no strap at all.

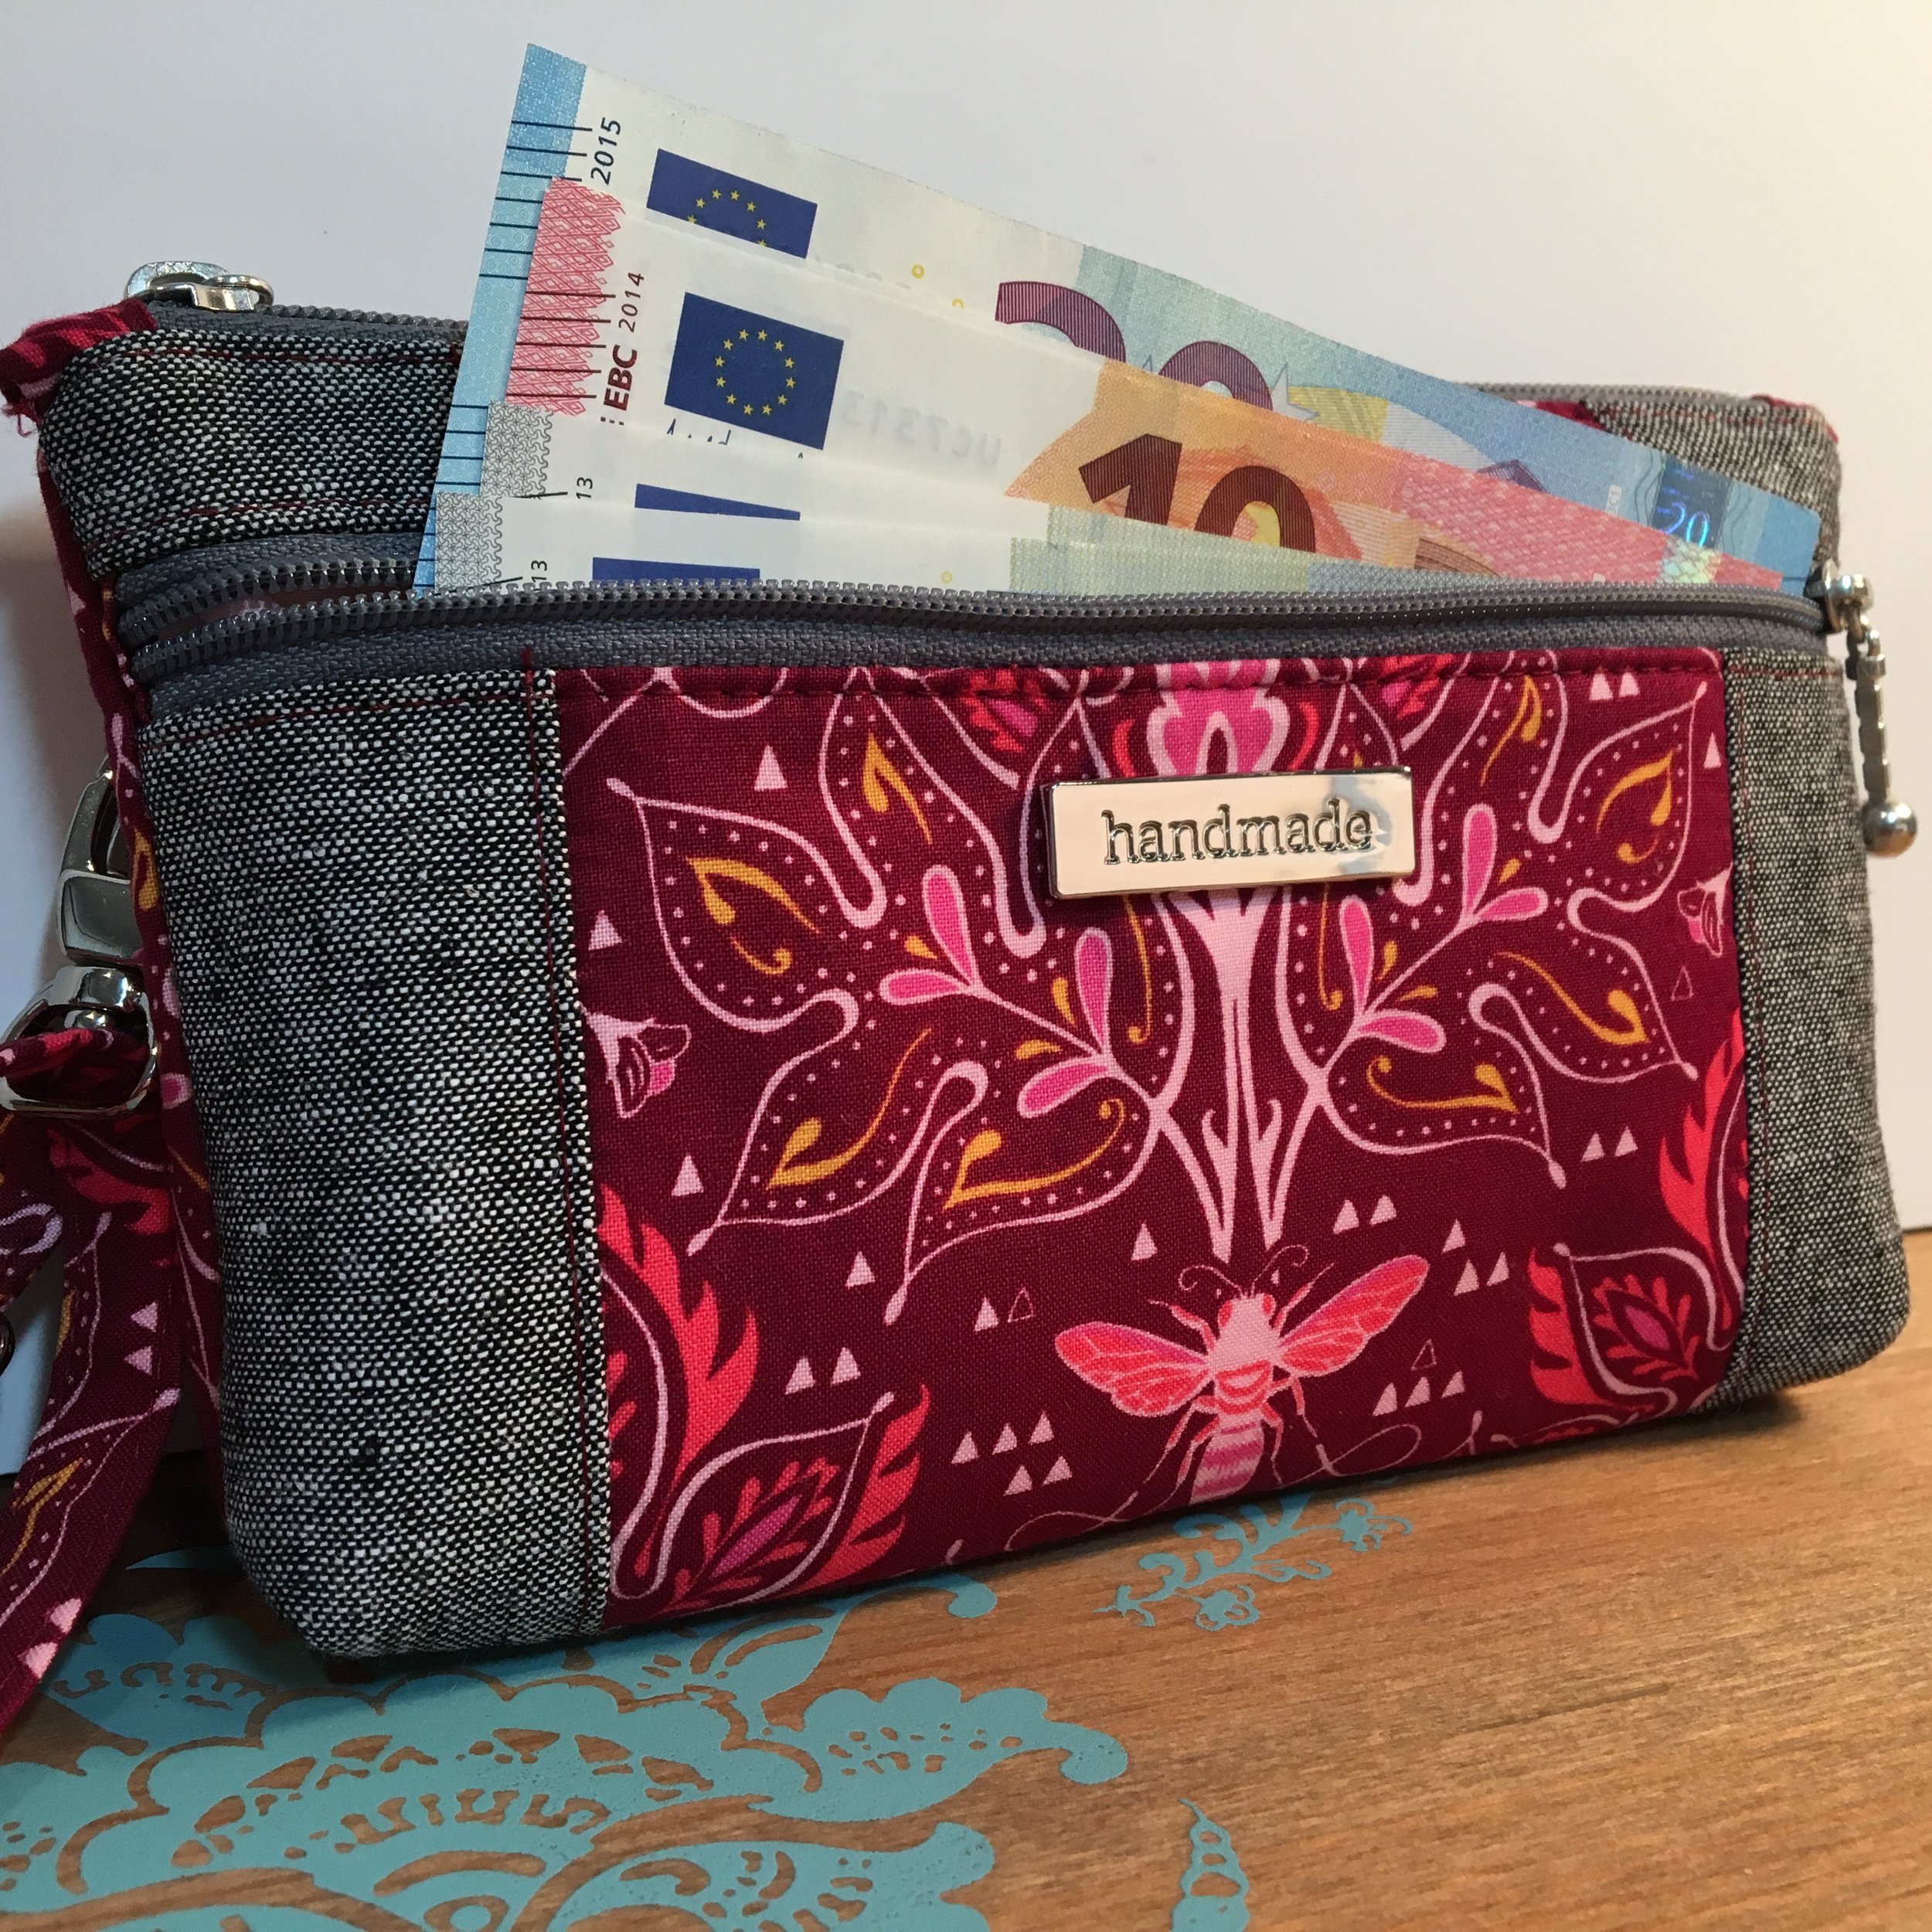
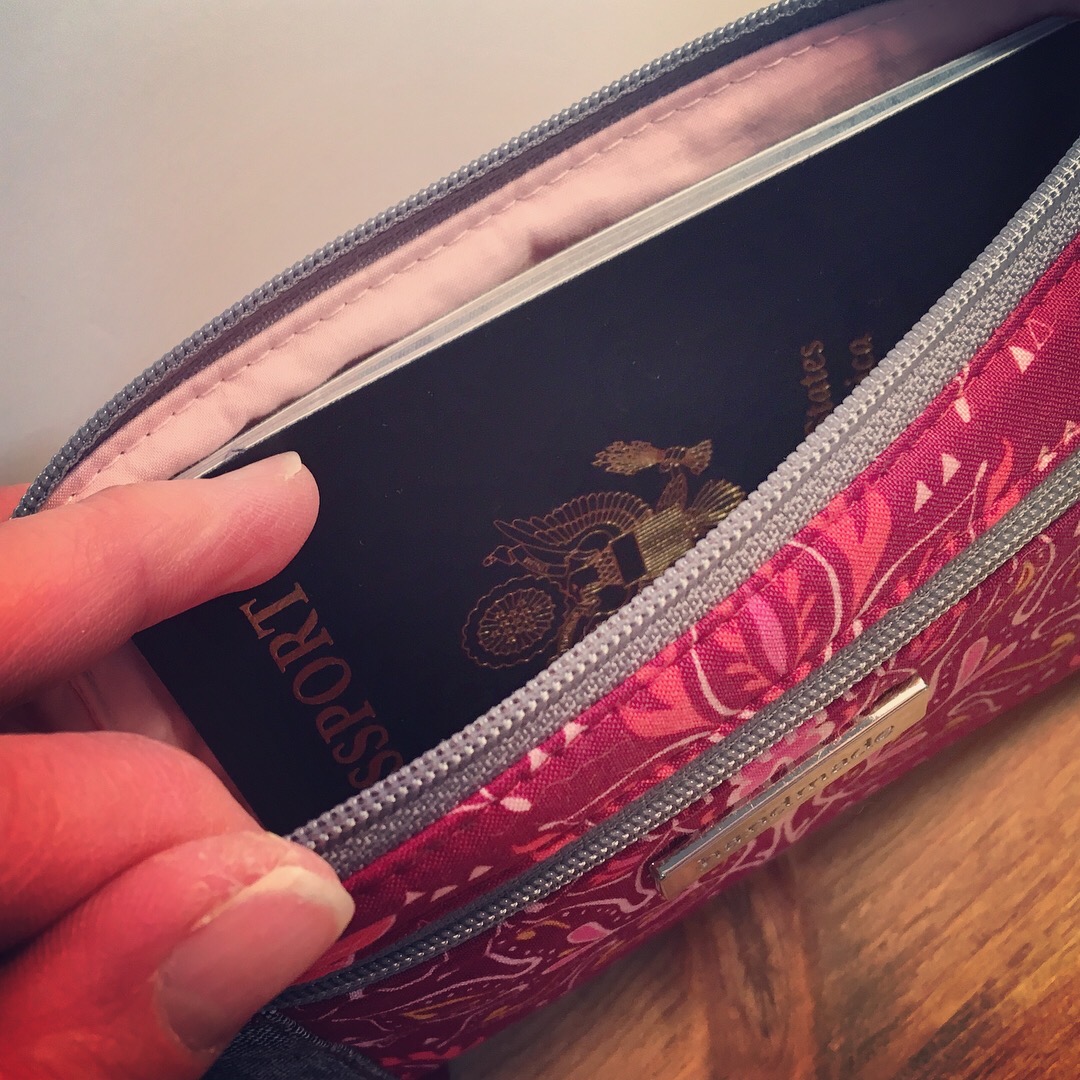
I am happy to say that I came up with a solution! I just changed up the placement of the strap connectors, adding them to the back of the Lindsay Wristlet instead of to the side seams. I tried this option out on the Lindsay Wristlet that I made myself for a trip that my husband and I took to Europe this spring. I wore my Lindsay Wristlet as a crossbody bag most of the time. Sometimes I had it on a lanyard when we were in the more sketchy parts of Rome where the pick-pocketers are an issue. I used it as a wristlet occasionally and I put it in my carry-on, in wallet form, without any straps when we flew or traveled by train. It was a perfect little travel companion that held my passport, credit cards, cash, phone, and lip gloss.

So, would you like to wear the Lindsay Wristlet as a crossbody? Well then, I wrote this tutorial for you! This is an easy and quick supplement to the Lindsay Wristlet pattern! You will need to refer to the Lindsay Wristlet pattern for the fabric and interfacing cuts and instructions for making the majority of the wristlet. Let's get started!
There are a few extra materials you will need to add a crossbody strap. You will need:
- From the exterior of the fabric, you will need to cut 1 piece @ width of the fabric x 2" high, and a second piece @ 25" wide x 2" high
- From the SF101, you will need to cut 1 piece @ 50" wide x 1" high (this can be pieced together too)
- A second 1/2" D-ring
- 2 - 1/2" swivel snap hooks
- 1/2" ajustable strap slider
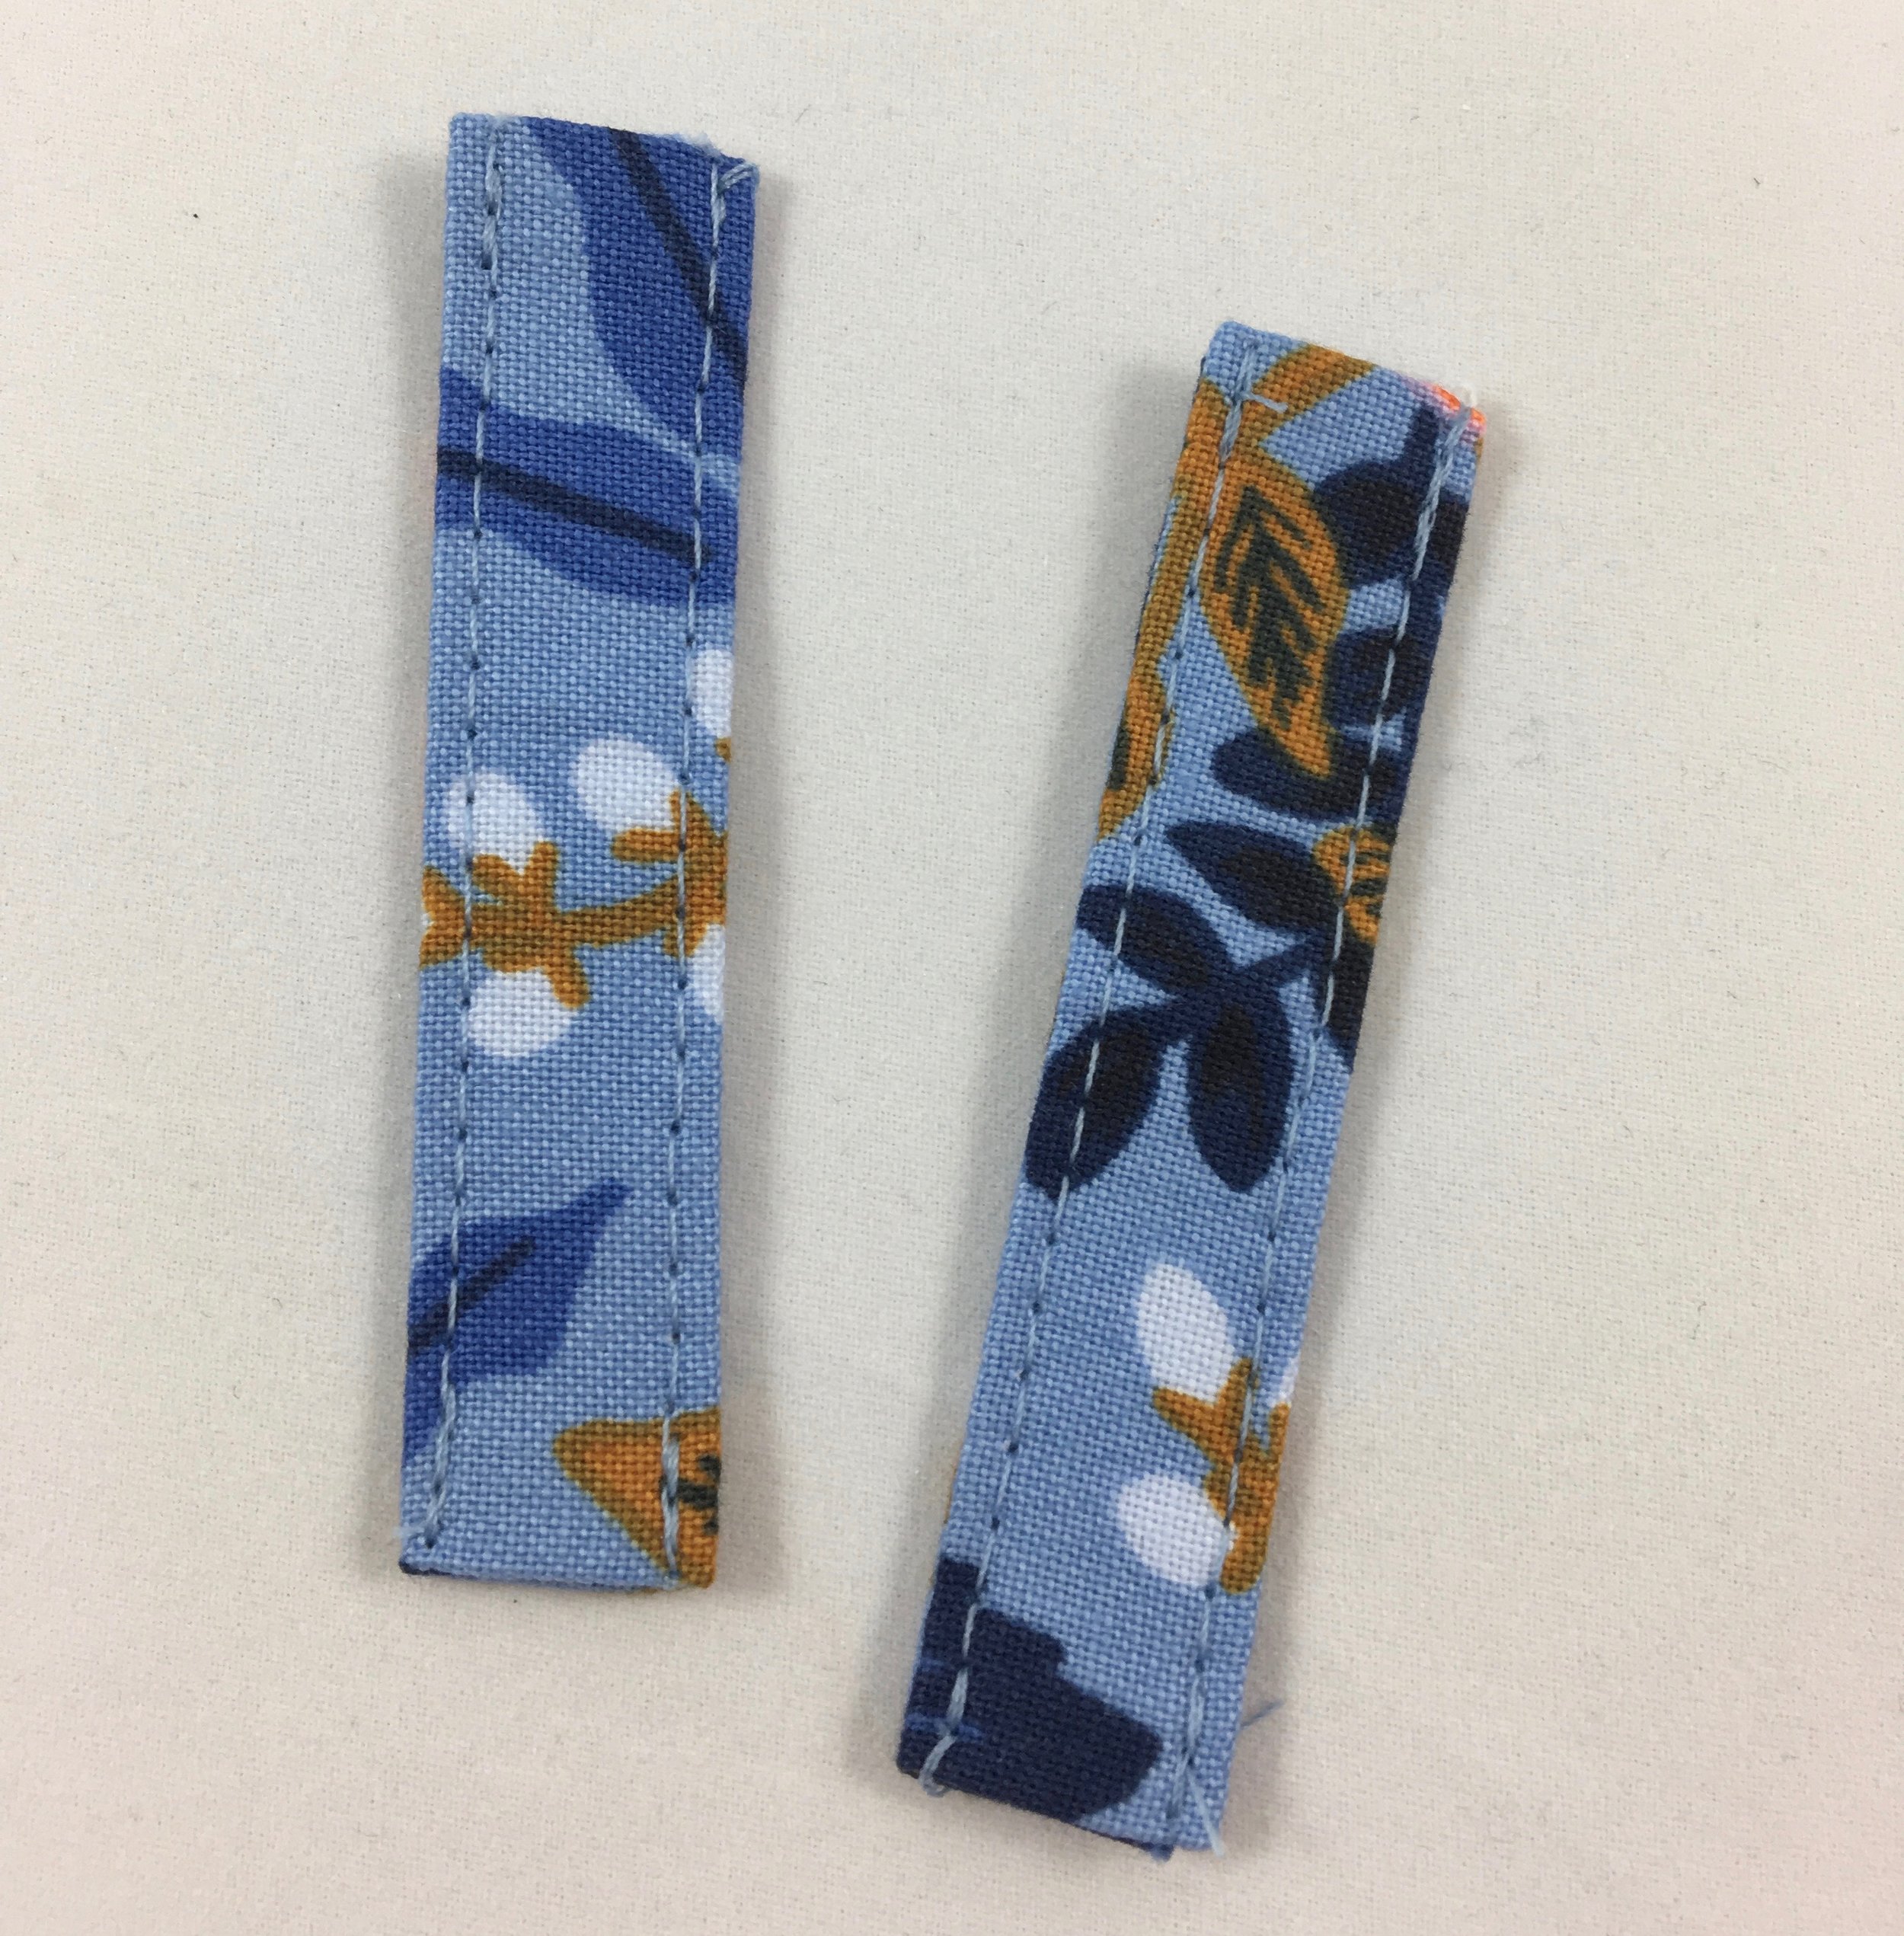
1. Cut out two Anchor Pieces (not just one) @ 3" x 2" each. You will also cut out two pieces of SF101 @ 2 1/2" x 1". Center the interfacing on the back of the Anchor Pieces and fuse into place. (see photo below)

2. Fold the two short ends of one of the Anchor Pieces to the wrong side 1/4" and press in place. (see photo below)

3. Fold the Anchor Piece in half the long way, wrong sides together and press. Now, fold the two raw long edges into the center fold, wrong sides together and press. With all the folds in place, press the Anchor Piece well. (see photo below) Repeat this step for the second anchor piece.

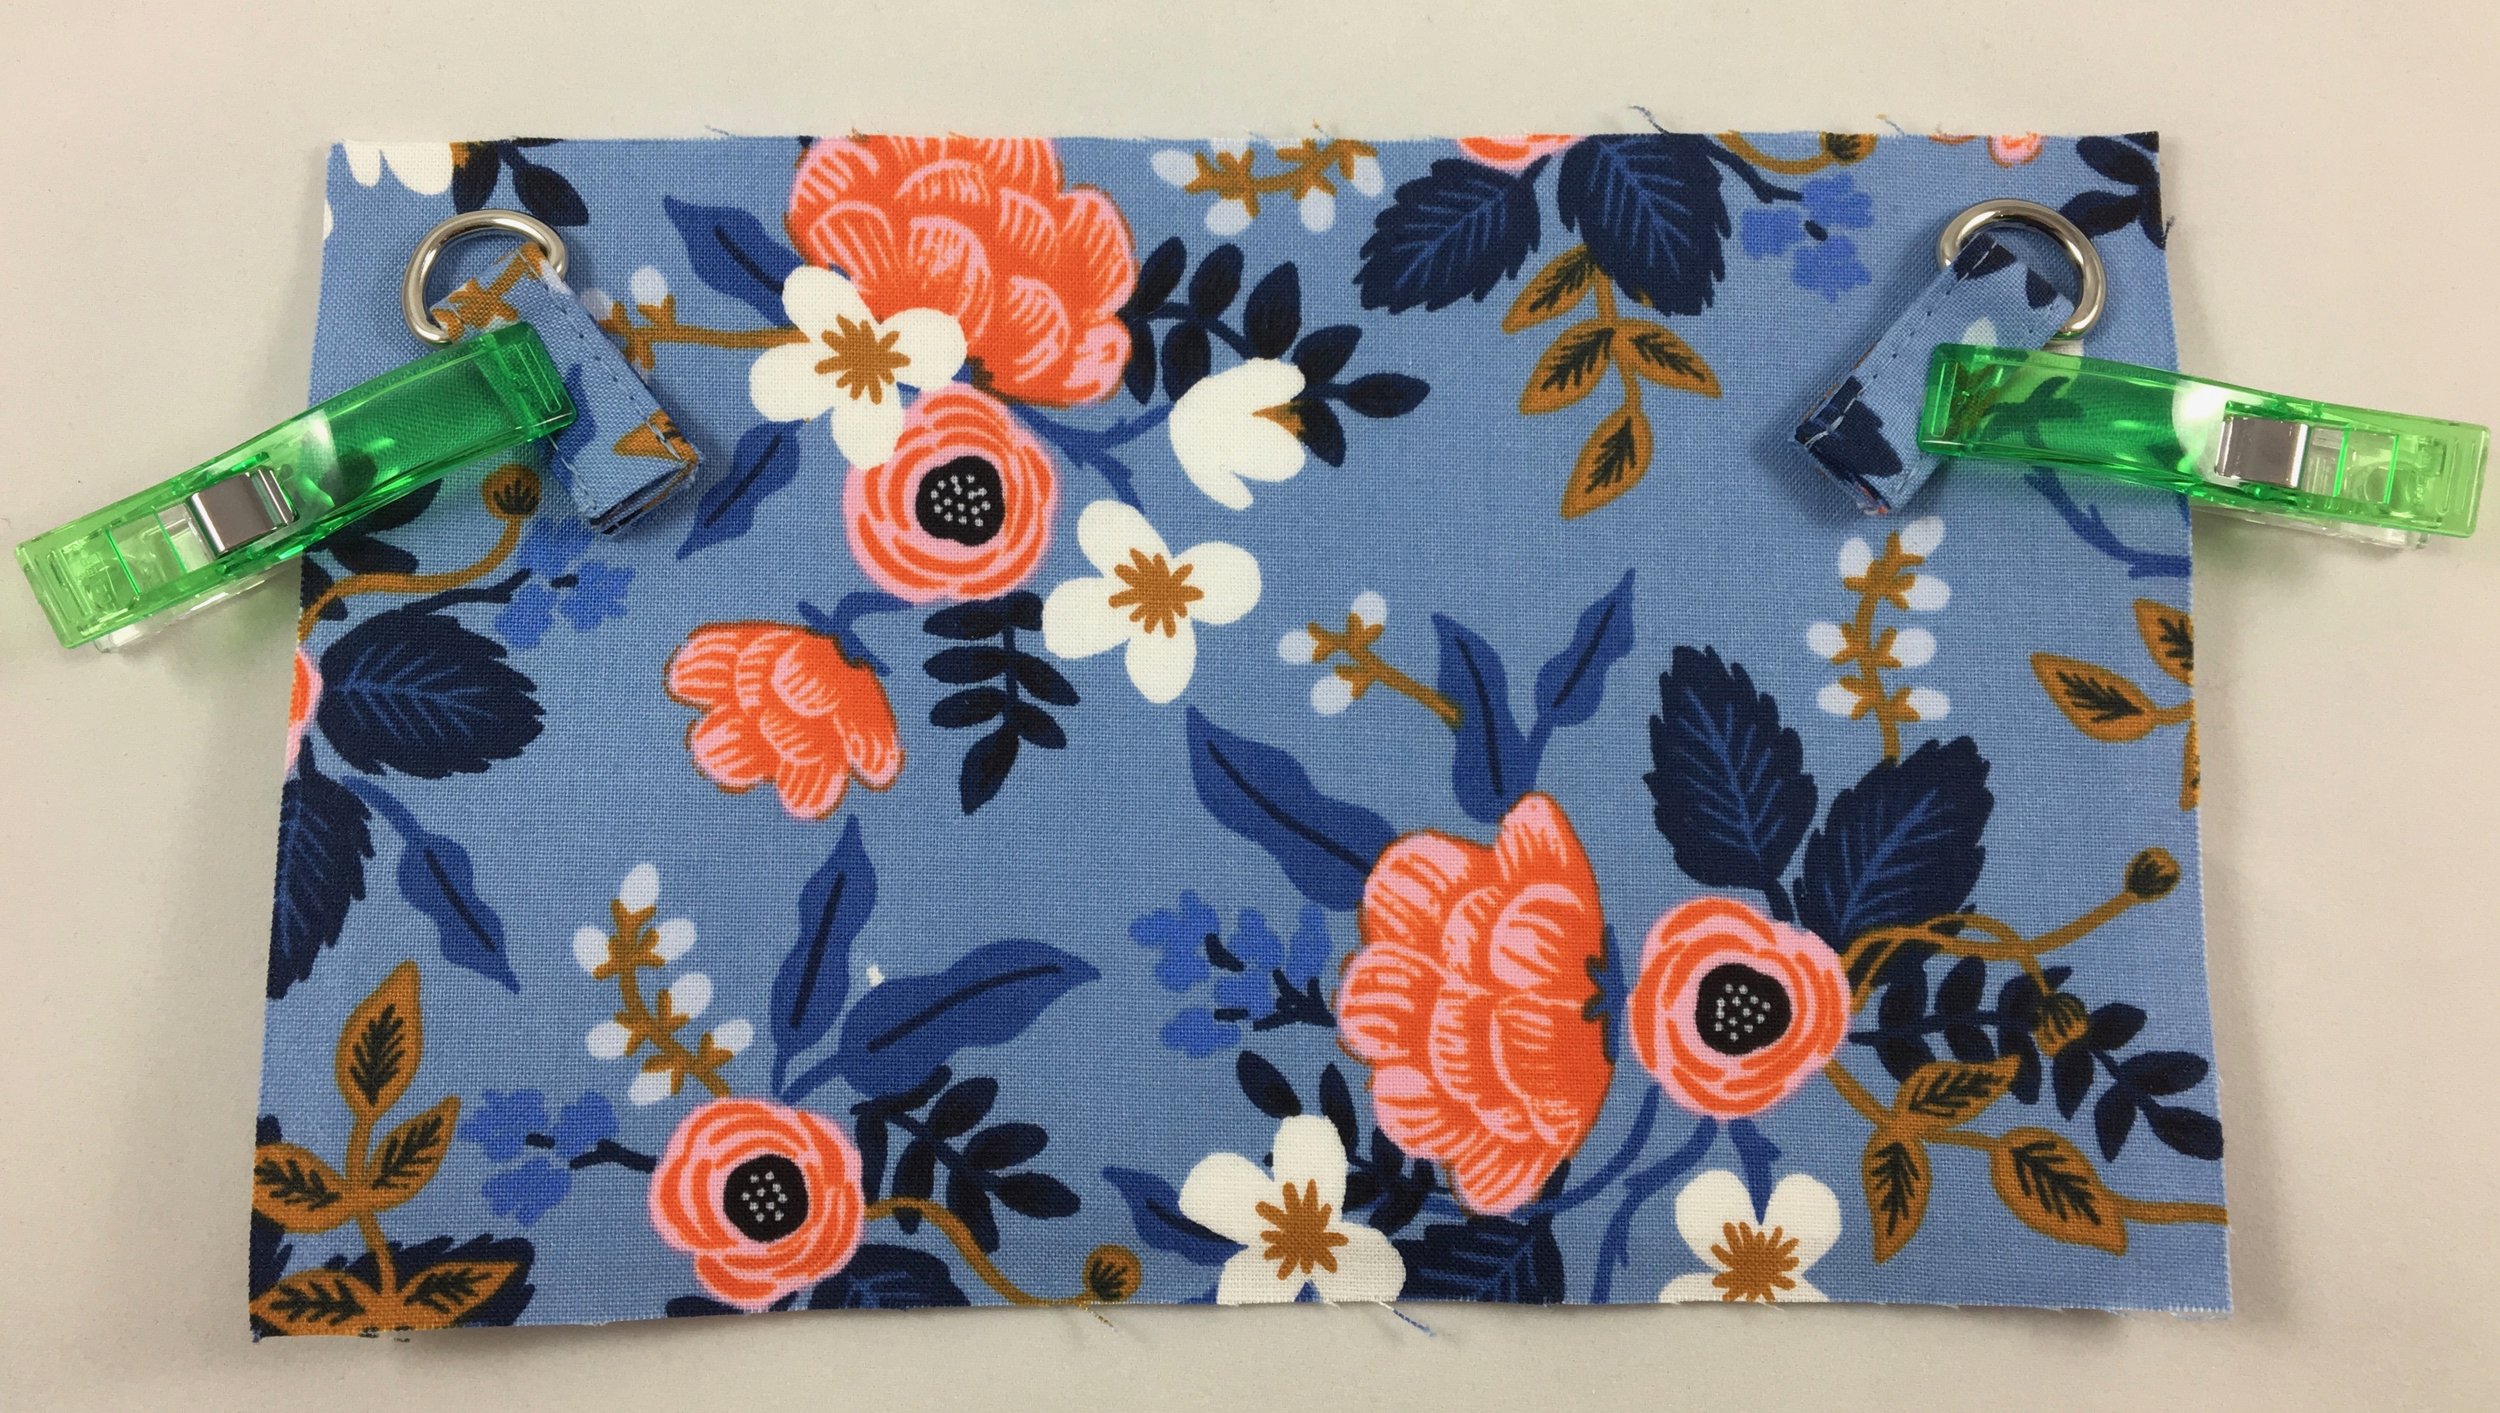
3. Top stitch the long edges of the Anchor Pieces 1/8" from the edges. (see photo below)
4. Fold each Anchor Piece in half over a 1/2" D-ring and pin or clip the ends together and set these aside while you work on making your Lindsay Wristlet following the instructions given in the pattern. (see photo below)

5. Before starting step 11 (Adding the Main Zipper) of the Lindsay Wristlet pattern, you will need to add the Anchor Pieces to Piece C (the Back). I place one Anchor Piece, at an angle so that the center of the D-ring is pointing directly at one of the upper corners of the Back piece. I also make sure that each folded upper corner of the Anchor piece is 1/2" away from the nearest raw edge of the Back piece. Pin or clip (you need large clips for this) in place. Repeat this step with the other Anchor Piece on the other upper corner of the Back Piece. (see photos below)
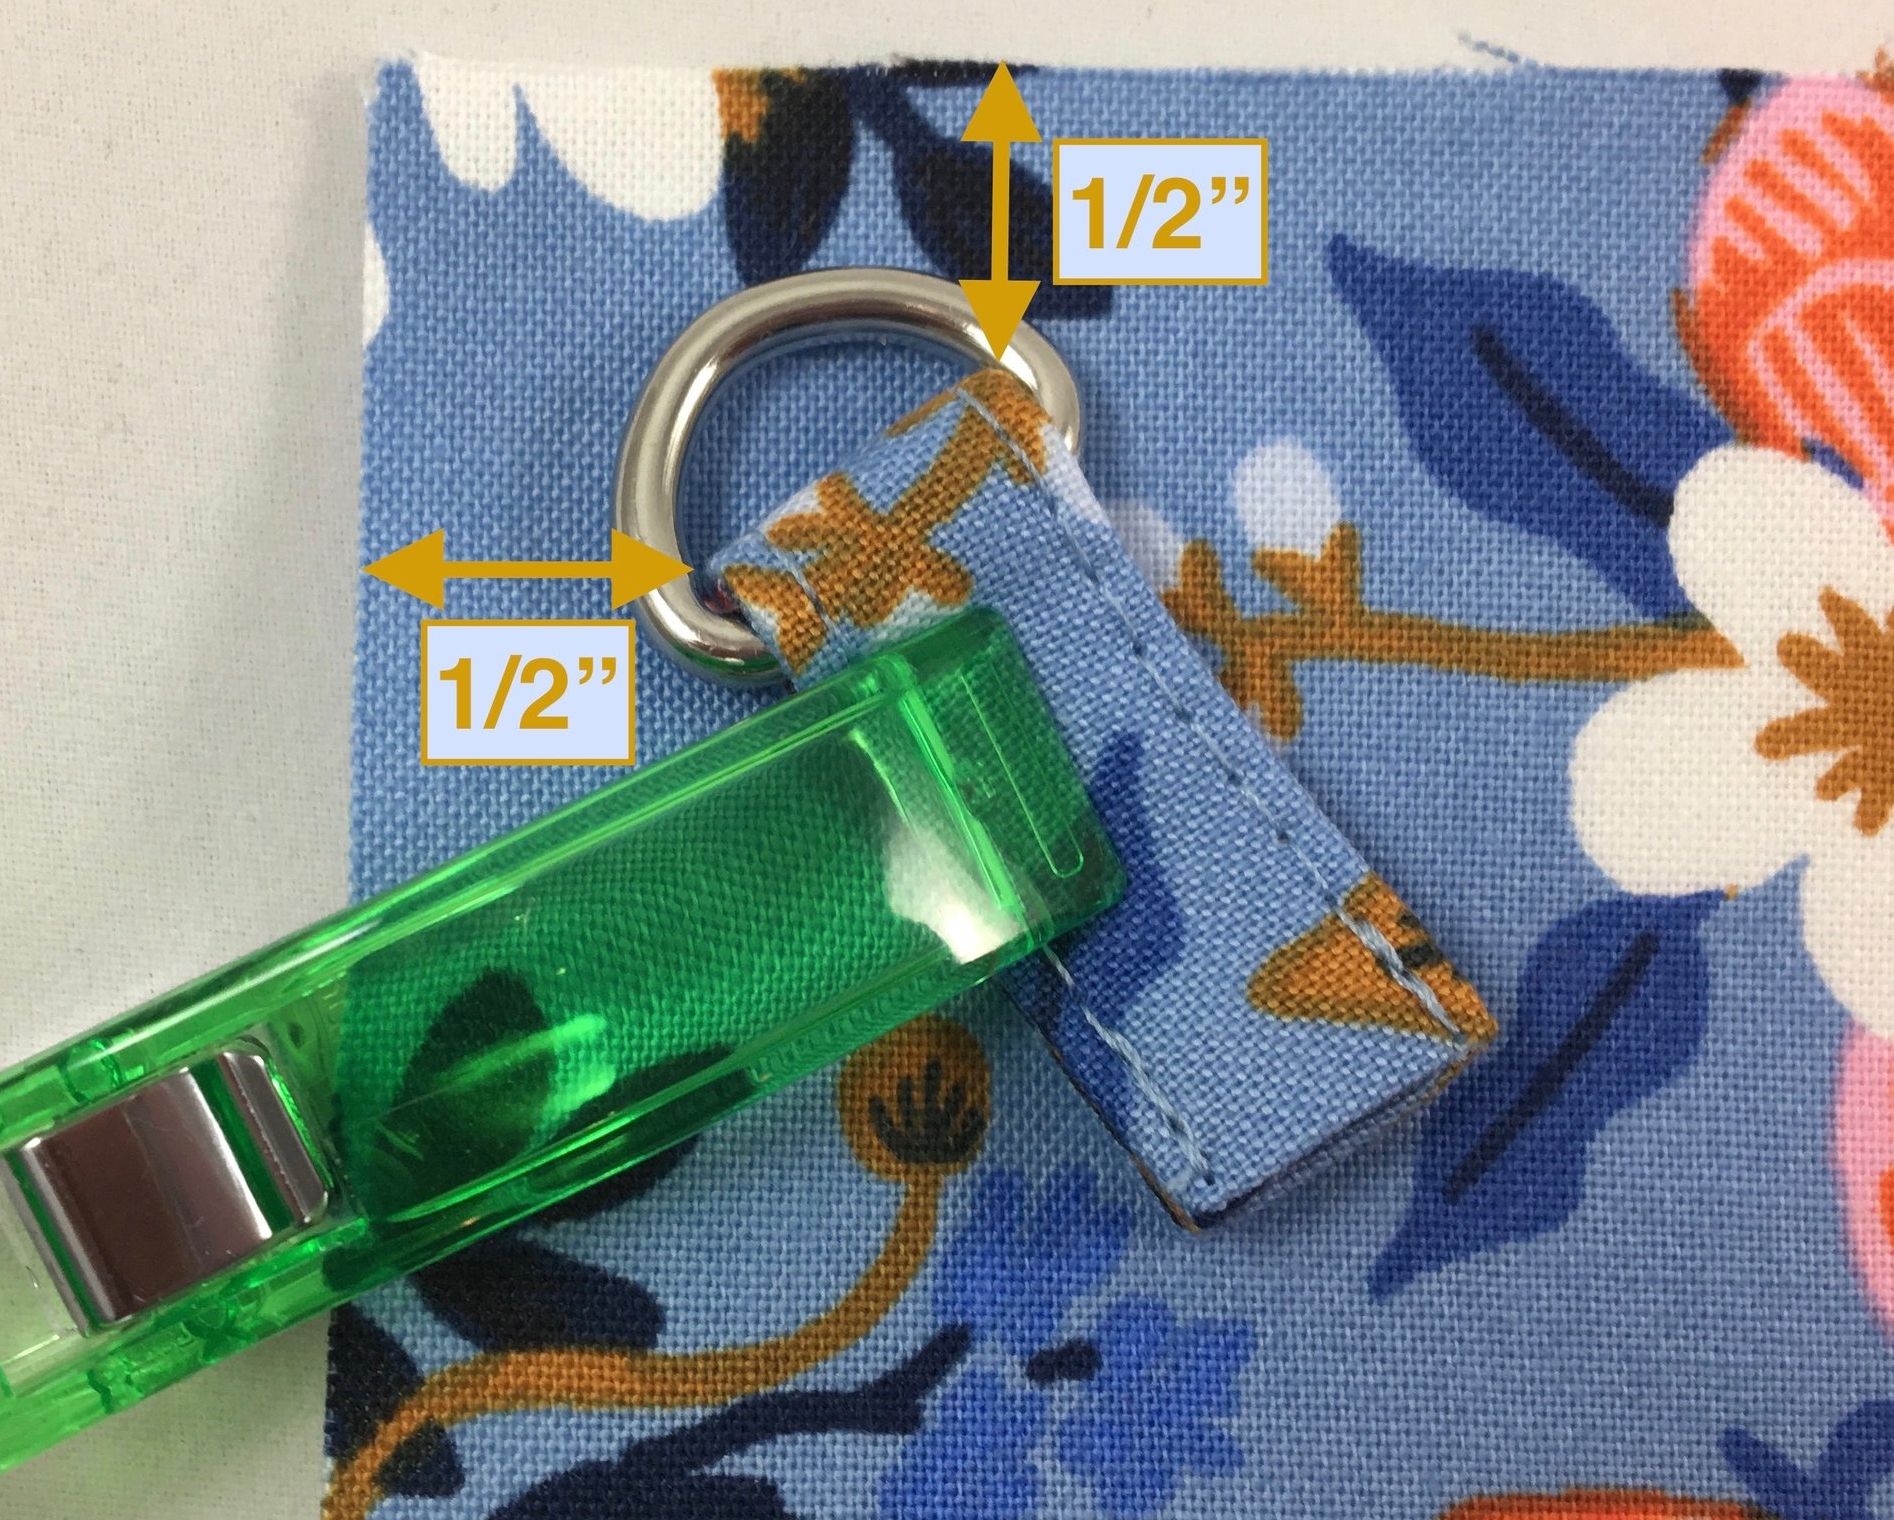
6. Top-stitch a box at the end of the Anchor Piece through both ends of the Anchor Piece and the Back Piece. To make it easier to sew the Back Piece to the wristlet later, I like to give the D-ring a little wiggle room. To do this, I start by topstitching the part of the rectangle that will be closest to the D-ring, so that the flat edge of the D-ring is at the outer edge of my sewing foot and I sew across that short section with my needle centered. (see photo below left) Once you have sewn across the Anchor Piece fairly close to the D-ring, make a box by sewing 1/8" from each edge of the end of the Anchor Piece. (see photo below right)
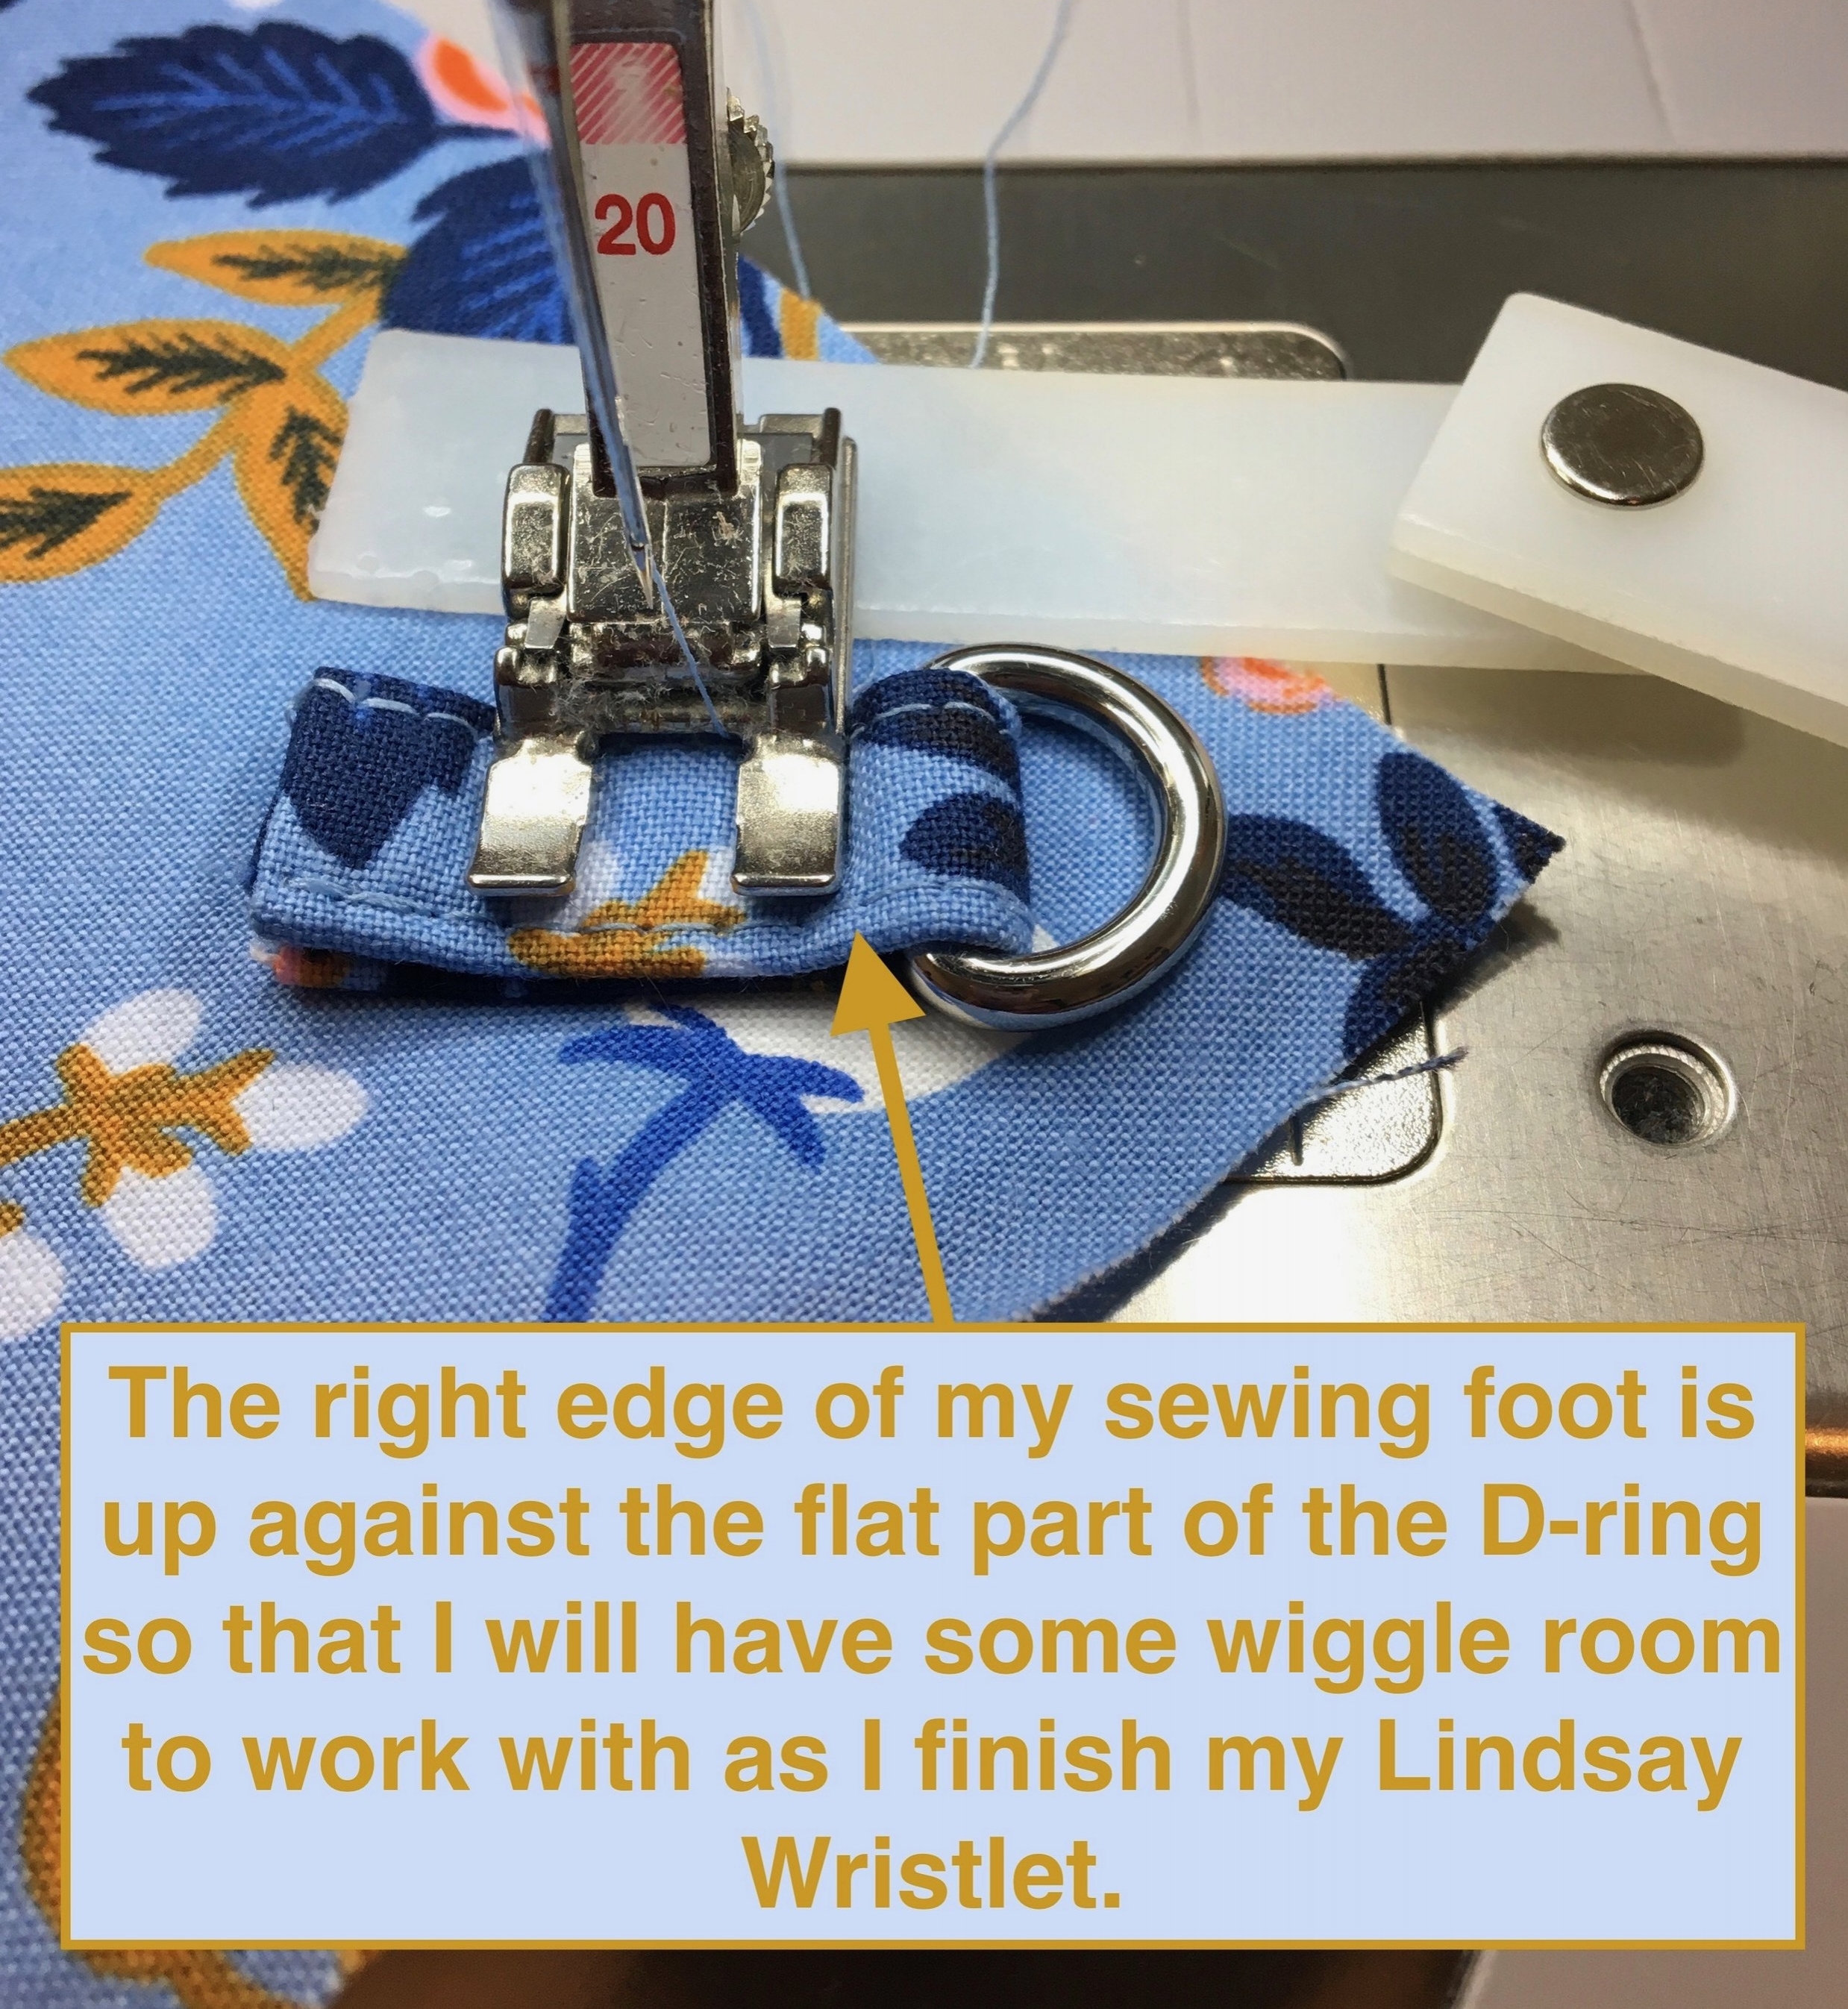

Hint: I use my Bernina Height Compensation Tool to keep my sewing foot level as I sew the Anchor Piece in place. This keeps my stitches nice and even. (see photo below) To read more about how the Bernina Height Compensation Tool works, check out this blog post: Sewing Has Its Ups and Downs.

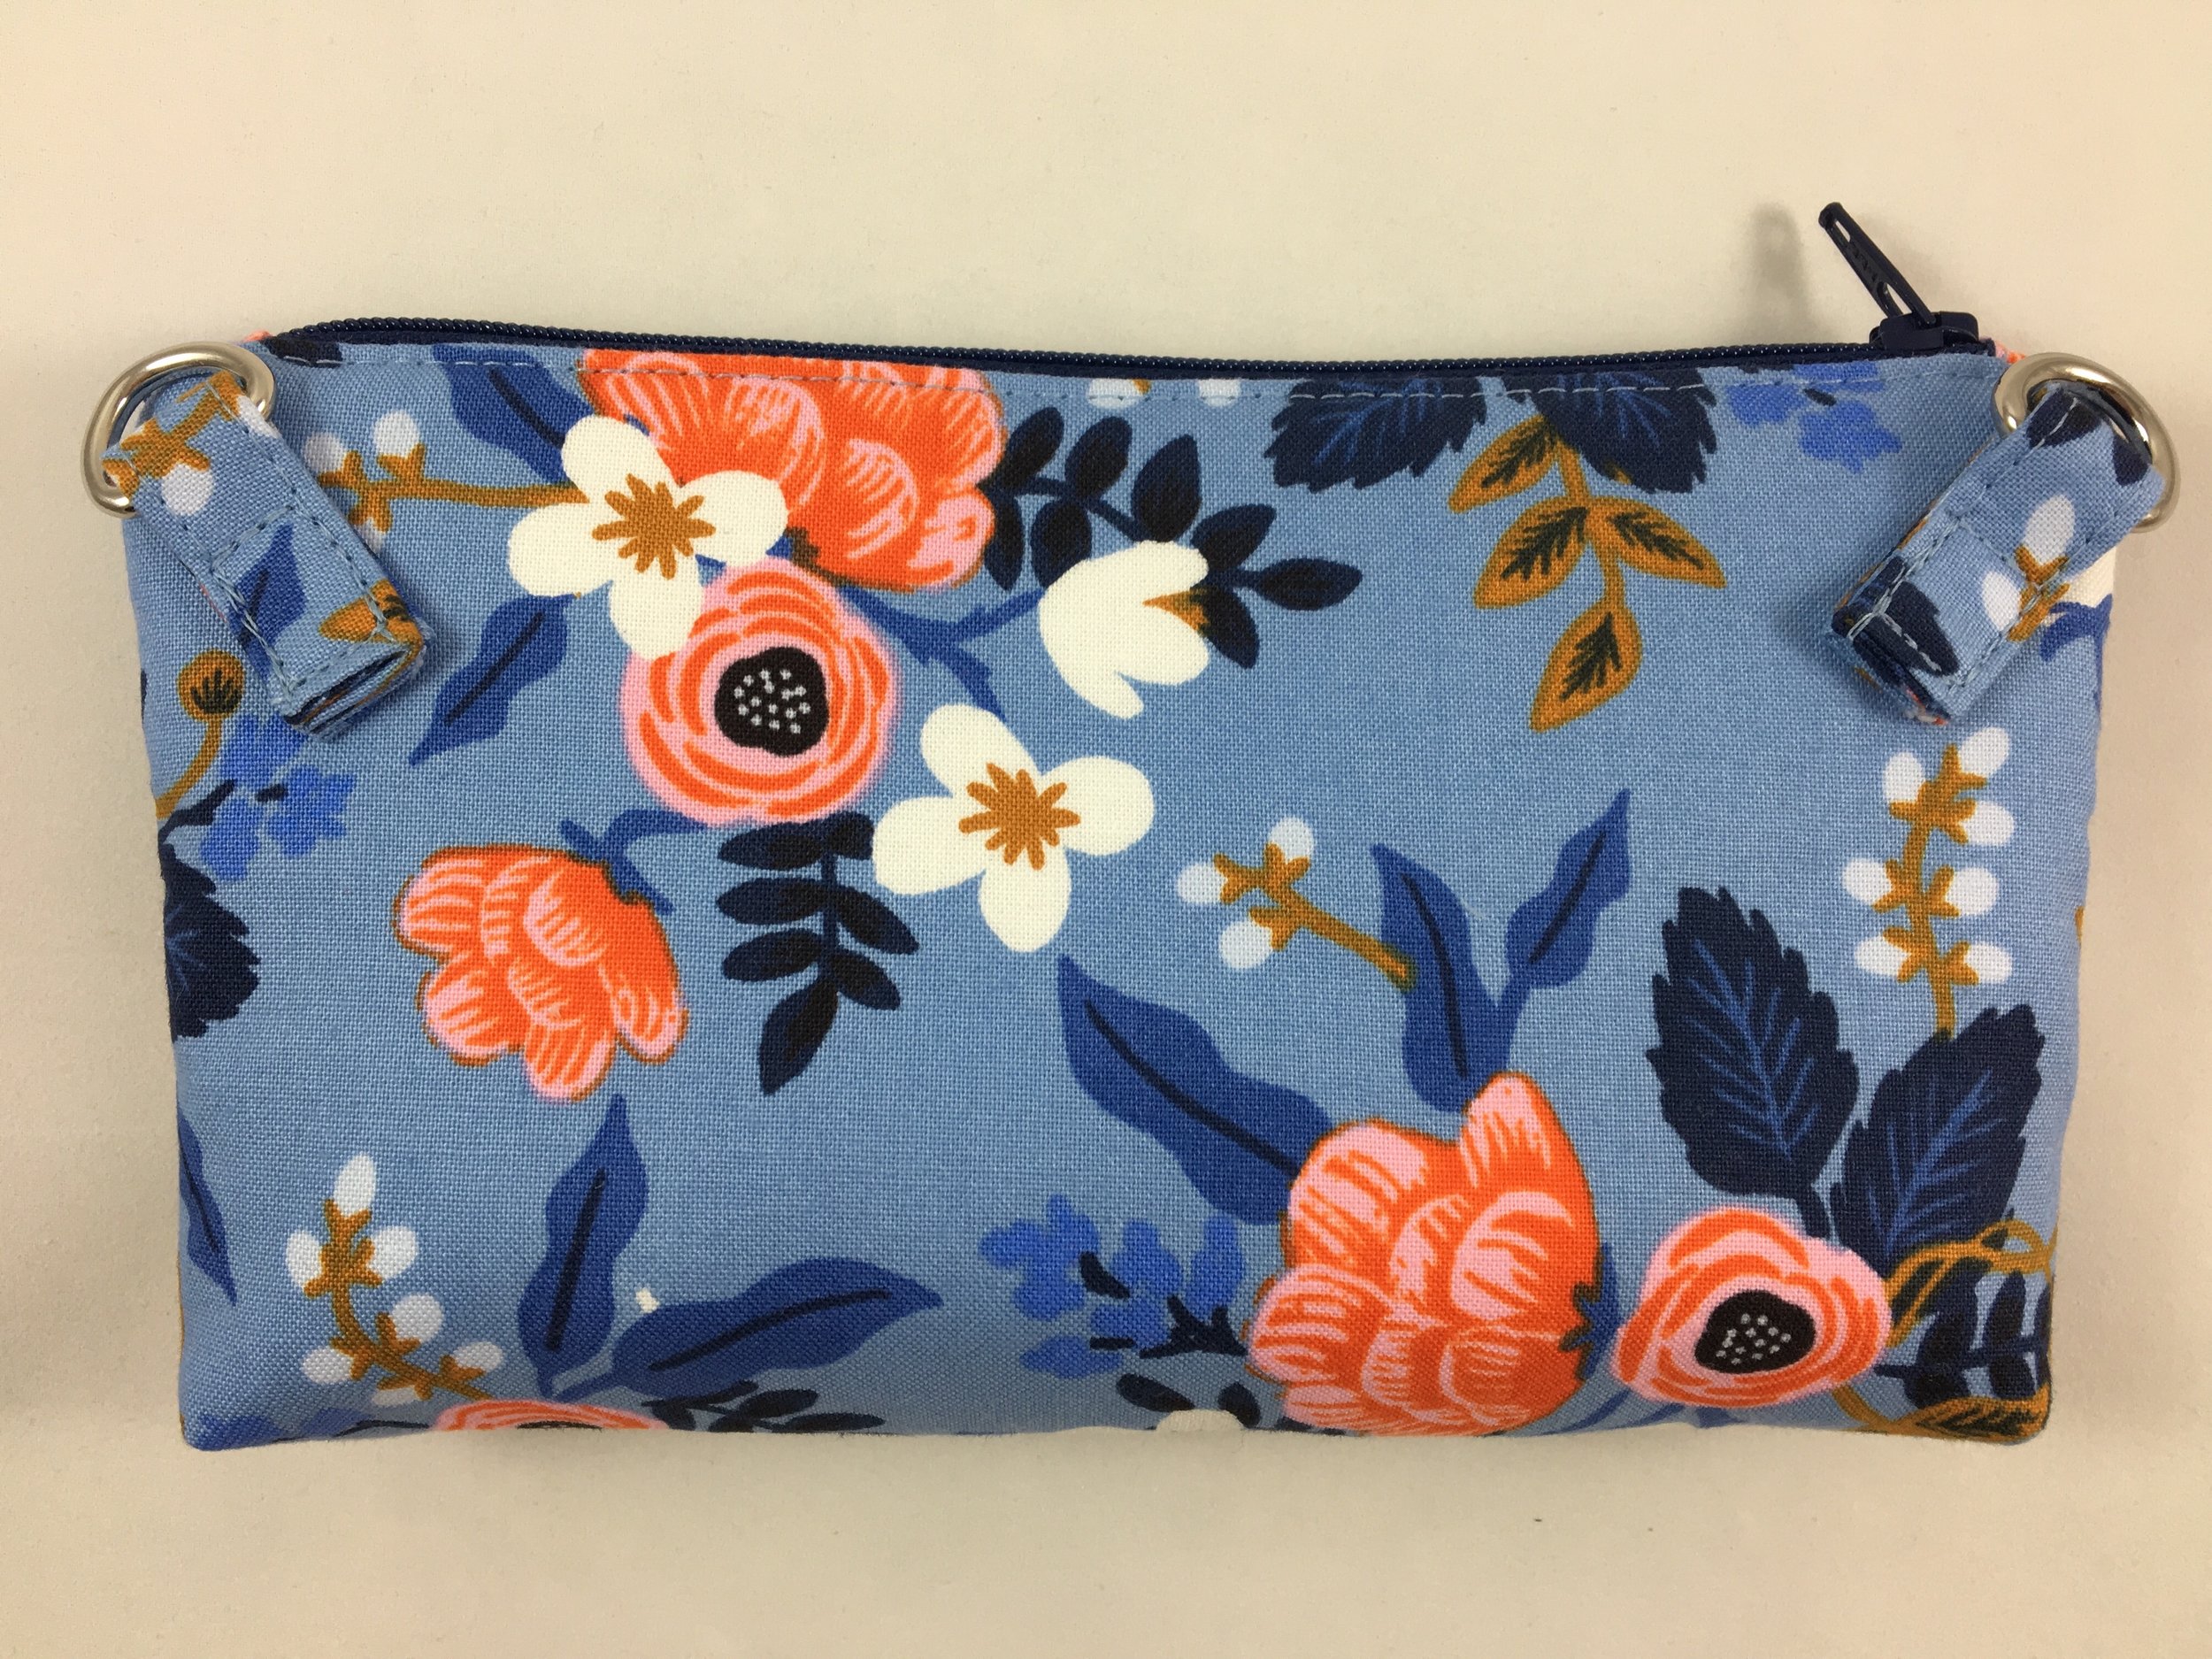
7. Continue following the instructions given in the Lindsay Wristlet sewing pattern to finish making your Lindsay Wristlet. You know that wiggle room I mentioned in step 6? You will appreciate it when you sew the main zipper in place and when you are on the final step of the pattern because you will be able to move the D-rings well out of the way as you sew nearby. (see photo below)

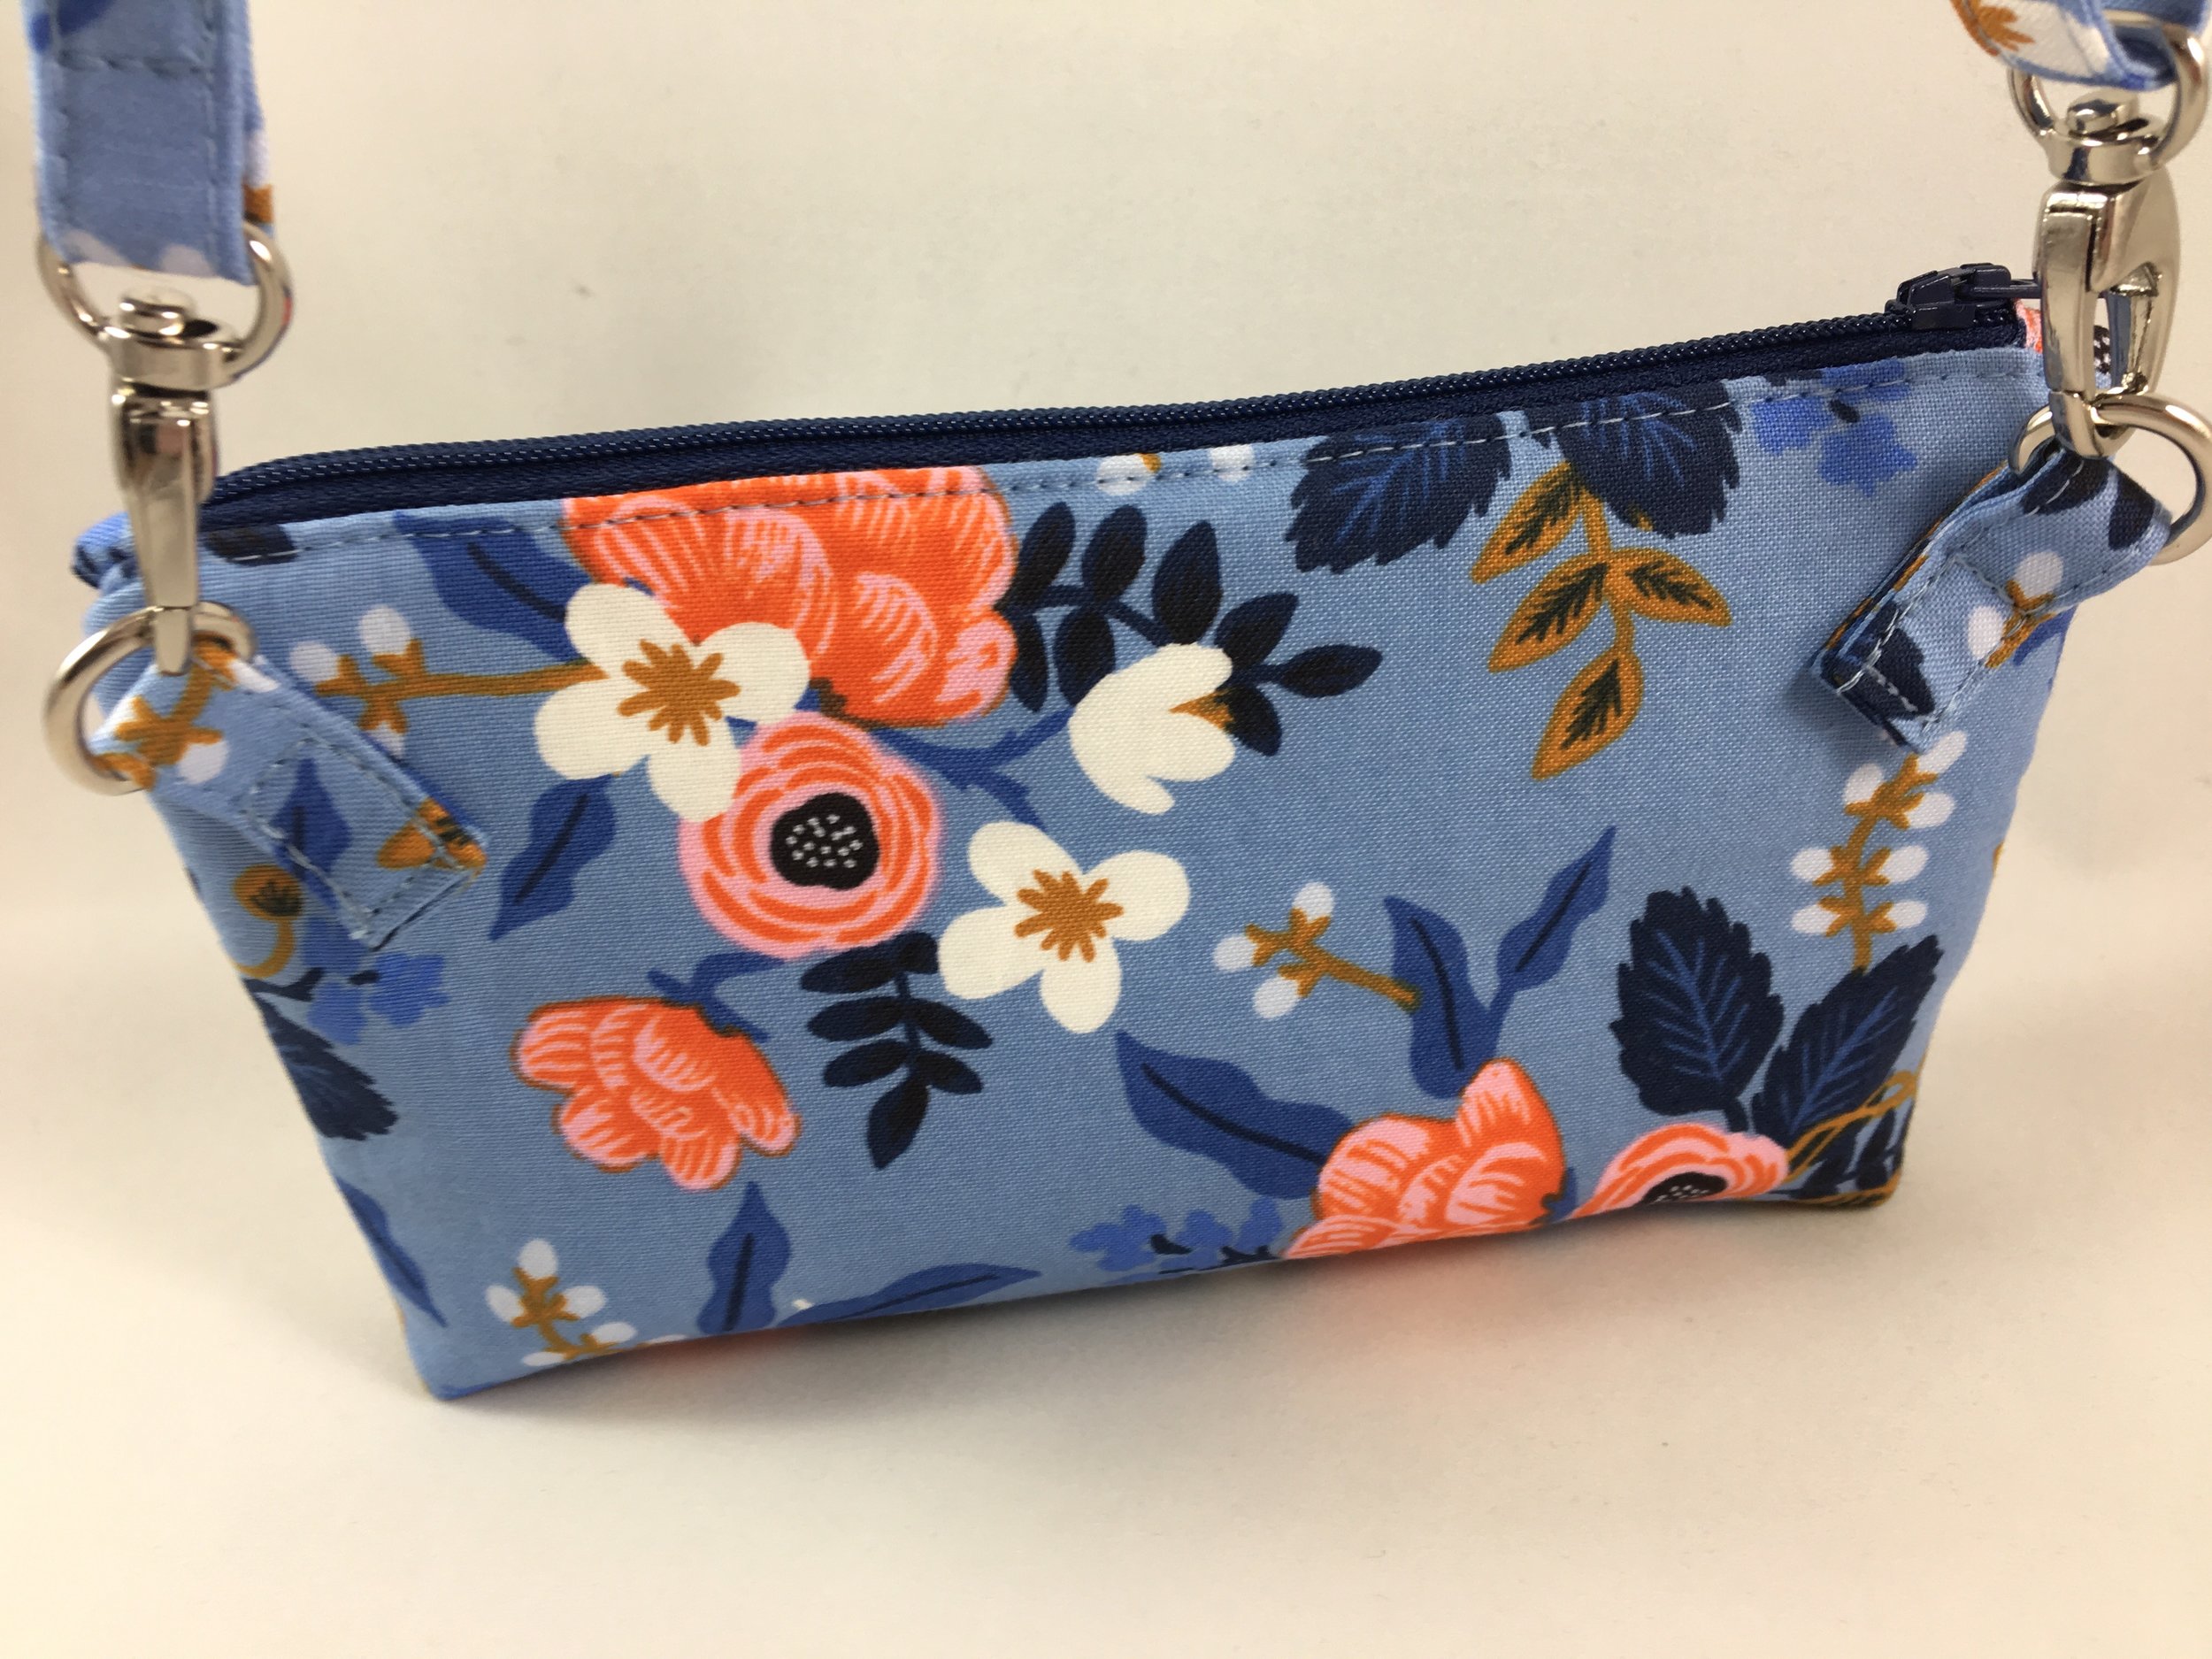
8. One more thing is needed - the crossbody strap! To make the crossbody strap, refer to the blog post from Lindsay Wristlet Week, "Adding a Crossbody Strap to the Lindsay Wristlet - Part 2."

The Lindsay Wristlet sewing pattern is available to purchase from the Uniquely Michelle Website Shop, the Uniquely Michelle Etsy Shop or the Uniquely Michelle Craftsy Pattern Shop.
Make sure to keep in-the-know on all the latest happenings at Uniquely Michelle by signing up for the Uniquely Michelle newsletter below!