Pam's Alternate ID Window for the Kristine ID Wallet
Michelle Burke
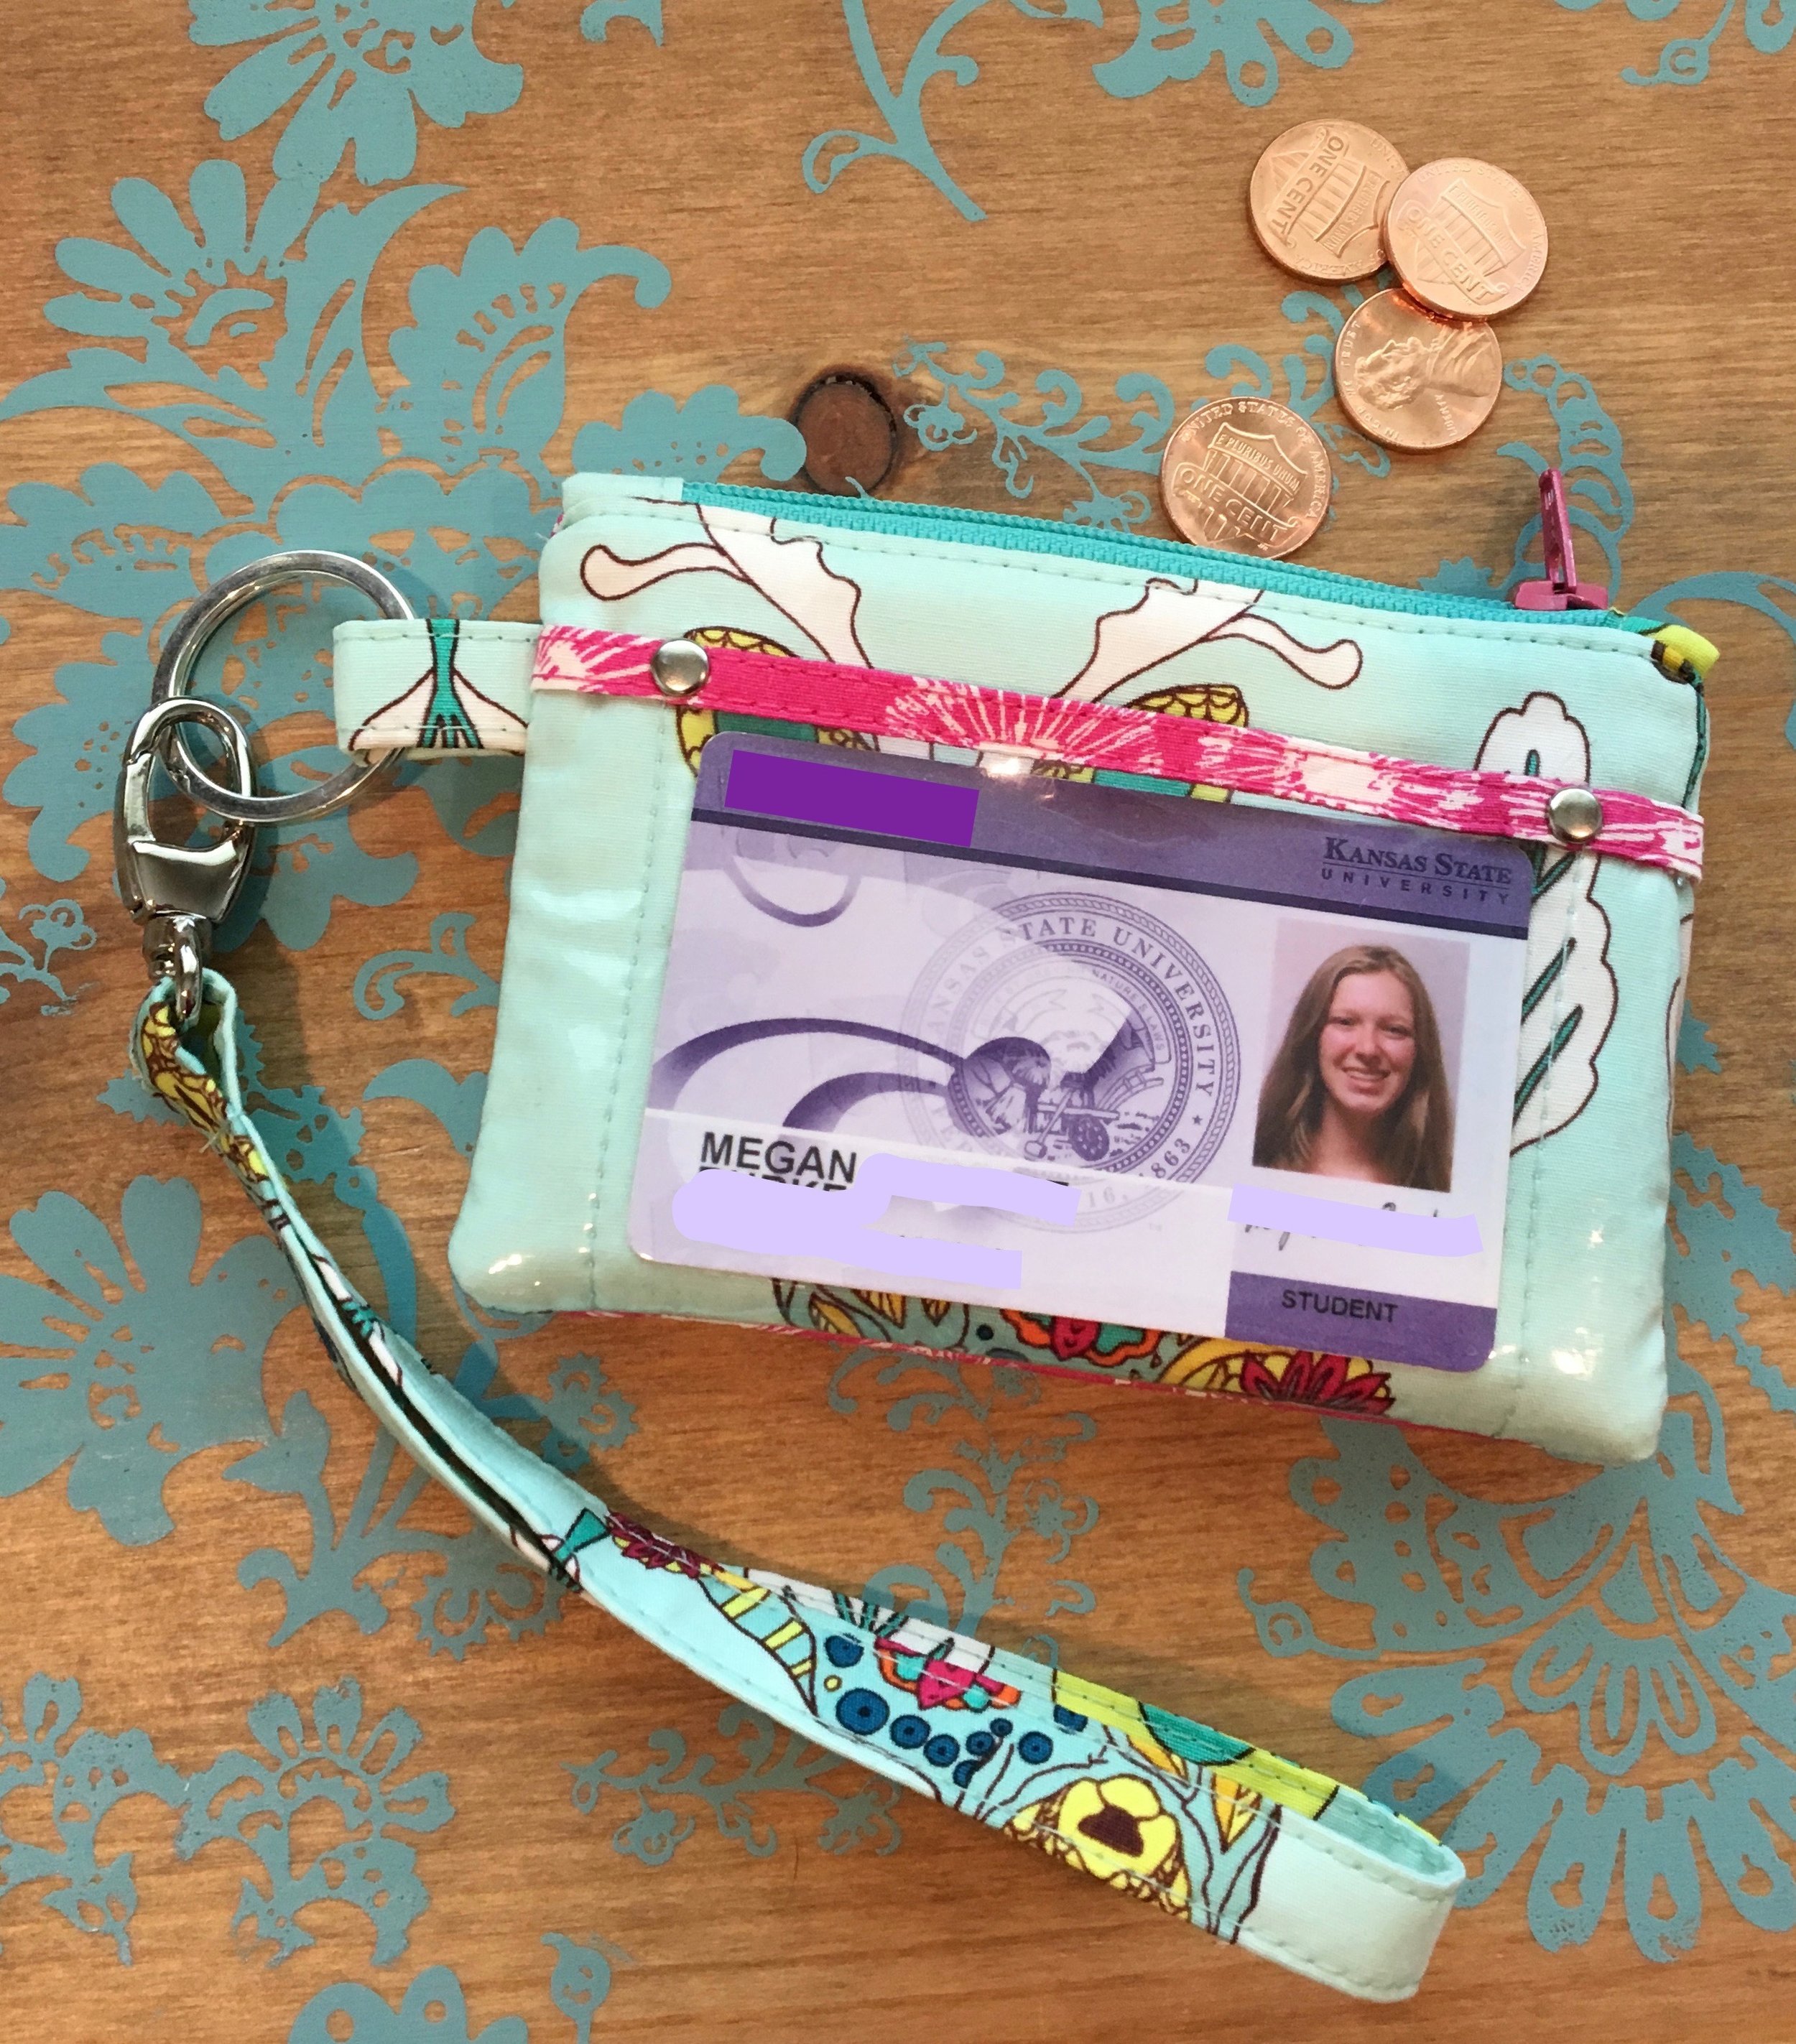
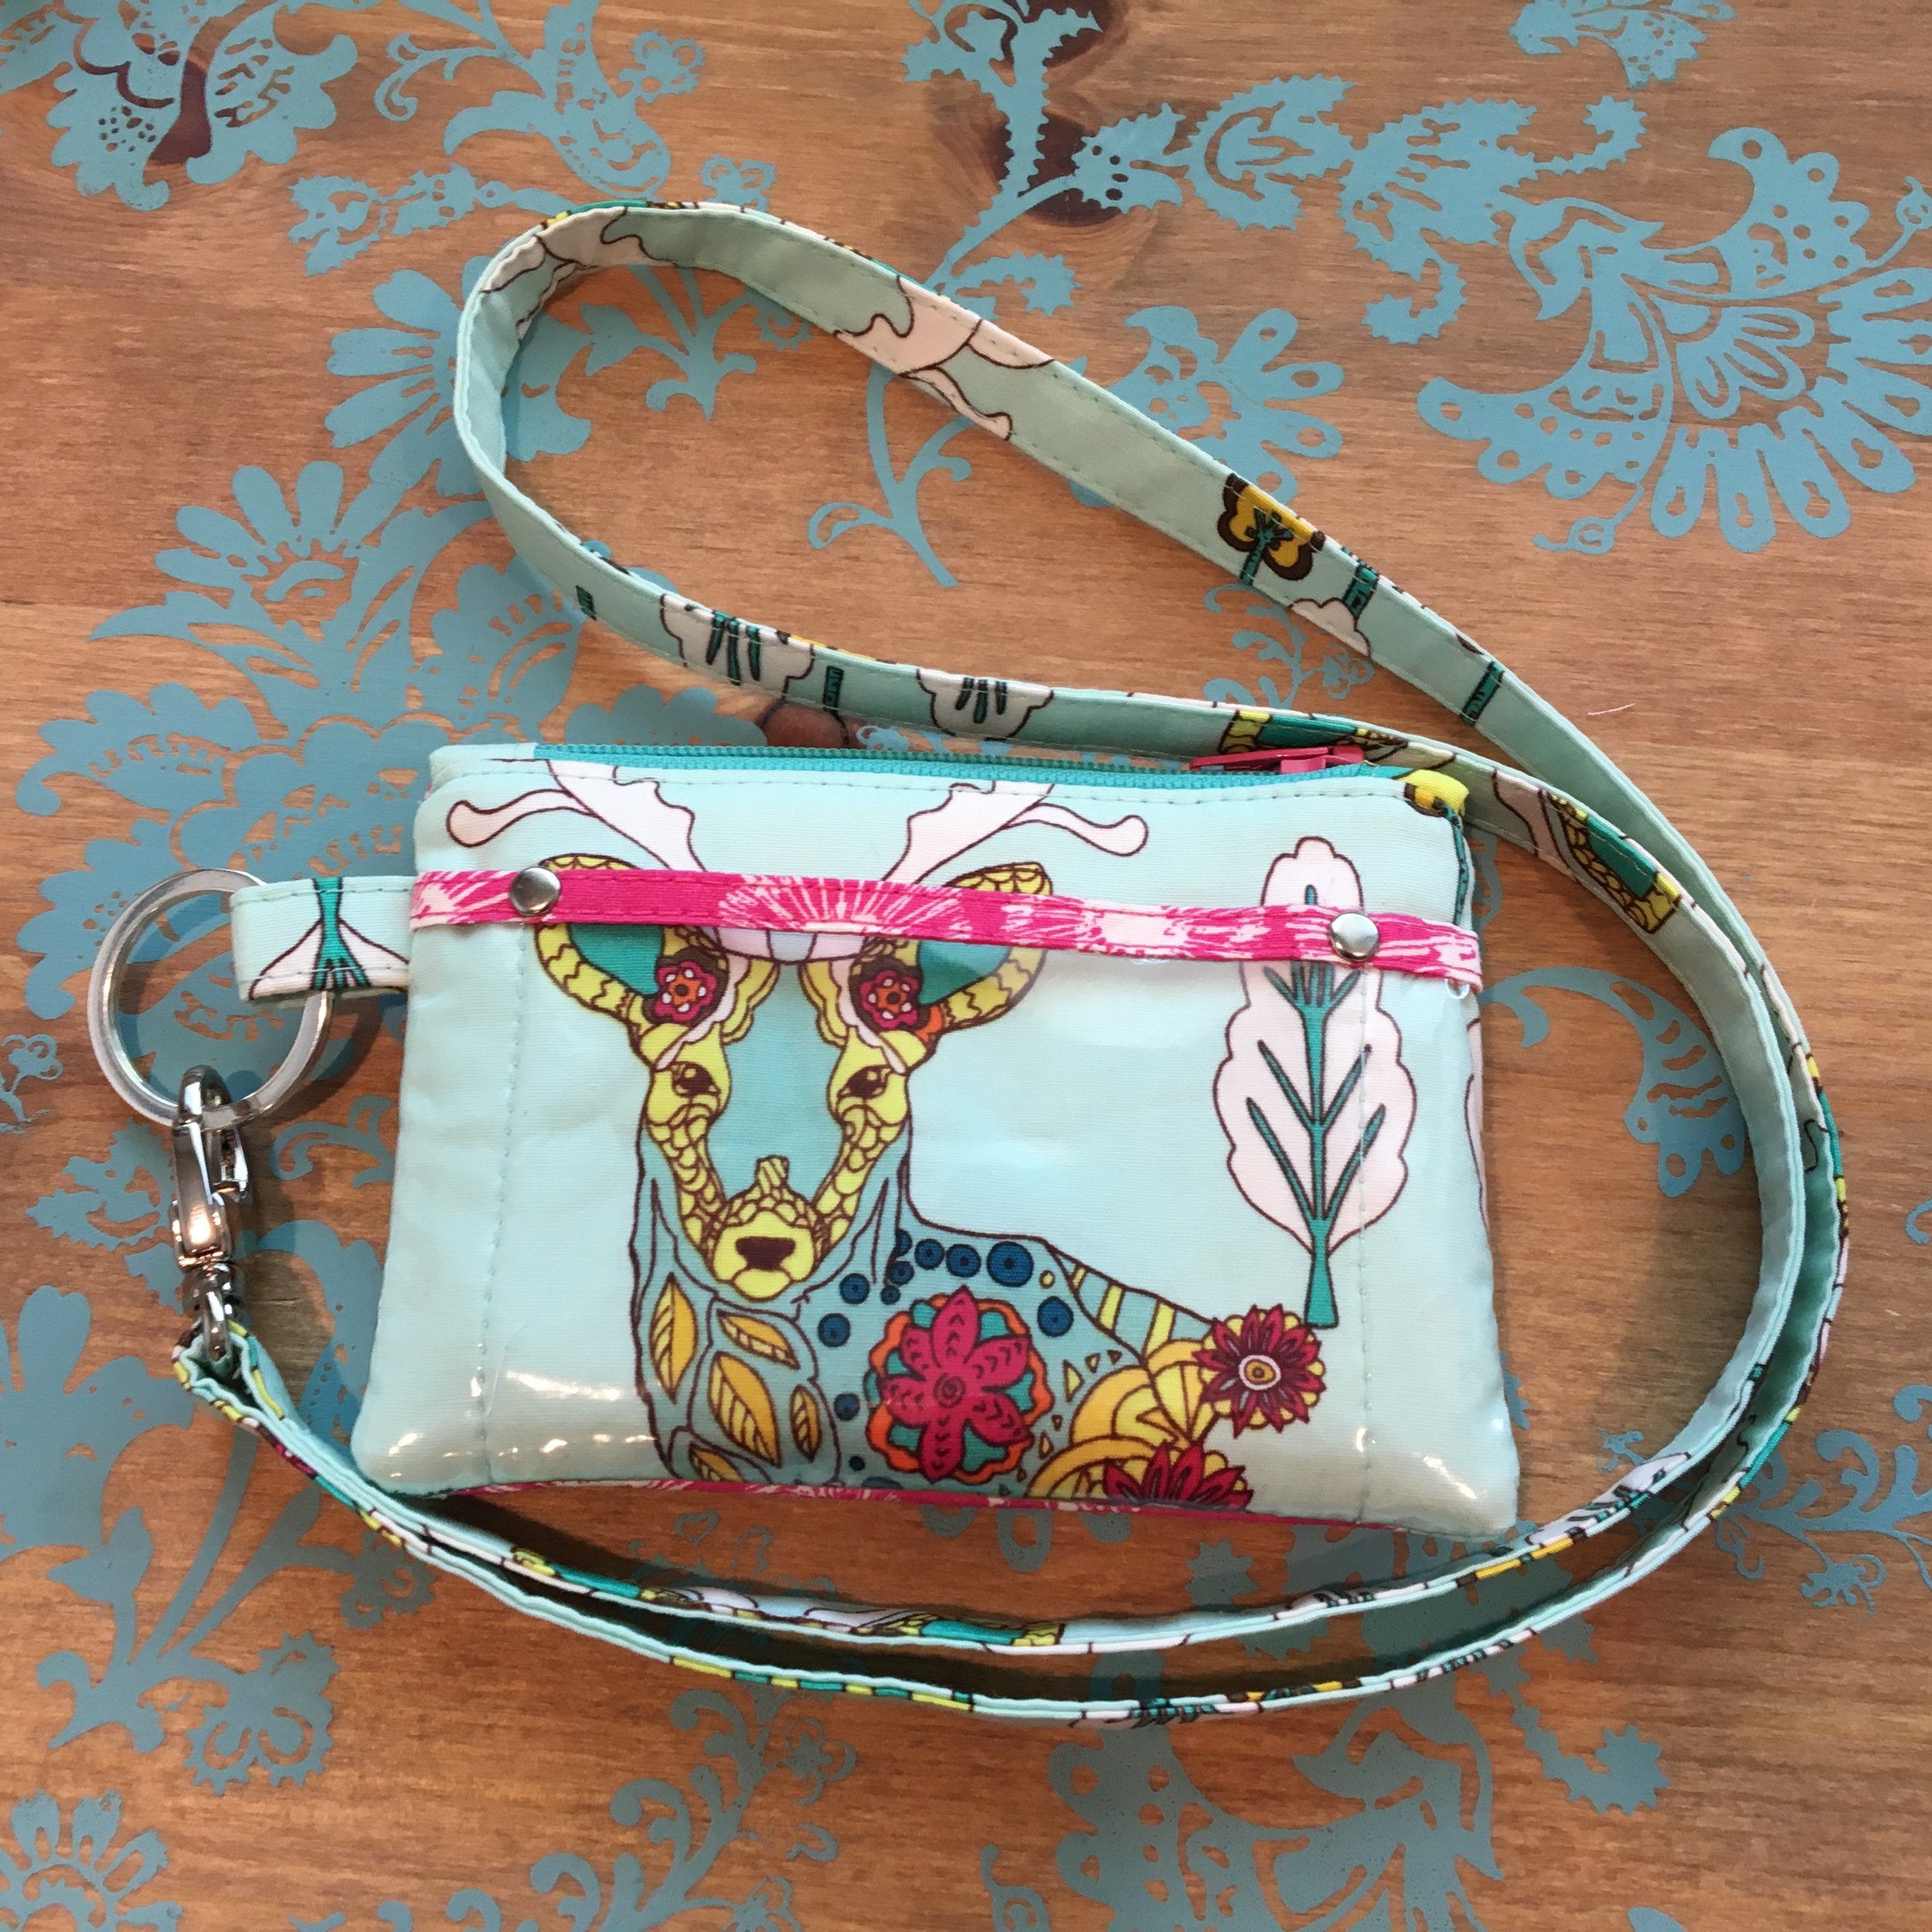
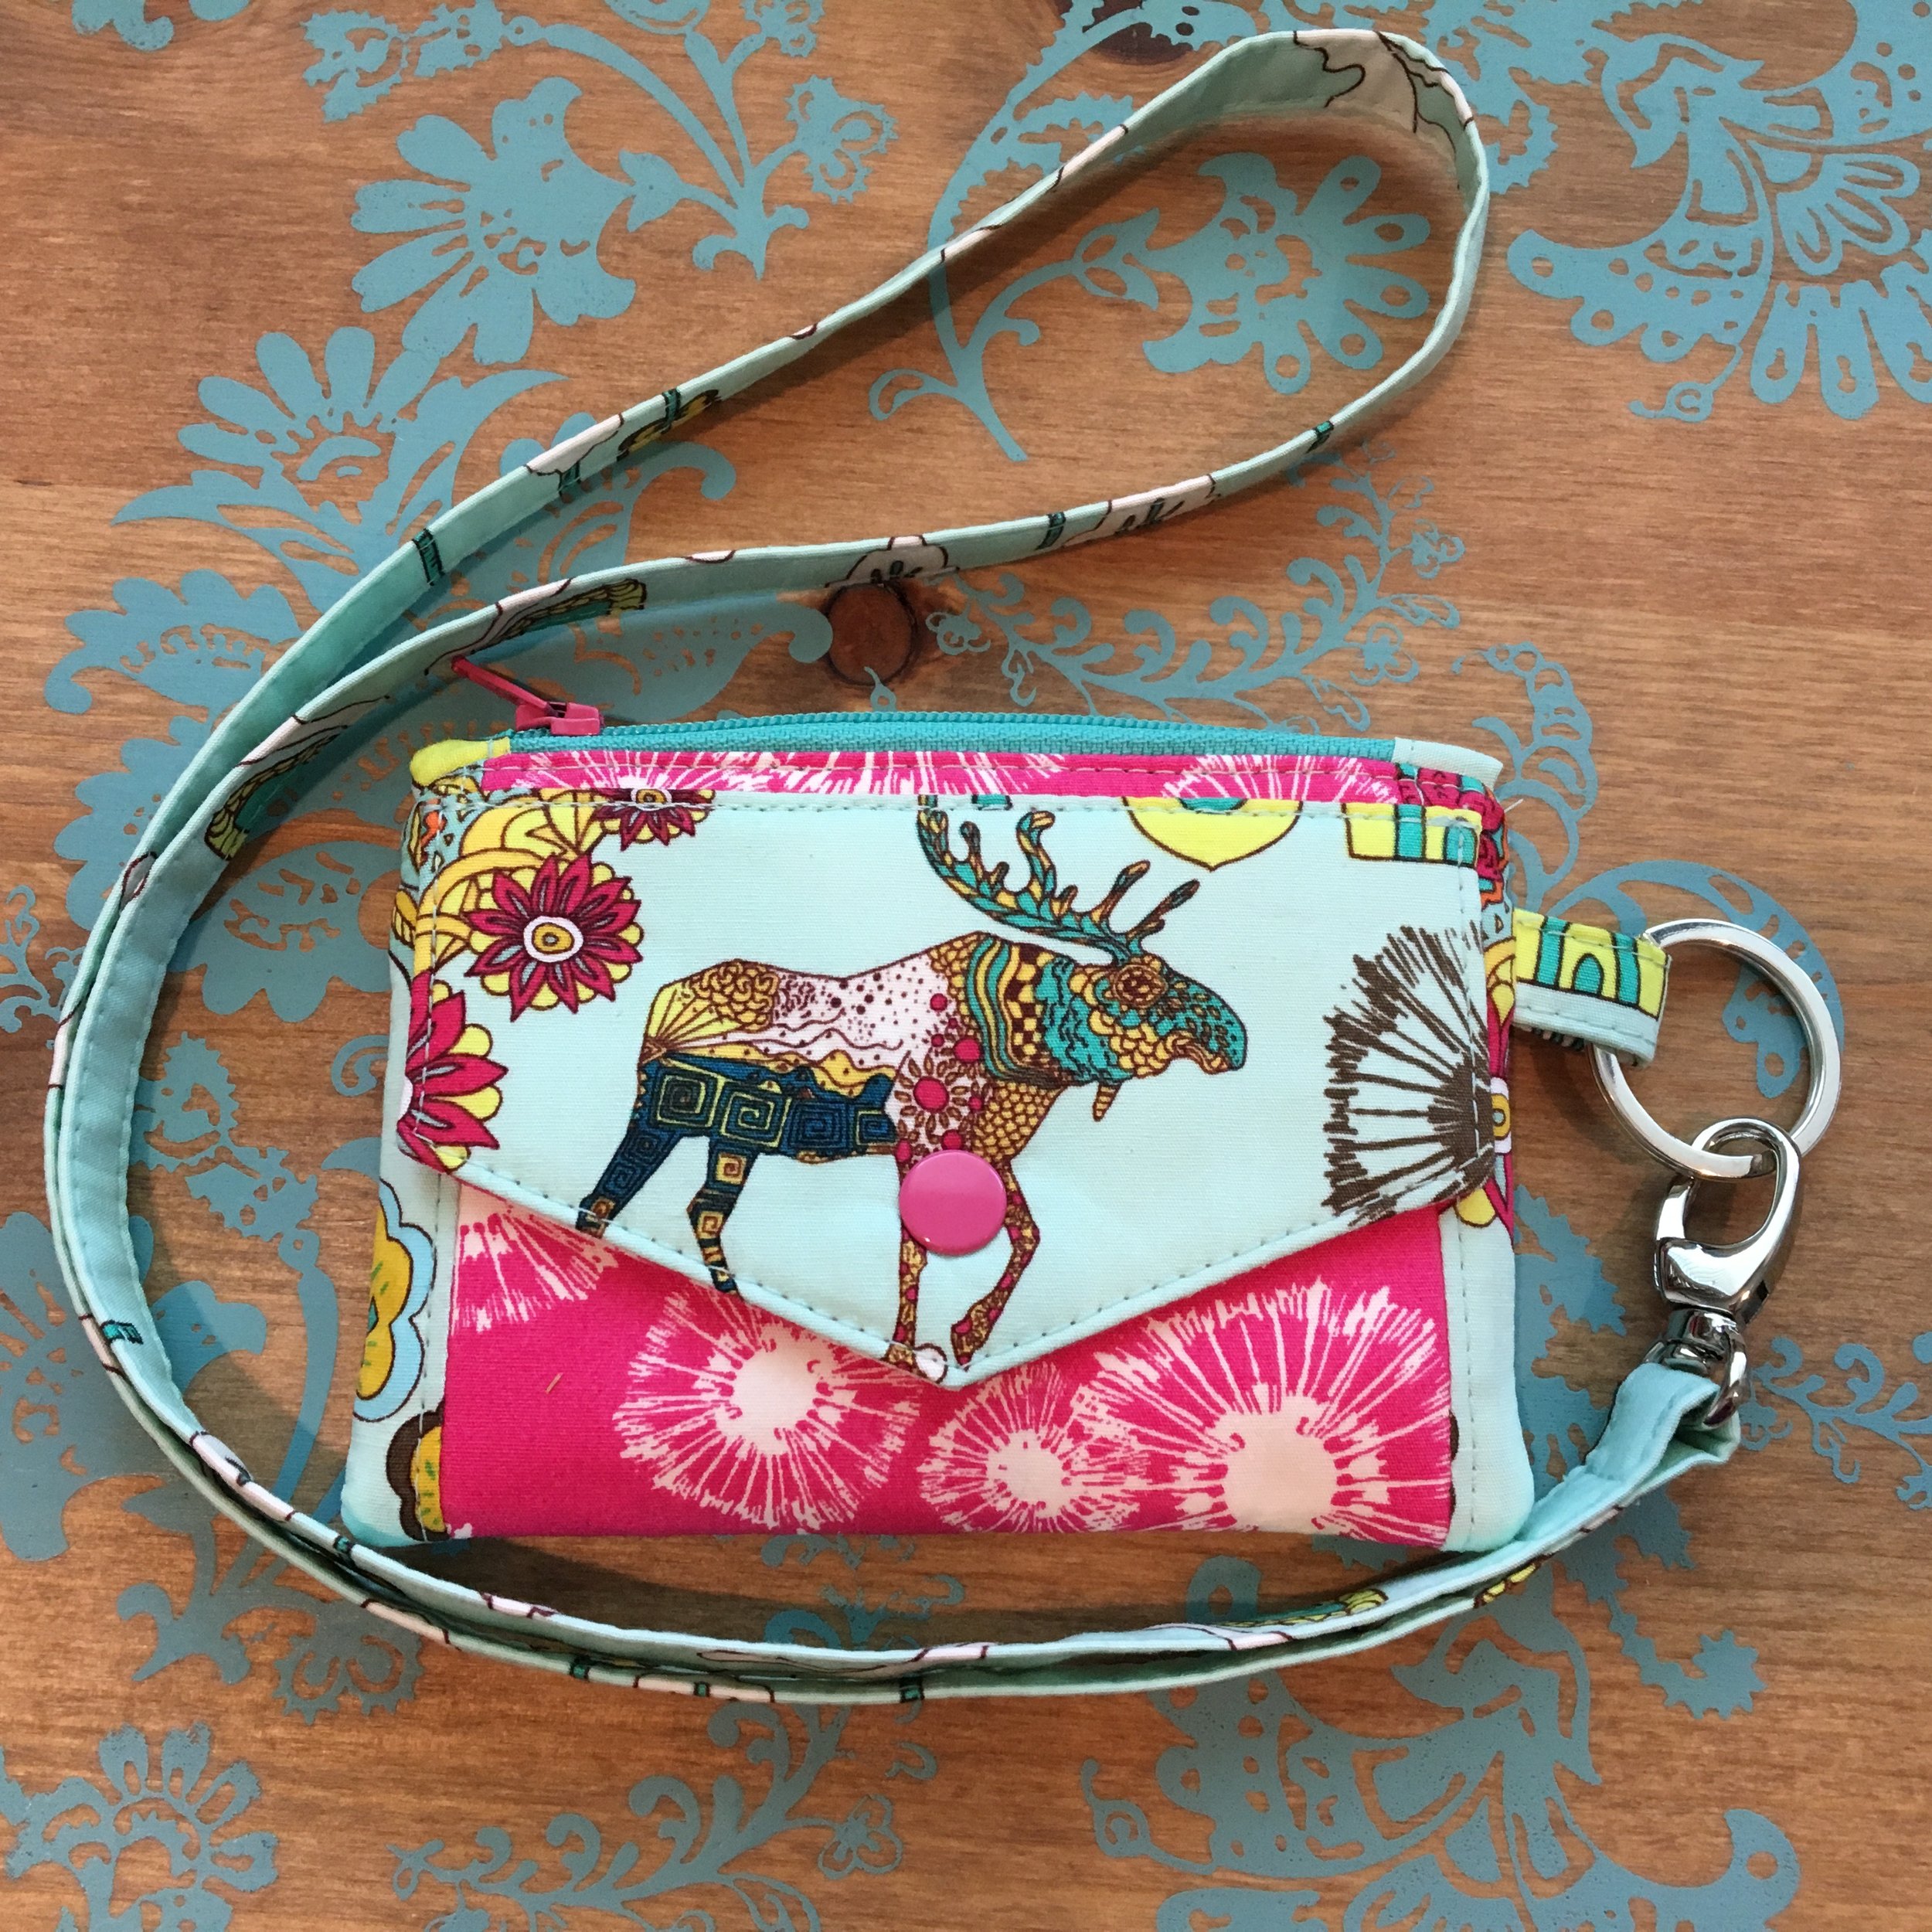
Last month I shared a tutorial for an alternate way of making the ID window pocket for a Kristine ID Wallet that Mary Wauters Divita had shared with us on the Uniquely Michelle Sewing Patterns Facebook Group. Today, I am sharing yet another alternate way to make the ID window pocket for a KIDW! This method is one that Pam Sutey came up with. I like Pam's method for making the ID window pocket, it is simple and great for showing off a favorite fabric. Check out the great Kristine ID Wallets that Pam made using her method in the slideshow below!

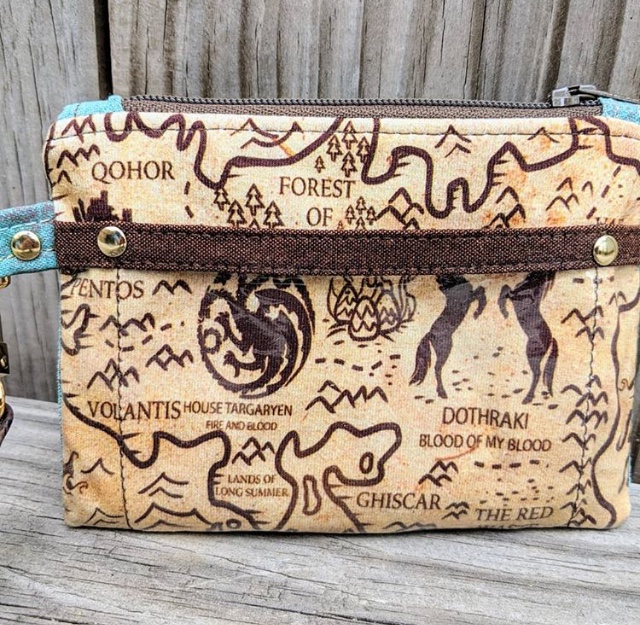
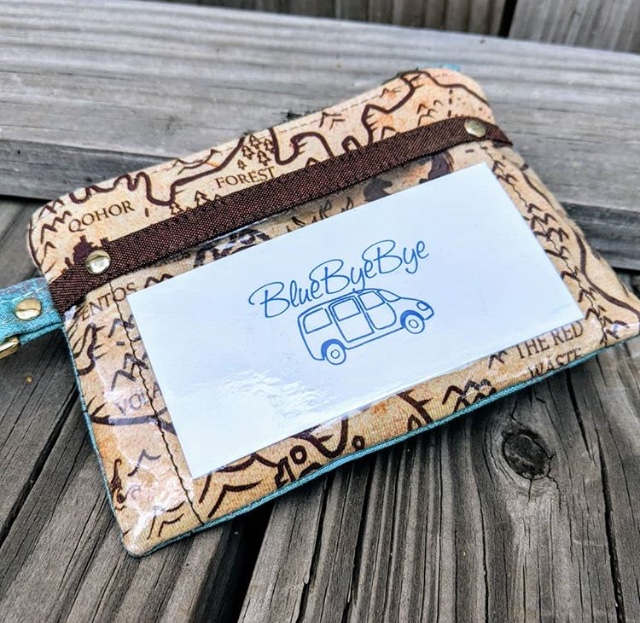
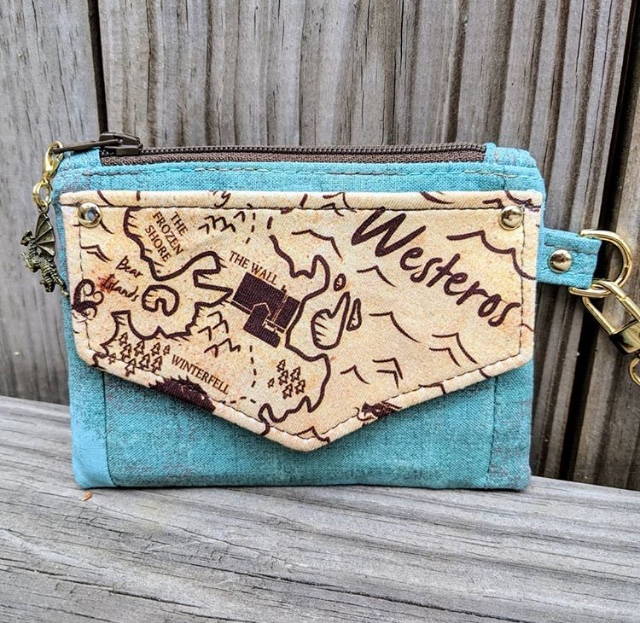
Don't you just love the way Pam's Kristine ID Wallets look? Pam shared her method with me so I could share it with you - thanks Pam! I made a Kristine ID Wallet using Pam's method because I wanted to be able to add process pictures to Pam's tutorial, but also because I wanted to try it out. Pam's method is fabulous, I really think you will like it . . . and of course the extra bling that the rivets add is perfect!
Here is Pam's method for making her alternate ID window pocket in her own words:
I had 2 reasons to experiment with the ID pocket:
1. My work ID needed a bit more room to show the entire front of the badge.
2. I wanted to show off some fabric I had fussy cut and was certain I would use too many brain cells trying to match up the ID pocket frame.
Here is what you need that is different from what you need for the Kristine ID Wallet pattern:
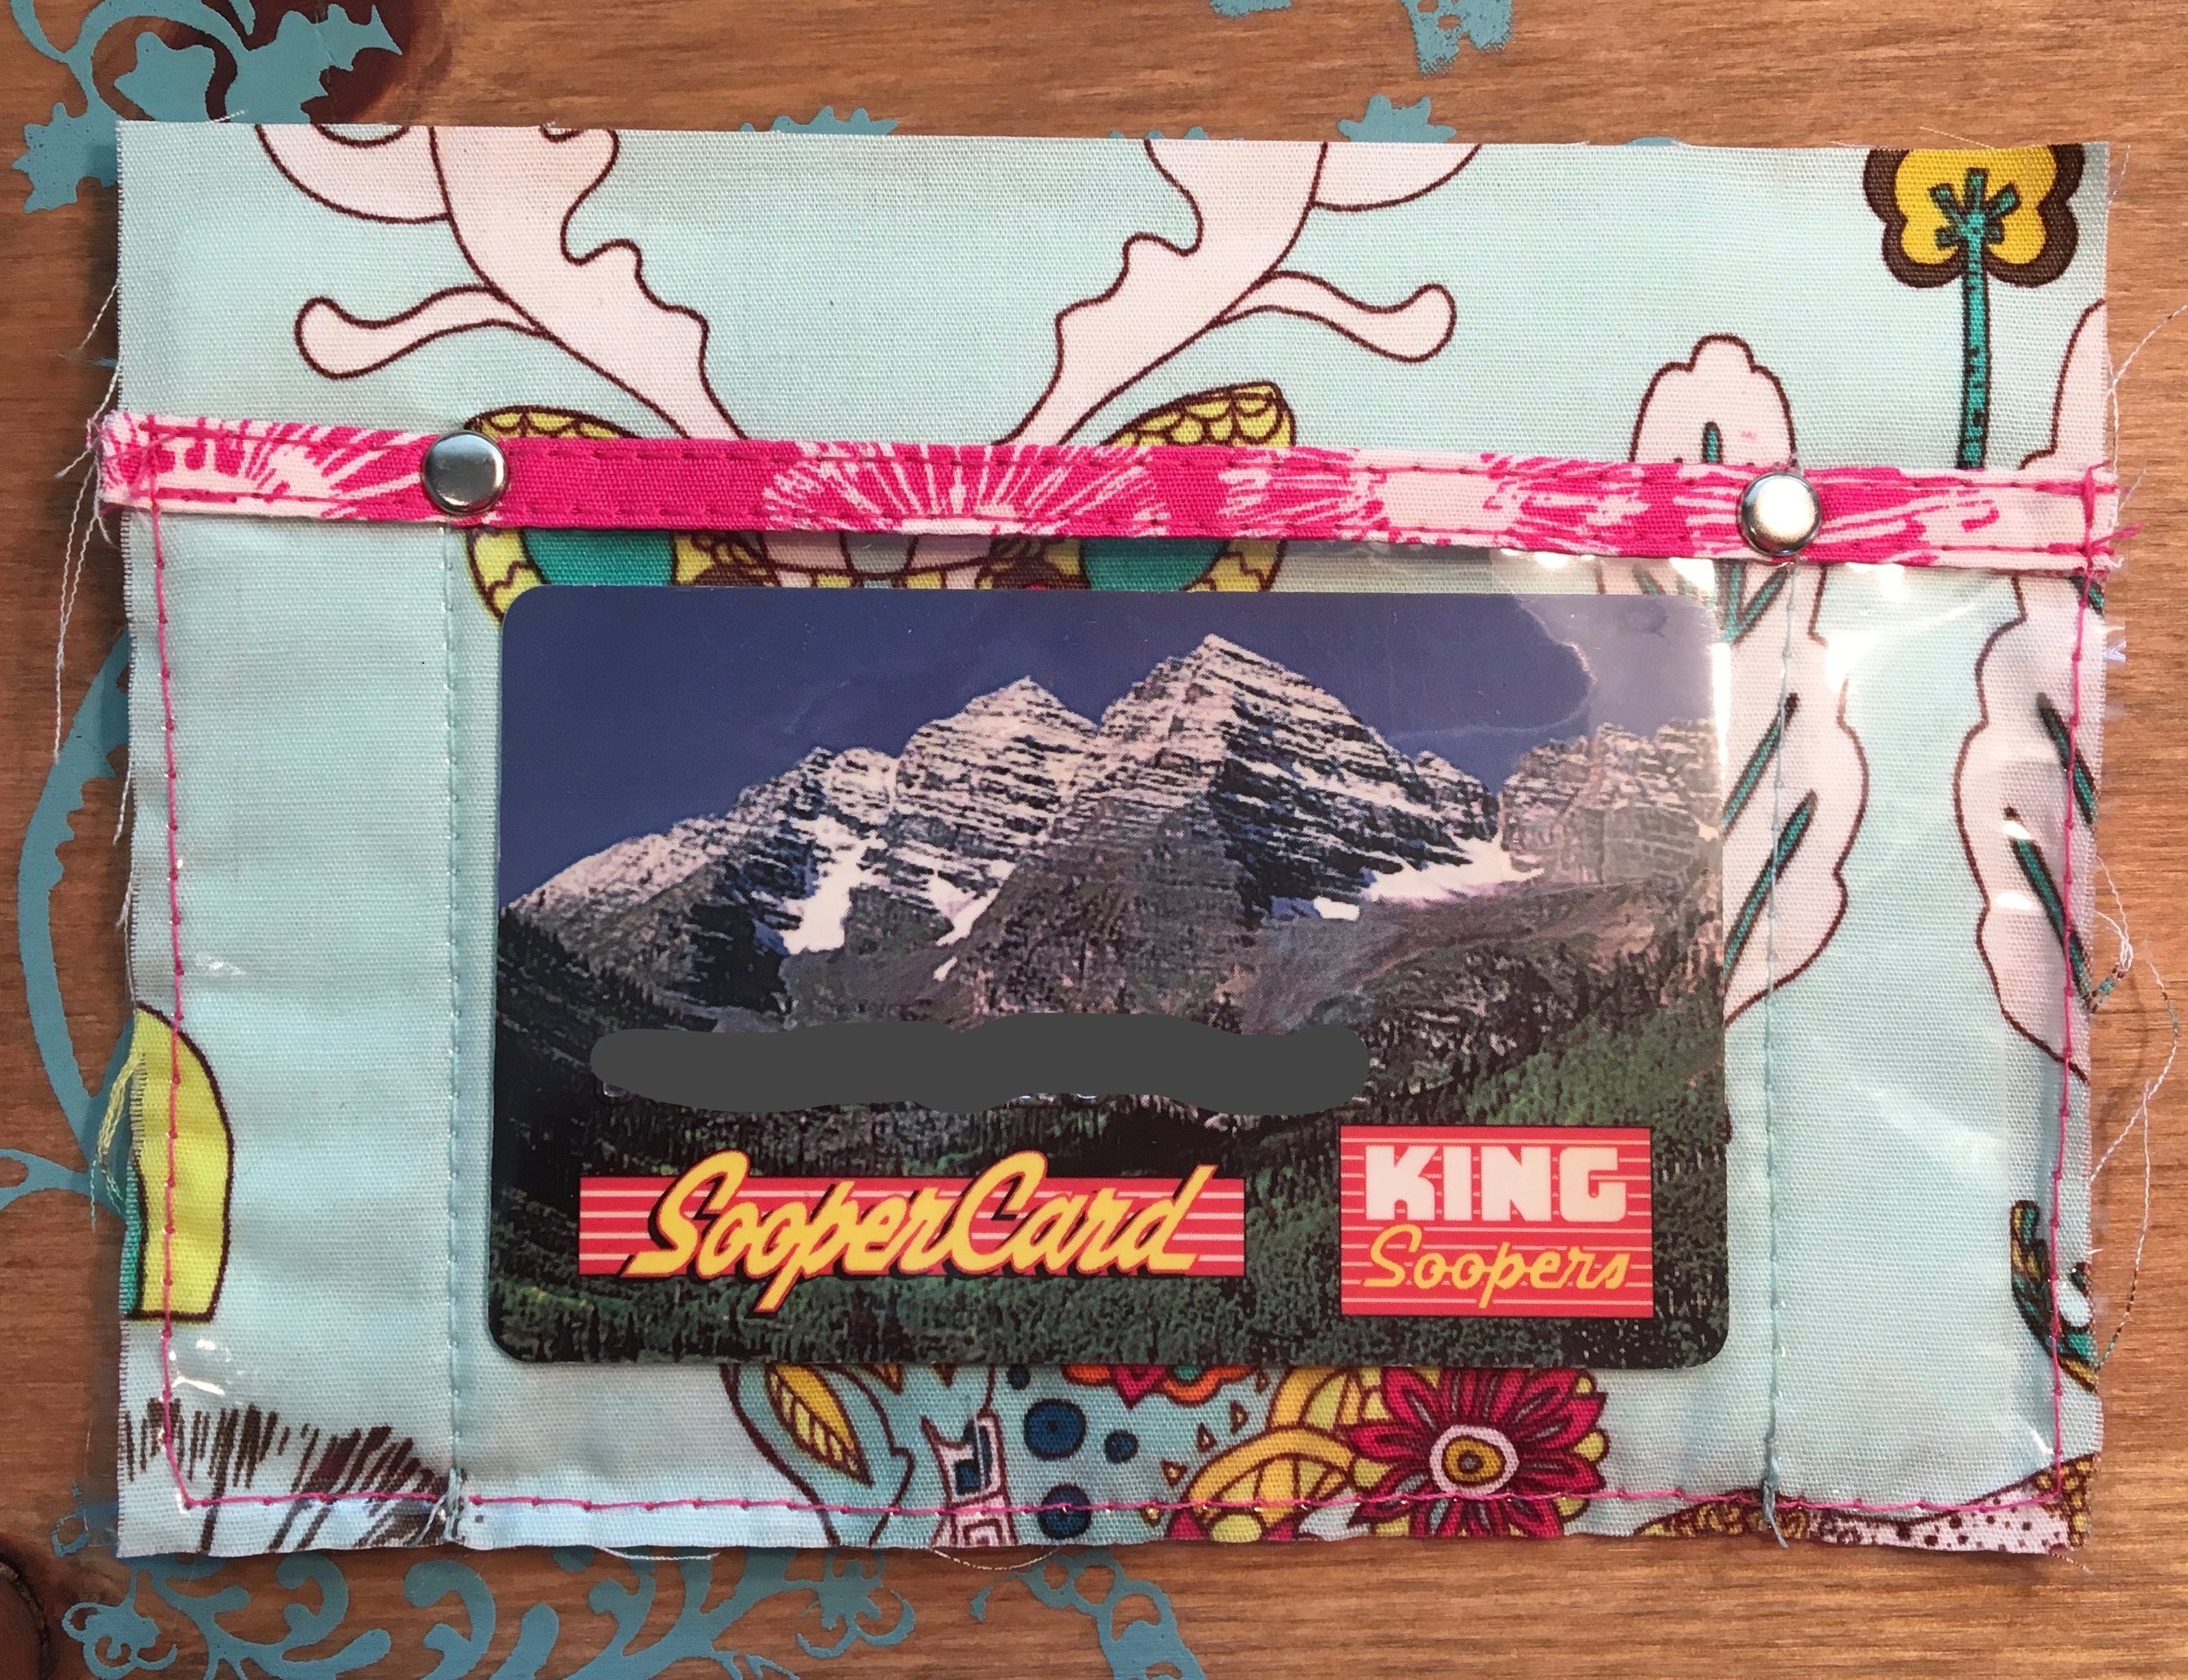
Cut one piece of vinyl 5 1/2" x 3" (same width as the wallet back)
Cut vinyl pocket fabric trim 5 1/2" x 1". No interfacing needed on the trim.
2 rivets - I used very small ones, 5mm width and a short post.
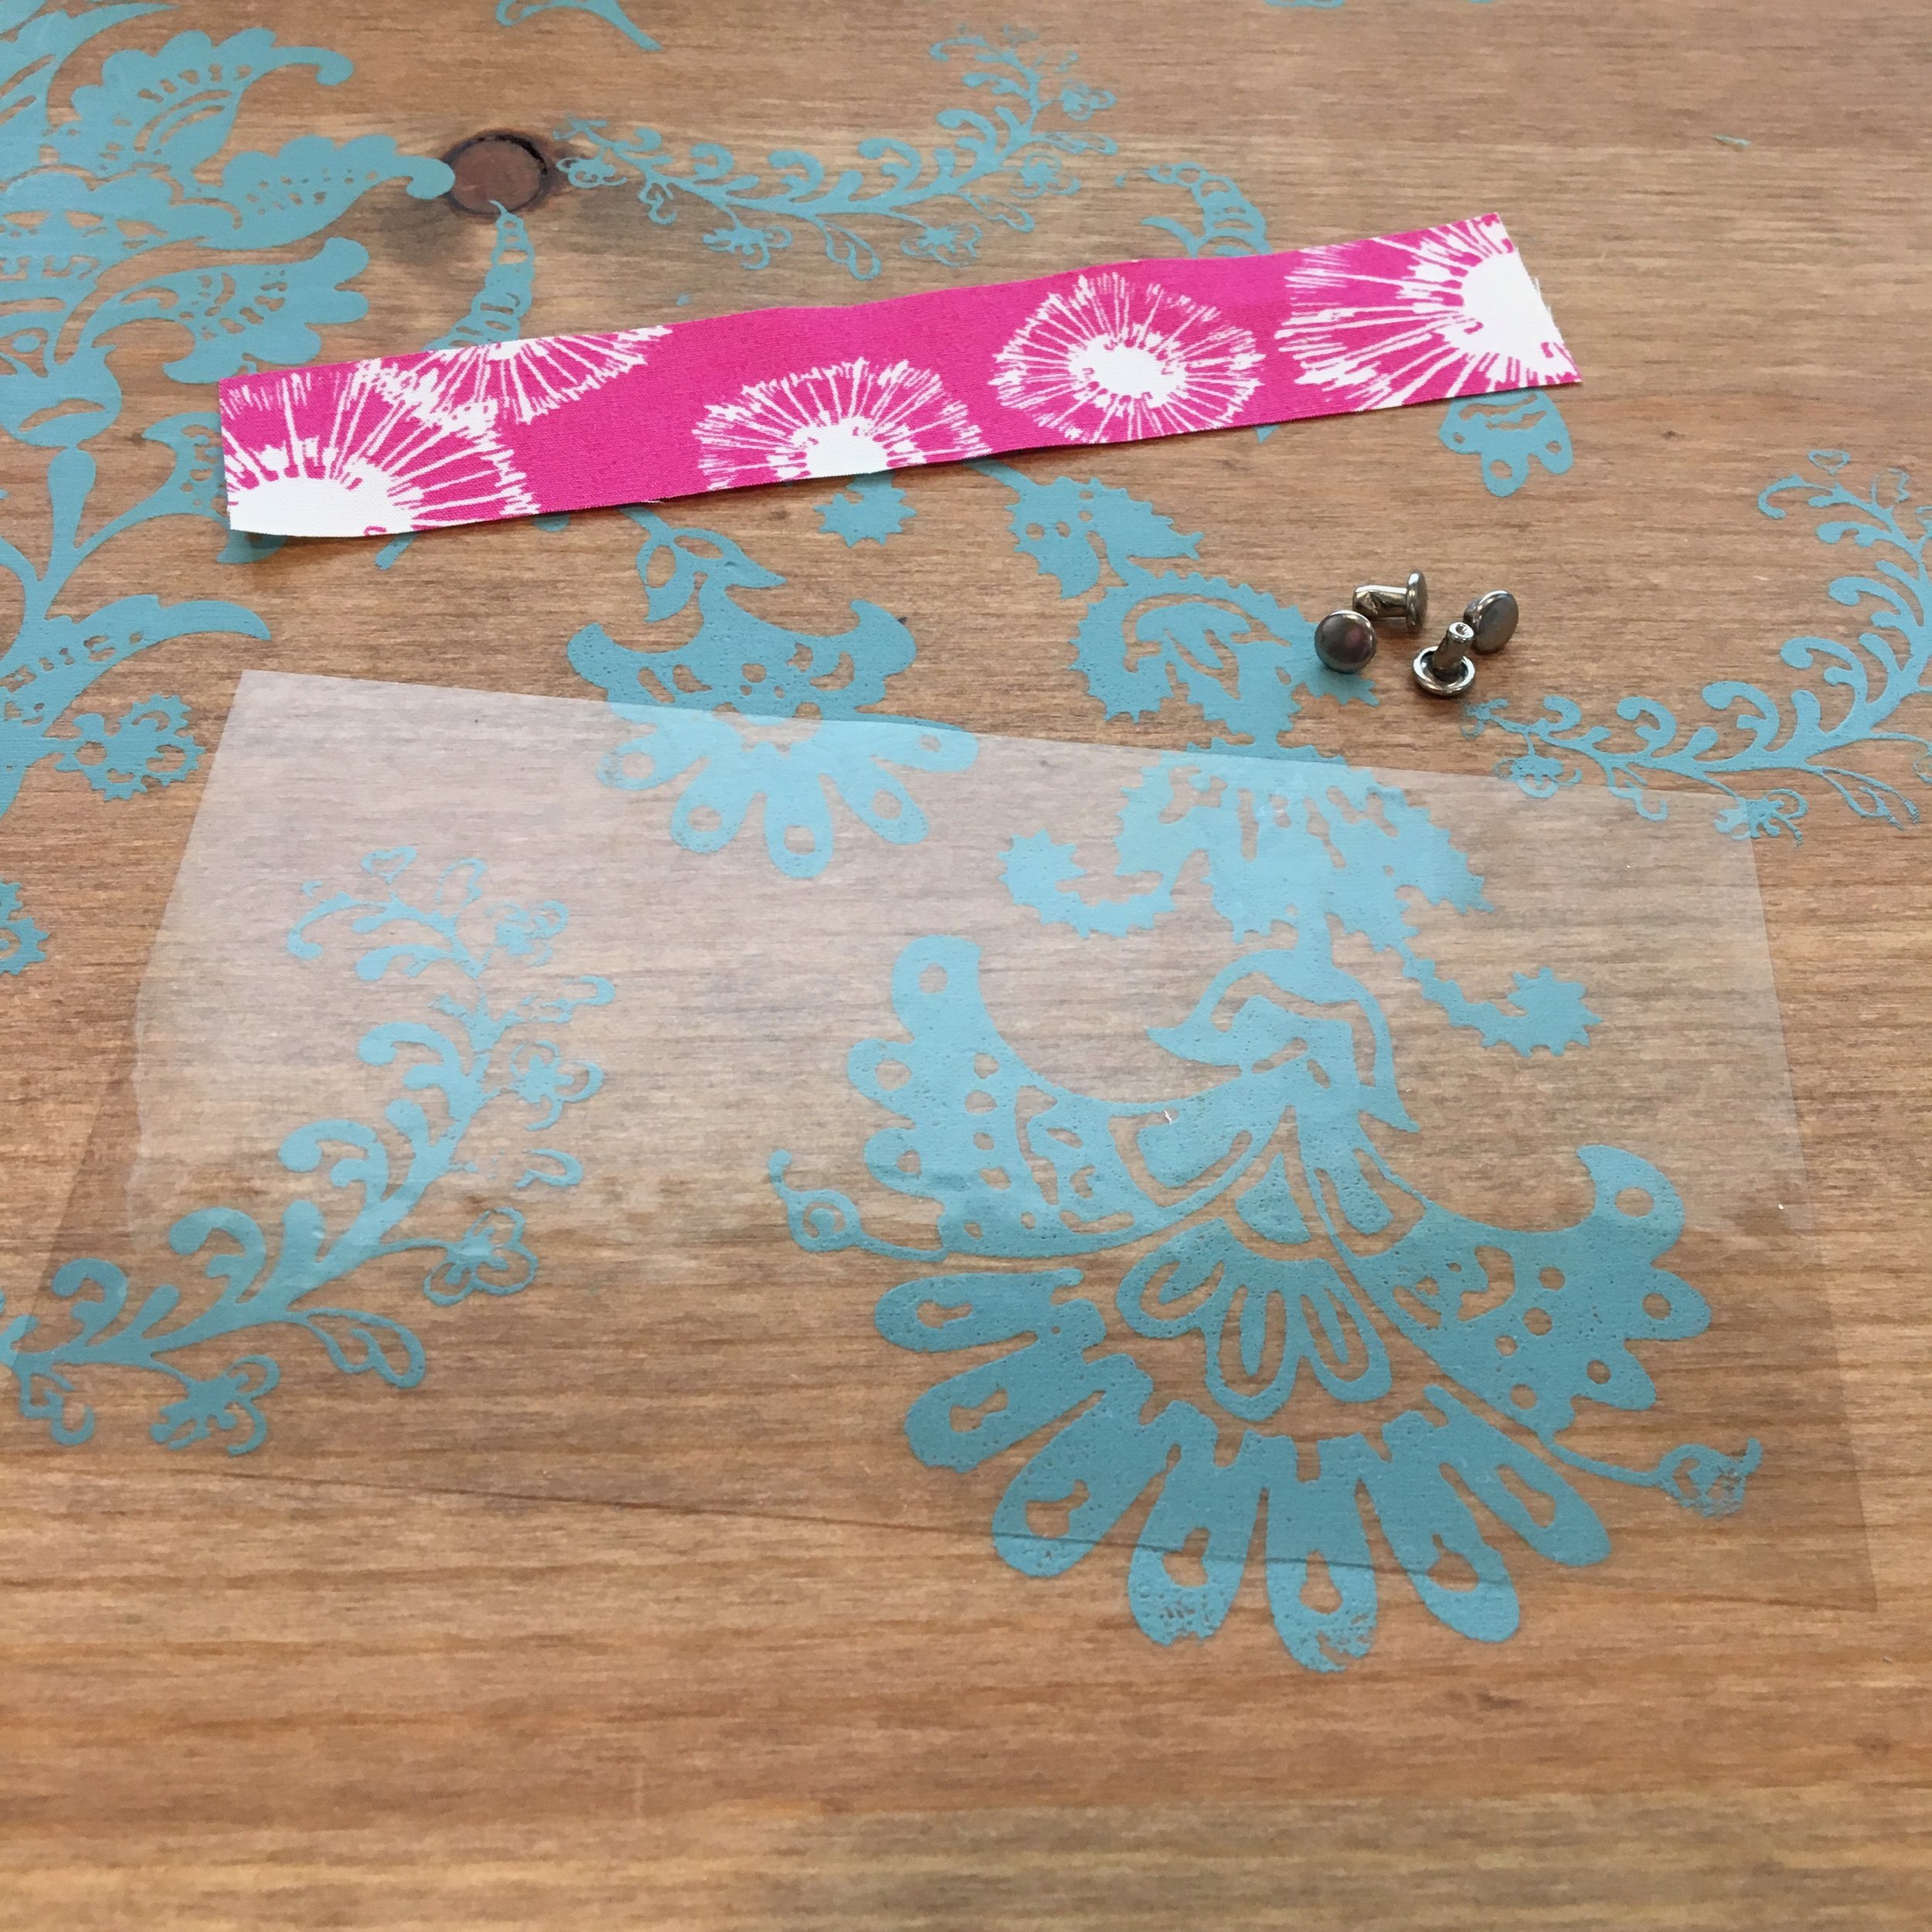
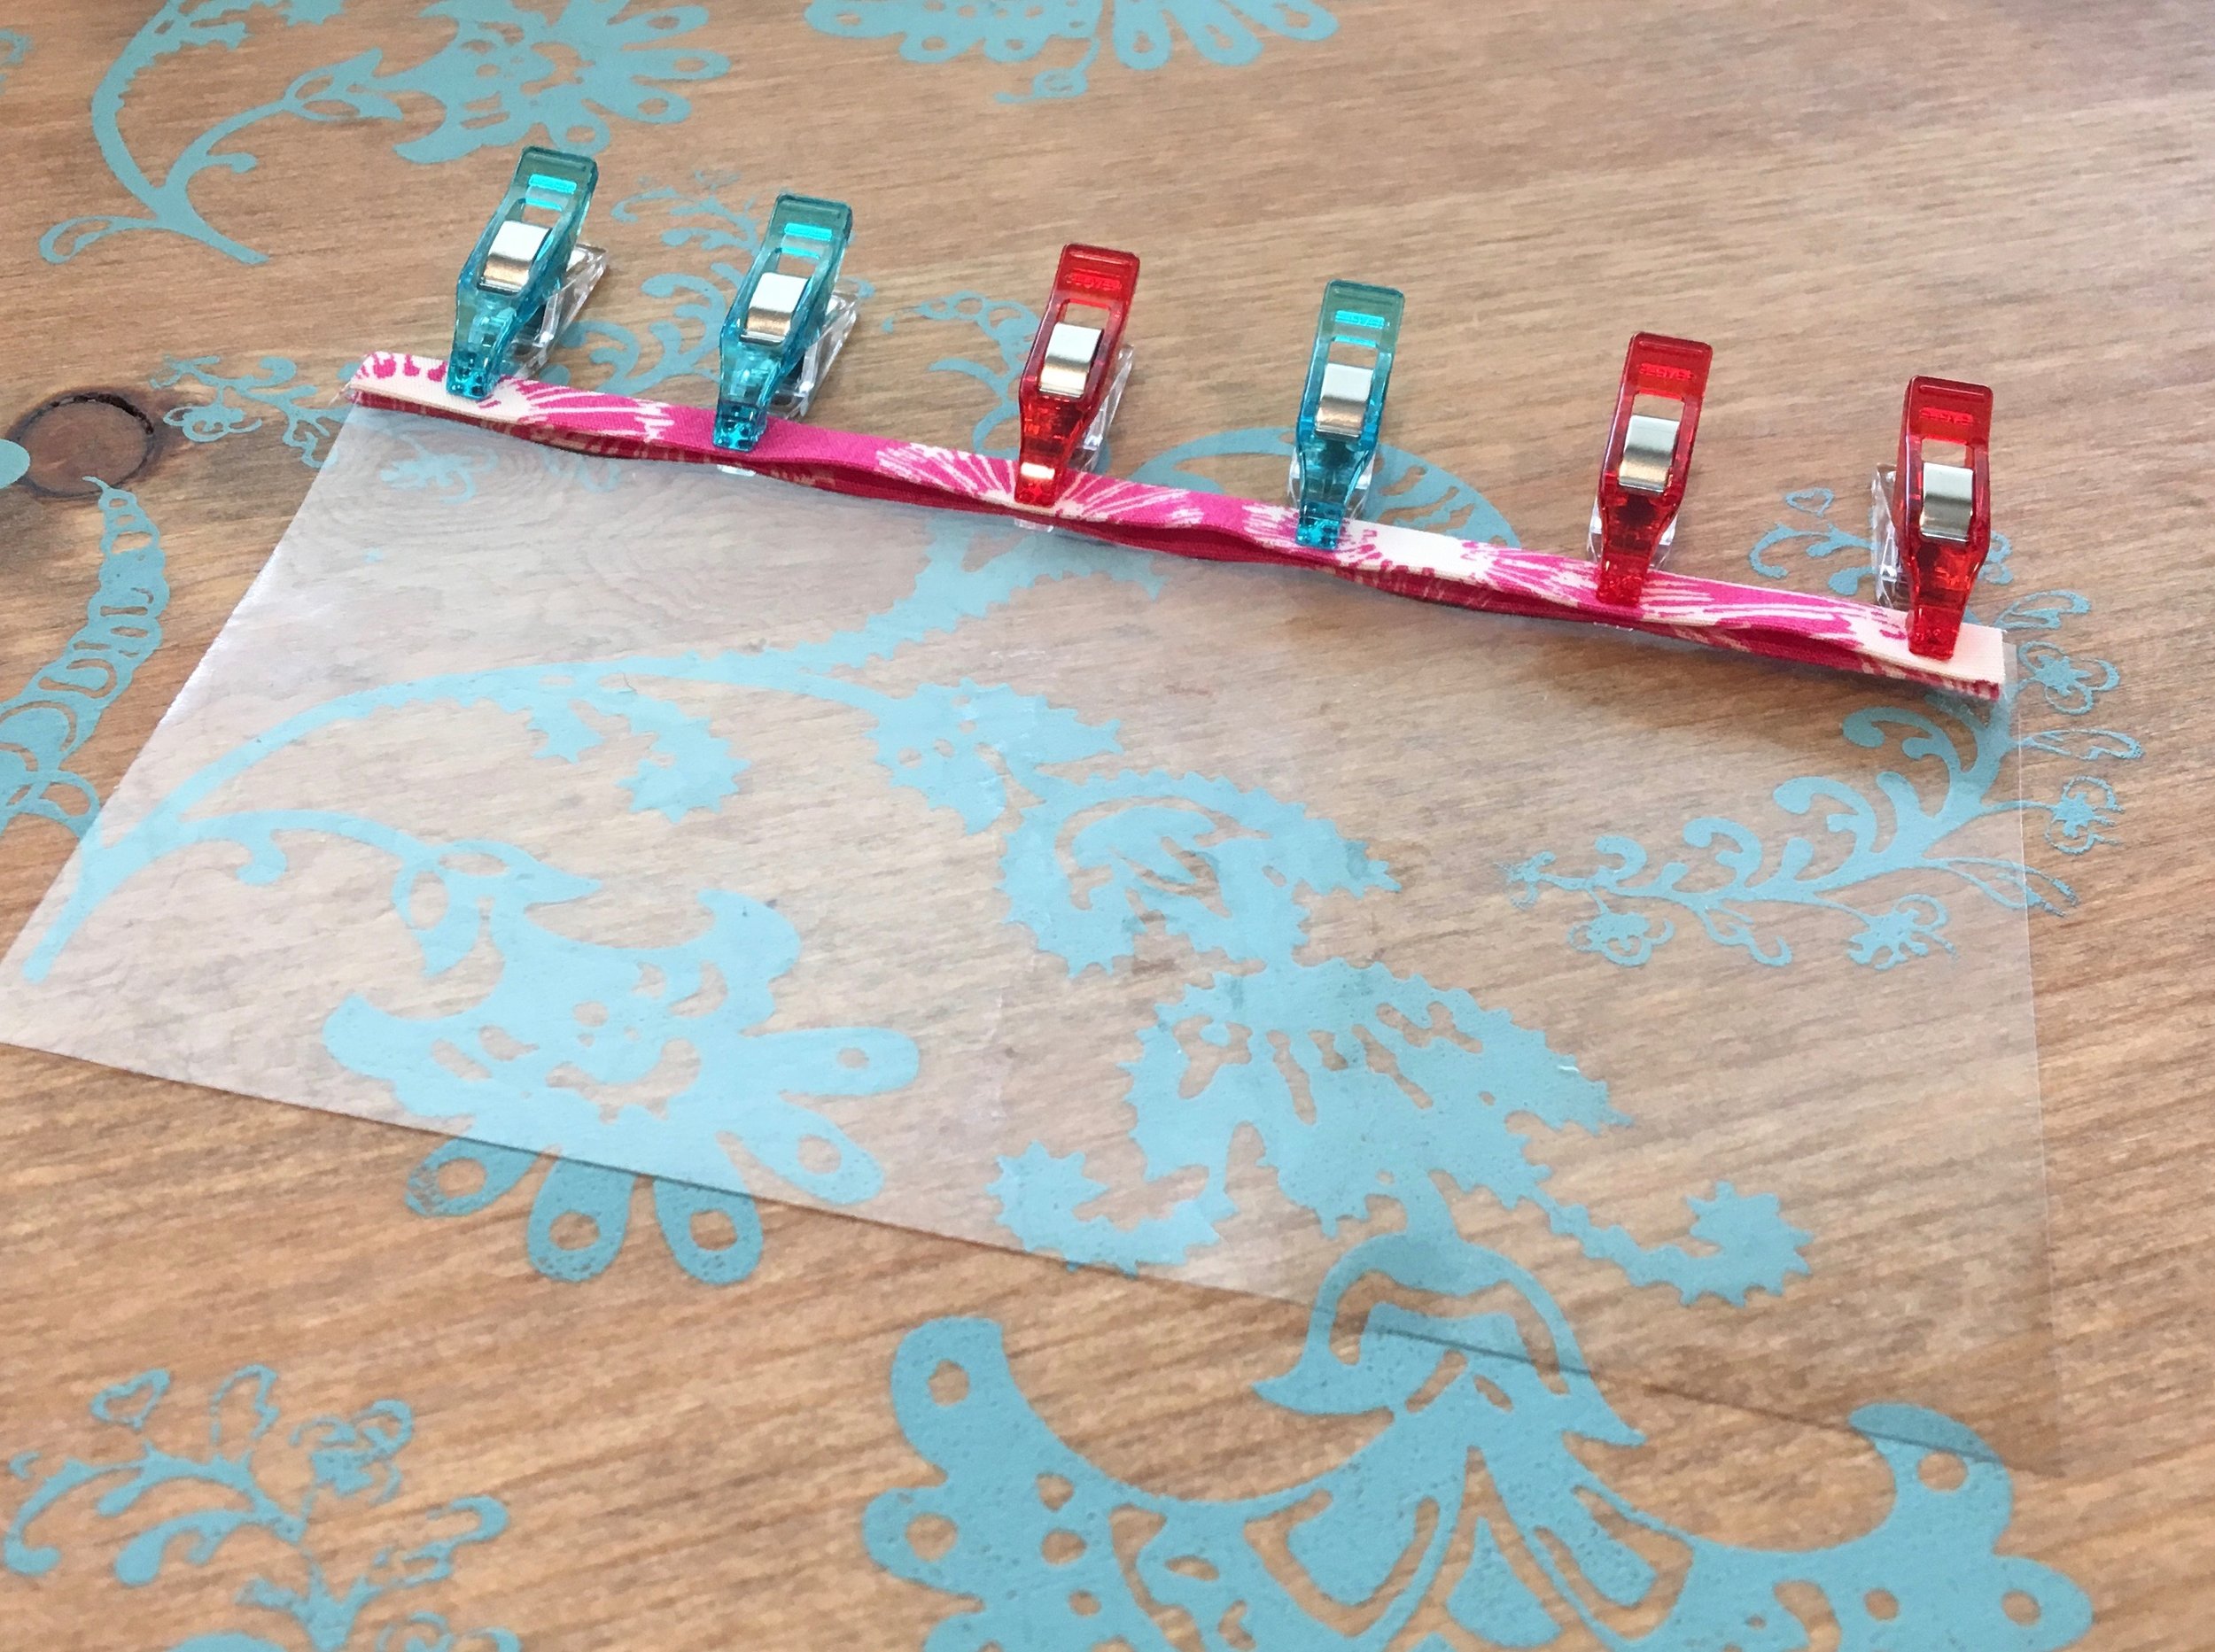
Fold and press the fabric trim piece in half the long way, then fold the raw long edges in toward the center crease to create 1/4" binding (see photo below).

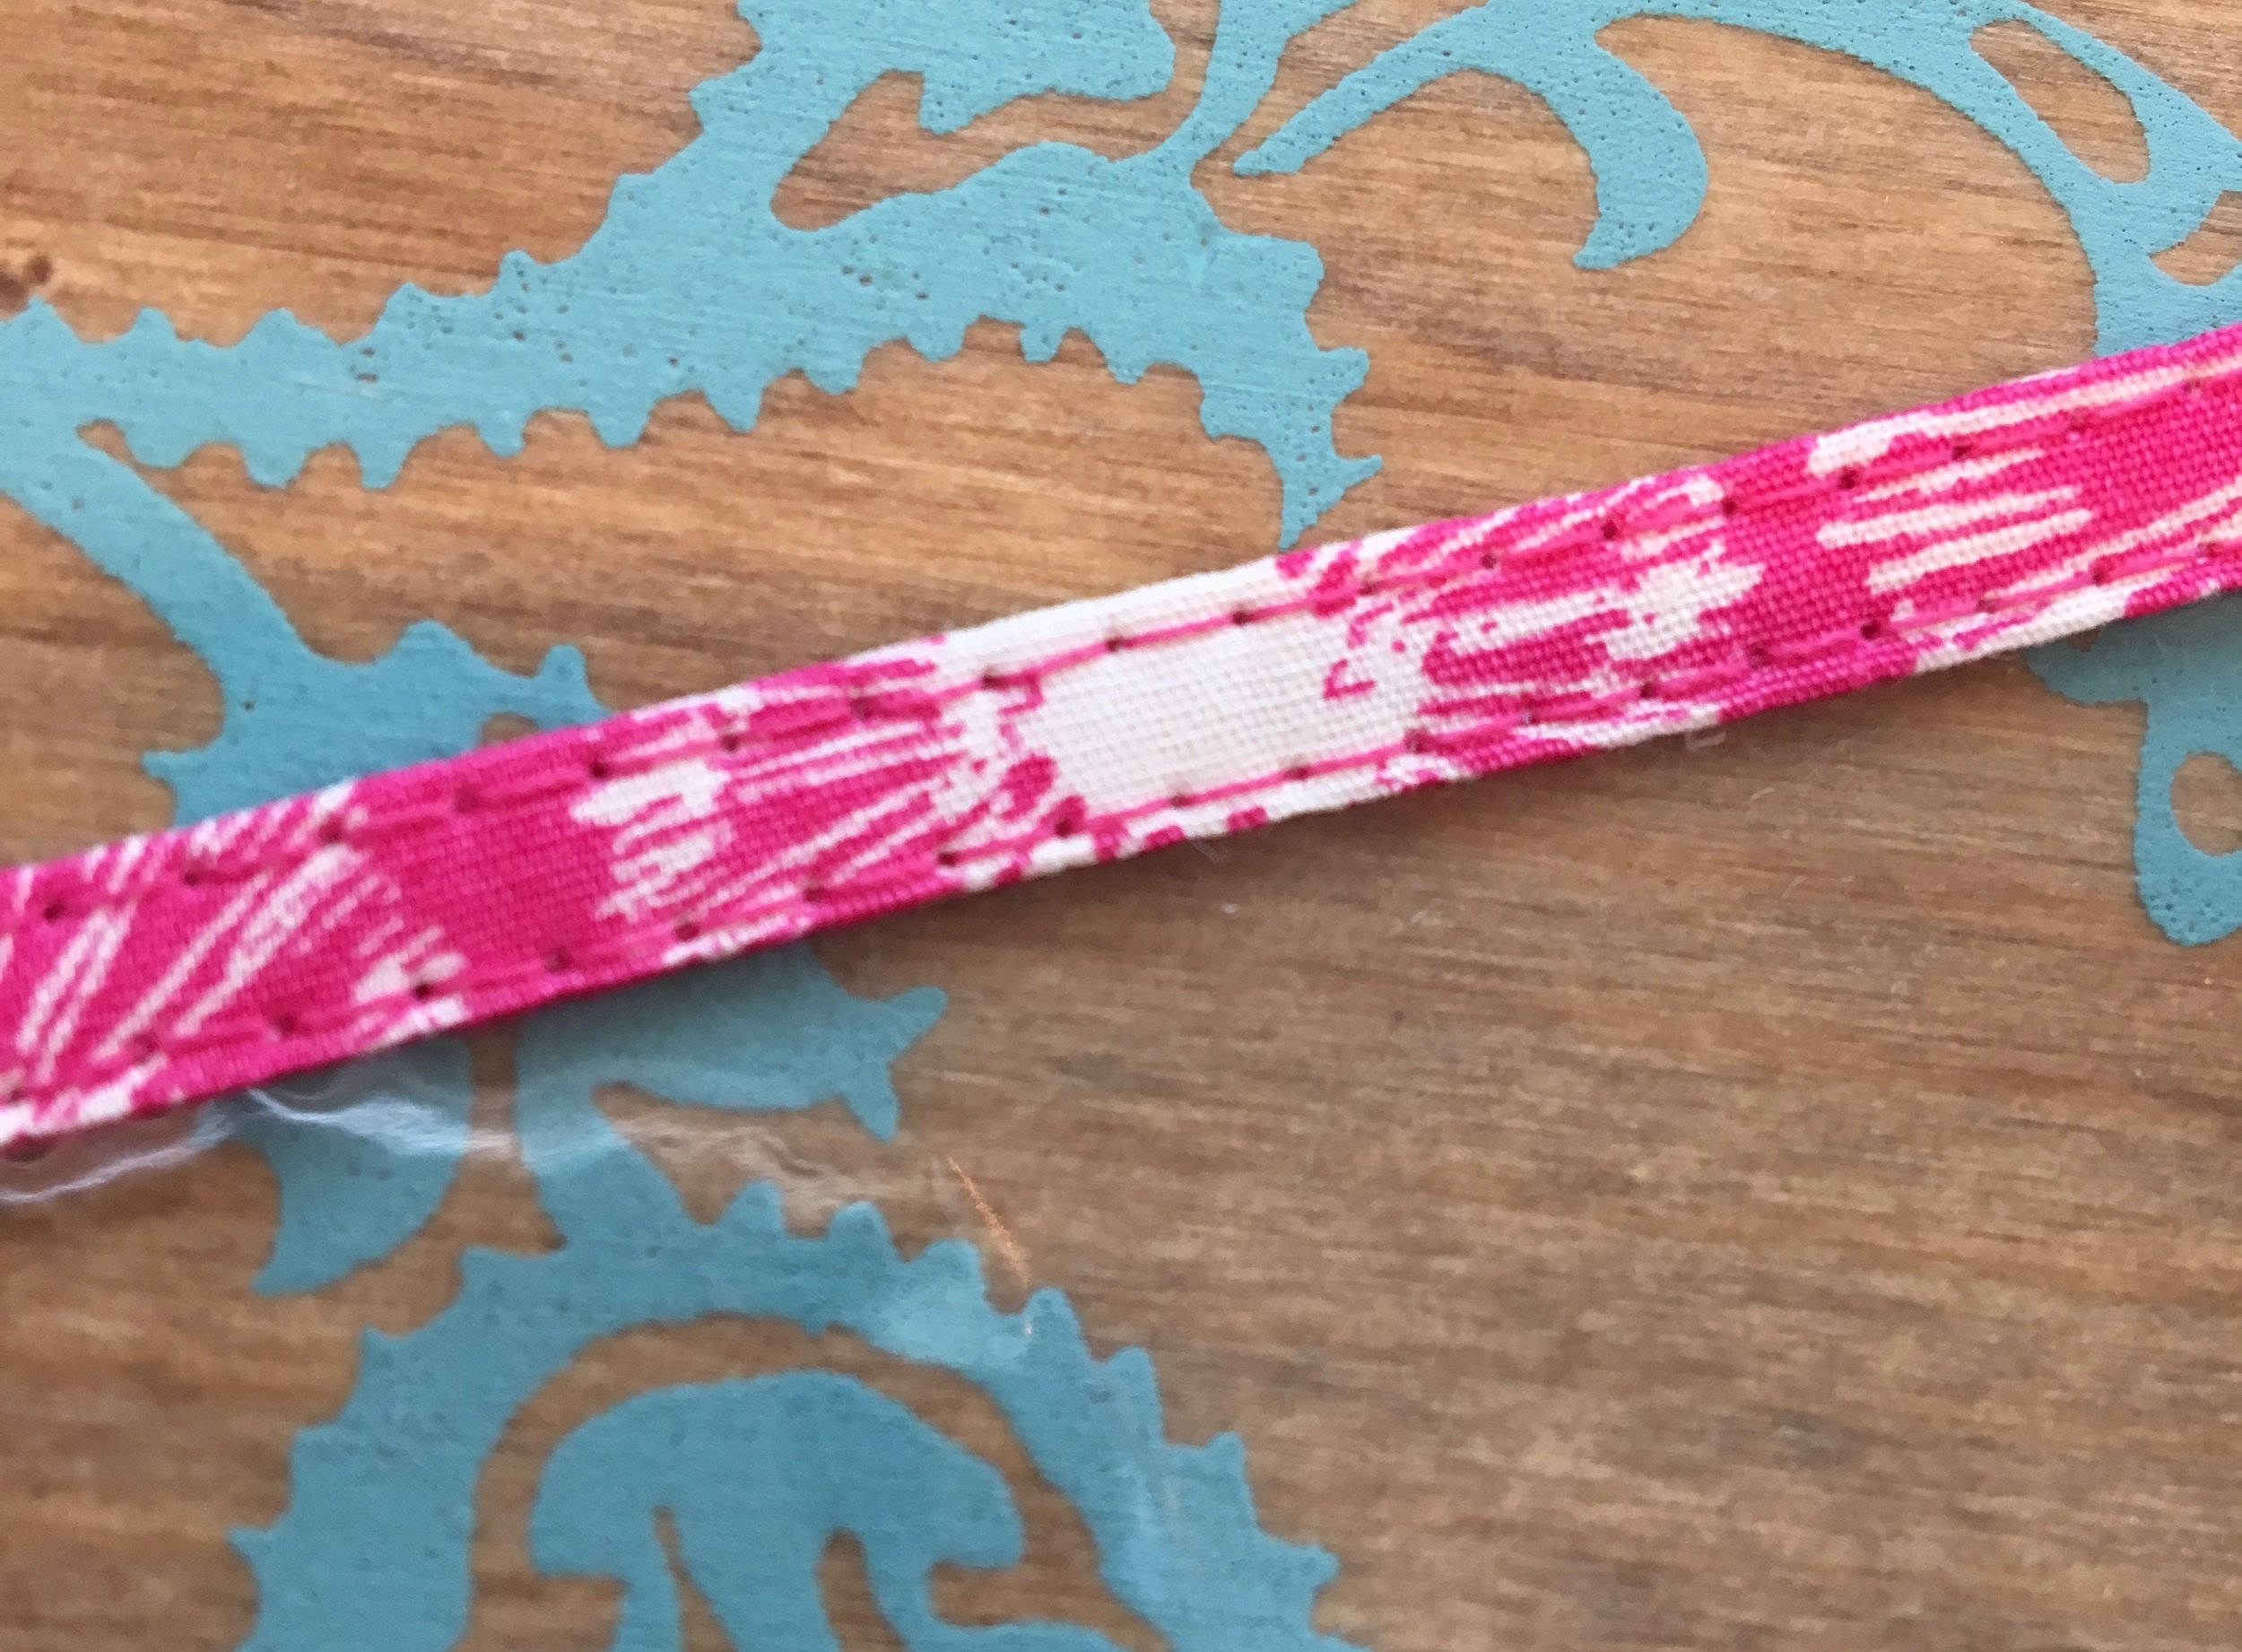
Slip the top edge of the vinyl into the open side of the 1/4" binding and top stitch close to both long edges to create the top trim (see photos below).
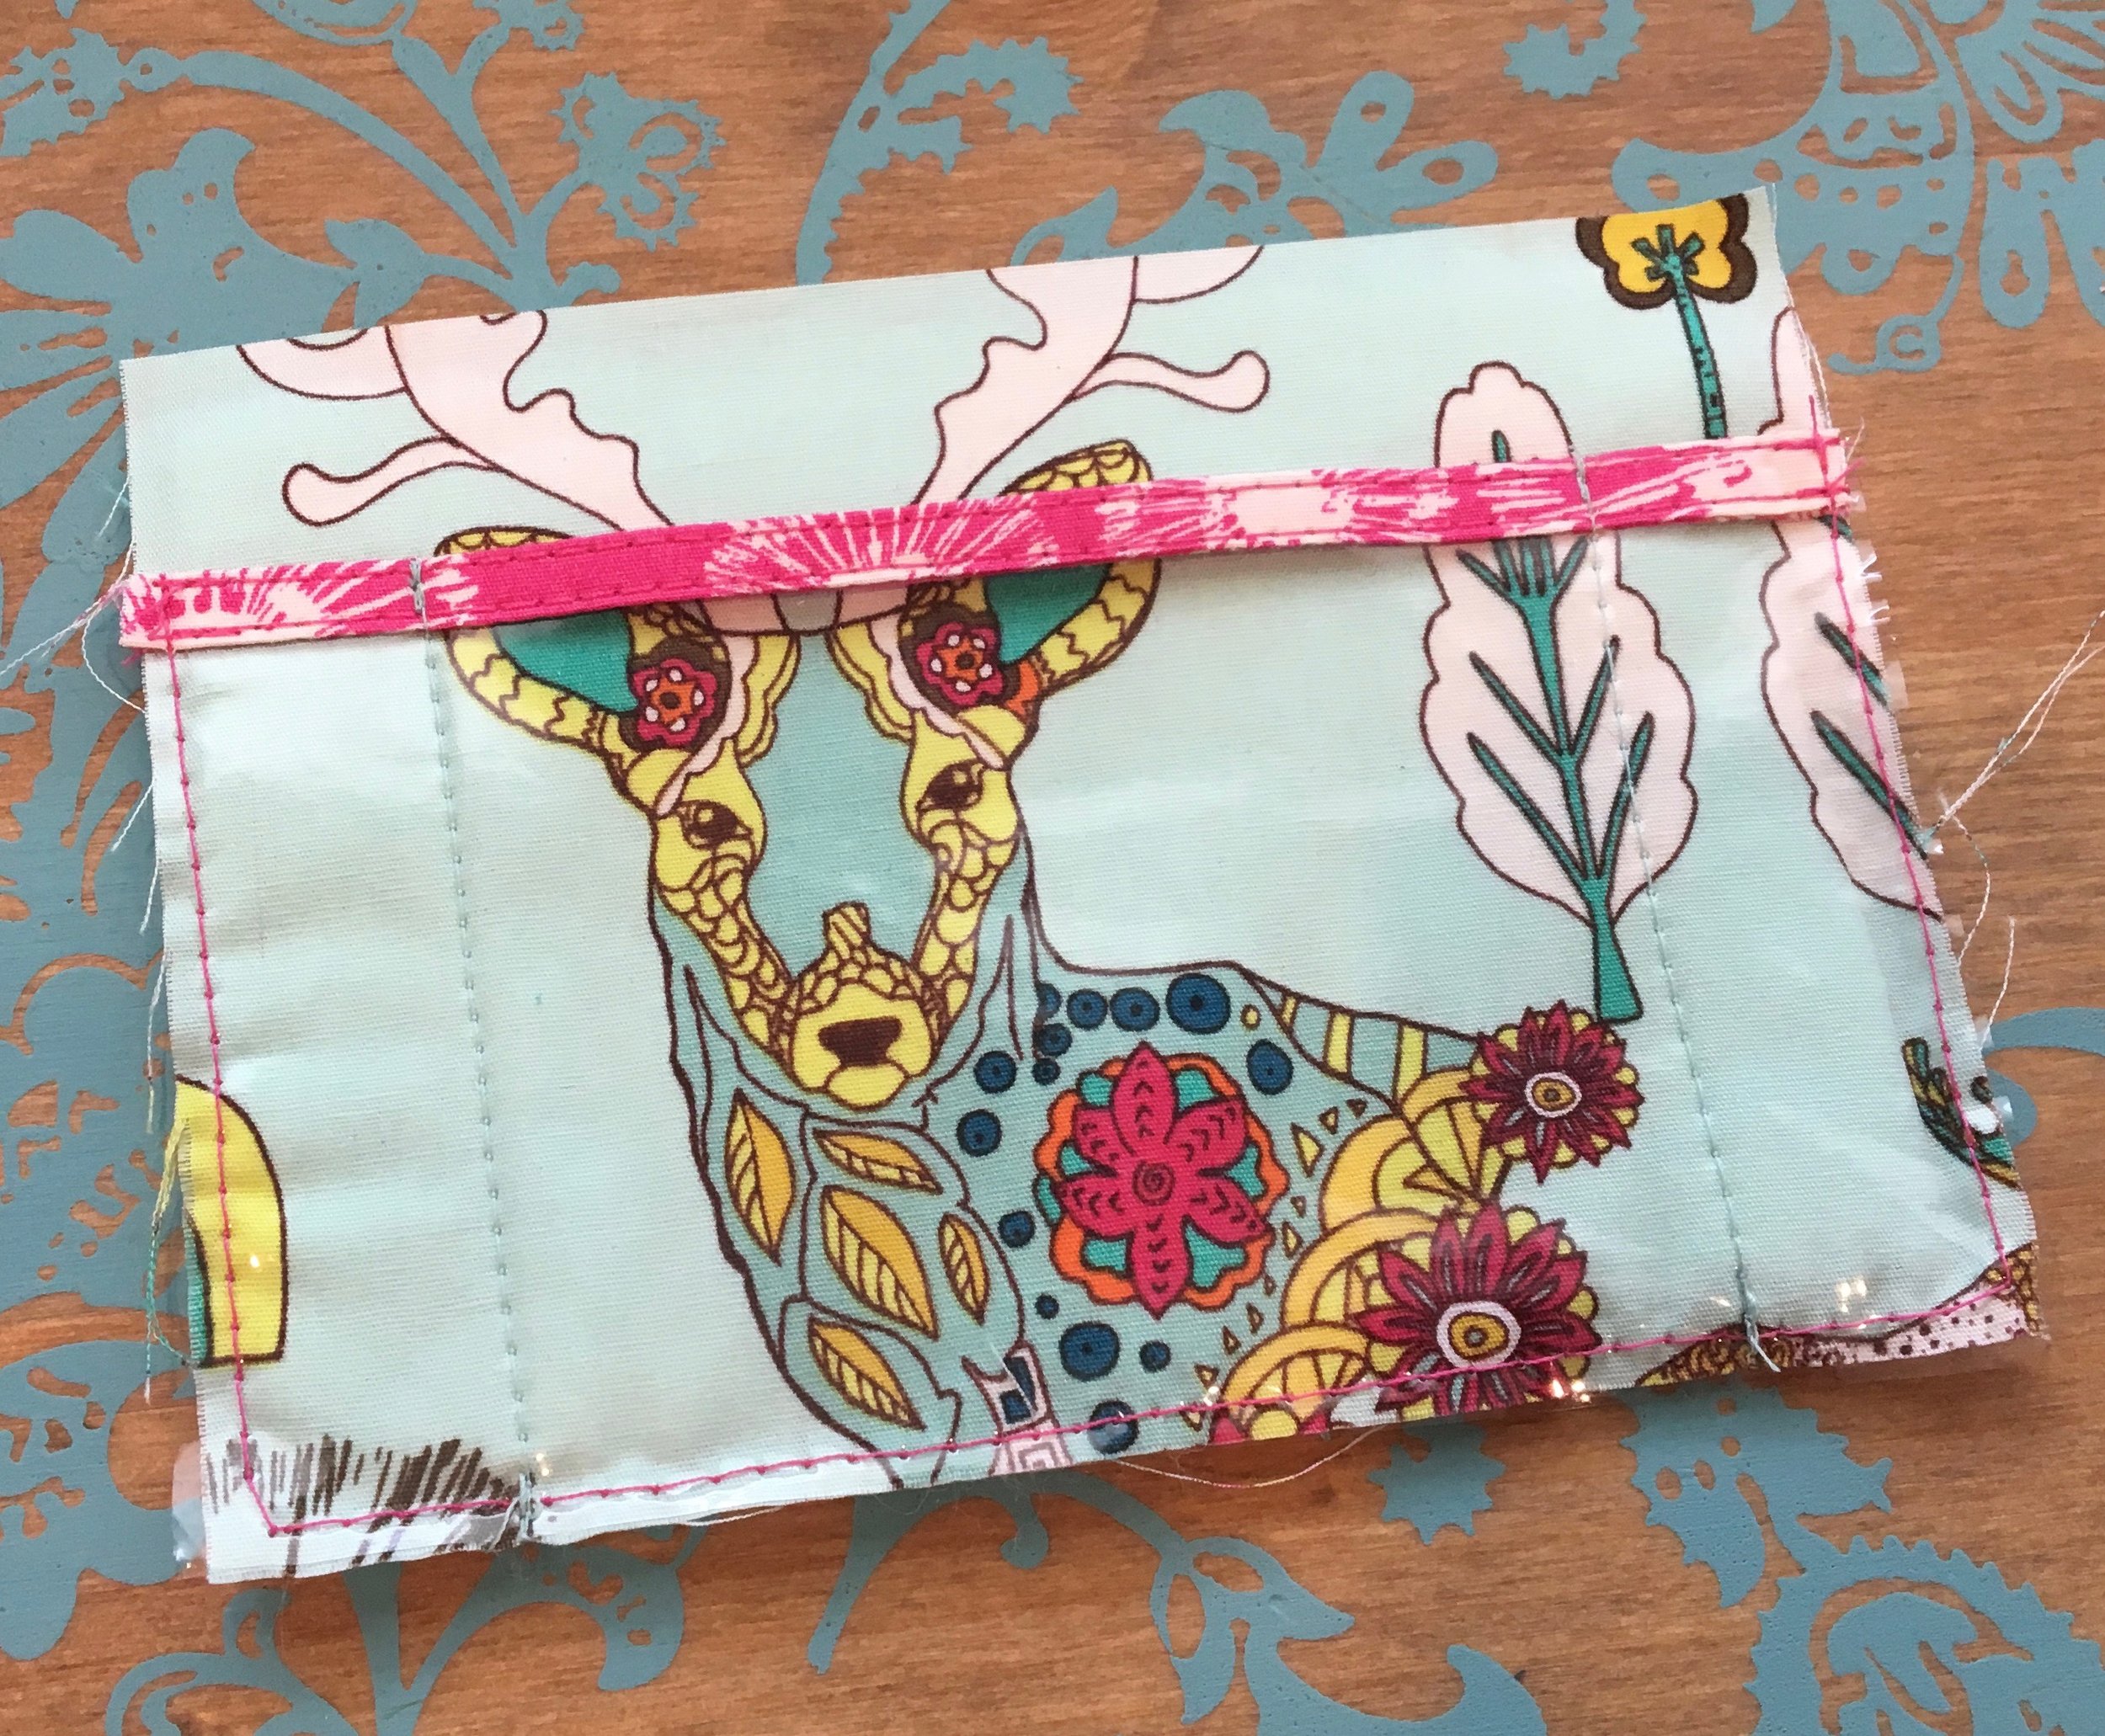
Make a small mark at the top and bottom of the wallet back piece, 7/8" in from the left side and 7/8" in from the right side - these seams will reduce the width of the pocket (see photo below). Without the seams, the vinyl pocket might be too loose, allowing the ID to slip out.

Clip the vinyl pocket to the wallet back piece, keeping in mind which direction you want your back piece to go if you are using a directional fabric. Line up the sides and bottom edges of the wallet back and the vinyl pocket (see photo below).

Use an ID badge, credit card, or business card to test the pocket space to make sure it is the size you want it, keeping an eye on the 7/8" markings you made on either side.
Baste the 3 sides - I used a teflon foot to help move the vinyl along. (I used a walking foot for this and that works too . . . just another option! - Michelle)
Sew the 2 seams which are 7/8" in from each side edge, starting at the top edge of the binding. Sew back and forth a few times at the top to really secure the pocket, then sew down to the bottom. (Note: I didn't draw the entire 7/8" lines on the wallet back, not wanting to have to worry about removing them later. I simply lined the top/bottom marks up at my machine, put my needle down into the top of the binding edge, and then used markings on my machine bed to keep a straight line going down. Yikes - so many words to explain that - you can almost just eye-ball it. ha!) (see photo below)
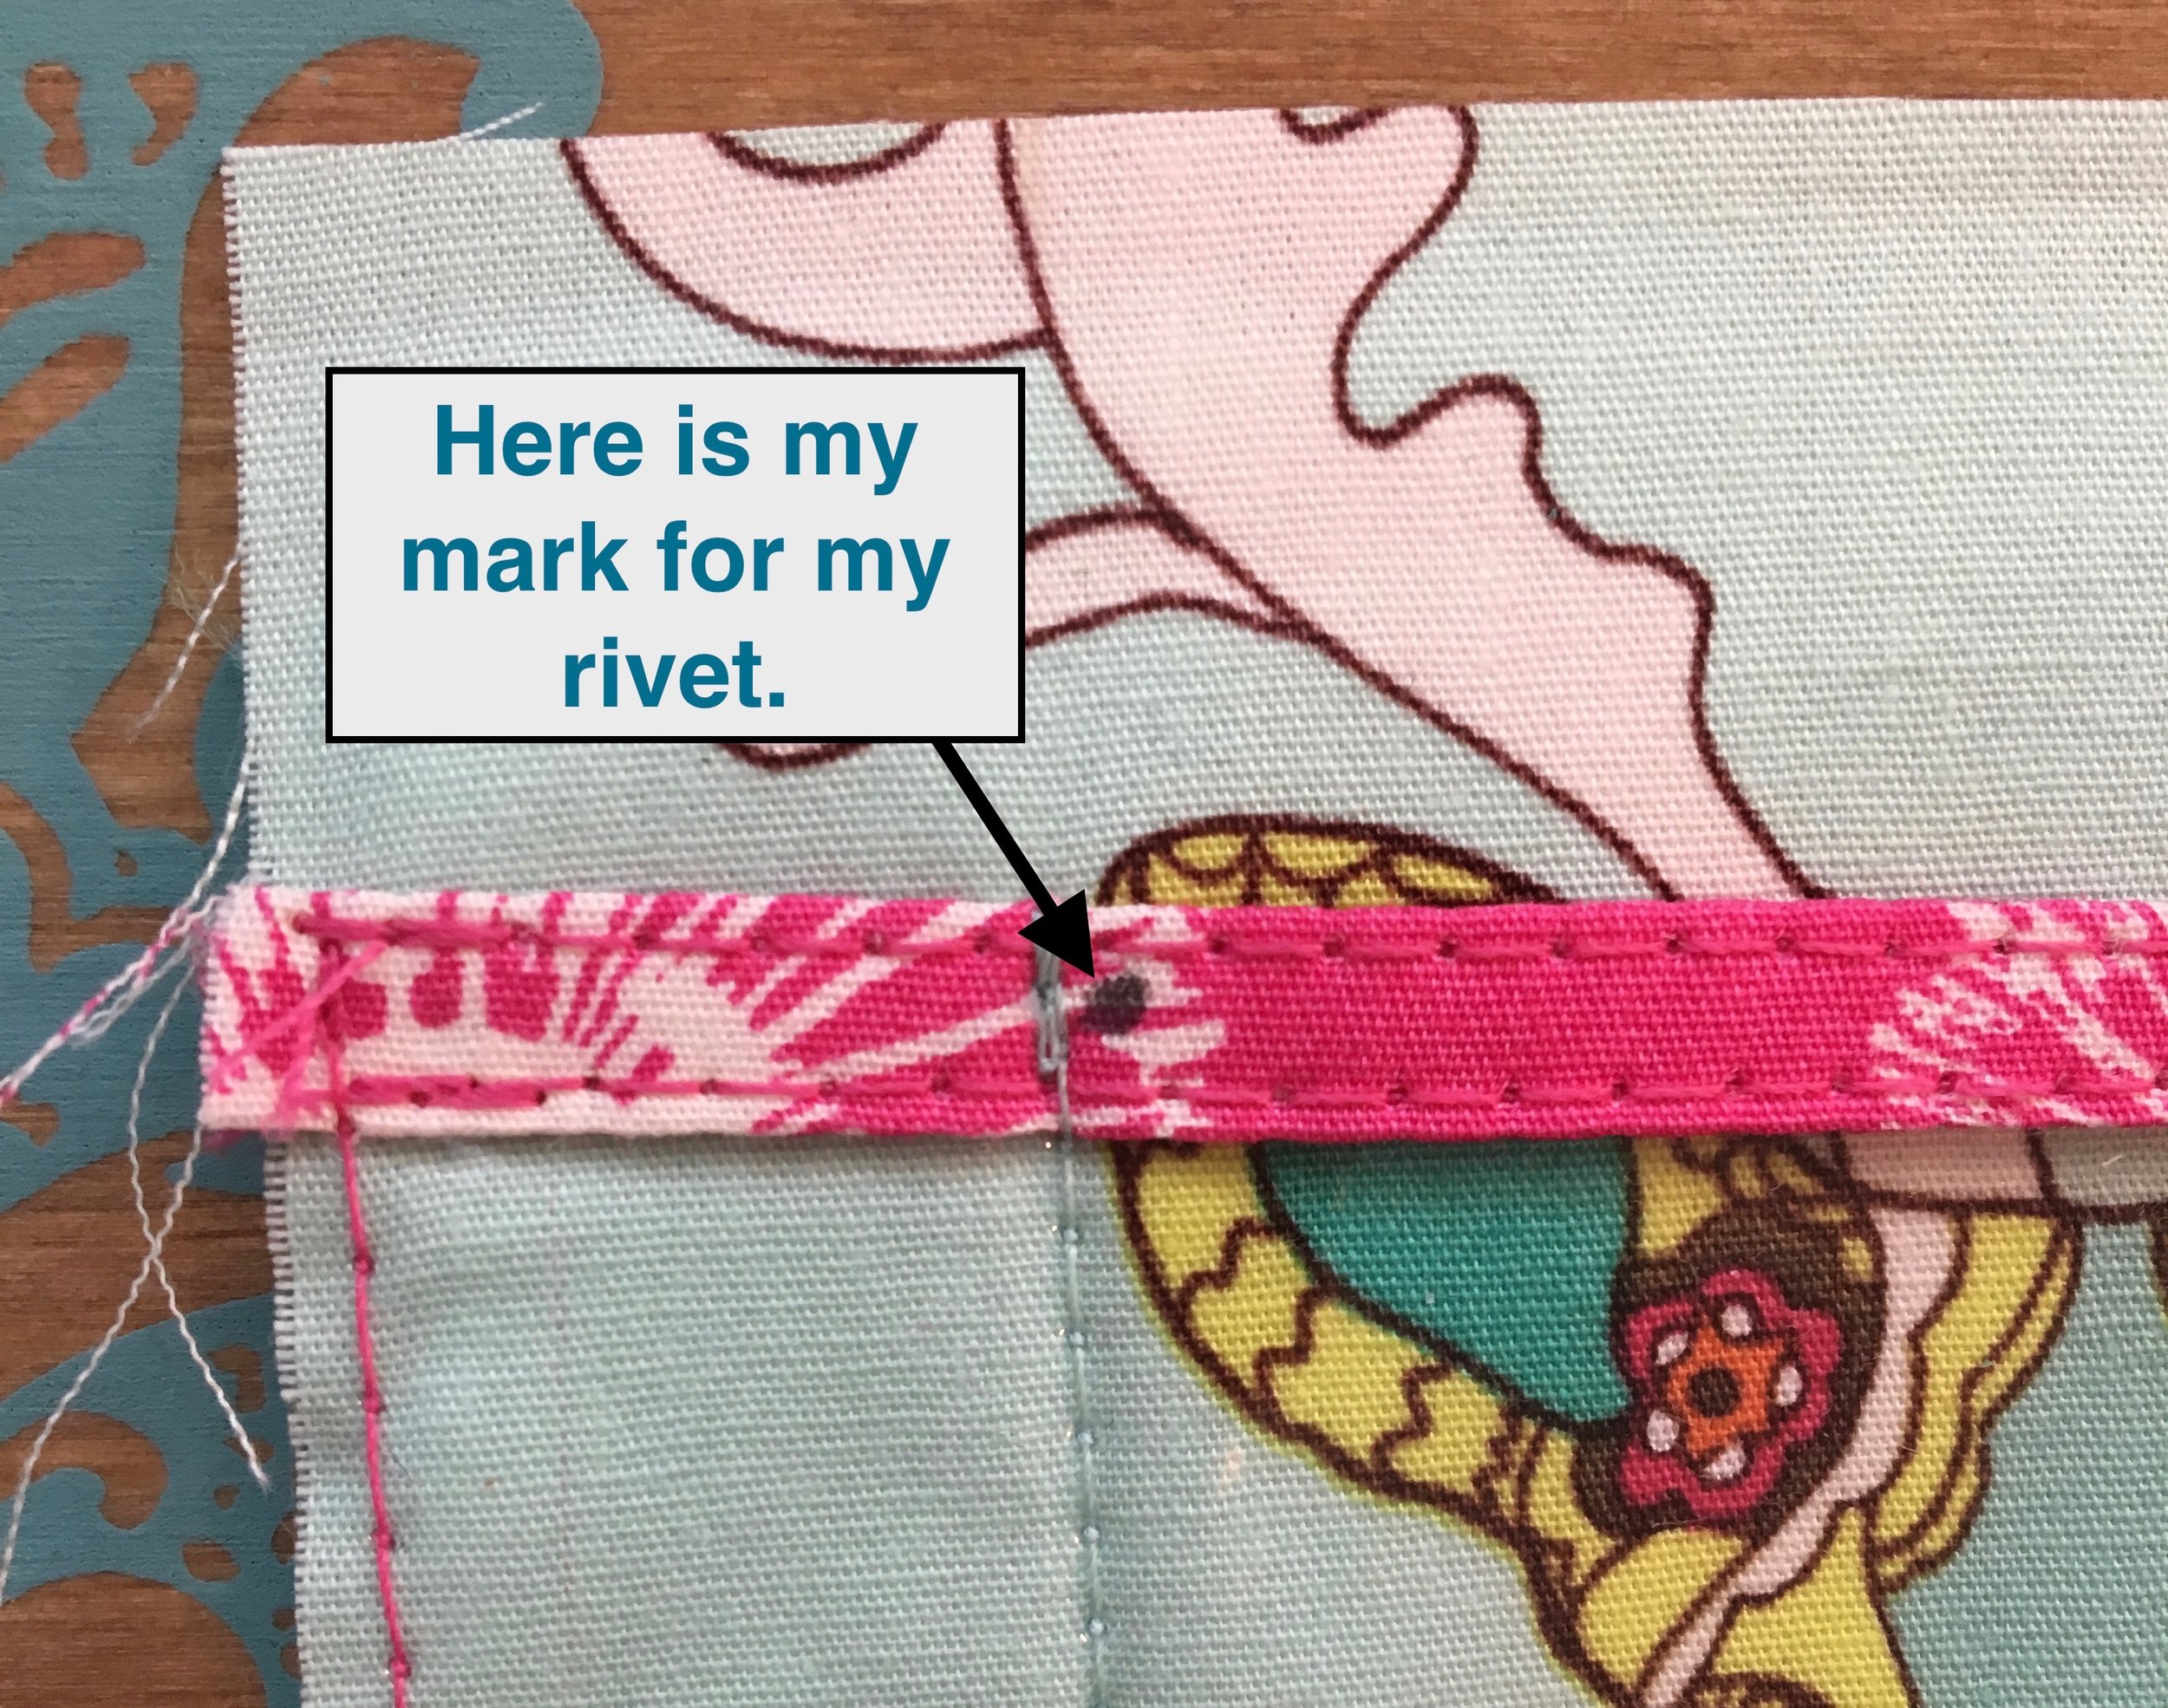
I added small rivets to the top of the vinyl pocket at each 7/8" seam line for two reasons: I really like rivets and wanted to add a bit more bling to the wallet but more importantly, the rivets give a tiny little extension to those 7/8" seam lines. To insert an ID, I have to angle in just a bit around the rivet, before pushing the ID on into the pocket. I am hoping that adds a bit more security. (I love the added rivets! Just a quick note, I marked the holes for the rivets just to the inside of each line of stitching so that I didn't end up cutting my stitches in the process of adding the rivets. - Michelle)
After the small rivets are installed, the wallet is constructed following the pattern as written.

Thanks so much Pam for your great instructions! You can see more of Pam's beautiful work on Instagram @bluebyebye.
If you would like the pattern for the Kristine ID Wallet, you can purchase it from the Uniquely Michelle Website Shop, the Uniquely Michelle Etsy Shop or the Uniquely Michelle Craftsy Pattern Shop.
Make sure to sign up below to receive the Uniquely Michelle newsletter so you can keep up with the latest happenings at Uniquely Michelle!