contact Me

Use the form on the right to contact Me.


123 Street Avenue, City Town, 99999

(123) 555-6789

email@address.com


You can set your address, phone number, email and site description in the settings tab.
Link to read me page with more information.

Blog

A Handmade Season of Giving - Heart Hand Warmers

Michelle Burke

The saying goes, "Cold hands, warm heart." With these adorable heart hand warmers, you can have warm hands too! I decided last year that I was going to make as many gifts to give this year as possible. I am sharing my ideas for handmade gift-giving in this A Handmade Season of Giving blog series. I am excited to share these fun heart-shaped hand warmers with you today!

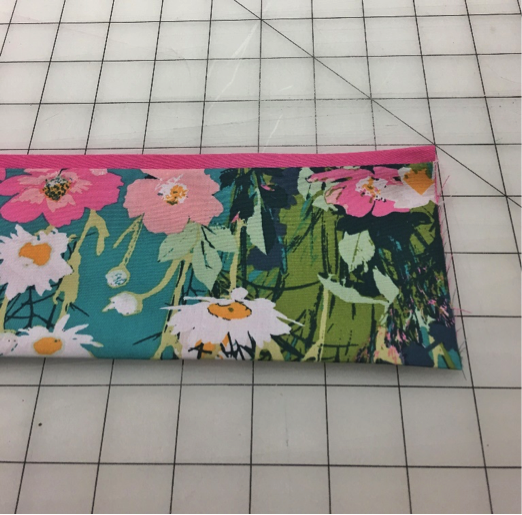
I found the Upcycled Heart Hand Warmers Tutorial to make these fun heart-shaped hand warmers awhile ago. Stephanie Woodson wrote the tutorial in her blog, Swoondson Says. In the tutorial, it says to use an old sweater which is a great up-cycling option, but I don't have any old sweaters. Instead, I decided to use some wool felt.

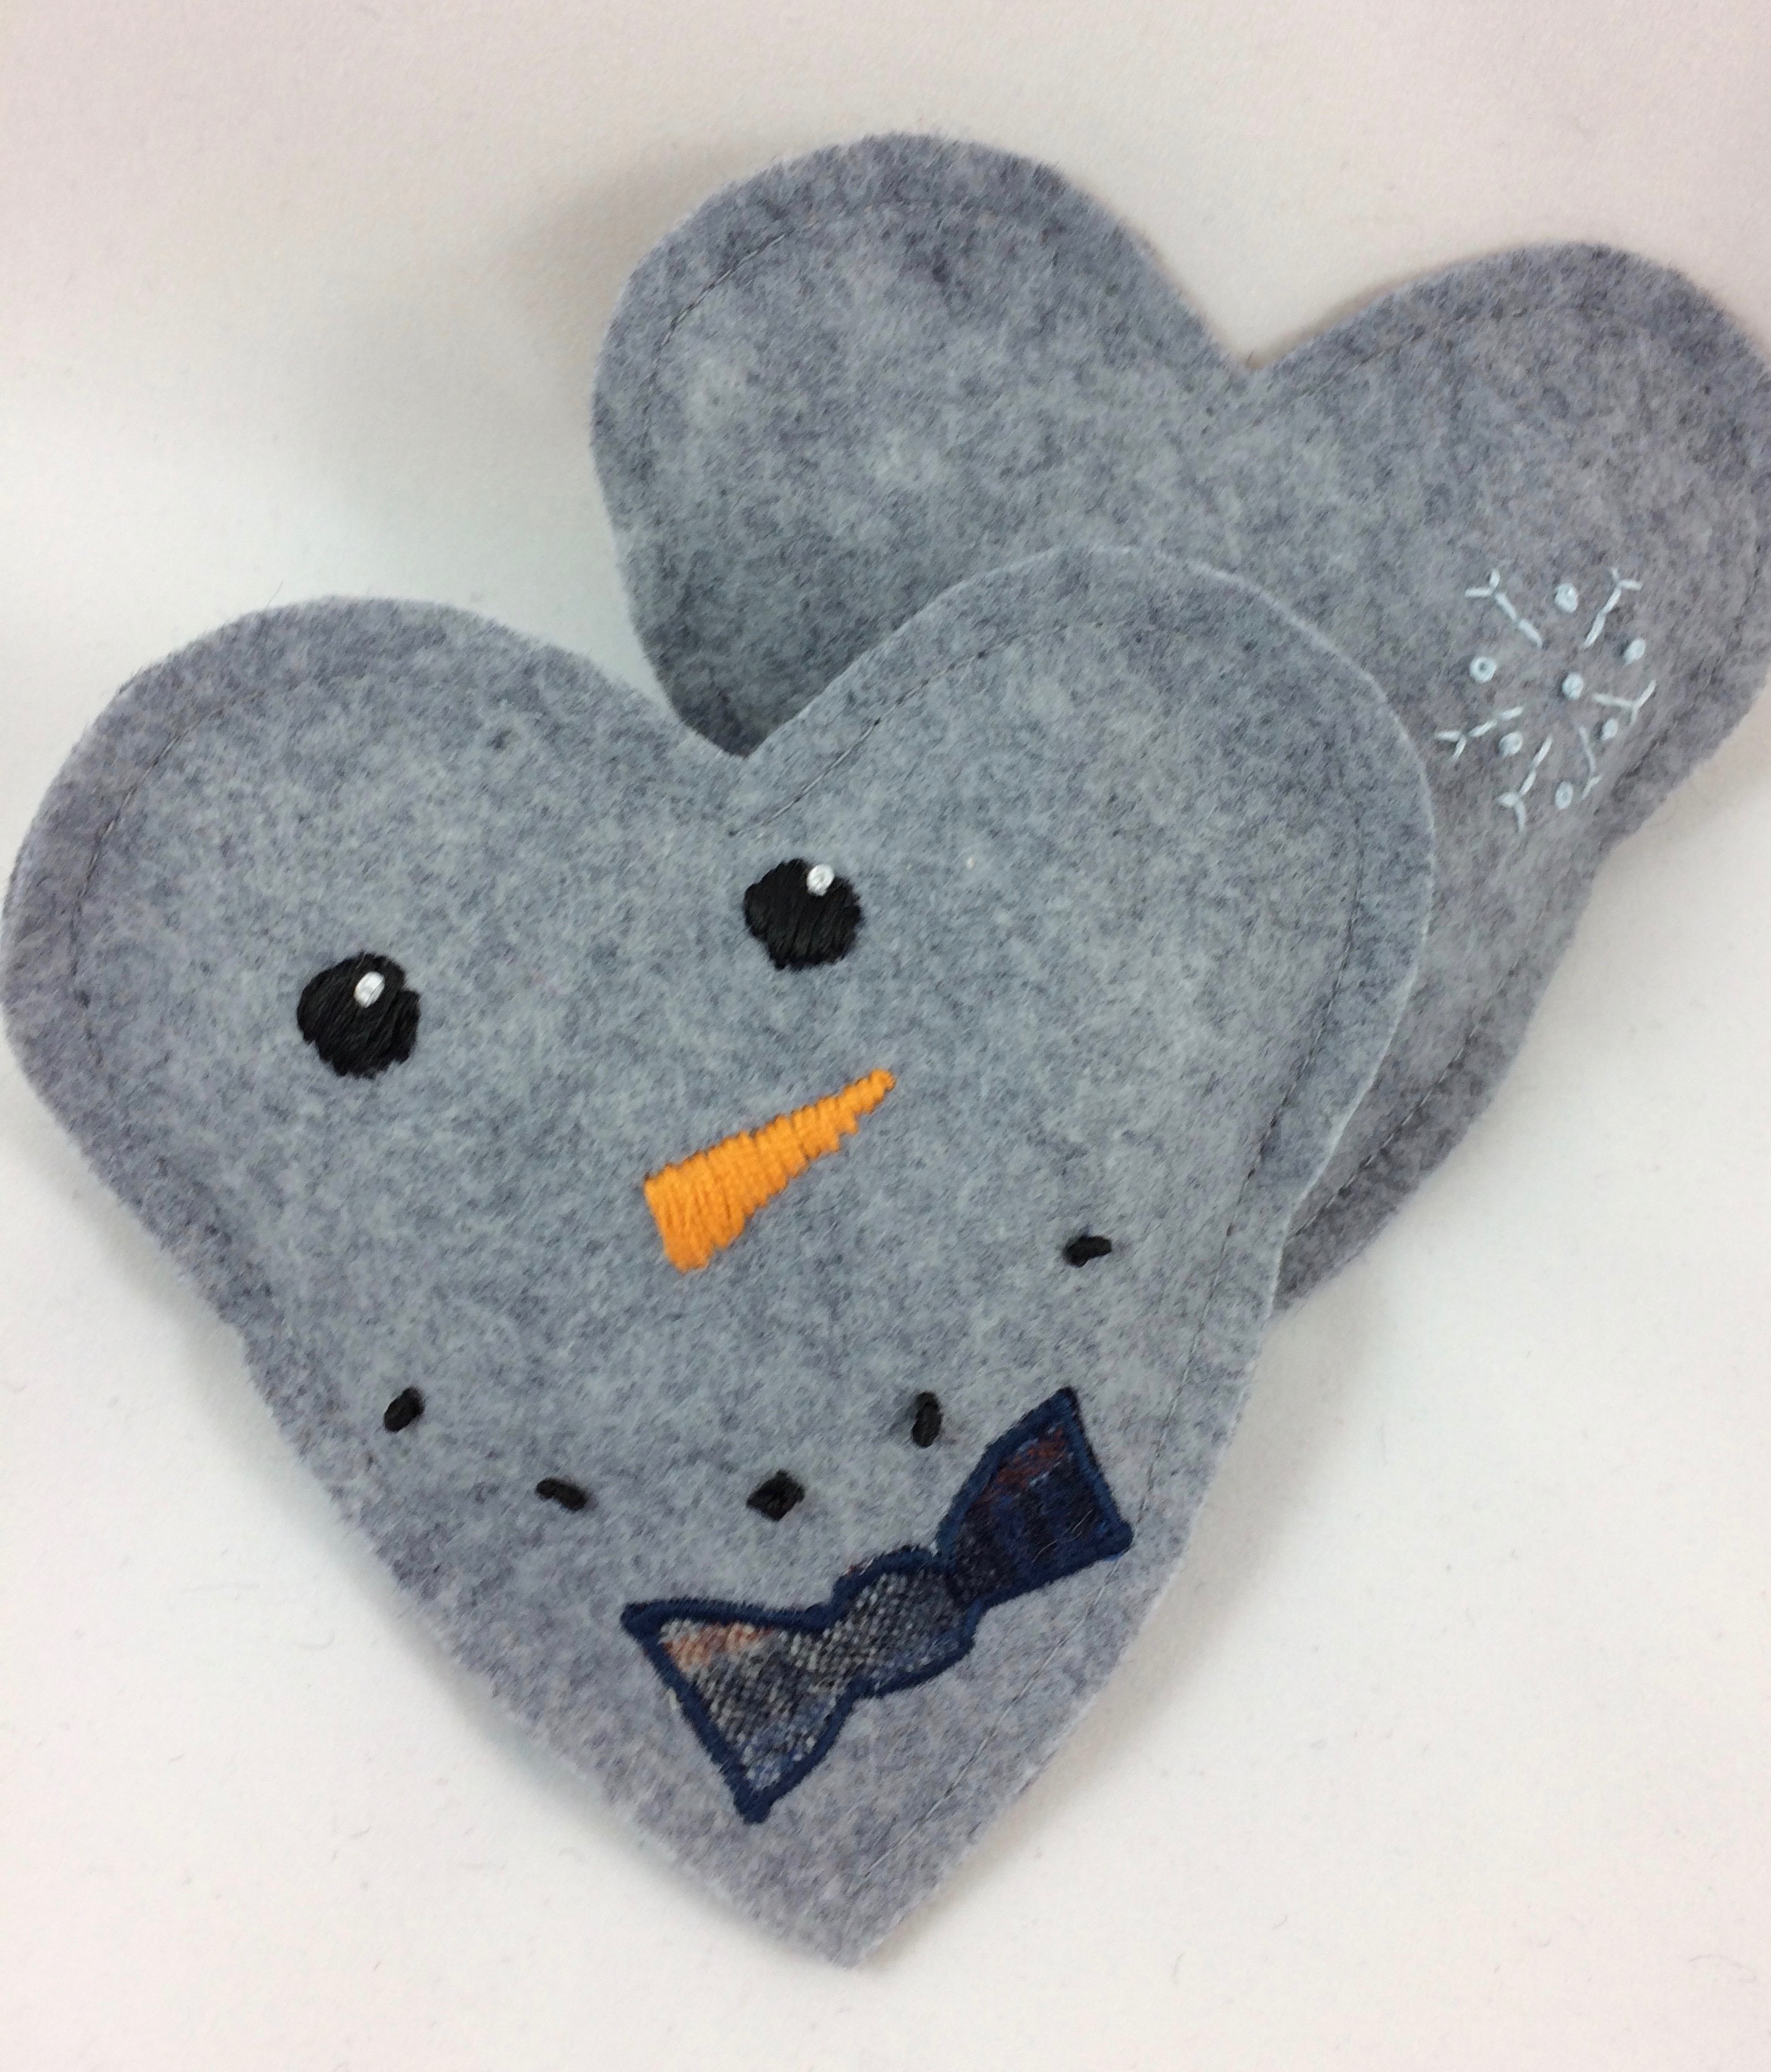
The wool felt is great because it doesn't unravel, so I sewed the hearts together leaving the seam allowance on the exterior of the hand warmers. Making these handwarmers this way, made this project just that much faster.

I also did a little hand applique on the front of each one. I did a more complicated design on one heart of the pair of hand warmers and then just a simple snowflake or heart on the other heart. The applique was a little time consuming, but once that was finished, the hand warmers came together very quickly.

The small heart that goes inside the larger heart is made of knit fabric (suggested in the tutorial) and filled with rice. Then if the outer heart gets dirty, it can be hand washed and used again! I warm the interior hearts in the microwave for 1 minute on high, insert them into the outer wool felt heart and put one in each pockets just before heading out on a walk with my dog. As one hand gets cold from holding the leash, I can switch hands, putting the cold one in a pocket warmed by one of these cute hand warmers. This is a perfect gift for someone who walks or does other cold-weather activities.

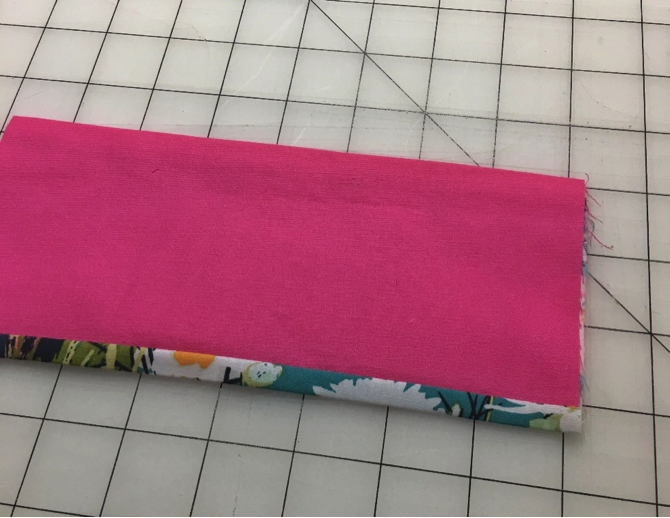
One small change I made on the pattern is I cut off 1/4" from the straight edge on each of the exterior back pieces. I did this because I didn't have to finish the edge since it wasn't going to unravel. In case you are wondering (like I did), I found that each interior heart took about a heaping 1/4 cup of rice to fill. It would be fun to make these with an old sweater, some knit fabric or even some quilting cotton. I think with a knit or cotton fabric, the heat may be lost faster, but I may be wrong about that.

Giving a set of hand warmers as a gift to someone who is special to you with a note that said something like, "Now you can have warm hands to go with your warm heart" would be perfect! I hope you are inspired to give someone who is special to you these adorable handmade heart hand warmers!


Sign up to receive email newsletters from Uniquely Michelle:

A Handmade Season of Giving - The Kristine ID Wallet

Michelle Burke

Today I am sharing a handmade gift idea that I am really excited to give this Christmas. Last year I decided that I was going to make as many gifts as I could this year and now I am sharing some of those handmade gifts with you. Today I am sharing the Kristine ID Wallet. Yes, this is one of my own patterns, but the Kristine ID Wallet is also one of my favorite gifts to give!

The Kristine ID Wallet is perfect for anyone who needs an access badge at work – medical professionals, teachers, government employees, military, any corporate employee, etc. It will easily hold an access badge plus a little cash for lunch and some business cards or credit cards. The Kristine ID Wallet can be worn as a wristlet or as a lanyard - directions for both options are included in the pattern.

This Christmas my niece will be receiving one of these from me (I am hoping she isn’t reading this!). My niece is 15 and will be getting her driver’s license in a few months. The Kristine ID Wallet is perfect for a new driver. It holds all the essentials in a compact form and it has the much preferred lanyard that the teens love – I think they like the lanyard just because it is a fun way to swing your keys and wallet as you walk! My college daughters love their Kristine ID Wallets to hold the key cards that they use to get into their dorm/apartment. Once again, college girls love the lanyard option as well as the wristlet option.

The Kristine ID Wallet is quick to make – I can make one in about 1 ½ hours. It doesn’t require much fabric; less than 1/2 yard of fabric and a small piece of clear vinyl. You can purchase the Kristine ID Wallet pattern and find all the fabric requirements and other items needed to make this wallet in the description of the pattern in my Etsy Shop, in my Craftsy Pattern Shop or in the "Shop" section on the Uniquely Michelle Website.

On one side, The Kristine ID Wallet has a clear ID pocket. It also has a zipper pocket perfect for change and cash. The thing that makes the Kristine ID Wallet unique is the cute envelope flap that covers two card pocket slots on one side. 

This wallet is really perfect for holding just the essentials when you don’t want to lug a purse around. I like to use my Kristine ID Wallet for sporting events and quick trips to the grocery store. 

Now I just need to decide which of these two wallets my niece would like better and wrap it up!


Sign up to receive email newsletters from Uniquely Michelle:

A Handmade Season of Giving - Easy Embellished Dishtowels

Michelle Burke

In this season of gift giving, I am making as many gifts as I can this year. I am sharing the gifts that I have made in this blog series, "A Handmade Season of Giving." Today I am sharing how I embellished some dishtowels to give them a holiday flair. One of the dishtowels I embellished for everyday use, not just for use during the Christmas season.

I had a great time embellishing dishtowels to give as gifts this year. It was fun to use Christmas and wintery fabric for this project and adding some fun coordinating ribbon or other trim. Dishtowels make great hostess gifts and can be paired with a coordinating apron (see previous post) and or a recipe and wooden spoon or two. Wrapped with some of the ribbon you used to embellish your dishtowel and you won’t need wrapping paper to make a pretty gift for your favorite cook.

I used dishtowel fabric that I found sold by the yard at THIS ETSY SHOP. MODA’S dishtowel fabric is fabulous and the edges are finished, so you only have to prewash the fabric to preshrink it and then cut it to length (around 27” is good) and finished the cut edges. I pressed the raw edges up to the wrong side of the dishtowel ½” and then up another ½” and then just top-stitched the folded edges in place. You could definitely use a dishtowel that is pre-made and bought from a store. You will still want to prewash it before you add any embellishments.

I embellished most of my dishtowels in on of two ways - a strip of fabric edged either with ribbon or with smaller strips of an accent fabric. These are fun and fast to make - I made each one in less than ½ hour from cutting the fabric to finished product! The part of this project that slowed me down was the time I spent deciding which fabrics and trims to put together – it was just so much fun to think of all the possibilities! The fabrics and trims you use determine whether the finished dishtowel will have a classy or a playful look – or something in between!


EMBELLISHING A DISHTOWEL

Sewing On Your Main Fabric Strip:

1.  Cut the main fabric strip so that it is  1 1/2" wider than the measured finished width of the dishtowel that you are using. Cut it 4 1/2" tall.  

2.  Take your main fabric strip and press one short edge in 1/2”. Leave the other short edge unpressed so that you can adjust it to fit the width of the dish towel exactly. You don't need to worry about doing anything with the long raw edges of your fabric strip, they will be finished later with ribbon or a smaller fabric strip.

3.  Pin main fabric strip onto dish towel so that lower edge is about 2 1/2” up from the bottom edge of the dish towel. Start pinning at pressed short edge (photo below left). When you get to the unpressed edge (photo below center), finger press it to match the width of the dish towel exactly. Pin in place (photo below right).

4.  Top-stitch around entire edge of fabric strip very close to the edge (1/16” away from edge if possible). I use a long stitch length for this (3.5). I like to use a thread the machine with a color of thread that coordinates (or one that is a fun contrast) with the main fabric strip. For the bobbin thread, I use a color that matches the dish towel.

Adding Ribbon to Finish the Long Raw Edges of the Main Fabric Strip:

1.  Cut two pieces of ribbon so each one is 1 1/2" longer than the measured width of your dishtowel. Pin one ribbon piece in place centered over one long raw edge of your main fabric strip. Use the same method you did for pinning the main fabric strip: folding one edge of your ribbon over 1/2" and matching that to the edge of your dishtowel, pinning across and folding in the other end so it exactly matches the other edge of your dishtowel. (See photos below)

2.  Once both ribbons are pinned in place, sew around all four edges of each ribbon very close to the edge (1/16” away from edge if possible). I use a long stitch length again (3.5) and I use a thread the machine with a color of thread that coordinates (or one that is a fun contrast) with the ribbon. For the bobbin thread, I use a color that matches the dish towel.

Adding Accent Fabric Strips to Finish the Long Raw Edges of the Main Fabric Strip:

1.  Cut two pieces of accent fabric so each one is 1 1/2" longer than the measured width of your dishtowel and 2" high. 

2.  Use a chalk pencil or a erasable marker on the wrong side of each of your accent fabric strips to mark the center of the length of each strip (the long way). Fold both of the long raw edges of each accent fabric strip to the wrong side so that they meet at the center line and press. (See photo below)

3.  Pin one accent fabric strip in place centered over one long raw edge of your main fabric strip. Use the same method you did for pinning the main fabric strip: folding one edge of your accent fabric strip over 1/2" and matching that to the edge of your dishtowel, pinning across and folding in the other end so it exactly matches the other edge of your dishtowel. (See photos below)

4.  Once both accent fabric strips are pinned in place, sew around all four edges of each accent fabric strip very close to the edge (1/16” away from edge if possible). I use a long stitch length again (3.5) and I use a thread the machine with a color of thread that coordinates (or one that is a fun contrast) with the accent fabric strip. For the bobbin thread, I use a color that matches the dish towel.


I love giving fun and practical gifts - these dishtowels definitely are fun and practical! They are fun and easy to make too! Watch for another quick and easy handmade gift idea coming in a couple days!


Sign up to receive email newsletters from Uniquely Michelle:

A Handmade Season of Giving - A Reversible Apron

Michelle Burke

Last year I decided I would make as many gifts as I could to give as Christmas gifts. In this, "A Handmade Season of Giving" blog series, I am featuring some of the gifts that I am giving this year or have given in the past. All of them are quick and easy to make! Today I am featuring a reversible apron that I love to make and give as a gift.

Giving an apron to a someone who likes to cook is always a much-appreciated gift! I have received aprons as gifts (thanks Mom) and I have made them for myself and others. My favorite apron pattern is Mary Mulari’s Favorite Reversible Apron Pattern. This butcher style apron includes a pocket or two and an adjustable Velcro neck strap. I have made this apron many times and it is a fast and fun sewing project. You only need two 1 yard pieces of cotton fabric, although I sometimes use another small piece of fabric or two to make the pockets.

I like just having one pocket (where my phone lives while I cook) and I either reverse the pocket fabric (fabric #1 pocket sewn onto the side of the apron made with fabric #2) or I use a completely different fabric for the pockets on each side. The only other alteration I have made to this pattern is that I usually sew the straps together at the neck or if I want it to be adjustable, I put a button or two on one strap and a button hole or two on the other strap. The pattern instructs you to put Velcro on the neck straps and I have made the apron this way as well and it works very well, I just prefer buttons.

My daughters made these aprons for themselves when they were around the ages of 12 & 14. They really had fun picking out fabrics and sewing them up. They also added buttons to the pockets and sewed on a feature piece of their fabric near the top to add even more personality to their aprons.

I didn’t make aprons this year for gifts, but I have made them before for a Christmas craft fair at my church. I also made a Christmas-themed apron for my Mom for her birthday present a couple years ago – her birthday is at the end of November so she had it in time to wear for all her holiday baking and cooking.

I can make one apron, from cutting the fabric out to finished apron in about 1½ to 2 hours. It is important to prewash the fabric so that it is preshrunk before you cut the apron. If the cook you are giving this gift to is anything like me, the apron will be washed several times in its lifetime. I am a messy cook - the reason I wear an apron!

An apron can be a fun gift to include in a combination gift that includes a favorite recipe and a wooden spoon or two. You could also add a coordinated dishtowel! That brings us to the next blog post in this series – adding some fabric and trims to a dishtowel to make a pretty custom dishtowel, perfect for giving as a gift! Watch for the next blog post coming soon!!!


Sign up to receive newsletters from Uniquely Michelle:

A Handmade Season of Giving - The Chunky Crochet Cowl Infinity Scarf

Michelle Burke

Believe it or not, I am starting this Handmade Season of Giving series with a gift idea that isn’t sewn, but crocheted! Even if you don't crochet, no worries - read on! The Chunky Crochet Cowl Infinity Scarf is fast and easy to make and it looks so nice when it is finished. I really had fun making these, to the point that I made quite a few! 

This is five of the eight scarves that I made to give as Christmas gifts.

This is five of the eight scarves that I made to give as Christmas gifts.

I found this scarf while looking for gift ideas on Pintrest. Janna of JJCrochet has patterns for the Chunky Crochet Cowl Scarf (a shorter scarf) as well as the Crochet Cowl Pattern with Infinity Loop (a longer scarf) available for free on her website! I actually took what I liked from each of these two patterns to make my scarves. I liked the shorter cowl neck scarf because it uses less yarn and it is faster to make than the long one. I liked the infinity loop of the longer cowl scarf though. Basically I just made the short version (the Chunky Crochet Cowl Scarf) a little longer so that I could add a twist before sewing the ends together, making it an infinity scarf. I have details toward the bottom of this post explaining exactly how I made this change!

This scarf is a great beginner scarf, it only takes two different stitches to make and they are easy to learn! I learned the two crochet stitches needed to make this scarf by watching the two short videos Janna has made where she demonstrates how to crochet the two stitches.

To give you an idea of how easy this scarf is to make, I have crocheted before, but just afghans made solely using a basic chain stitch. Using Janna’s videos and practicing a little, I was able to quickly figure out how to make the Chunky Crochet Cowl Scarf. Once I had the stitches down, I could make one in between 2 and 2½ hours!

I recently visited my sister in Maryland. I crocheted a couple scarves on the flights to and from - a nice way to pass the time on an airplane!

I recently visited my sister in Maryland. I crocheted a couple scarves on the flights to and from - a nice way to pass the time on an airplane!

The Cowl Neck Infinity scarf is also fairly economical too (depending on the yarn you choose to use) because you will need only one or maybe two skeins of bulky yarn for each scarf! Janna recommends Lion Brand Wool-Ease Thick & Quick Yarn for theses scarves. I used Wool-Ease Thick & Quick Yarn for most of my scarves and I also recommend it; it was easy to work with, I only needed one skein of yarn, I was able to get it at JoAnns and I think the scarves made of this yarn are beautiful.

My sister wearing her early Christmas gift - she loved it!

My sister wearing her early Christmas gift - she loved it!

I varied how I made the scarf slightly because I wanted my scarves to be a little longer. Each of my rows has 65 stitches and after the Foundation Chain row, I crocheted another 10 rows using the Herringbone Half Double Crochet stitch. I found that with a total of 11 crocheted rows, I was still able to make a scarf with one skein of the Wool-Ease Thick & Quick yarn. The only other change I made was that before I whip stitched the ends together, I added one twist to the scarf to make it an infinity scarf. 

I can't wait to give these scarves as gifts, I think my friends and family will love them! Now I just have to make one for myself!


Sign up to receive email newsletters from Uniquely Michelle:

A Handmade Season of Giving

Michelle Burke

I decided last Christmas that I was going to try to give handmade gifts as much as I could next year. Well here it is almost a year later and I have been able to come up with some great handmade gift ideas to give this Christmas. I want to share my gift ideas with you in a blog series - hopefully one or more of these great handmade gift ideas will inspire you to make some gifts to give this year too! 

All of the handmade gifts I will be suggesting in this blog series are ones that I have made and have enjoyed making them – the reason I am suggesting them.  They are also fast to make and some are quite economical. It has also been fun making these handmade gifts and thinking about the person I will be giving each gift to as I make it!

Even though I love to sew, not all the handmade gift ideas will be sewn creations. I will share a  crocheted scarf that is fast and easy to make! Of course many of the gifts will be sewn, like embellished dishtowels and handwarmers. The common thread with all the gifts is that they can be made quickly and are easily! Most of these gifts can be made in less than 2 hours, some in as little as ½ an hour.

I will share any materials that I recommend and any helpful hints I have found as I have made the gifts. I welcome any suggestions you have on any of the projects, I think it is helpful to get a variety of ideas and help from several sources. Just so you know, I have not been paid by anyone of the people who have produced any of the tutorials or patterns that I will reference in this series. All the gifts I have made are just ones that I have used and I love and therefore feel that they are worth sharing with you! 

Watch here for a new post every few days with an new, quick and easy gift to make!


Sign up to receive email newsletters from Uniquely Michelle:

Goodbye Lindsay Wristlet Week - It Has Been Fun

Michelle Burke

Today is the last day of Lindsay Wristlet Week - I hope you have enjoyed learning some way to change up the Lindsay Wristlet a bit! It was fun learning from Kristina how to increase the size of the Lindsay Wristlet and how to add a slip pocket. Thanks Kristina for teaching us how to do both of those things! It was fun for me to give away three of my patterns - congratulations to the winners! The 15% off sale will go through today at 10:00pm (MDT), so don't miss out - get any Uniquely Michelle patterns now! Remember to enter the coupon code LINDSAYWEEK during checkout in my Website Shop or in the Uniquely Michelle Etsy Shop. You can also purchase patterns from the Uniquely Michelle Craftsy Pattern Shop where I have reduced the prices to reflect the 15% off.

I would love to see pictures of everyone's Lindsay Wristlet creations, whether you change it up some or just follow the pattern! Please share any pictures on Instagram (#uniquelymichelle) or in the Uniquely Michelle Sewing Patterns Facebook Group. The Facebook group is a fun place to not only share pictures of your Uniquely Michelle creations, but to also get help and share ideas. Speaking of sharing ideas . . . please share any ideas you have for changing up the Lindsay Wristlet pattern. I have already had someone suggest another great change up for the Lindsay Wristlet (I will have to share this one later), but I am sure there are even more ideas out there! Share your ideas in the comments below or in the Uniquely Michelle Sewing Patterns Facebook Group.

Thanks for joining me during Lindsay Wristlet Week, it has been a blast!


Sign up to receive email newsletters from Uniquely Michelle:

Adding a Cross-Body Strap to the Lindsay Wristlet - Part 2

Michelle Burke

Today is day six of Lindsay Wristlet Week! I am excited to finish sharing with you a tutorial on making a cross-body strap for the Lindsay Wristlet! Yesterday we cut out the fabric and interfacing and gathered everything we needed. We also made and added the second anchor piece for the cross-body strap to attach to. Today we will make the strap itself!

IMG_4121.jpg

To make the cross-body strap, we need to start by sewing the two strips of fabric together. I like to do this on the bias because it makes it so that the adjustable slider can more easily go over the seam in the strap. Place one end of each strip right sides together so that they are at a right angle to each other. Draw a diagonal line across the square made by the intersection of the two strips of fabric from one corner to the opposite corner (see the photo on the left below). Make sure the two short ends of the strips are on one side of the line and the two long ends of the strips are on the other side of the line. Pin the strips together and sew on the line. Trim the seam allowance to ¼” and press the seam open. Now you have one long strip of fabric!

Next, it's time for interfacing. Following the manufacturer’s instructions, fuse the interfacing to the wrong side of the fabric, centering the interfacing down the middle of the strip of fabric and leaving 2” at each short end of the fabric strip with no interfacing. You may need to cut your interfacing strip shorter so that you have 2” of fabric without interfacing at each short end. If you don’t have one long strip of interfacing, just butt the ends together as you fuse them to the fabric. I fuse the interfacing right over the seam in the strap.

More pressing ahead! Fold both short ends of the Cross-Body Strap to the wrong side ¼” and press. Now fold the strip long raw edges wrong sides together and press. Next fold the raw edges of the long sides into the center fold that you just made and press. Give the Cross-Body Strap one more good press with all the folds in place and we are ready to sew!  Top-stitch 1/8" away from each long edge of the strap through all the layers.

Adding the hardware to a cross-body strap can seem a little daunting the first few times you do it. Start by putting one end of your strap over the center bar of the adjustable slider so that 1” of the end of the strap overlaps on the other side. Sew this strap end in place with a little square near the end of the strap going through both layers of the strap. 

Loop the other end of the strap through one of the swivel snap hooks and then bring that end back to the adjustable slider. Keeping any twists out of the strap, put the end of the strap through the adjustable slider - up one side, over the center and down the other side of the adjustable slider.

Now you just need to add the other swivel snap hook in the same way you added the adjustable slider to the first end of the strap.

Your cross-body strap is now finished and ready to clip onto your Lindsay Wristlet! I love that the Lindsay Wristlet can still be used as a wristlet, but now can be used as a cross-body bag too!

Don't forget the SALE that is going on all week! You can get 15% off all Uniquely Michelle patterns by entering the coupon code LINDSAYWEEK during checkout in my Website Shop or in the Uniquely Michelle Etsy Shop. You can also purchase patterns from the Uniquely Michelle Craftsy Pattern Shop where I have reduced the prices to reflect the 15% off. The sale runs through this Sunday, October 23rd at 10:00pm (MDT).

Please share pictures of your Lindsay Wristlets and any other Uniquely Michelle creations you make on Instagram (#UniquelyMichelle) and on the Uniquely Michelle Sewing Patterns FB group! I love seeing everyone's creations! 


Sign up to receive email newsletters from Uniquely Michelle:

Adding a Cross-Body Strap to the Lindsay Wristlet - Part 1

Michelle Burke

Welcome to day five of Lindsay Wristlet Week! Today I have the first of a two-part tutorial on how to add a cross-body strap to the Lindsay Wristlet. Having a cross-body strap is a nice way to make this cute little bag easy to carry completely hands-free. I have found my Lindsay Wristlet perfect to take to school events, sporting events and when I just need the necessities when I am out and about. Adding a cross-body strap makes it so that I don’t have to worry about keeping track of a small bag and I can still clap, cheer or shop! The following tutorial will give you a cross-body strap that can adjust from an approximate length of 31” to an approximate length of 60”.  If you don't yet have the pattern for the Lindsay Wristlet, see the links at the end of this post!

IMG_4195.jpg

Here is what you will need (above and beyond what you need to make the Lindsay Wristlet*):

1/8 yard exterior fabric*

1/8 yard 20” wide fusible woven mid-weight interfacing (Shapeflex 101)*

1 - ½” D-ring

2 - ½” swivel snap hook

1 – ½” adjustable slider

*You probably have enough exterior fabric and SF101 to make the cross-body strap if you get the amount of fabric called for in the pattern!


We will start by cutting the fabric and interfacing.

From the exterior fabric cut:

Width of the fabric x 2” & 25” x 2” These will be the Cross-Body Strap

3” x 2”  The Second Anchor Piece

From the SF101 cut:

1” x 50” (this can be pieced together as you iron it to the strap fabric, it doesn’t need to be one long strip)

Before you finish sewing up your Lindsay Wristlet, you will want to make the second anchor piece. All you need to do is make two anchor pieces instead of just one by following the directions in the pattern. There is one change I would make though, I would omit the interfacing on the anchor pieces. The interfacing makes the anchor pieces more stiff, which is fine for a wristlet but when you attach a cross-body strap, you want the anchor pieces to flex easily so that the bag hangs well. Easy enough, you get to skip the step of adding interfacing to the anchor pieces – woo hoo!

When adding the second anchor pieces, just clip/pin it to the opposite side of the front piece from where the first anchor piece is placed. Then just sew it in place in the same way you are instructed to sew the first one in place in the pattern.

Now that we have everything cut and we have made the necessary adjustments to the Lindsay Wristlet, we are ready to make a cross-body strap . . . but we will break for now. Tomorrow we will make the cross-body strap! 

Don't forget the SALE that is going on all week! You can get 15% off all Uniquely Michelle patterns by entering the coupon code LINDSAYWEEK during checkout in my Website Shop or in the Uniquely Michelle Etsy Shop. You can also purchase patterns from the Uniquely Michelle Bluprint Pattern Shop where I have reduced the prices to reflect the 15% off. The sale ends this Sunday at 10:00pm (MDT).

Please share pictures of your Lindsay Wristlets and any other Uniquely Michelle creations you make on Instagram (#UniquelyMichelle) and on the Uniquely Michelle Sewing Patterns FB group! I love seeing everyone's creations! 


Sign up to receive email Newsletters from Uniquely Michelle:

Adding An Exterior Slip Pocket to the Lindsay Wristlet

Michelle Burke

As Lindsay Wristlet Week continues, Kristina of Restitch is back today to explain how she adds an external slip pocket to the Lindsay Wristlet. I love her slightly unconventional, but very easy and awesome way of doing this and I think you will love it too! You can read more about Kristina in yesterday's blog post, but I want to give you the chance to see her beautiful work again today by going to her website, liking her Facebook page, and following her on Instagram!
And now here is Kristina . . .

Hi everyone, it's Kristina again! Today I am going to teach you how to add a slip pocket to the outside with a fun little trick!

Ya’ll this will seriously blow your mind and you’ll use it ALL the time because it looks that good! I’m going to show you how to add an exterior slip pocket with a cute trim band at the top. It’ll look like you stitched that baby on with much precision and it’ll honestly up your game on bag making! Here’s what I’m talking about:

See that orange and white polka-dot band? That’s what we are going to make!

Start off by calculating how tall you want the slip pocket to be. In most cases, you want the pocket to only take up about 75% to 80% of the side of the bag. If you do it too low, things will fall out and if you do it too high then it’ll interfere with the zipper on the top opening. In this case, my pocket was going to be 8” x 4” completed.

Here we go:

--Cut out two pieces: one of the exterior fabric and one of the lining fabric. They should both measure 8” x 4.5” - With right sides facing each other, sew one of the long side together with a ¼” seam allowance.

--Sew down the other long side with the same seam allowance. It should now look like this:

-Turn it right side out and press down your seams. Here is where it gets fun! Right side facing up, take and roll your seam allowance towards your body. So that the fabric on the underside is now showing at the top of the pocket. Like this:

Are you seeing it?!

Decide how much of a band you want on the top of your pocket and adjust accordingly. Once you’ve figured that out, give it a good press. It should look something like this:

Huzzah! Aren’t we so fancy!!


Here are a few suggestions about this pocket: I topstitch everything. I think it looks more professional and clean if you have a nice row of fat top stiches to keep everything in place. I just top stitch about a ¼ inch in with a nice long stitch. 

Another thing you can do is add some sort of closure. I like snaps! But you could also use Velcro or something similar. THIS is the step you’ll have to add the closure and is the only time you’’ll be able to do this! Line up your pocket with the main body piece and mark where you want you closure to be. 

-Clip/pin your exterior pocket to the exterior Main Body C. Make sure to line up your edges and make sure the band looks straight. Stitch around the pocket piece at a 1/8” seam allowance. We want to just hold it in place during assembly.


And there you have it! Assemble the rest of the bag as per the instructions!


You can use this trick on almost any sort of slip pocket and it is such a nice little touch. Here is the finished product!!

I hope I have given you some great ideas on how to make this awesome bag even better!

Thank you Michelle for having me!! I truly enjoyed sharing this with y’all!!

Thank you Kristina! It has been great learning from such a talented bag maker!
Over the next two days, I will share how you can add a cross-body strap to the Lindsay Wristlet!
Today is the last day to enter the giveaway - I will draw names at 7:00pm (MDT) for three lucky winners to receive a Lindsay Wristlet pattern! Details on the giveaway and the Uniquely Michelle sale are in Tuesday's blog post!

Sign up to receive email newsletters from Uniquely Michelle: