contact Me

Use the form on the right to contact Me.


123 Street Avenue, City Town, 99999

(123) 555-6789

email@address.com


You can set your address, phone number, email and site description in the settings tab.
Link to read me page with more information.

Blog

Jaby's Tutorial - Sewing The Kristine ID Wallet in Vinyl

Michelle Burke

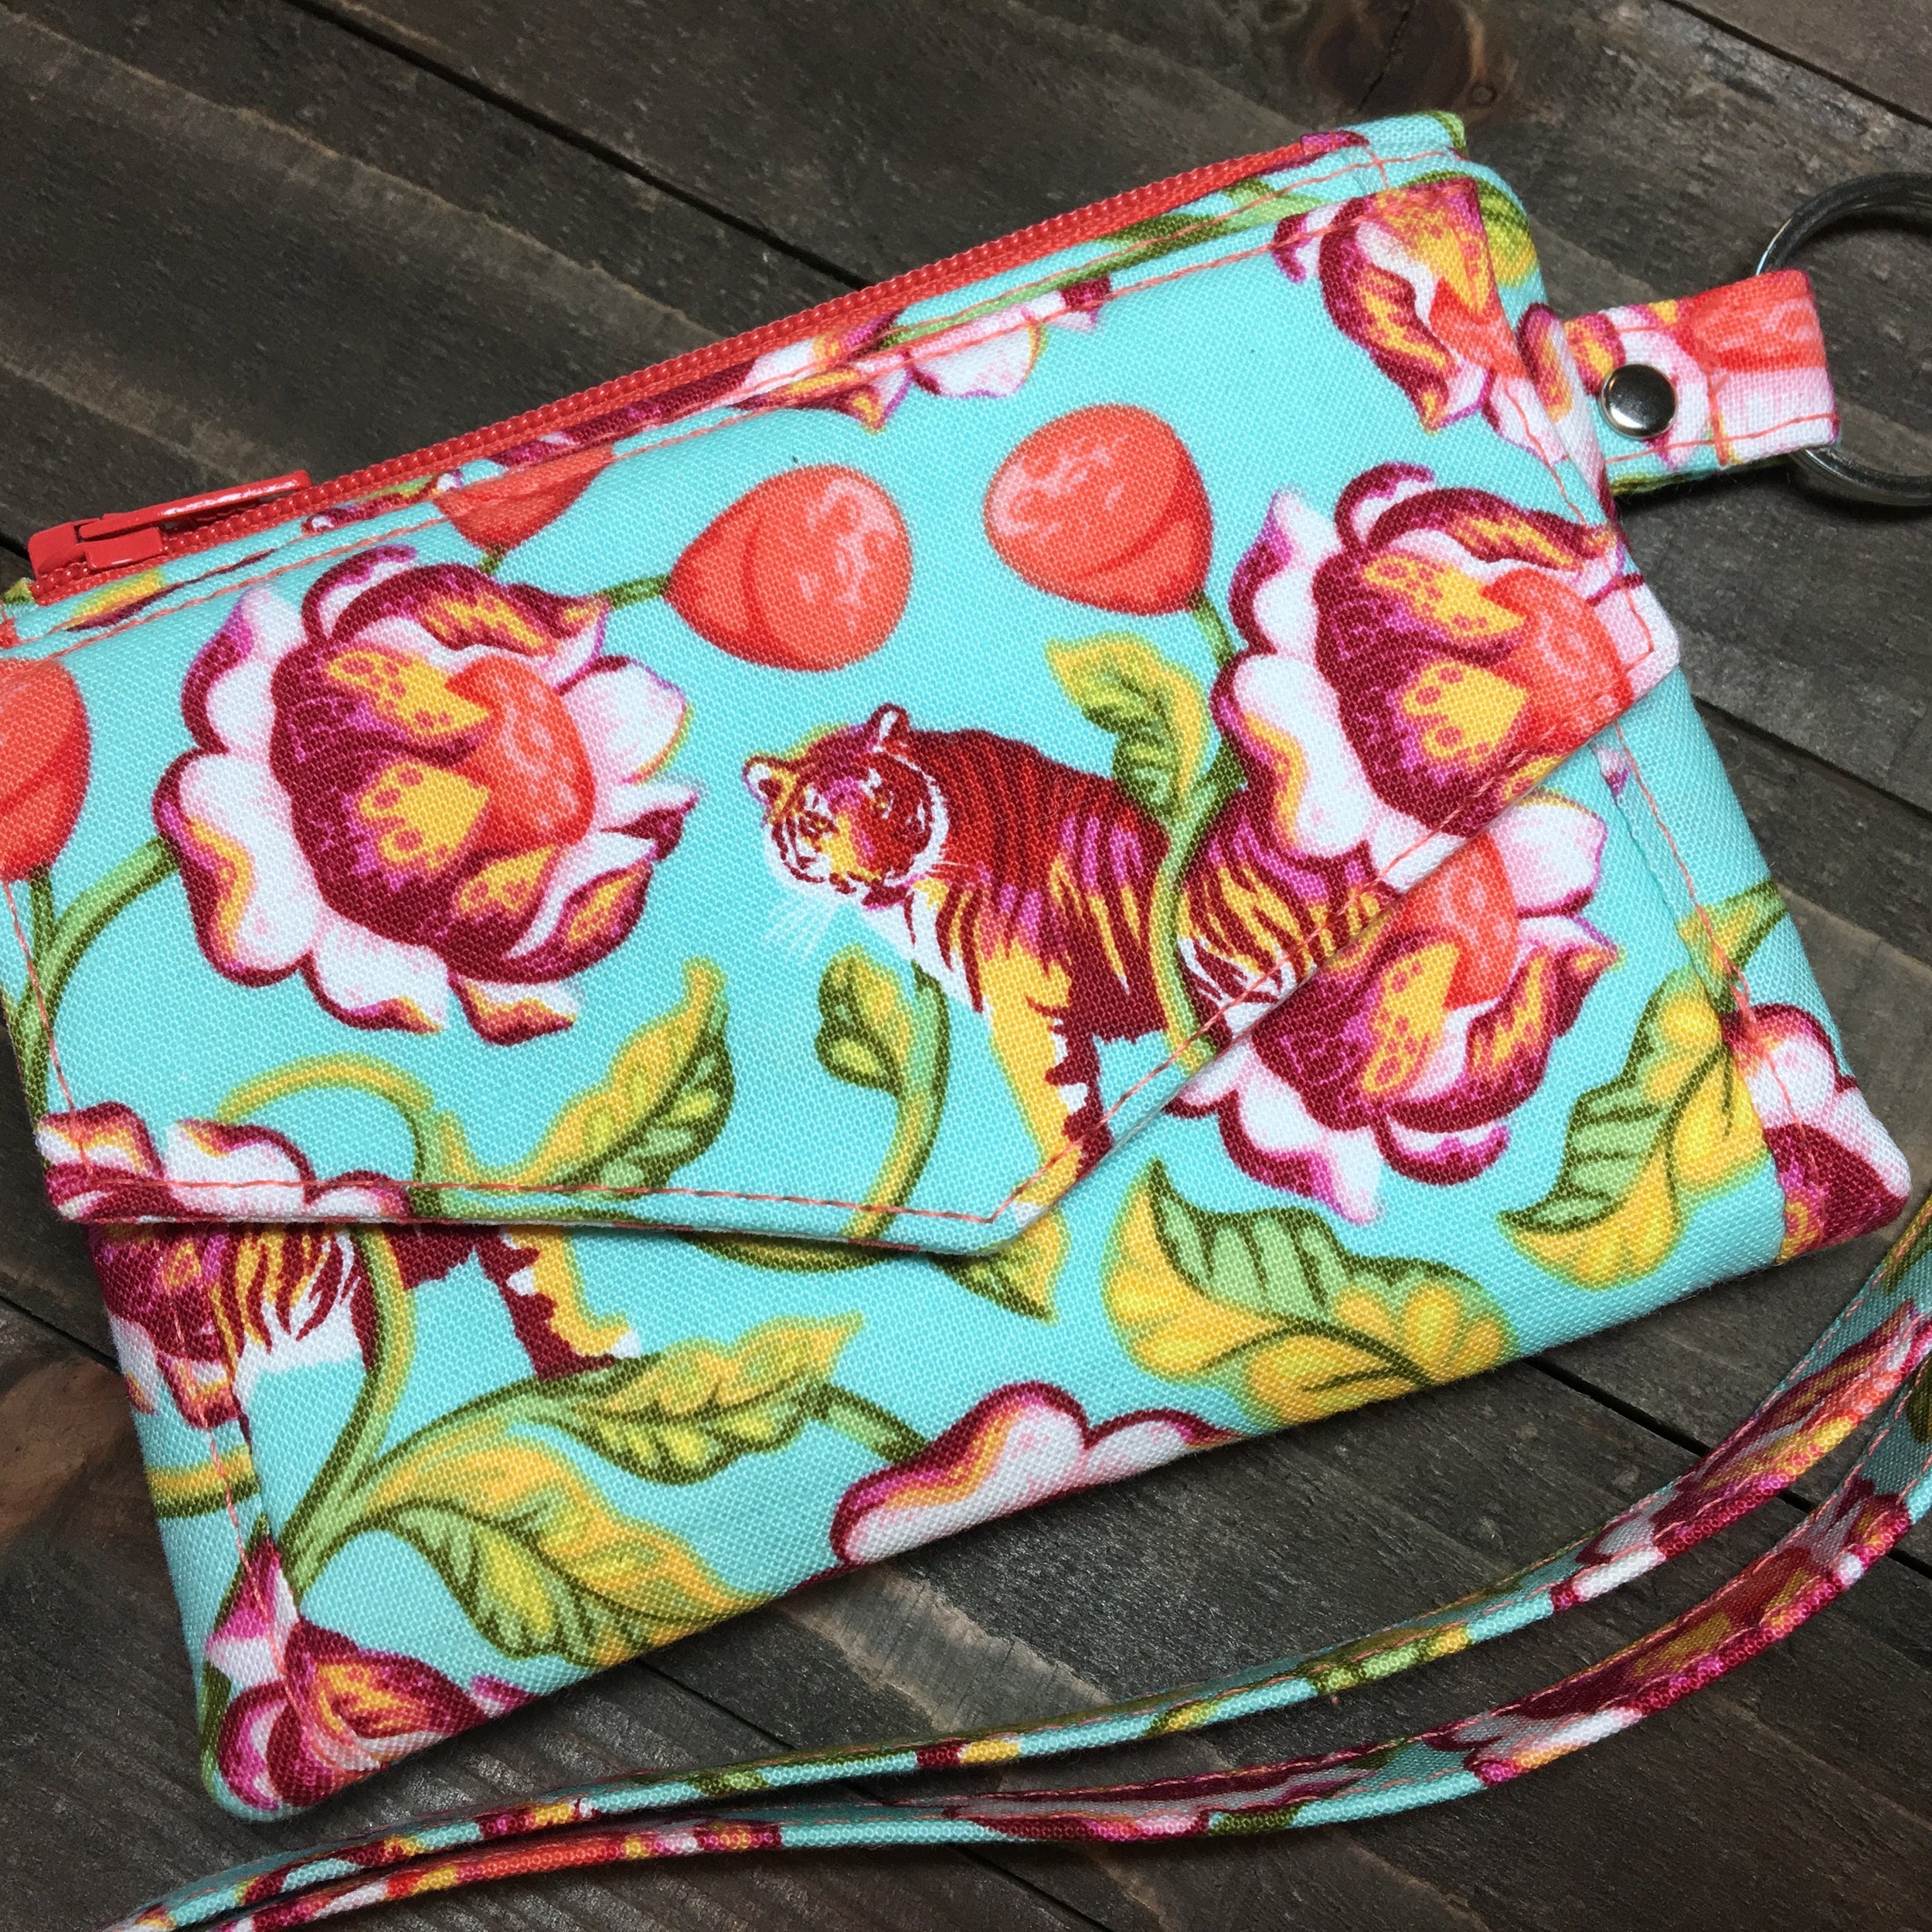
I know you have been waiting for this . . . Jaby of Sew 1980s is sharing her tips for sewing the Kristine ID Wallet out of vinyl or faux leather without adding a lot of extra bulk! Her alternate way of making the card pockets is genius! Jaby knows that time is money when it comes to selling her sewing creations, so her methods are also fast! So now, here is Jaby's tutorial!

KIDW Vinyl Tutorial

Jaby1.png
Jaby2.png

By Sew1980s

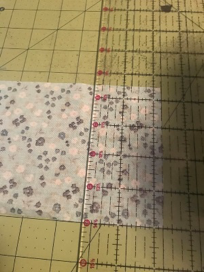
Cut the card wallet back piece 4 ½” wide by 4” tall. 

Jaby3.png

Using an exacto knife or sharp blade; cut a thin slit 1.25” below the top of the wallet.  The slot will start and end at .25” on each side of the wallet.   Your second slot will be cut half an inch below your first one.  Cut the second card slot using the same length as your first card slot. 

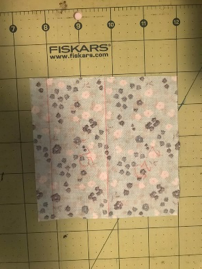
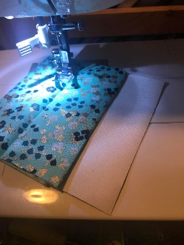
Cut your credit card pockets using your lining fabric.   These will be two separate pieces measured 4.50” x 4.50” On the right side of the lining fabric, mark a line across the top-half an inch down.  Then flip the fabric over to the wrong side and mark another line 2.25” below the top.  Below that, still on the wrong side mark another line 1.75” below the line you just made.  There should be half an inch of fabric remaining below that second line.  At the 2.25” mark fold the right sides together; then fold the wrong sides together at the 1.75” line.  The pocket should look like this.  I also put a crease in the very top line to know where to place the fabric at on the back of the vinyl piece.

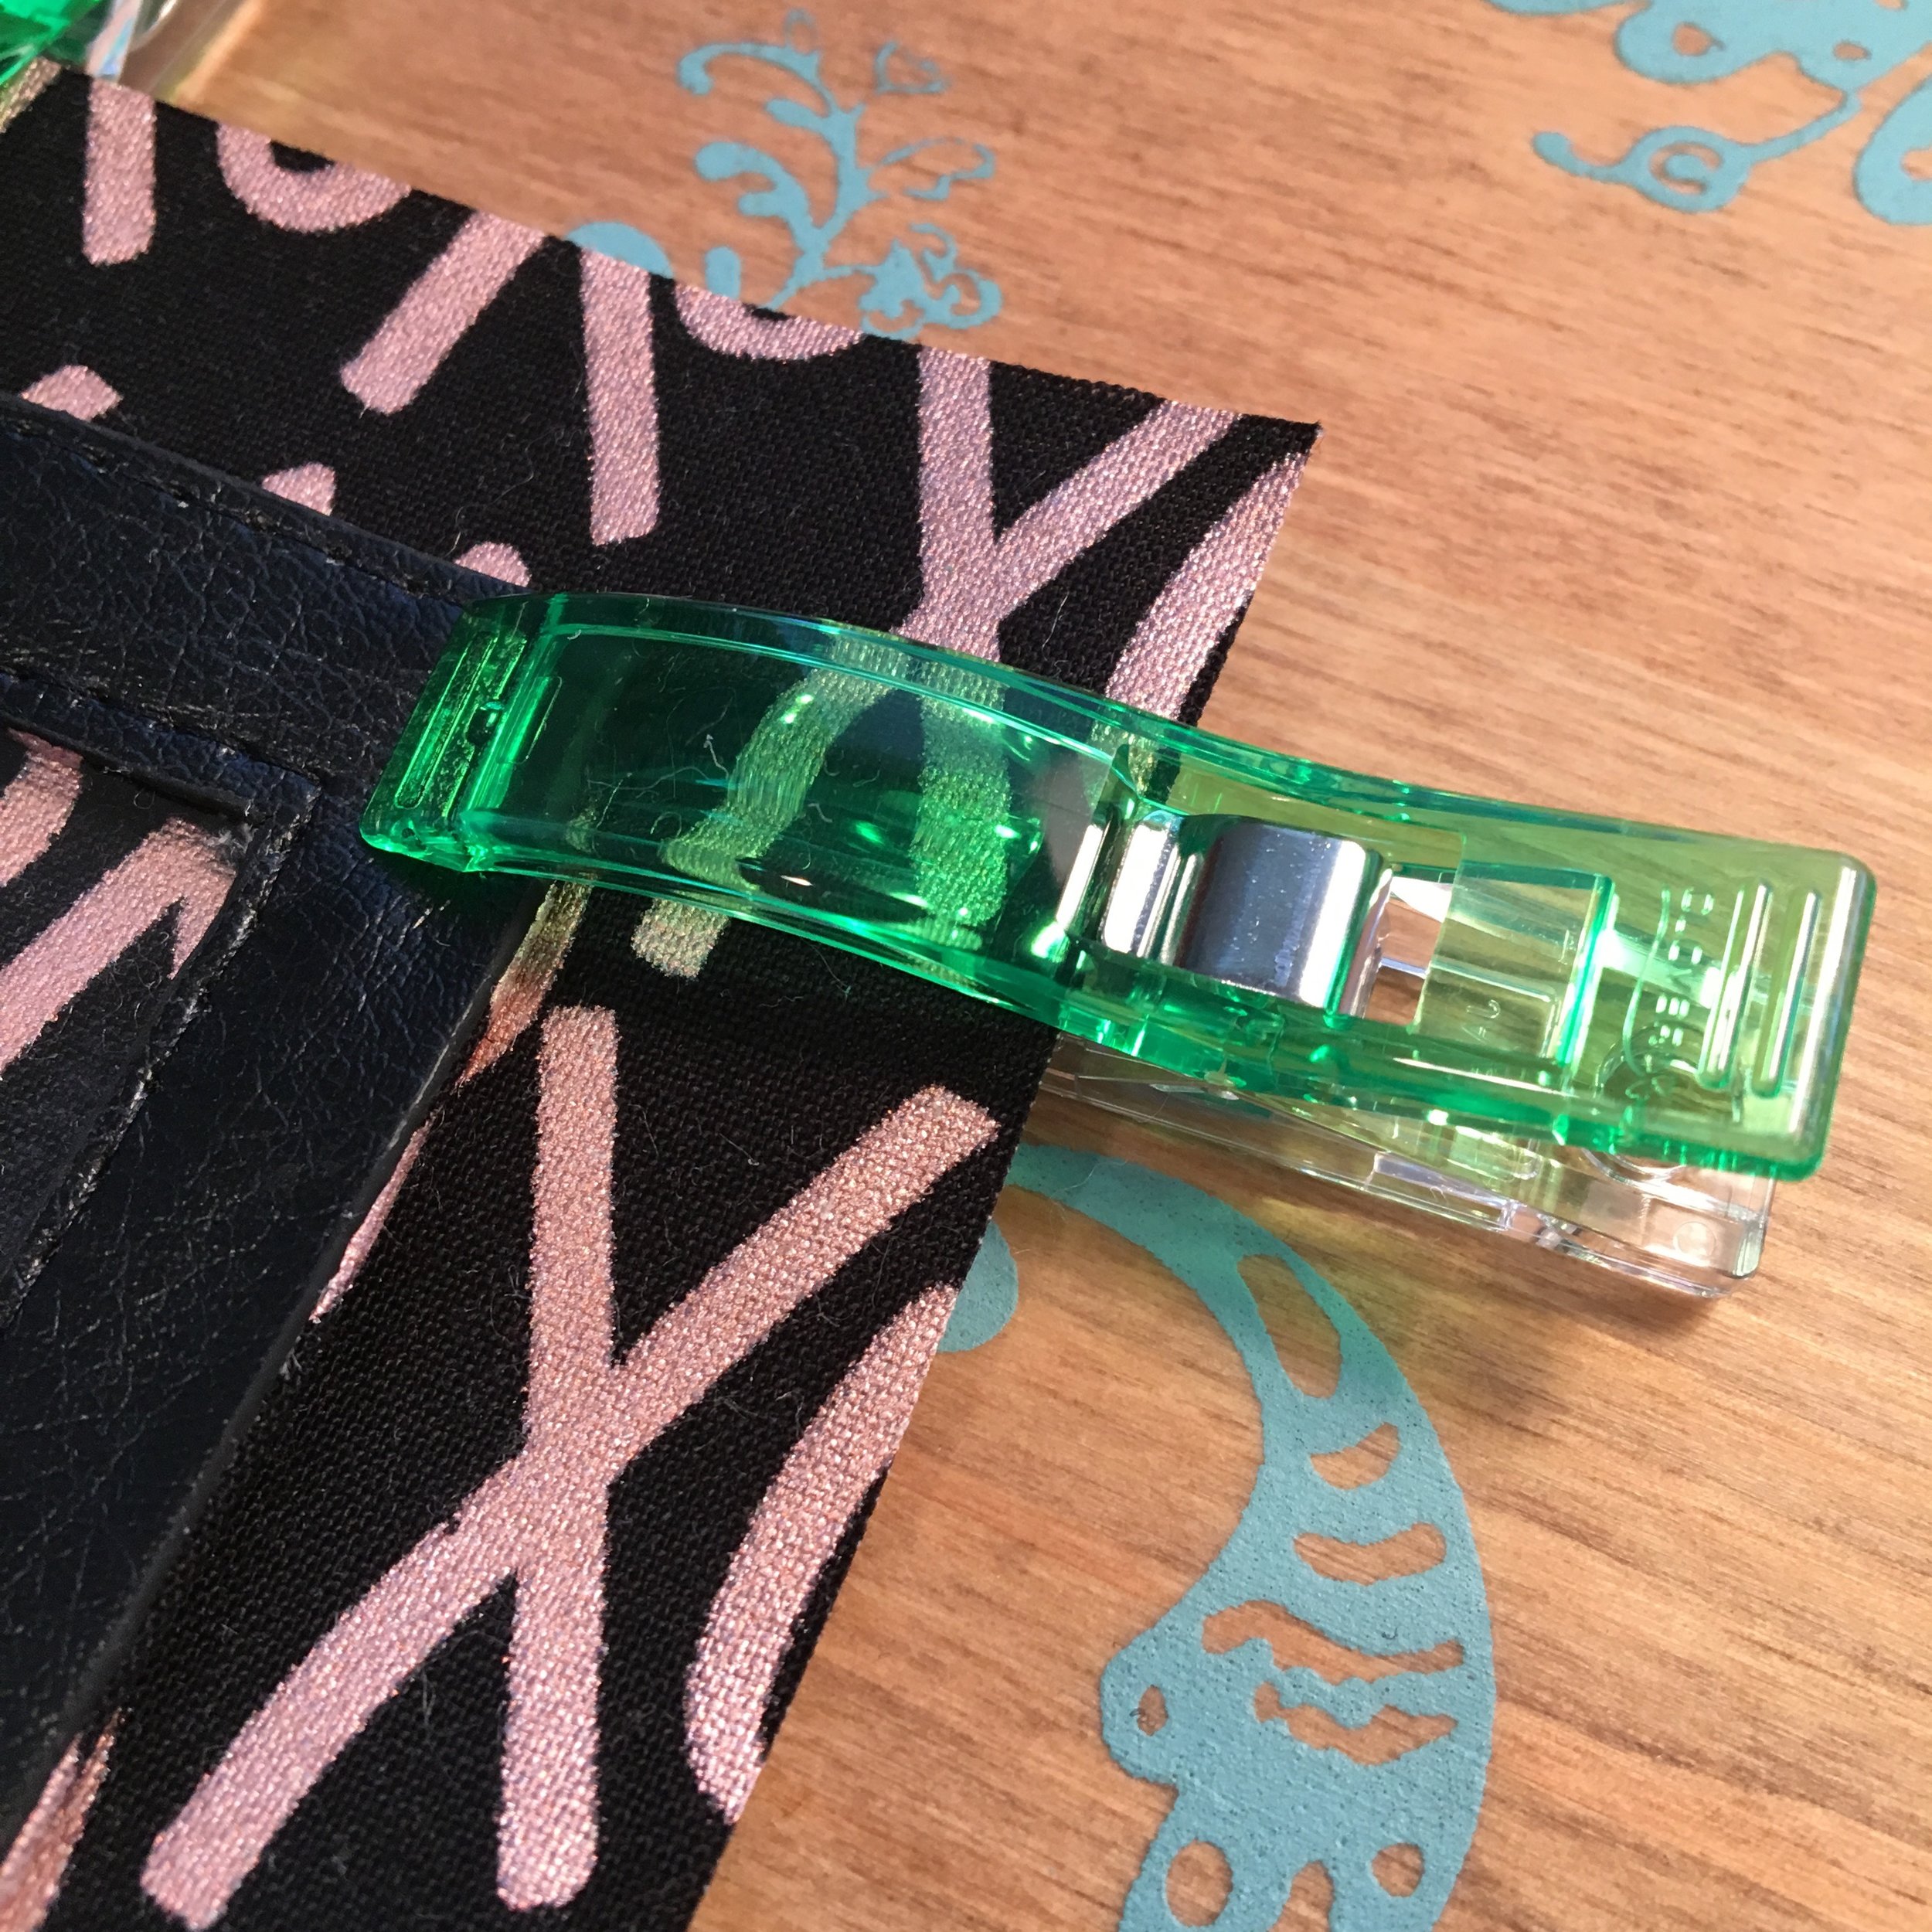
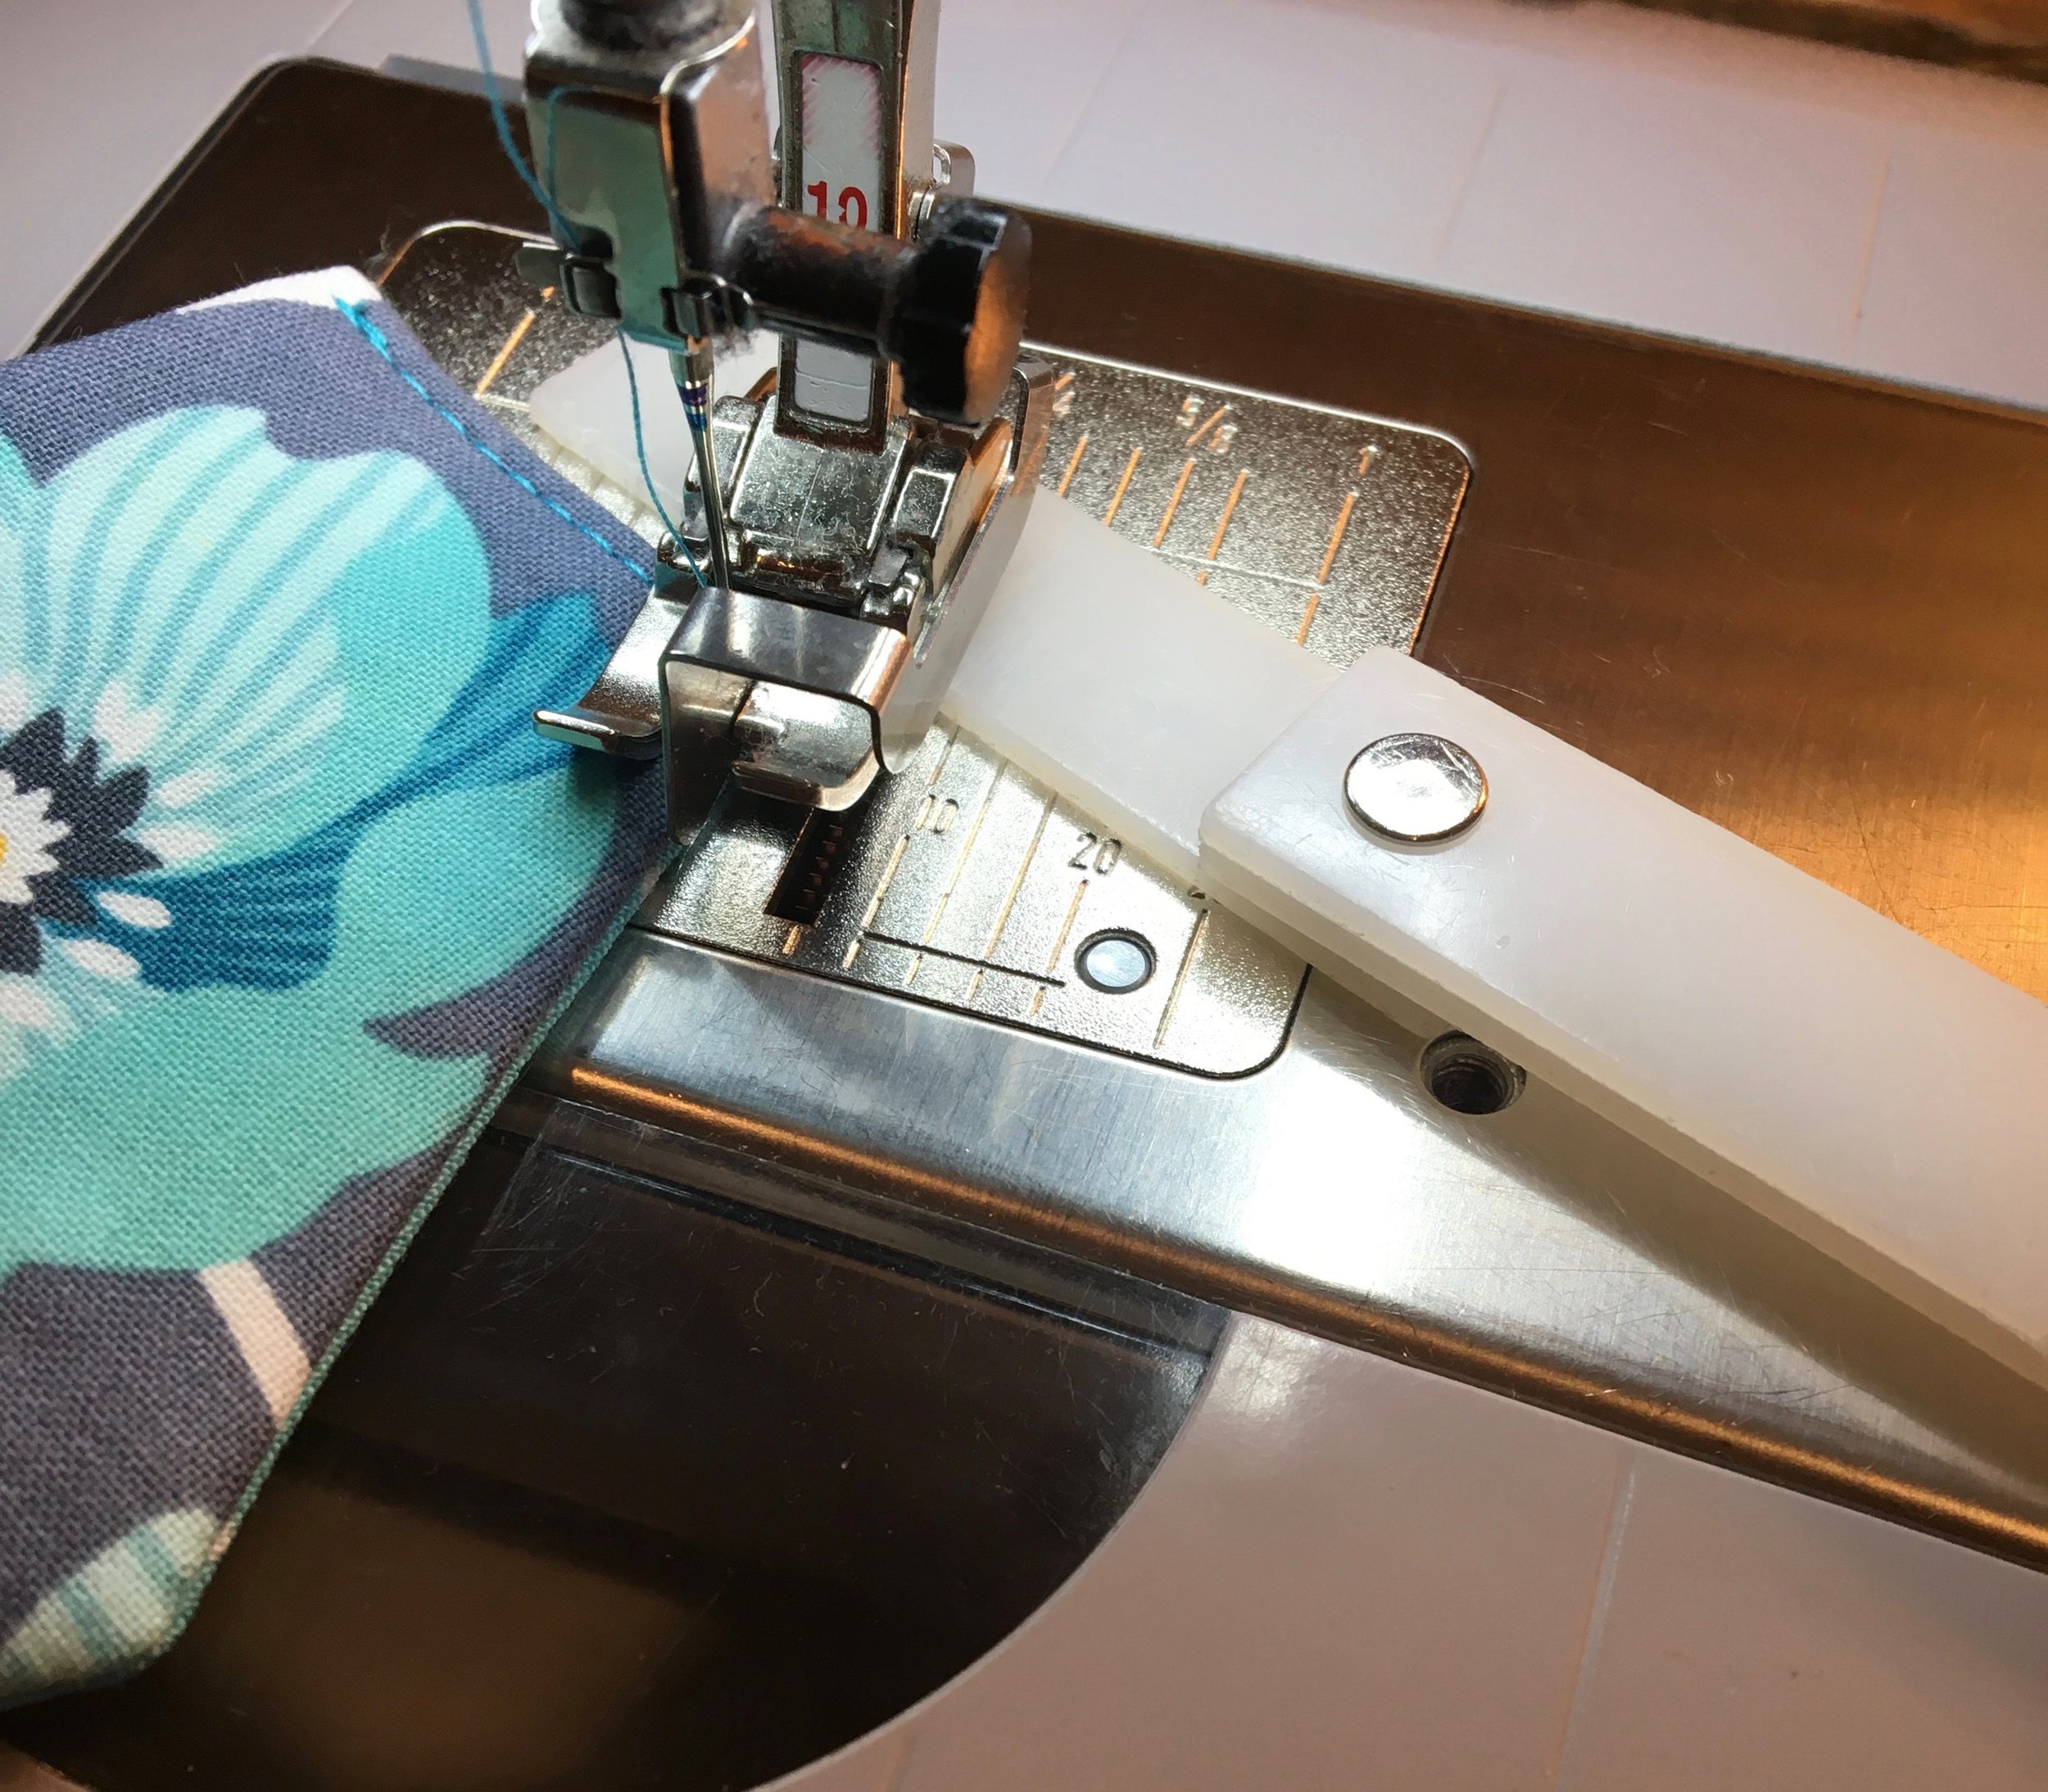
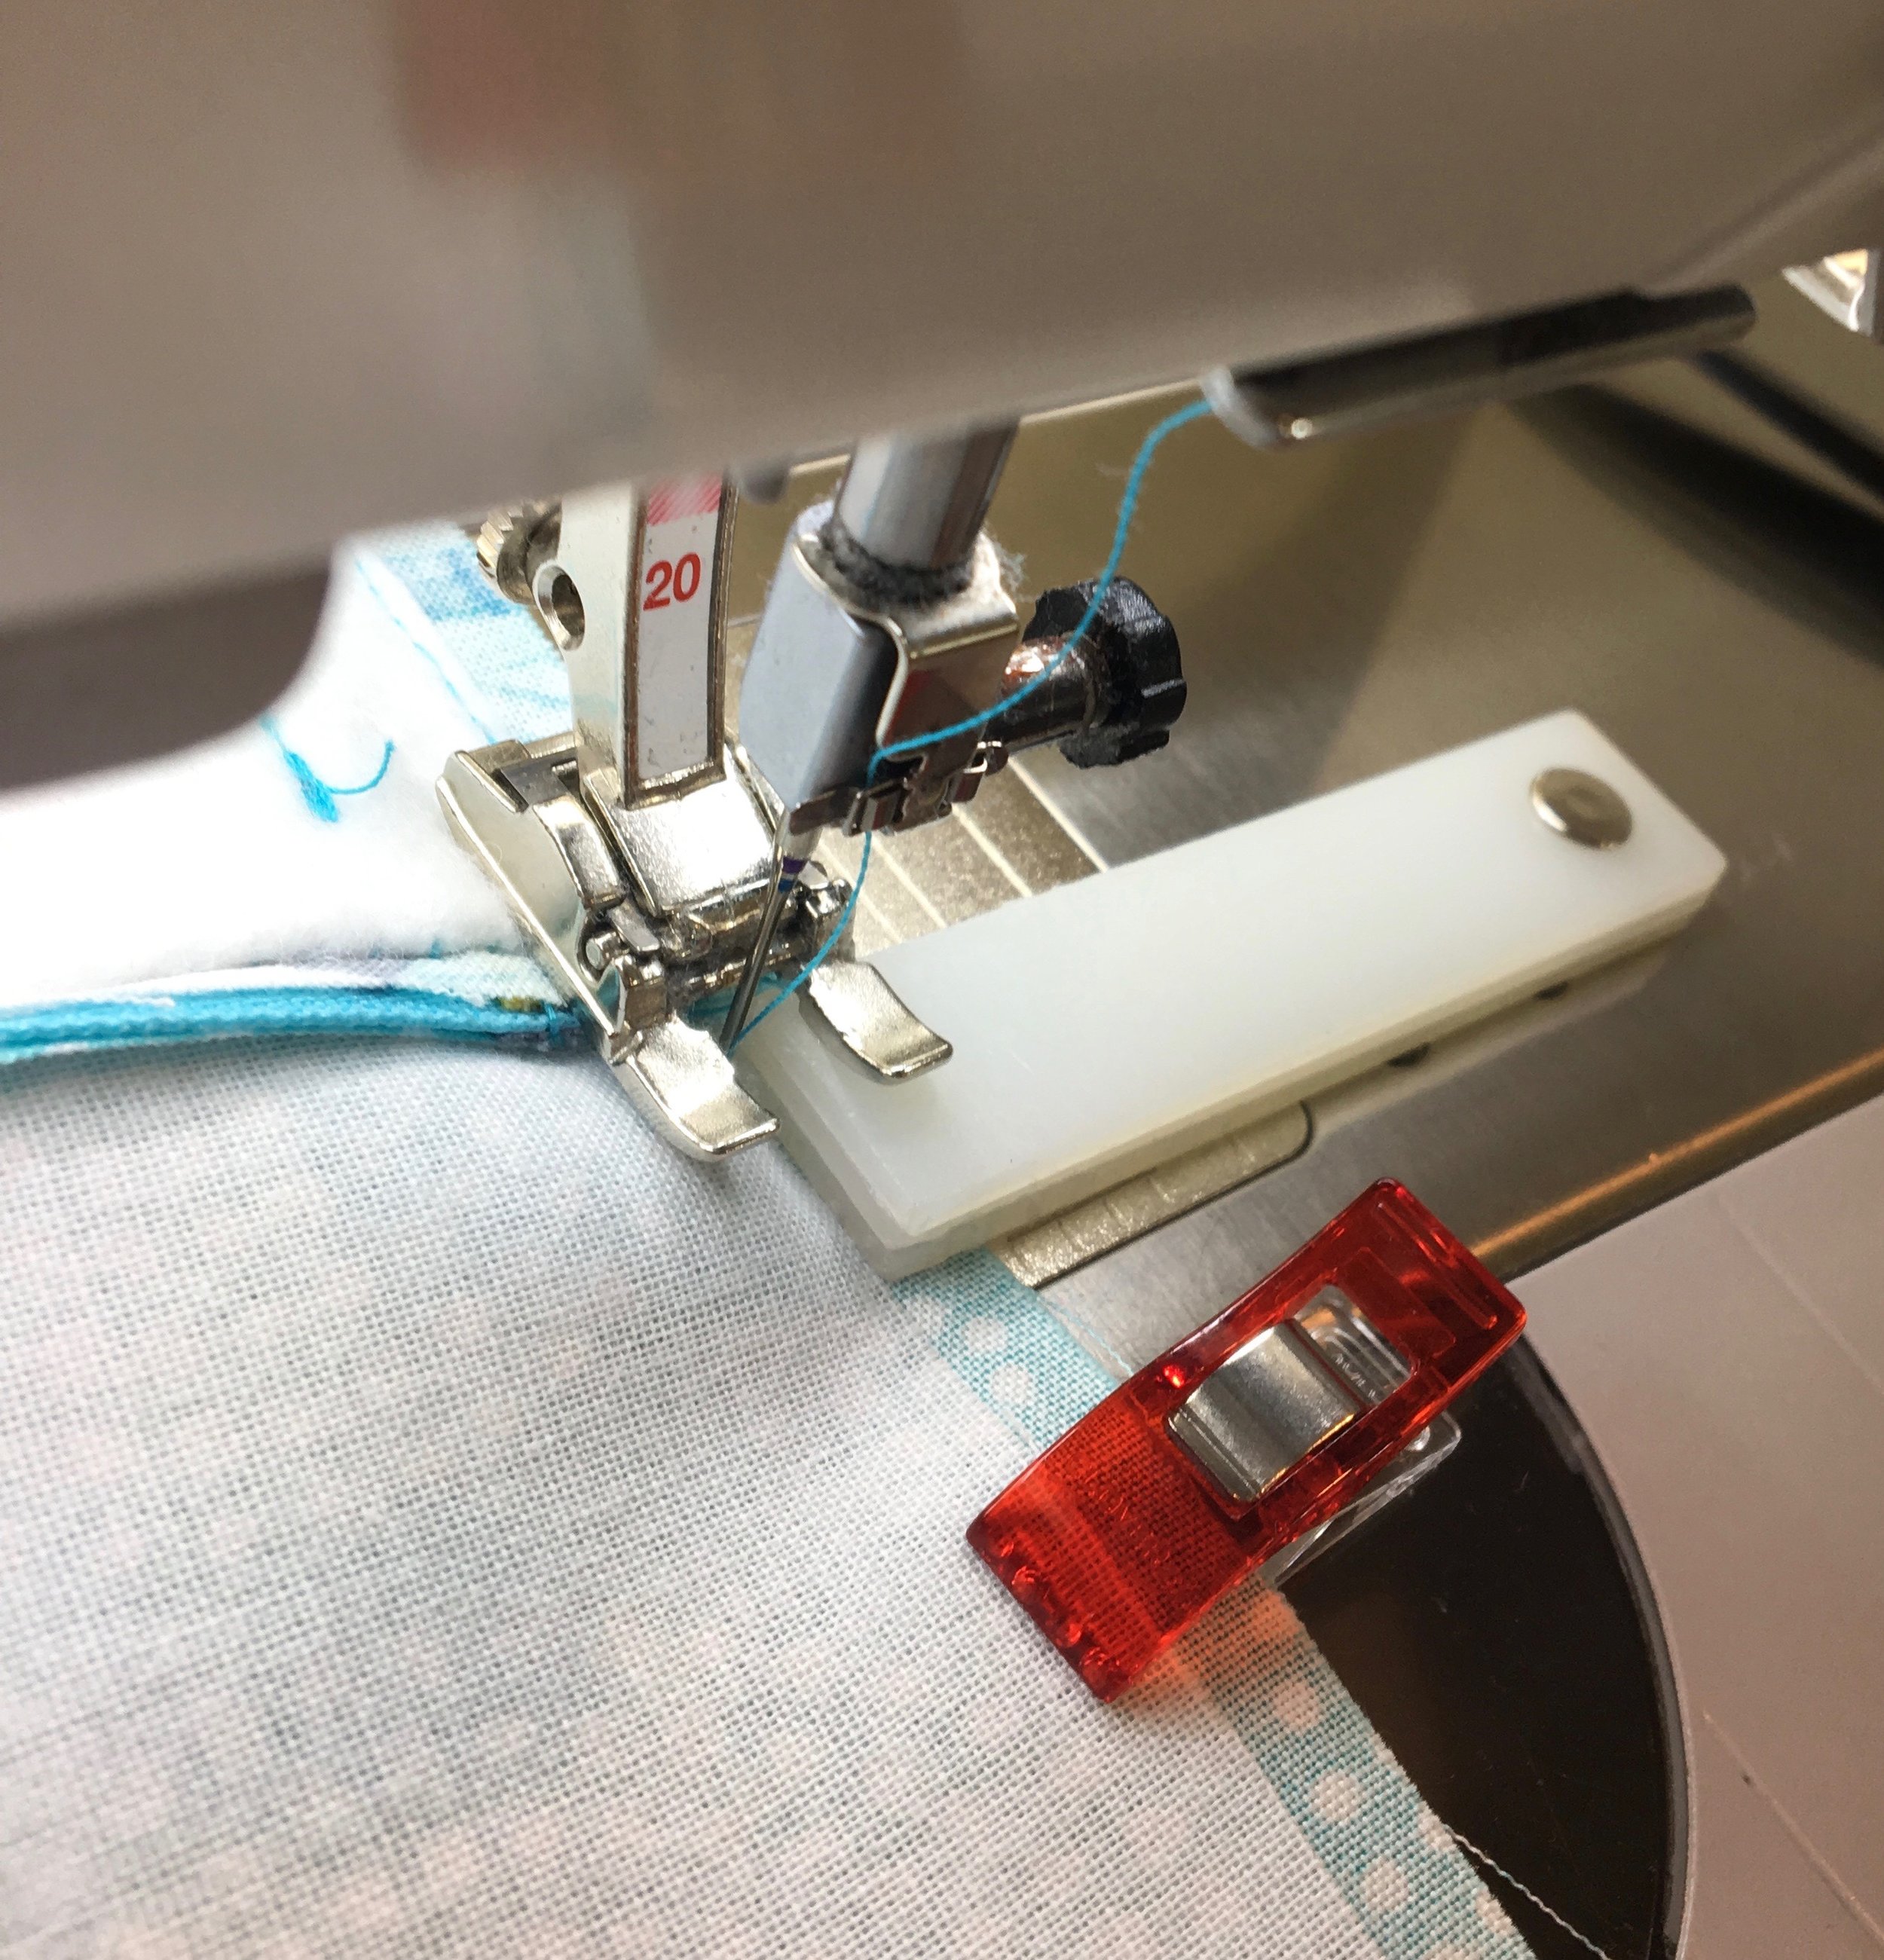
To assemble the credit card pockets, flip the vinyl pocket piece over with the wrong side facing up, place your bottom pocket as pictured.  You can use clips to hold it in place or manually hold it in place when you flip it back over and stitch it to the bottom of the second credit card slot. 

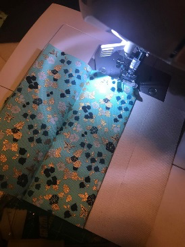
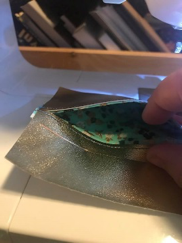
Before you start the top pocket; fold over that excess fabric wrong sides together.  Continue to sew the top pocket like the bottom credit card pocket was done. 

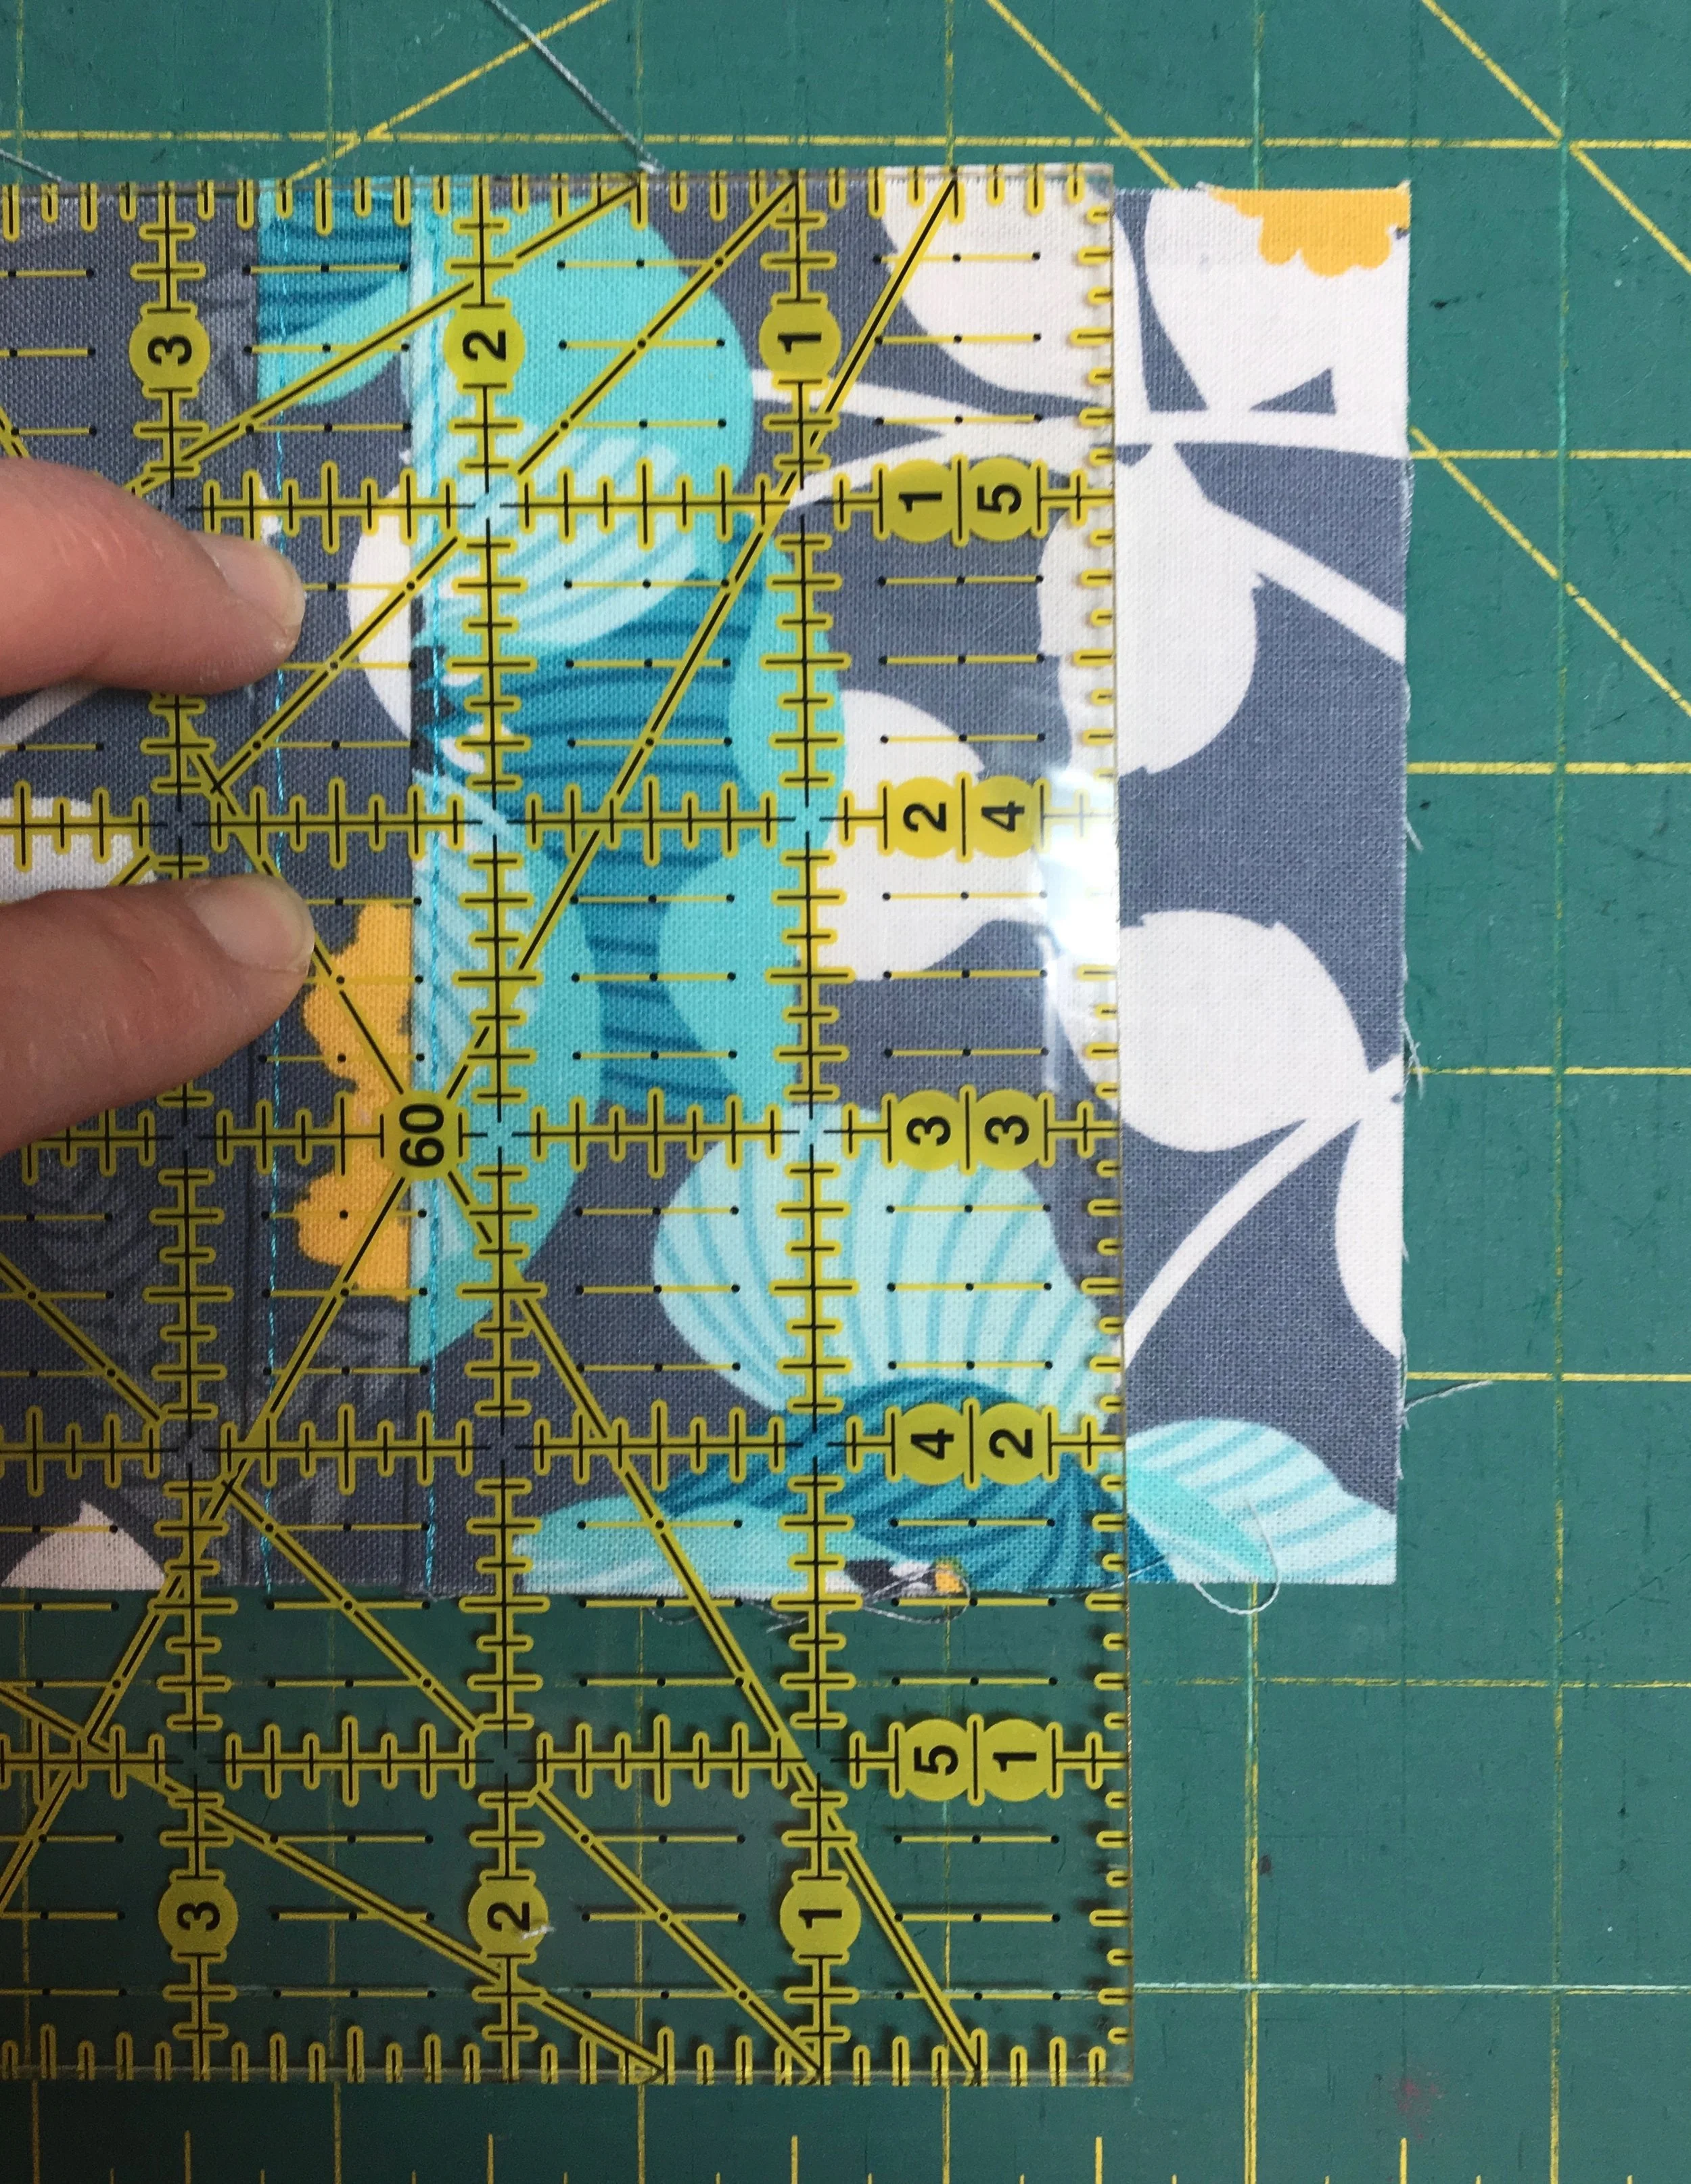
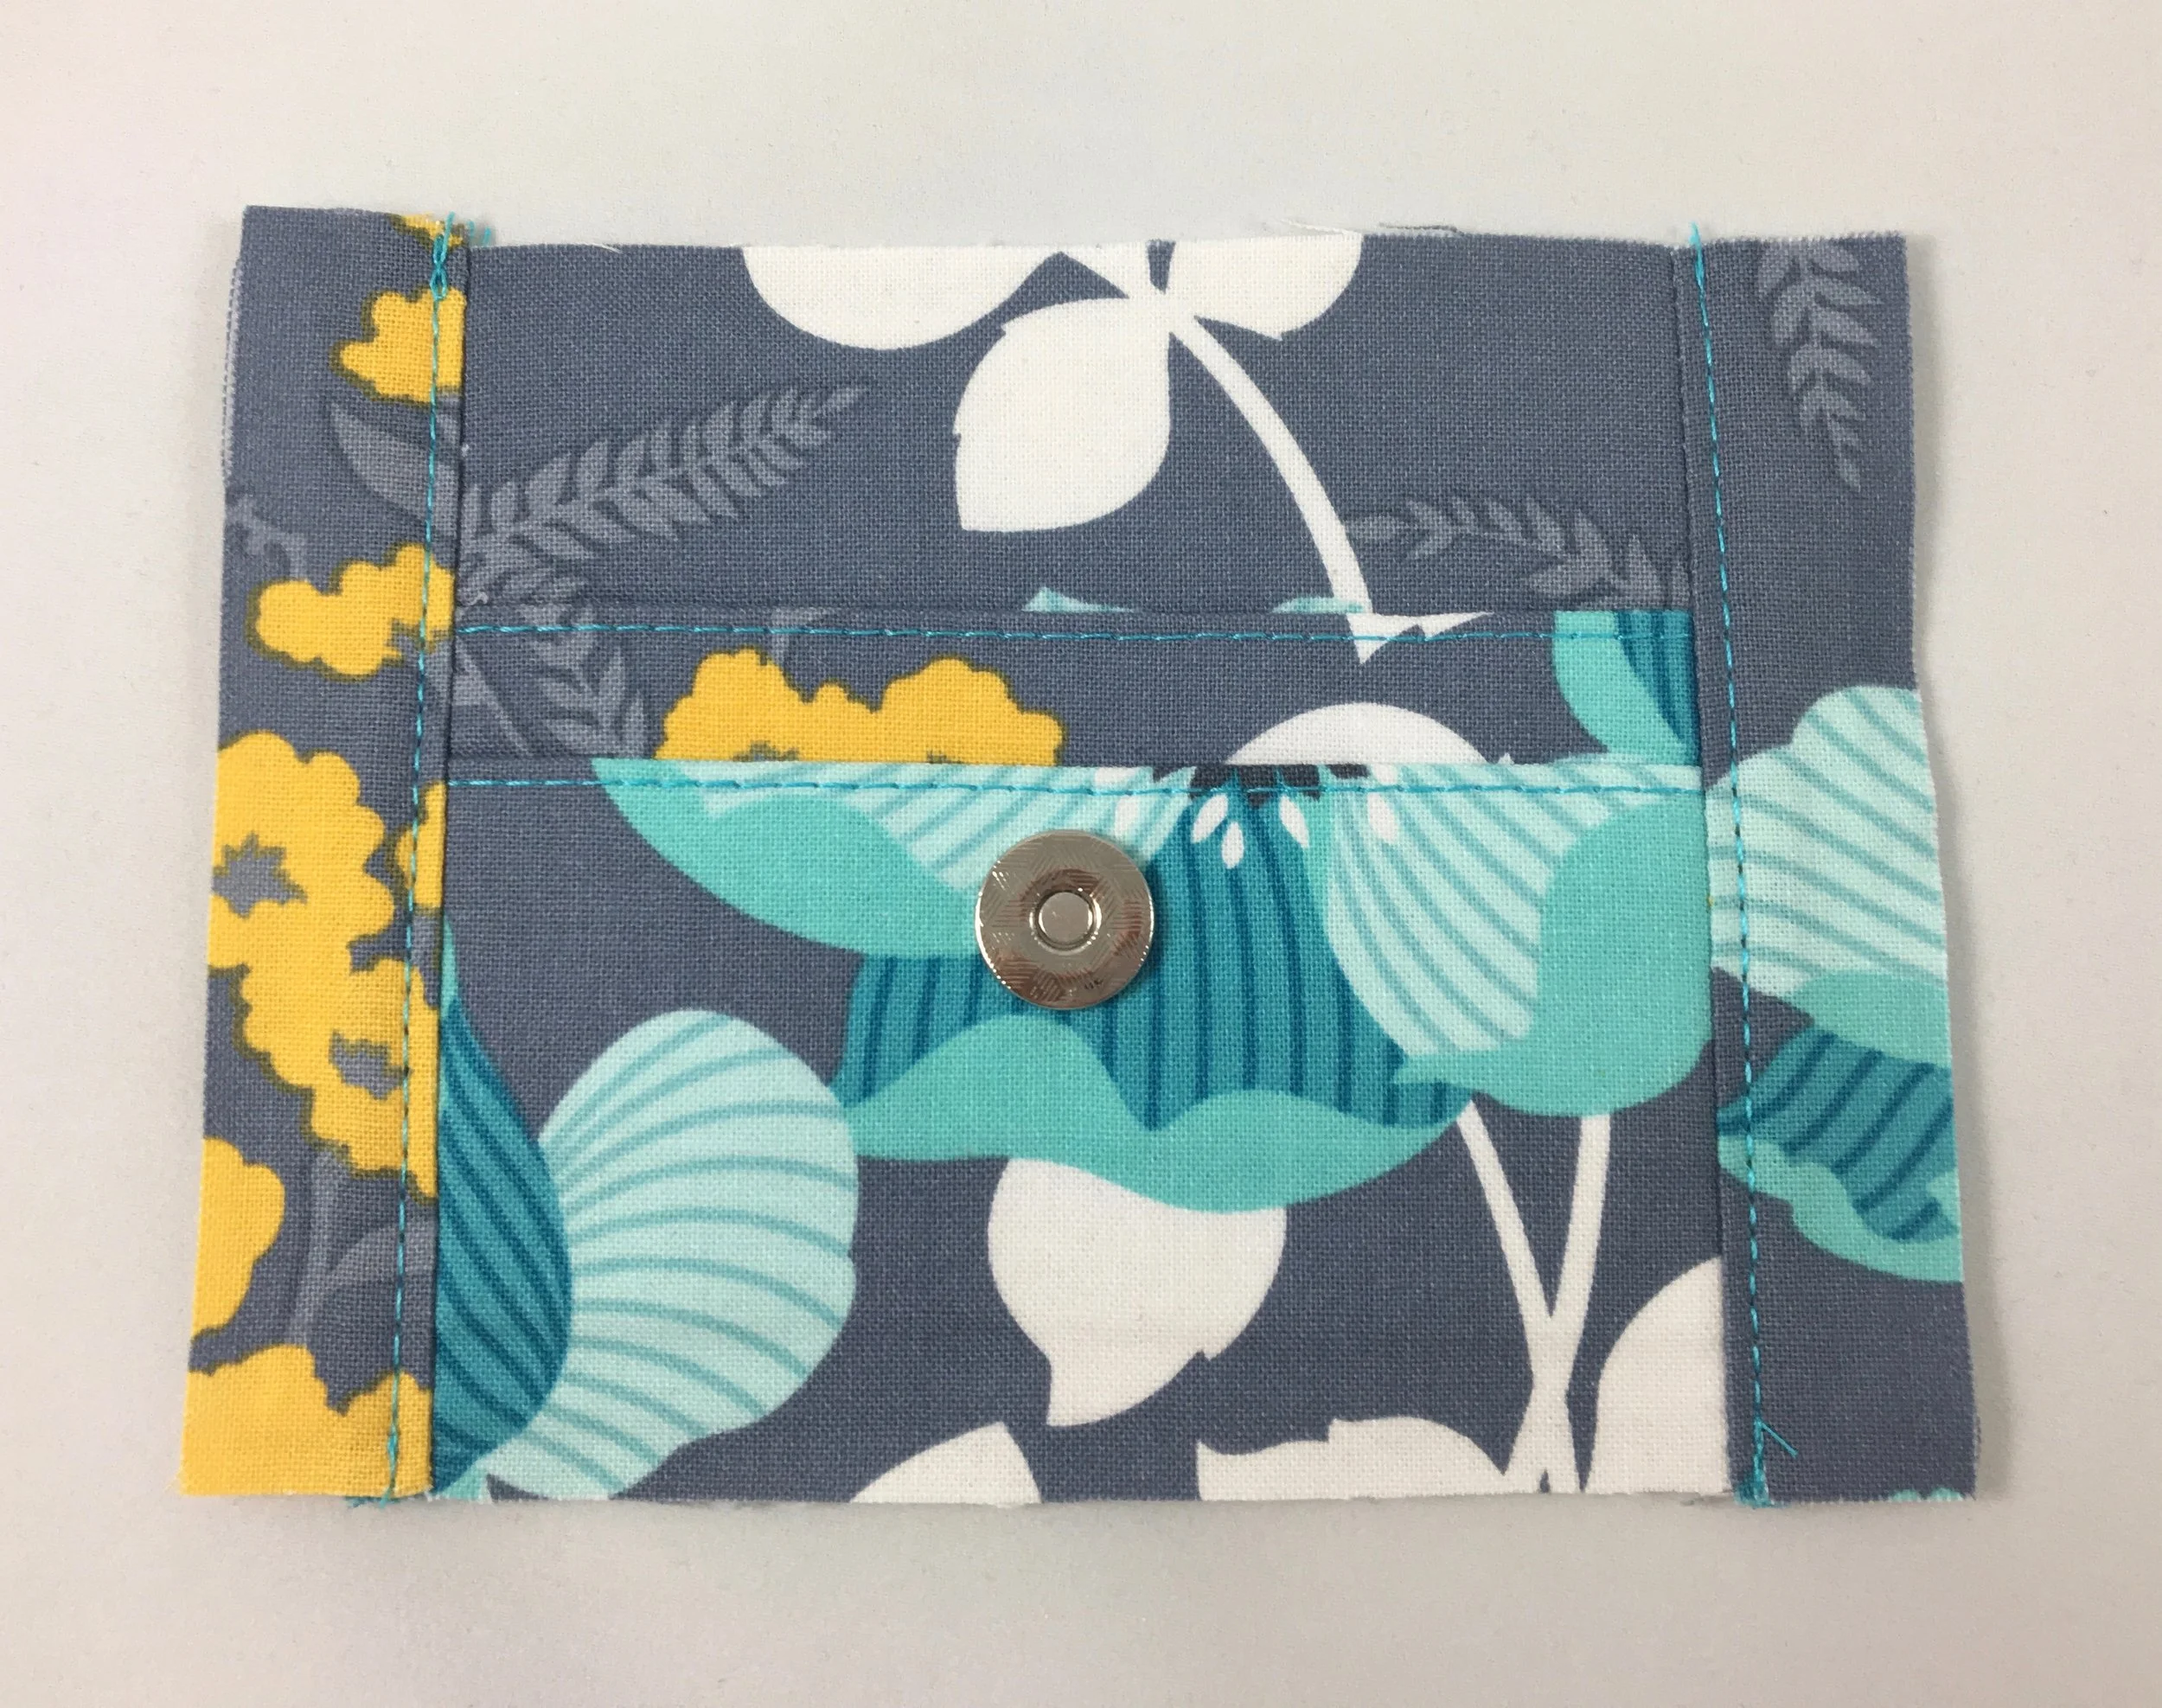
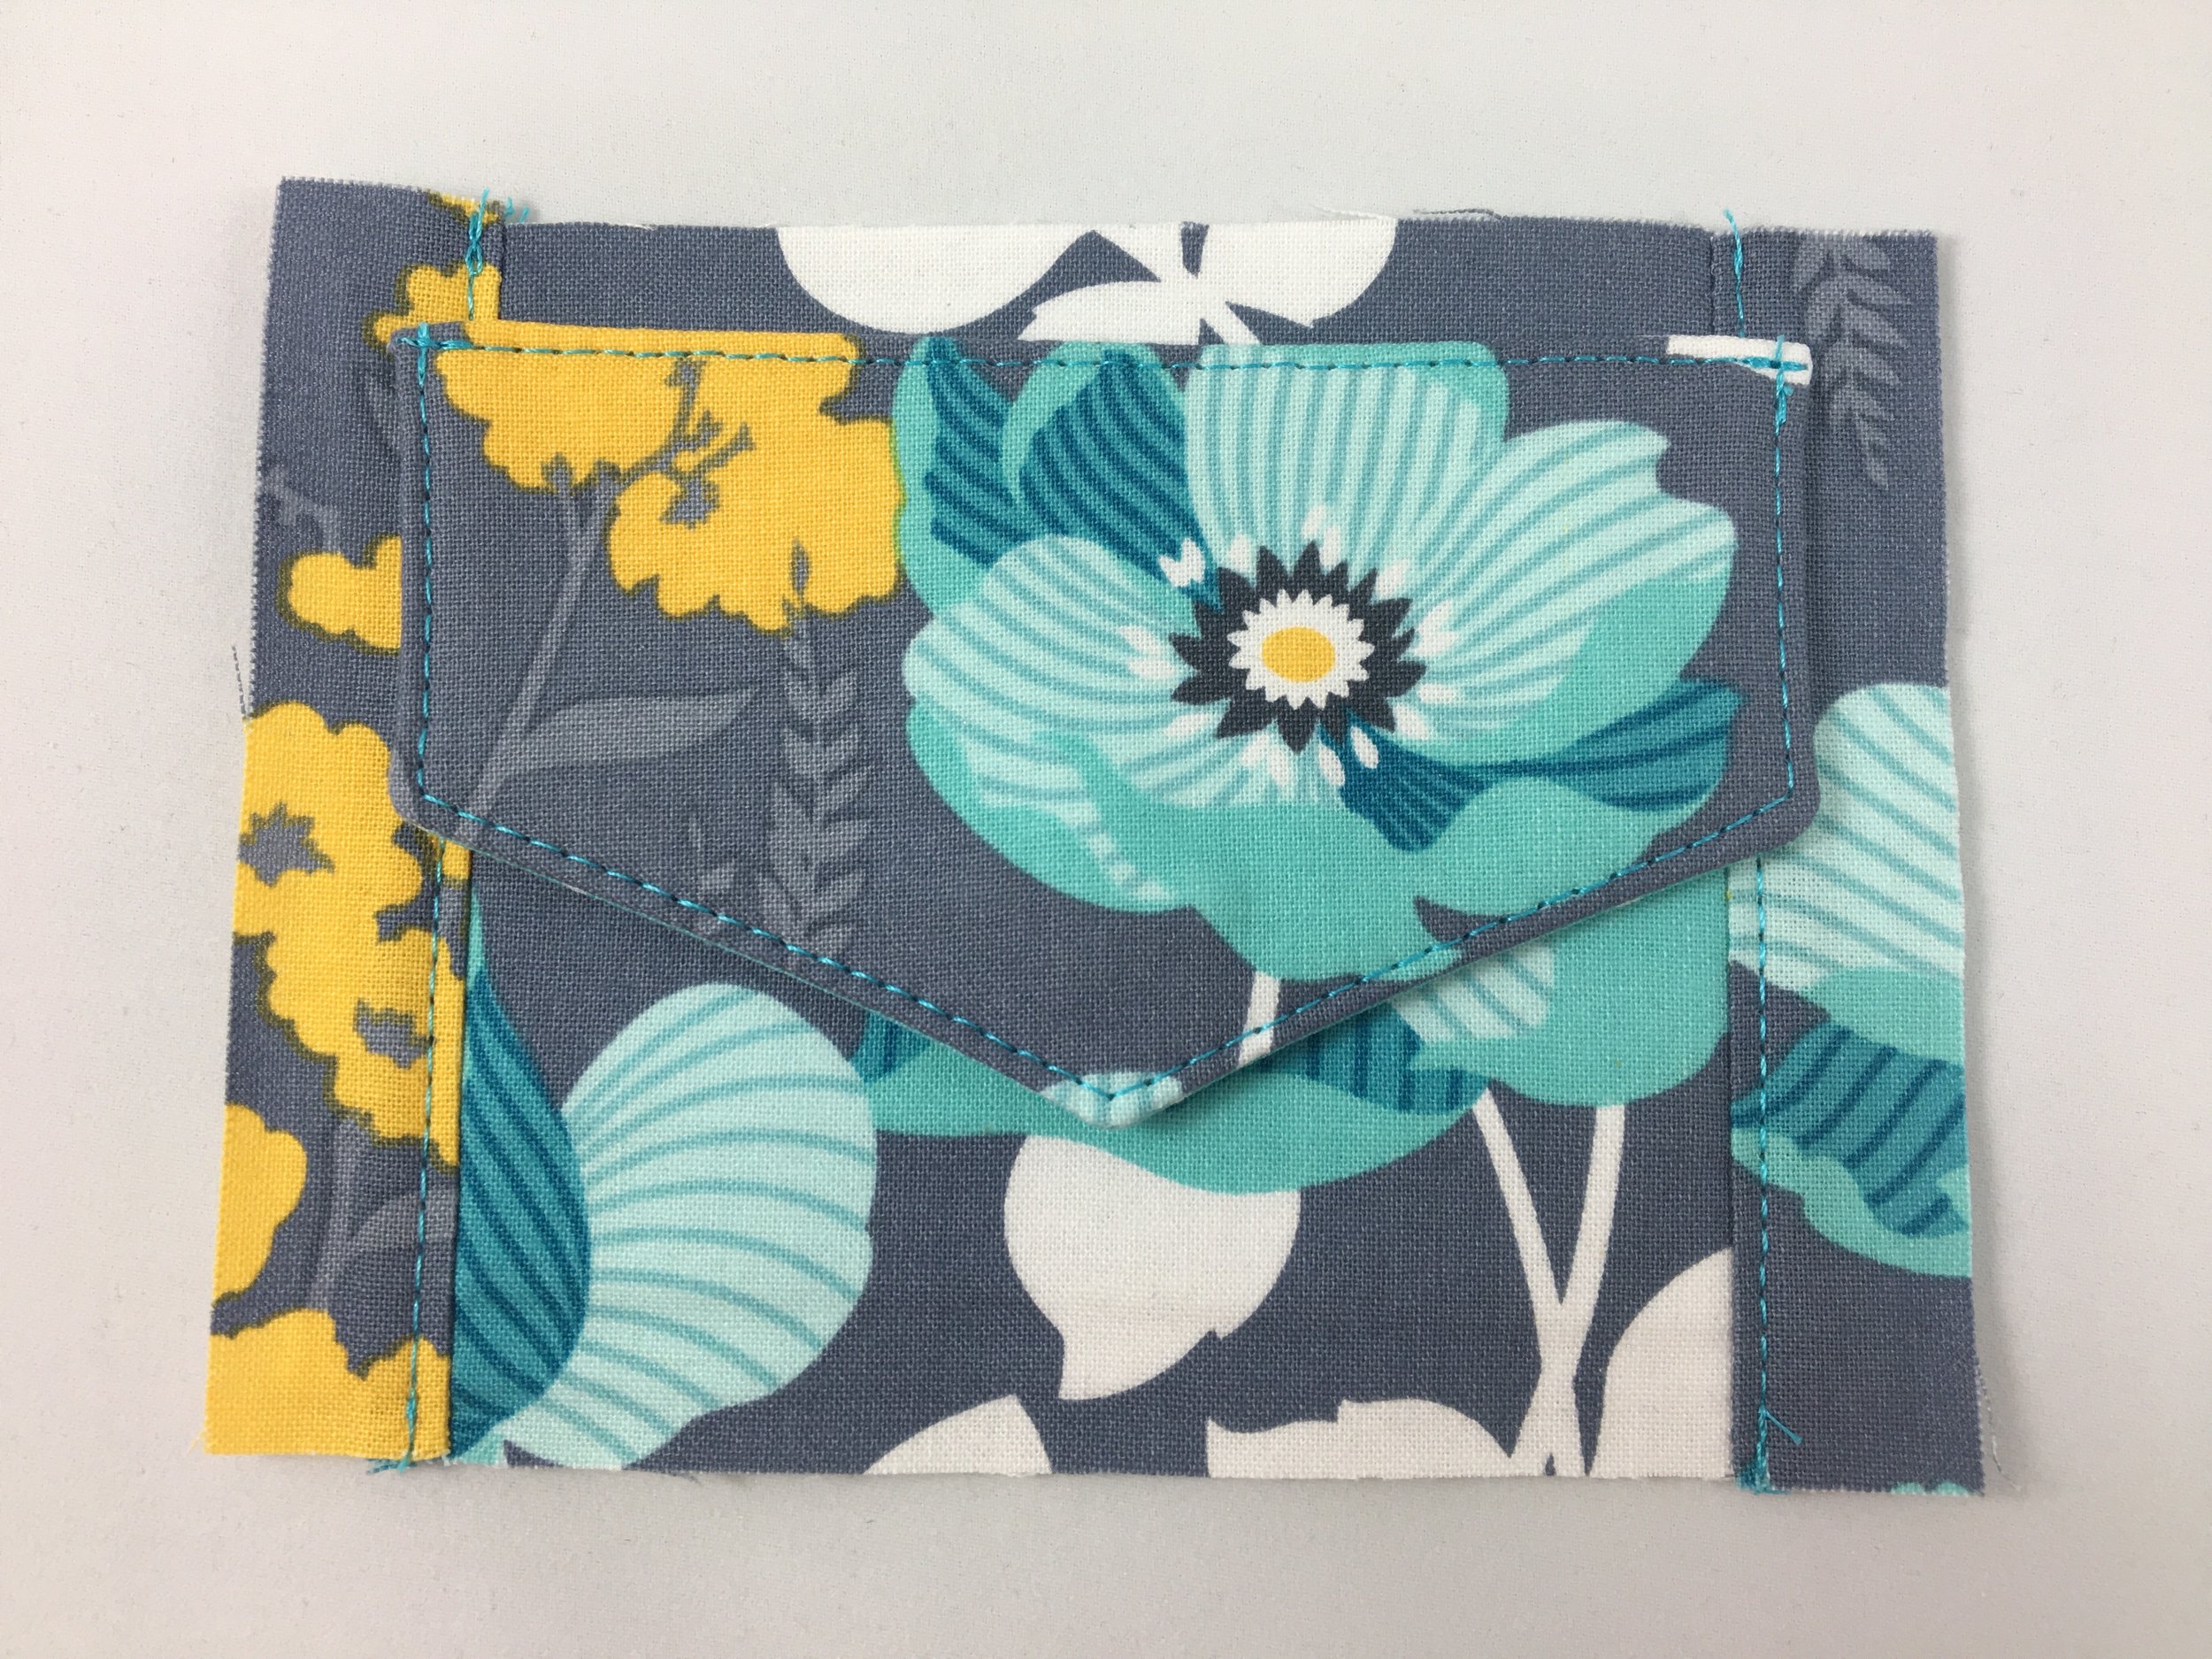
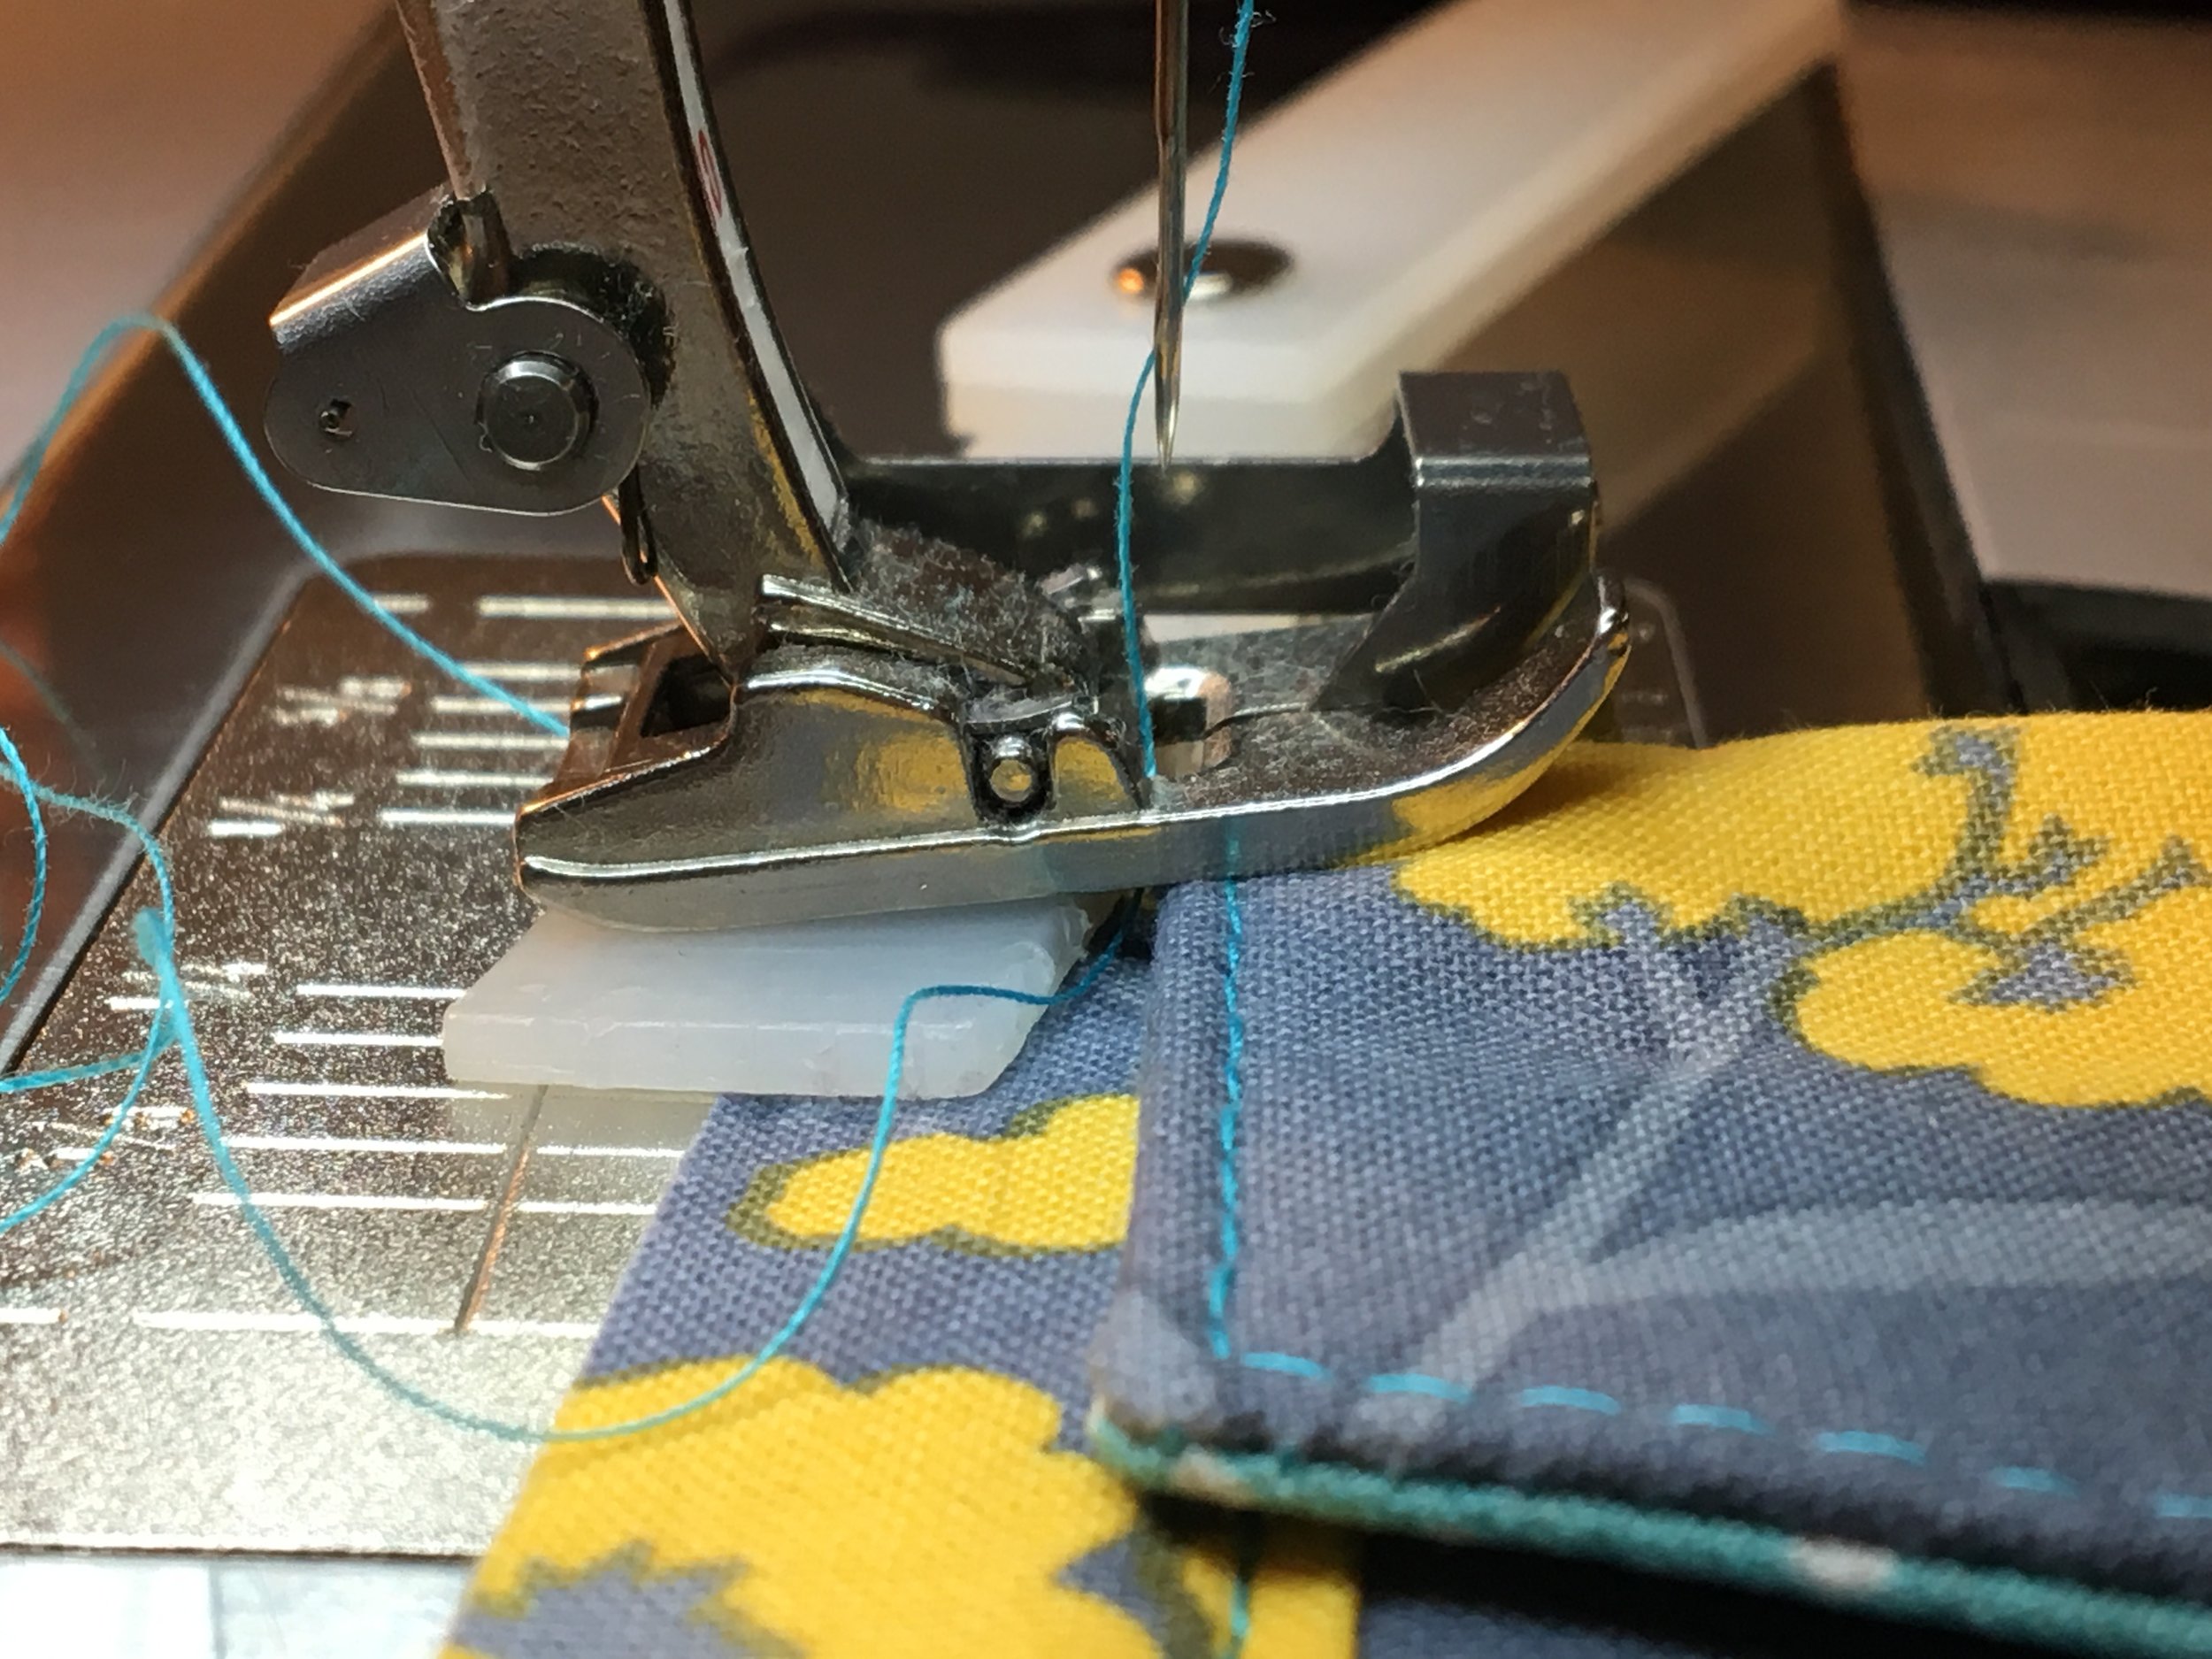
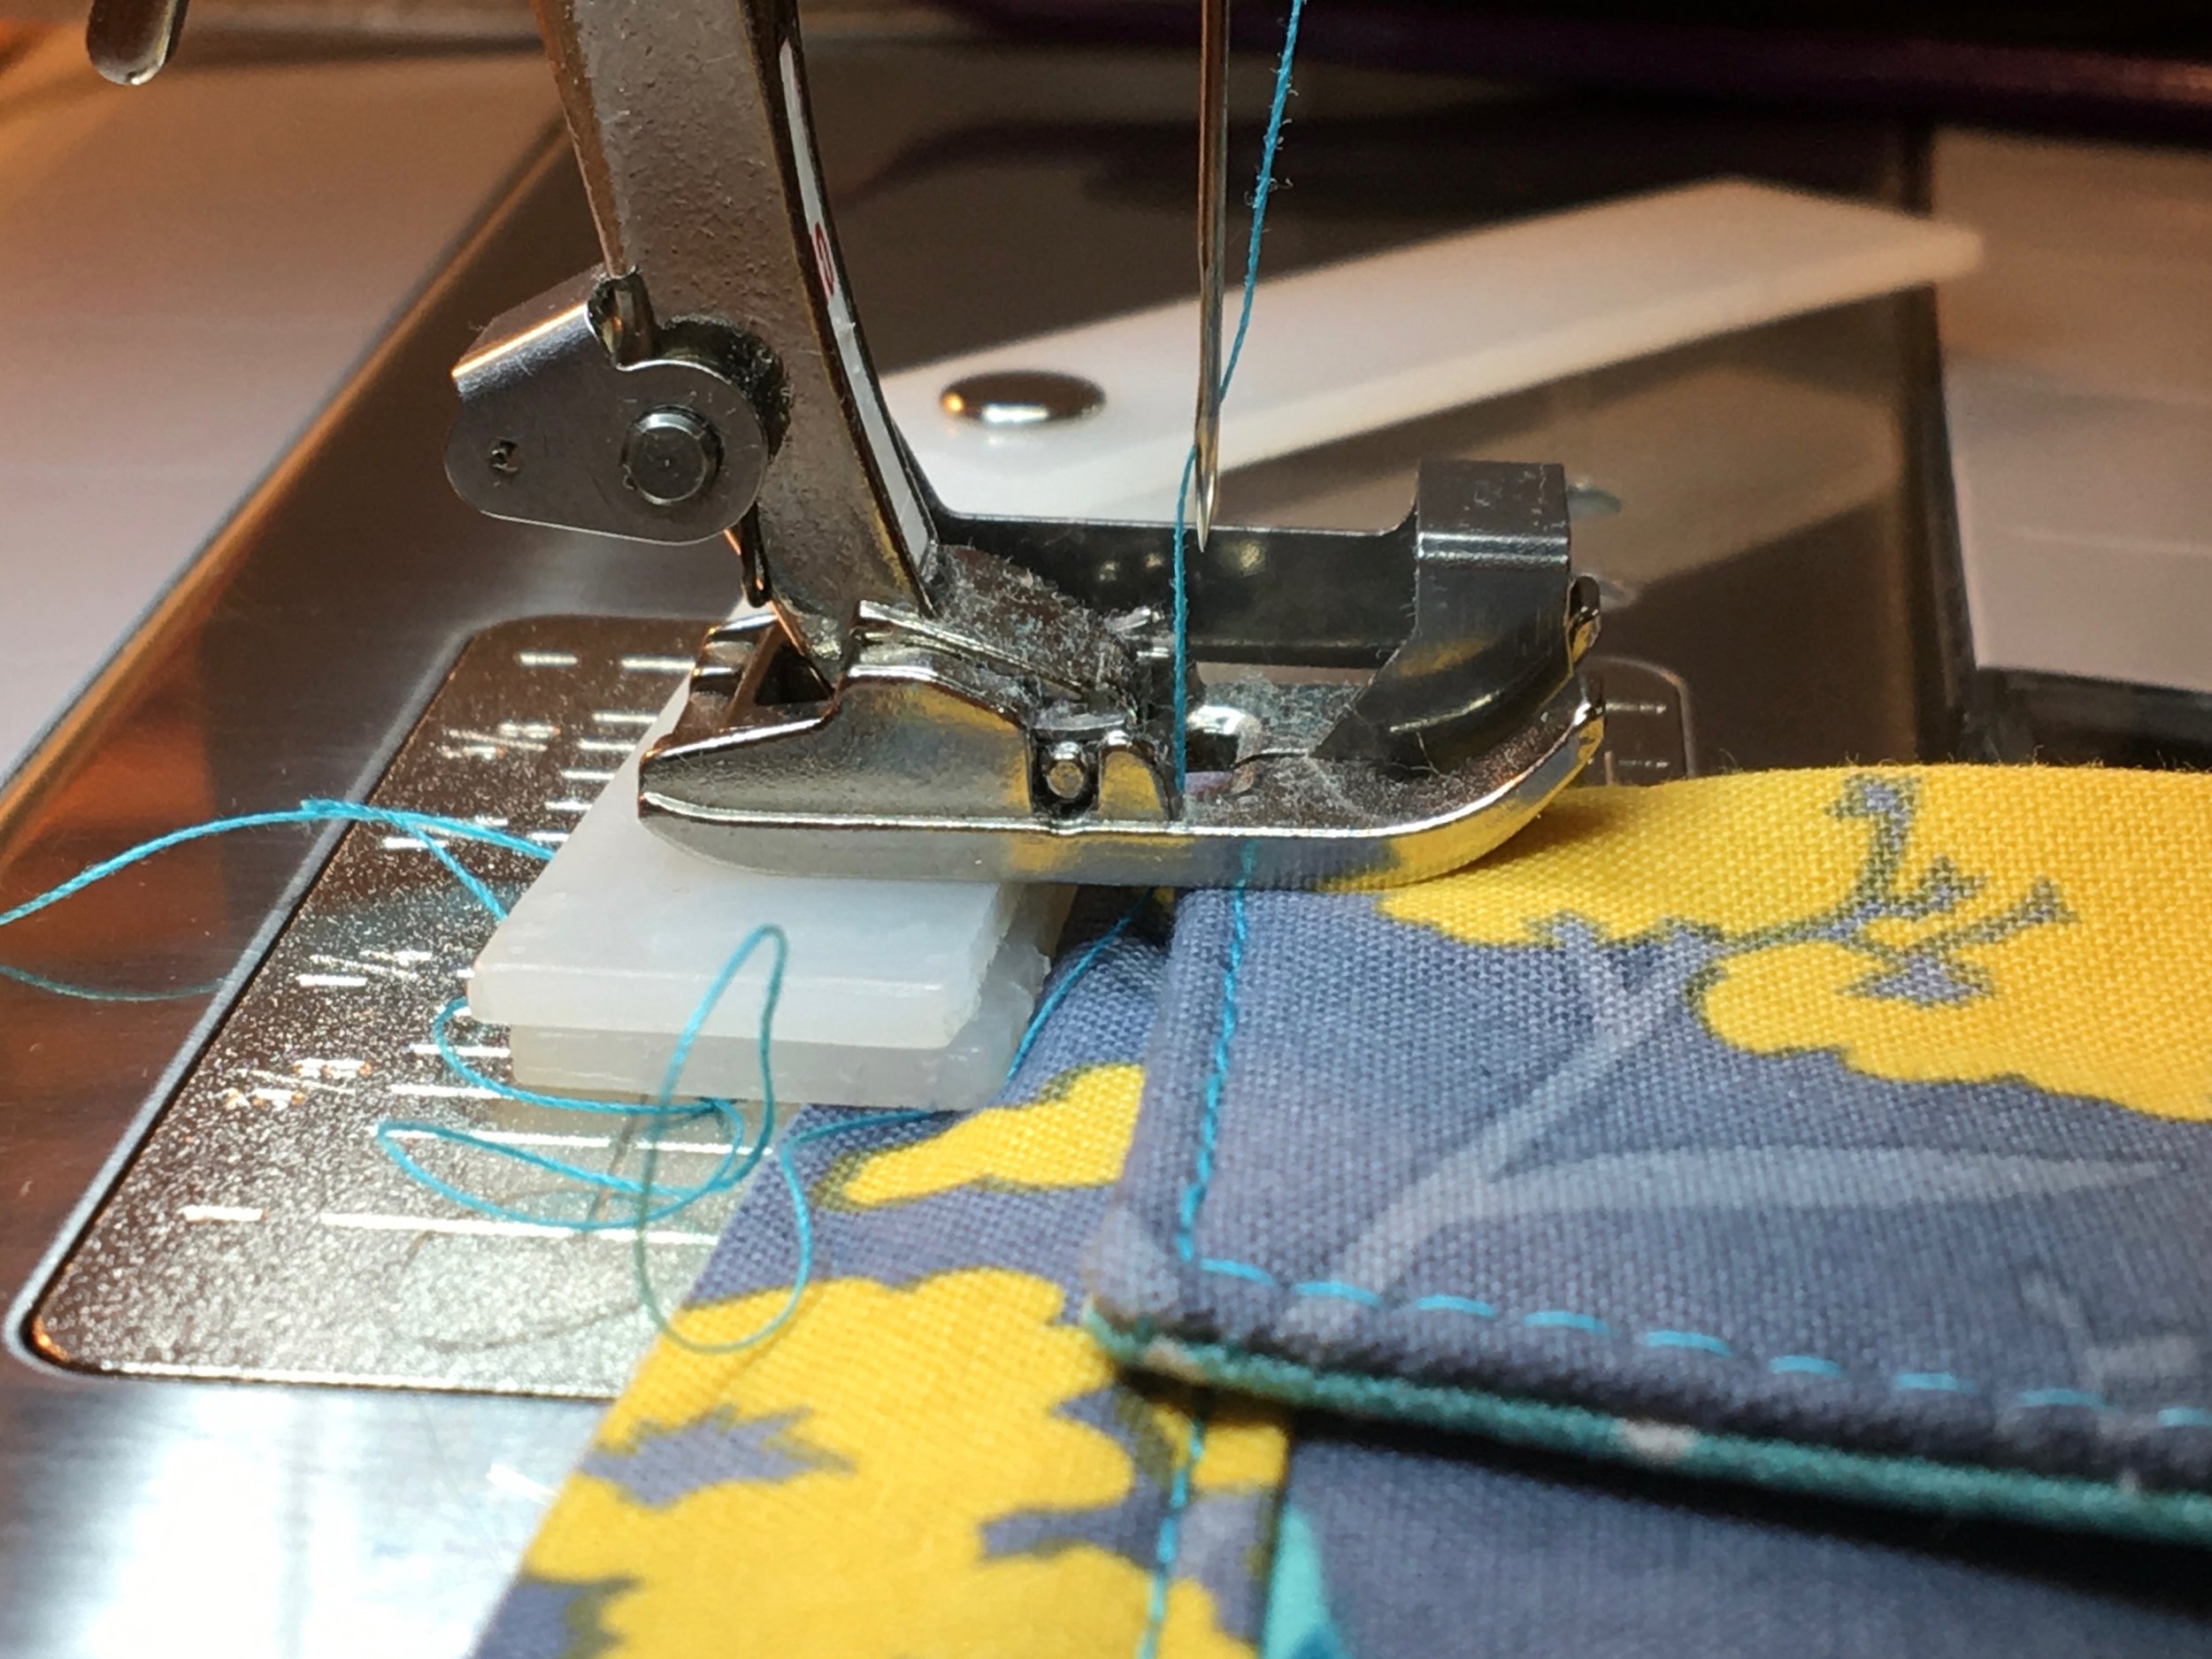
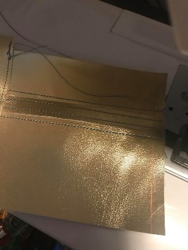
Mark the placement lines on the both the right and the left sides to lay the 2-1” x 4” back pocket pieces on each side.  Stitch the envelope flap on.  The Envelope flap will be stitched into the zipper, and cut .50 larger than the regular pattern piece.  (See the KIDW Reverse applique flap tutorial for instruction)

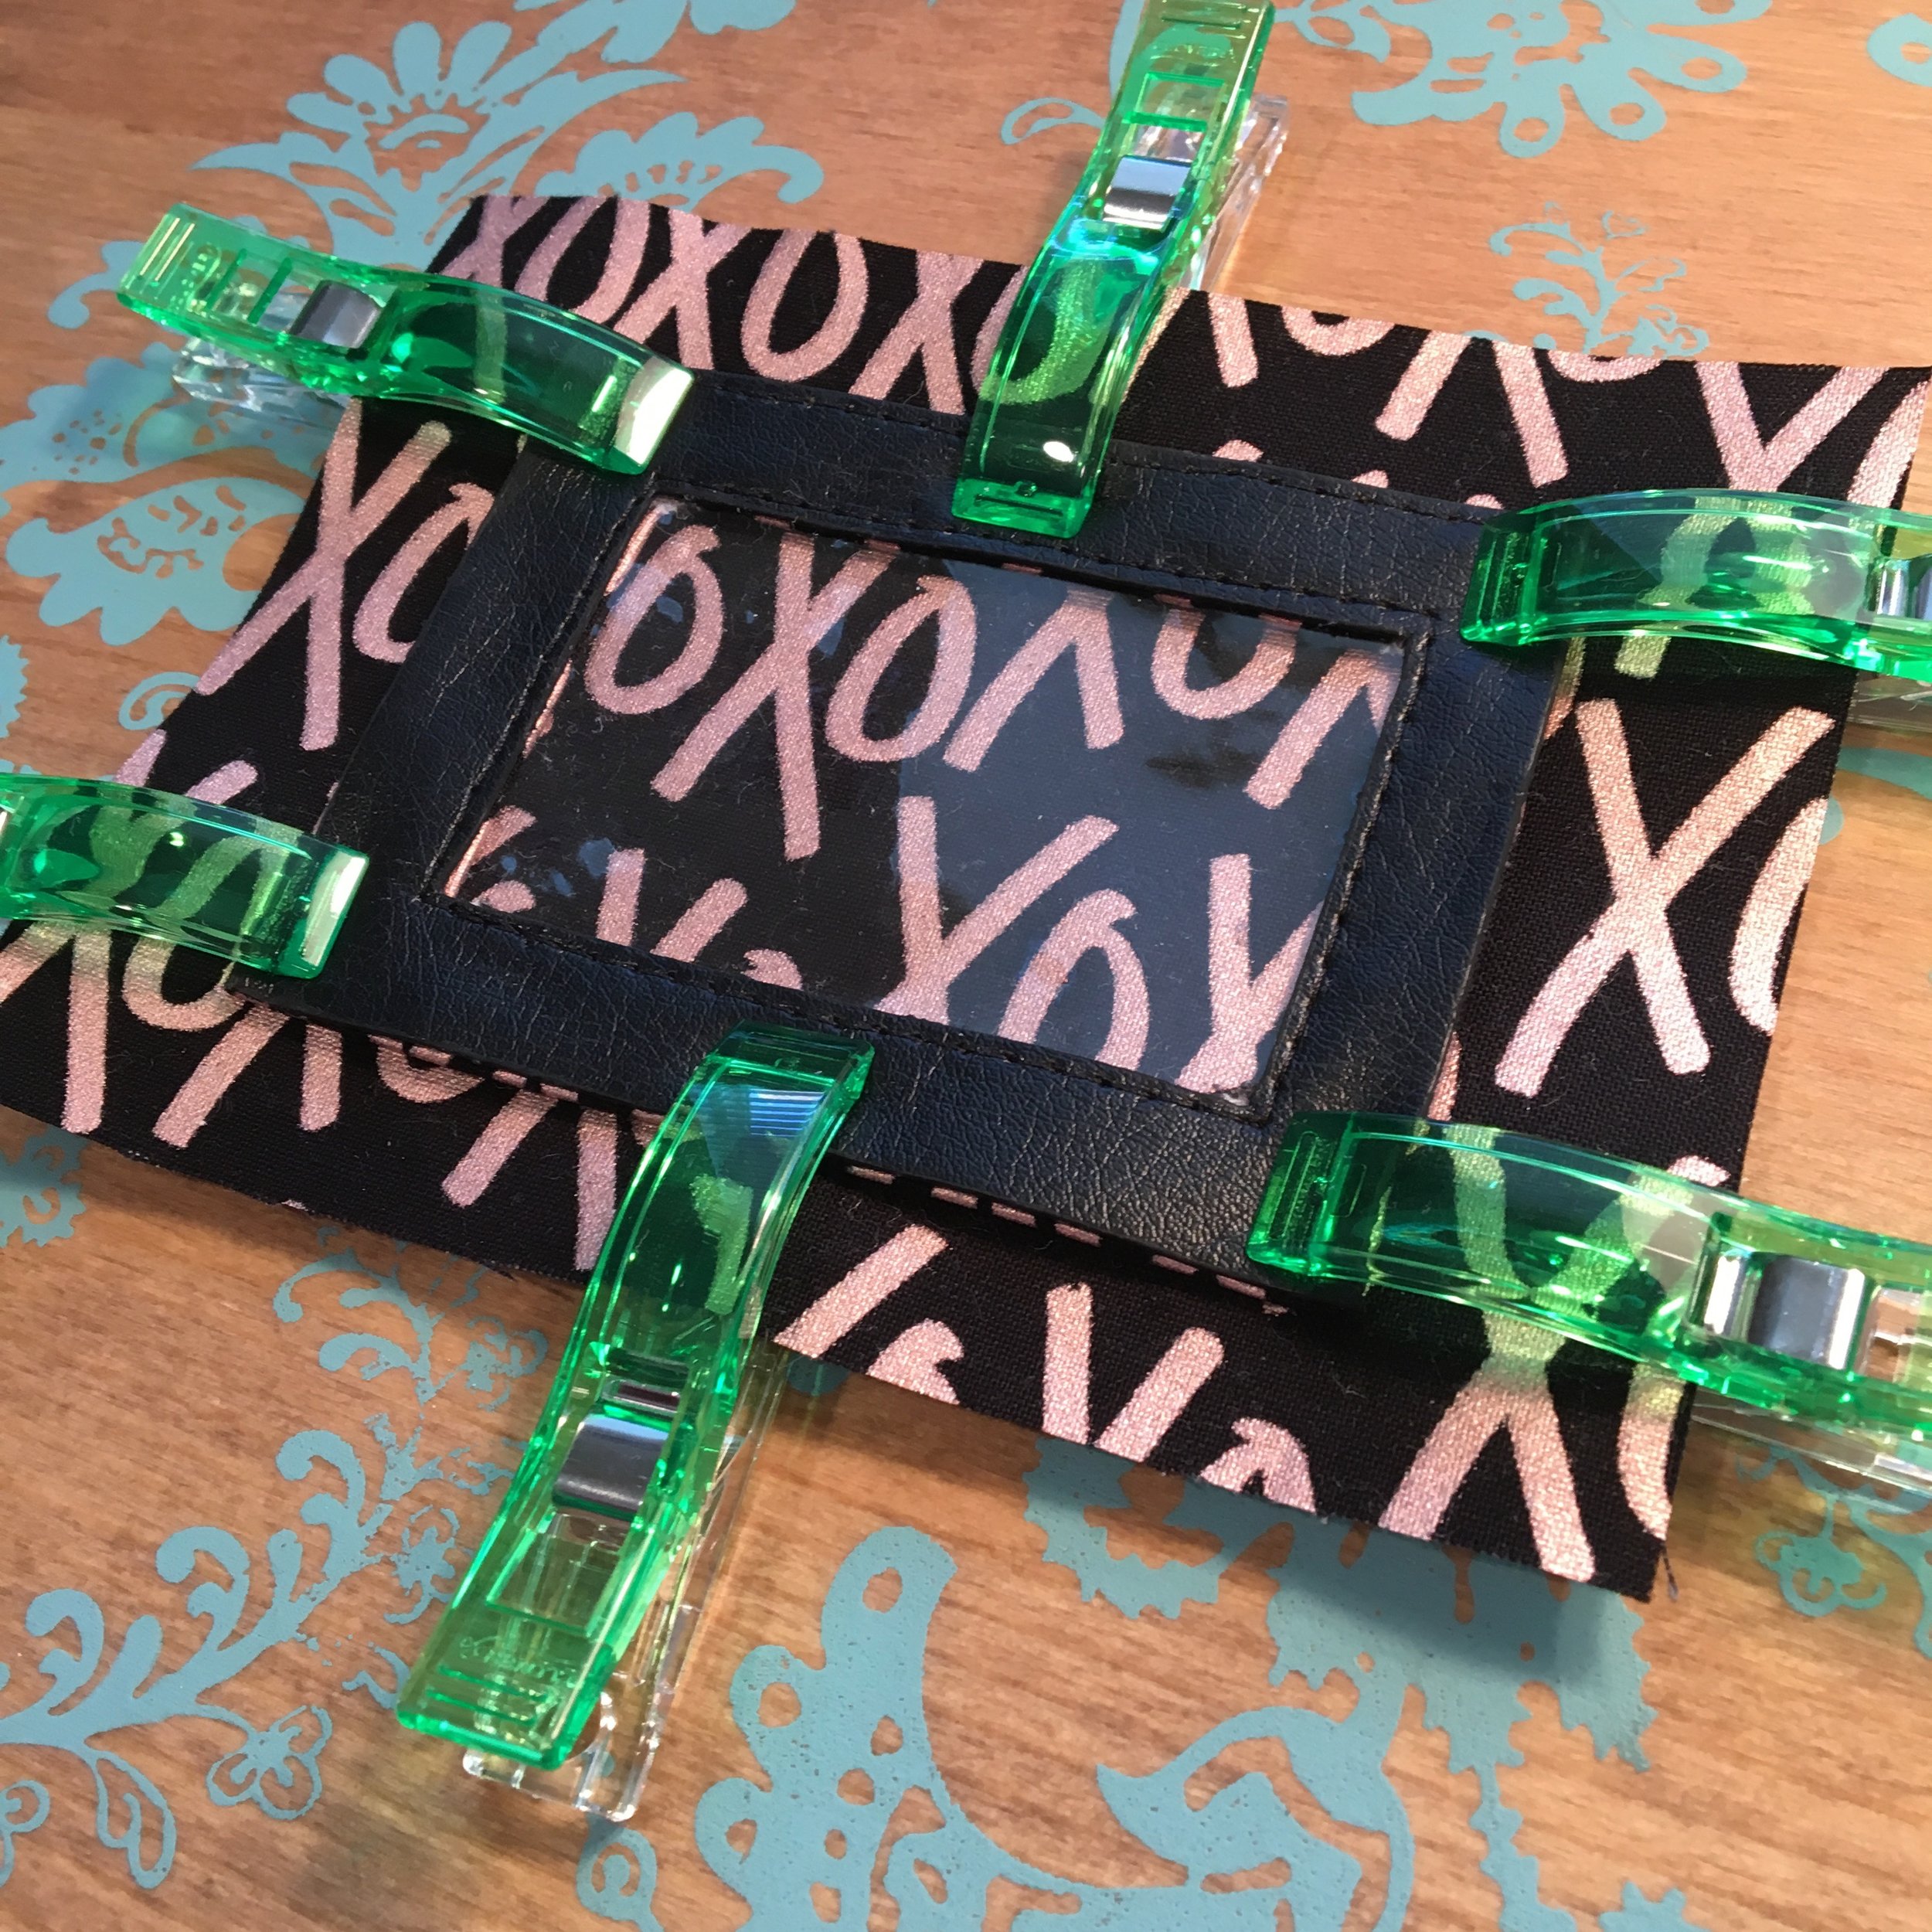
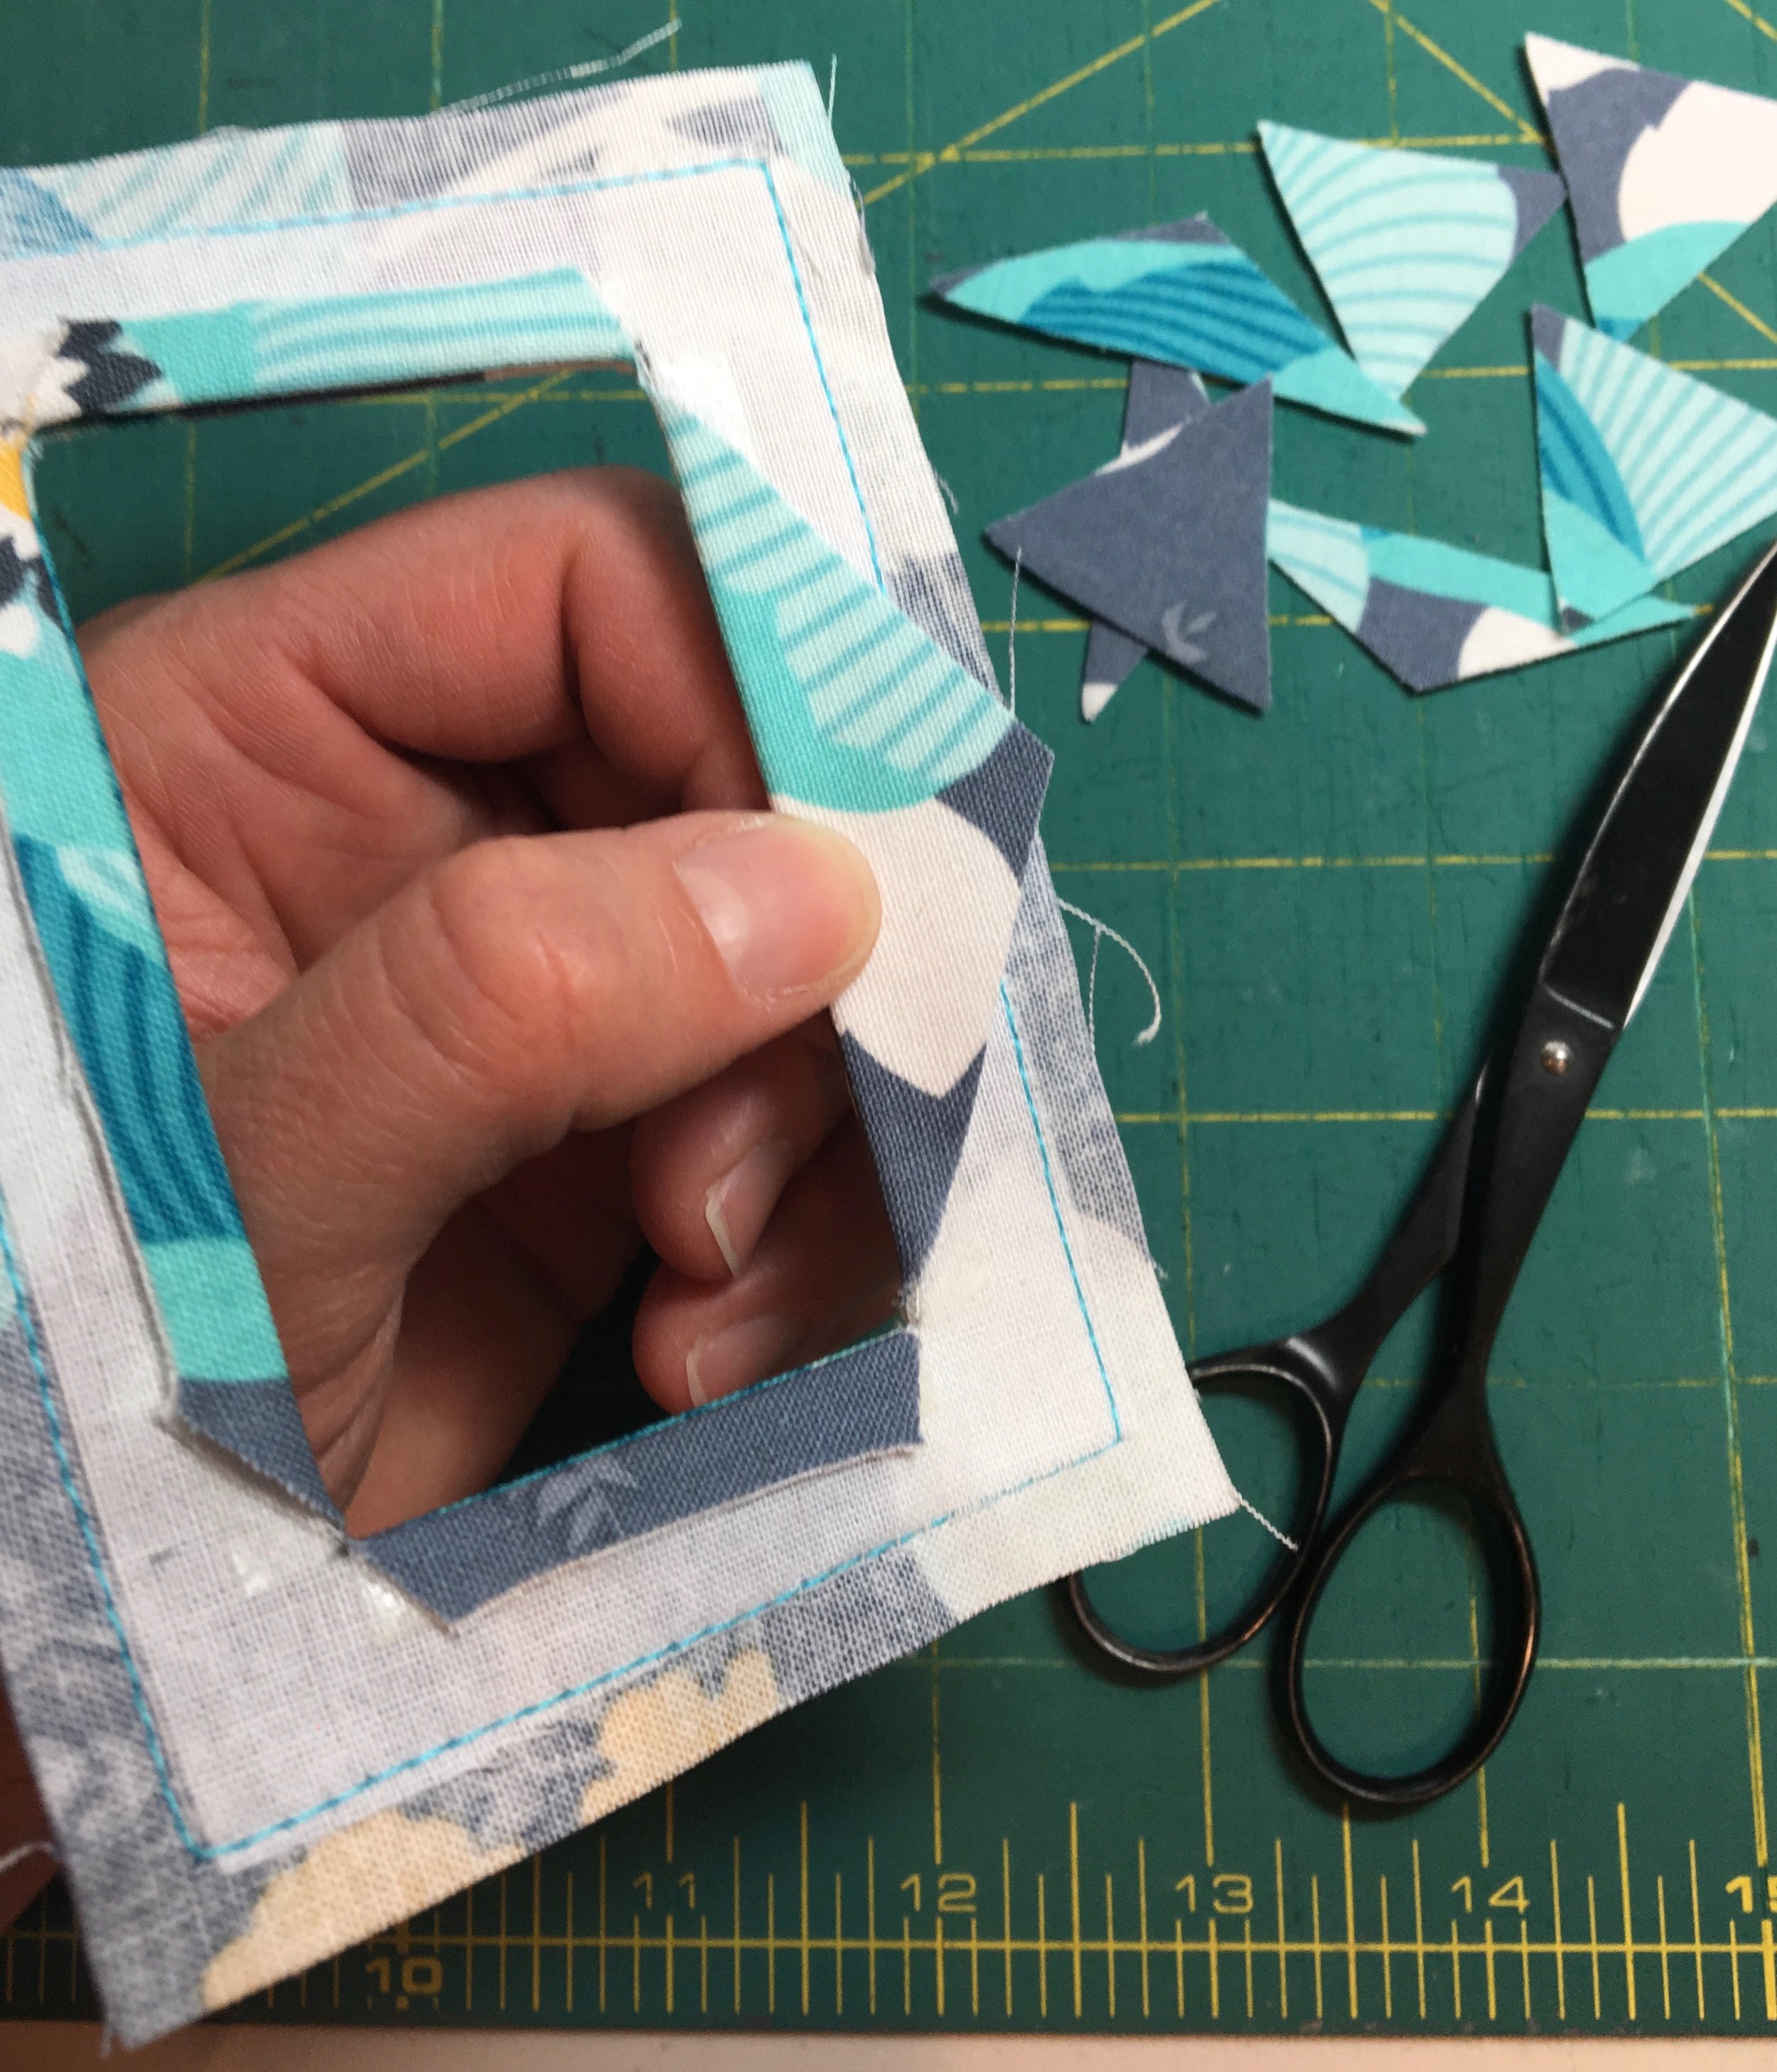
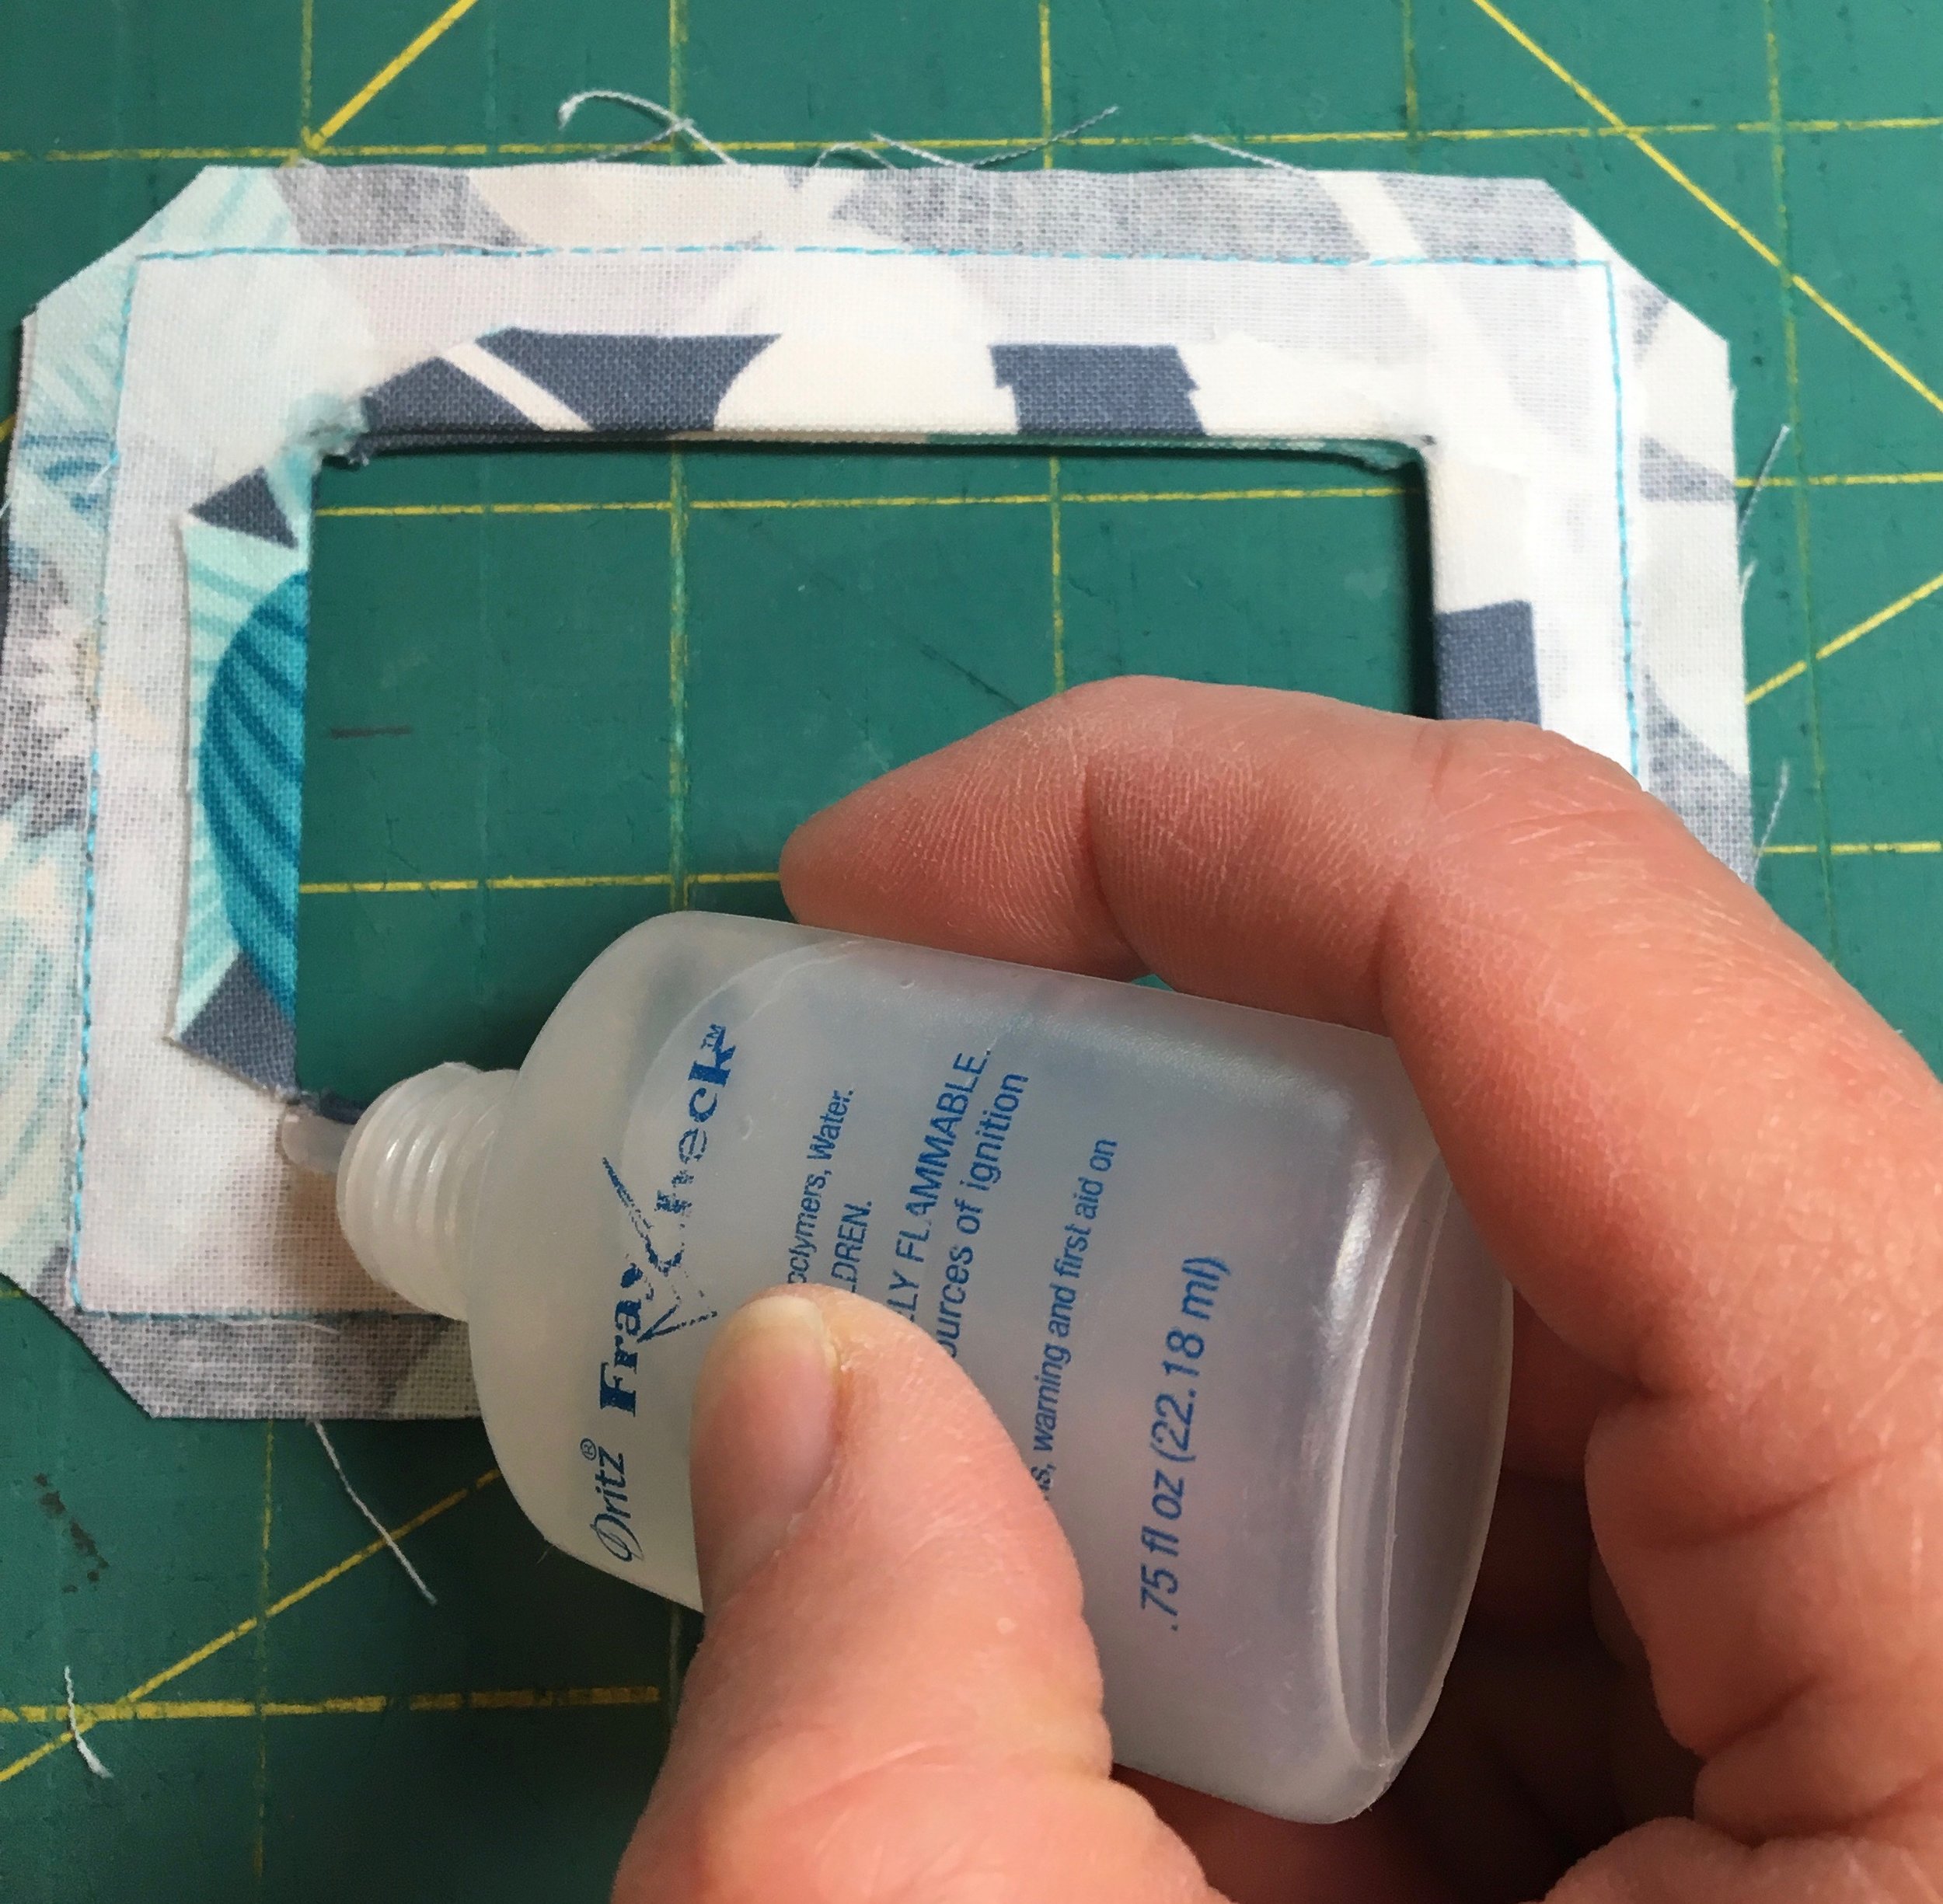
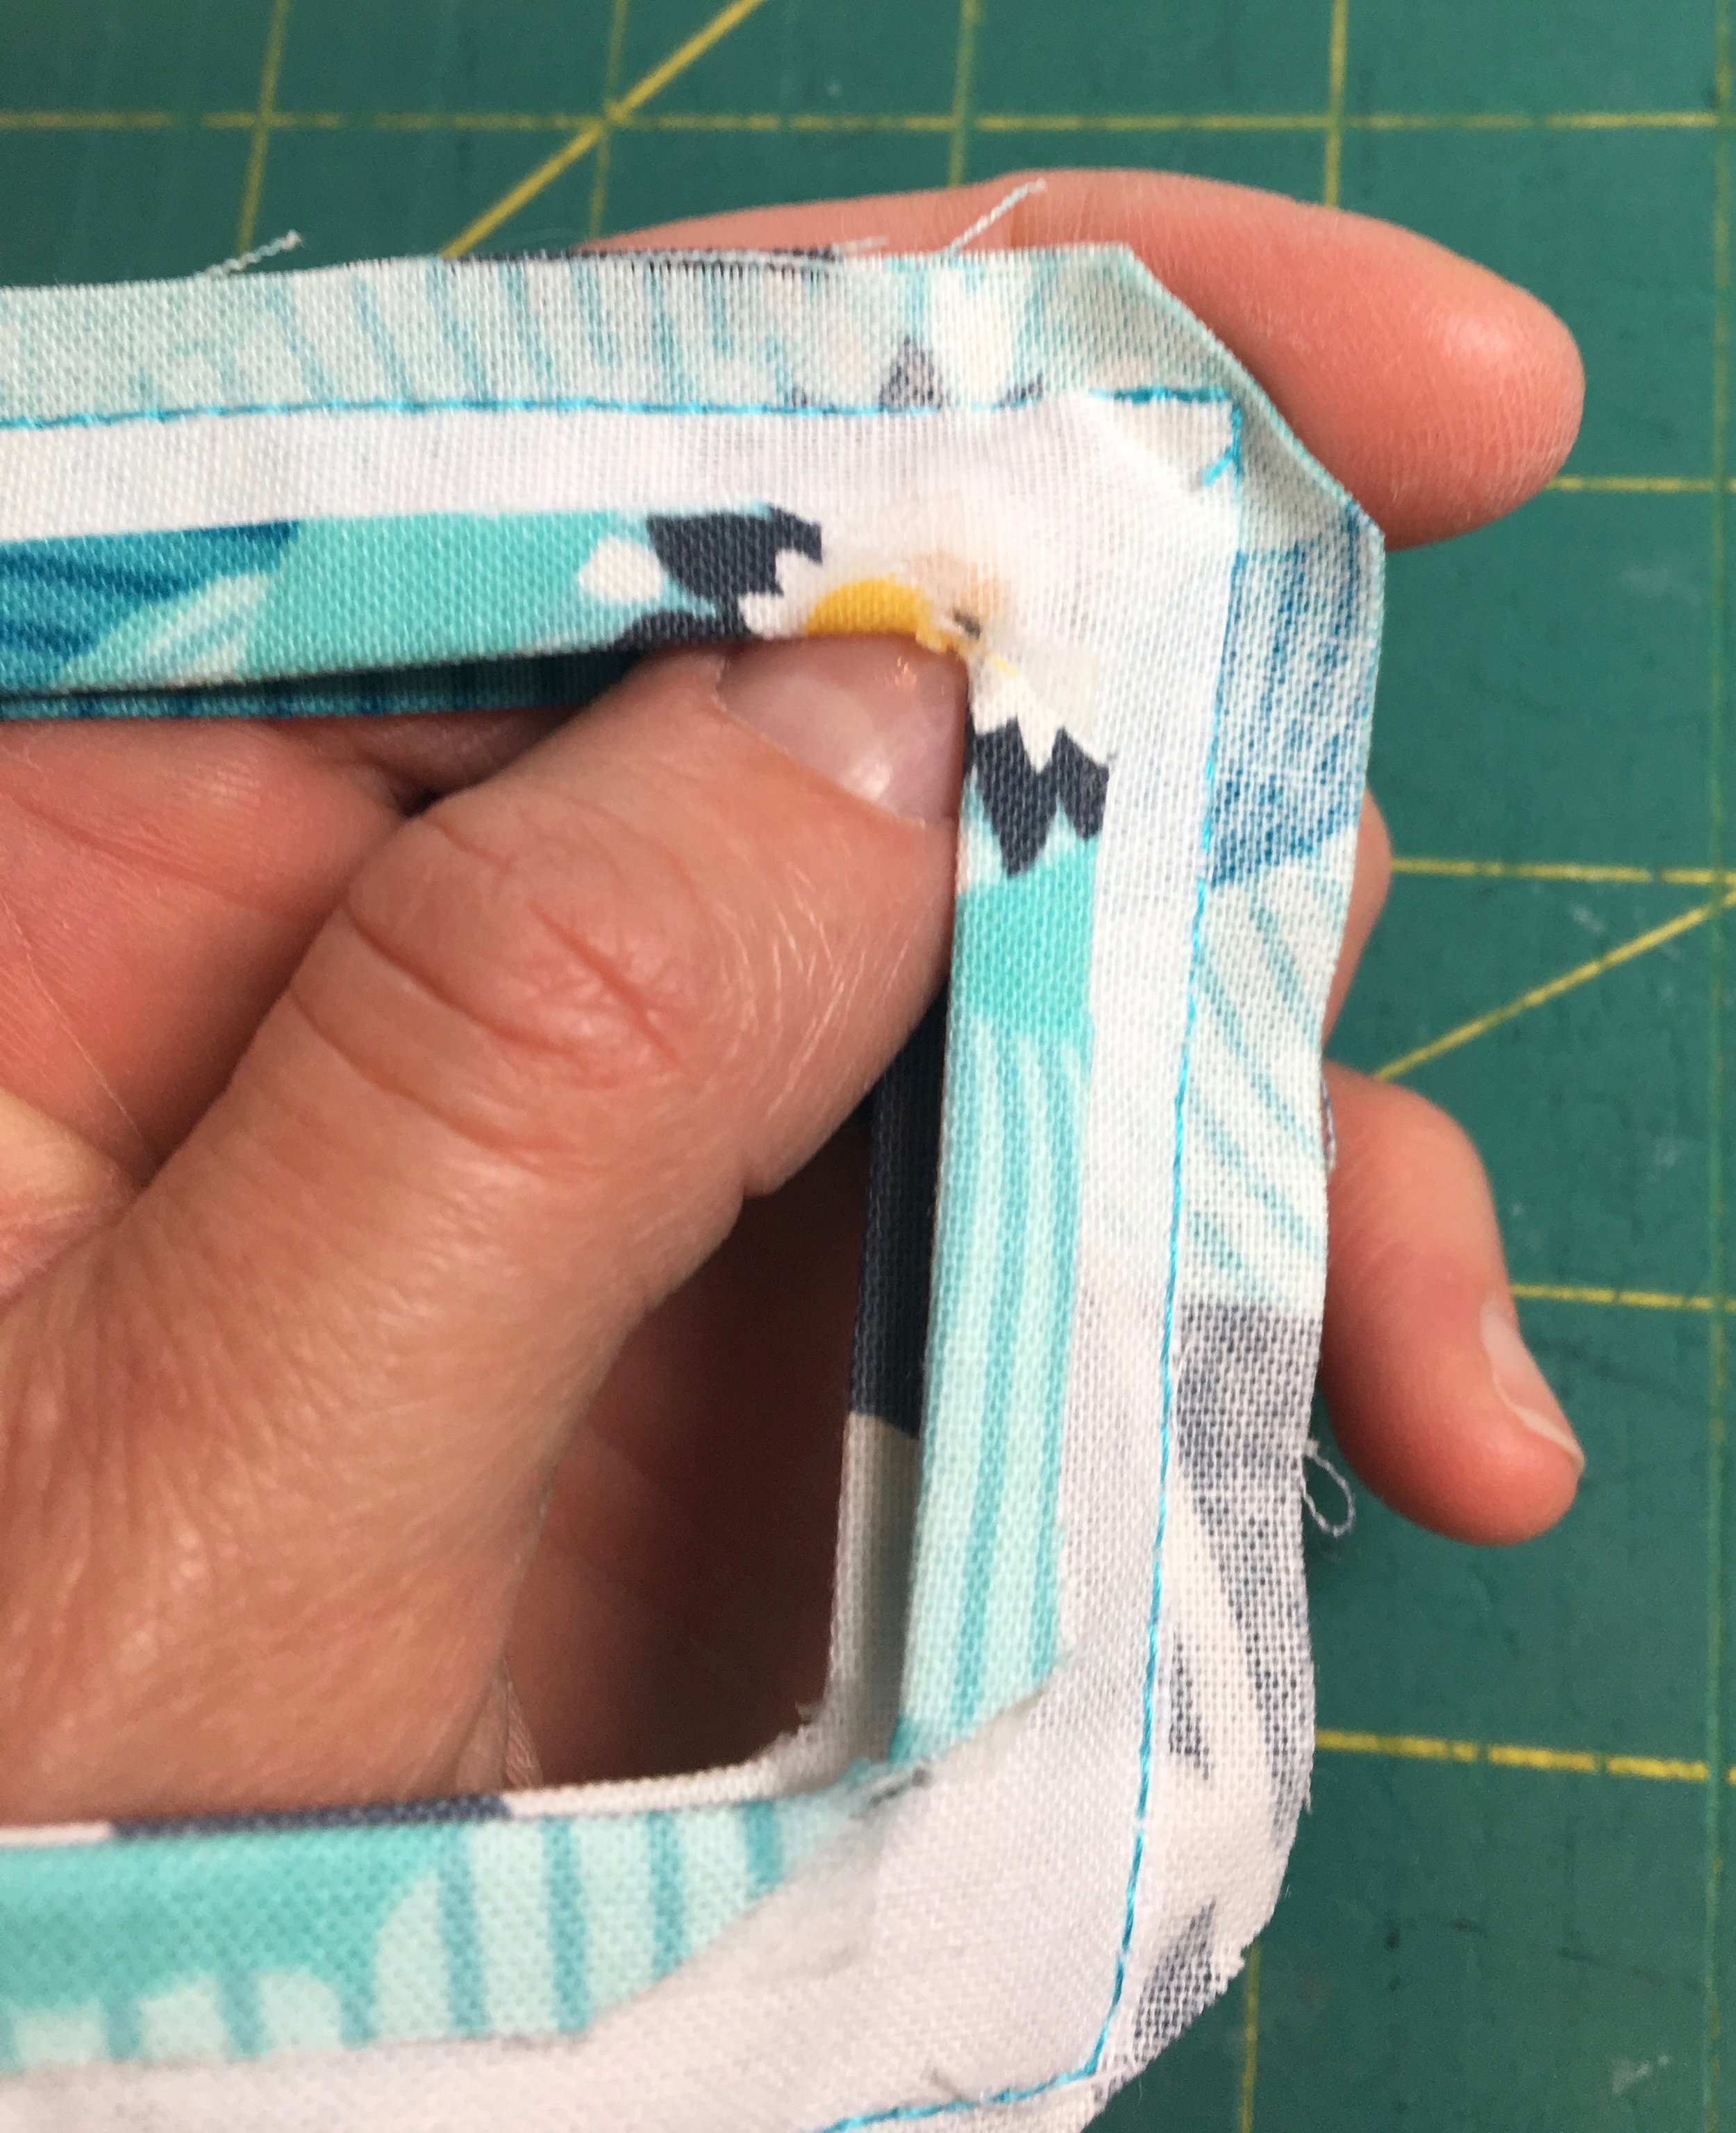
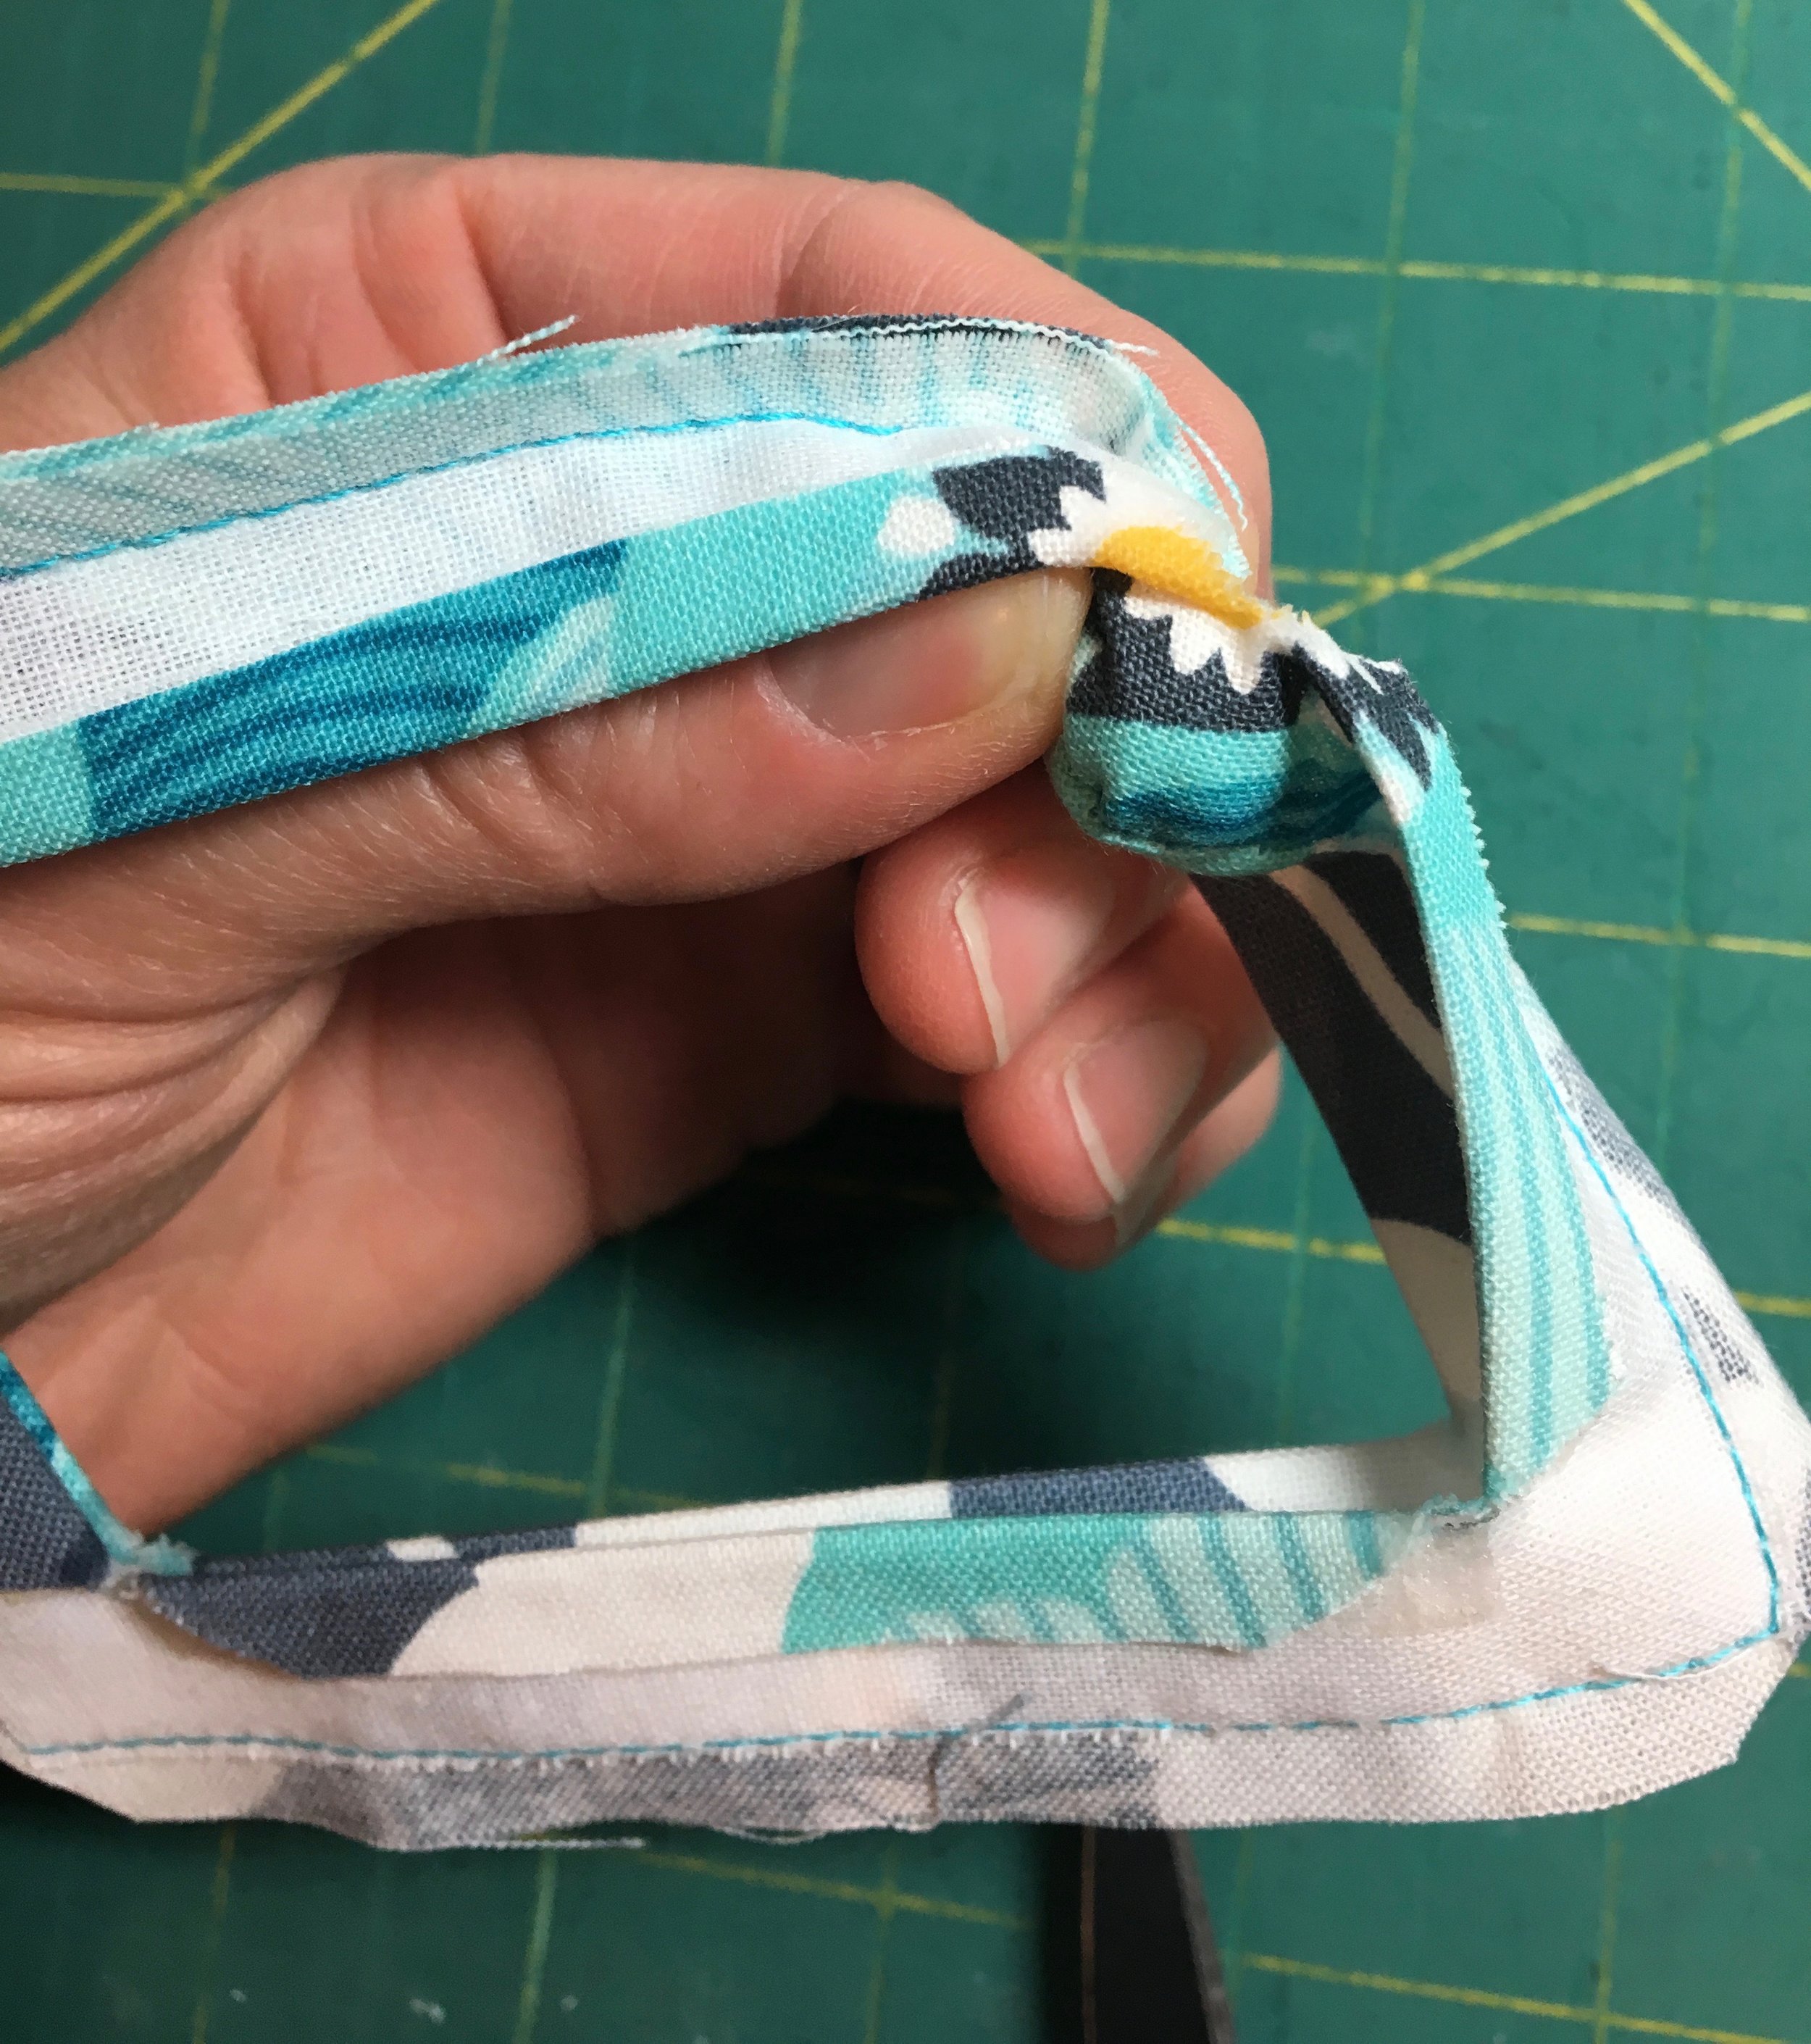
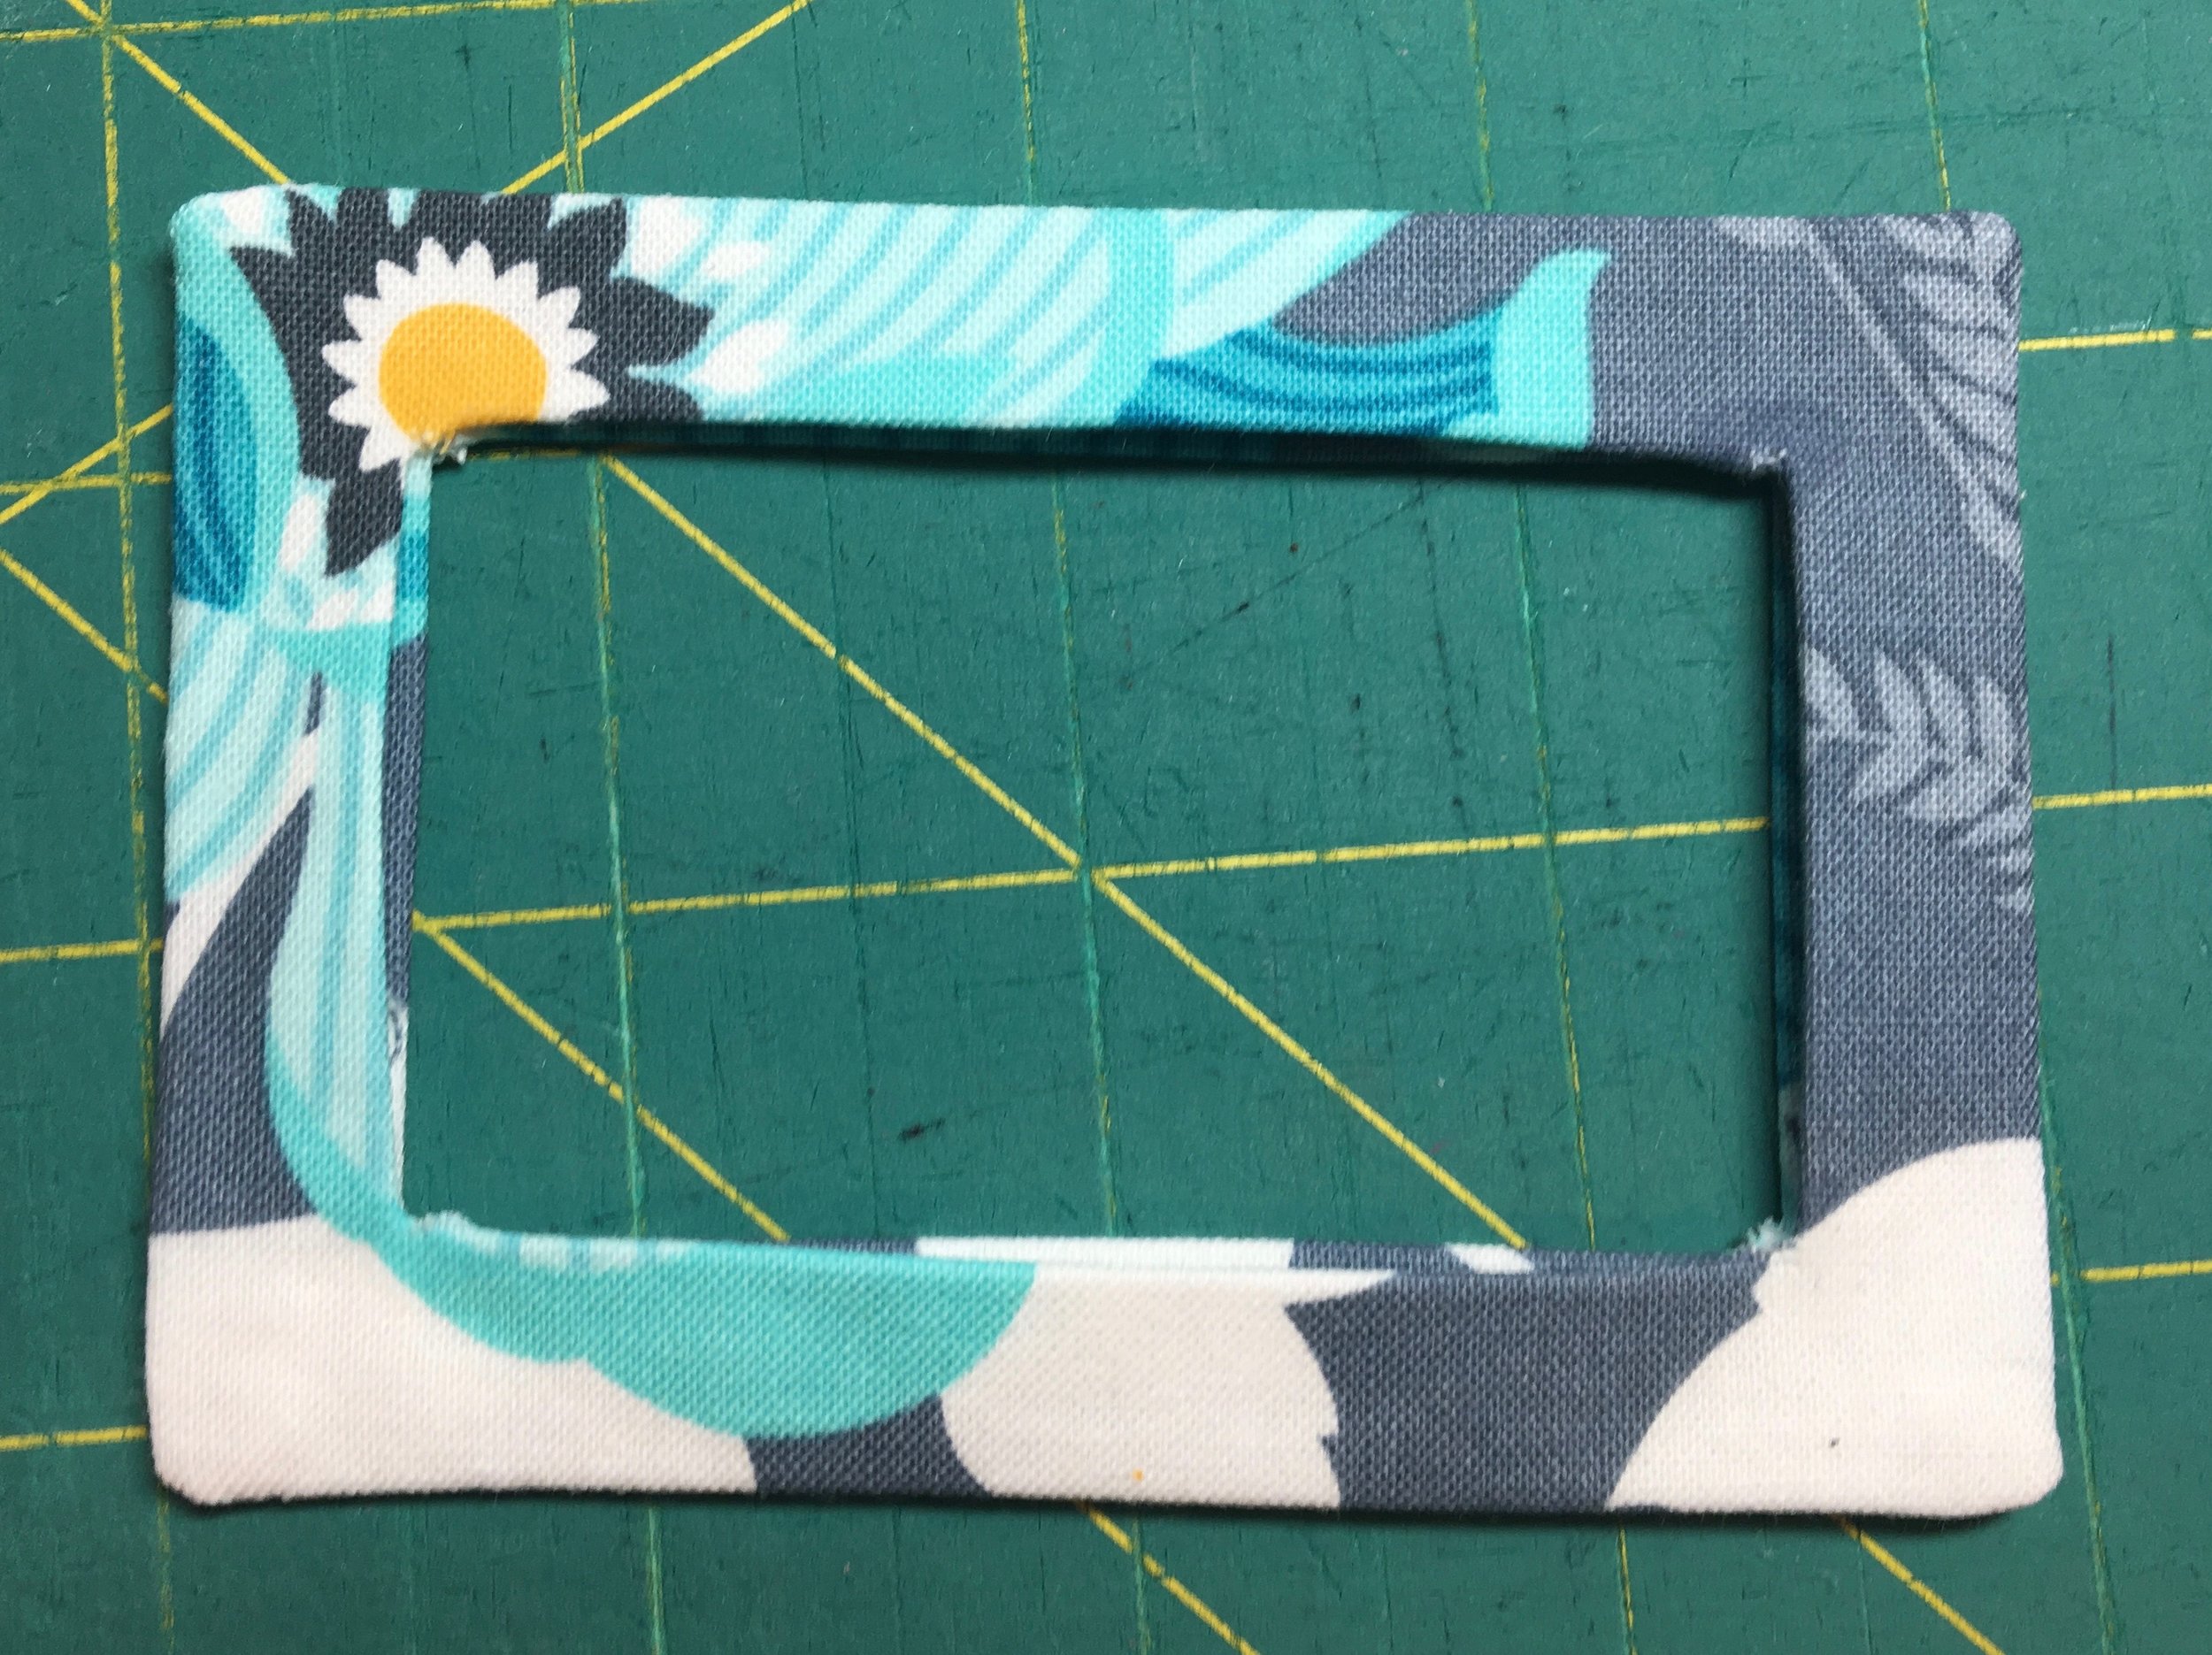
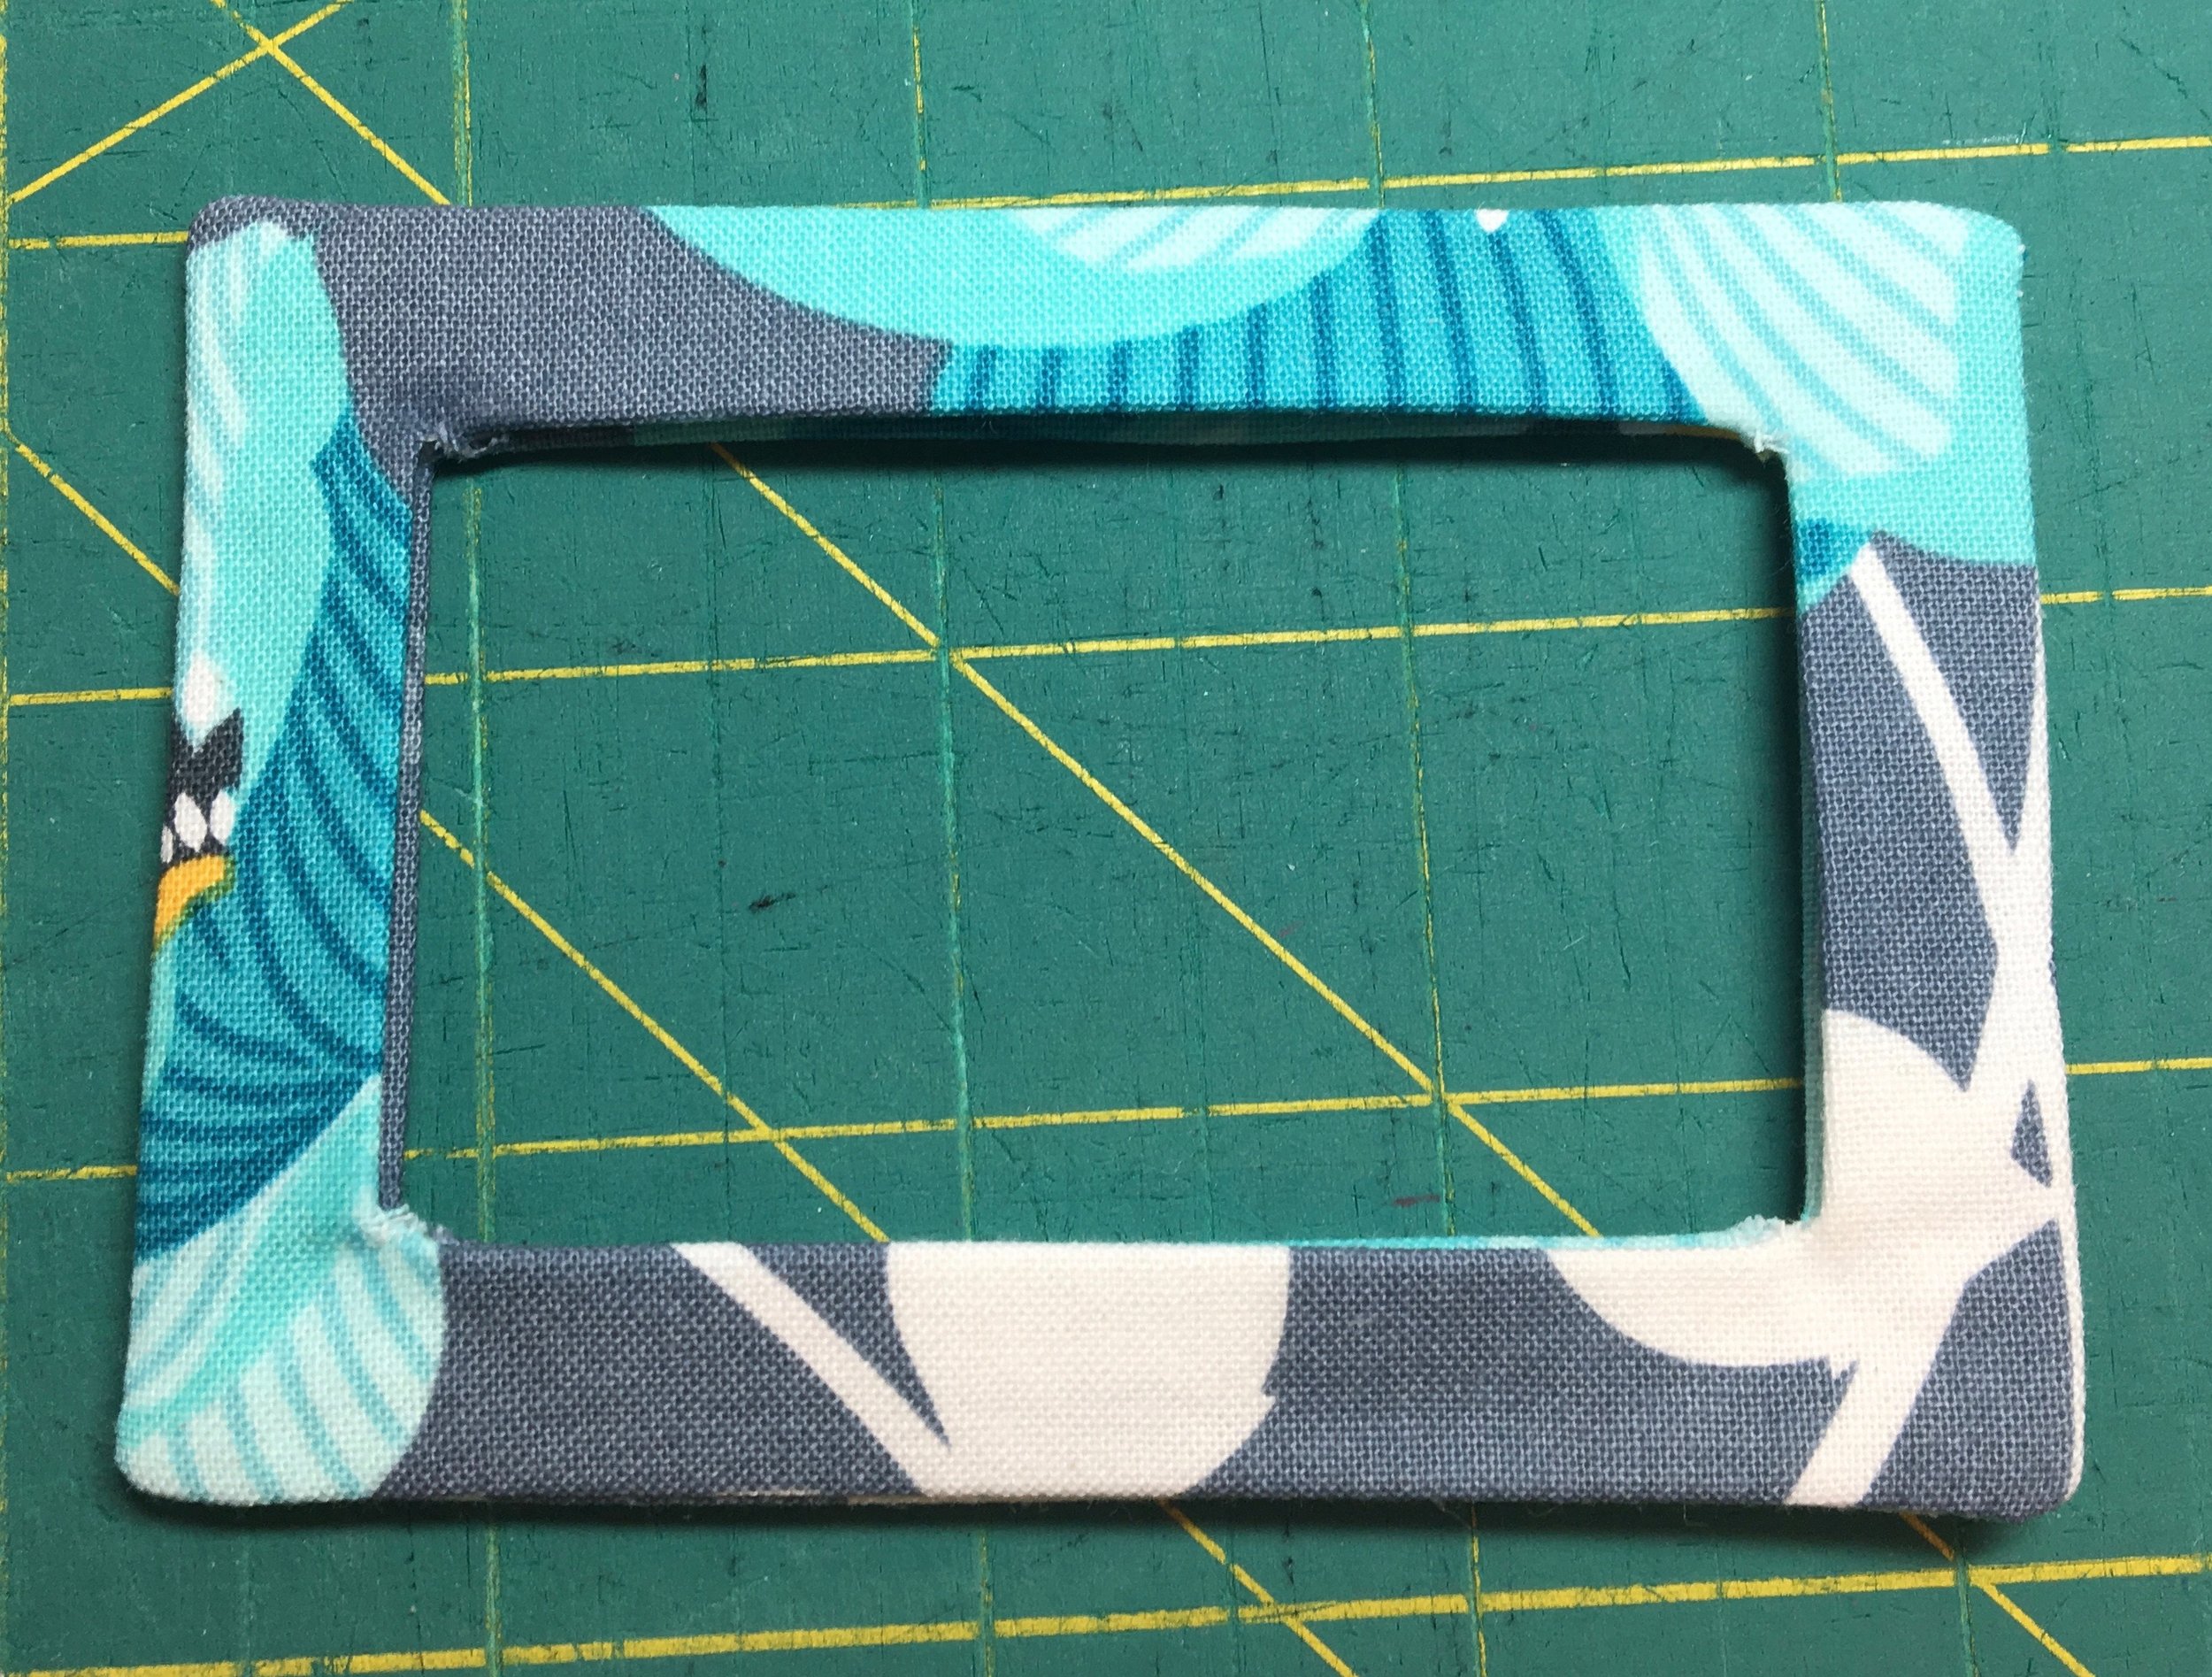
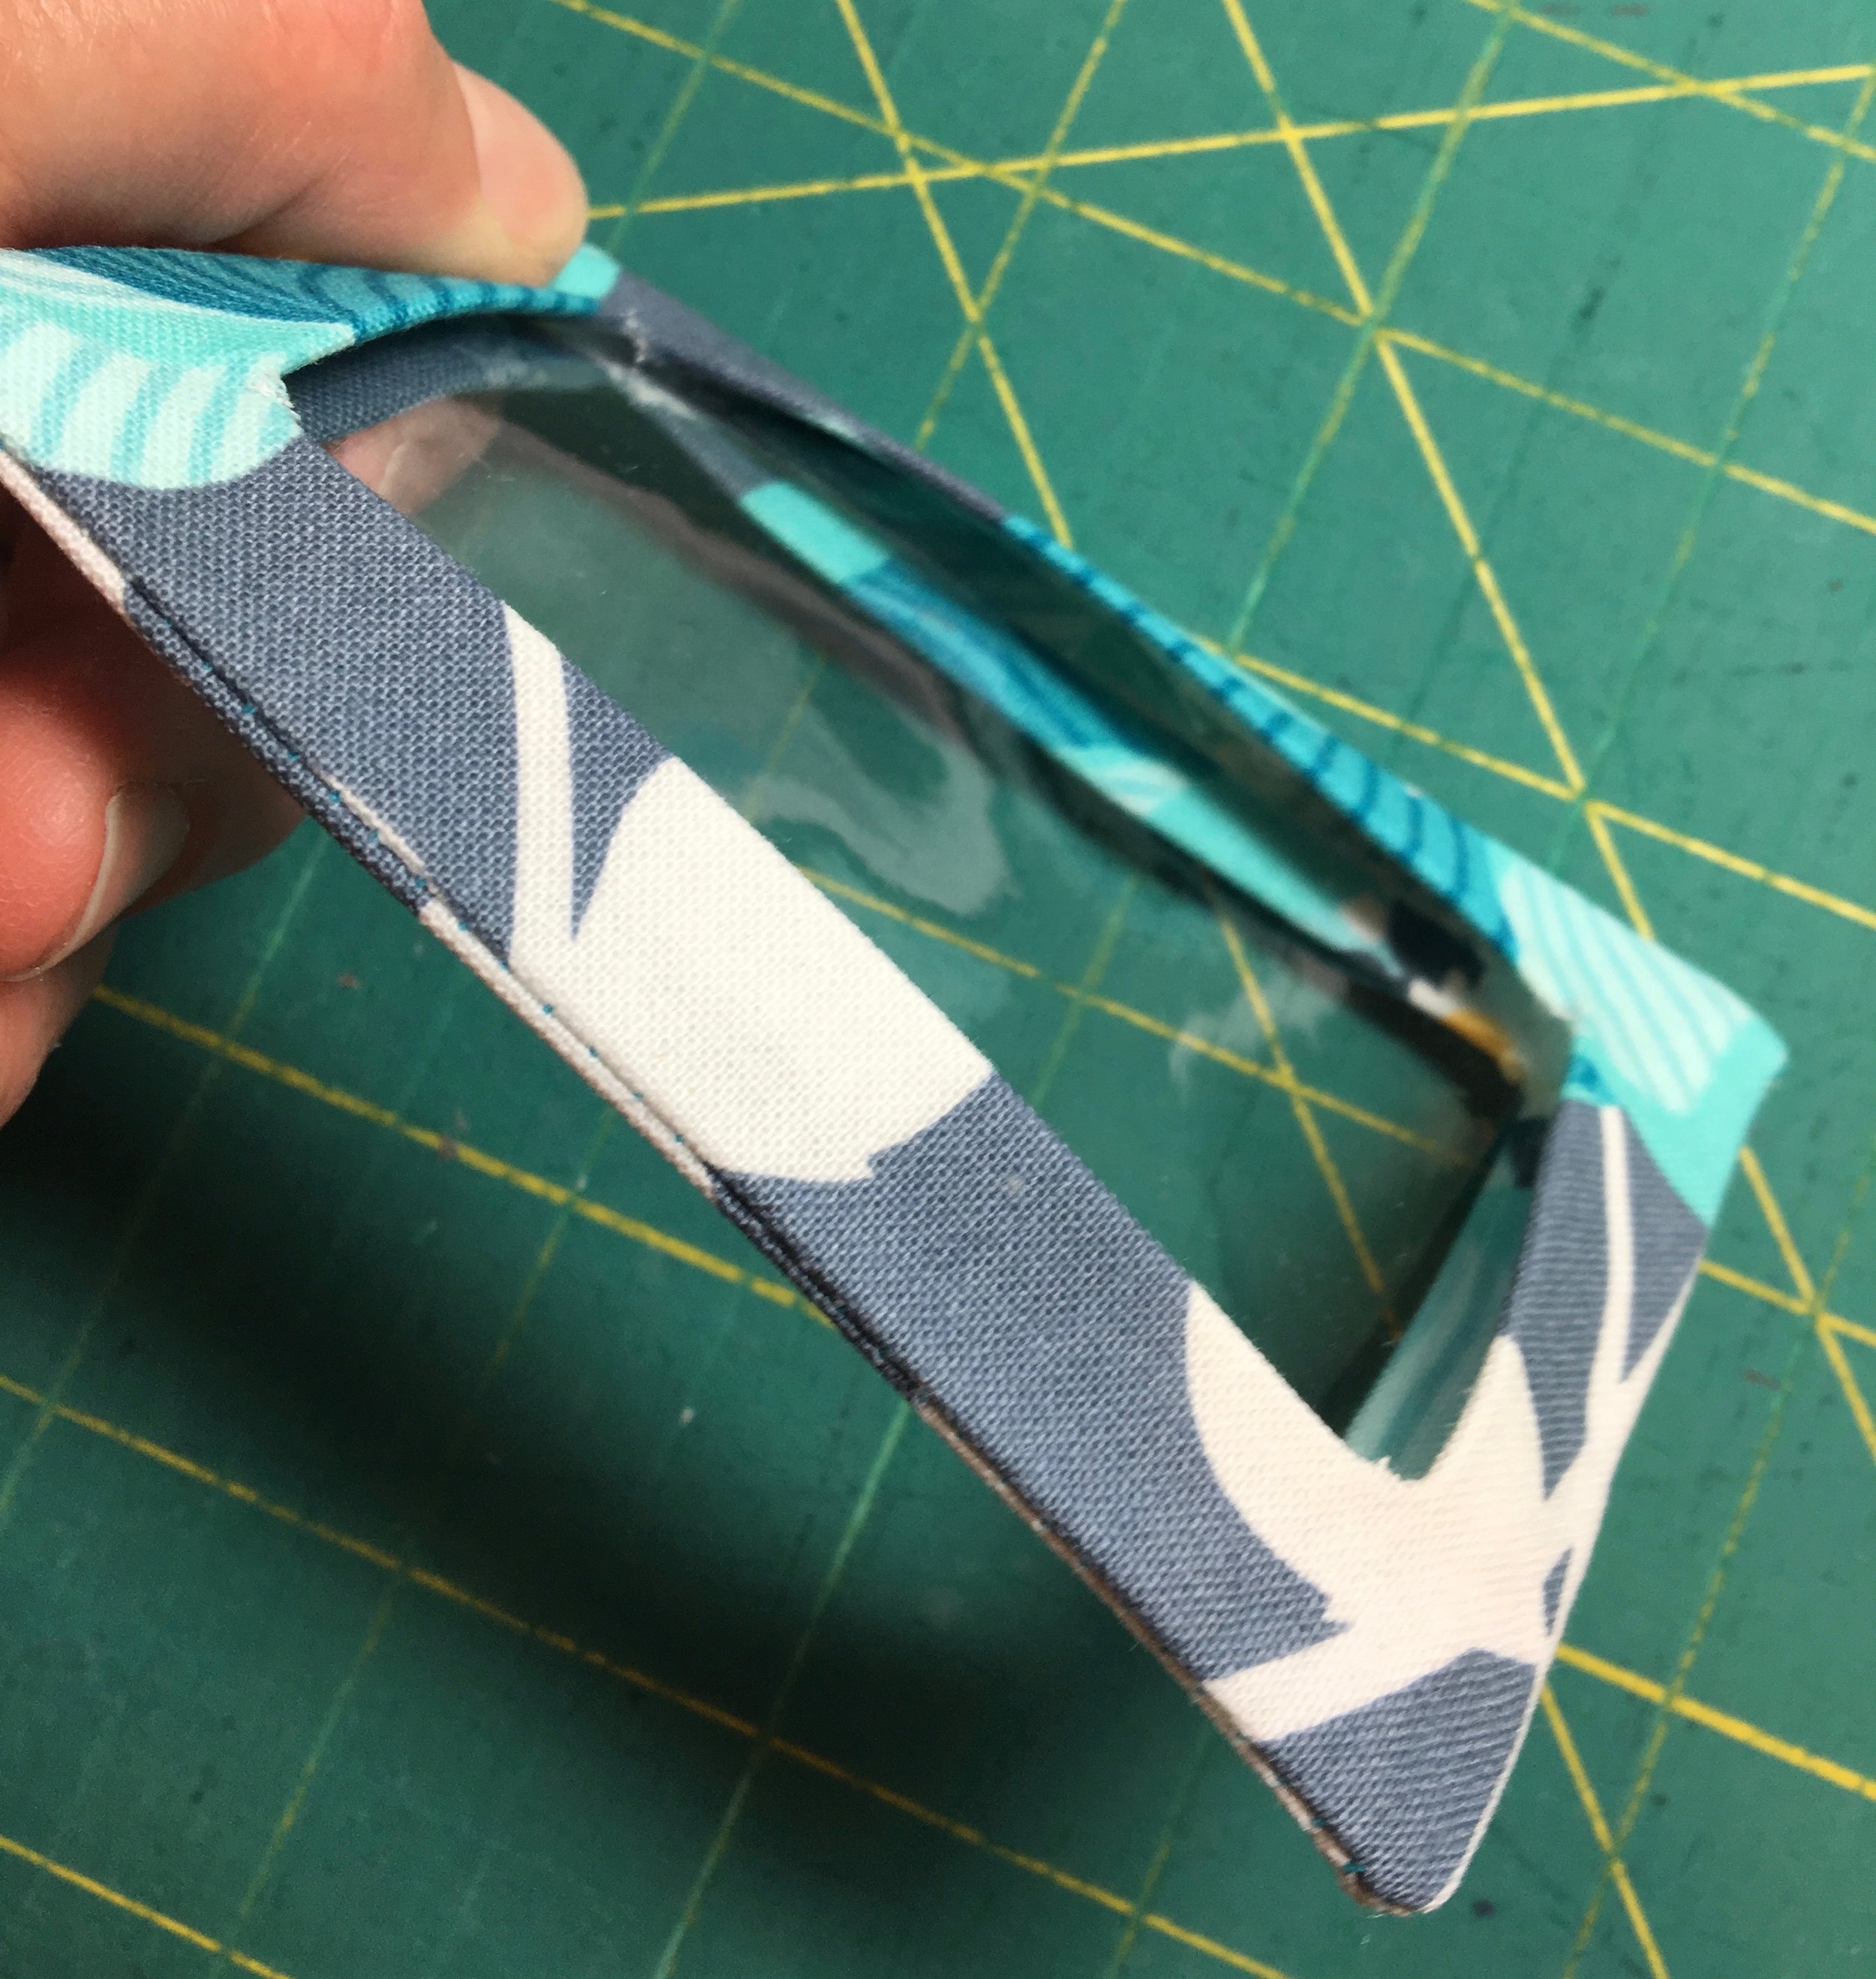
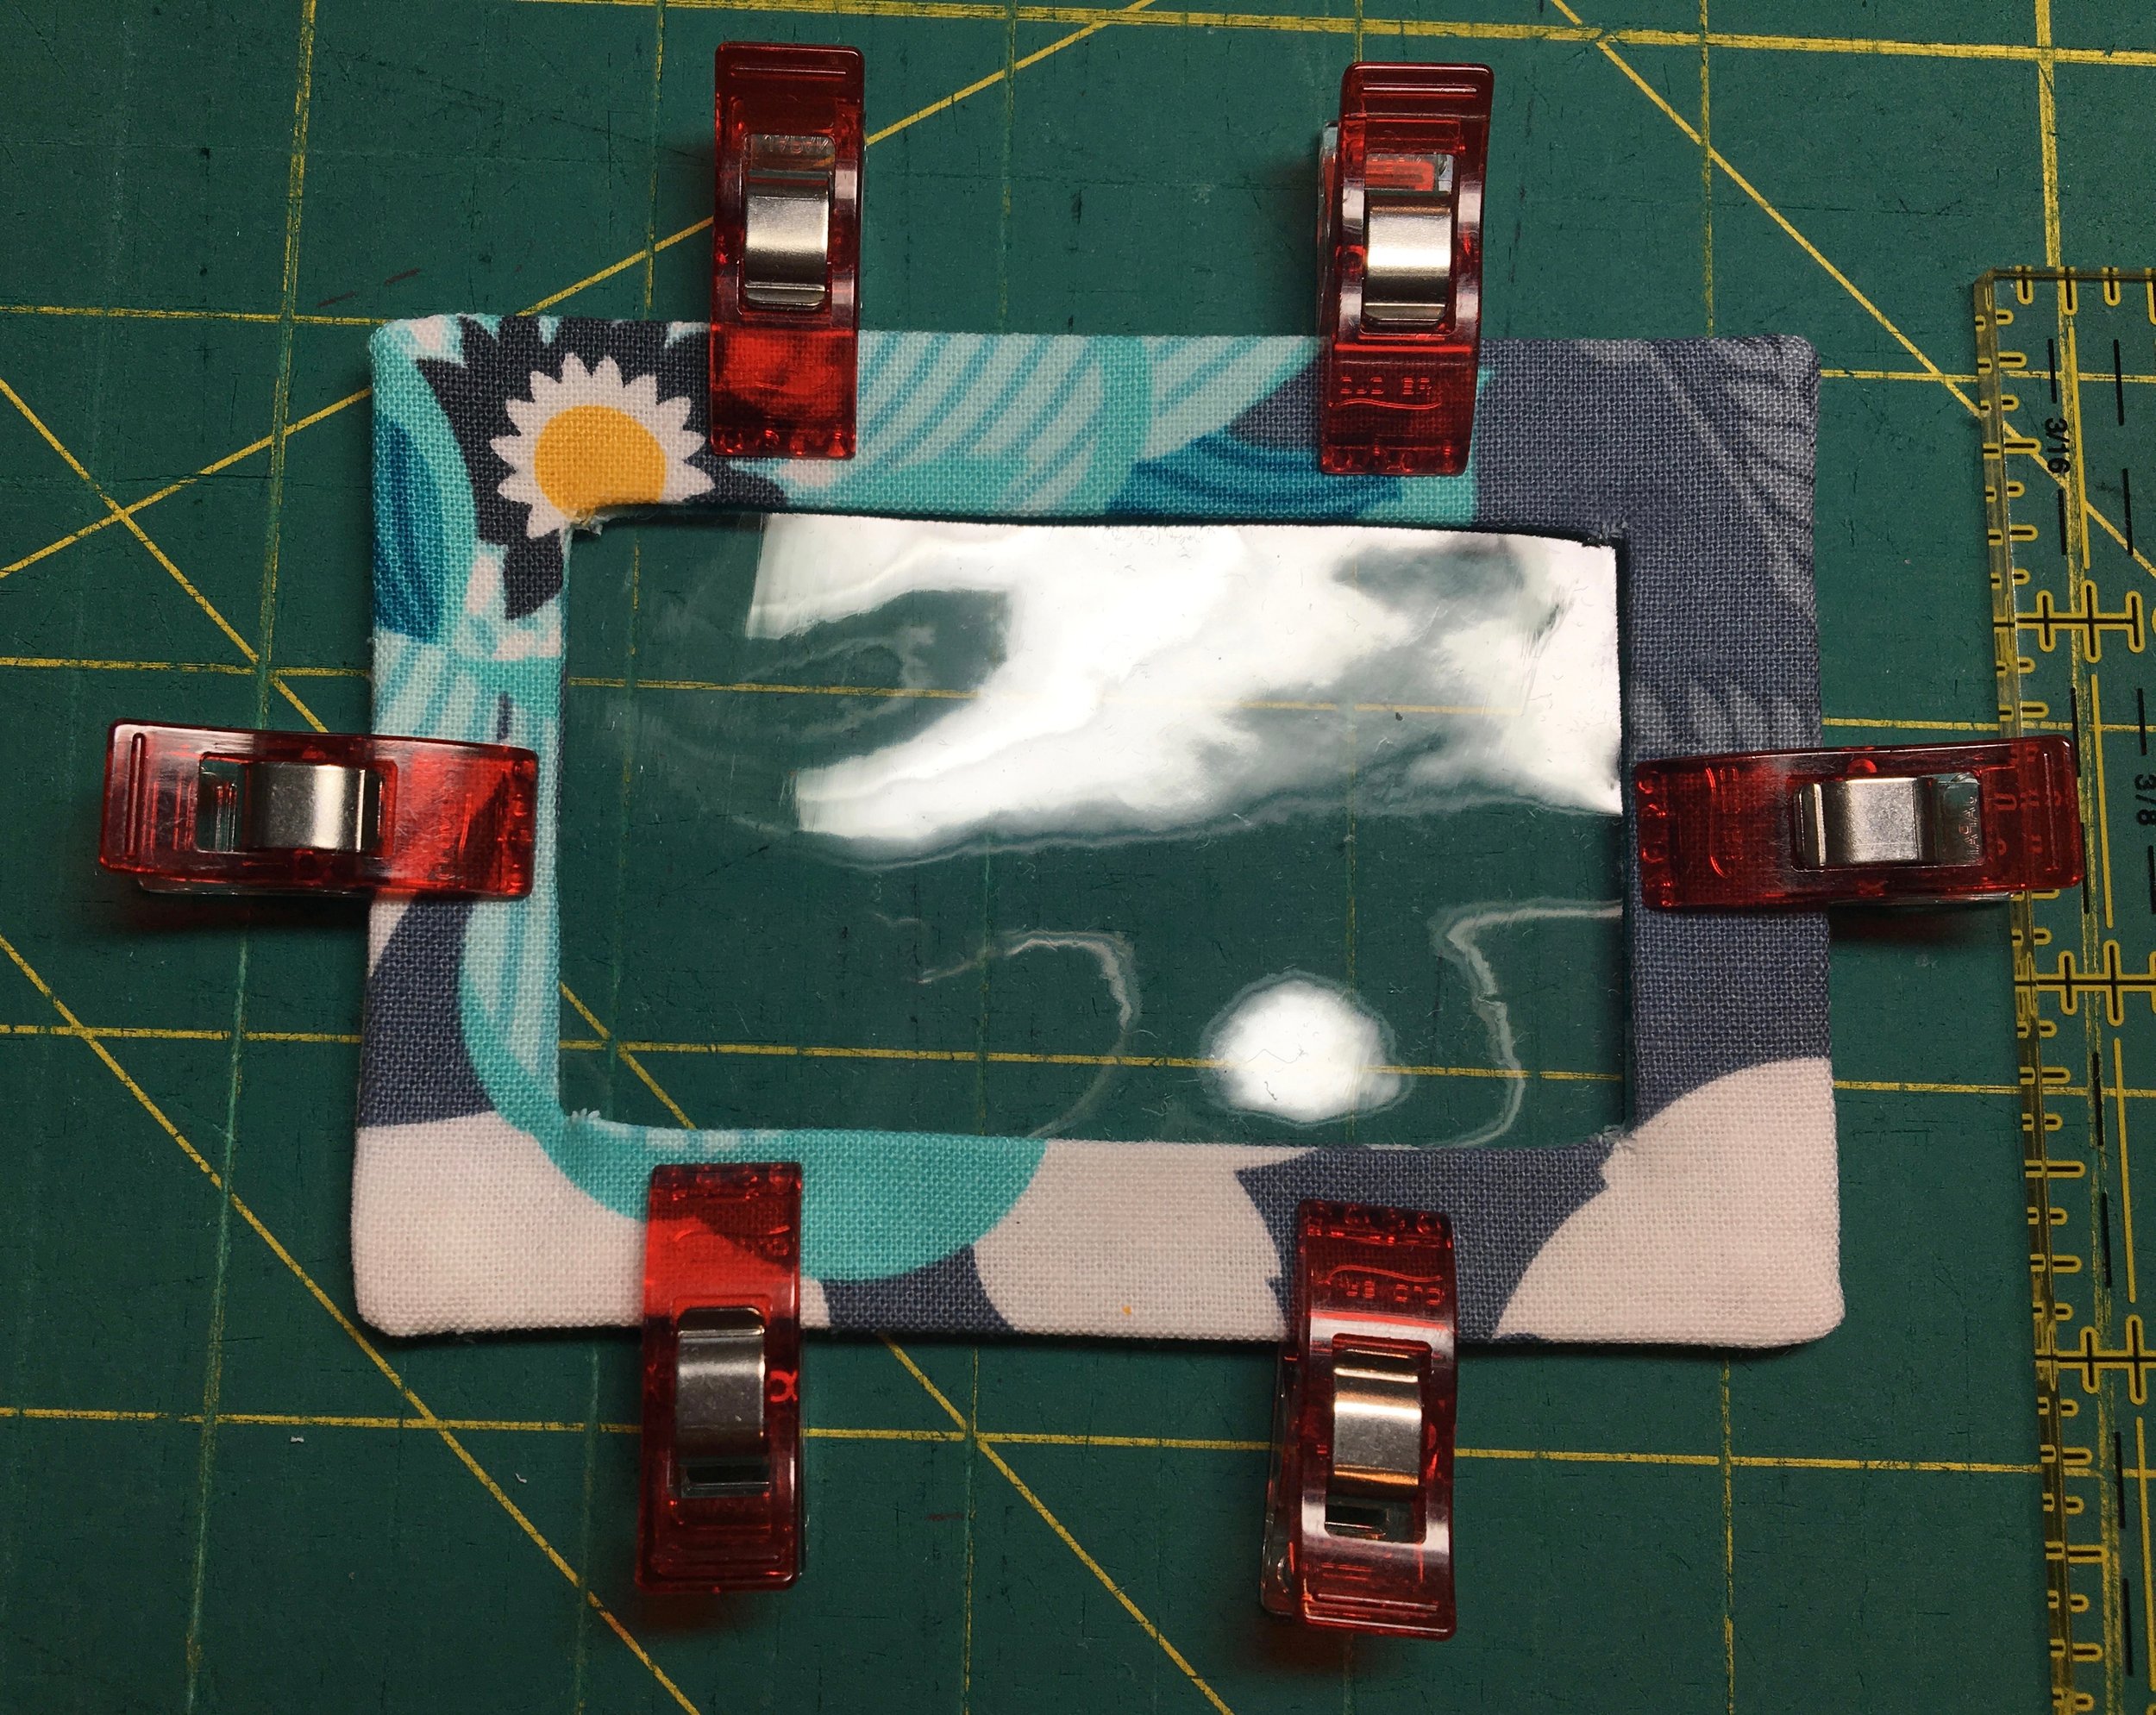
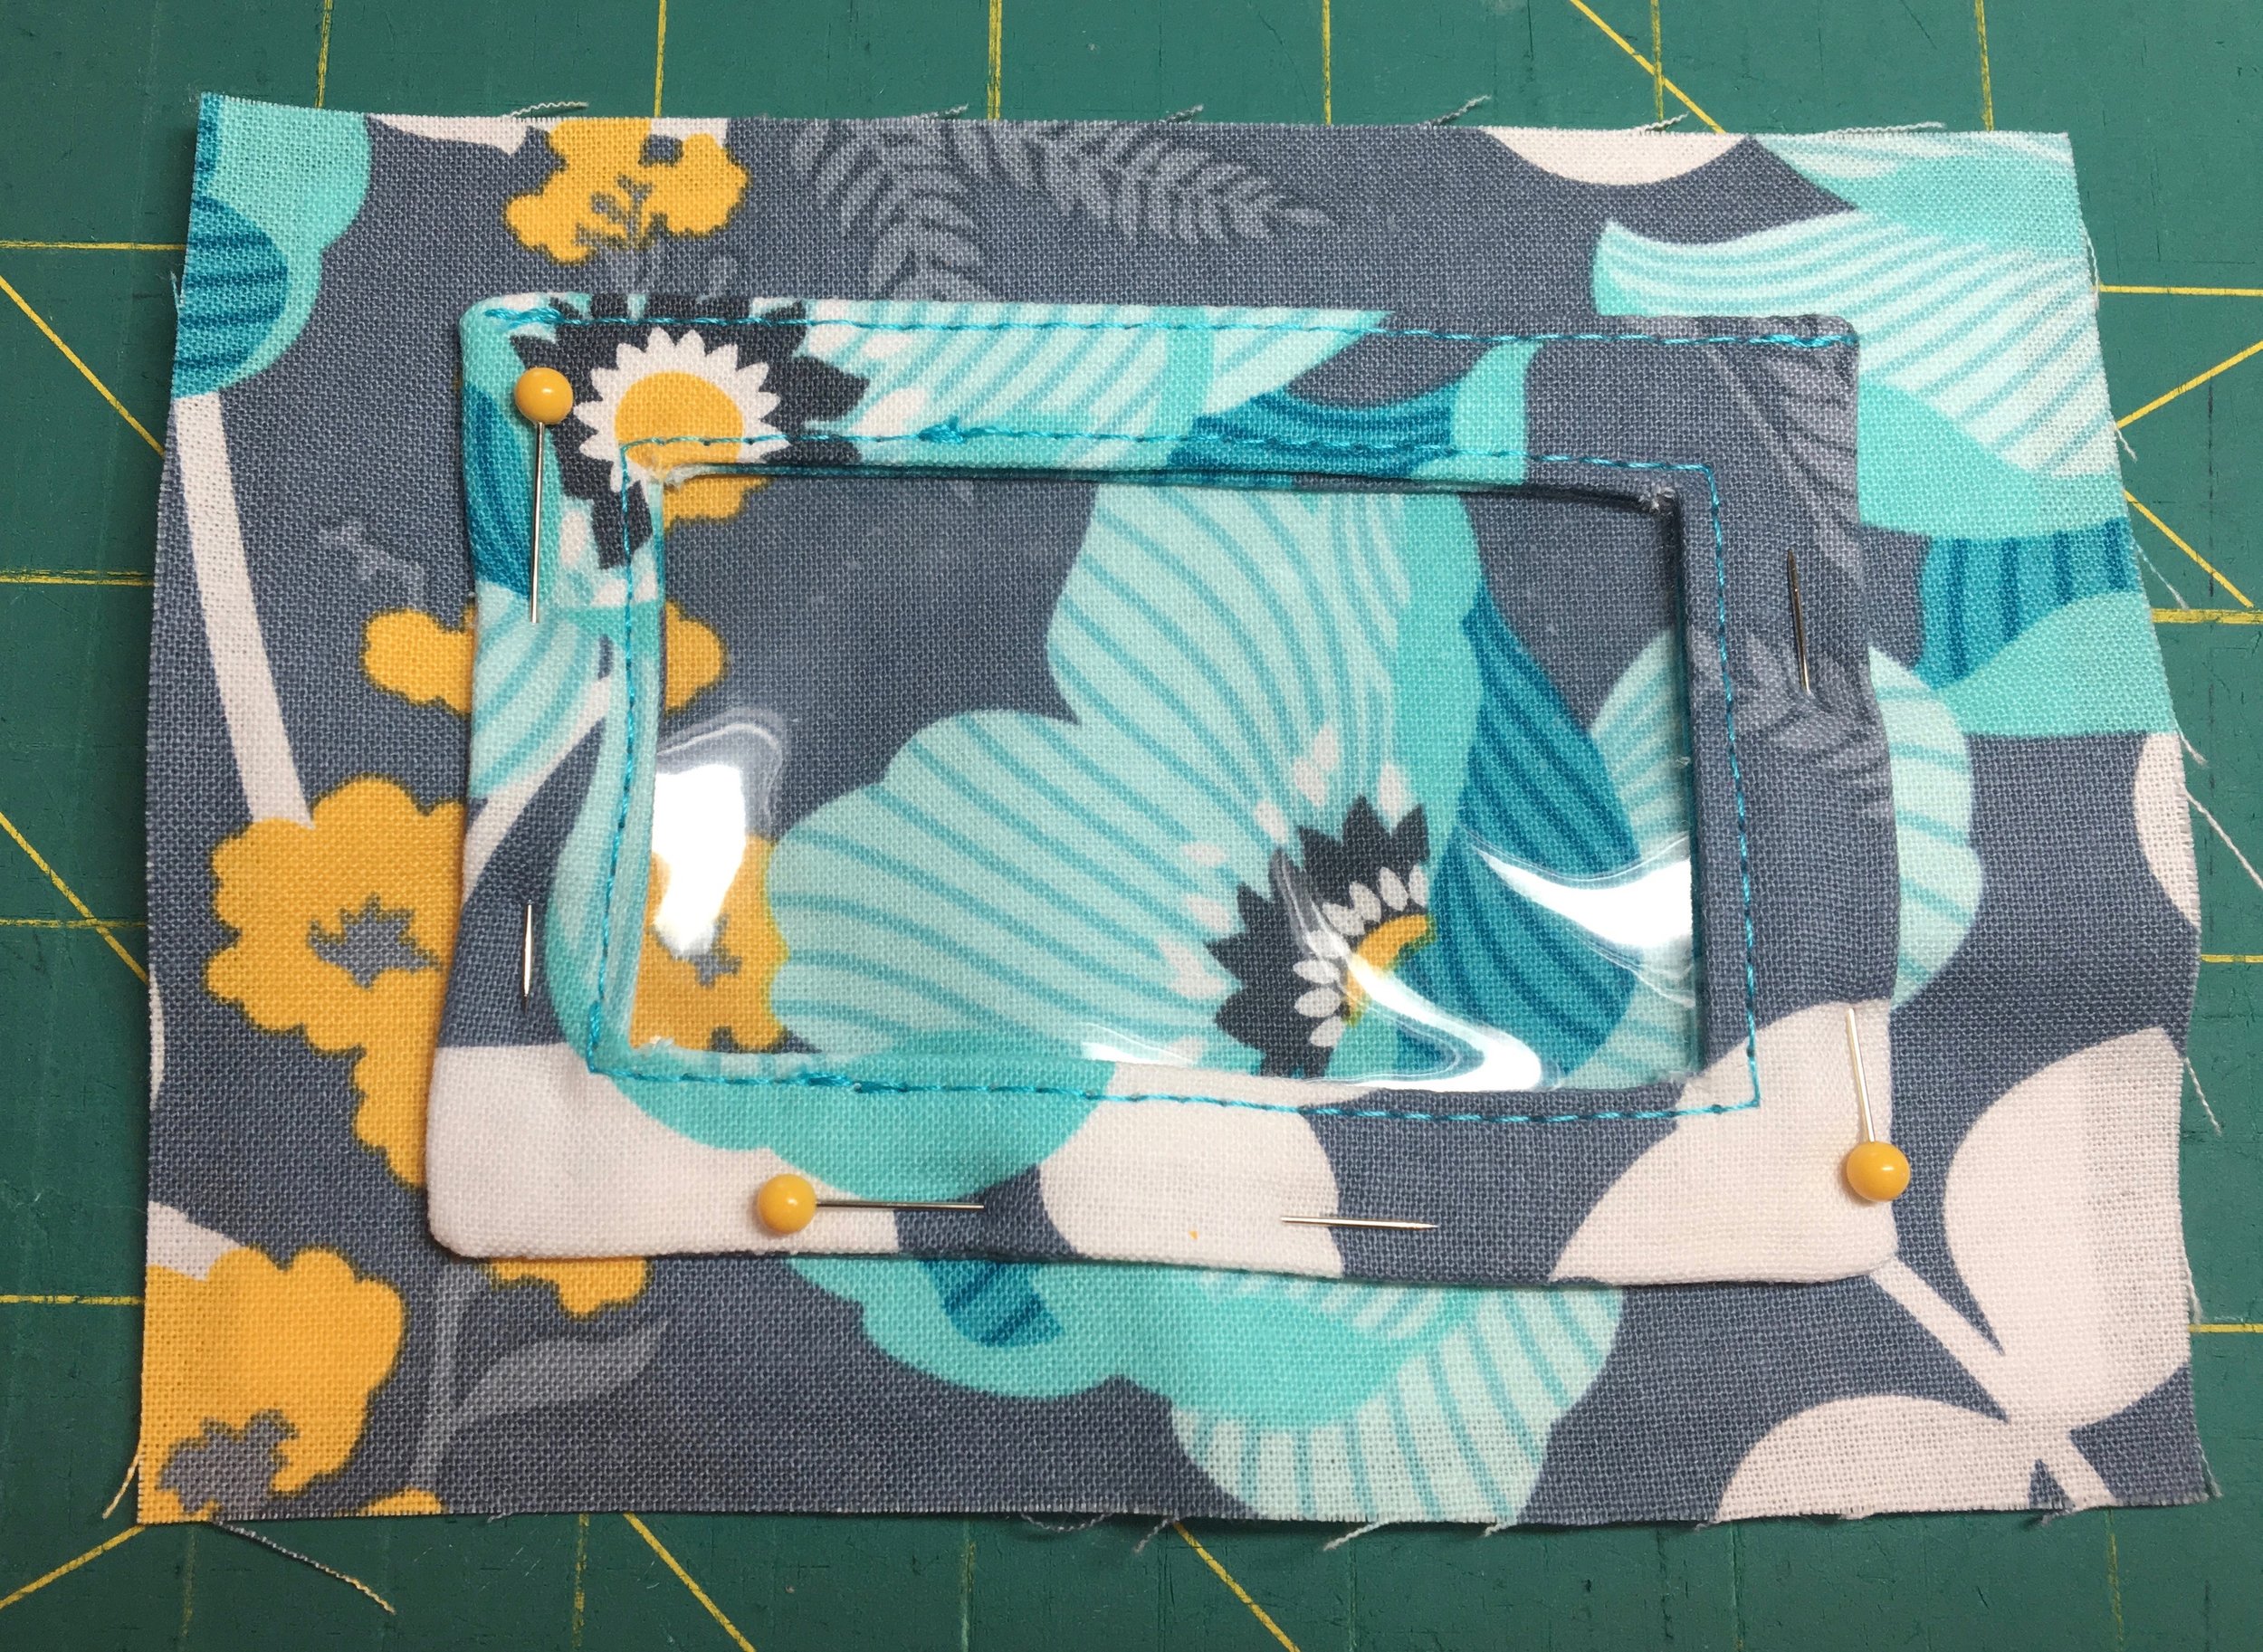
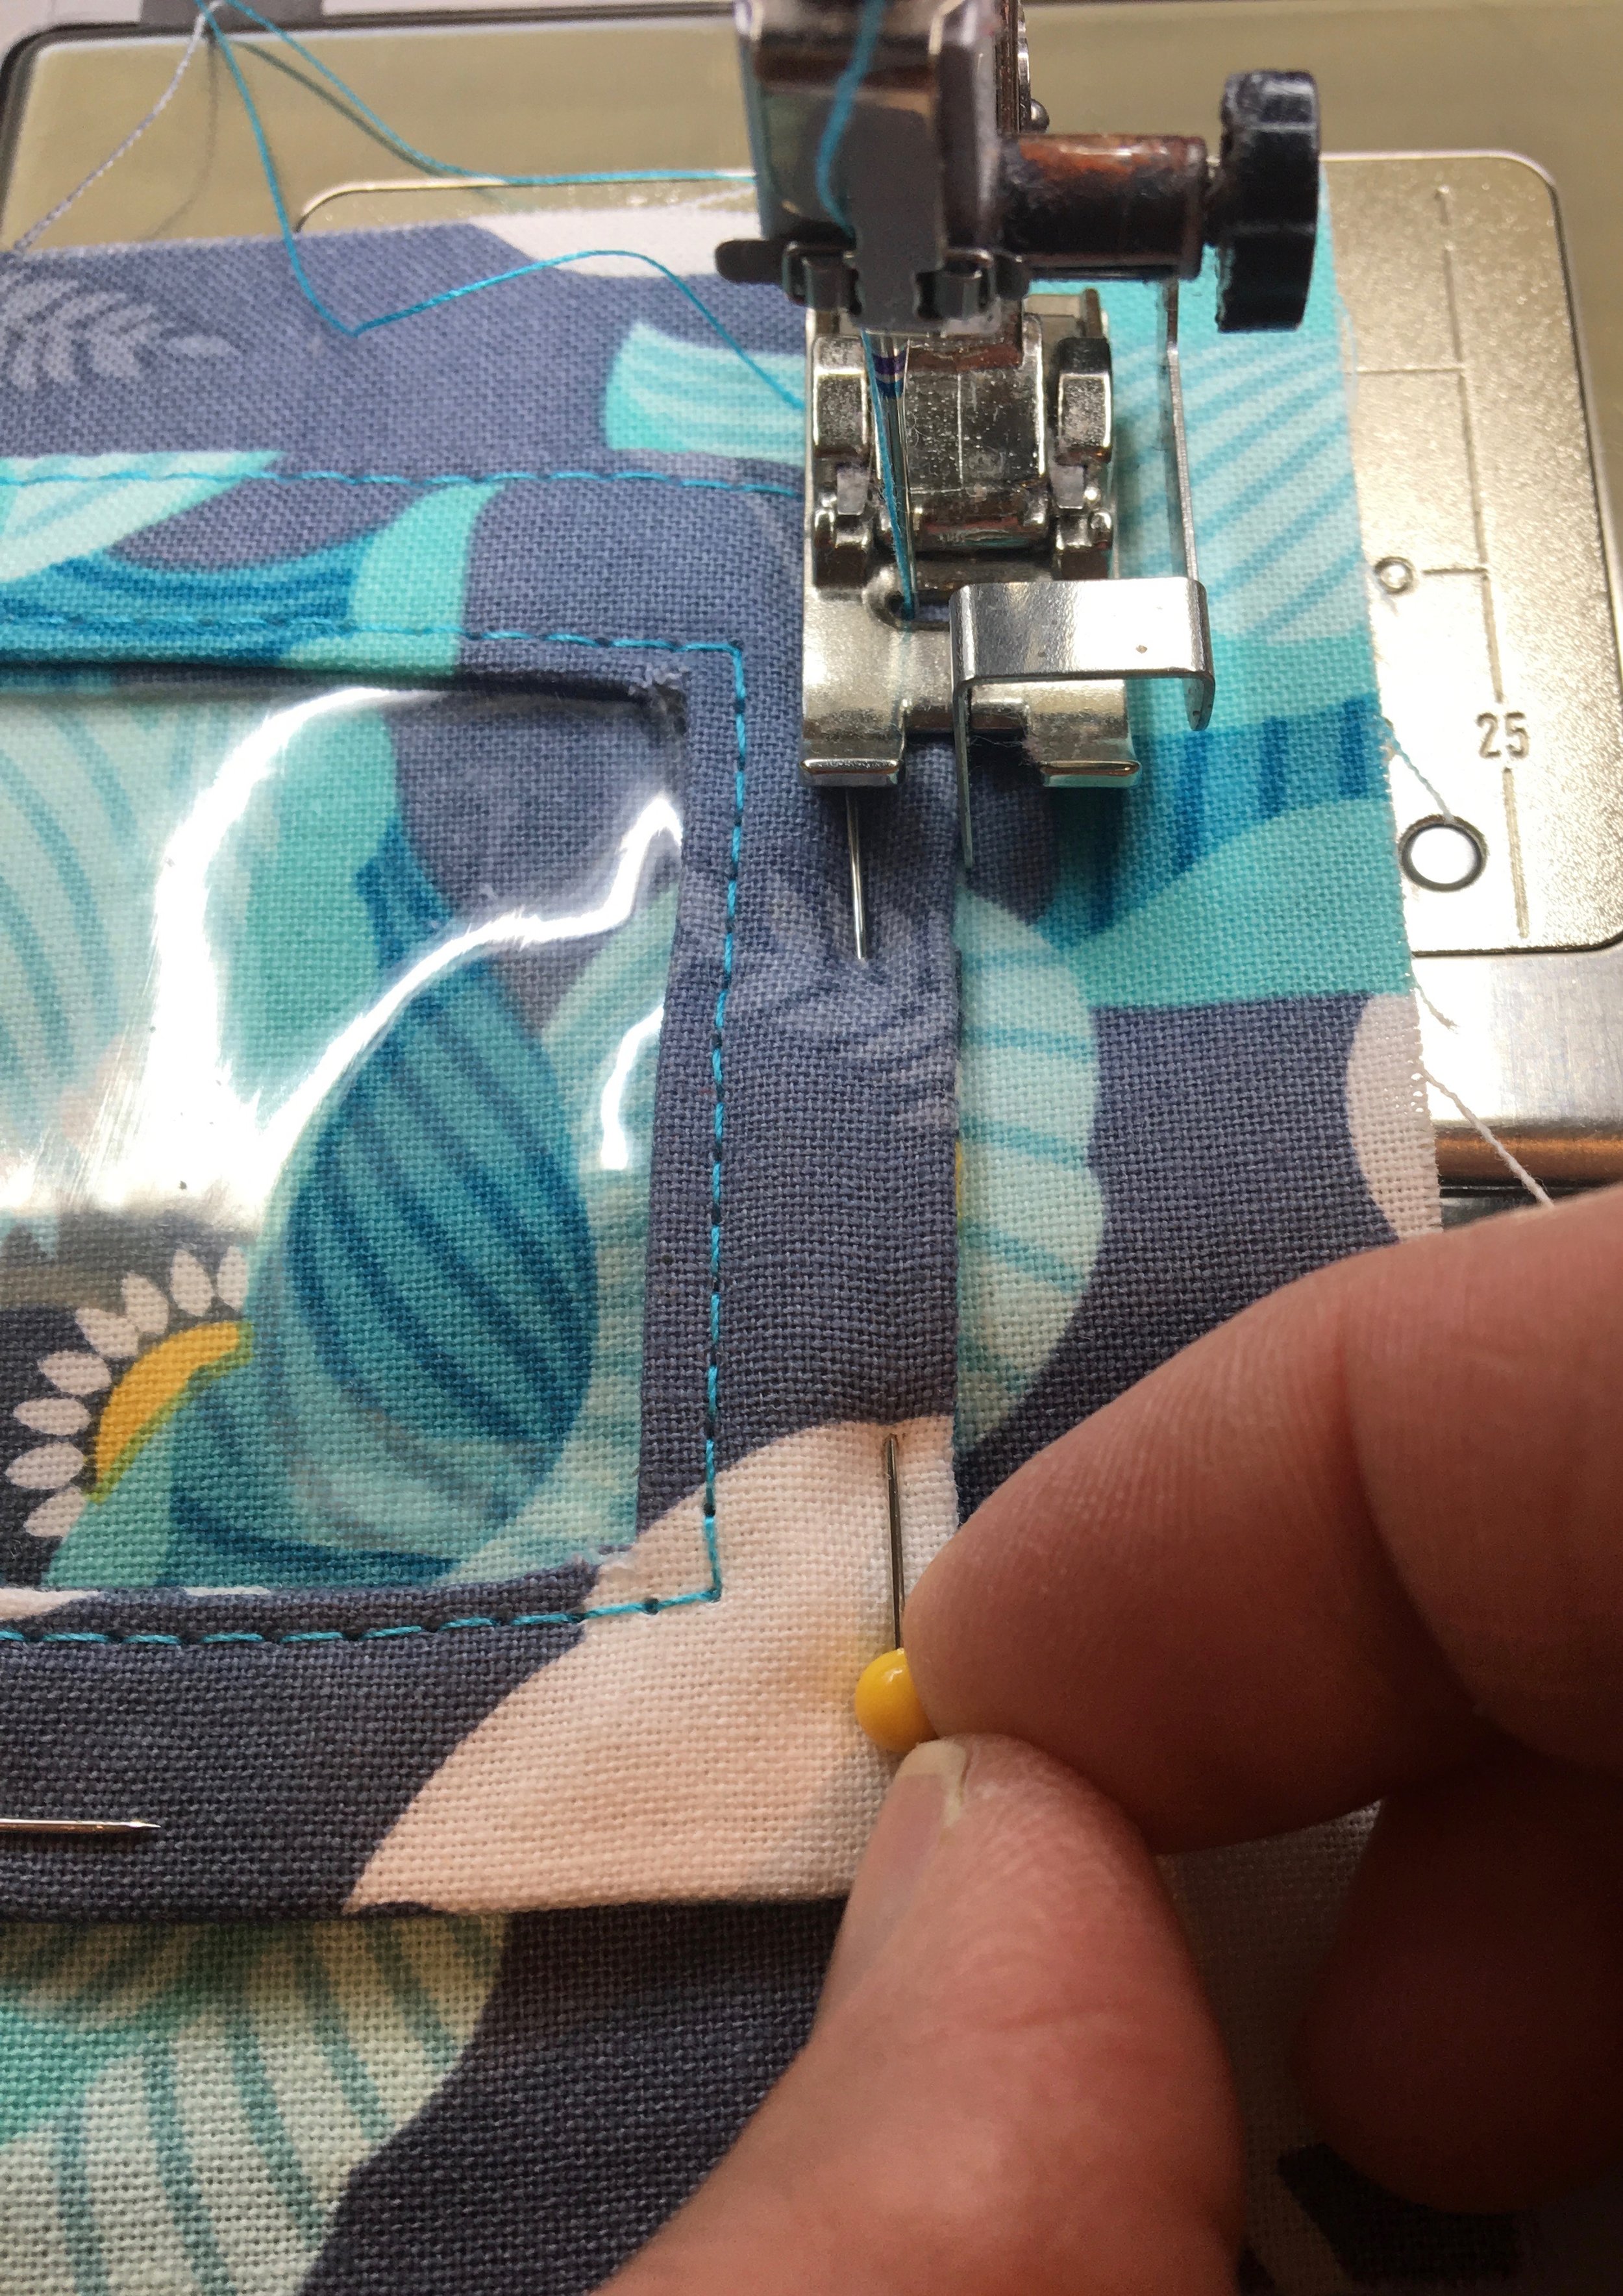
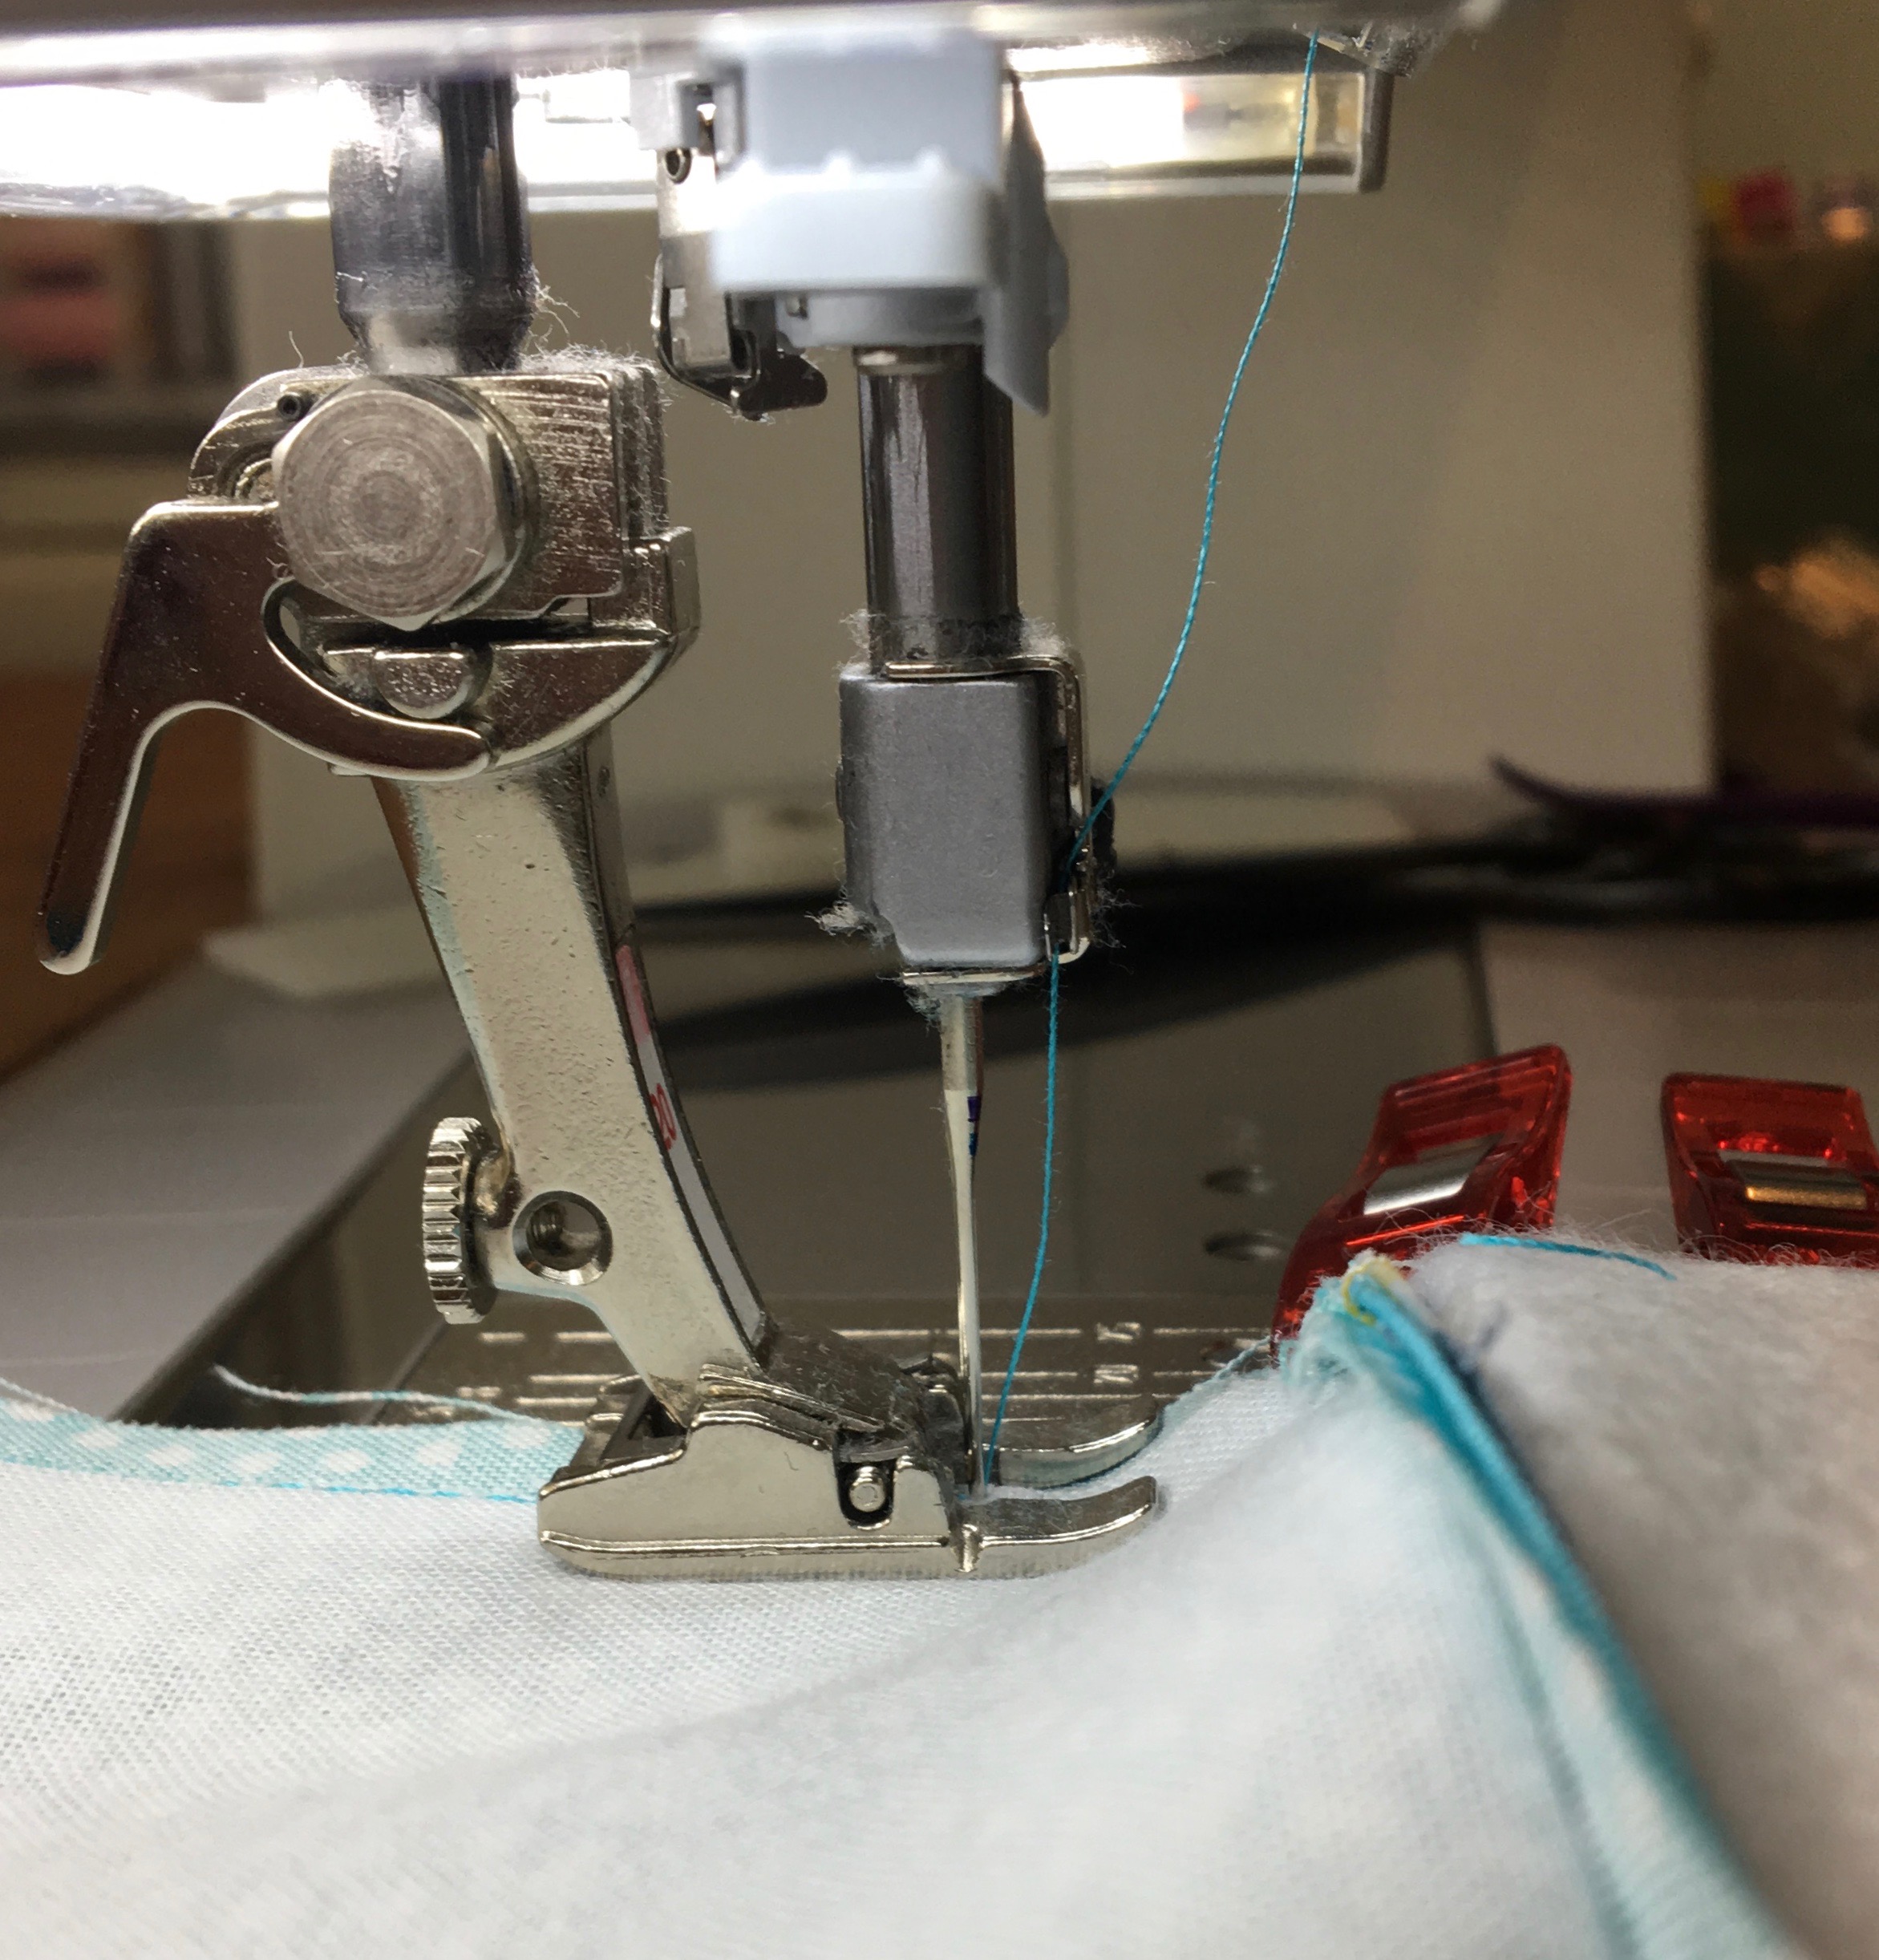
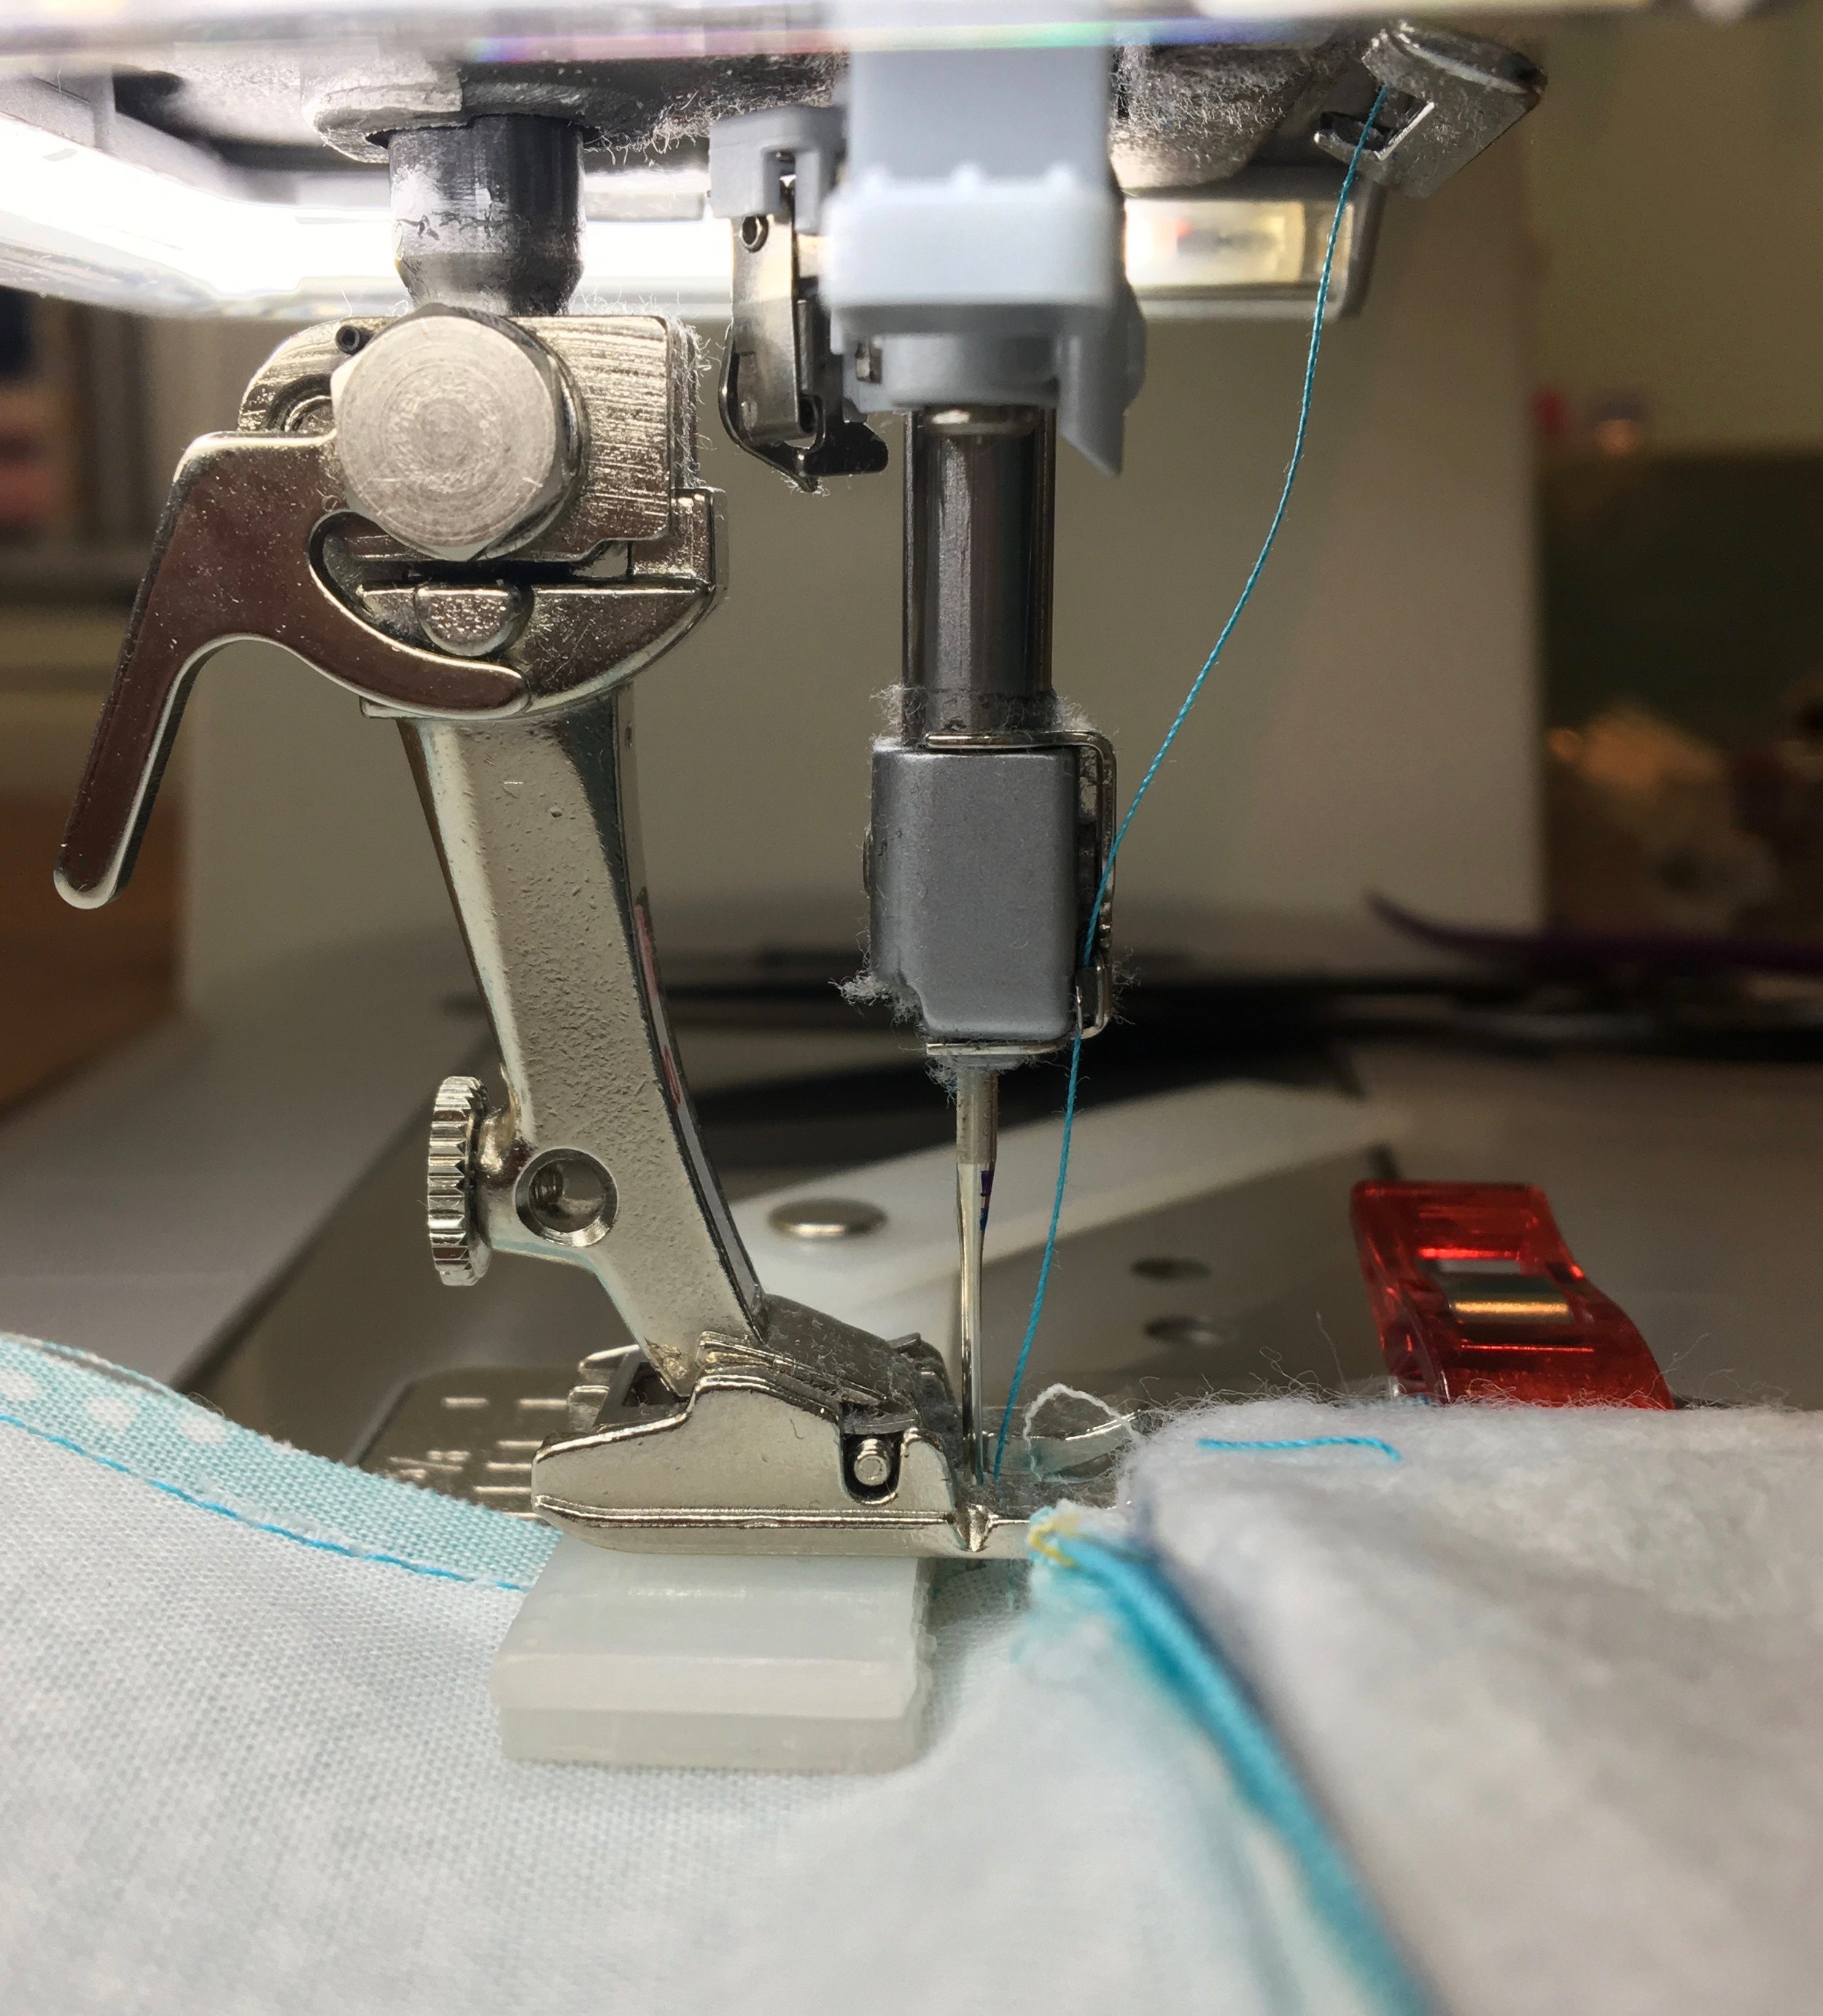
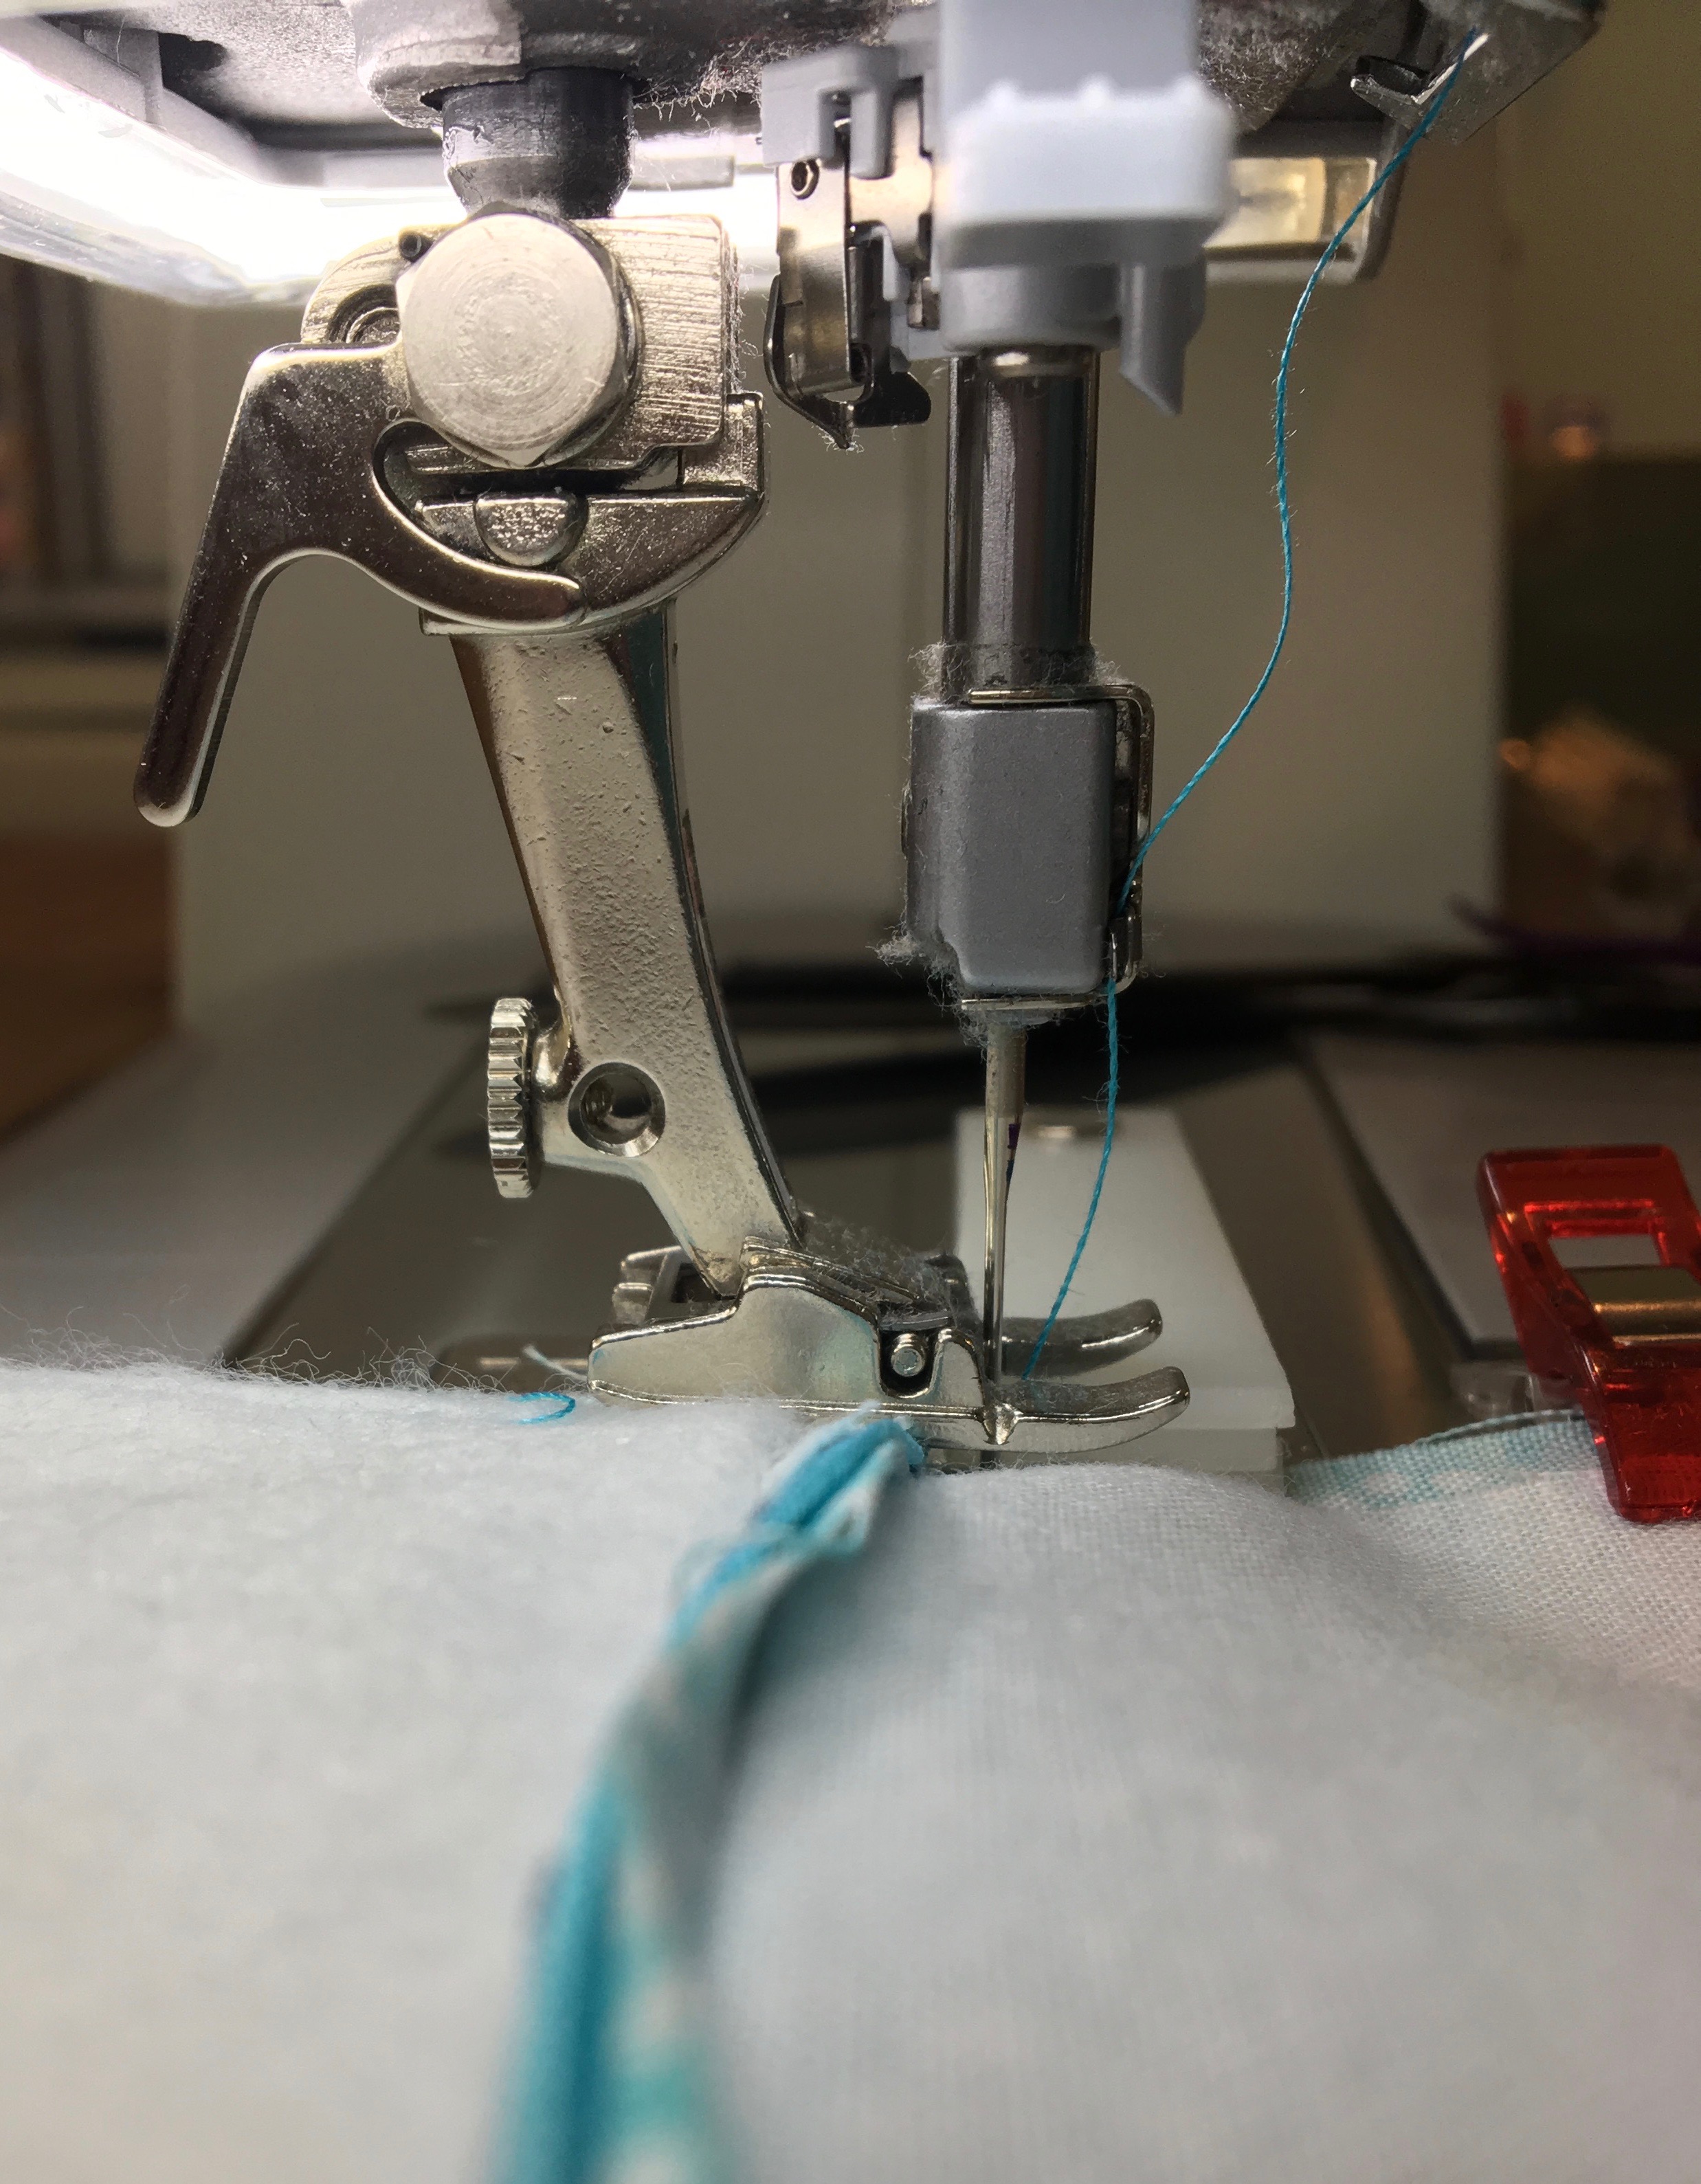
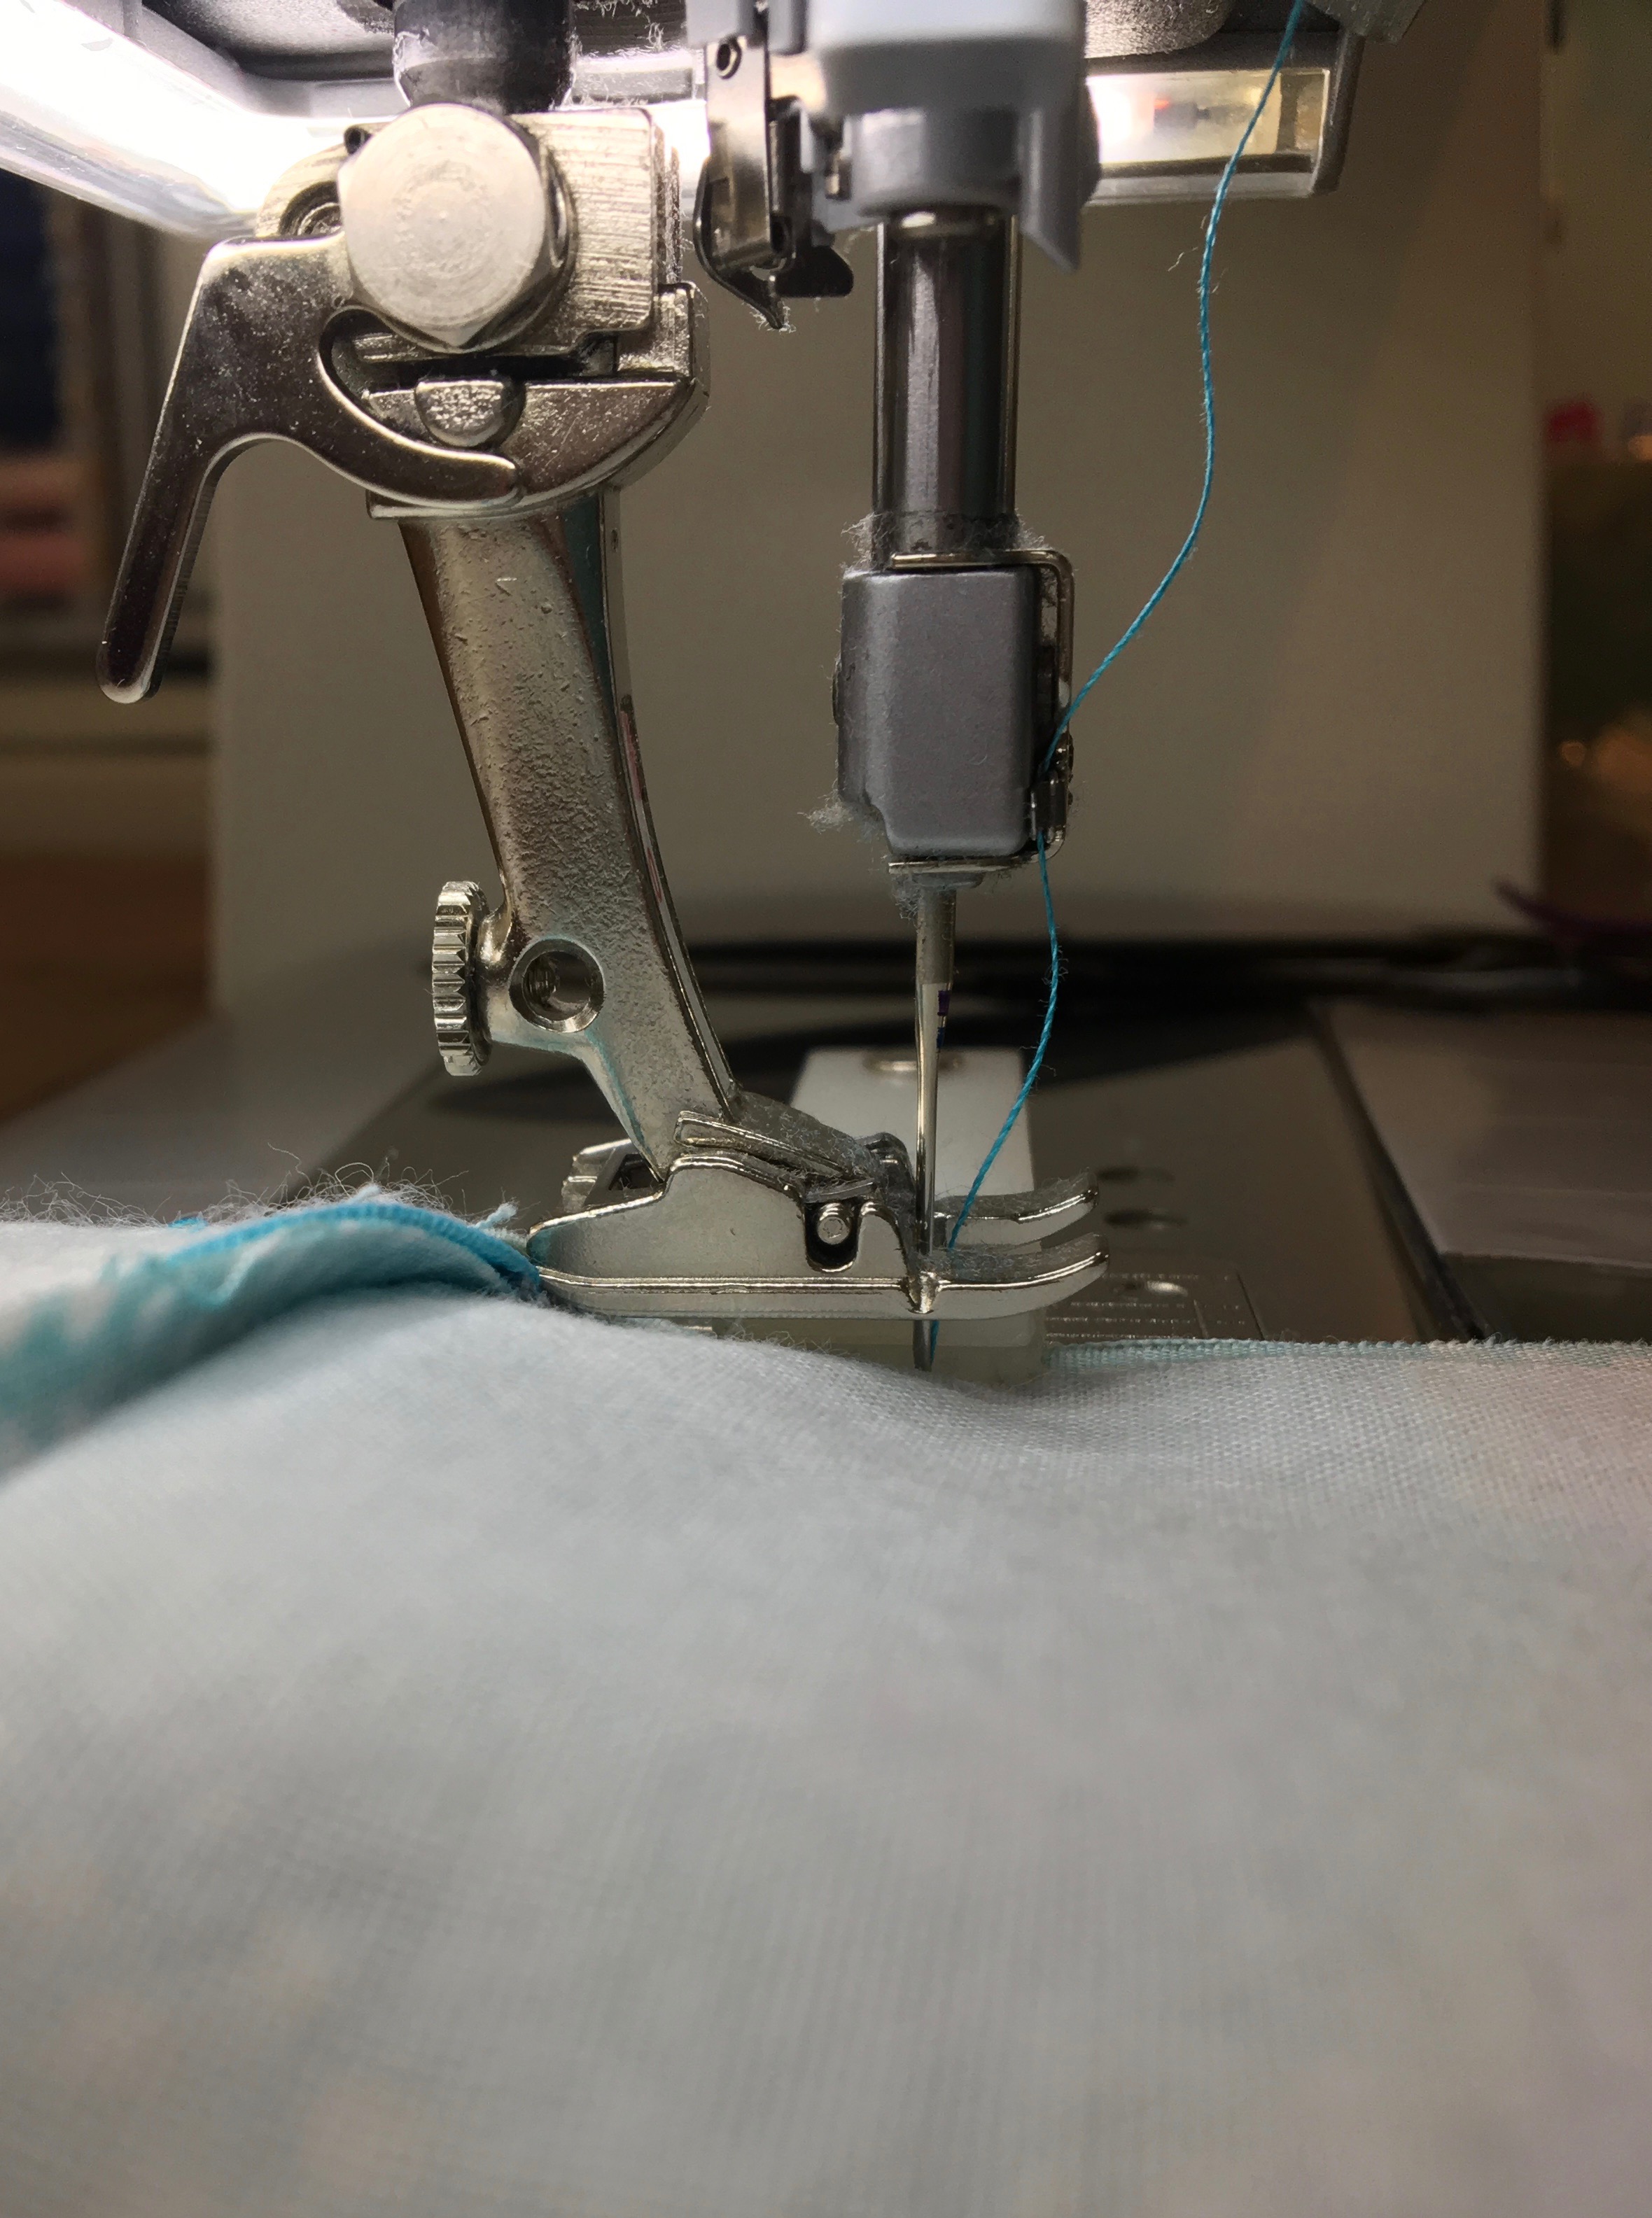
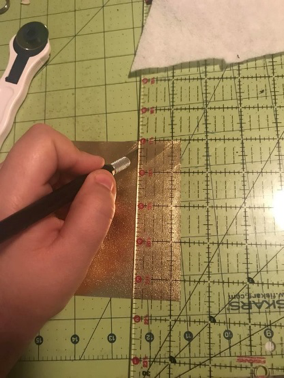
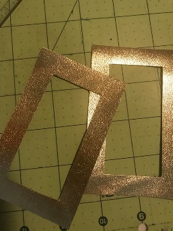
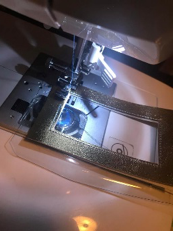
To make the ID window cut two pieces of vinyl measured 4” x 2 ½”.  Mark a square on the inside measuring a half inch on all sides.  Cut the square out on both pieces of vinyl.  Add your clear vinyl piece and sew together with raw edges. 

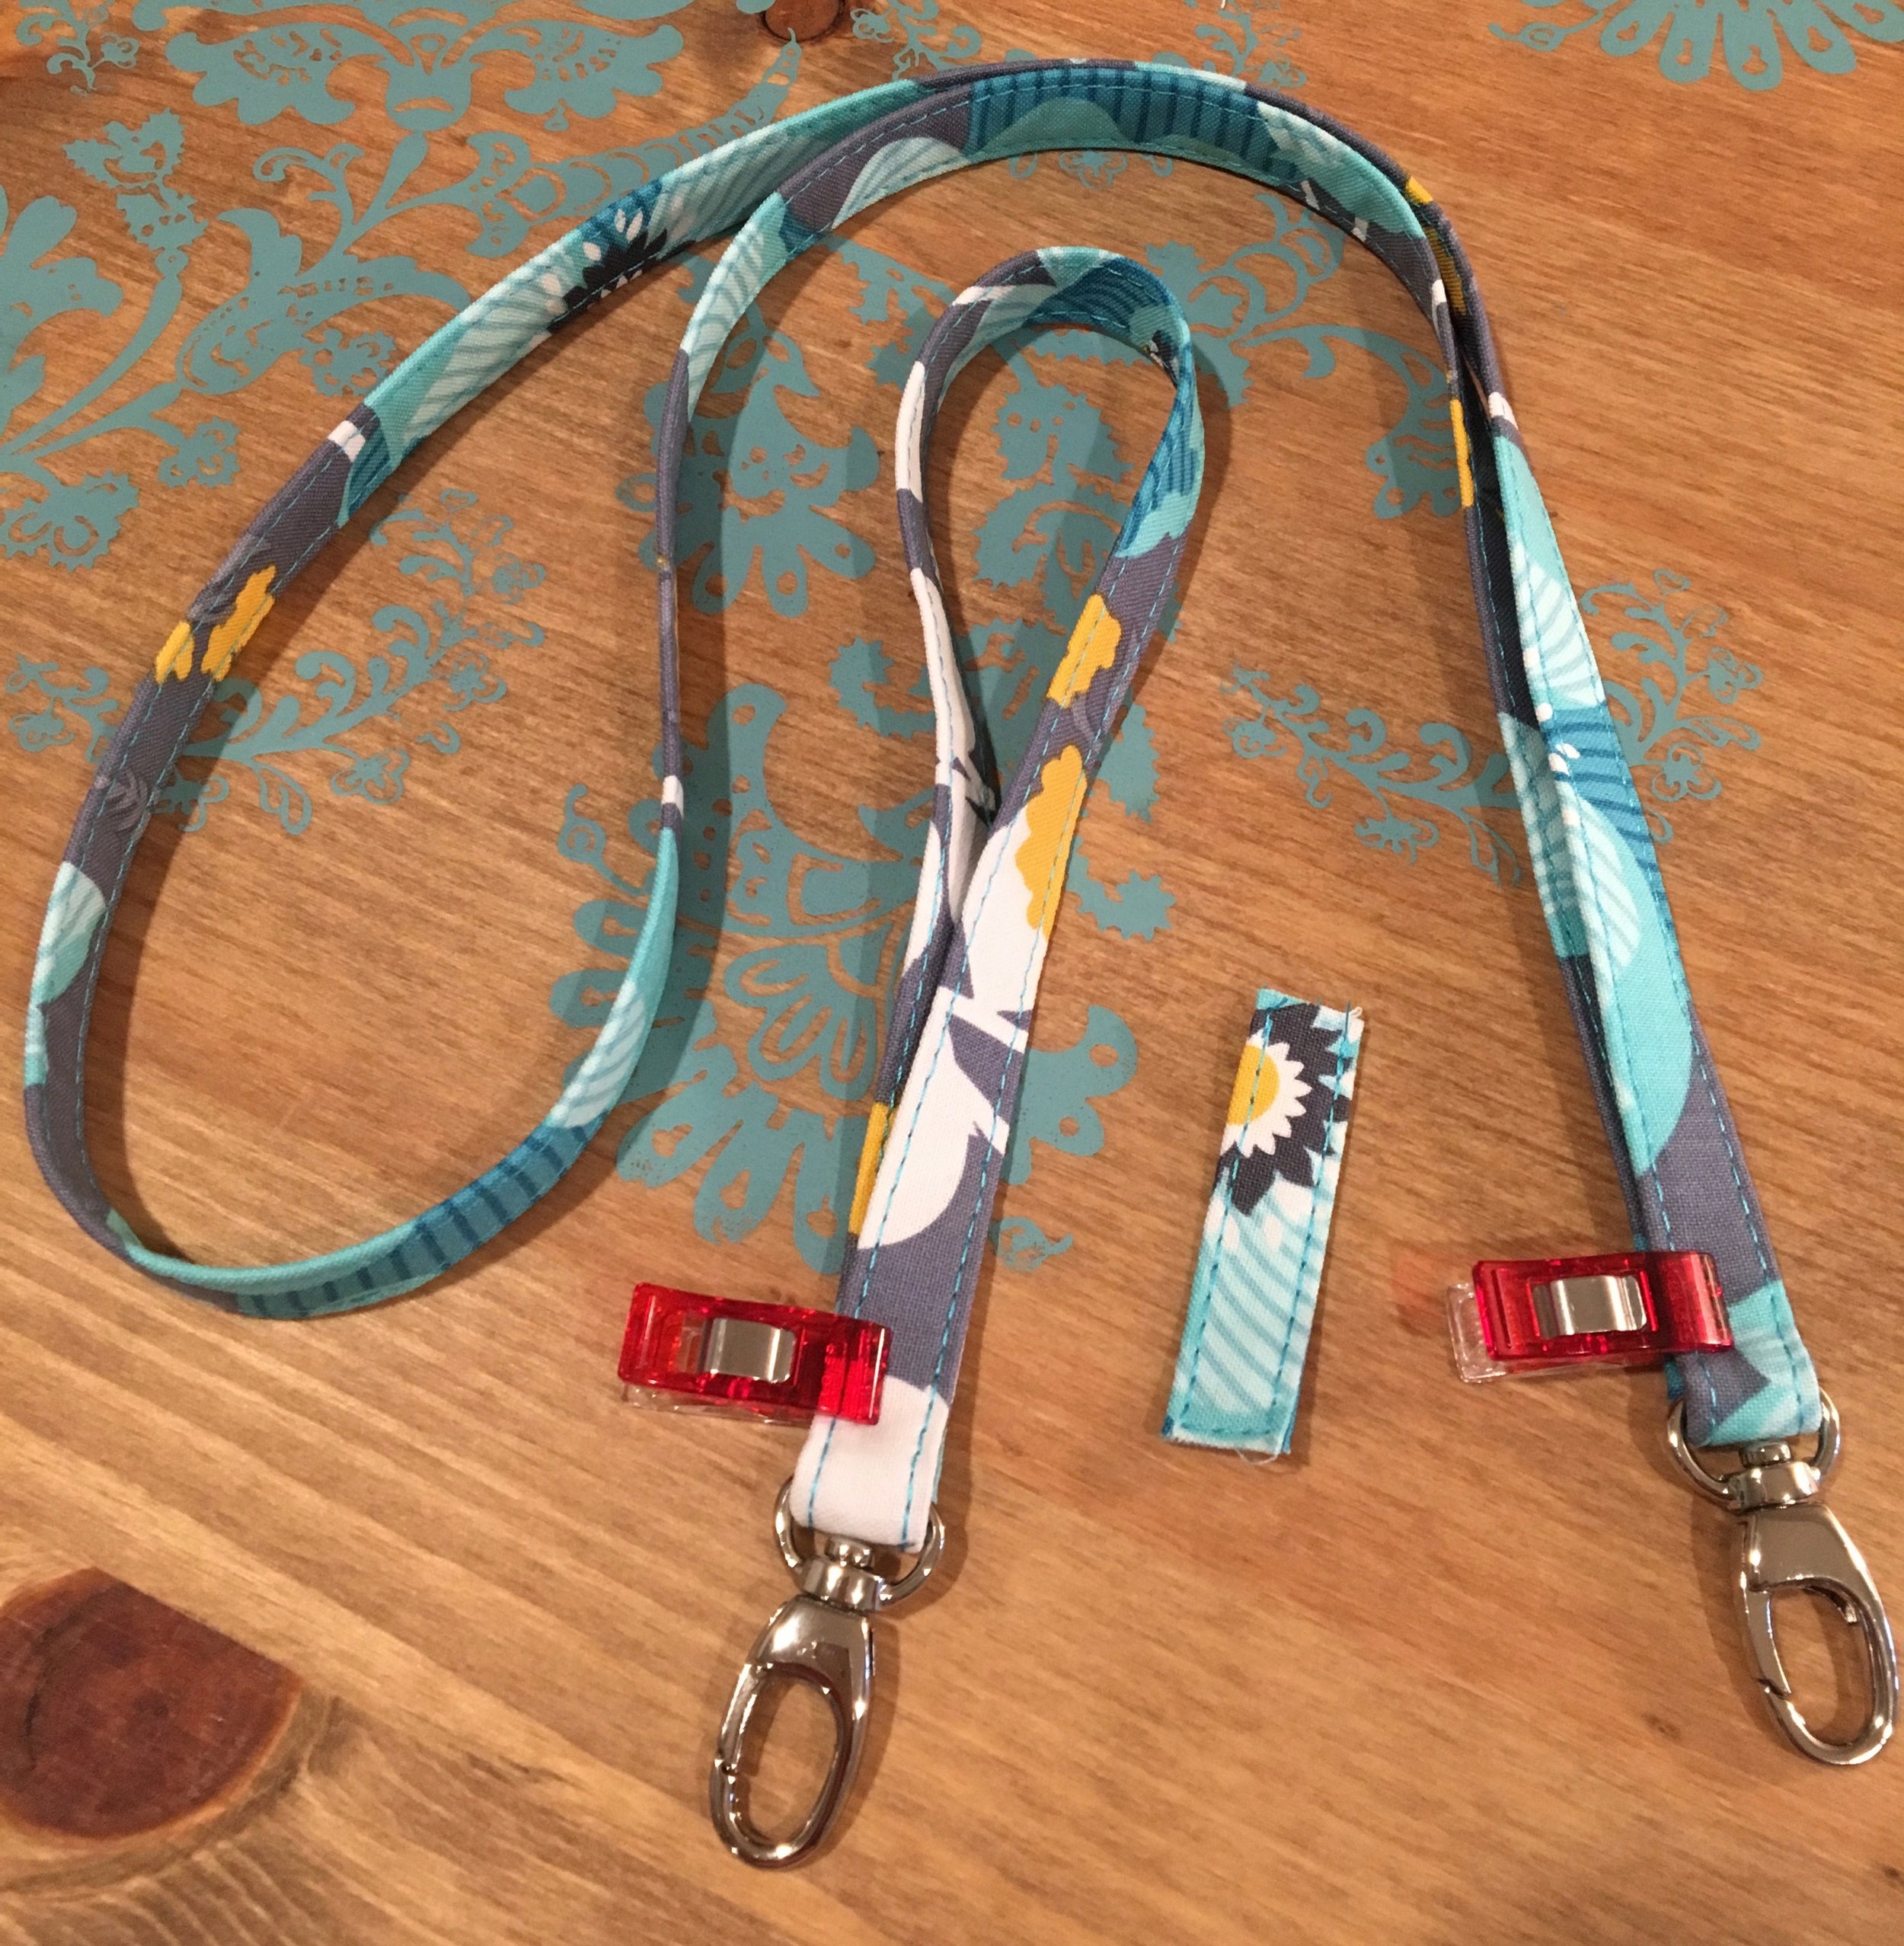
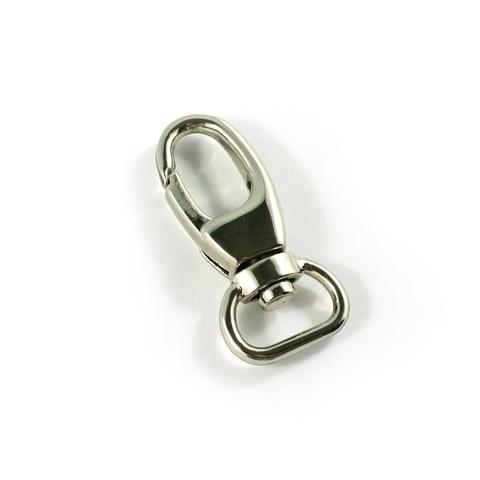
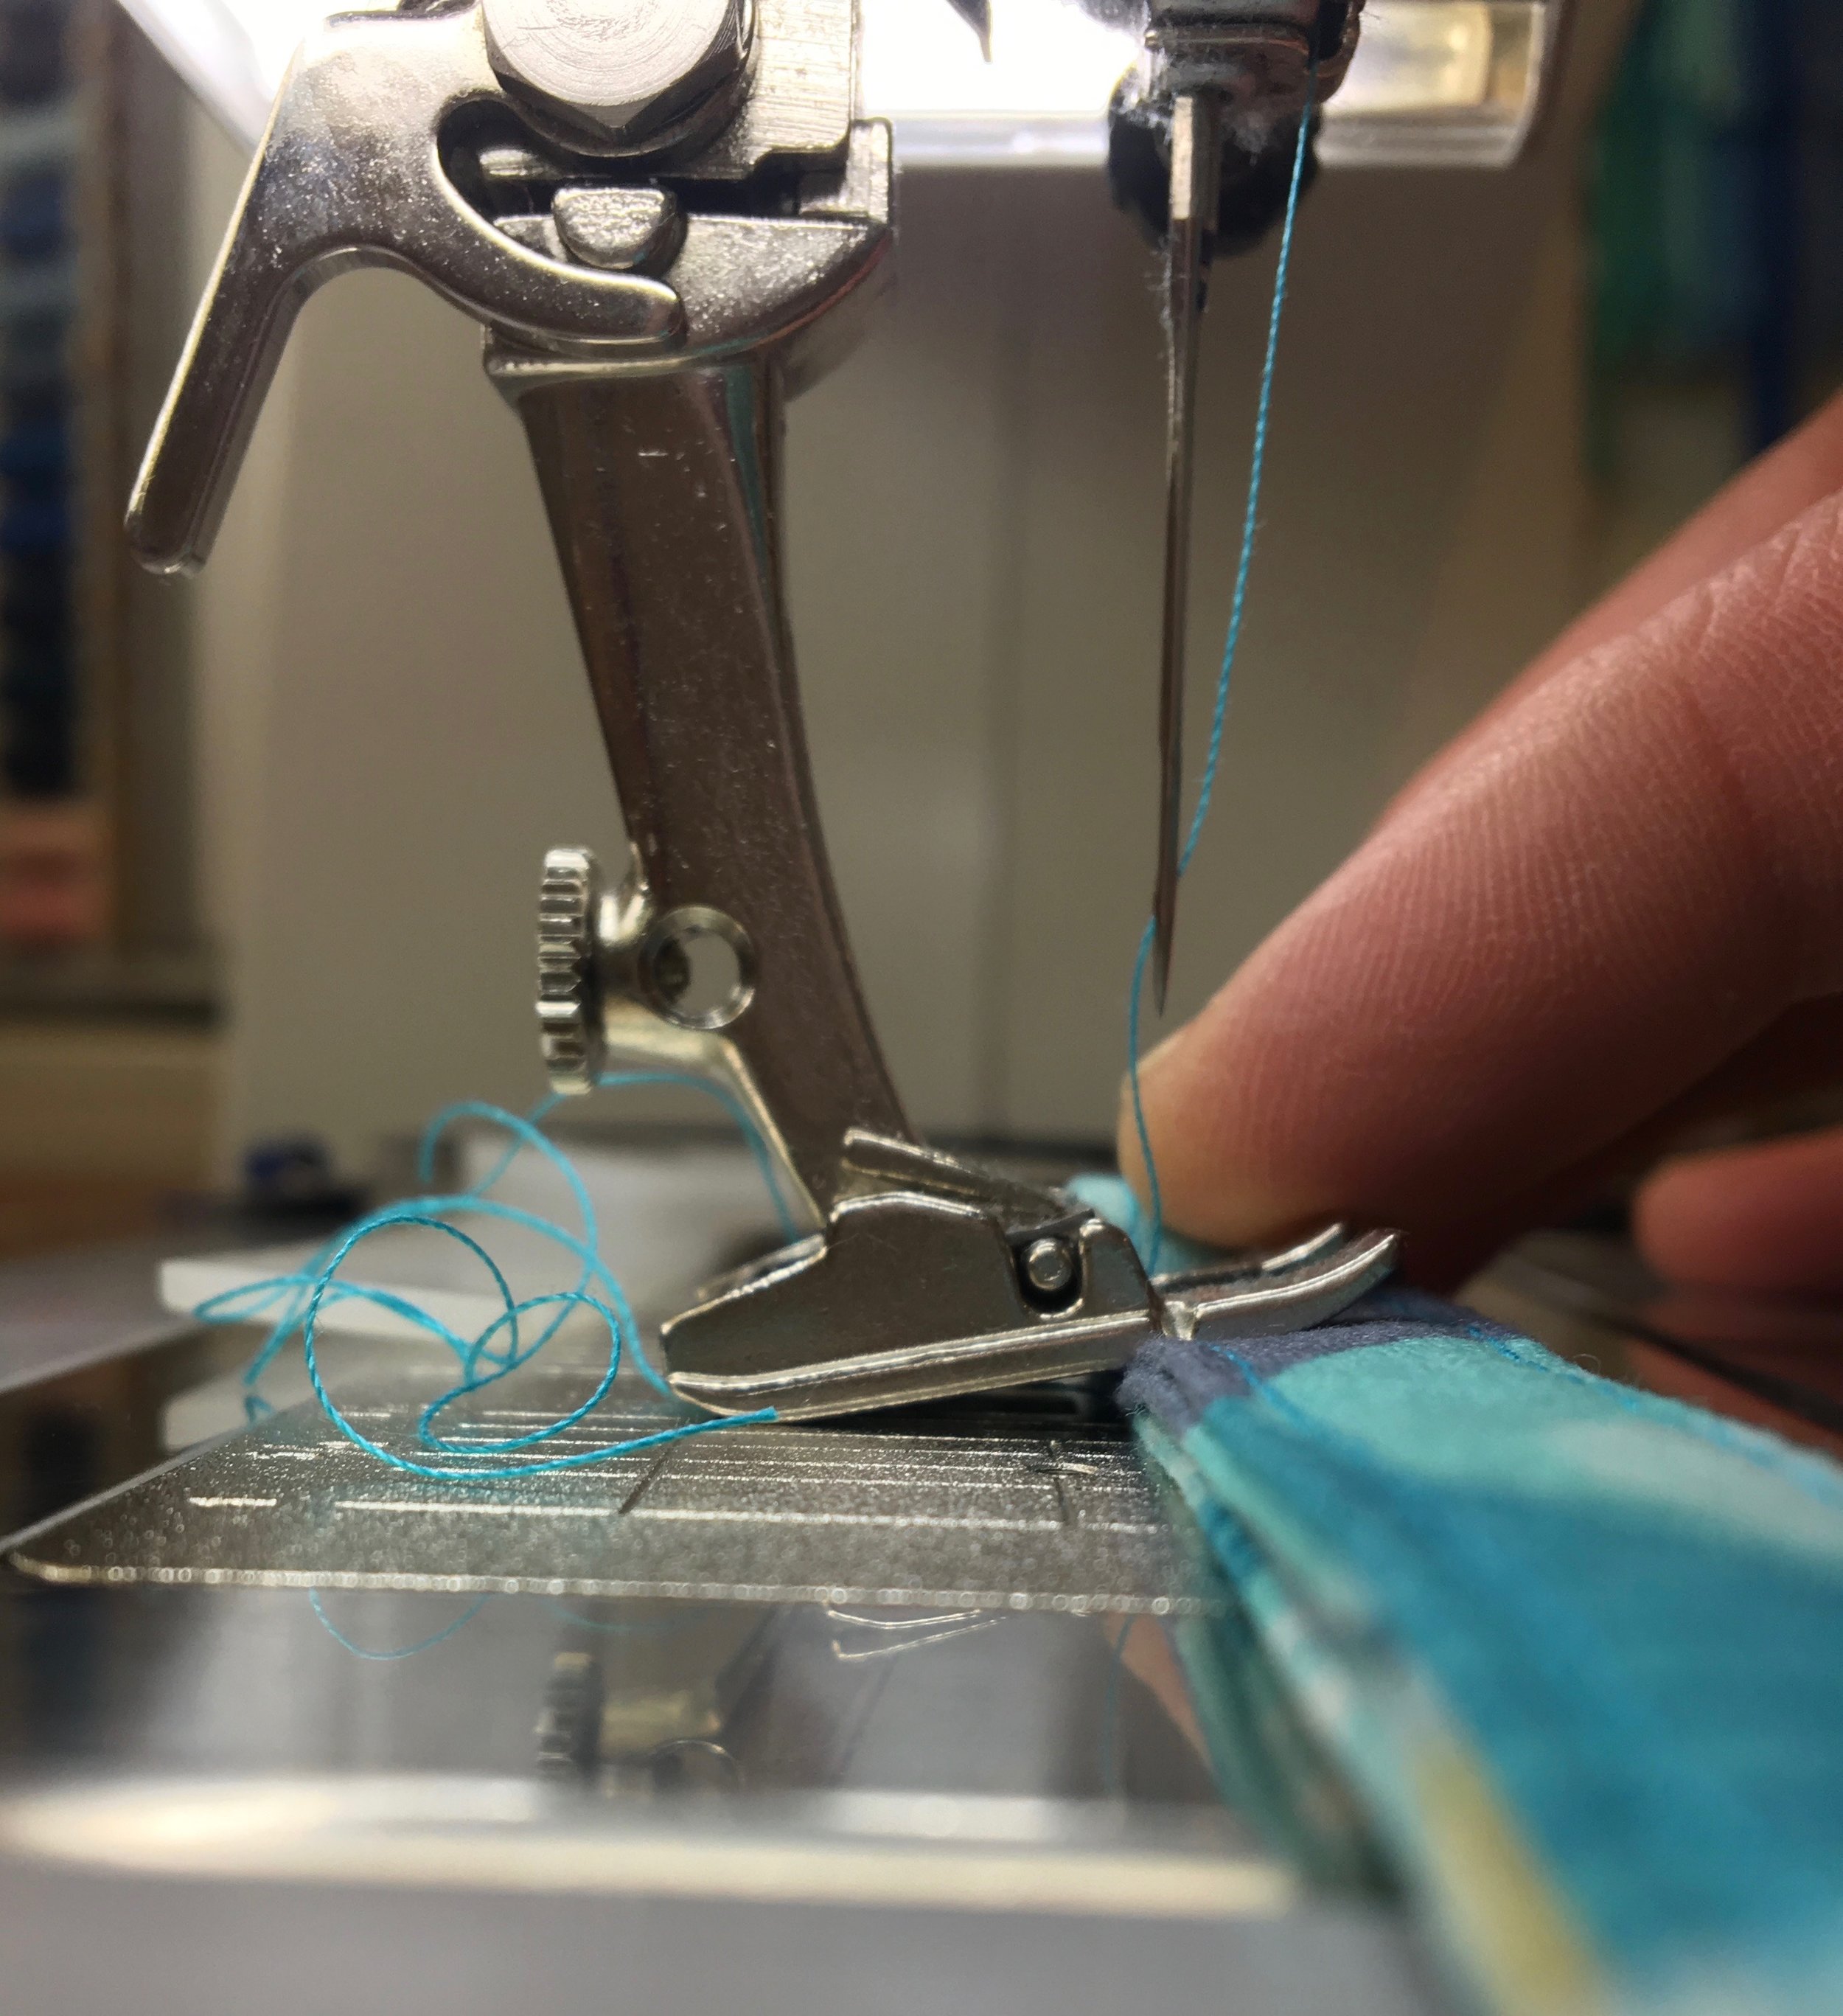
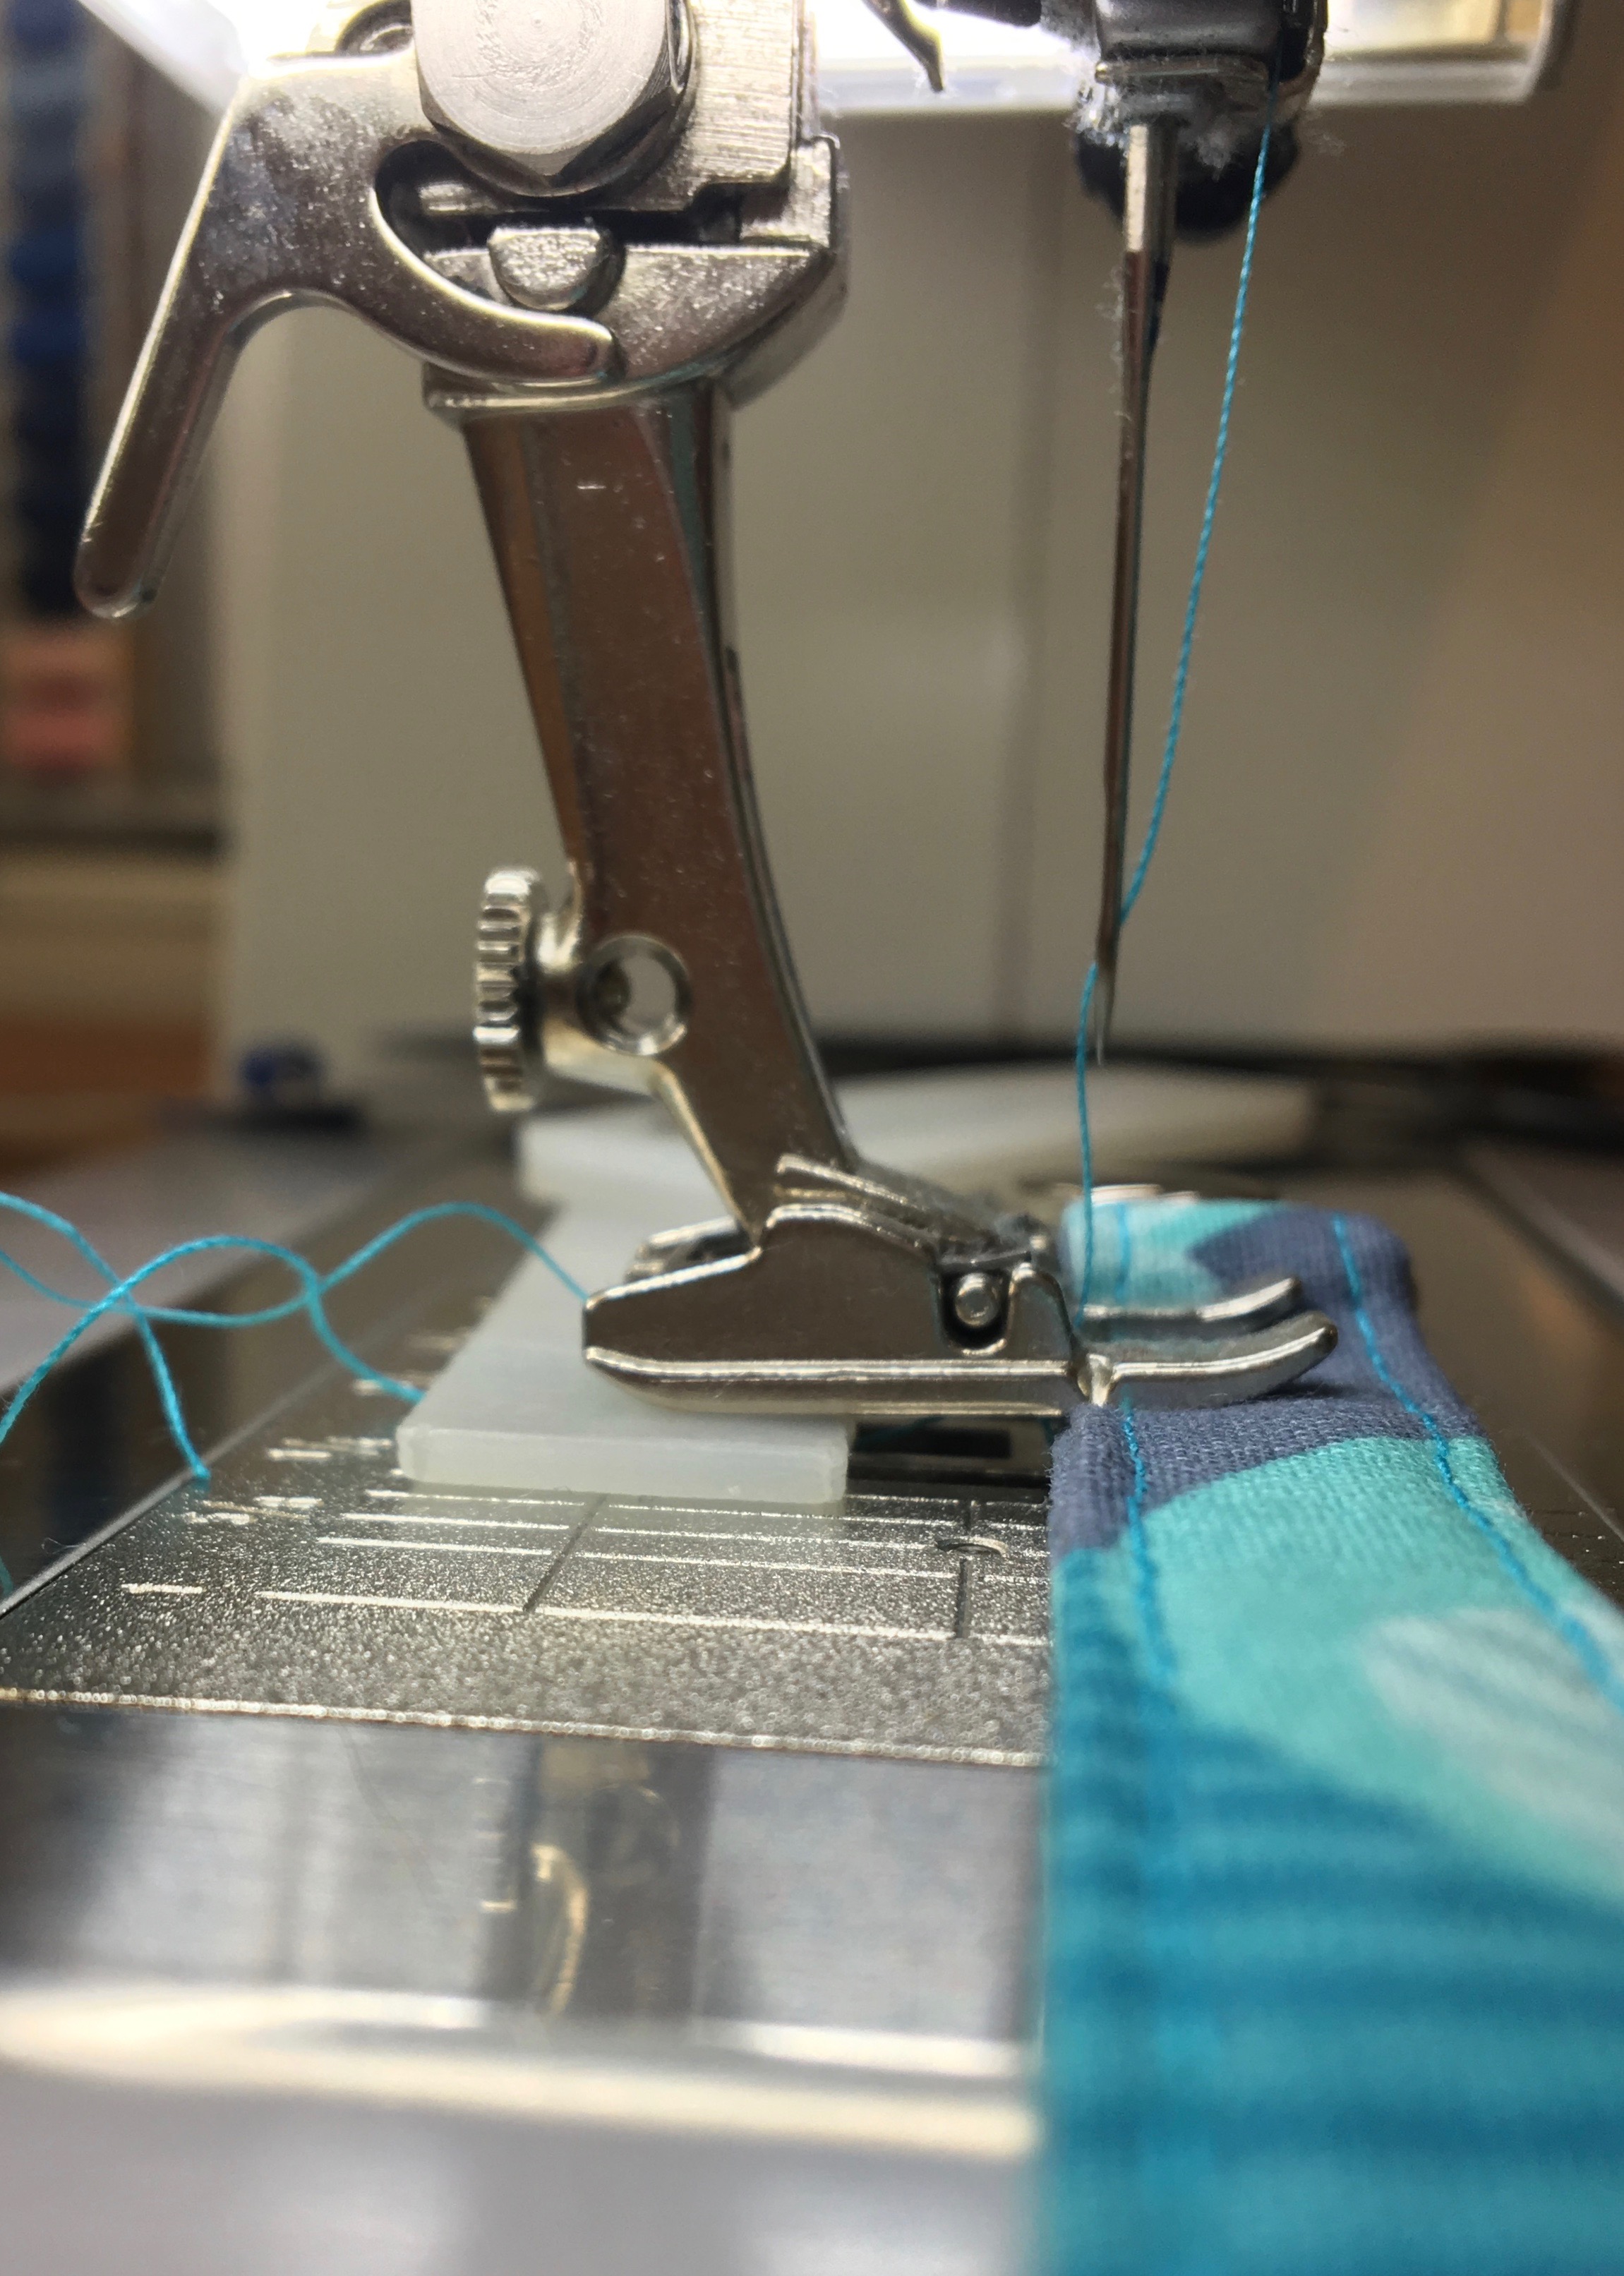
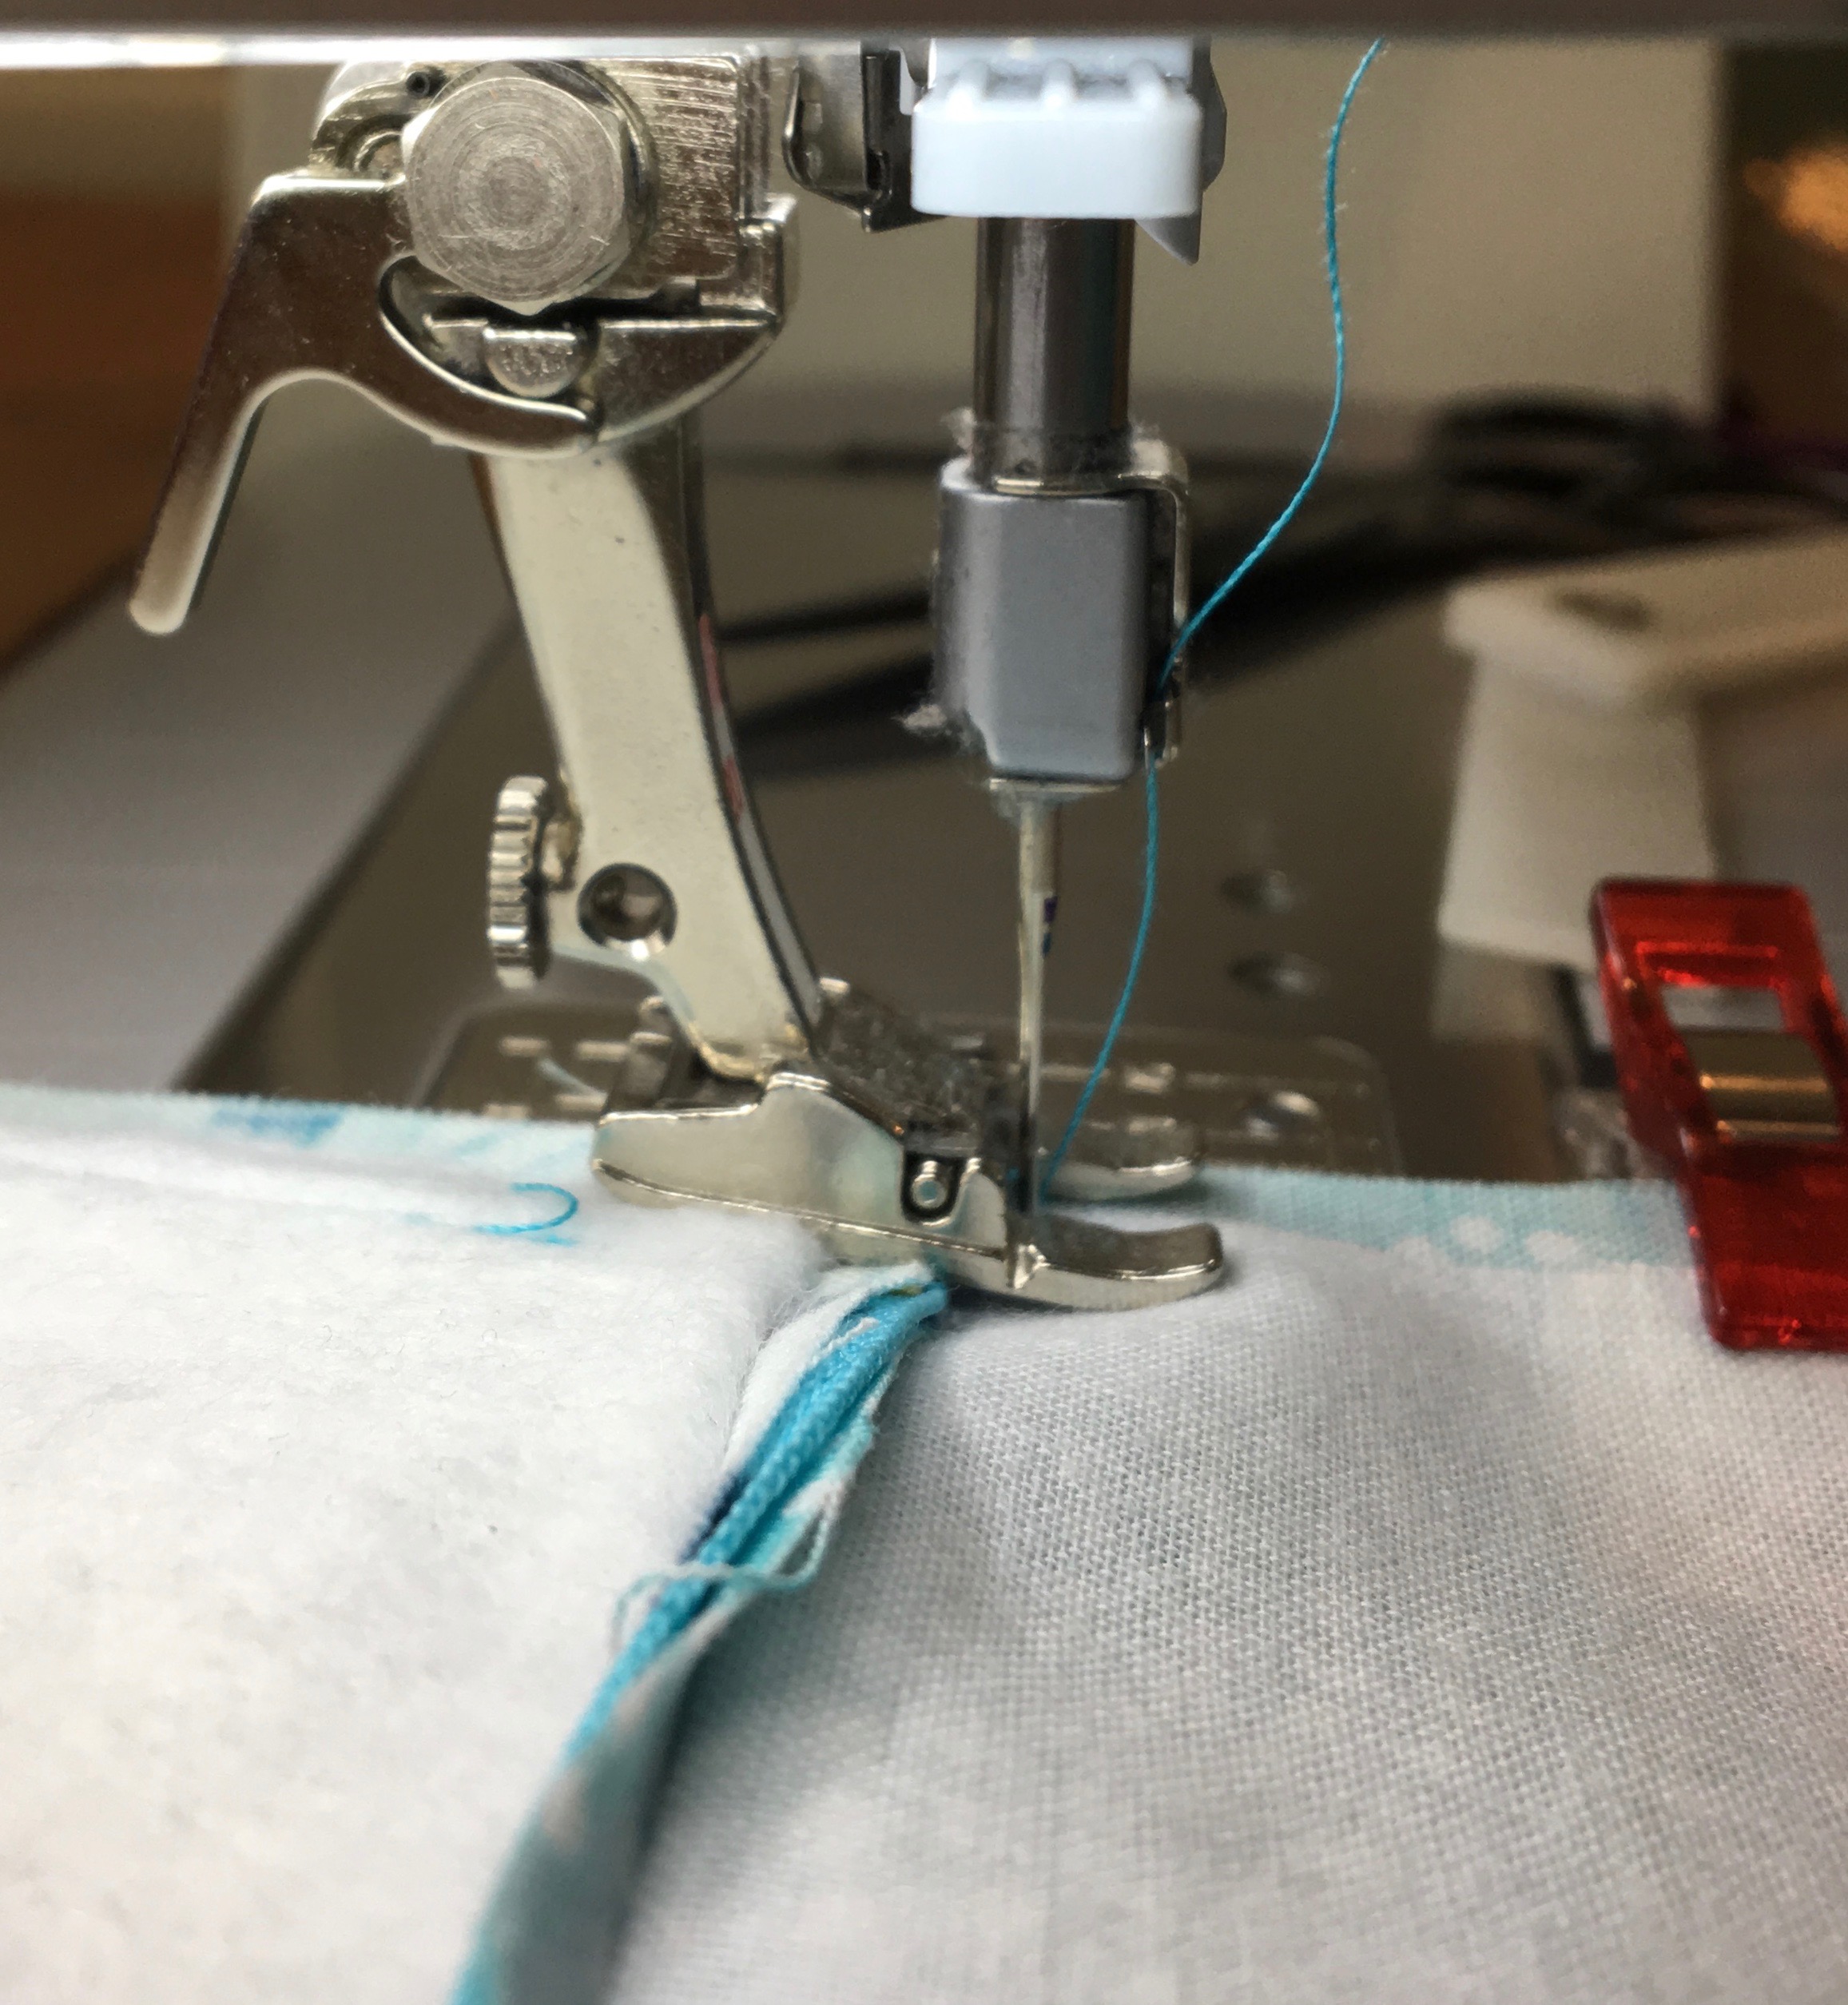
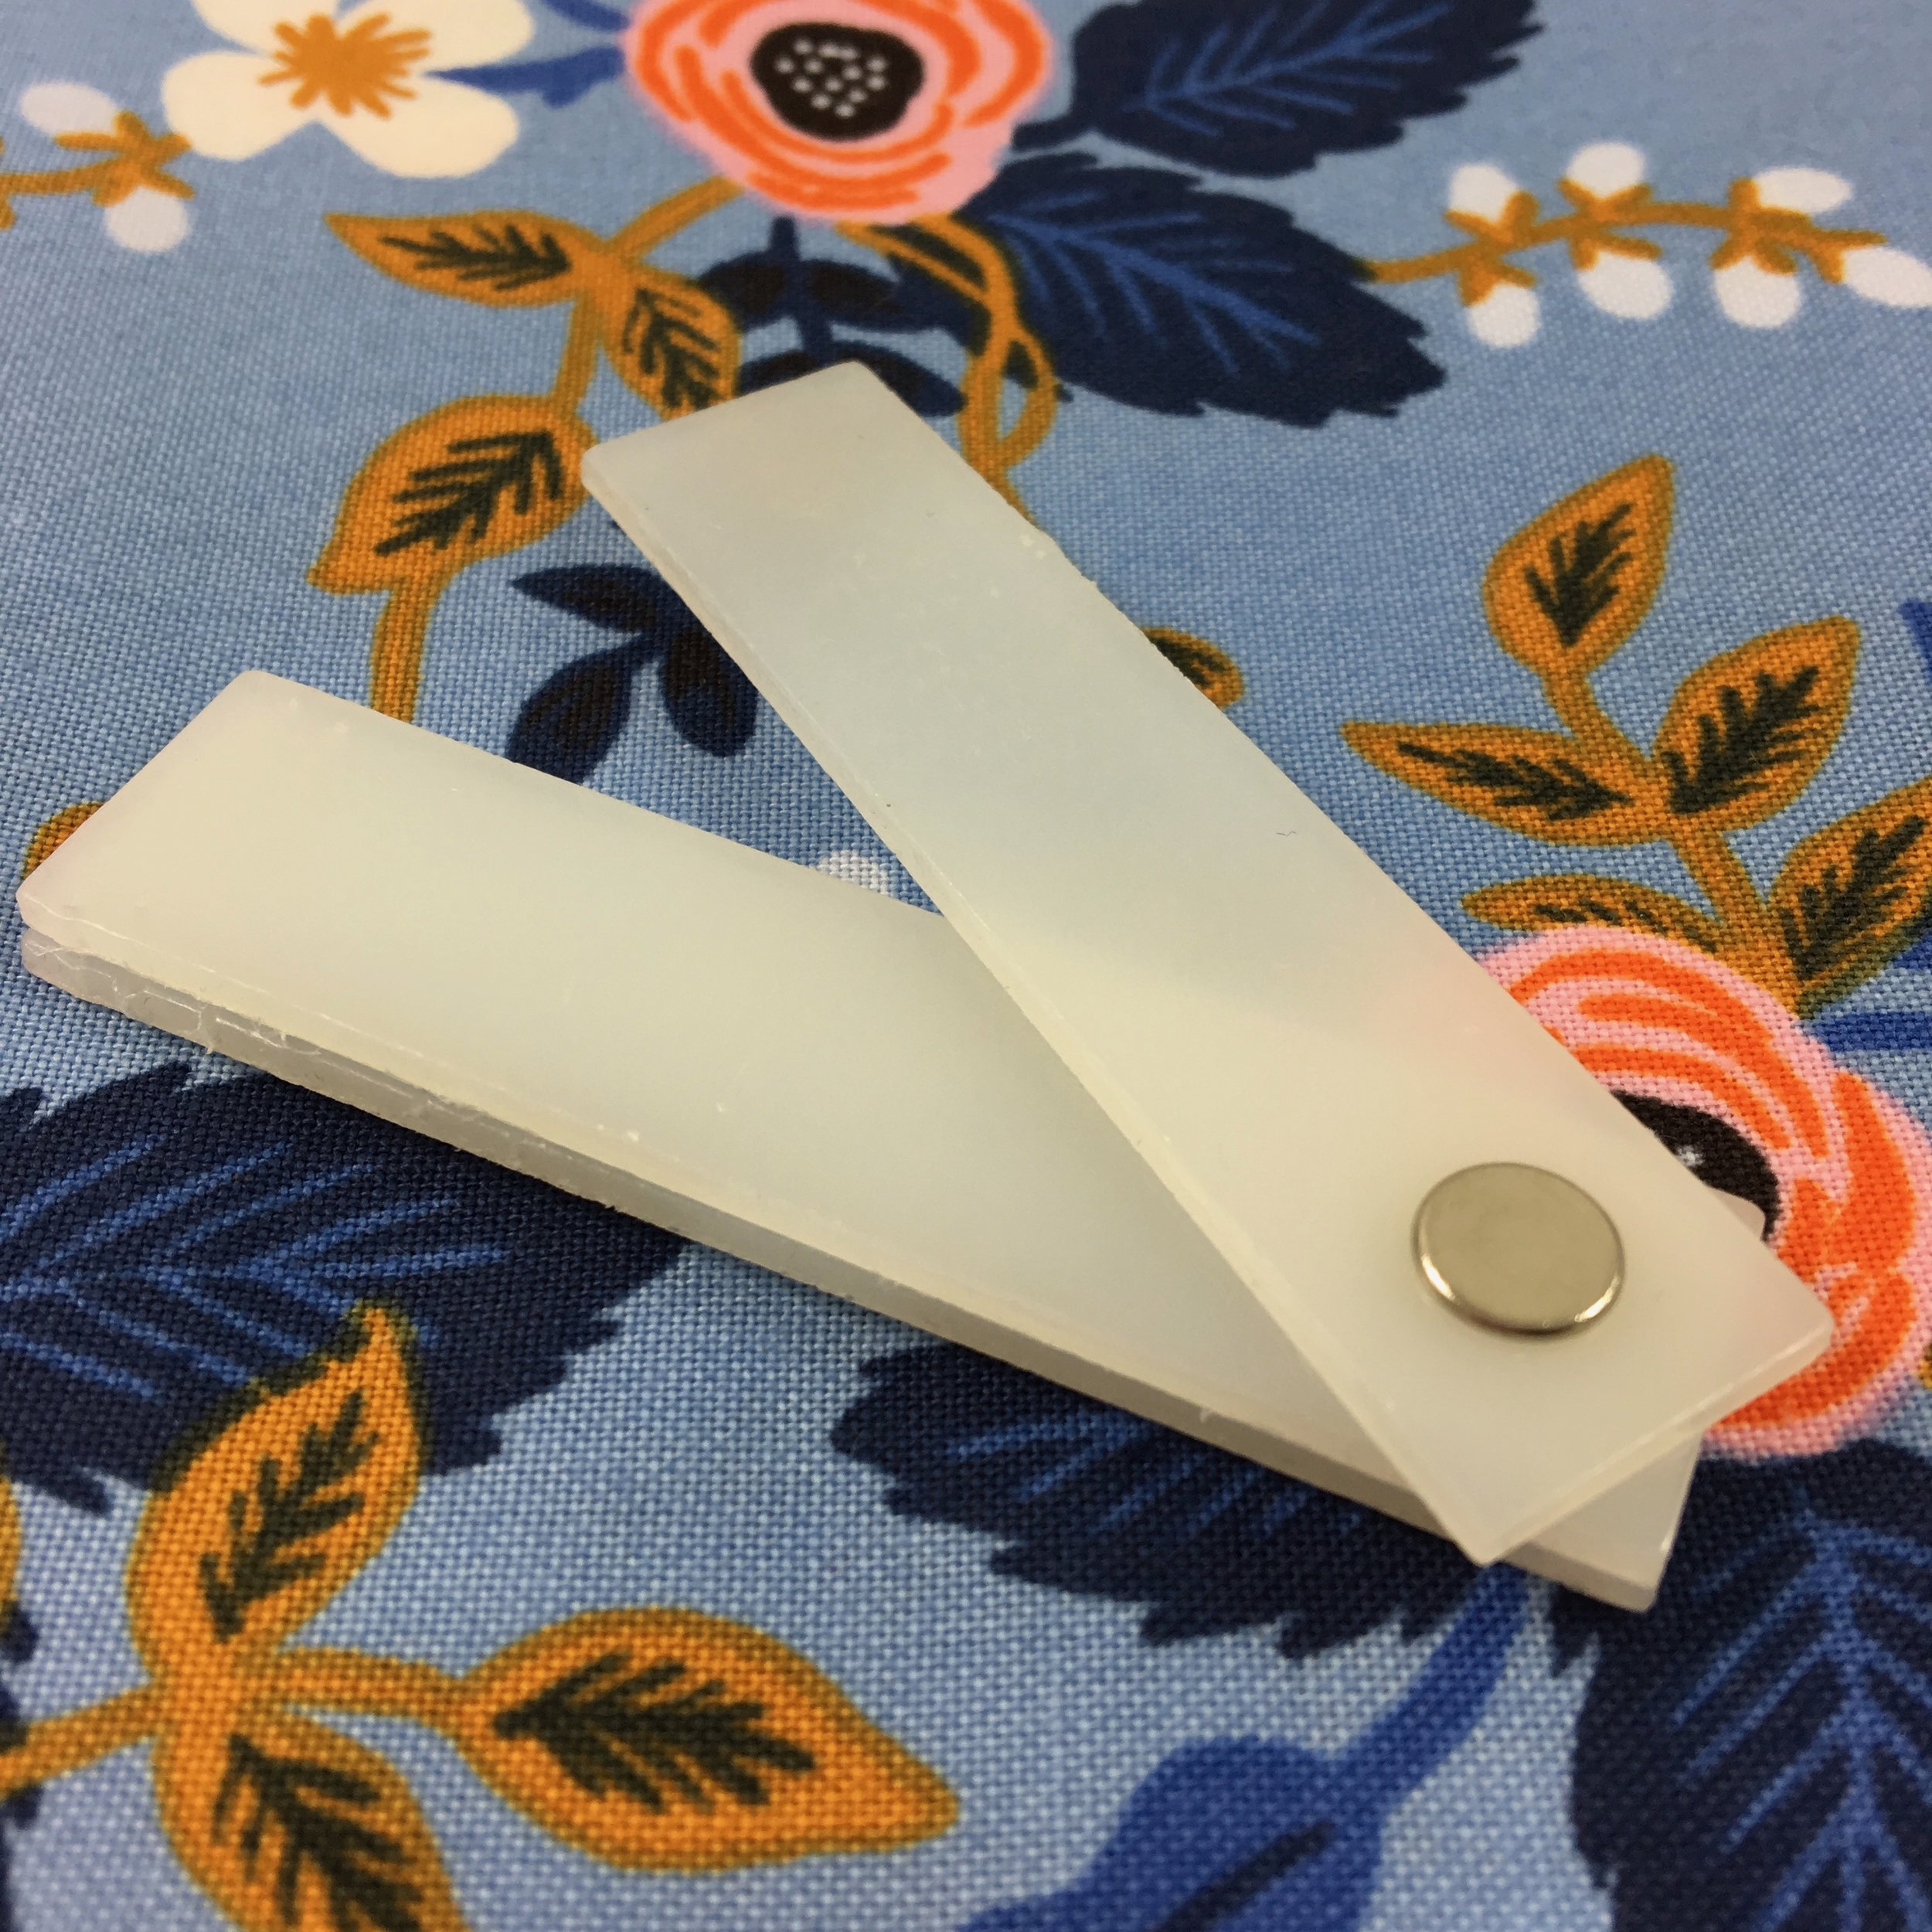
For my key chain strap I cut a piece of vinyl .5” x 2.5”.  Because I use a thin piece of vinyl I fold mine in half to stitch together for stability.  However; if your vinyl is thicker, you should not need to fold it in half.

Jaby20.png

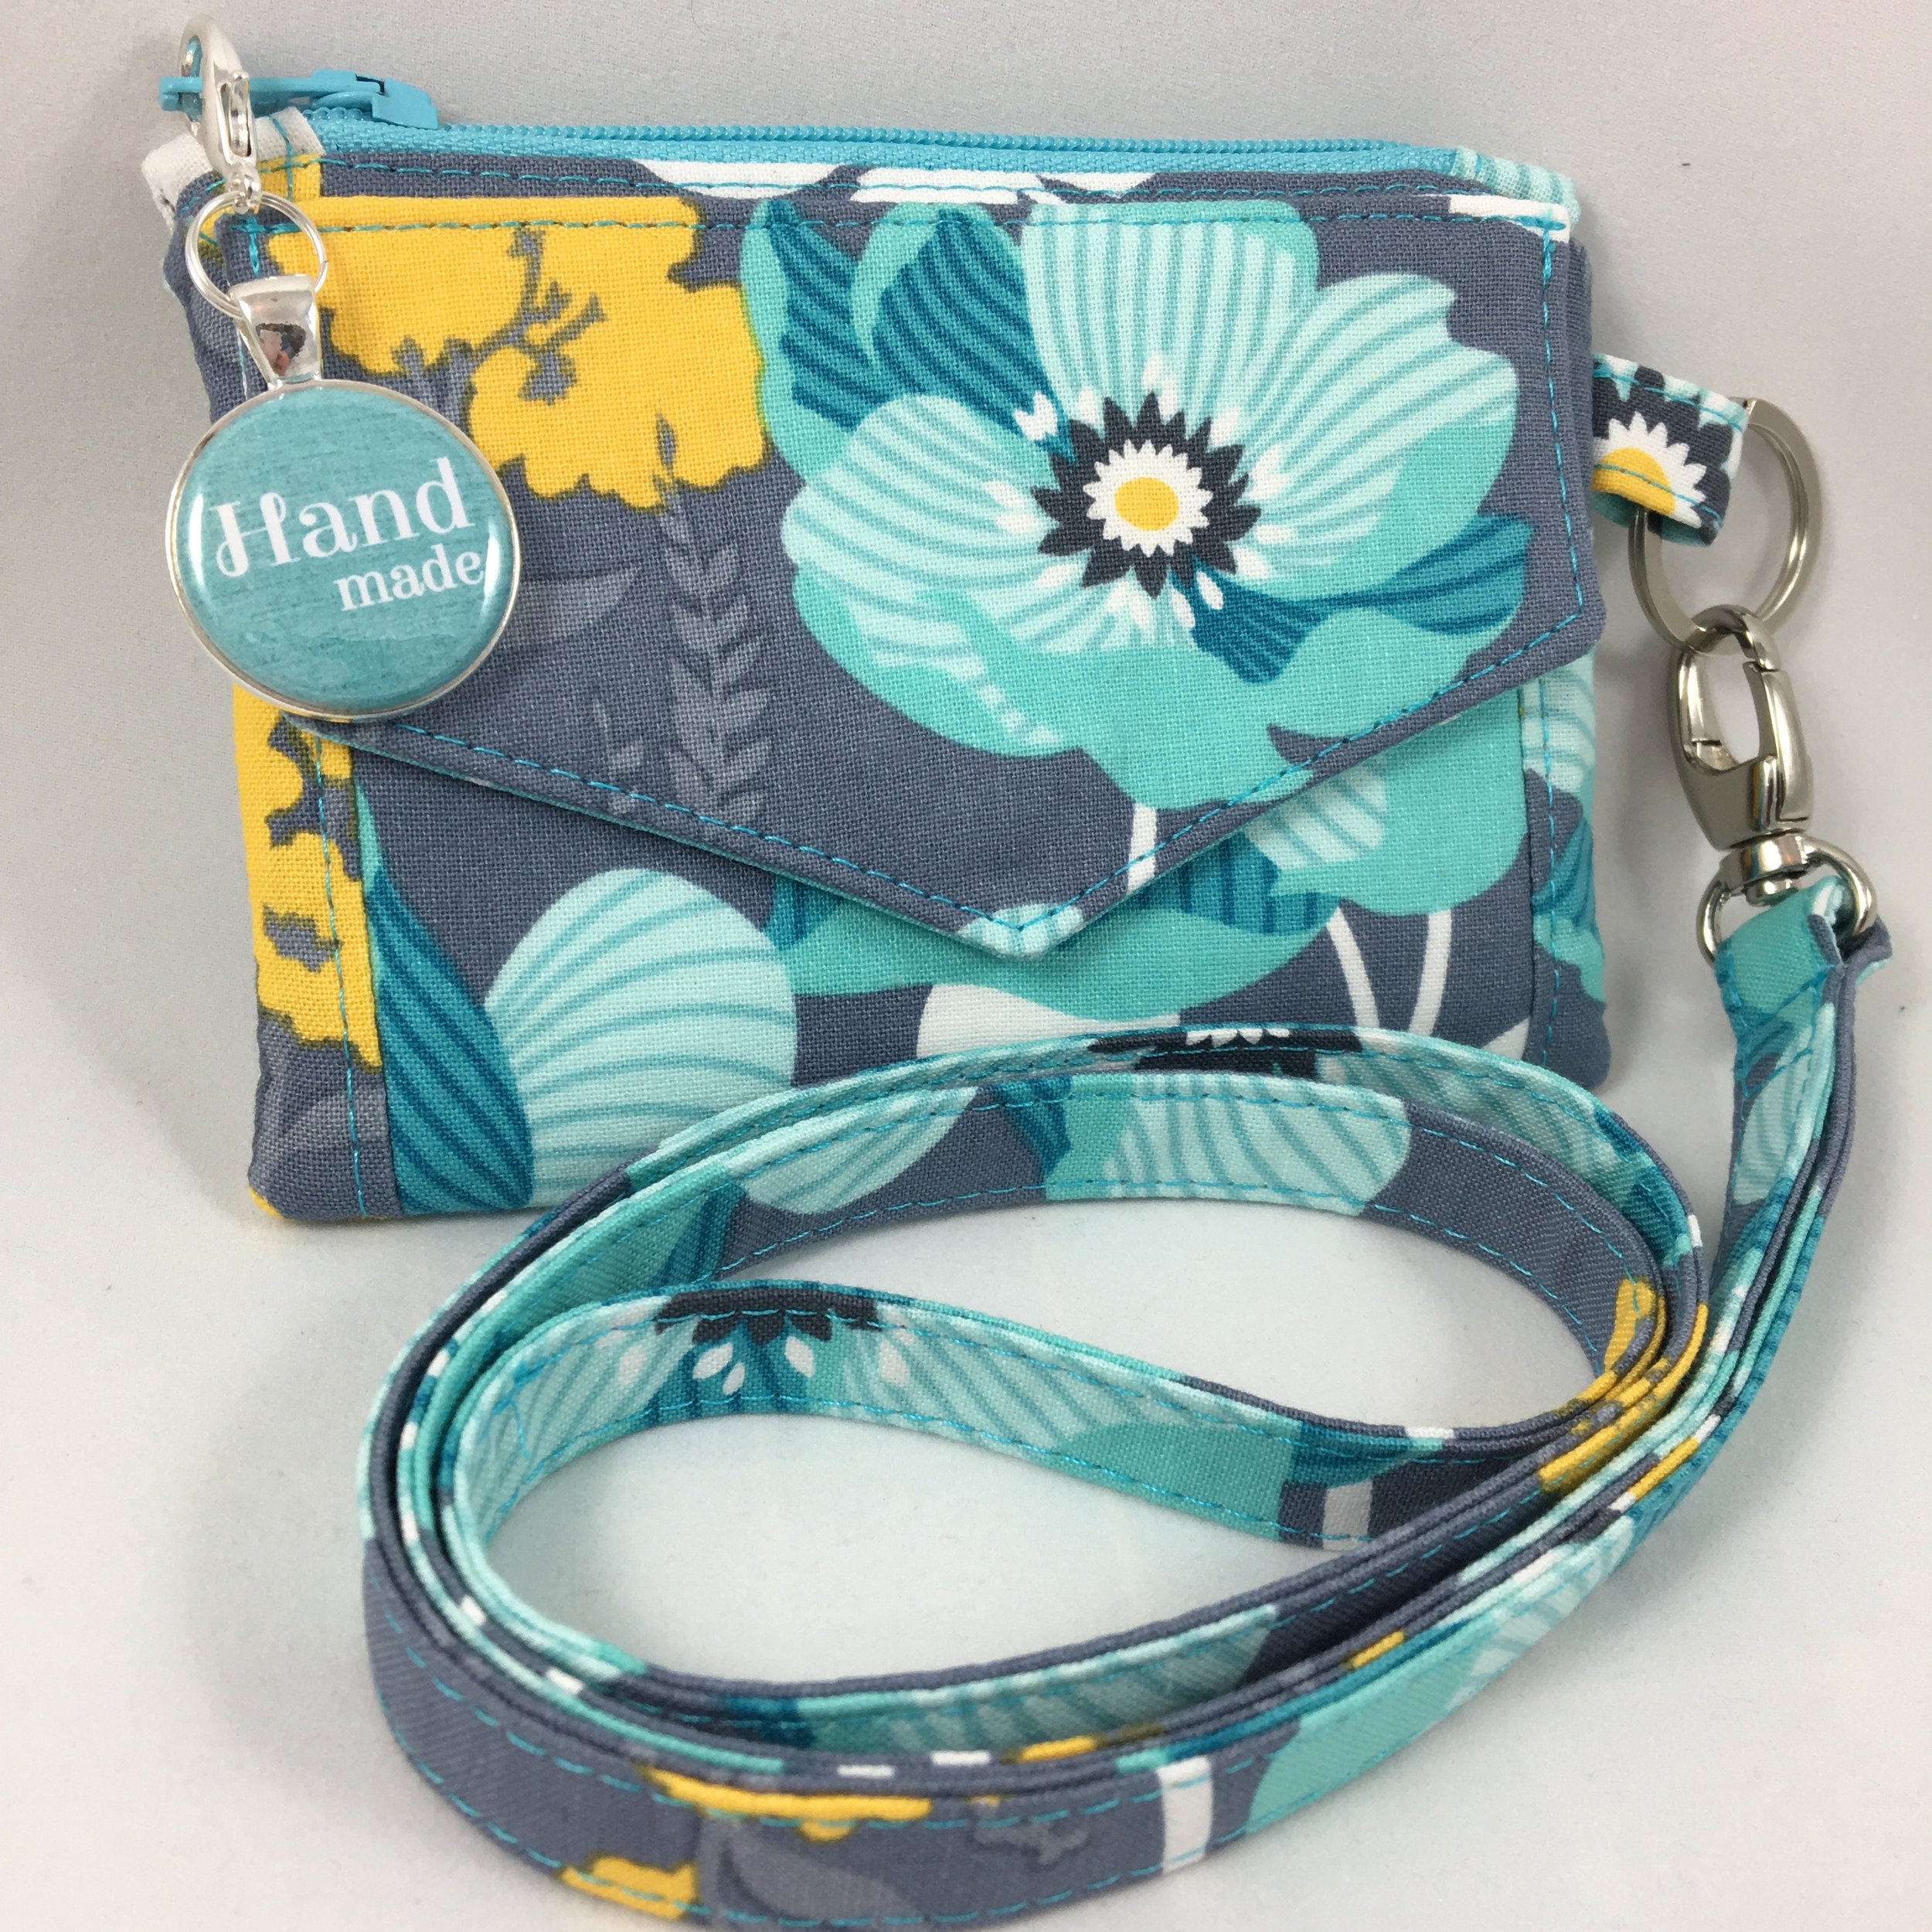
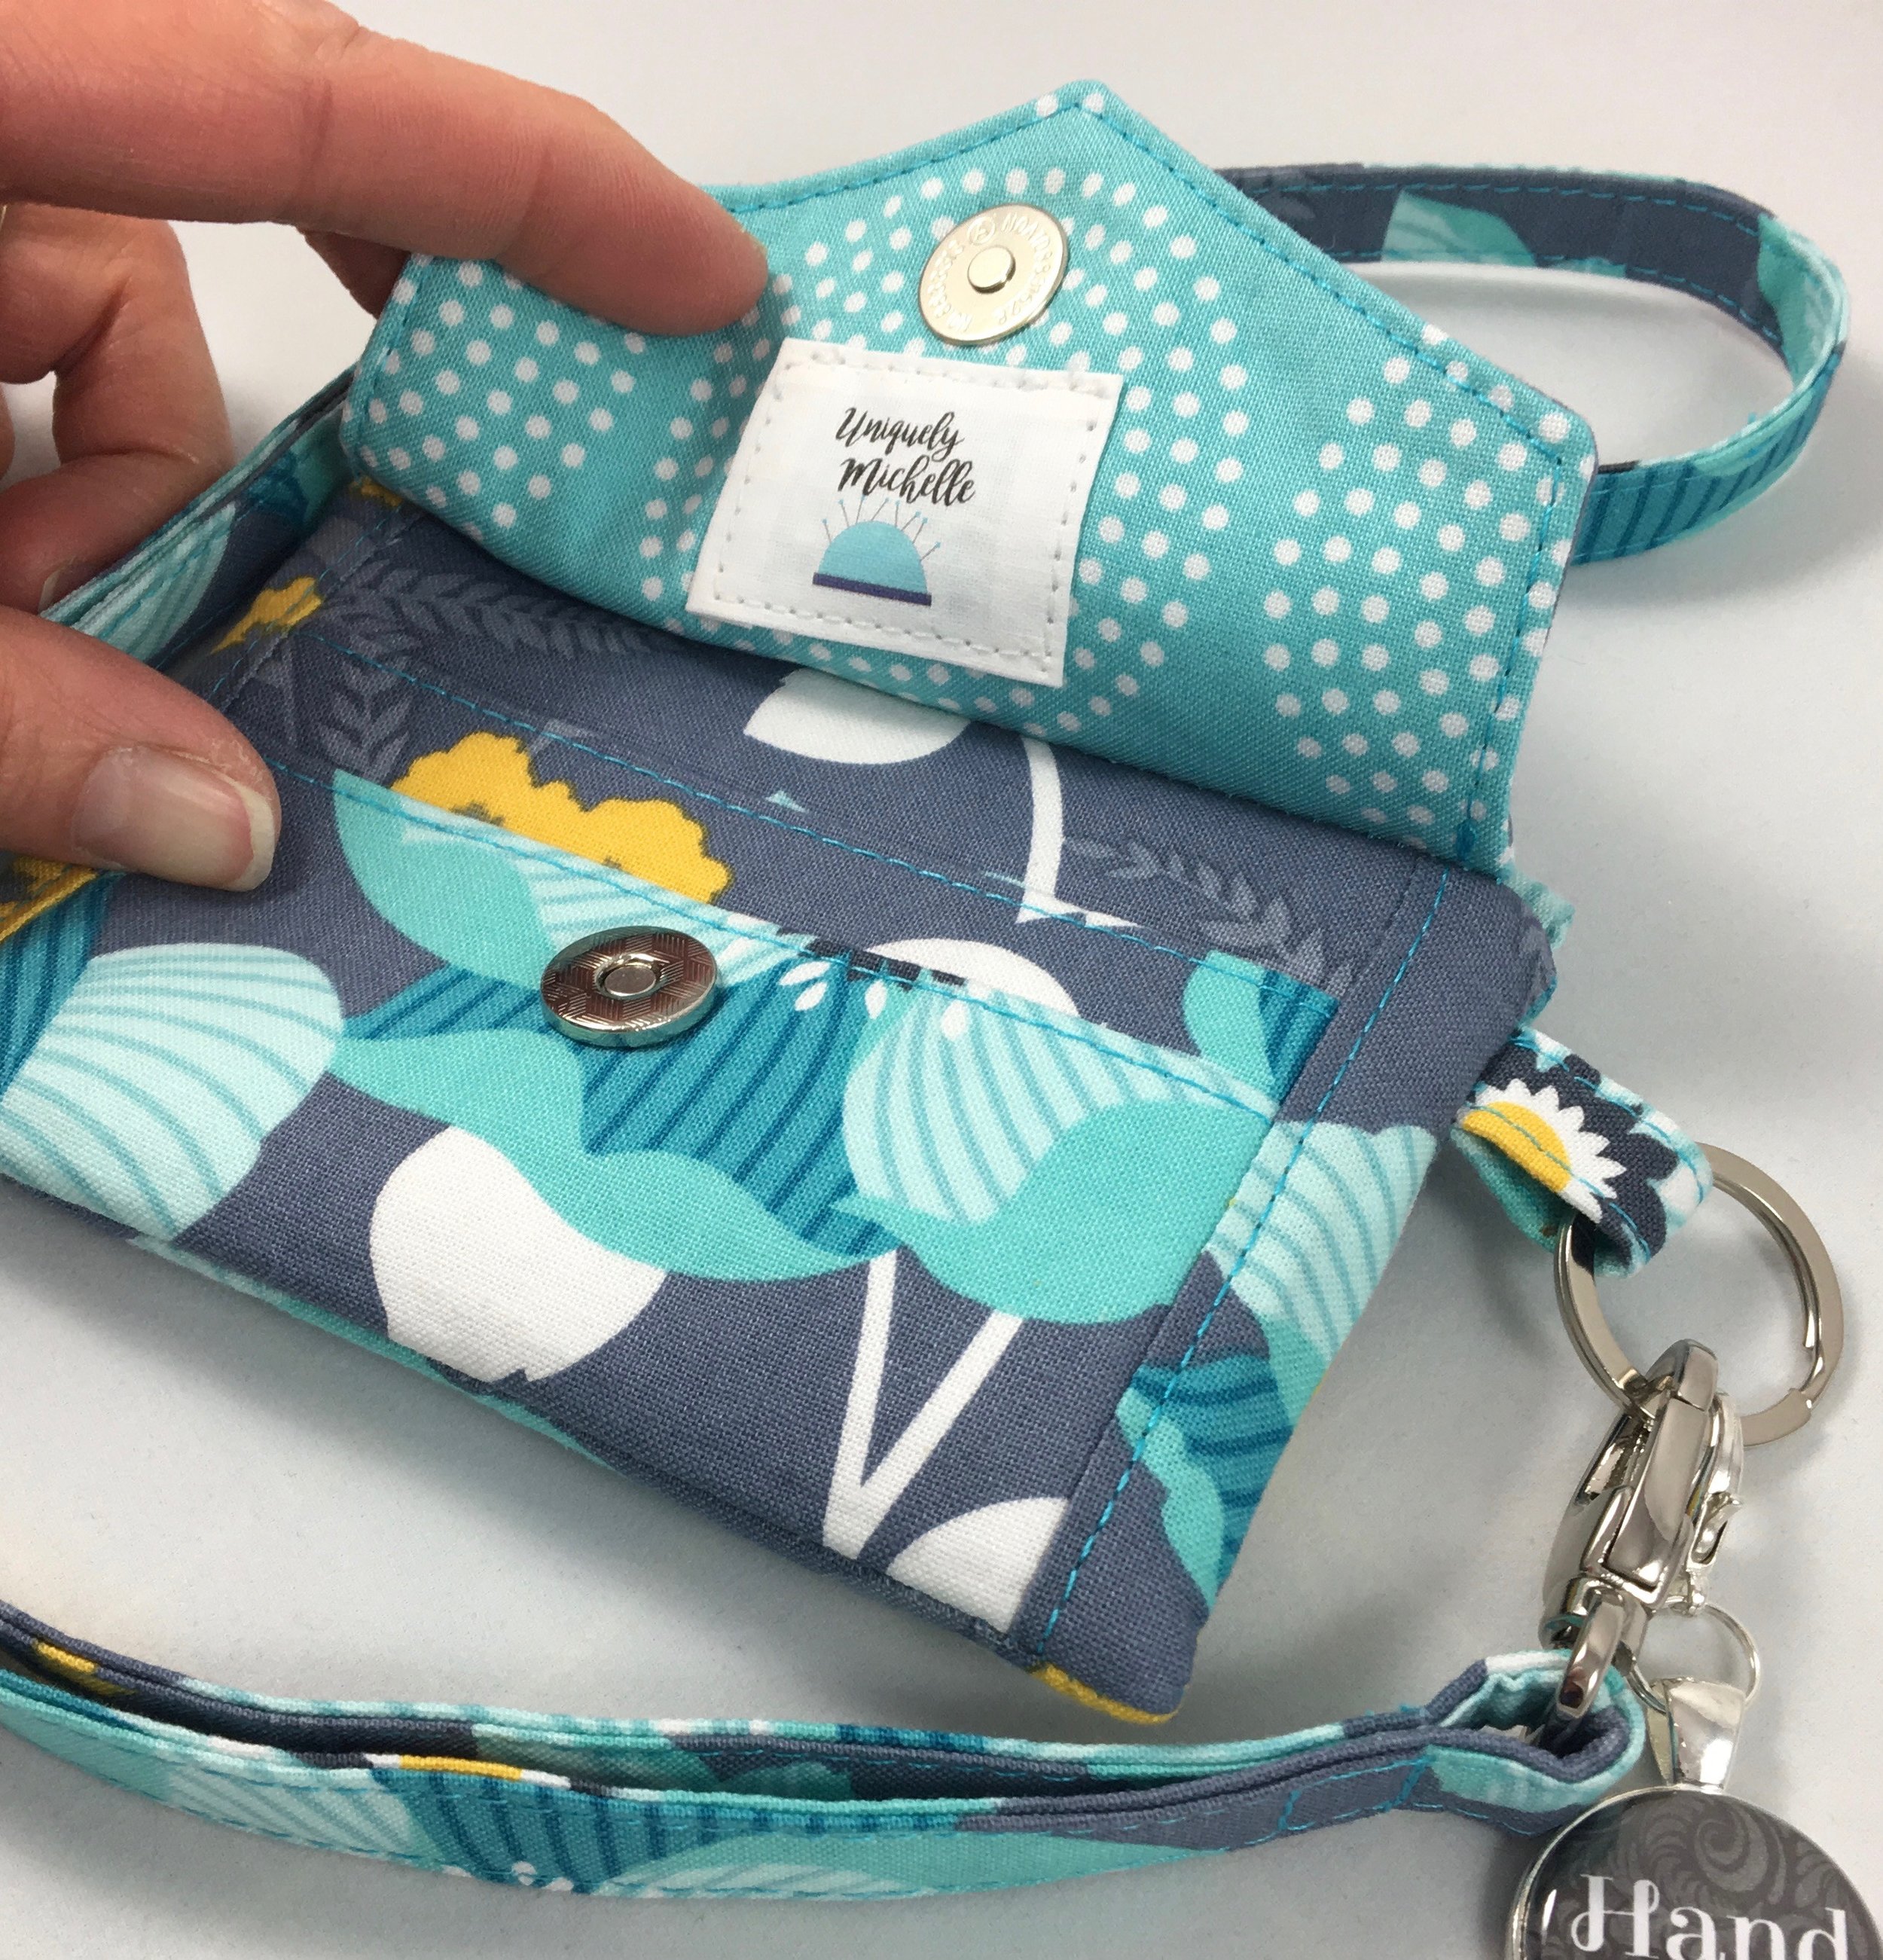
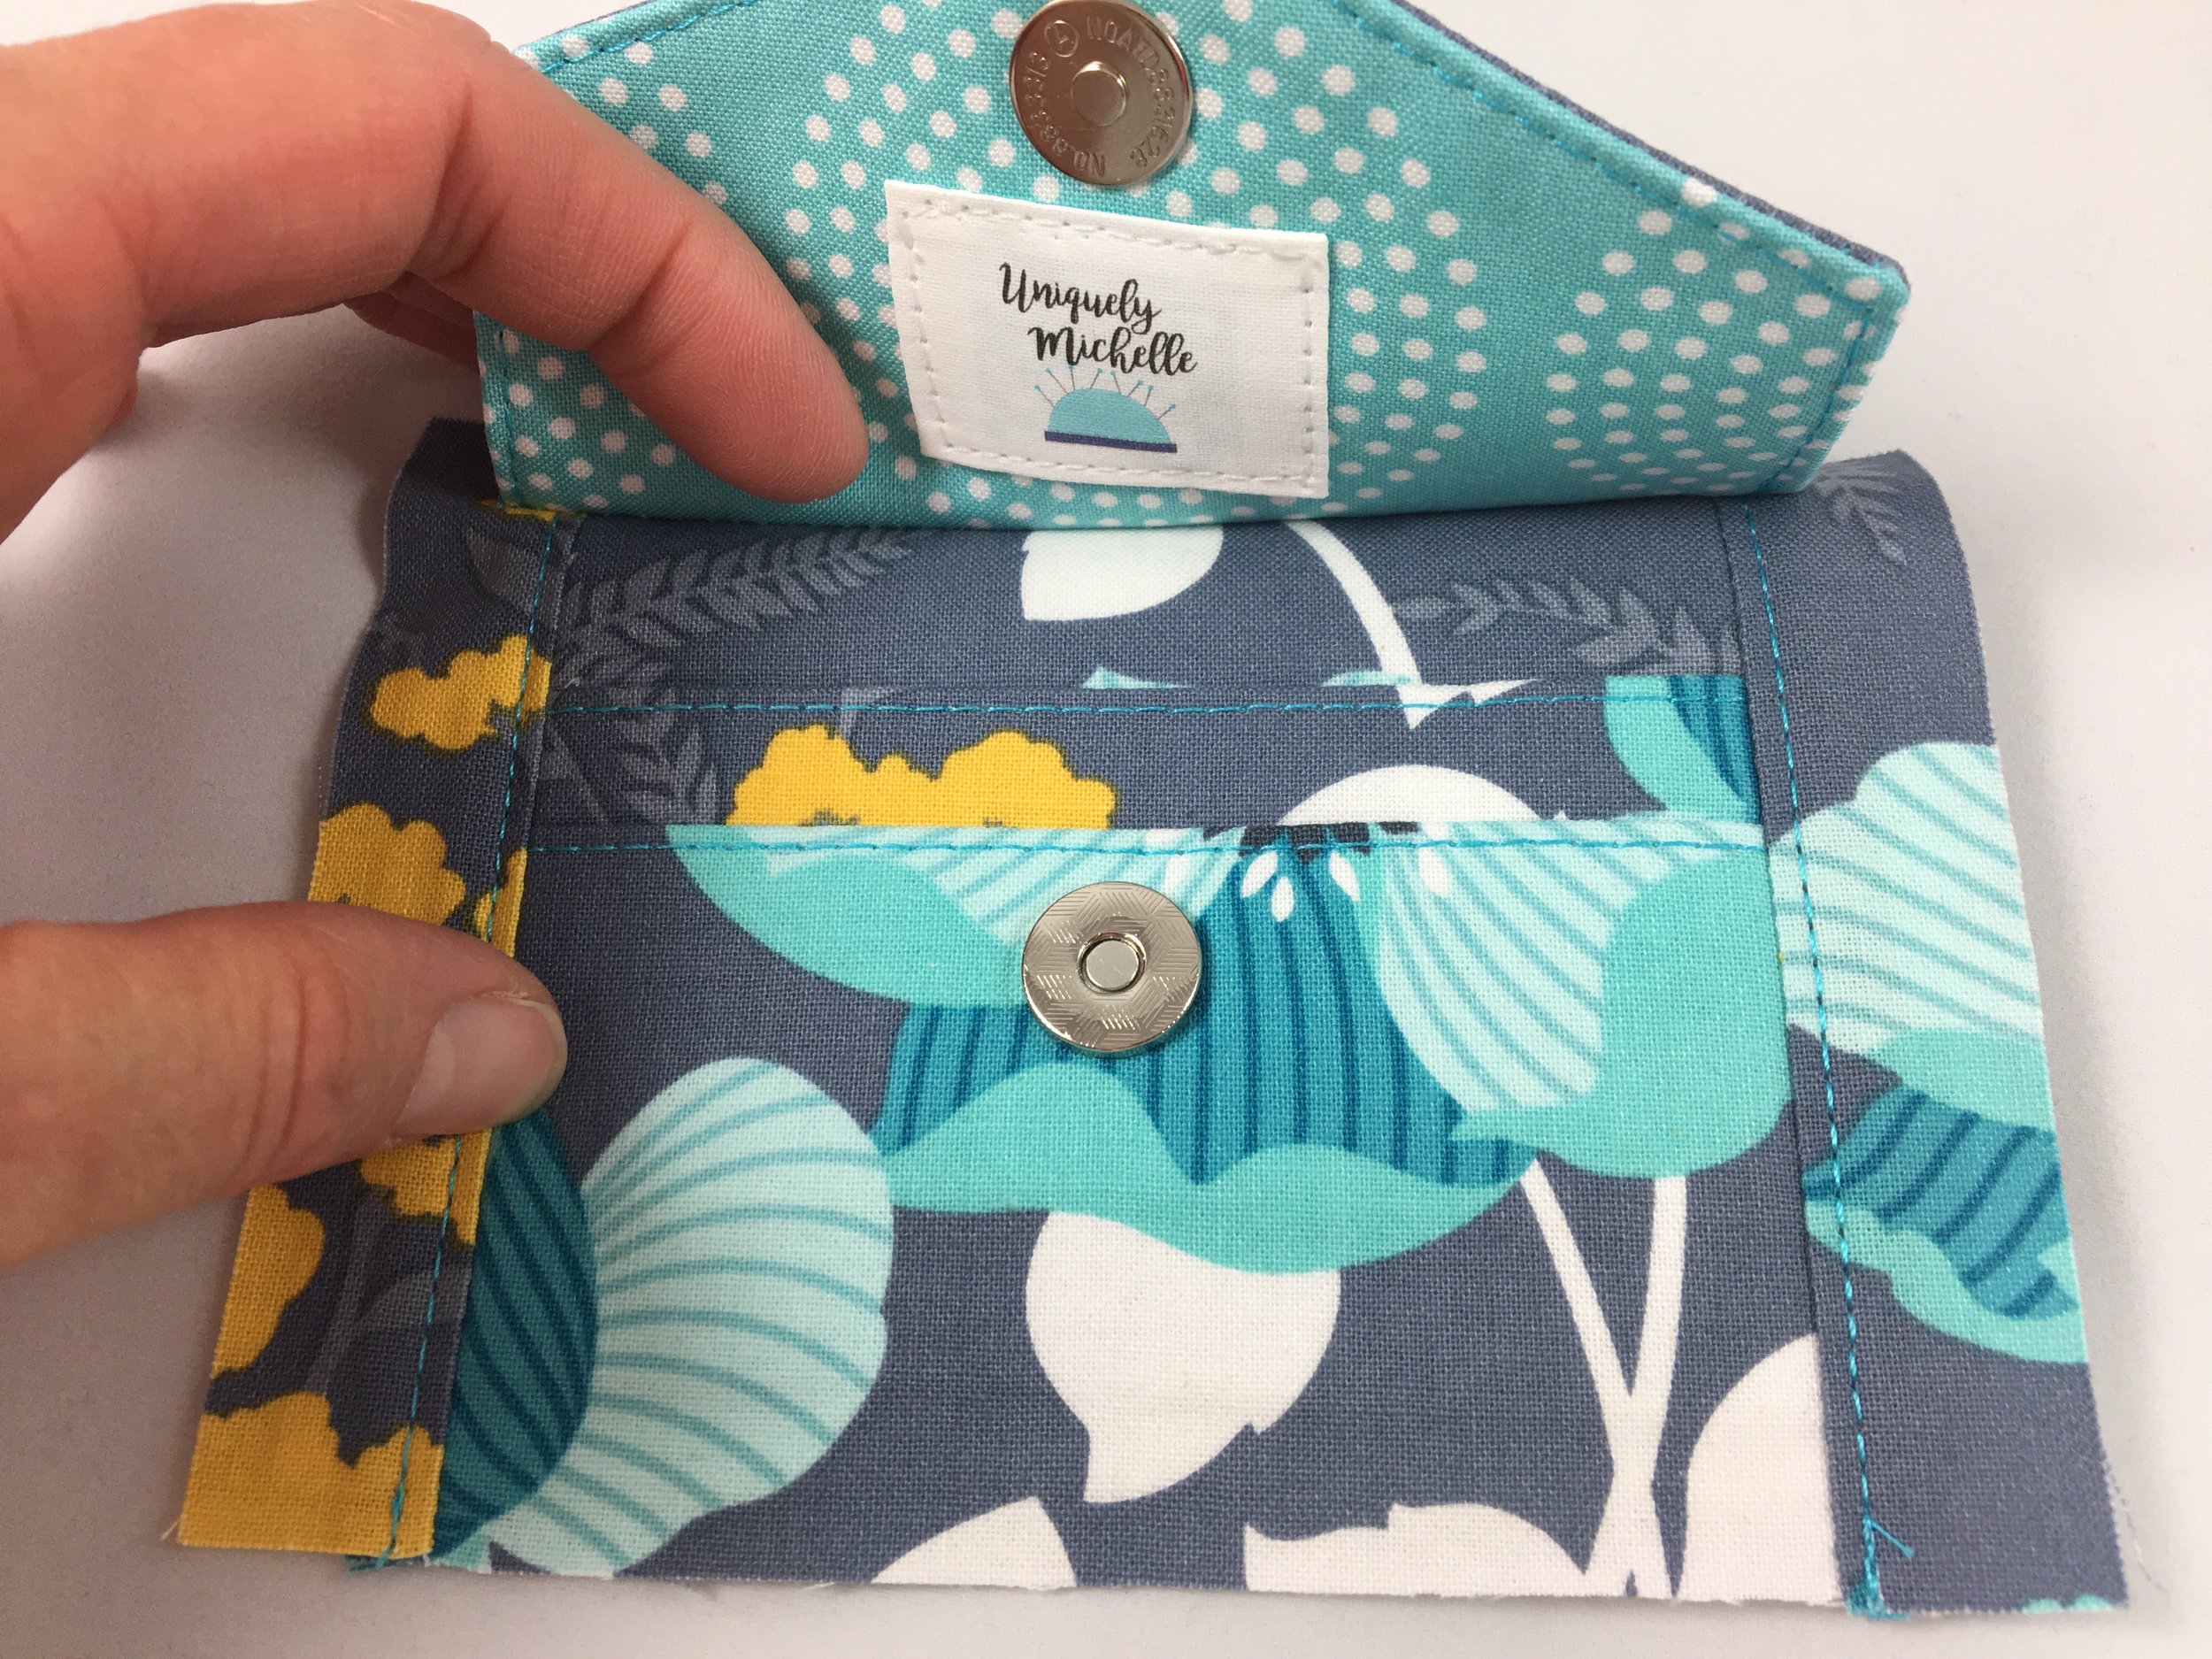
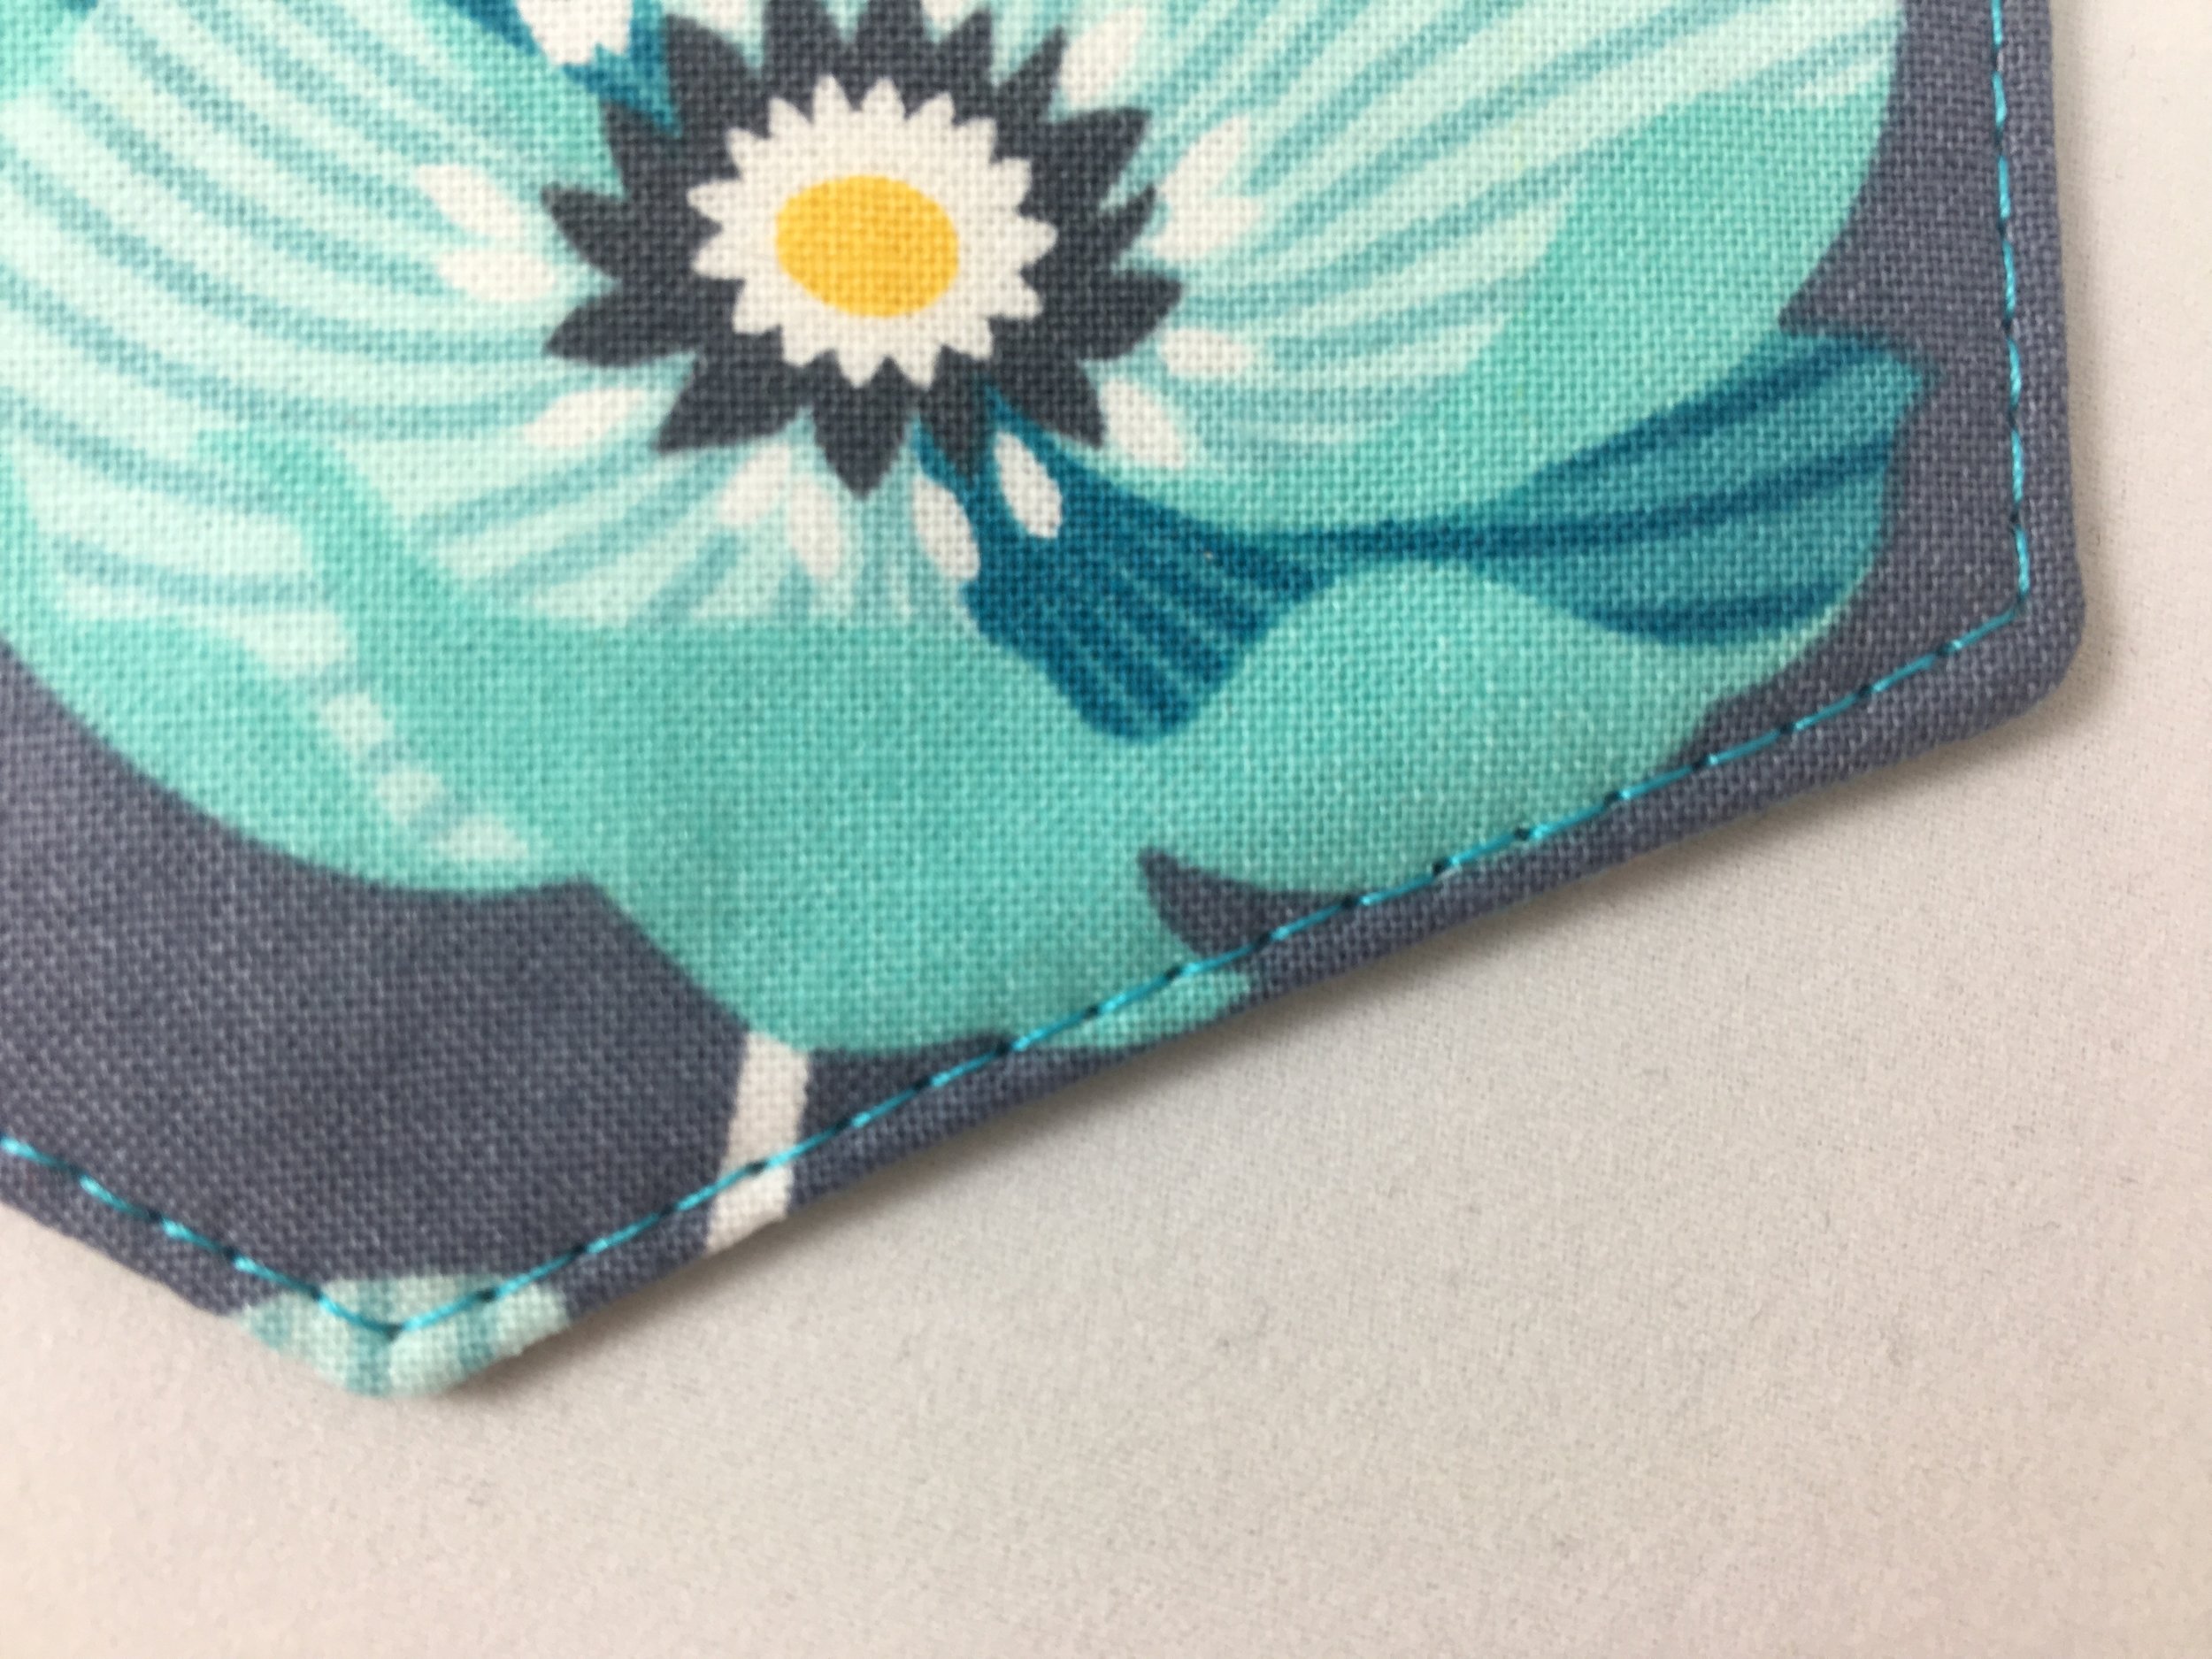
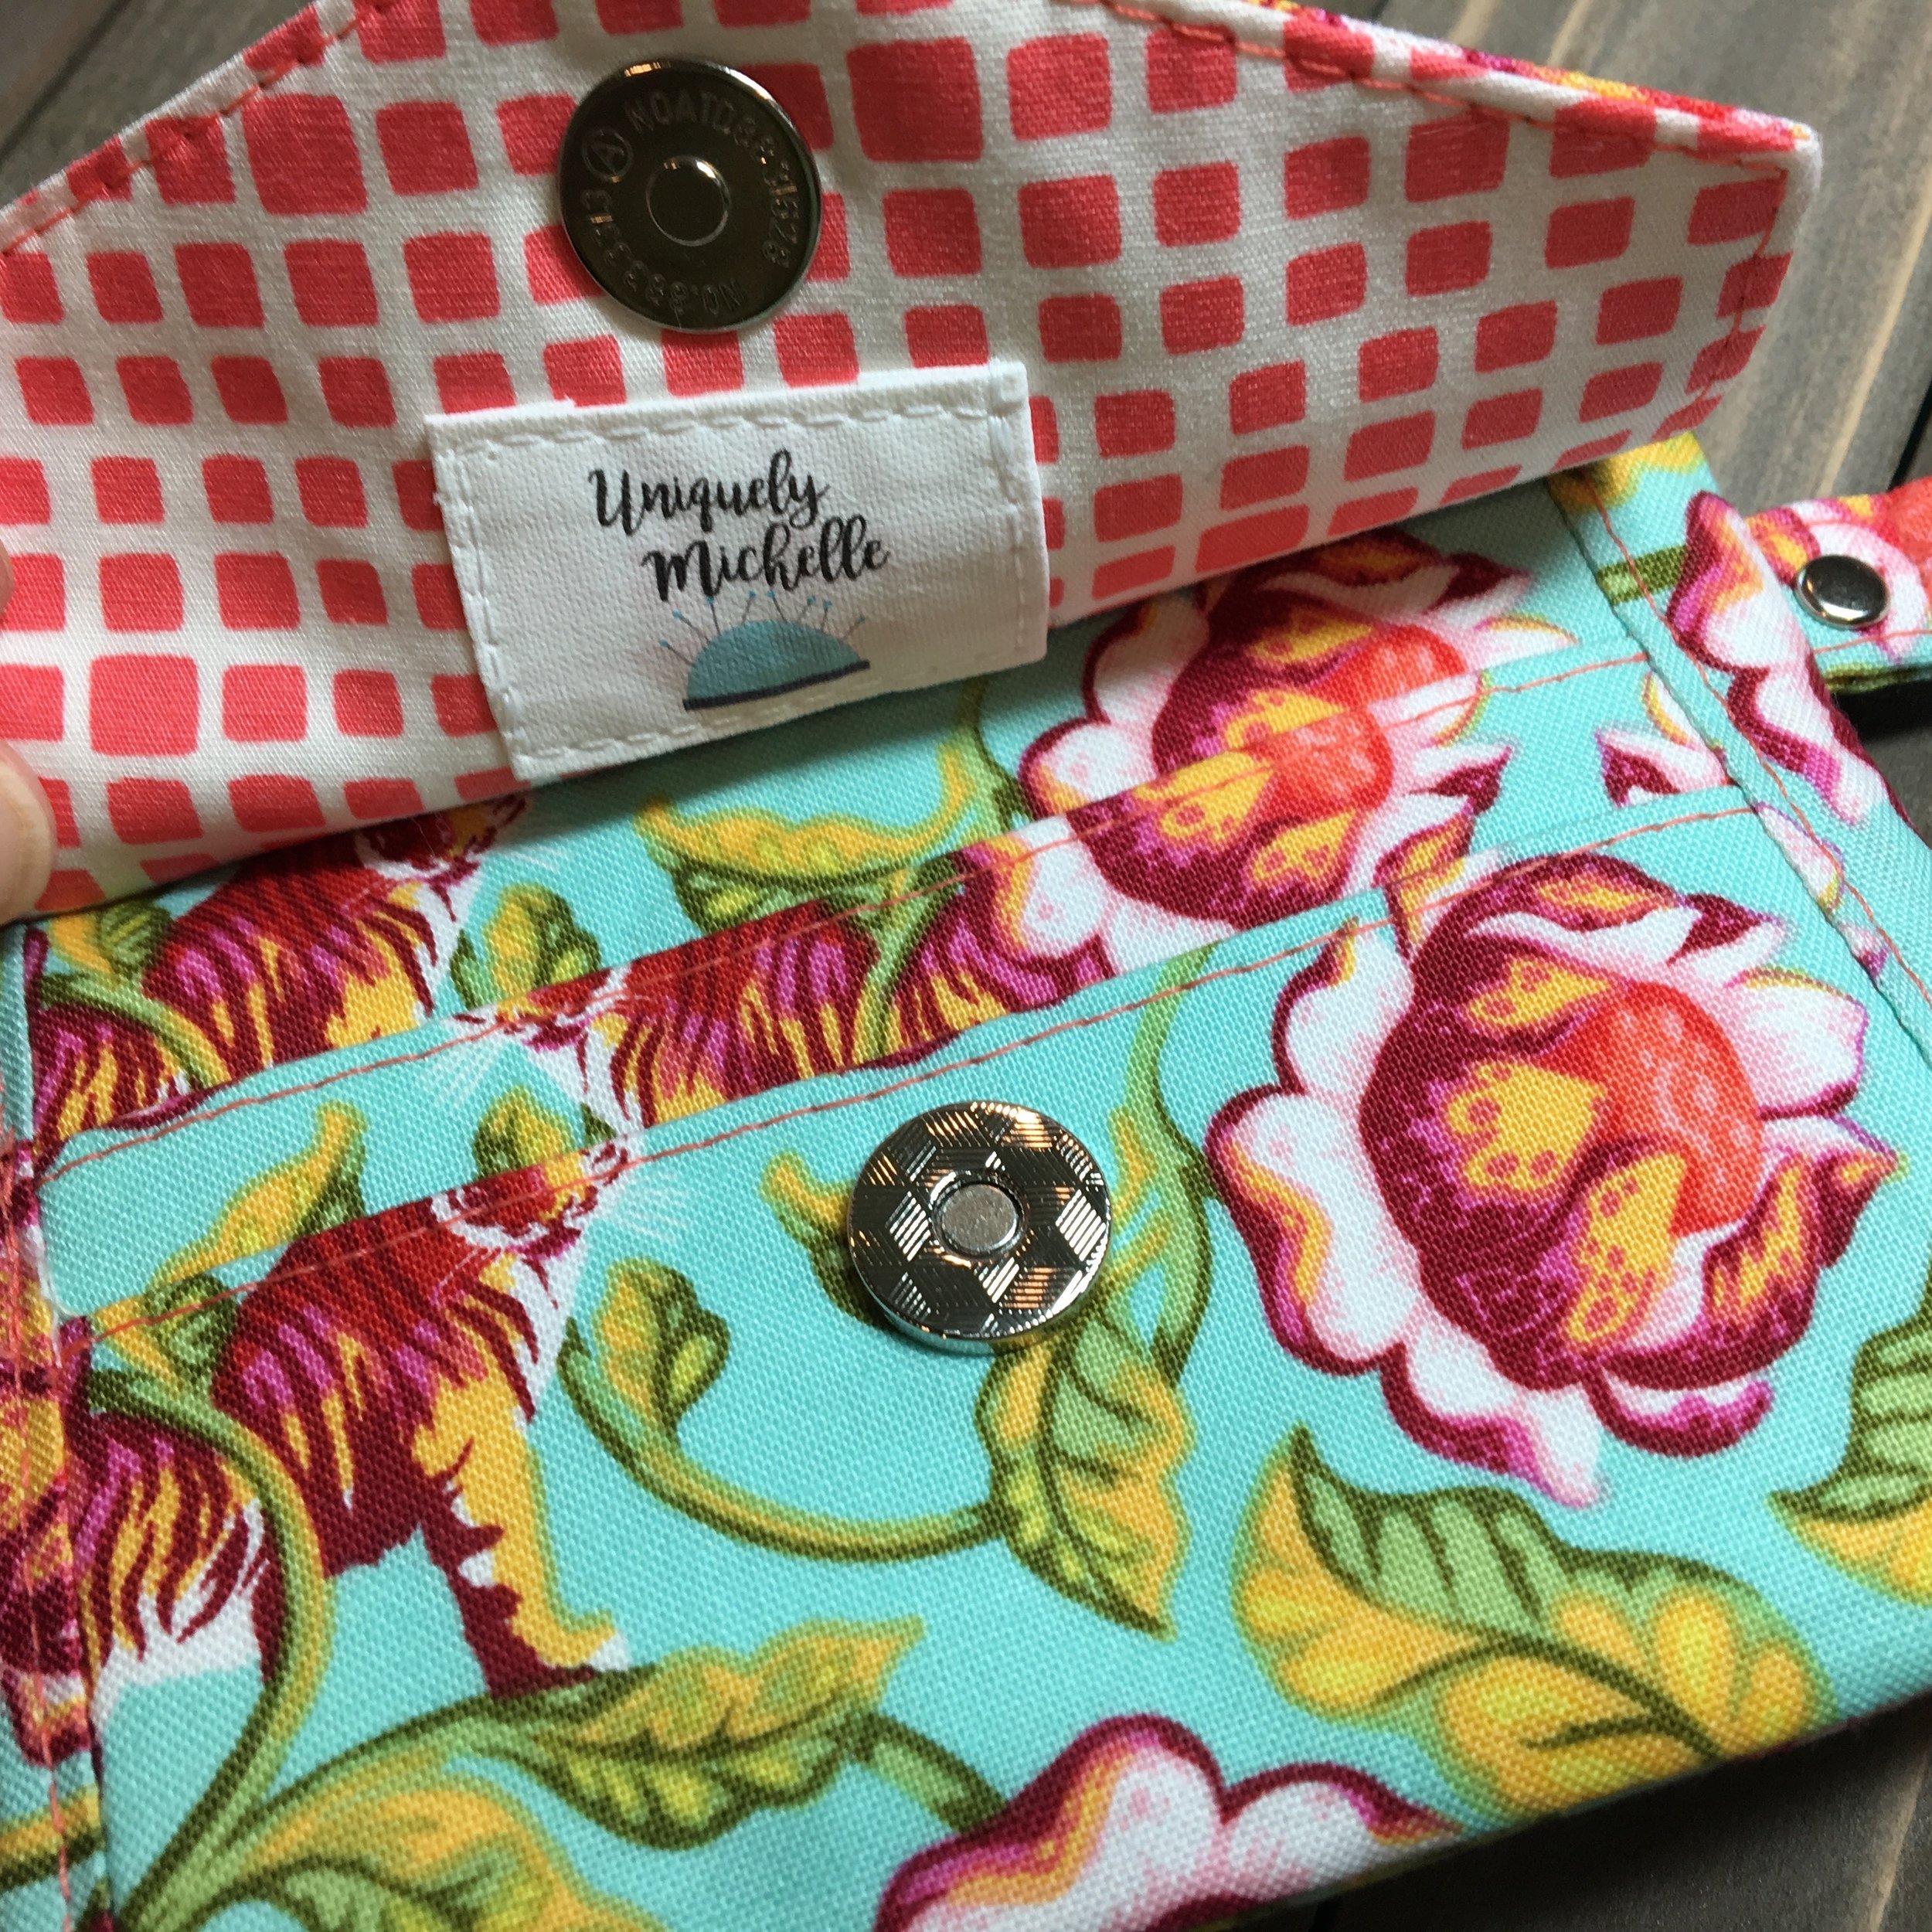
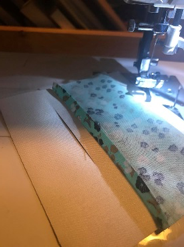
The final pieces should look like this.  Continue stitching the wallet using the KIDW Instructions. 

Jaby21.png

Thanks Jaby for another great Kristine ID Wallet tutorial! You can see more of Jaby's awesome creations in her Sew 1980s Etsy shop and on her Sew1980s Facebook page. You can also follow Sew1980s on Instagram (@sew1980s)!

If you don't have the Kristine ID Wallet pattern yet, you can purchase it from one of these shops: the Uniquely Michelle Etsy Shop, the Uniquely Michelle Website Shop, or the Uniquely Michelle Bluprint Pattern Shop.


Sign up to receive email newsletters from Uniquely Michelle:

A Fresh Find - Jumbo Wonder Clips

Michelle Burke

I have been using the red and multi-colored Wonder Clips for awhile now and I love them . . . but there are times when they just don't have enough reach to do what I need them to do.

IMG_8518.jpg

But just recently I found Jumbo Wonder Clips.

You can see in the pictures above how the Jumbo Wonder Clips compare to the normal-sized Wonder Clips - they have a much longer reach.

Sewing the Kristine ID Wallet has its challenges when trying to use the normal sized Wonder Clips and pins aren't always the best back-up option either. For instance, when placing the ID window pocket, Wonder Clips don't reach and pinning is difficult because you don't want to pin through the clear vinyl. So when I first saw the super-sized Jumbo Wonder Clips, I couldn't wait to order some and try them out! They work perfectly for holding the ID window pocket in place, making it so much easier to sew it in the exact place I want it!

IMG_8528.jpg

I also used the Jumbo Wonder Clips to hold the flap while I sew it to the front of the Kristine ID Wallet. The normal-sized Wonder Clips just can't quite reach . . .

IMG_8532 2.jpg

. . . but the Jumbo Wonder Clips reach without any problem!

IMG_8494.jpg

One more place I found the Jumbo Wonder Clips useful is to hold my Uniquely Michelle tag in place. Usually I put my tag on the inside of the flap, but this time I wanted it on the lining. A Jumbo Wonder Clip did a perfect job of holding the tag in place.

IMG_8514.jpg

I am excited to try the Jumbo Wonder Clips on more projects - I am already planning to use them soon when I sew some Just the Ticket Luggage Tags! Do you have any sewing projects in mind where you think you would use Jumbo Wonder Clips? Leave a comment and let me know!

Keep up with the latest Uniquely Michelle happenings by signing up for the newsletter below!


Sign up to receive email newsletters from Uniquely Michelle:

Kristine ID Wallet Sew Along Day #5 - Finishing It Up

Michelle Burke

Today is the last day of the Kristine ID Sew Along! It has been so fun seeing everyone’s progress pictures and reading everyone’s comments along the way! Don’t worry if you have missed parts or all of the sew along, you can click on the links in the schedule below to catch up with what we did on days 1-4. The Kristine ID Wallet is a fast sew! Also, you still have time to enter the random drawing for the three prizes – see the details at the end of this post. If you need the Kristine ID Wallet pattern, you can purchase it from the Uniquely Michelle Website Shop, the Uniquely Michelle Etsy Shop, or the Uniquely Michelle Craftsy Pattern Shop. Remember the discount code if you are purchasing from the website or Etsy – SEWKIDW. The price is already reduced on Craftsy. The sale on the Kristine ID Wallet continues through Monday, October 16.

The Kristine ID Wallet Sew Along schedule:

I hope you are as excited as I am to finish your Kristine ID Wallet today! We should have completed wallets in no time today! The pattern gives complete instructions on how to finish up your Kristine ID Wallet, but I have a few hints to share that may help with the final steps.  

The pattern mentions several times that you should be careful not to touch your iron to the clear vinyl on your ID pocket. I keep a pressing cloth on my ironing board during this last part so that I remember to use it as I am pressing anything near the clear vinyl. So far, I have not messed up a Kristine ID Wallet by ironing the clear vinyl, but I have accidently touched the iron to the vinyl while making a Just the Ticket Luggage Tag – not a happy time in my sewing room!

IMG_8188.jpg

Once the zipper is installed and all your pretty top-stitching is finished, it is time for the final step. Make sure your zipper is most of the way open for this step, otherwise turning your Kristine ID Wallet will be a much longer process than necessary.

IMG_8193.jpg

I use clips instead of pins now to pin the exterior pieces together and the lining pieces together. I like to put a clip on the spot where my ring loop is placed, then when I am sewing that spot, I remember to go back and forth several times. The ring loop will get a lot of stress from use and it is important to make sure the wallet doesn’t come apart!

IMG_8190.jpg

When it comes to clipping the transition area from interior to exterior, I make sure that the zipper tab is folded in such a way that the outer part of the fold is toward the exterior portion of the wallet. This is the direction I want the zipper tabs to fold when the wallet is finished.

IMG_8197.jpg

Speaking of the ring loop and the transition areas, these are places that are perfect to use the Bernina Height Compensation Tool. I wrote a blog post about how this tool works – Sewing Can Have Its Ups and Downs. It is worth getting one, it is a game changer!

I find when turning any bag that it is easiest if I start by bringing one of the lower exterior corners through the opening in the lining first. This I think definitely helps when turning something as small as the Kristine ID Wallet!

IMG_8210.jpg

Before sewing the opening close, make sure all four exterior corners are pushed out all the way. The upper corners where the zipper tabs are can be a little tricky and take a little time, but they look great in the end if they have been pushed out completely.

Now you just need to add your split key ring (if you didn’t use a D-ring) and some pretty bling and your Kristine ID Wallet is finished! I love Andrie Adornments Zipper Pulls on the Kristine ID Wallet! The size is perfect and the come in a variety of colors and with a variety of quotes!

IMG_8387.jpg

I think Andrie Adornments Zipper Pulls work well as a zipper pull on the Kristine ID Wallet, but they also look great when used as a charm on the key ring!

I hope you have had fun sewing a Kristine ID Wallet with a few of your closest internet, sewing friends and I hope you love your Kristine ID Wallet! Please share any useful hints or ideas you have for making a Kristine ID Wallet or ask any questions you may have in the comments! I am always happy to answer questions too! If you don’t want to ask me questions, you can get answers to questions in the Uniquely Michelle Sewing Patterns Facebook Group – there are a lot of Kristine ID Wallet experts out there!

Screen Shot 2017-09-23 at 6.16.27 PM.png

Please share those pictures of your completed Kristine ID Wallet! Even if you have shared progress pictures, you need to share a picture of your finished Kristine ID Wallet by Monday, October 16 at 10:00pm MDT in the Uniquely Michelle Sewing Patterns Facebook Group and/or on Instagram with #KIDWSewAlong to be entered into the random drawing! You can still post progress pictures to increase your chances of winning one of the three prizes that will be given away with the random drawing that will take place on Monday, October 16th at 10:00pm MDT! I am loving seeing all your beautiful Kristine ID Wallet progress pictures and I am beyond excited to see everyone’s completed Kristine ID Wallet!

IMG_7909.jpg

So, are you ready to take your Kristine ID Wallet to the next level? You can get some ideas and inspiration for doing just that from Kristine ID Wallet Week! Kristine ID Wallet week happened several weeks ago, but no worries, you can see all the great blog posts from the week! There are a total of 6 posts, so make sure to check out all of them!

Here are all the Kristine ID Wallet Week links:

A couple of ladies have made a video as they construct the Kristine ID Wallet. Watch Kylie of Lean Mean Sewing Machine as she sews a Kristine ID Wallet. Nicole of Sew Much Moore In Store also has a Kristine ID Wallet Video.

I would like to thank Jaby of Sew1980’s for her expert comments as we went along! Also, Kylie of Lean Mean Sewing Machine for her helpful comments! Thanks ladies!


Sign up to receive email newsletters from Uniquely Michelle:

Kristine ID Wallet Sew Along Day #4 - Straps, Ring Loop and Zipper

Michelle Burke

Are you ready for a quick and easy day of sewing today? I hope so, because that is what day #4 of the Kristine ID Wallet Sew Along is! If you haven’t been able to sew along with us each day or you are just starting the Kristine ID Wallet Sew Along, you can click on the links in the schedule below to catch up with what we did on days 1-3. The Kristine ID Wallet is a fast sew, so it will be easy to catch up! Do you still need the Kristine ID Wallet pattern? You can purchase it from the Uniquely Michelle Website Shop, the Uniquely Michelle Etsy Shop, or the Uniquely Michelle Craftsy Pattern Shop. Remember the discount code if you are purchasing from the website or Etsy – SEWKIDW. The price is already reduced on Craftsy.

The Kristine ID Wallet Sew Along schedule:

Day #4 is easy, but will involve a lot of pressing! So, get those irons hot and let’s get started! Today we will be making the wrist strap, lanyard and ring loop; and prepping the zipper for installation!

IMG_8435.jpg

When I first wrote this pattern, I was only going to include instructions for a wrist strap. Then one of my testers made it with a lanyard and I asked my testers if I should include instructions for both a wrist strap and a lanyard. Of course, the answer was YES! I’m glad I listened to my testers (they are a pretty smart group of ladies) because most people make the lanyard and not the wrist strap. Those who sell Kristine ID Wallets sell them with lanyards usually. Paula of Paula Made It has a great idea for selling Kristine ID Wallets, she makes matching lanyards for each one and then makes only a few wrist straps that could coordinate with several of the Kristine ID Wallets that she has made. People can then choose to switch out the lanyard for a wrist strap or buy a wrist strap along with their purchase of a Kristine ID Wallet with a lanyard – perfect!

Even though the instructions have you making the wrist strap and lanyard in a different step than making the ring loop and prepping the zipper for installation, I like to construct these parts at the same time. The first steps for all of them are the same, so we might as well make them in a more assembly line fashion.

IMG_8164.jpg

The first stop is the iron today! All four fabric pieces, the wrist strap, the lanyard, the ring loop and the zipper end tabs get pressed in the exact same way – in half and then the raw edges are pressed toward the center fold. It’s a lot of pressing, be careful not to burn those fingers!

IMG_8169.jpg

Once everything is pressed, let’s work first with the wrist strap and lanyard. Remember to put the swivel snap hook on these before you sew the short ends together – something I forget to do sometimes! It is also important to make sure the wrist strap and lanyard aren’t twisted when you sew the short ends together.

After pressing the seam you just sewed open, and then pressing the folds in place again, the edge top-stitching is easy. If you start by top-stitching the open side of the strap, then it is a piece of cake to sew the folded side. I like to place the swivel snap hook directly on the seam, then it is more hidden that way. I use my Bernina Height Compensation Tool to keep my stitches even as I sew the little square that closes the loop near the swivel snap hook. You can see more about this handy little tool by going to the Sewing Can Have Its Ups and Downs blog post.

Here is my ring loop with a D-ring, but in reality I want to use a split key ring!

Here is my ring loop with a D-ring, but in reality I want to use a split key ring!

With the wrist strap and lanyard strap finished, the ring loop is up next. The edges need to be top-stitched on this and if you are adding a D-ring, now is the time to do that. If you are adding a split key ring, you won’t add that until your wallet is completely finished. Stitch the ring loop in place on the wallet and that’s it for the ring loop!

IMG_8166.jpg

The last item for today is getting the zipper ready for installation. Cut the zipper down to size following the instructions in the pattern. Add the zipper end tabs to each end of the zipper. When I add the zipper end tabs, I like to see if I can put a more colorful or fun part of the fabric design centered over each end of the zipper so that it will be seen once the zipper is sewn in place. The zipper can be set aside until tomorrow.

IMG_8184.jpg

Tomorrow is day five, the last day of the Kristine ID Wallet Sew Along. Keep sharing your awesome progress pictures, they are fun to see! Progress pictures posted in the Uniquely Michelle Sewing Patterns Facebook Group and on Instagram with #KIDWSewAlong increase your chances of winning one of the three prizes that will be given away with the random drawing that will take place on Monday, October 16th at 10:00pm MDT! Of course, you will have to post a finished picture of your Kristine ID Wallet by the draw day and time to be entered into the drawing.

For day 5 of the sew along, you will need all the parts of your Kristine ID Wallet that you have made so far – the front, back, zipper, wrist strap, and lanyard. You will also need your split key ring if you are using that and not a D-ring. I am excited to finish up our Kristine ID Wallets tomorrow!


Sign up to receive email newsletters from Uniquely Michelle:

Kristine ID Wallet Sew Along Day #3 - Card Pockets and Flap

Michelle Burke

Hi everyone! I’m so glad to have you back for day 3 of the Kristine ID Wallet Sew Along! If you are just joining us, no worries you can click on the links in the schedule below to see what we did on days 1 & 2. The Kristine ID Wallet is a fast sew, so it will be easy to catch up! If you don’t have the pattern yet, you can purchase it from the Uniquely Michelle Website Shop, the Uniquely Michelle Etsy Shop, or the Uniquely Michelle Bluprint Pattern Shop. Remember the discount code if you are purchasing from the website or Etsy – SEWKIDW. The price is already reduced on Craftsy

The Kristine ID Wallet Sew Along schedule:

For day 3, we will be putting the card pockets, and the flap together – basically the front of the Kristine ID Wallet. This day is the most time-consuming day of the entire sew along, but don’t let that scare you off, it is still quite easy!

We will start with the card pockets. I think the instructions in the pattern are self-explanatory and the pattern includes some great photos showing you what to do, but there are a couple of things that I do slightly differently now and a couple of hints I will share with you.

IMG_8116.jpg

One thing I do differently is I use clips instead of pins when I am making the folds for the card pockets. I still use pins to mark the fold lines from the opposite side, but clips are great to use as I finger press the folds in place. 

Another change I have made is a result of using a regular snap instead of a magnetic snap, although this change works well if you are using a magnetic snap too. When using a regular snap, I need to be able to get the snap installation tool into the correct spot to install the female side of the snap. This is difficult when the folds of the card pocket piece had been basted on the sides and the side pieces have been sewn in place. So, I still top-stitch the tops of the pockets, but I wait to stitch the sides to hold the folds in place until after I have installed the snap.

IMG_8117.jpg

You will need to be very careful to keep the folds neatly in place and straight as you cut the height of the card pocket piece down to 4”. I also don’t add the sides of the card pocket pieces until after I have installed the female half of the snap.

IMG_8119.jpg

Everything I have explained above makes it so I can unfold the card pockets to add the snap - making it easier to add a magnetic snap and it is required for adding a regular snap. If you are installing a regular snap, the measurements are the same for the installation of both the female and male halves of the snap. The measurements are to the center of the snap either way.

Once the female half of the snap is installed on the card pocket piece, I baste the folds in place, making sure they are nice and straight and then I add the side pieces.

You can see the impression from my iron in the fleece - lol!

You can see the impression from my iron in the fleece - lol!

Finally, I fuse the fusible fleece in place on the wrong side of the entire card pocket side and top-stitch as explained in the pattern.

IMG_8127.jpg

Here is what your card pockets should look like when you are finished. Now on to the flap!

The first step in making the flap is easy to miss, but it is an important step so that you measure correctly for your snap. So, first fold the top, long edge of the flap ¼” toward the wrong side. Do this for both the exterior and interior flap pieces.

IMG_8130.jpg

In the pattern, I marked for the snap on the right side of the fabric, but you can make the mark on the wrong side of the lining fabric if you are installing a magnetic snap.

I installed a magnetic snap on this Kristine ID Wallet flap, but you can see what I mean about installing the male half of the snap through all layers if you have a pretty snap that you want to show off.

I installed a magnetic snap on this Kristine ID Wallet flap, but you can see what I mean about installing the male half of the snap through all layers if you have a pretty snap that you want to show off.

If you would rather use a regular snap instead of a magnetic snap, you may want to install your regular snap at a different point in the flap-making process. If you have a snap that has a pretty or colorful part, you may want that showing on the exterior of your flap. If this is the case, sew the exterior and interior flap pieces together as the pattern instructs, leaving the top, long edge open. Turn your flap and top-stitch and then add the male part of your snap so that it goes through all the layers of the flap and so that the pretty part of the snap is visible on the exterior of the flap. The measurement is the same for adding a regular snap as for adding a magnetic snap.

I like to add a tag to the inside of the flap, but I have seen others add a tag to the interior of the zipper pocket. I have also seen sewists add a folded tag to the exterior side of the Kristine ID Wallet. If you want to add a tag to the flap lining as I do, add it after adding the male part of the magnetic snap and before you sew the flap pieces together. If you are installing a regular snap, add your tag before you sew the flap pieces together, making sure to leave room for the snap.

In the pattern instructions, once you have sewn the exterior and interior flap pieces together it says to top-stitch around all the edges of the flap. Then when you sew the flap to the wallet, you top-stitch again over the top-stitching at the top, long edge. You could skip the top-stitching on the top, long edge when you are top-stitching around the other edges of the flap and then just have a single line of top-stitching when you attach the flap to the wallet. Either way works well!

When I am top-stitching and installing the flap, I use my Bernina Height Compensation Tool as I start sewing after each corner. It keeps my presser foot from having to climb up onto the flap, making my stitches even. I wrote a blog post recently about the Bernina Height Compensation Tool, Sewing Can Have Its Ups and Downs, it is one of my favorite and most-used tools!

Now the front of your Kristine ID Wallet is finished! Tomorrow we will sew the straps and get the zipper ready to install. It is so fun seeing everyone’s progress on their Kristine ID Wallets, so please share pictures! Progress pictures posted in the Uniquely Michelle Sewing Patterns Facebook Group and on Instagram with #KIDWSewAlong increase your chances of winning one of the three prizes that will be given away with the random drawing that will take place on Monday, October 16th at 10:00pm MDT! Of course, you will have to post a finished picture of your Kristine ID Wallet by the draw day and time to be entered into the drawing.

IMG_8152.jpg

Look at how far we have come! For day 4 of the sew along, you will need one or two ½” swivel snap hooks (depending on whether you will be making both the wrist strap and the lanyard or just one of them), a D-ring if you are not using a split key ring, and a zipper that is at least 6” long. For more information on where I get my hardware and supplies, check out this blog post. See you back here tomorrow for a quick and easy day 4 of the Kristine ID Wallet Sew Along!


Sign up to receive email newsletters from Uniquely Michelle:

Kristine ID Wallet Sew Along Day #2 - ID Window Pocket & Back of KIDW

Michelle Burke

I am really excited for day #2 of the Kristine ID Wallet Sew Along because we actually get to start sewing! If you missed day #1, you can click on the link in the schedule below and get caught up. If you still need the Kristine ID Wallet pattern, you can purchase it from the Uniquely Michelle website shop, the Uniquely Michelle Etsy shop, or the Uniquely Michelle Bluprint Pattern shop. Remember the discount code if you are purchasing from the website or Etsy – SEWKIDW. The price is already reduced on Craftsy. 

The Kristine ID Wallet Sew Along schedule looks like this:

  • Day #1: Cutting and Fusing

  • Day #2: ID Window Pocket/Back of KIDW

  • Day #3: Envelope Flap and Card Pockets/Front of KIDW

  • Day #4: Straps, Ring Loop and Zipper

  • Day #5: Finishing It Up

Today we will be constructing the back of the Kristine ID Wallet. The main feature on the back is the ID window pocket. I love the ID window pocket on the Kristine ID Wallet for two reasons, one you can make it stand out by using a different fabric for it than you use for the main part of the wallet and the second reason it is pretty on both the outside and inside.

If you want to know more about which clear vinyl I like to use and different sources for clear vinyl, check out the Some Information About Clear Vinyl blog post.

IMG_8060.jpg

Okay, so let’s get started making the ID window pocket. After you have the two pieces for the pocket sewn together following the pattern instructions, then comes the most important part of making the ID window pocket – making the marks for folding and cutting. I like to use a Frixion pen for this, the marks from this pen disappear with a little heat from your iron. When you are making the rectangle marks, it is really important that you measure ½” from the stitching. Doing this will make the frame of the pocket even and professional looking.

Once you have all your marks made, it is time to cut on the cut lines. I use a pair of pointy, sharp scissors to cut all the way into each of the corners, this will make your corners more crisp. After all your cuts are made, put double-sided tape or fabric glue just on the outside edge of the fold lines. I like using double-sided tape because I feel it is more accurate; I can place the edge of the tape on the fold line and then it is easy to fold on the line and the edge of the tape helps keep my fold lines straight. Someone once suggested using a credit card to help get a very straight, crisp fold.

Is it weird that I think the triangles that you cut off the ID pocket kind of look neat? Now is the time to add Fray Check to the corners on both sides of the ID window pocket.

I am always really excited to turn the ID window pocket right side out. I start pushing in one corner and flip everything right side out. It always looks like such a mess at this point. Before I iron it to make it look good, I finger press it a bit to get it all heading in the right direction. I love how the ID window pocket looks after it is pressed well!

I have to take a little break here to figure out which side of the ID pocket I want facing out. I usually pick the side that is a little more colorful or has a more interesting part of the fabric showing - definitley the one on the left!

This next part can be tricky, sometimes I can get the clear vinyl piece to pop right into place and sometimes it takes me a couple tries to get it in place. When I wrote the pattern for the Kristine ID Wallet pattern, I hadn’t heard of Wonder Clips yet. Using clips to hold the vinyl in place can be very helpful at this point.

Screen Shot 2017-09-26 at 9.22.13 AM.png

I use a tool called That Purple Thang as I top-stitch the vinyl in place. That Purple Thang helps me to push or shift the inner folded edges on both the front and back of the ID window pocket so that they match perfectly. I also use this tool to make sure that each corner is folded under and sticking to the tape just before I get to it, helping to make my corners more crisp.

Make sure when you pin the ID window pocket in place that the top-stitched, top edge is up – this is especially important if your fabric is directional. I usually just hold the pocket in place as I sew it on the back piece, but when I decide to pin it in place, I put the pins in so that they are not making holes in the vinyl and so that the pins can be easily removed as I sew. Note: I just found longer Wonder Clips!!! I think they will work to hold the ID pocket in place as you top stitch. I ordered some and will have to try it out. If they work, they will be added to at least one of the three prizes!

IMG_8107.jpg

Yay – the back of your Kristine ID Wallet is complete! Tomorrow we will work on the front side of the wallet. I would love to see pictures of your progress! Remember progress pictures posted in the Uniquely Michelle Sewing Patterns Facebook Group and on Instagram (use #KIDWSewAlong so I can find your post) to increase your chances of winning one of the three prizes that will be given away with the random drawing that will take place on Monday, October 16th at 10:00pm MDT! Of course, you will have to post a finished picture of your Kristine ID Wallet by the draw day and time to be entered into the drawing.

For day 3 of the sew along, you will need either a magnetic snap or a regular snap. If you want more information about where I get my hardware and supplies for the Kristine ID Wallet, check out this blog post. I’ll see you back here tomorrow for day 3 of the Kristine ID Sew Along!


Sign up to receive email newsletters from Uniquely Michelle:

Kristine ID Wallet Sew Along Day #1 - Cutting and Fusing

Michelle Burke

Today is day #1 of the Kristine ID Wallet Sew Along! I am so excited and I hope you are too! Before we get started today, I want to share with you the schedule for the sew along and the details for the giveaway.

The Kristine ID Wallet Sew Along schedule looks like this:

  • Day #1: Cutting and Fusing
  • Day #2: ID Window Pocket/Back of KIDW
  • Day #3: Envelope Flap and Card Pockets/Front of KIDW
  • Day #4: Straps, Ring Loop and Zipper
  • Day #5: Finishing It Up

This sew along will be five consecutive days starting today and ending this Friday, September 29th. If you miss a day don’t worry, the post will stay up indefinitely. I will also link to the previous posts in the following days so that you can easily find them.

Screen Shot 2017-09-23 at 6.16.27 PM.png

Even though the sew along posts will finish up on Friday, you will still have a couple weeks to finish up your Kristine ID Wallet and enter the drawing for prizes. There will be three prizes, each will be a little different, but a free Uniquely Michelle sewing pattern of your choice, fabric, and one of Andrie Adornments zipper pulls are all in the mix for the prizes! To enter the drawing, you need to complete your Kristine ID Wallet by Monday, October 16th at 10:00pm MDT (this is when the random drawing will take place) and you must post a picture of your completed wallet in one of two places – in the Uniquely Michelle Sewing Patterns Facebook Group or in on Instagram with #KIDWSewAlong. Posting a picture of your completed Kristine ID Wallet in one those two places is required to be entered in the drawing for prizes, but if you post in both places that will increase your chances for winning! One more way to increase your chances for winning - post a progress picture in the Uniquely Michelle Sewing Patterns Facebook Group or on Instagram with #KIDWSewAlong or post in both places. Basically, the more you post, the better your chances of winning, but let’s keep the posts to one per day per person in each place – I don’t think anyone wants a stitch-by-stitch progress report. ;)

Are you ready to get started on the sew along? If you don’t have the pattern yet, you can purchase it from the Uniquely Michelle Website Shop, the Uniquely Michelle Etsy Shop, or the Uniquely Michelle Craftsy Pattern Shop. Remember to use the discount code "SEWKIDW" if you are purchasing from the website or Etsy. The price is already reduced on Craftsy. This sew along is not going to give you the step-by-step instructions that the pattern does, so you will need to refer to the pattern. To begin you will need to print out your pattern or you can just print out the pattern piece and refer to the instructions on your computer or mobile device as you go. There are important instructions in the pattern for printing out the pattern piece so that it is the correct size, so it’s best not to skip over that part!

IMG_7864.jpg

Except for the one pattern piece, all the other pieces for the wallet are rectangles, so it is easy to cut them out with a rotary cutter and a plastic ruler. If you would rather, you can draw cut lines on your fabric and then cut the pieces out with scissors. I love to use a rotary cutter and so I drew the flap pattern piece on to some heavy-duty template plastic and cut it out (with scissors other than my sewing scissors). I find that I can use a rotary cutter to cut out the fabric and interfacing with this heavy-duty template plastic. I used a permanent marker around the edges of the pattern piece so that it is easier to see as I am cutting. Do you like my attempt at writing fancy on the pattern piece? :P

Here is my fabric!!!

Here is my fabric!!!

One of my favorite parts of sewing anything is picking out the fabric! Do you like that part too? As you pick out your fabric for your Kristine ID Wallet, you will want to decide if you will make it as the pattern instructs with one exterior fabric and another fabric for the lining or if you want to use more than one fabric for the exterior.

Here are some options for the exterior:

o   One fabric as suggested in the pattern

o   One fabric for the main part of the wallet and a coordinating fabric for the flap and ID pocket

o   One fabric for the main part of the wallet and a coordinating fabric for the flap and card pockets.

o   And then there’s the straps, do you want those to be from the main fabric or a coordinating fabric. Do you want to make a wrist strap, a lanyard or both?

With all these options in mind, it is important to remember that the card pockets require the most fabric since the fabric cut for them is 12” high.

This is my exterior fabric, so I have my flap pattern piece positioned so it is right side up, but . . .

This is my exterior fabric, so I have my flap pattern piece positioned so it is right side up, but . . .

Once you have figured out what fabrics you are using for the different parts of the Kristine ID Wallet, it is time to start cutting! Another reason I like using the heavy-duty template plastic for the flap pieces is that I can see the fabric through the plastic so I can decide what part of the fabric I want on my flap.

. . . when I am cutting my lining fabric, I position my flap pattern piece upside down. No, this is not directional fabric, so it doesn't make any difference, but I thought a visual would help us remember to do this! ;)

. . . when I am cutting my lining fabric, I position my flap pattern piece upside down. No, this is not directional fabric, so it doesn't make any difference, but I thought a visual would help us remember to do this! ;)

It is important with the flap to remember that if you are using a directional exterior fabric, the long edge of the flap should be up. But when you are cutting out directional fabric for the lining of the flap, the point of the flap should be up.

Here is all my interfacing, cut and ready to fuse!

Here is all my interfacing, cut and ready to fuse!

Fuse your interfacing to the backs of all the fabric pieces EXCEPT the fusible fleece for the front of the Kristine ID Wallet will be fused on after we assemble the front of the wallet (the card pockets). Make sure the interfacing pieces are centered on the back of the fabric pieces. The best way to fuse the fleece onto the fabric is to place it on the wrong side of the fabric, flip it over carefully to keep in in place, spray it with a little water and then press down firmly with your iron for several seconds. If it isn’t fused in place, spray it with a little more water and press it firmly again with your iron until the fleece is fused to the fabric.

For day 2 of the sew along, you will need the clear vinyl piece. If you are still trying to figure that part out, it may help you to read the Some Information About Clear Vinyl blog post. I would love to see what fabrics you have chosen for your Kristine ID Wallet! Please share them in the Uniquely Michelle Sewing Patterns Facebook Group and/or on Instagram with #KIDWSewAlong. Posting your fabric choices can be your first entry into the giveaway drawing!

Please ask any questions you have in the comments! You may also want to read the comments to see if any expert Kristine ID Wallet makers have added their tips, thoughts or advice on today’s sew along!


Sign up to receive email newsletters from Uniquely Michelle:

The Kristine ID Wallet - Suppliers for Hardware and Zippers

Michelle Burke

I thought in preparation for the Kristine ID Wallet Sew Along I would share with you where I get my hardware and zippers. Unfortunately, I didn’t think of doing this until now – two days before the start of the Kristine ID Wallet Sew Along. You should still have time to order supplies (from my suggested suppliers or from other sources) in time to finish your Kristine ID Wallet before the random drawing for prizes which will be held on Monday, October 16th. There are very few items you need, so you may have what you need on hand.

I get magnetic snaps, ½” swivel snap hooks and ½” D-rings (if I am not using a split key ring) for the Kristine ID Wallet from Emmaline Bags. Make sure to check out the many choices of finishes - antique brass, copper, gold, gunmetal and of course nickel. Emmaline Bags is my main source for bag hardware, whether for the Kristine ID Wallet or for other bags. Emmaline Bags is located in Canada and Janelle, owner of Emmaline Bags, has excellent customer service and high quality bag hardware.

I have two sources for split key rings, Purple Mountain on Etsy and Shapenty on Amazon. Both suppliers sell key rings that are 1" (25mm) in diameter. Purple Mountain also sells key rings that are about 1 1/4" (30mm) in diameter. I ordered the 1" (25mm) key rings from Purple Mountain, but now I realize that they are larger, so I think they sent me the extra large (30mm) size. Both suppliers have shiny nickel key rings, but I will have to say if you look closely you will see small scratches on the key rings from both Purple Mountain and Shapenty. I have ordered key rings from several sources and these are the best two that I have found. Overall, the key rings look pretty, so I am still recommending these two suppliers. If you are looking for something other than nickel, Purple mountain also has bronze, gunmetal and antique copper and Shapenty also has black. When I ordered the nickel key rings from Purple Mountain, I also ordered a few in antique copper and bronze - they are really nice!

If you would like to use a regular snap instead of a magnetic snap, I highly recommend Snap Source. They have a huge variety of colors in size 16 snaps – the size I use for the Kristine ID Wallet. Snap Source also has a tool for installing snaps, The SnapSetter tool, that is easy to use and reasonably priced. Make sure you buy the correct tool for the snap size you are purchasing. I like to buy my snaps in a variety of colors, so I usually purchase from their color collections which offer 20 sets of snaps in four pre-determined colors. You can also buy snaps  multi-colored packs are always what I order usually, but you can also choose choose to buy 10 sets or 50 sets in a single color in their cap sets section. They have pearl snaps and different sizes of snaps too!

I get my zippers from Zipit. They have YKK zippers in a large variety of colors and lengths. I use #3 nylon coil zippers for the Kristine ID Wallet. Zipit sells zippers that are 5” long, a perfect size to purchase for the Kristine ID Wallet! I love choosing a variety of colors when I order!

I have written an entire blog post on what gauge of vinyl to use and where to purchase it. You can read all about clear vinyl in the Some Information About Clear Vinyl blog post. Don’t forget to check for things that you may have around that you could take a small piece of vinyl from – things like the plastic, zippered bags that bedding sometimes comes in.

One more unnecessary, but oh-so-pretty addition to the Kristine ID Wallet - bag bling! I have found that the zipper pulls from Andrie Adornments work so well with the Kristine ID Wallet. They are high quality and come in different colors and with different quotes. If you don’t want to add a zipper pull, but want a little bling on your Kristine ID Wallet, the zipper pulls work well as charms on the key ring or on the D-ring!

Of course, you will need the Kristine ID Wallet pattern for the sew along. You can purchase it at a 20% discount now through Monday, October 16th! Purchase the Kristine ID Wallet pattern from the Uniquely Michelle Website Shop, the Uniquely Michelle Etsy Shop, or the Uniquely Michelle Craftsy Pattern Shop. Use the discount code”SEWKIDW” if you are purchasing from the website or Etsy. The price is already reduced on Craftsy.


Sign up to receive email newsletters from Uniquely Michelle:

Sewing Can Have Its Ups and Downs

Michelle Burke

Have you ever seen one of these little gadgets?

IMG_8248.jpg

It is a Bernina Height Compensation Tool. This is one of my many favorite tools because it keeps my stitches even in those tough spots. I got my Height Compensation Tool as an added freebie when I bought my sewing machine about 15 years ago. You don’t have to buy a Bernina sewing machine to get one of these little helpers, you can purchase them from your local Bernina retailer (the Bernina store near me sells them for $5.69) or you can find them on EBay (when I looked, they were being sold for between $8.50 and $15).

IMG_8245.jpg

Although you may be able to guess by its name how the Height Compensation Tool is used let me tell you how I use it and why I love it. Have you ever been frustrated as you are sewing along and you reach a thicker spot – maybe it is a spot where you are going over a seam so there are several layers of fabric, or maybe it is where you are adding a strap to a bag?

The frustration comes when suddenly your machine makes teeny tiny stitches as your foot works to climb up a thicker area and then it seems to skip stitches or make really long stitches as it goes down the other side. I think of it like running up and down a hill. When running uphill, you take mores steps, just as a sewing machine makes stitches closer together. When running downhill, you take longer strides, just as a sewing machine makes longer stitches when it is coming off a thicker spot. Your machine may not have trouble going through the extra layers, but it may just need help going over the hills. The Height Compensation Tool is a perfect help for this!

As my presser foot is just starting to climb a thicker area, I put the Height Compensation Tool under the back part of the presser foot so that the presser foot is parallel to the feed dogs. I keep the tool there until the entire presser foot is on the thicker part of the fabric. Sometimes I must stop and reposition the tool under the back of the presser foot again until I have sewn far enough.

Once I am close to the end of the thicker area then the Height Compensation Tool goes under the front of the presser foot. I make sure it is off center so that I don’t run over it with my needle. I keep the tool under the front part of the presser foot, repositioning it if necessary until the foot can sit flat without any part of it being on the thicker area at all.

One feature of the Height Compensation Tool that I like is that it has three plastic rectangles each about 1/8” in thickness that rotate on a rivet. This makes it easy to use one, two or all three rectangles under your presser foot depending on how high you need your presser foot to be.

IMG_8252.jpg

If you look closely, you will see that I have put the needle through my Height Compensation Tool a couple times, but fortunately it is made of a soft plastic so the needle just goes through it without breaking the needle or messing up my machine.

Using the Height Compensation Tool keeps my stitches uniform over the thicker parts and makes sewing these areas much less frustrating!


Sign up to receive email newsletters from Uniquely Michelle:

Kristine ID Wallet Sew Along Coming Soon

Michelle Burke

There was a lot of interest in a Kristine ID Wallet Sew Along after Kristine ID Wallet Week, so in 10 days (September 25th) the Kristine ID Wallet Sew Along will begin! I am so excited!!! This post has some general information that you need to know now to prepare for the sew along including information on how to get the Kristine ID Wallet pattern at a reduced price!

IMG_7195.jpg

In case you have never participated in a sew along, it is a blog series that focuses on one pattern so that you can get some extra help and hints on that pattern while sewing along with the host of the sew along (the person writing the posts) and others who join the sew along. A sew along is perfect for someone who wants to try a new pattern, someone who has sewn a pattern but has questions, or someone who just want to be part of sewing something along with some great internet friends.

IMG_7198.jpg

A sew along is sometimes hosted by the pattern designer and sometimes it is hosted by another sewist. The Kristine ID Wallet Sew along will be hosted by me, Michelle (the pattern designer). I like the idea of someone other than the designer hosting a sew along because you get a different perspective on the pattern, but since this is the first Uniquely Michelle sew along I thought I would host it. You will still get a lot of great tips and hints – things that if I included in the pattern it would make the pattern crazy long. You will also get some great tips and hints from other sewists.  I am asking any of you who have sewn Kristine ID Wallets to add your expert tips, tricks and ideas along the way by adding comments to each post. I love a sew along because it can feel like you are sewing something with your friends instead of sewing by yourself – how fun! Oh yes, there will be prizes of course too!

The Kristine ID Sew Along will start on Monday, September 25th and the sew along blog posts will continue each day through Friday, September 29th. You can sew along with the posts each day but if you miss a day you will have time to catch up. There will be a random drawing with prizes. To enter the random drawing, you will need to have posted a picture of your completed Kristine ID Wallet by Monday, October 16 at 10:00pm MDT. More details will follow on how to post your Kristine ID Wallet picture so that you will be entered in the drawing, but you will be able to post in the Uniquely Michelle Sewing Patterns Facebook Group, Instagram or you can email me a picture of your completed Kristine ID Wallet.

IMG_5526.jpg

The Kristine ID Wallet pattern has a supply list, but here are some things that you may want to consider that vary slightly from the supply list:

o   Of course you will need the Kristine ID Wallet Pattern! You can purchase it from the Uniquely Michelle Website Shop, the Uniquely Michelle Etsy Shop or the Uniquely Michelle Patterns Craftsy Shop. The Kristine ID Wallet pattern will be 20% off from now through October 16th. Use coupon code SEWKIDW in the Website Shop and Etsy Shop. On Craftsy, the price reflects the discount - no coupon code neede.

o   Fabric – See the pattern for the materials list, but you may want to start figuring this part out now, mostly just because it is so fun. You may also want to consider if you only want to use two fabrics, one for the exterior and one for the interior as the pattern suggests or do you want the flap and ID window to be in a third, coordinating fabric. Maybe you want the flap and card pockets to be in a coordinating fabric. These are just things to think about!

o   Hardware – a magnetic or regular snap, a small piece of clear vinyl (see the Information About Clear Vinyl post for suggestions for what I use), and a split key ring or a ½” D-ring, and one or two ½” swivel snap hooks (one if you will be making the wrist strap OR the lanyard, two if you want to make both).

IMG_5525.jpg

The Kristine ID Wallet is a fast sew, so this should be a fun and relaxed sew along! Make sure you join the Uniquely Michelle Sewing Patterns Facebook group to stay informed about the sew along. You can also stay informed by signing up to receive email newsletters - see the end of this post. I am really looking forward to seeing everyone’s progress pictures (posting these will increase you chances for winning prizes) and your final Kristine ID Wallet creations!


Sign up to receive email newsletters from Uniquely Michelle: